One Die with Two Different Themes
Hi readers! Happy Tuesday! I always enjoy seeing the beautiful things Yoonsun Hur makes and today is no exception! She cleverly shows in the duo of cards how to easily use color and scene setting to stretch your dies into every season! Read on to learn more & enjoy!

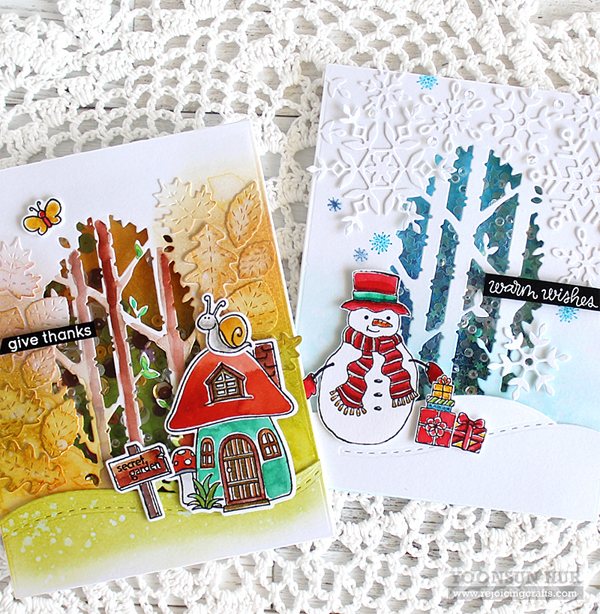
Hello crafty friends, happy Tuesday!! I am so excited to share my cards with you! Today I have two different themed cards using the Birch Tree Window die.
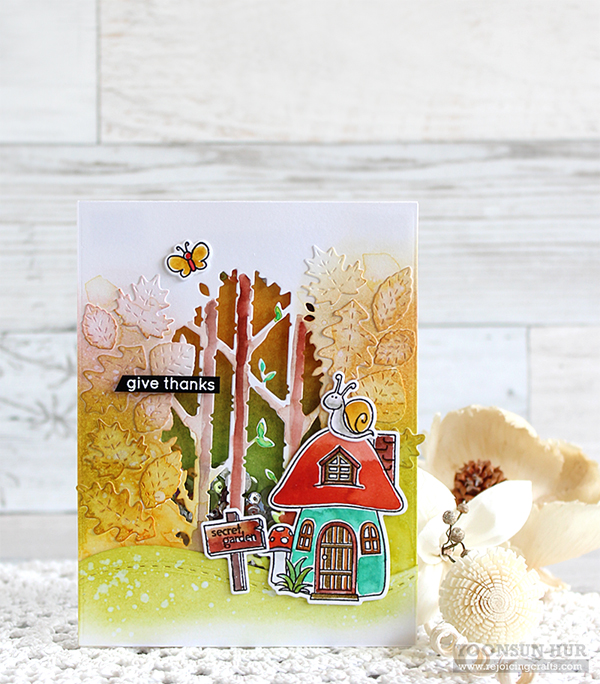
For my first card, I made an autumn card.
1) Die cut the Birch Tree Window from the centre of the watercolor paper panel.
2) Die cut some tiny leaves from a separate watercolor paper using the Stitched Leaf Wreath die.
3) Adhered all leaf die cuts on the birch tree window panel using the fine-tip glue pen.
4) Ink blended on the panel with Crushed Olive, Wild Honey, Victorian Velvet Distress inks using mini ink blending tool, and then lightly brushed the panel using a wet paint brush.
5) Watercolored the birch trees and leaves using Hero Arts Watercolor Wheel.
6) Adhered the acetate sheet to the back of the birch tree window panel using double-sided tape. Allow this to dry completely.
7) Stamped and watercolored the images from the Secret Garden set, and then die cut them with the matching dies.
8) Die cut the grass hill from watercolor paper using the Stitched Slopes and Hills dies, ink blended it with Crushed Olive Distress ink, added water droplets.
9) Heat embossed the sentiment from the Autumn Greetings set on black card stock in white, then cut it the small banner.
10) Positioned some autumn colored sequins on the back of the birch tree window panel, then applied foam tape around the edges of the shaker window.
11) Mounted all elements as shown to an A2 sized card base using foam tape.
Supplies:
 |
 |
 |
 |
 |
 |
 |
 |
 |
 |
 |
 |
 |
 |
 |
 |
 |
 |
 |
 |
 |
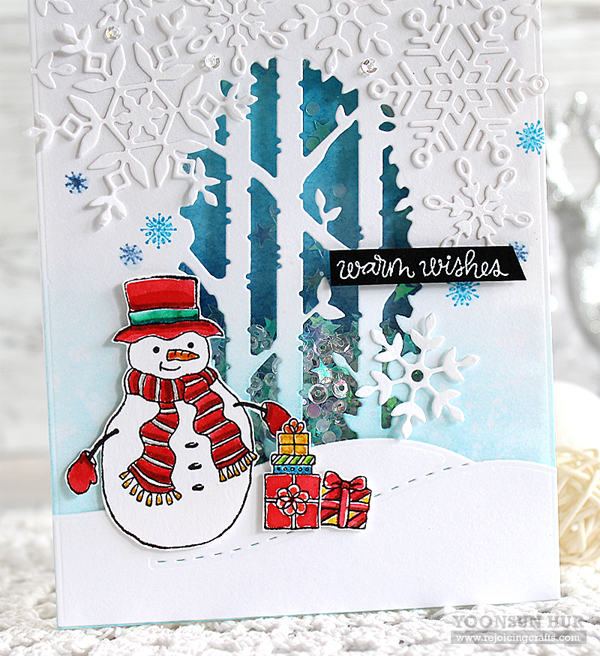
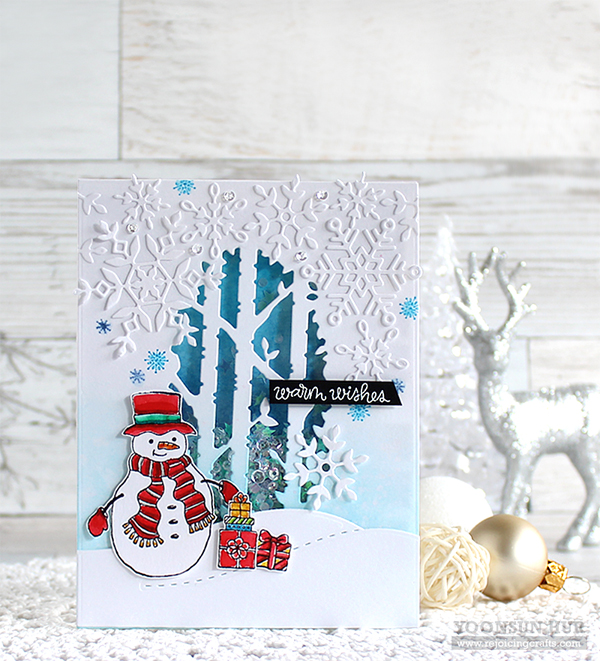
For my second card, I made a Christmas card with the same Birch Tree Window die. I decorated the shaker window panel with the snowflakes and snowman instead of autumn leaves.
Supplies:
 |
|
 |
 |
 |
|
|
 |
 |
 |
|
|
|
|
|
|
|
|
|
 |
|
Thanks for reading today, and thanks to Yoonsun for being our guest!

Blog Candy Alert!! Follow our blog via email and comment on this post for a chance to win a special blog candy!
Congrats! Blog Candy Winners!
From: Big Numbers Birthday: Danielle Dietz!
From: Coordinating Die Masking with Jennifer McGuire…Plus Hero Arts Sale!!: Cheryl Crenshaw!
From: Weekender with Wanda – Taylored Expressions Cupcakes: Marcie Lovett!
From: Color Coordinates: In the Stars: Lynn Gauthier!
From: Studio Monday with Nina-Marie: 10 Craft Room Organization Quick Tips: Tara Prince!
Please email [email protected] with your mailing address, the name of the blog you won from, and the prize you won to claim your prize!
Studio Monday with Nina-Marie: 10 Craft Room Organization Quick Tips
Hi there crafty friends! It’s Nina-Marie back here with you again, starting off the new week with a brand new Studio Monday video!

This week we are doing something a bit different and talking about organization! This is something that is very important to me, as I cannot work very well in a messy space… I am always looking for new ways to make my studio organized in a way that suits my workflow.
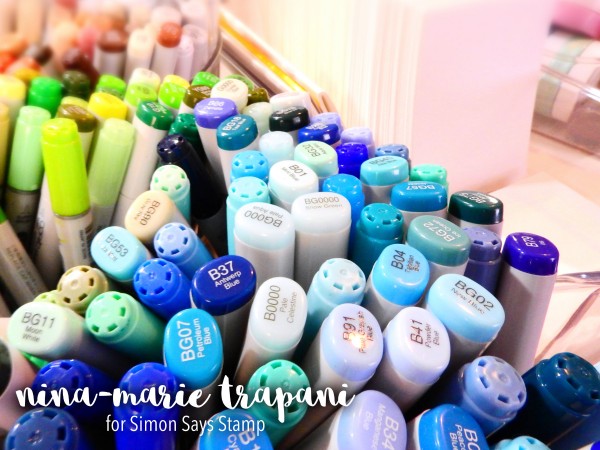
In today’s video, I’ll be sharing 10 of my favorite tips and tricks for keeping my craft space organized. I’ll be sharing different ways that I use products like the InterDesign Turntables, FridgeBinz, and the Tiny Container Tray, as well as tips for labeling, storing stamp shammys, organizing paper, and more!

Remember that these tips can be adapted to best fit your budget, workspace, creative flow and decor very easily. I hope that this video provides some helpful tips that you can use and incorporate into your own studio space!

WATCH THE VIDEO:
SUPPLIES:
 |
 |
 |
 |
 |
 |
 |
 |
 |
 |
 |
 |
 |
 |
 |
 |
 |
 |

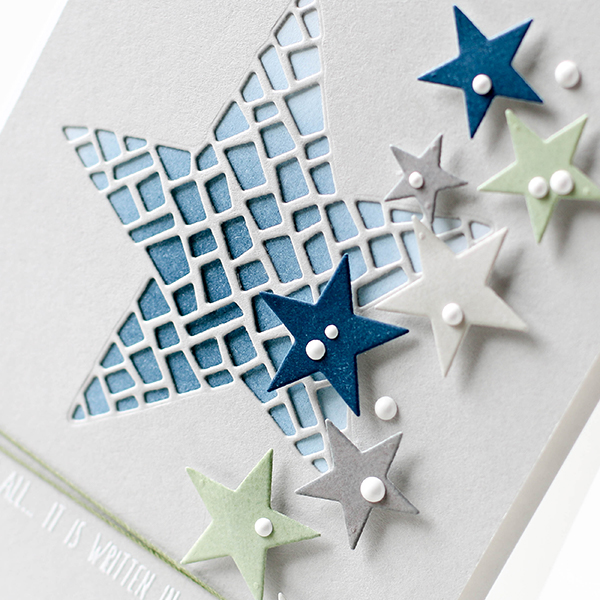
Color Coordinates: In the Stars

Happy Sunday everyone! I have some inspiration for you today with a Color Coordinates. This combination was inspired by home exteriors that I’ve noticed lately. I see a lot of Navy and Grey used together with accents of greenery and cement. These colors are also great for masculine cards!
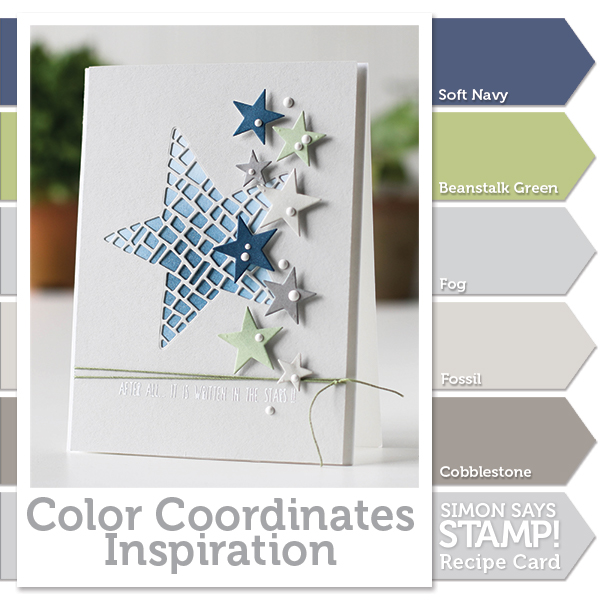
For my card, I’ve used an array of star dies cut from inked paper and set them over a Mosaic Star die cut panel.

For the layer beneath the Mosaic Star, I did some ink blending using Soft Navy Ink. To finish off the arrangement, I used Glacier White Ranger Enamel Accents and Tim Holtz Craft Thread.
I’ve shot a video of the process which you can view below or on our YouTube channel.
Blog Candy Alert!! Follow our blog via email and comment on this post for a chance to win a special blog candy!

Thanks for stopping by today, I hope you enjoy the rest of your weekend!
 |
 |
 |
 |
 |
 |
 |
 |
 |
 |
 |
 |
 |
 |
 |
|
|
|


