Monthly Mail Art – January 2017
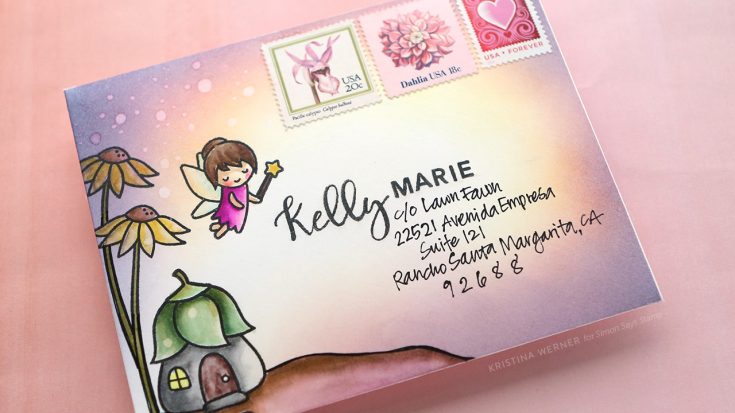
Hi all! Kristina here! I’m excited to share with you a new monthly feature here at the Simon blog: Monthly Mail Art. On the first Thursday of every month I will be showing how I create a custom mail art envelope. This month I’ll be sending an envelope (with a card inside, of course) to Kelly Marie of Lawn Fawn. :)
Most envelopes are not made out of paper or cardstock that can handle lots of stamping and watercoloring, so I first created my own envelope out of Strathmore Bristol paper with the aid of the We R Memory Keepers 123 Punch Board. This punch board does envelopes, bows, and boxes. For this envelope, I followed the instructions for an A2 envelope.
I stamped images from Lawn Fawn’s Fairy Friends stamp set and ink blended some Distress Inks from the edges of the envelope. I then watercolored the images using Zig Clean Color Markers.
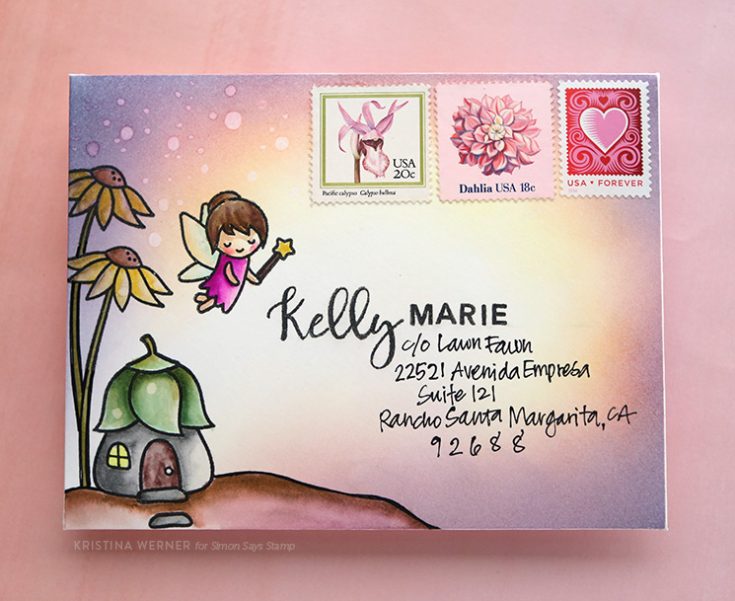
I used Concord & 9th’s Perfectly Penned stamp set to add Kelly Marie’s name on the envelope and wrote the Lawn Fawn business address below.
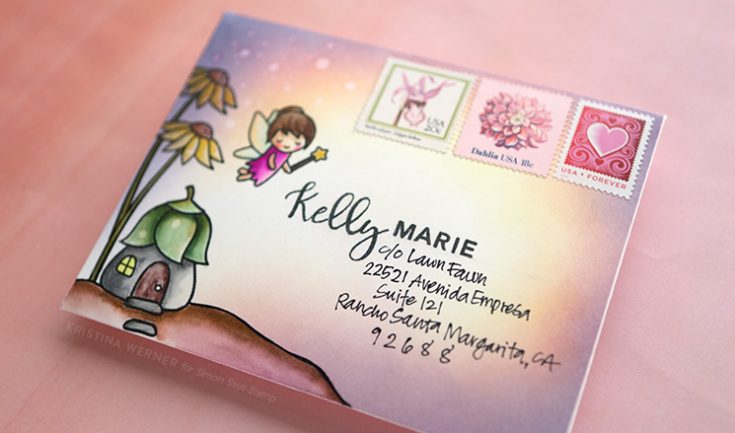
Before the last step of applying some Distress Micro Glaze, I made sure to add the postage stamps. The postage stamps won’t stick to the envelope if the Distress Micro Glaze is applied first since the glaze seals off the surface and makes it fairly slick (it protects the paper from moisture so it’s perfect for protecting all the ink and watercoloring I did). So just to avoid having that problem, I stuck the postage stamps to the envelope first. Then I rubbed the Distress Micro Glaze into the envelope using my fingertips. Once applied over the entire surface, I buffed off any excess Distress Micro Glaze using a dry paper towel.
I hope you enjoy today’s envelope. And yes, this will definitely go through the mail! You just have to make sure the address is legible. :)
Supplies
 |
 |
 |
 |
 |
 |
 |
 |
 |
 |
 |
 |
 |
 |
 |
 |
 |
 |
 |
 |
 |
 |
 |
 |
 |
|
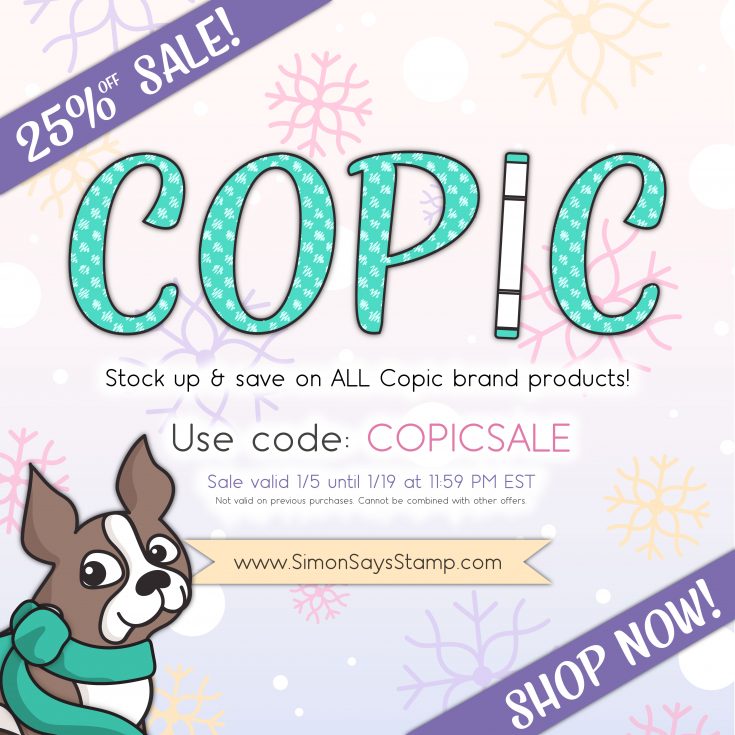
Copic Marker Brand: 25% off!
Hi friends! Use code COPICSALE to take 25% off any Copic Marker branded products. Shop early for the best selection and enjoy!
Warm Winter Wishes
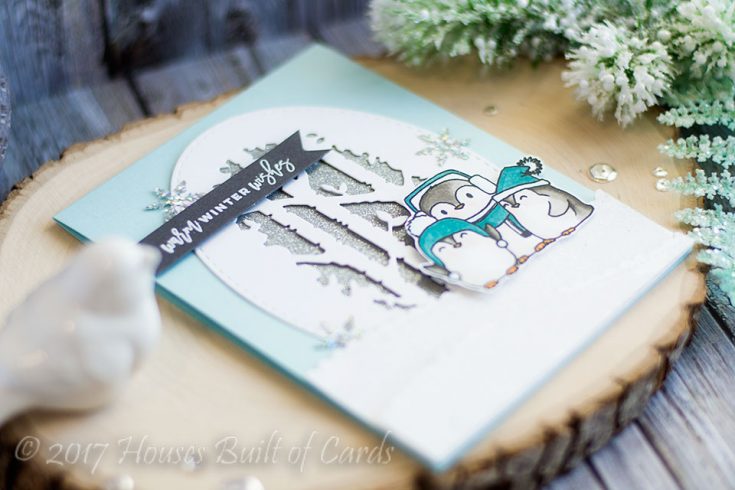
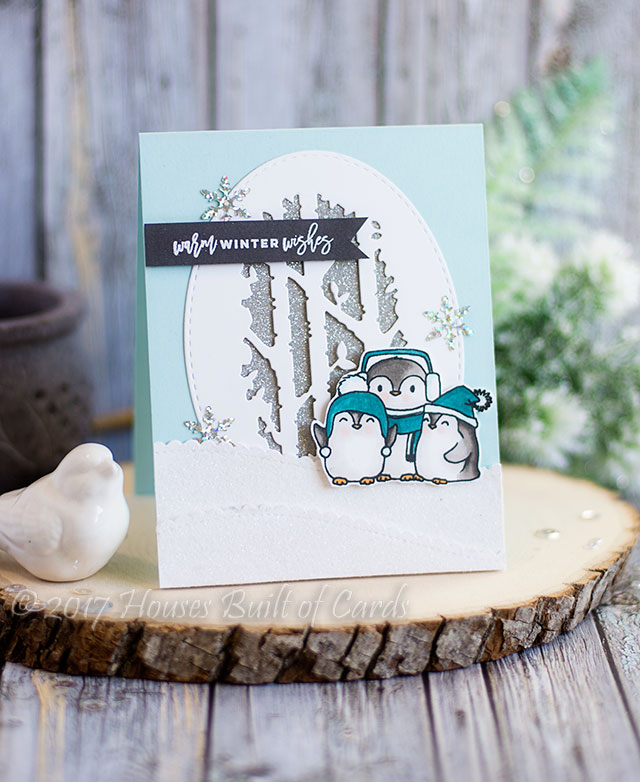
Hi friends! Happy Wednesday! I am so pleased to welcome the fantastic Heather Hoffman as a guest blogger on our store blog. I just fell in love with this new Season’s Tweetings stamp set from Winnie & Walter, and asked Heather if she might be able to make something special for us to share on the blog featuring it. I love how she incorporated our very popular Birch Tree window die cut for a truly adorable winter scene! Be sure to read on and enjoy!
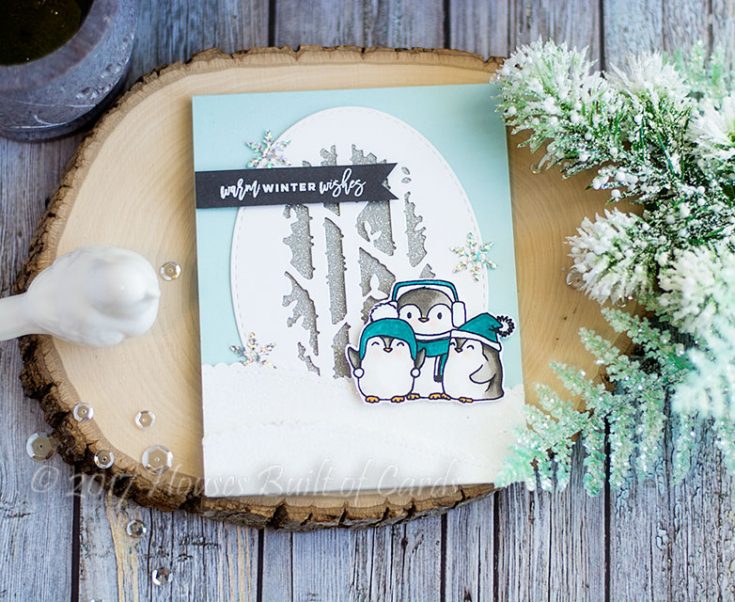
Good morning! Heather here this morning – and I’m delighted to be guesting here on the Simon Says Stamp Blog with a fun and wintry card combining some beautiful SSS Exclusive Dies, and some adorable new stamps from Winnie and Walter!
I started off by creating a background for my card using one of my favorite SSS Dies – Birch Tree Window Wafer Die, and backed it with sparkly silver cardstock. I also die cut a couple pieces of white cardstock using SSS Wavy Scallop Stitches Wafer Dies and coated them with Ranger Multi Medium Matte then sprinkled with Rock Candy Distress Glitter for some sparkly snowdrifts.
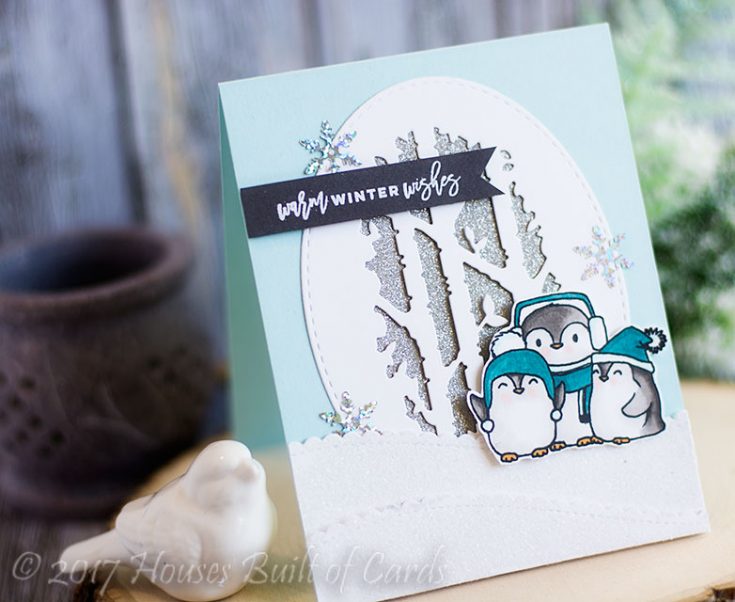
While that dried, I stamped out my adorable little birdies from Winnie and Walter’s Season’s Tweetings, colored them in with Copic Markers, and fussy cut them out. I grabbed a sentiment from Winnie and Walter’s Sentimental Winter and heat embossed it in white on some Slate Gray Cardstock and trimmed into a banner shape.
Finally, I assembled all the layers onto a top folding cardbase that I created using SSS Sea Glass Cardstock, using foam adhesive for the birdies, the front layer of snow, and the sentiment. Finished off with a few snowflake sequins from Pretty Pink Posh’s Snowflake Sequin Mix!
Thanks so much for stopping by today! Have a wonderful day!
Supplies:
 |
 |
 |
 |
 |
 |
 |
 |
 |
 |
 |
 |
 |
 |
 |
 |
 |
 |
 |
 |
 |
 |
 |

Blog Candy Alert!! Follow our blog via email and comment on this post for a chance to win a special blog candy!


