We’re Making Our Own Backgrounds On The Monday Challenge

This week on the Monday Challenge the theme is to ‘Make Your Own Background’.
Making your own background designs gives your creations a lovely finish and you can be sure that your project will be truly unique. There are so many fabulous products that can help you to achieve stunning results from stamps and stencils to paints, inks and texture pastes. Whatever you choose to use we will be looking forward to seeing what you create!
This week we are showcasing Dylusions Products designed by the super talented Dyan Reaveley.
Once you have made your creation just go ahead and upload it into the linky on the Simon Says Stamp Monday Challenge blog!
As always, we’re offering a chance to win a $50 Gift Voucher to Simon Says Stamp! All YOU need to do is join in with the challenge!
Below are three projects created by our Guest Designer and the design team. Please visit the challenge blog to see all of the projects that the design team have created this week. If you click on each designers name, you’ll be taken directly to their blog where you’ll get more details about their project! Be sure to give these talented ladies some comments!
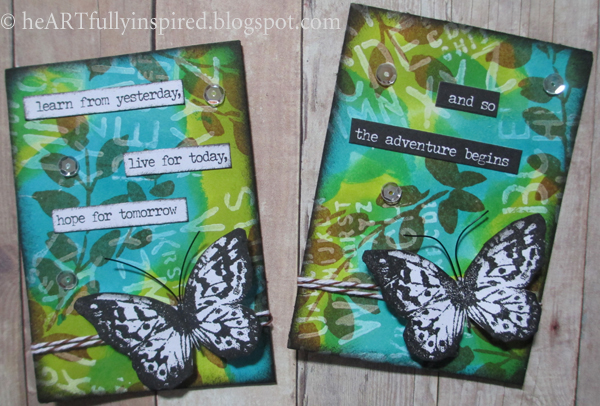
Linda Kunsman is our Designer In The Spotlight this month and she made two beautiful Artist Trading Cards.
Linda used:
 |
 |
|
 |
 |
 |
|
 |
 |
 |
 |
 |
 |
 |
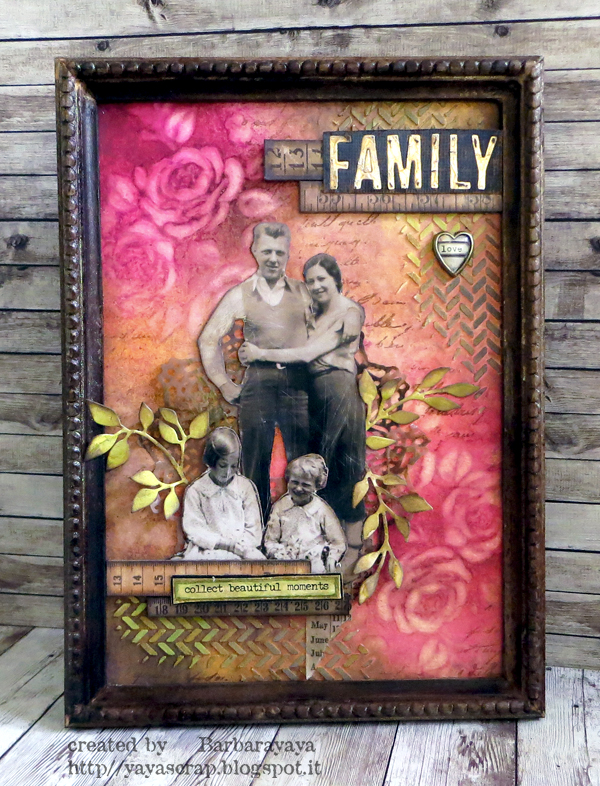
Barbara Schiassi has created a beautiful vintage panel using a selection of inks, stencils and texture pastes. She also has an extra 2 projects that you can see on her blog.
Barbara used:
 |
 |
 |
 |
 |
 |
 |
|
|
|
 |
 |
 |
 |
 |
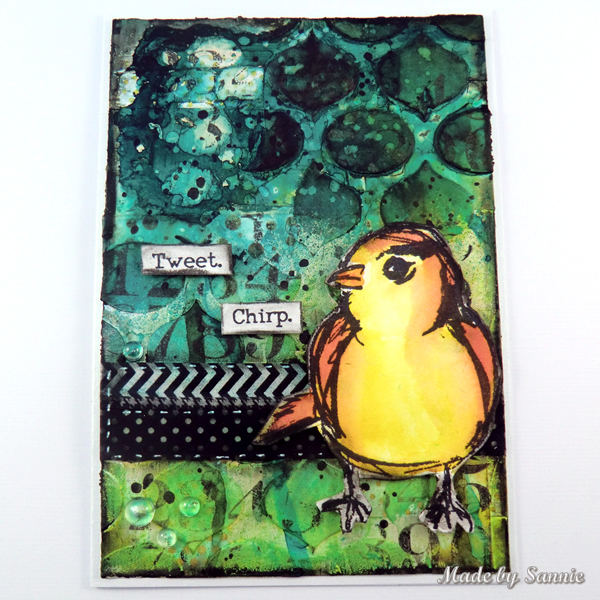
Sandra Mouwen made her card using paints, inks and stencils to create her awesome background and she has a fabulous instruction video on her blog.
Sandra used:
 |
 |
 |
 |
 |
 |
 |
 |
 |
 |
 |
 |
 |
 |
So now it’s your turn to get out your inky supplies and join in!

Do you use Instagram? If so please add #sssmchallenge to your challenge entry uploads so we can see them on there too!
Blog Candy Alert!! Follow our blog via email and comment on this post for a chance to win a special blog candy!

Studio Monday with Nina-Marie: Stamp Layering with Pantone Green
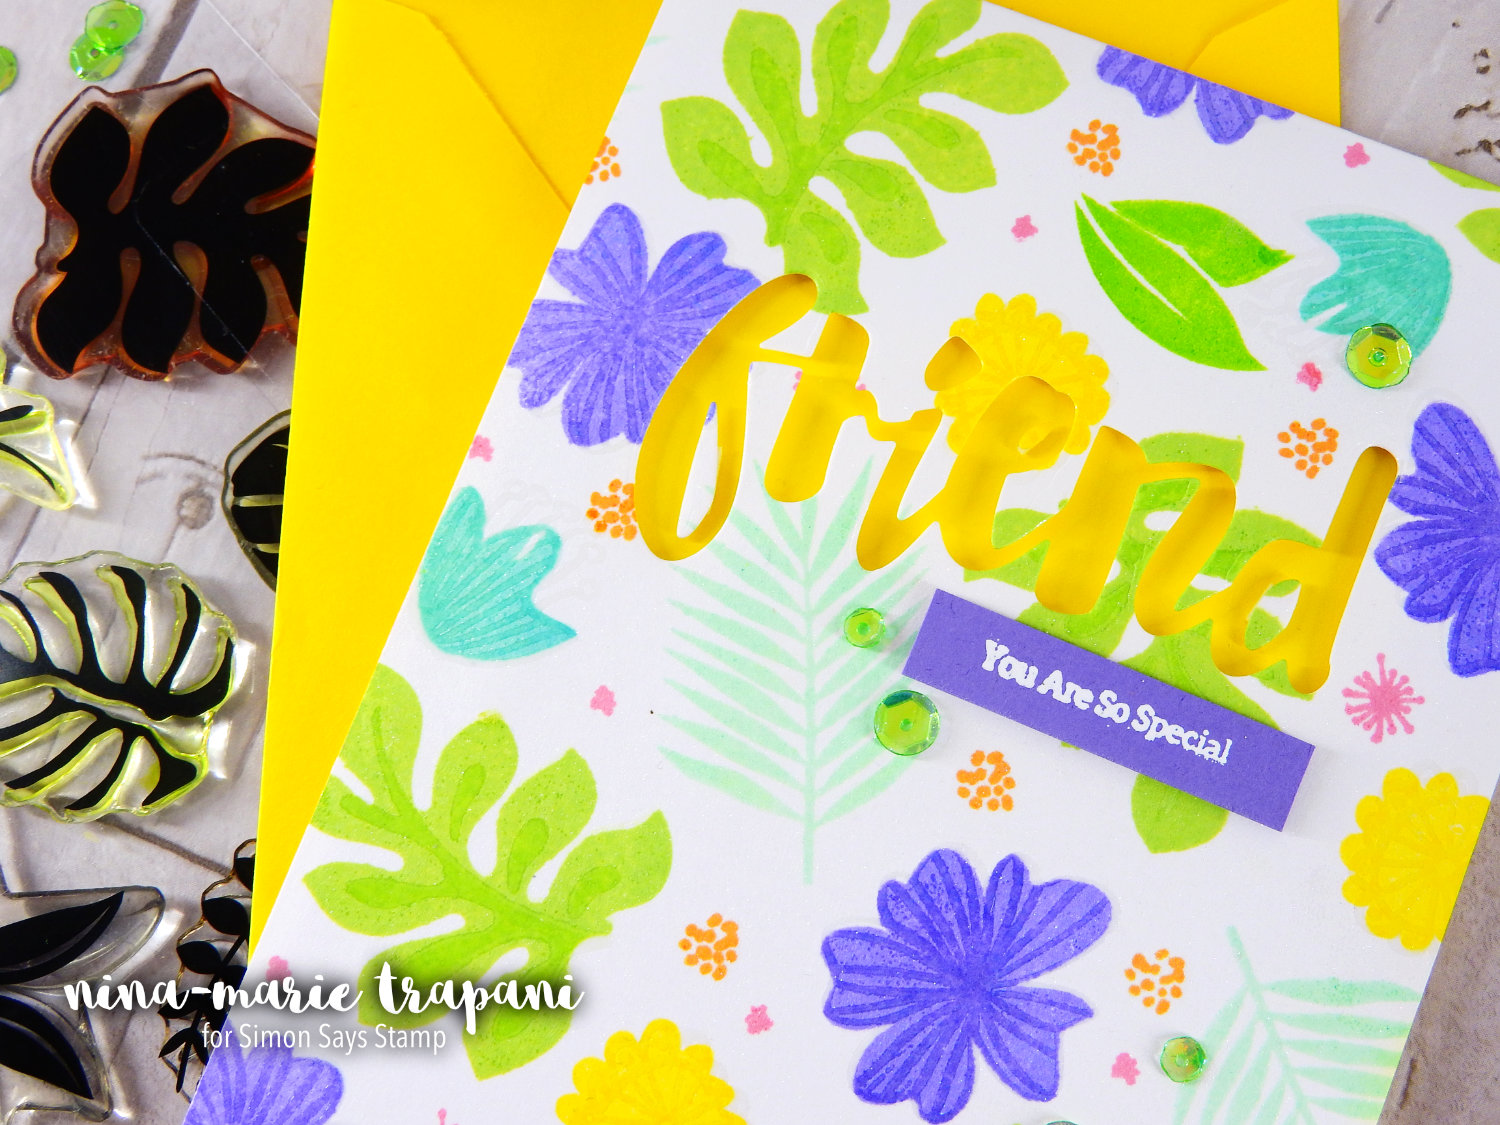
Hello everyone and Happy Monday! In this week’s Studio Monday post, I wanted to feature some Simon exclusive products along with Pantone’s color of 2017: Greenery!

If you are not familiar with Pantone’s color of the year – or Pantone itself – let me give you a quick background: Pantone is the authority and worldwide resource for color. They provide color systems and technology to a wide range of industries and companies. Each year they choose a color that symbolizes what is trending and happening in our world. For 2017, that color is Greenery, which symbolizes nature and new beginnings. I thought I would combine both symbols in my card today and create a floral card with Spring colors, since Spring is commonly thought of as a new beginning.
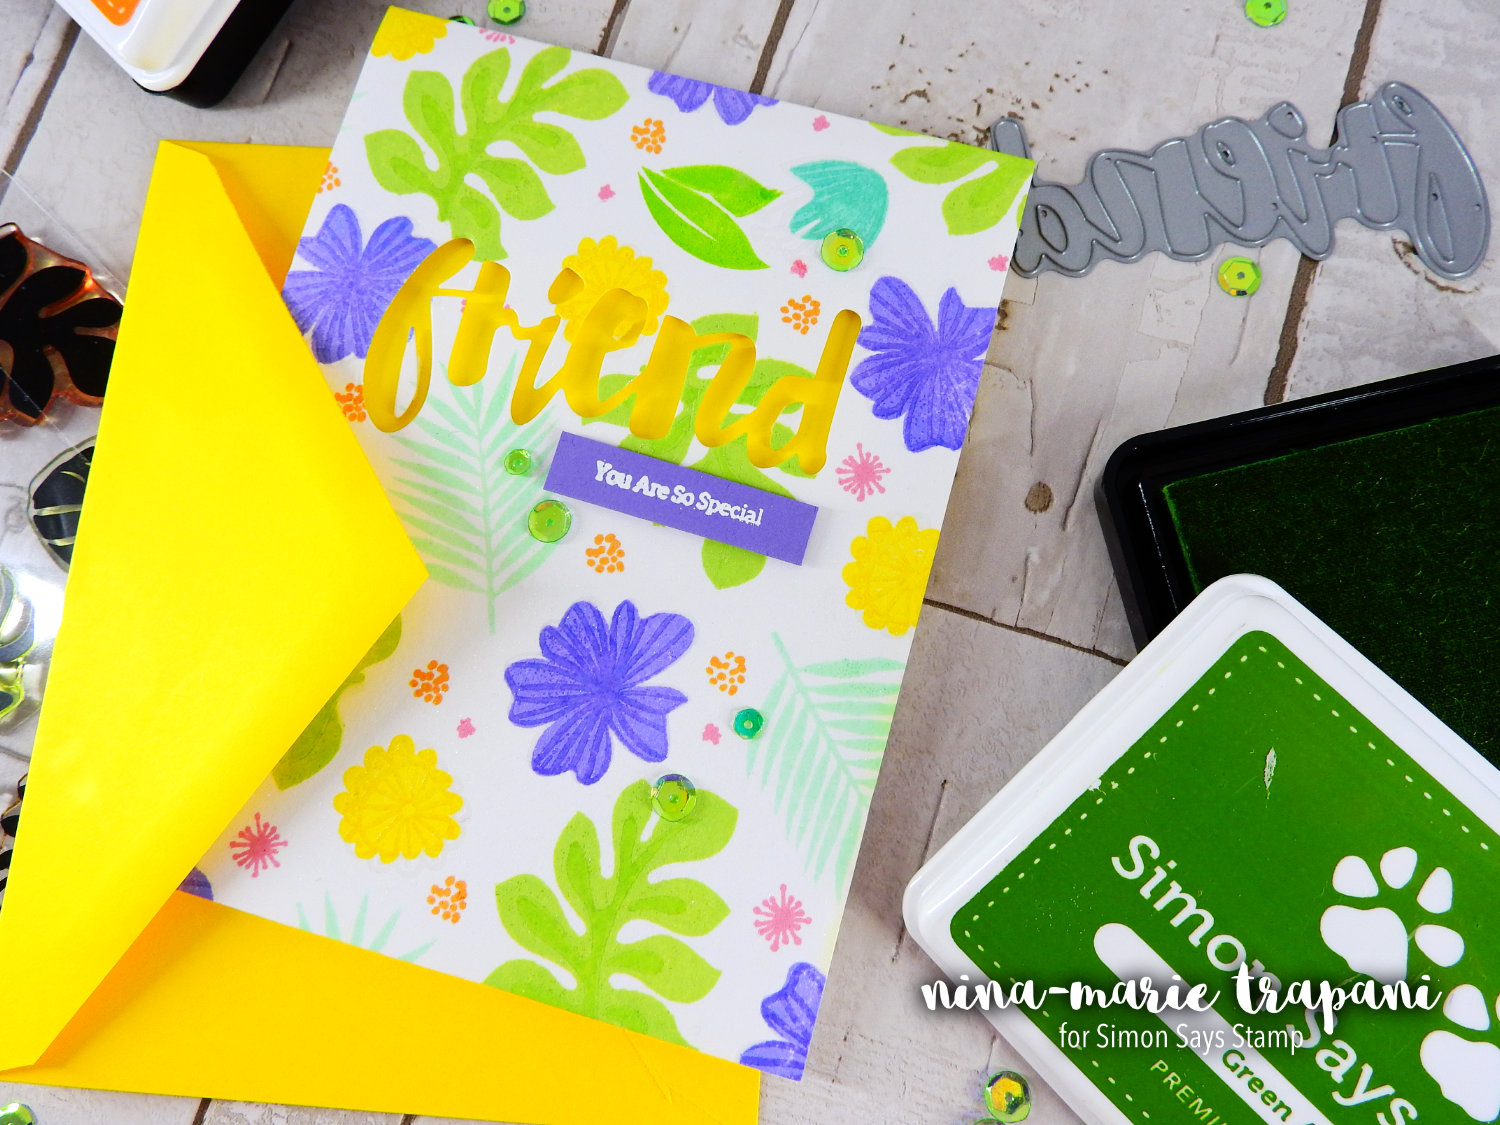
The floral images are taken from two Simon exclusive stamp sets; Tropical Leaves and Wild Beauty. There are coordinating dies available for both sets; however, I will not be using them today. Both stamp sets are simple, stamp layering sets. While many of you have multiple ink colors for doing stamp layering, I know not everyone does. So instead of doing stamp layering in the “normal” way, I want to show you how to do it with one ink color and heat embossing. This technique is perfect for stamp layering sets that have two layers. If you have a layering set with three layers, you could do some second generation stamping for the first and second layers and heat emboss the third.
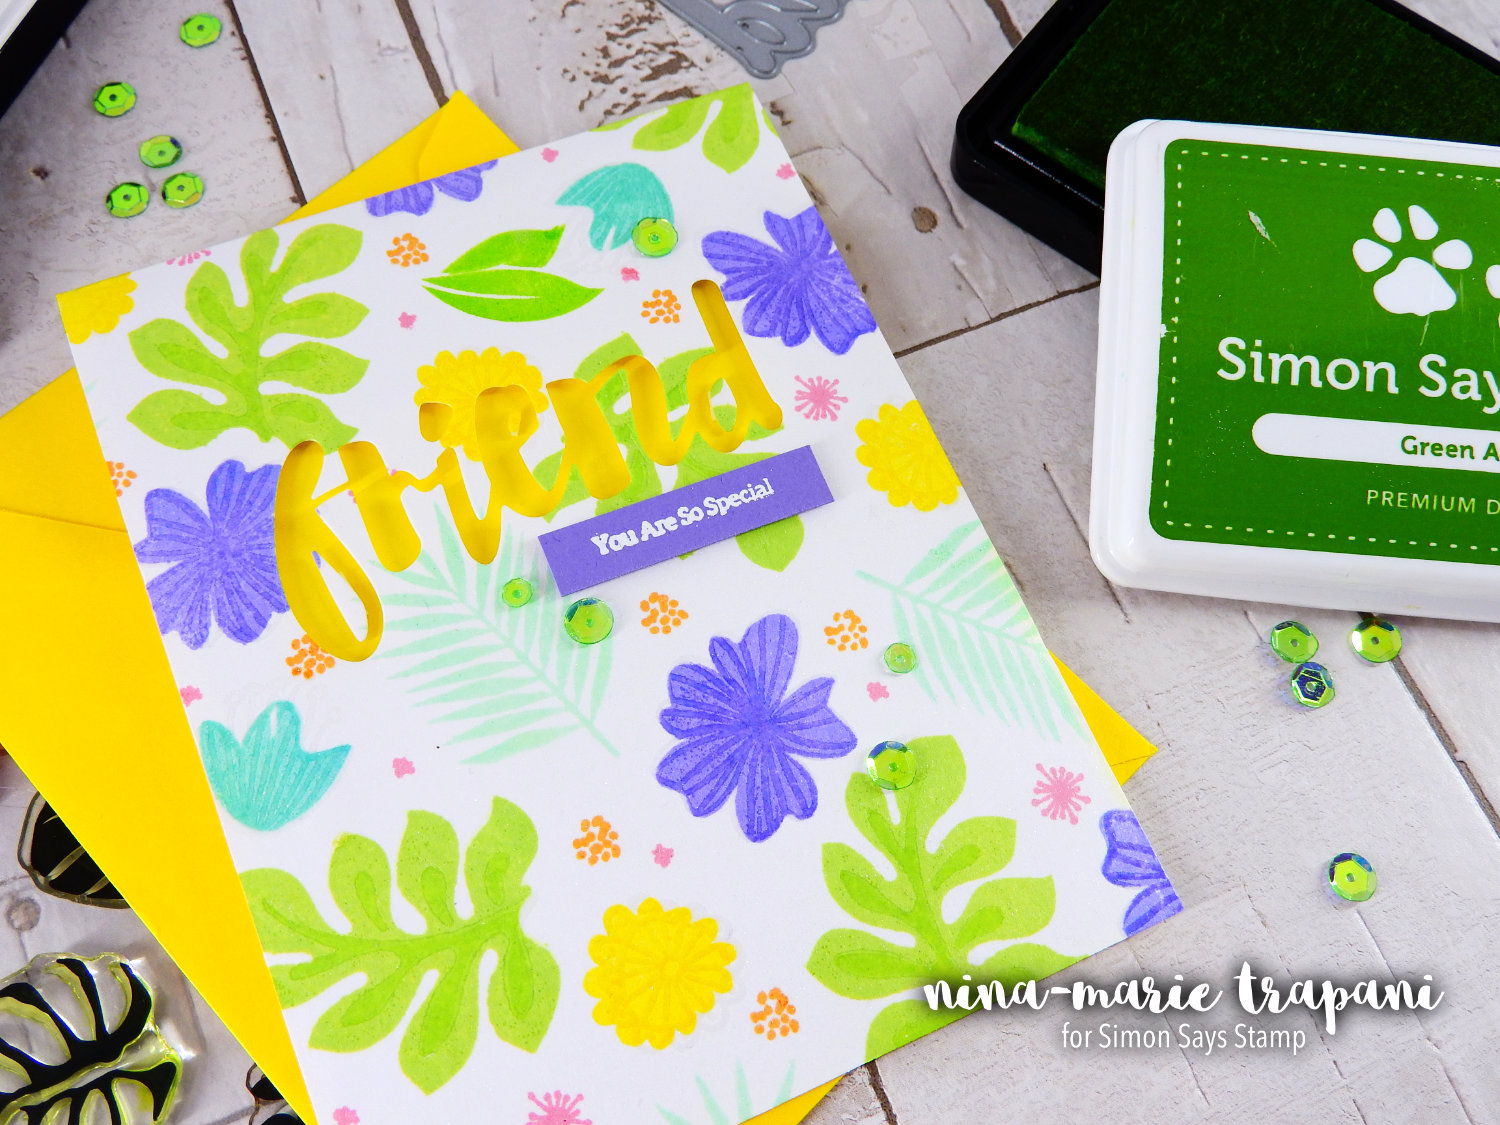
The sentiment features a fun negative/recessed appearance. I used the Simon Says Stamp Painted Friend die and a supporting sentiment from the Wild Beauty stamp set. I chose cardstock colors that matched my ink colors (as closely as possible). For the cardstock colors, I used Bright Yellow and a purple from Penny Black’s Periwinkle paper collection.
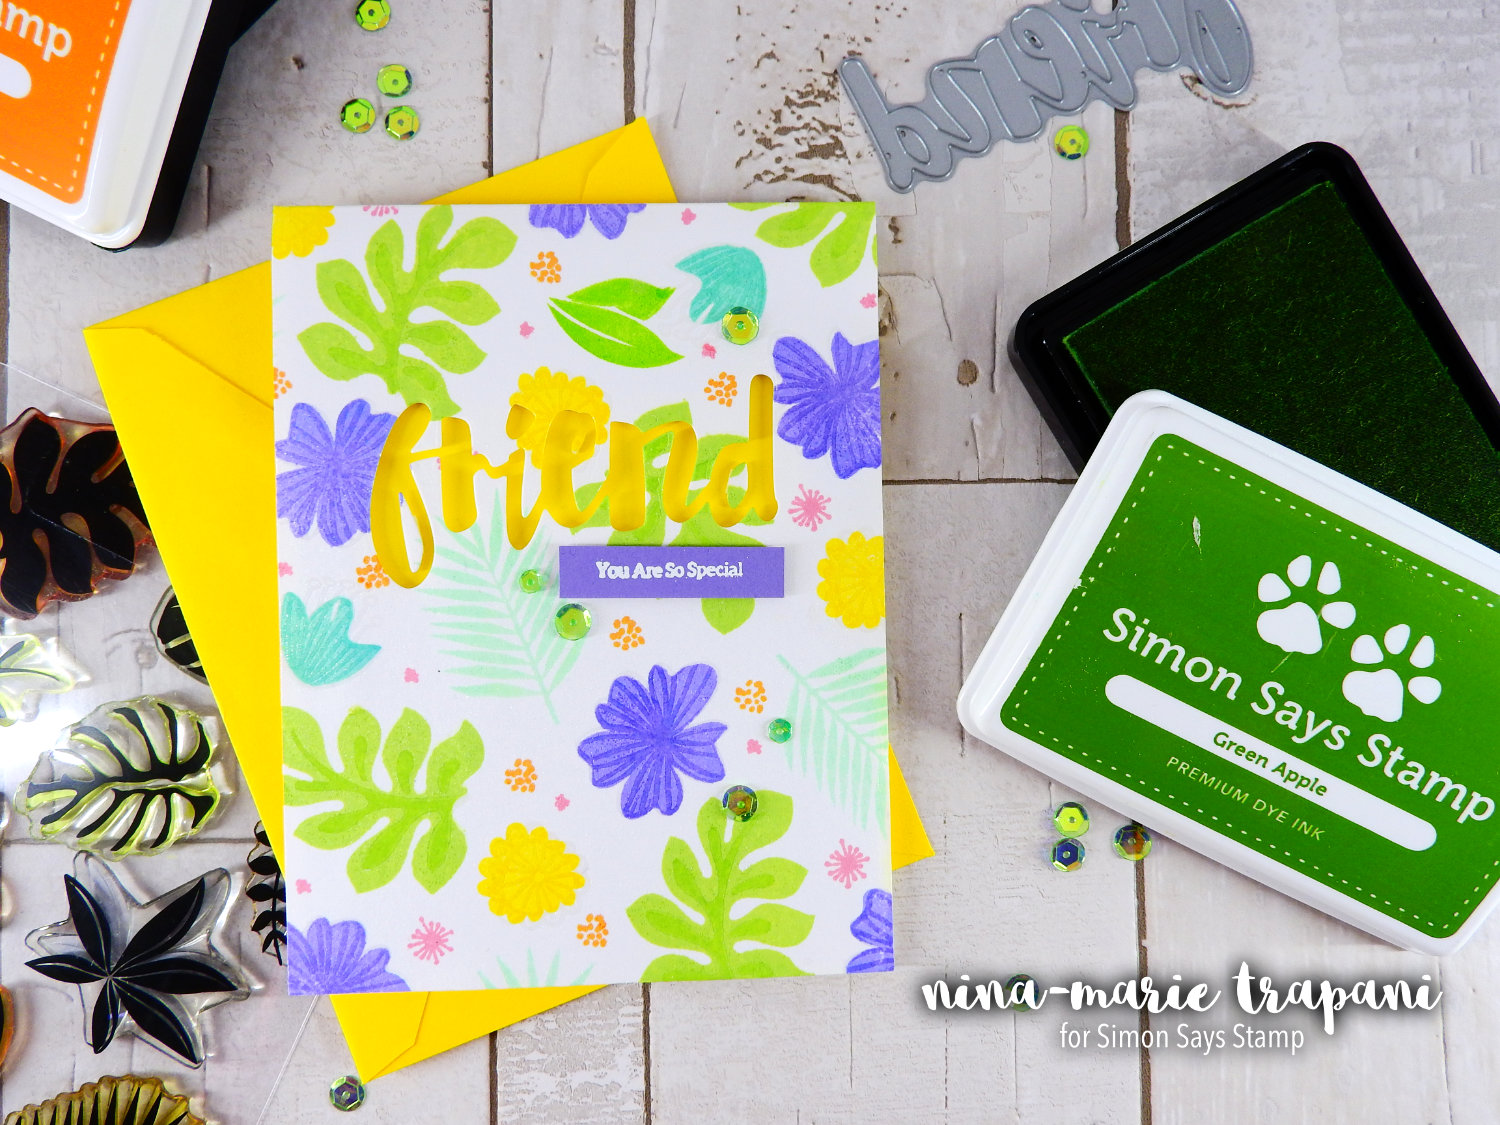
The colors I used today all pair really well with green. You’ll notice I used a lot of blue, green and purple and some pops of yellow. This is an analogous color scheme, which means all of these colors are next to each other on the color wheel. Analogous color schemes are easy to create because of this.
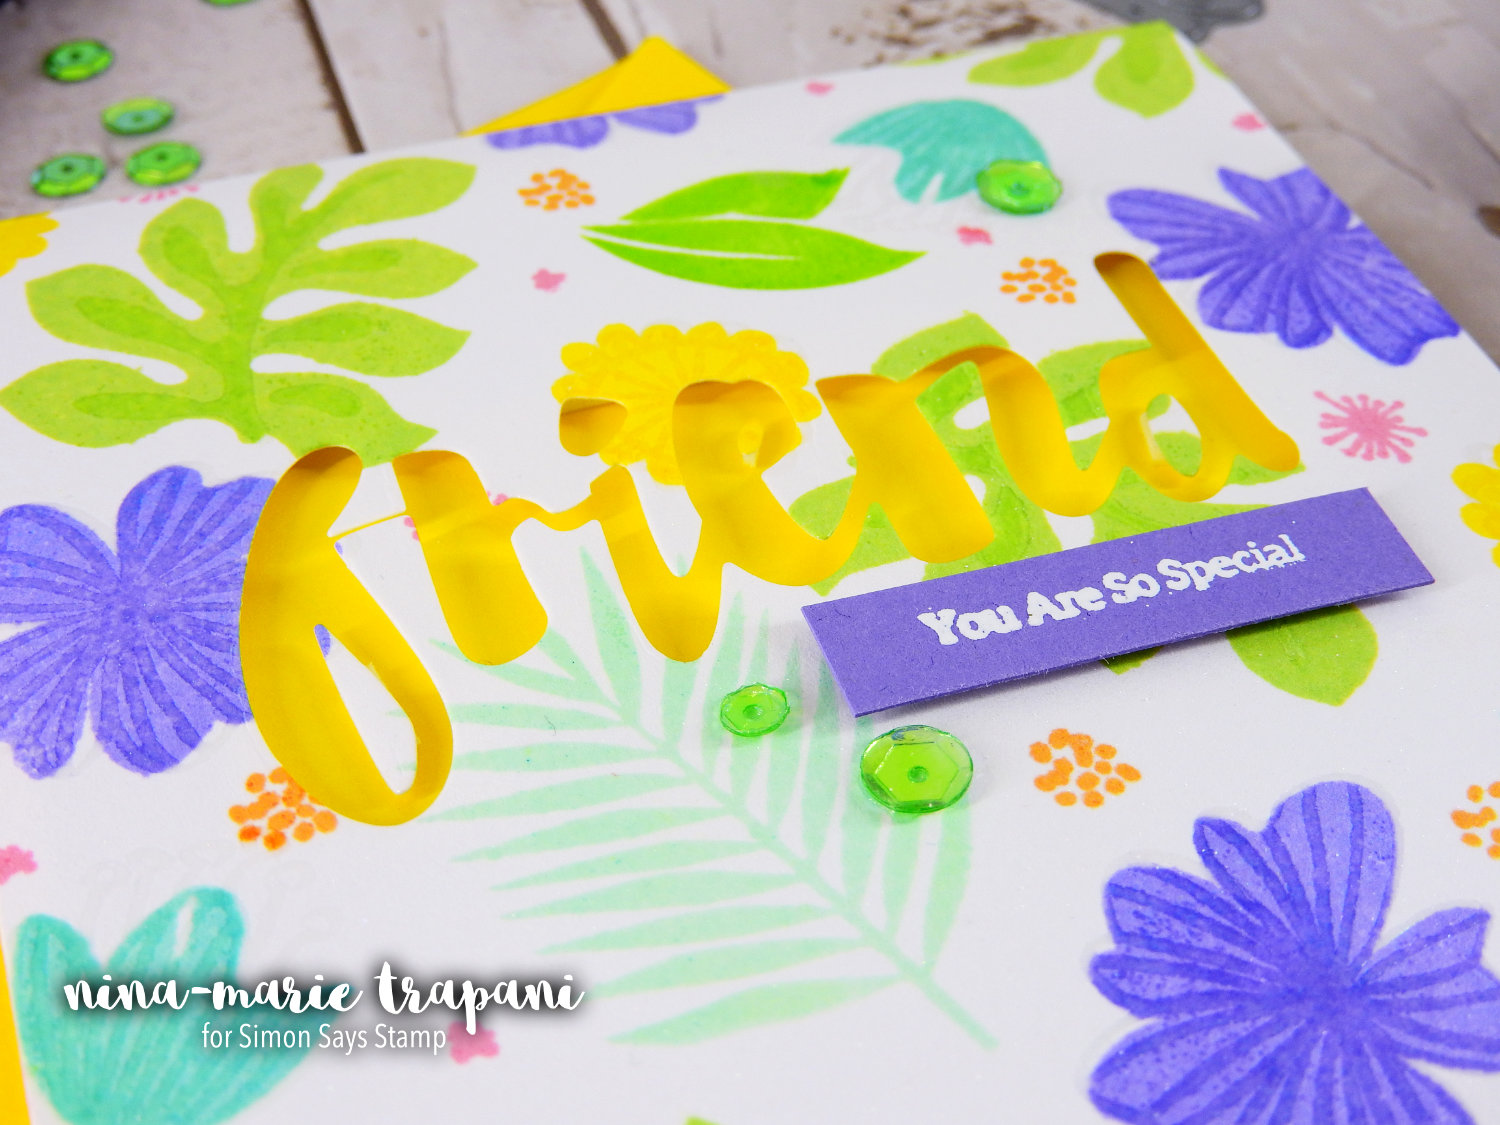
And because I wanted to throw in a bit more green, I used a few Peridot Mist iridescent sequins from Pretty Pink Posh to embellishment the card! The Peridot Mist sequins are a perfect match to the colors used in this card. I also love that how when the sequins catch the light, you can see hints of other colors!
I hope you will be checking out the video below to see how this card came together! Thanks so much for stopping by and visiting us today… I will be seeing you again this coming Sunday and Monday, so stay tuned!
WATCH THE VIDEO
SUPPLIES


Blog Candy Alert!! Follow our blog via email and comment on this post for a chance to win grab bags and blog candy! Remember to tag your awesome projects with #simonsaysstamp on social media so we can see what you are creating!

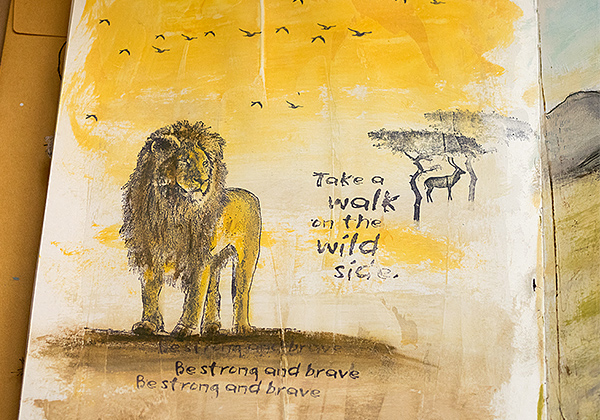
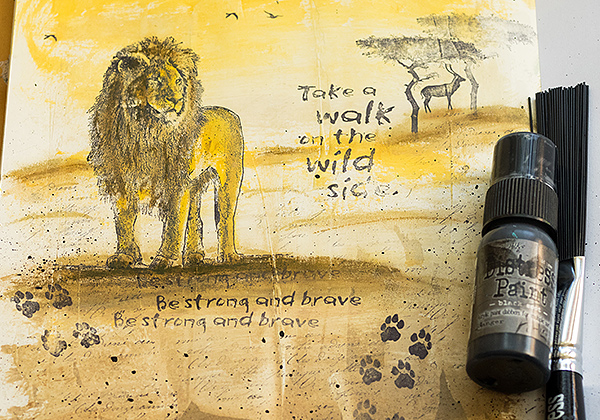
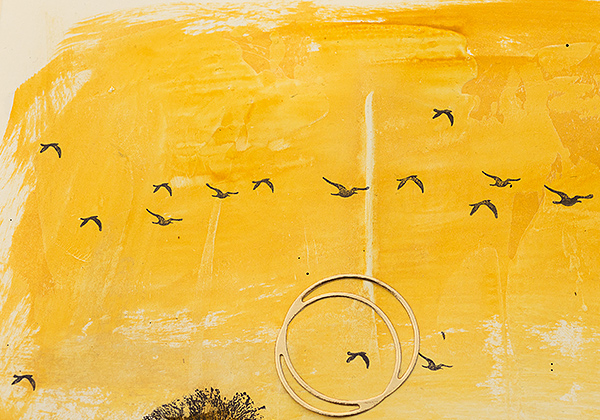
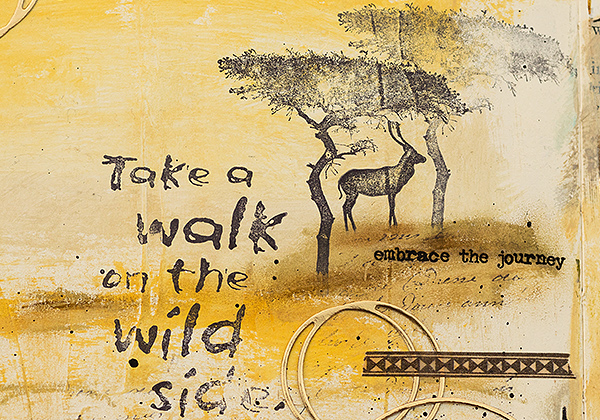
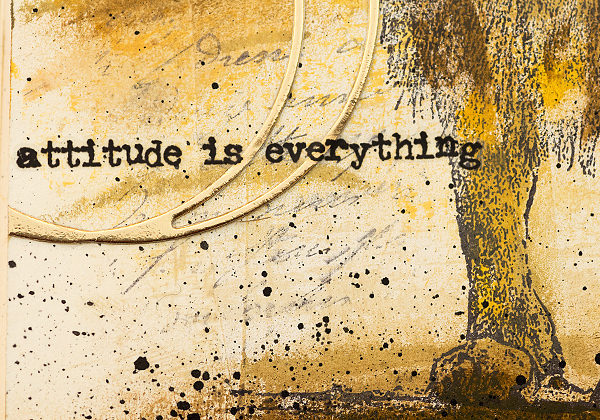
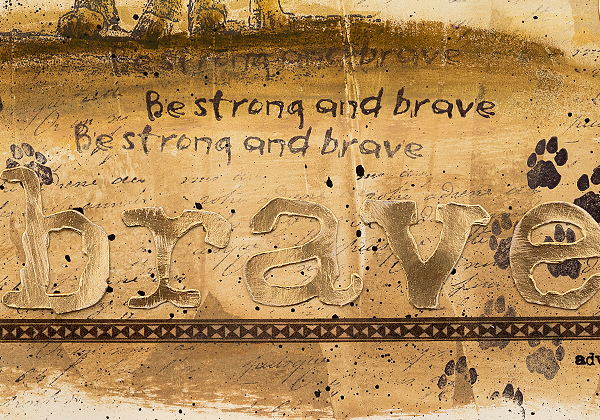
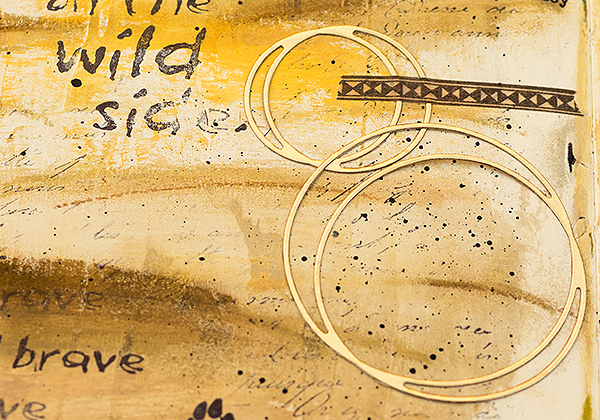
Walk on the Wild Side Journal Page
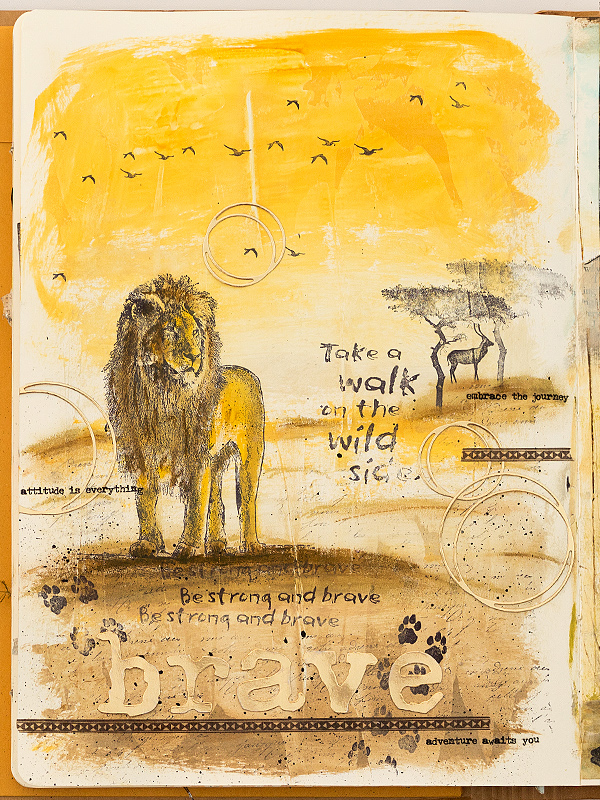
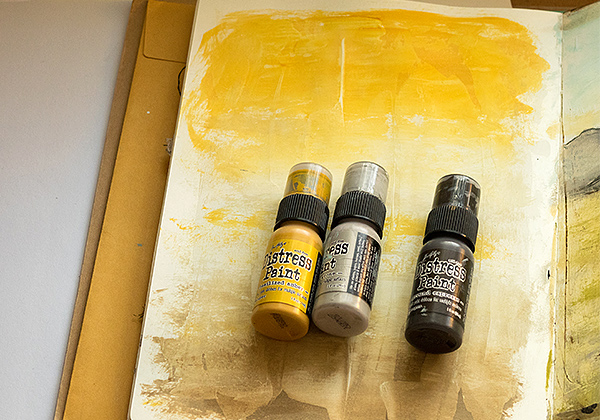
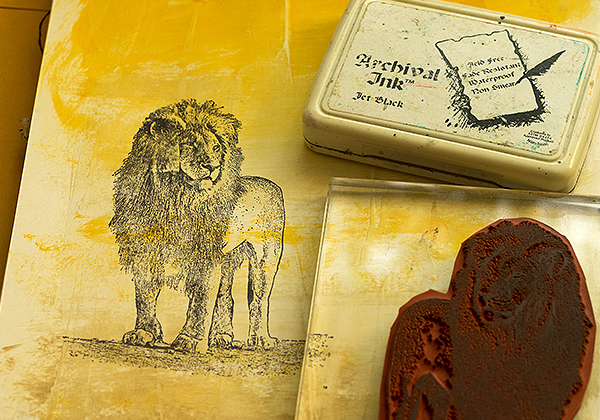
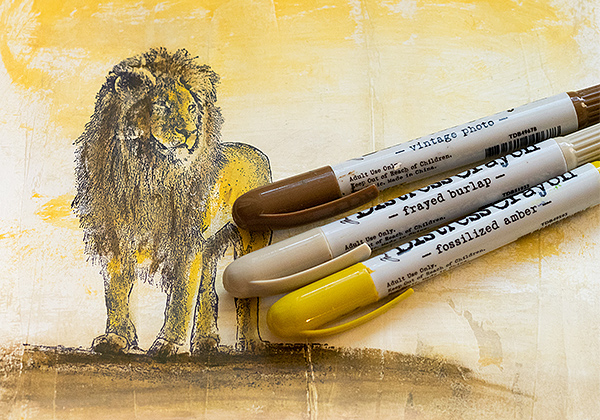
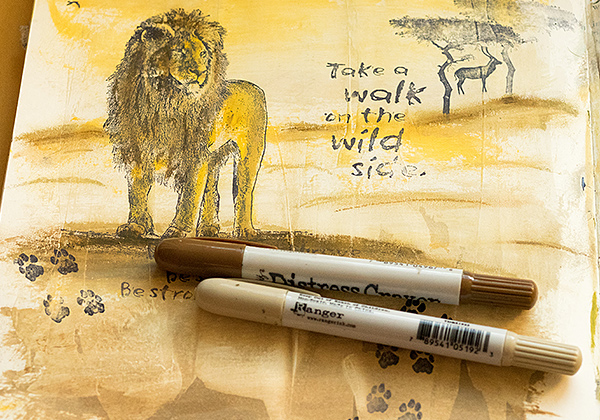
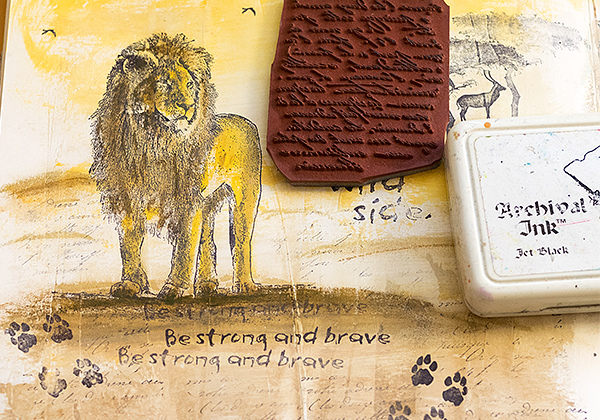
Hello everyone! I (Anna-Karin) am happy to be here on the Simon Says Stamp blog today, with an art journal page using stamps by Darkroom Door together with Ranger Tim Holtz Distress Paint and Distress Crayons. Even though I made an art journaling page, the techniques in the tutorial work for a wide range of projects, for example, cardmaking, scrapbooking, and canvases.
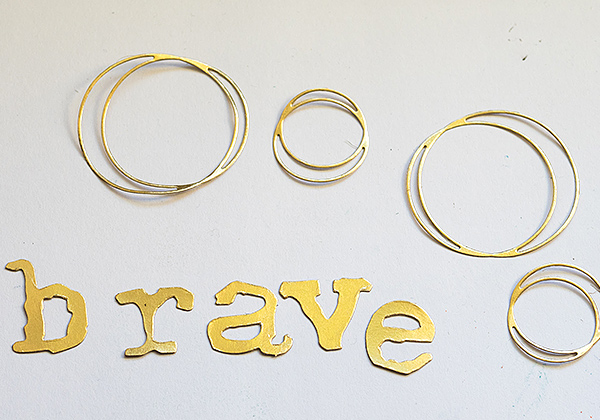
I did an art journal page in my large Dylusions journal, inspired by memories from safari trips and by my youngest son who loves lions. Nature-themed pages are a favourite of mine and you’ll find lots of them in my different art journals. To create the scene, I used three of Darkroom Door’s lovely Wild Africa stamps sets, namely: Wild Africa Vol. 2, Wild Africa Vol. 3, and African Trees.

SUPPLIES:
|
|
|
 |
 |
 |
 |
 |
 |
 |
 |
 |
 |
 |
 |
 |
 |
 |
 |
 |
 |
 |
|
|
Thanks for reading today, and thanks again to Anna-Karin for being our special guest! Visit her blog, Layersofink.blogspot.com for lots more inspiration too!

Blog Candy Alert!! Follow our blog via email and comment on this post for a chance to win a special blog candy!


