Exploring the New Distress Oxide Ink Pads
Hi Friends! Thanks for stopping by today! Happy last day of February! We asked our Wednesday challenge teamie Jenn Shurkus to whip up some cards using the new Tim Holtz Ranger Distress Oxide inks, and boy oh boy did she deliver! Be sure to read on and enjoy!
Hello Everyone! It’s Jenn Shurkus here and I am wicked exited to be sharing with you a fun technique you can do with the new Distress Oxide Ink Pads!
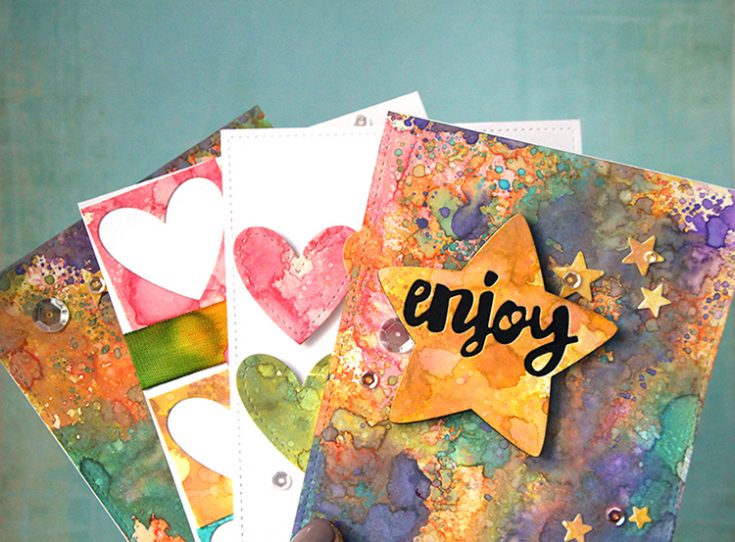
I had so much fun exploring and playing before I knew it I had 4 different cards to share with you. I hope this will inspire you to get a little inky and create something amazing with the new ink pads.

I think the big question is what is the difference between the Distress Ink Pads and the Distress Oxide Ink Pads. Some noticeable differences I learned right away are:
- It is a dye & pigment ink fusion. You will still have all of the properties you get with Distress Ink Pads where they react with water but they are opaque like a pigment ink so the layering of colors will act differently then with Distress Ink Pads
- The case the inkpads come in is gray, so you will be able to tell the difference right away of which ink pad you are grabbing
- The material of the actual inkpad is still a felt pad, usually with pigment type inks you will see a more spongy pad, that is not the case here
- There are 12 colors right now, that match the rest of the Distress line
- You will still be able to stamp with them, blend, stencil, watercolor and emboss with them
- Because they are more opaque they will work well on darker surfaces too
- Because they are a dye/pigment fusion you will get a beautifully detailed stamped image
- Because they have pigment properties when you layer the colors they will stay true to their colors unlike when you layer with regular Distress ink you will get some mixing. For example when you layer Blue and Yellow regular Distress you will get a lot of green, but that doesn’t happen with the Oxide Distress
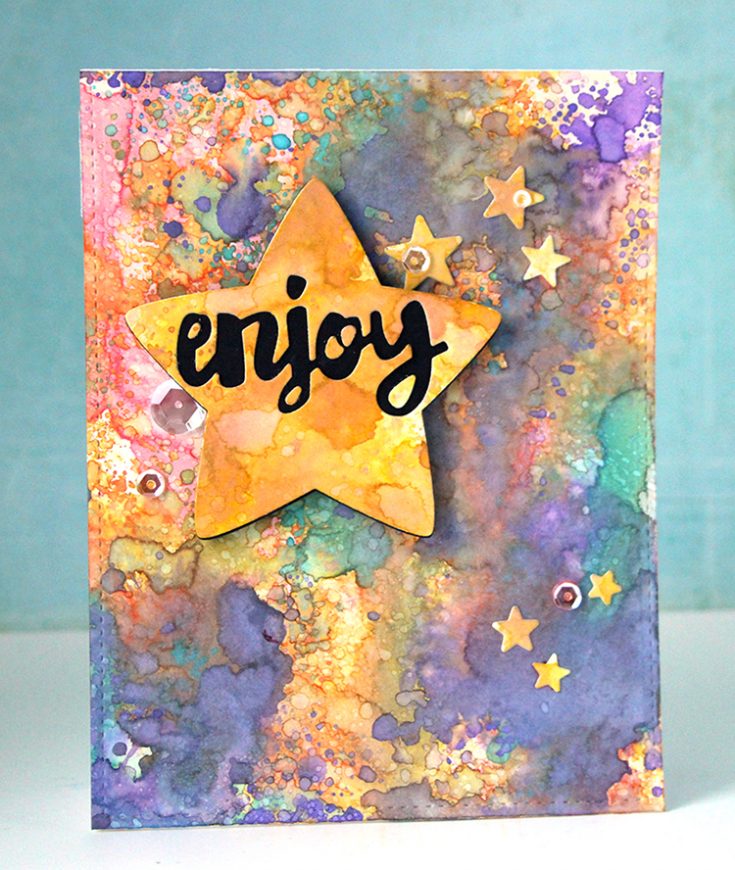
I was in awe of how beautiful they layering of the colors were so that is what I focused on to share with you today
I pulled out a rainbow of colors: Worn Lipstick, Spiced Marmalade, Fossilized Amber, Peeled Paint, Broken China and Wilted Violet. Working on the Ranger/Tim Holtz Mixed Media Cardstock as I knew I would be using a lot of water and I find this paper stands up really well to that.
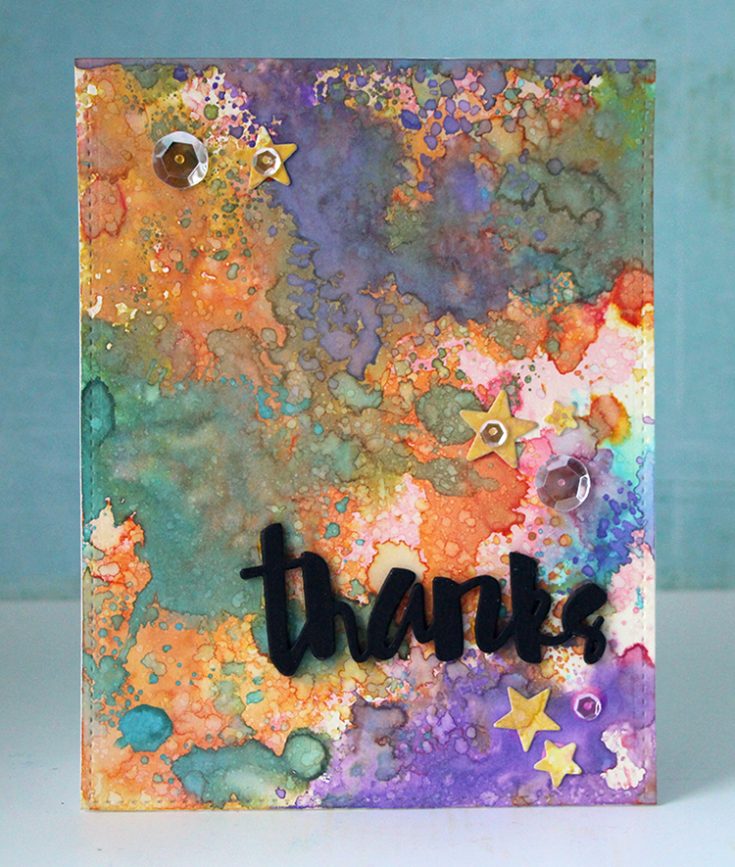
- Press, wipe and “smooch” the Worn Lipstick Distress Oxide Pad directly onto your craft sheet.
- Spritz with water until the ink beads up.
- The taking the Mixed Media Cardstock wipe and “plop” it into the ink.
- While you heat it with a heat tool, gently spritz some water droplets onto the ink. The distress sprayer is great for this to get good droplets.
Note: At this time you can wipe the Mixed Media Cardstock back into the ink to build up layers of just one color, but I knew I wanted to do a whole rainbow of colors so I cleaned up my craft mat and moved on.
- Press, wipe and “smooch” the Spiced Marmalade Distress Oxide Pad directly onto your craft sheet. Spritz with water. Wipe and plop the layer of cardstock into the ink. Heating it the same way, spritzing water droplets as you go.
- Next I did the same steps with Fossilized Amber, Peeled Paint and Broken China. You can’t really over think too much where the ink is going to go, but I knew because I was working with a lot of different colors that I just wanted a little bit of each so I carefully wiped the cardstock onto the craft sheet being aware of only some of it actually touching the surface.
- Lastly I finished up with Wilted Violet with the same steps.
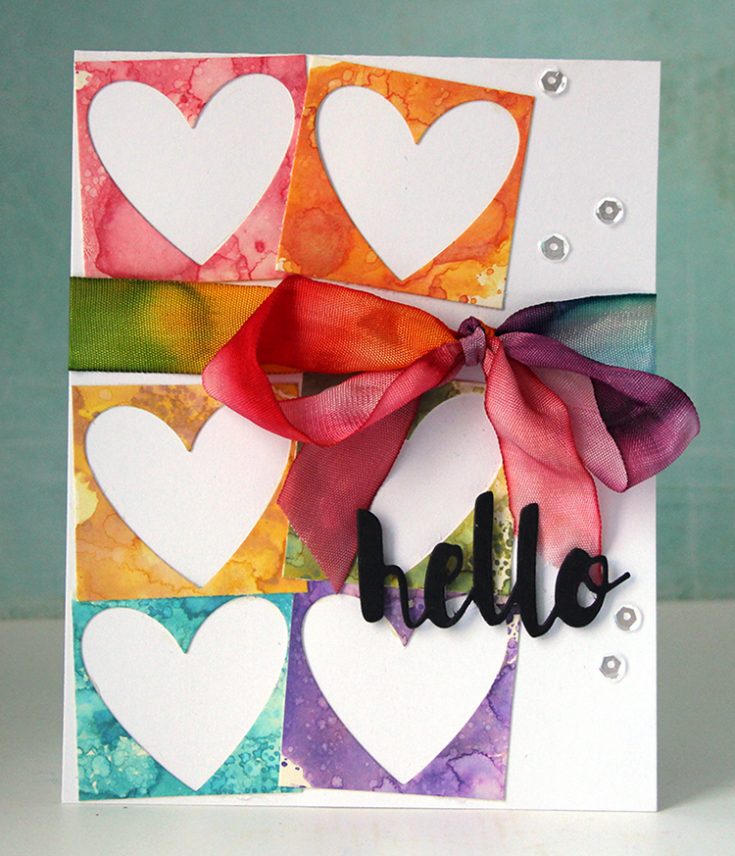
Once I made a few backgrounds this way I also made some with just one color. As I mentioned above you can use just one color but still build up layers, heating the ink in between and adding water droplets. That is how I got my single colors used on the hearts and stars.
I think I could play with these inks all day just to experience the different outcomes and color combos you can play with. Next I want to play with the Oxide Inks and Distress Inks together I think that will be beautiful too! I hope this has inspired you to play and try out the new Distress Oxide Ink Pads! Have an inky day!

SUPPLIES:
 |
 |
 |
 |
 |
 |
 |
 |
 |
 |
 |
|
 |
 |
 |
 |
 |
 |
 |
 |
 |
 |
 |
 |
 |
 |
 |
 |
Thanks for reading today, and thanks to Jenn for being our special guest!

Blog Candy Alert!! Follow our blog via email and comment on this post for a chance to win a special blog candy!
CONGRATS! Blog Candy Winners!
From: Studio Monday with Nina-Marie: Sticker Slider Card + Hopping Along Card Kit: Sabrina Radican!
From: 10 Crafty Must-Haves!: Nicki McStay!
From: Anything Goes on the Wednesday Challenge: Becca Yahrling!
From: Amore Laura Fadora Feature: YOU Make Me Smile: Holly Klingensmith!
From: NEW Lawn Fawn! Elphie Selfie in Scalloped Box Card Pop Up!: Miriam Prantner!
From: Hopping Along Limited Edition Kit Is Available Now: Valerie DeWitt!
From: What Would Kelly Make: 5th in the series!: Gail Hislop!
From: Yippee for Yana: Quick Stamp Wreath Cards: Mary Holshouser!
Please email [email protected] with your mailing address (if applicable), the name of the blog you won from, and the prize you won to claim your prize!
Studio Monday with Nina-Marie: Sticker Slider Card + Hopping Along Card Kit!
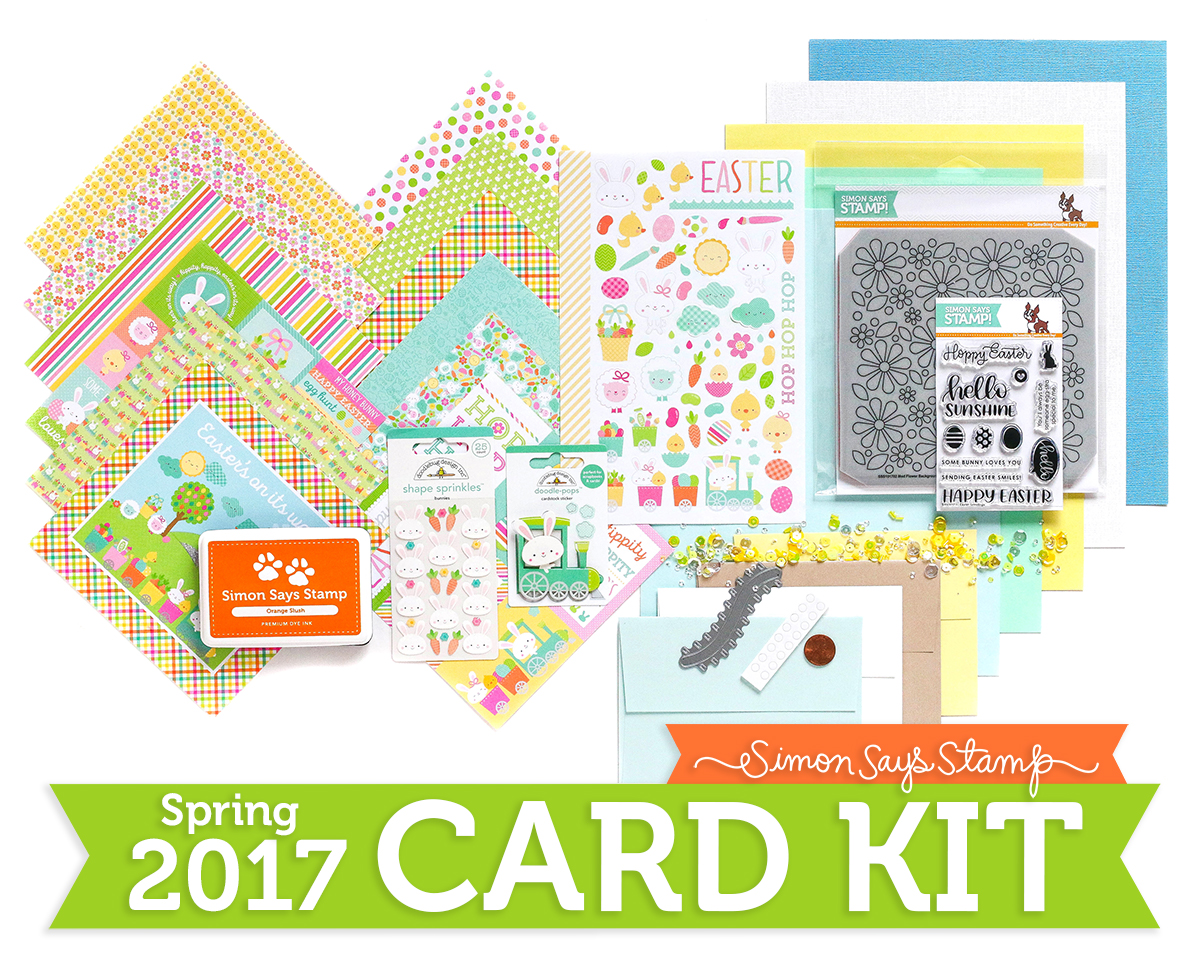
Hello everyone and Happy Monday! As most of you know, we released our latest, Special Edition Card Kit called Hopping Along last Thursday. I thought this would be a perfect thing to feature this week for Studio Monday; so I am going to use the kit and show you how to make a sticker slider card!

As a note, the Card Kit has sold out but most of the items are available for individual purchase. You’ll find them all listed at the bottom of this post.
There are a bunch of fun stickers included in this Special Edition Kit from Doodlebug; I used the Easter Express stickers and Bunny Shape Sprinkles today. I paired them with the Train Track slider die, which is the CUTEST slider die ever! The slider die is actually shorter than it appears in my card; in the video I will be showing how I used the partial die cutting technique to lengthen it for this card!
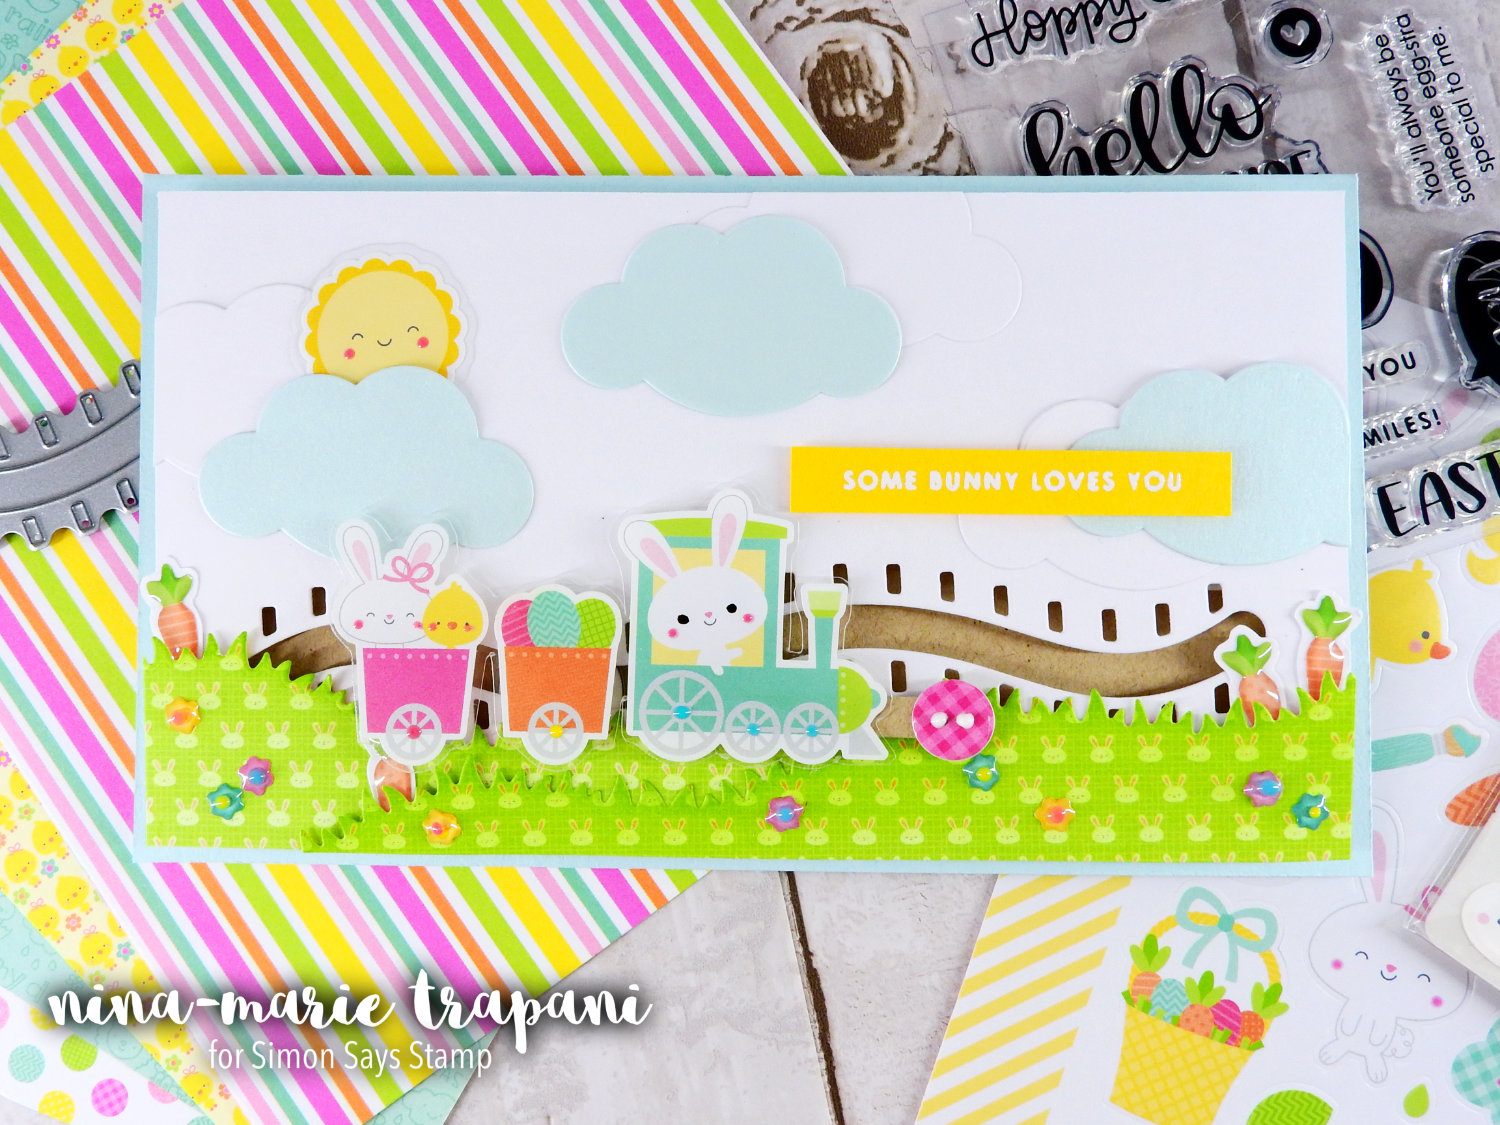
Because I love creating scenes, I wanted to do that with the elements I was using in my card. And all of the items in the kit make it even easier to do just that! This is one of my favorite aspects about every Simon Card Kit; all of the items are hand selected with the intent that they can be used interchangeably with one another. You can also get creative with the uses of the items in the kit… let me show you how!
I was able to use the pattern papers (from Doodlebug) to make my grass and the Sea Glass metallic envelope for the clouds. The subtle, metallic shimmer of the Sea Glass envelope adds the perfect amount of interest to the sky. I also tinted the grass a matching green color to make it a bit more subtle. The dies I used were the Grassy Hills from My Favorite Things and our Simon Says Stamp Happy Days dies.

The Easter Express stickers were easily turned into “faux die cuts” by attaching them to transparency sheets. You could also have used white cardstock instead. Aren’t those bunnies adorable???
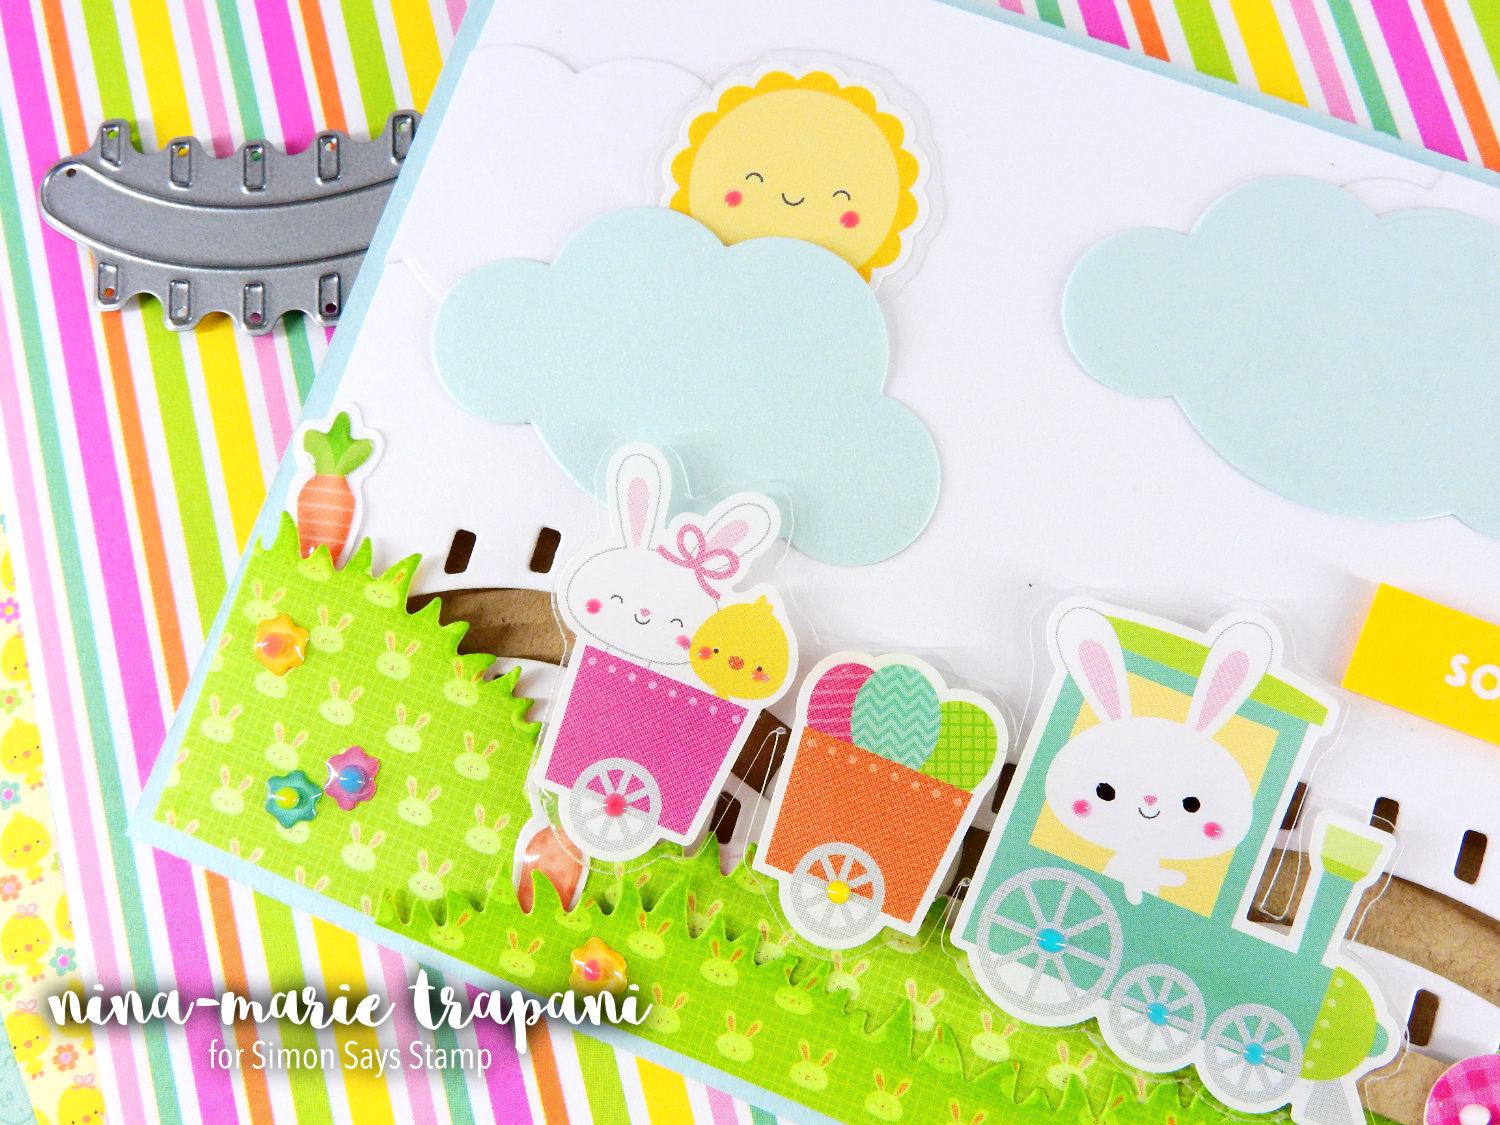
I also used the Bunny Sprinkles Shapes stickers to add flowers and carrots to my scene! The carrots were turned into “faux die cuts” too, which added some additional dimension and separation from other elements in the scene.

For the simple sentiment, I used the mini Easter Greetings stamp set and heat embossed it onto some yellow Simon Says Stamp cardstock. The card base was created with some of the Sea Glass cardstock included in the kit.
I hope this video provides inspiration to you for creating some fun cards with our Hopping Along Card Kit! Be sure to check out the video below to see how this card came together.
WATCH THE VIDEO
SHARE YOUR CARDS IN OUR GALLERY!
In the video, I mentioned we have galleries for each of our monthly and special edition card kits! You can find the link to the Hopping Along Gallery HERE. In the gallery you will find inspiration from fellow crafters using items from the kit. We also would love if you shared YOUR projects that you create with any of our kits in the galleries too! It is so much fun to see what everyone is creating!
SUPPLIES


HOPPING ALONG CARD KIT CONTENTS


Blog Candy Alert!! Follow our blog via email and comment on this post for a chance to win grab bags and blog candy! Remember to tag your awesome projects with #simonsaysstamp on social media so we can see what you are creating!

10 Crafty Must-Haves!
Hello friends, its Nina-Marie here with you! If you love discovering new tools and fun products, then today’s post is for you! I am sharing our Top 10 supplies that are MUST HAVES in your craft space. From ink and scissors to glitter and sequins, you are sure to find something here that you love too! For new crafters, this should also be a good starting point for learning more about supplies you will want to add to your supply stash.
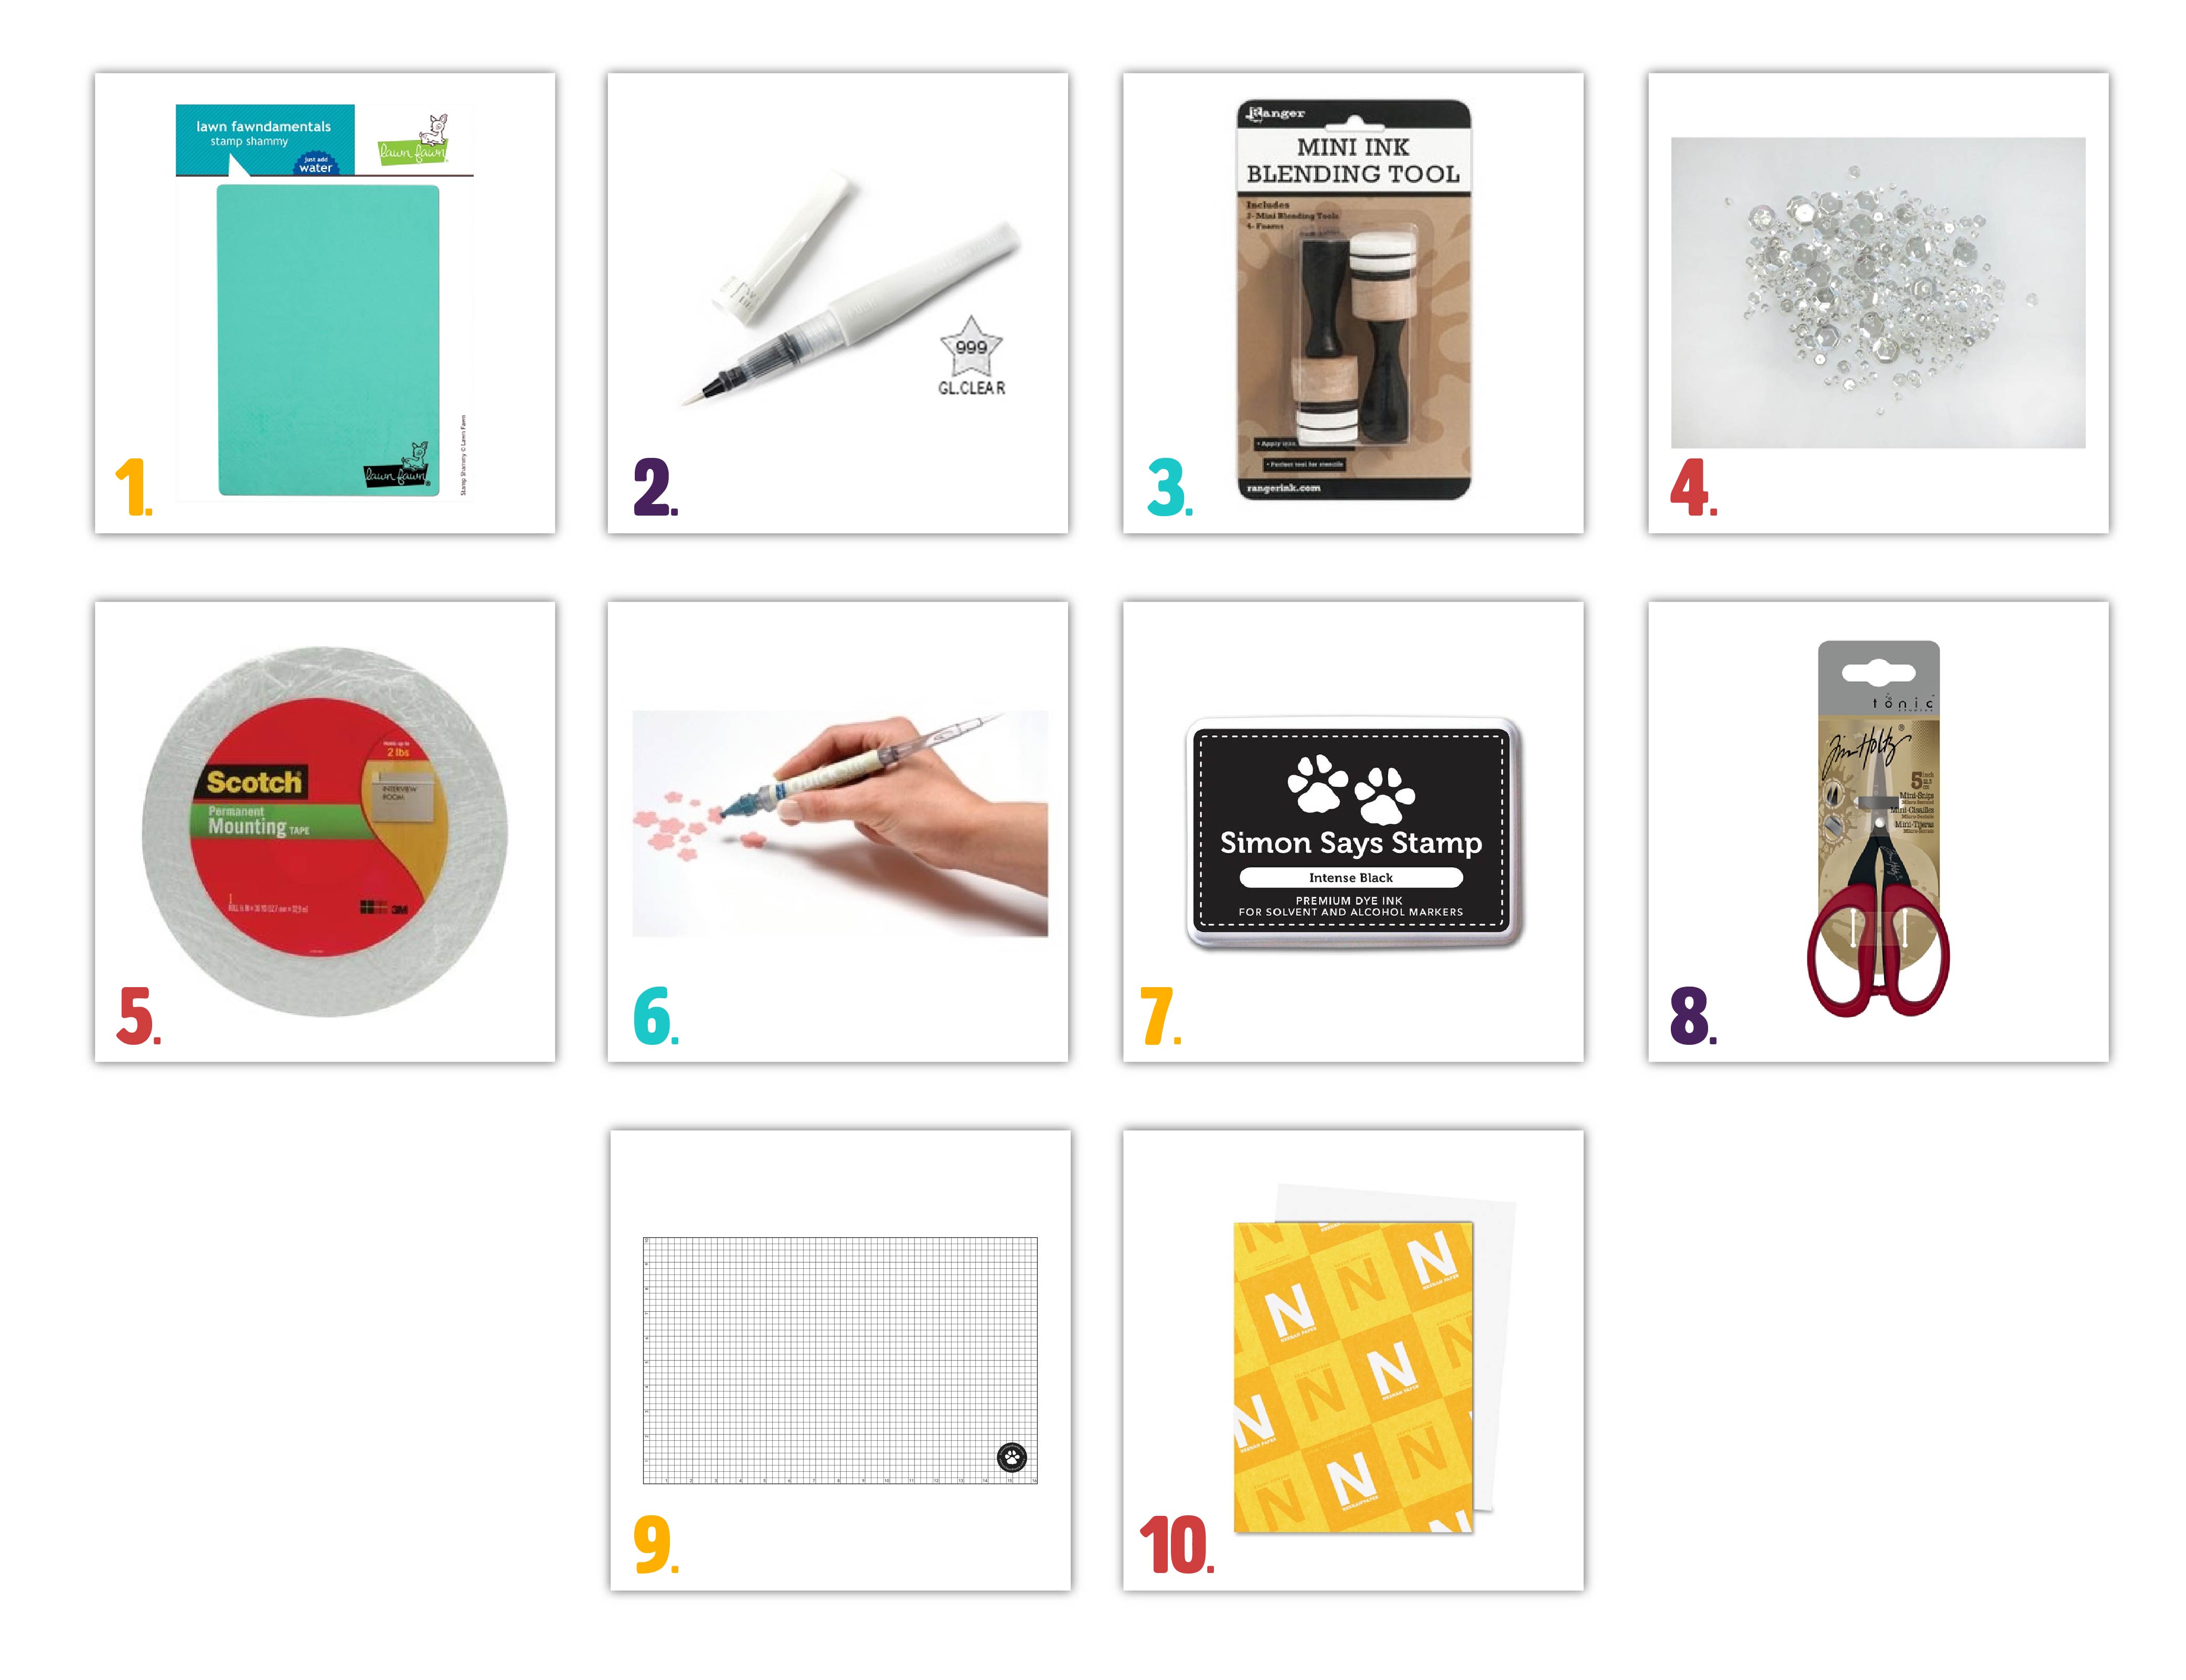
1. LAWN FAWN STAMP SHAMMY: This brightly colored cloth is perfect for keeping your stamps nice and clean while working on a project! It is reusable and does not require any special cleaner; all you need is a little bit of water! Having a reusable cloth allows me to conserve on baby wipes and specialty cleaners, which is both wonderful and cost effective. The Stamp Shammy will stain as it is used, but it will not effect how well it cleans your stamps. I personally use a Stamp Shammy for cleaning my stamps and love how convenient it is!
2. WINK OF STELLA CLEAR GLITTER BRUSH: Do you love glitter? I sure do! One of my favorite ways to add some sparkle on my cards is with this gorgeous glitter brush. The glitter is a clear shimmer, which makes it perfect for using over any die cut or stamped imaged. Another great feature about this brush is that you can refill it with water once the brush has gone dry. Usually there is a lot of leftover glitter in the bottom of the brush’s barrel, which can be reactivated by adding water. I have been able to refill my glitter brushes twice without noticing any change in the output of shimmer.
3. RANGER MINI ROUND BLENDING TOOL: Ranger is well known for their innovative crafting tools; one of my favorites are the Mini Round Blending tools. These blending tools are small enough to work with any size ink pad, including mini ink pads. This makes them extremely versatile. With the help of the round sponge pad, you can achieve great blending on your papers using a variety of different inks. The coordinating sponges last a very long time and can be removed or replaced onto the applicator at any time! I have about 6 applicators and I use a foam sponge for each color family. You could have more applicators, but I have a small studio. Because of that, I find having just a handful works perfect for me. Since the foam sponges can be interchanged so easily, I don’t mind swapping out sponges for a different color if need be.
4. SIMON SAYS STAMP MOONSHINE SEQUINS: When I reach for sequins, I almost always grab a clear mix like these Moonshine sequins! Clear sequins are my favorite to work with because they match with literally everything. One of the things I love about a sequin mix like this is that there many different sizes included, which can be mixed and matched on your project. Having a variation in size for embellishments is important to me when adding them on a card, as it helps balance the design.
5. SCOTCH DOUBLE-SIDED FOAM TAPE: Adding dimension to a project is so much fun! You can create depth, draw interest to an element or bring a scene to life, simply by popping something up with foam tape! It’s also handy for creating shaker wells with; simply stack layers of tape on top of each other around your window and then fill with your shaker bits! I love that the Scotch foam tape holds together so well; I never have to worry about a card falling apart. This is especially critical when creating a shaker card; we don’t want sequins or beads flying all over the place when the card is shook!
6. LIFESTYLE CRAFTS QUICK STIK TOOL: When working with tiny things like die cuts or sequins, having a tool like the Quick Stik is invaluable. On one end of the tool, there is tack for picking pieces up. At the other end, the detachable pick/chisel allows you to push items around while placing them on your project. I find the Quick Stik extremely helpful when trying to adhere very small sequins onto a project.
7. SIMON SAYS STAMP INTENSE BLACK INK: If you are like me, you love to work with a variety of mediums. Because of that, I find it important to have an ink that is compatible with the properties of those different mediums. For all my outline stamping, I reach for Simon’s Intense Black ink. The ink is true black and water-proof with water based mediums, as well as bleed-proof with alcohol inks (such as Copics). So no matter what medium I reach for, I always know my stamped images will stay crisp and clear!
8. TIM HOLTZ/TONIC MINI SNIP SCISSORS: Tim Holtz has a couple of different scissors on the market, but by far my favorite pair is the Mini Snip scissors! Not only are they compact and made with the same non-stick, titanium blades, but they can maneuver small areas too! These have been so handy for me in fussy cutting thicker materials such as watercolor paper; regular, fine tip scissors have a tendency to not cut quite as cleanly because of the thickness. But the micro-serrated blades of the Mini Snips can cut through those thicker materials SO smoothly. The scissors are also great for using with foam tape or other sticky materials because of the special coating on the blades. No more having to try to clean up scissor blades because the got “gummed up” by tape!
9. SIMON SAYS STAMP LARGE GRID MAT PAPER: Keeping my work surface clean is important to me (I’m a neat freak, LOL!), and I love using Simon’s Large Grid Mat for doing just that! The surface is 11″ x 17″, so no matter how large or small your work surface is, this paper should fit right on top. I find that my favorite way to use the paper is by taking one sheet off at a time and temporarily adhering it down to my table with masking or washi tape (to prevent it from sliding around).
10. NEENAH SOLAR WHITE CARDSTOCK: White cardstock is such an important tool for me as a crafter. I enjoy the look of white in the majority of my cards; the fresh, clean look just makes everything pop! This paper is perfect for coloring, especially with alcohol-based markers such as Copics. In shading techniques, the colors blend on the paper extremely well. There are two weights of Neenah cardstock; 80lb and 110lb. I most often reach for the 110lb because I like the slightly thicker and more sturdier feel, but this is personally preference; both weights provide beautiful results.
I hope these Top 10 must-haves were helpful to you in deciding if any of the products are something you need to add to your collection! I find all of these extremely useful in so many -if not all!- of my card projects. And if you are a new crafter, you may also want to check out our resource of Beginner Series videos on our YouTube channel. We have a growing playlist of short videos that feature how-to’s for must-have tools and supplies; they are invaluable lessons for any crafter to learn!
Thanks so much for visiting us today and I will be seeing you again very soon!
Blog Candy Alert!! Follow our blog via email and comment on this post for a chance to win grab bags and blog candy! Remember to tag your awesome projects with #simonsaysstamp on social media so we can see what you are creating!


