Altenew’s 3rd Anniversary Blog Hop + Giveaway

Welcome to the Altenew 3rd anniversary blog hop!!! If you’re coming from Amy Lee’s blog, you’re in the right place!!
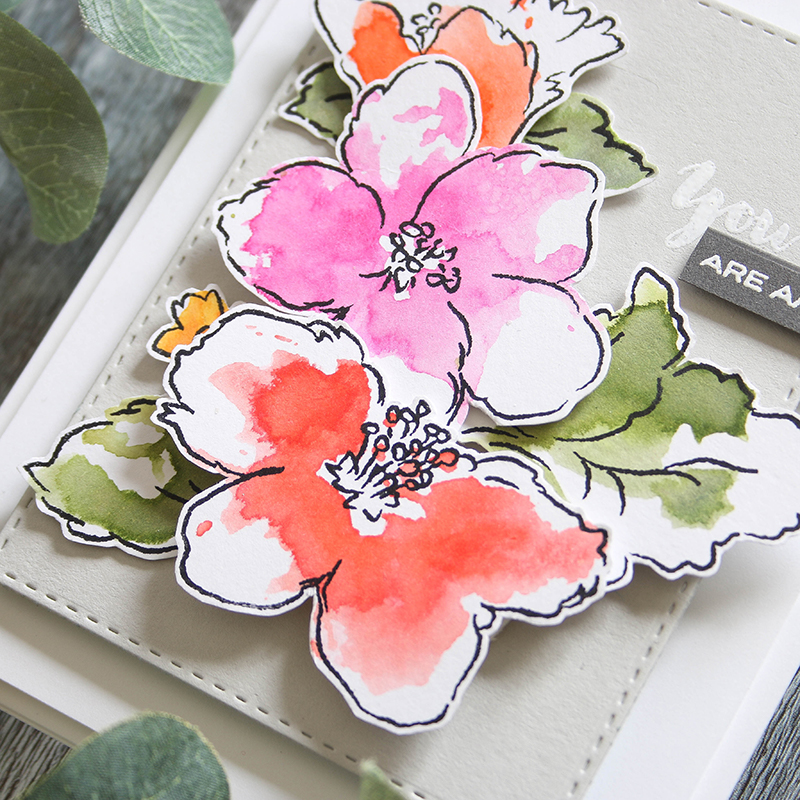
In celebration, I created a card using the Altenew Hibiscus Bouquet stamp set where I’ve used the center (solid) images to create watercolor effects.
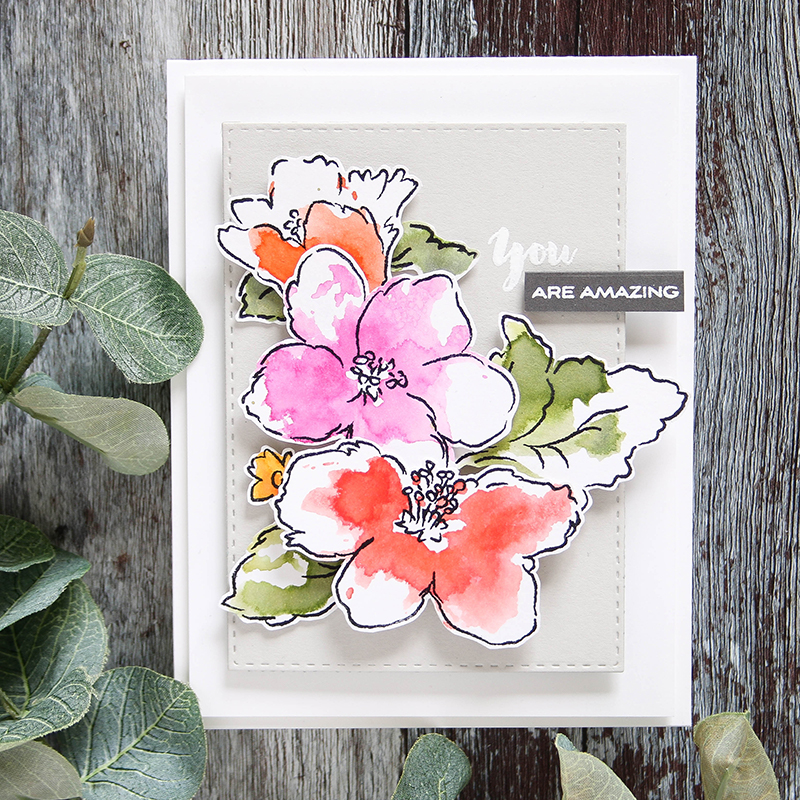
The watercolor technique is simple, first I layered on light tones of ink, then stamped a second time with ink in a specific area for a darker tone. When everything was dry, I stamped the outline images overtop in black.
I’ve filmed a video that you can view below or on our YouTube channel HERE.
Prizes
Altenew is giving away $50 gift certificates to FIVE lucky winners. There are also 12 awesome companies who are celebrating with us, and they are offering the following prizes:
- Spellbinders: Three $100 Gift Certificates
- Online Card Classes: Three Class Spots
- My Sweet Petunia : Mini MISTI
- Pretty Pink Posh : $30 Gift Certificate
- WOW! Embossing Powder : $30 Prize Pack
- Scrapbook Adhesives by 3L : $30 Prize Pack
- Tombow USA: 1 pack of 10 Dual Brush Pens
- Chameleon Pens: 1 Pack of 5 Chameleon Pens
- Butterfly Reflections Ink: $25 Gift Certificate
- Ellen Huston LLC : $25 Gift Certificate
- Freckled Fawn : $25 Gift Certificate
- Simon Says Stamp : $25 Gift Certificate
Be sure to leave comments by Tuesday, April 25, 2017 at 11:59 PM EDT for a chance to win! 15 WINNERS will be chosen at random from the comments left on any of the blogs listed below and will be announced on the Altenew blog on April 28th, 2017.
The anniversary celebration continues the rest of the week, just follow the links below!
Thanks for stopping, your next stop on the hop is to SVETA FOTINIA. Enjoy!!!
 |
 |
 |
 |
 |
 |
 |
 |
 |
 |
 |
 |
 |
 |
 |
 |
 |
 |
 |
 |
 |
|
|
 |
Studio Monday with Nina-Marie: Quick and Easy Emoji-tional Cards!
Hello everyone, it’s Nina-Marie! Today I have a very fun set of cards to share with you featuring products from the Simple Stories Emoji Love collection!

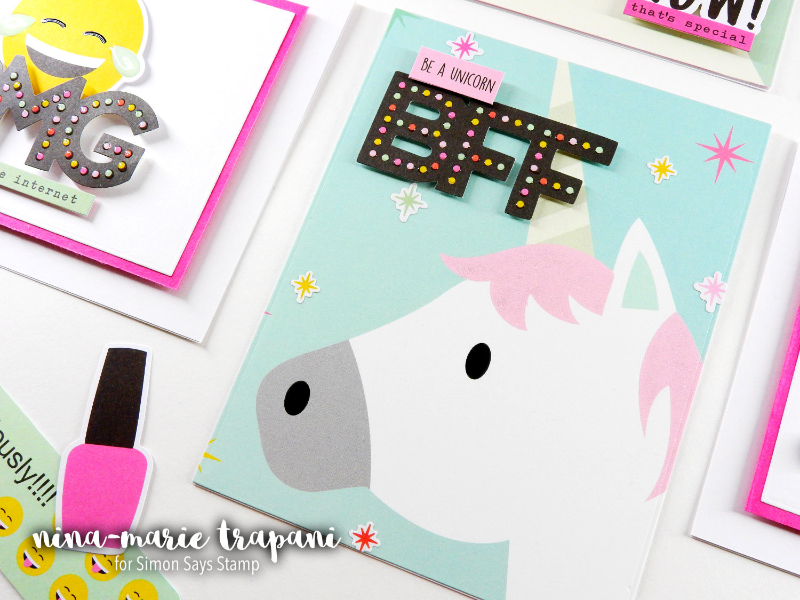
Emojis are so much fun to include in texts, why shouldn’t they be just as fun for including on cards?? I’ve got 6 quick and easy cards to share with you that all featuring an emoji-tion (pun intended)! In these cards, I used the Emoji Love 6×8 paper pad, the Emoji Love Bits and Pieces die cuts and the Emoji Love 4×6 sticker sheet pack.
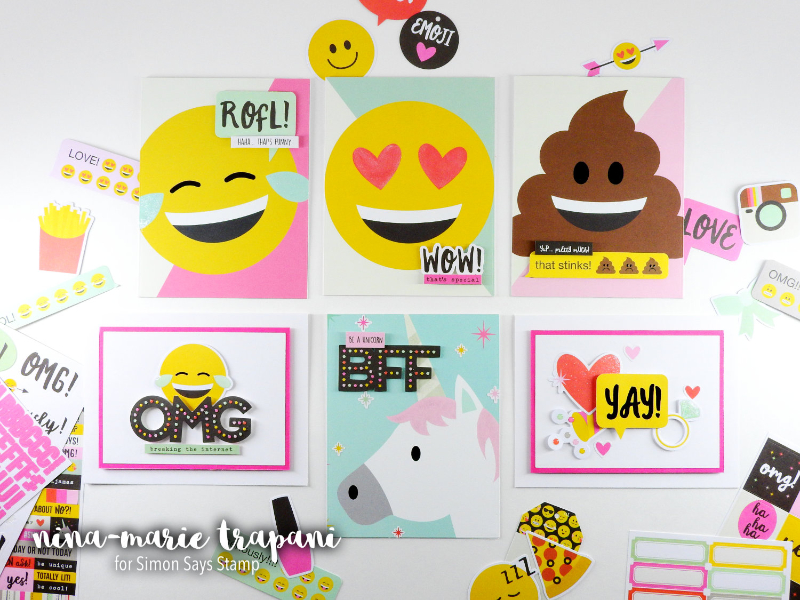
My first set of cards features using the the large emoji pattern paper sheets and making these the focal point of the cards. I die cut the papers with Simon’s Basic Rectangle dies and added sentiments from both the Emoji Love die cut pack and sticker sheets.
One of the tips I featured in the video (see below), is how I use the Emoji Love stickers. Because I like adding dimension, I wanted to be able to pop the stickers up off of my cards. By adhering the stickers to cardstock, I was able to trim them out and add foam tape to the back, resulting in a “die cut” piece!
Here’s a look at the pattern paper emoji cards…
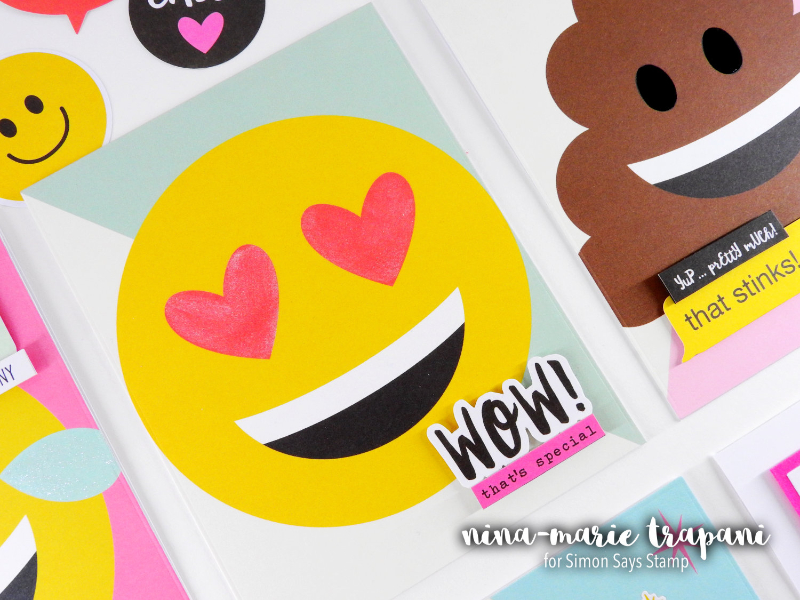
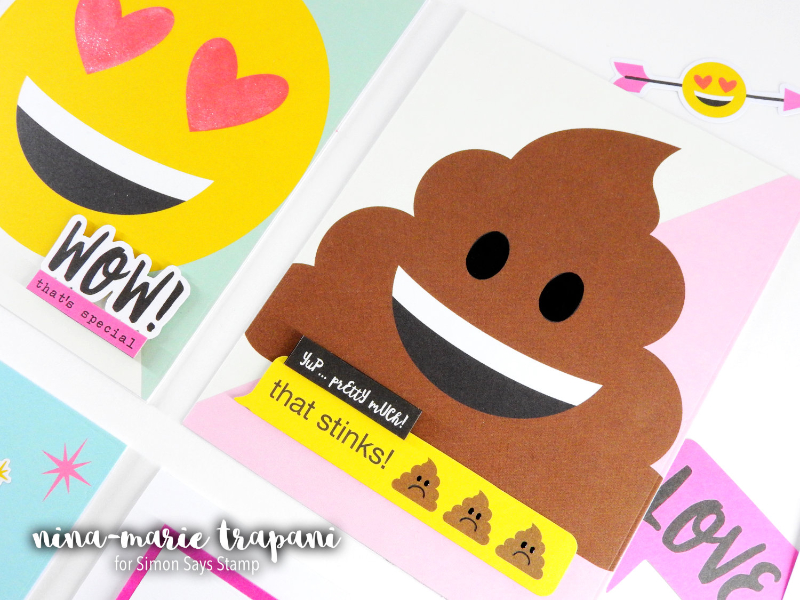
Which one is your favorite? I have to say, the little “stinker” emoji card cracks me up most of all! LOL!
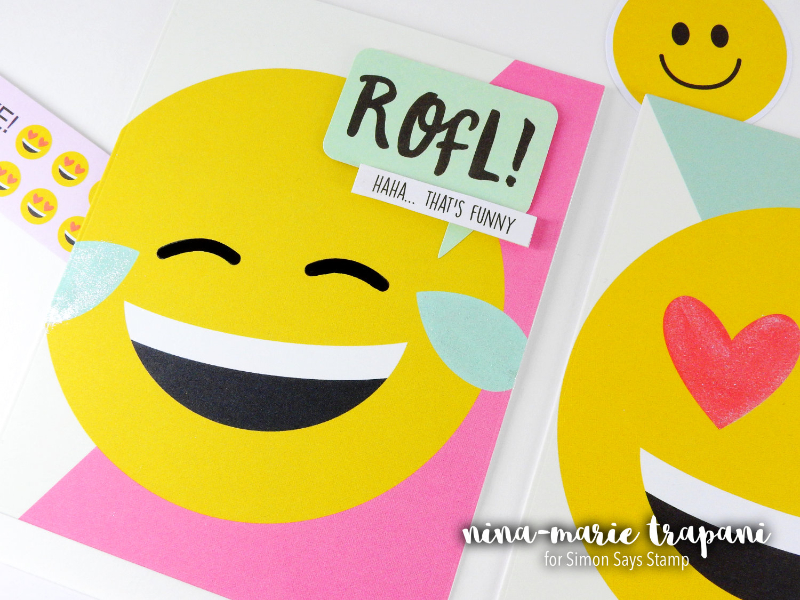
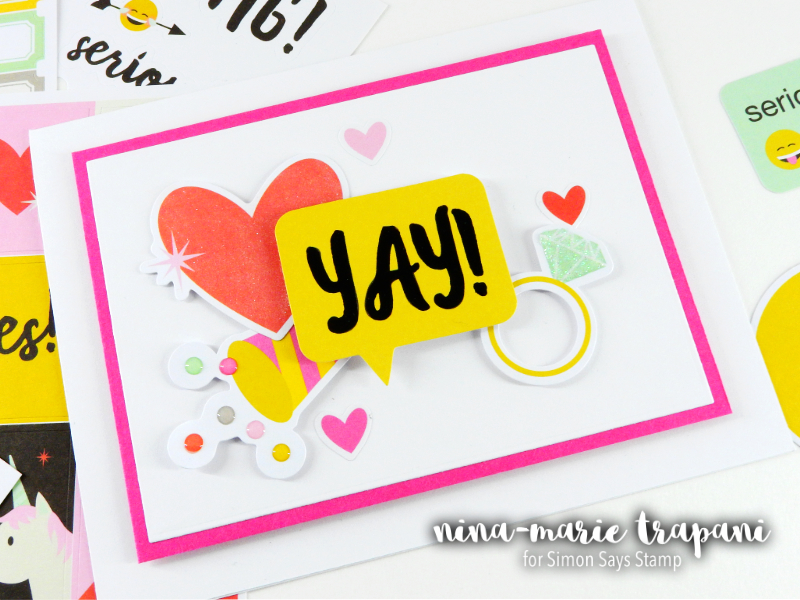
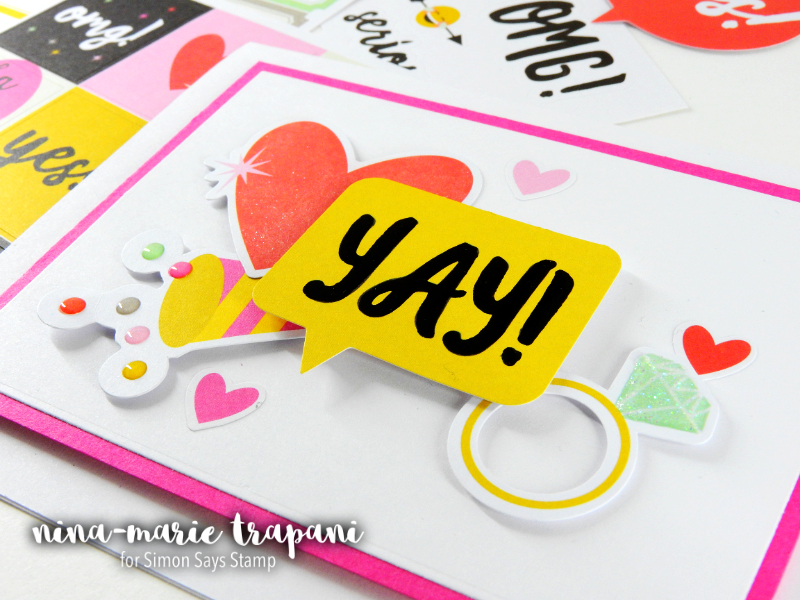
My next set of cards each feature the Emoji Love die cuts. These work wonderfully for making little collages! By pairing a few together, you can say exactly what you need to say using very few words! For example, I used the ring, the party popper and the “yay” speech bubble to create a congratulations card for an engagement or wedding. Isn’t it fun to see what kind of creative things you can say with emojis??
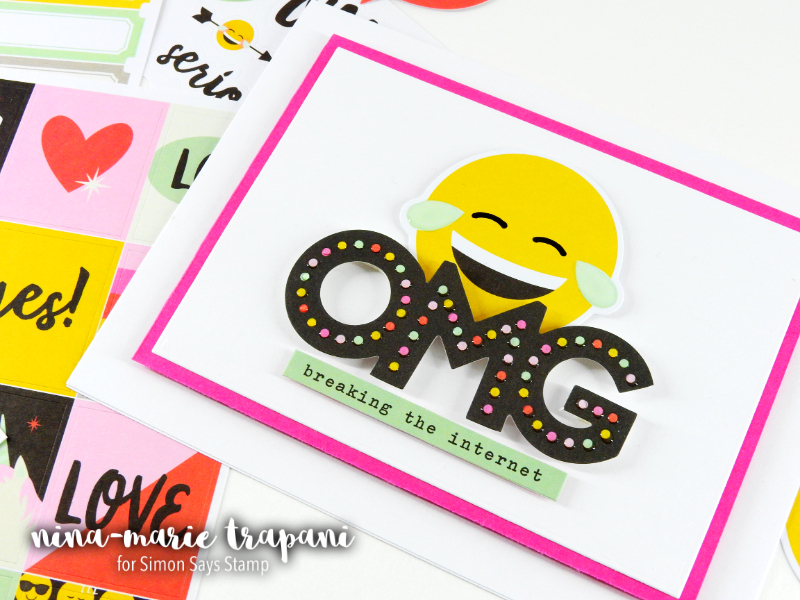
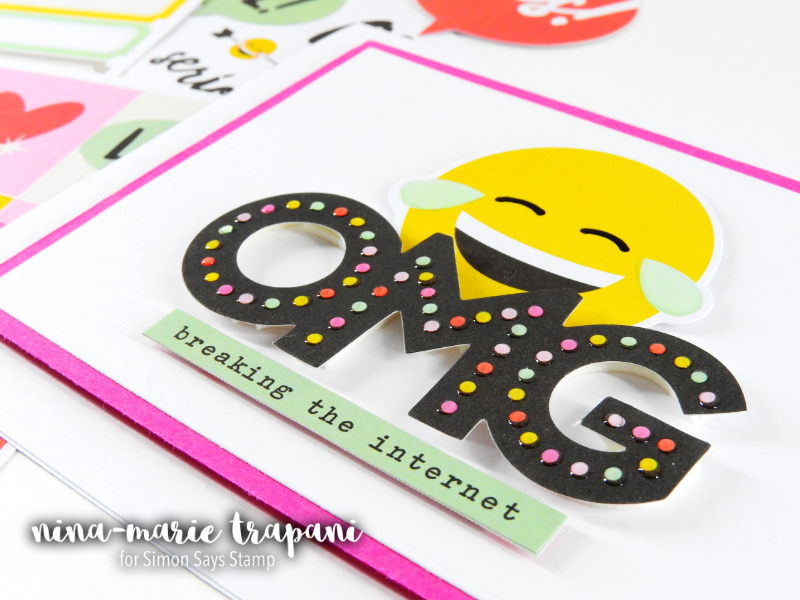
The other card has a more witty theme. I paired the laughing emoji and “oh my gosh” (OMG) die cuts together, along with a sticker sentiment that reads “breaking the internet”. Basically, whatever was so funny, it was so hilarious that it broke the internet! It may be silly, but I got a kick out of it and one of my friends did too!
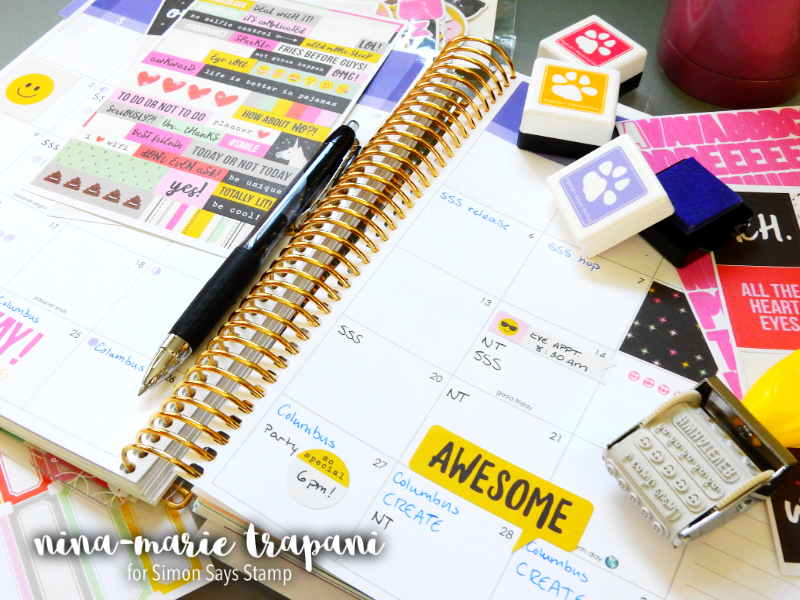
And! For those of you that are planner decorators, this collection is also great for decorating your planners! Here’s an example of how I decorated my planner for this month using some of the stickers/banners and stamp roller. There are other great planner products in the Emoji Love collection; you can see them all HERE.
I hope that these cards made you laugh as much as they did me! These cards would be perfect for any age group; kids, teens or adults. I think it is really fun to see what kind of clever pairings you can create using the Emoji Love collection.
WATCH THE VIDEO
SUPPLIES


Blog Candy Alert!! Follow our blog via email and comment on this post for a chance to win grab bags and blog candy! Remember to tag your awesome projects with #simonsaysstamp on social media so we can see what you are creating!

Doodling with Debby: Watercoloring with Distress Inks
Hi friends! Happy Sunday! Welcome to the latest (and might I add super ADORABLE) edition of Doodling with Debby! Every month Debby Hughes shares a new and fun card design! Be sure to read on, watch the video, and enjoy!
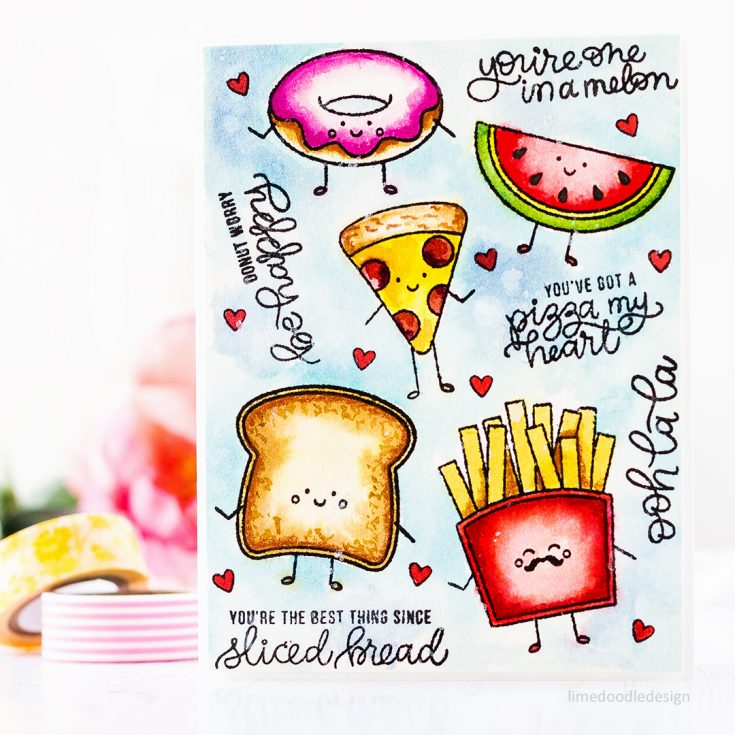
 Hi It’s Debby here and I’m delighted to be joining you with this month’s Doodling With Debby feature. Today I have a video using Distress Inks to watercolour the cute Funny Food set. I did wonder about creating a bunch of cards with each having just one of the fun foods. However, I loved how playful the foods all looked together on the stamp sheet and so decided to arrange all the foods on one piece of card.
 I laid everything out in the Mini Misti and then as the watercolour card is textured I stamped the images multiple times with Versafine Onyx Black ink to get a good impression. I used a waterproof black marker to fill in any gaps in the stamping and then taped my card down to a piece of board to help prevent it warping as I painted. I used a piece of acetate as a palette, rubbing Distress Ink minis on to the acetate to leave a puddle of colour then adding a little water to get the ink to a paintable consistency but not too much as I wanted the colours to stay strong and vibrant.
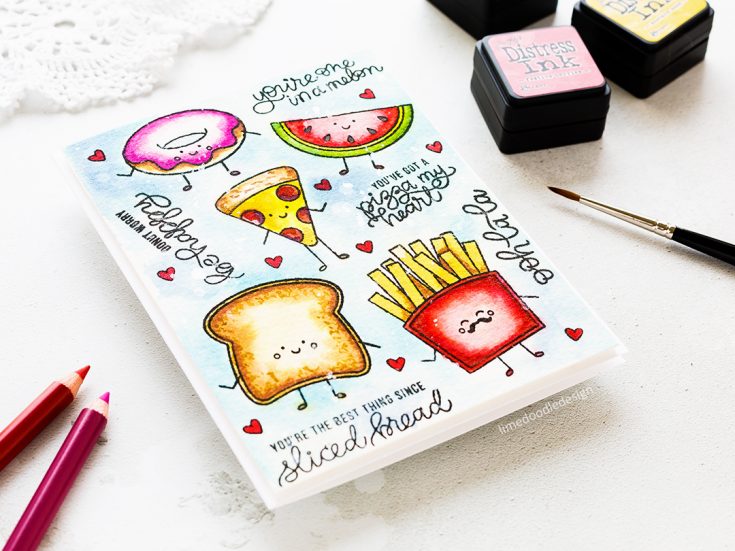 I used a variety of different Distress Ink colors, which are listed in the supplies section below. I added the ink around the edges of the food images and then rinsed my brush and used water to blend that out. While the ink was still wet I added more colour to the shadow areas and let the water do the work to soften and blend that out. I dotted around the card colouring different areas so that each area had time to dry which meant it didn’t bleed in to the adjacent area.
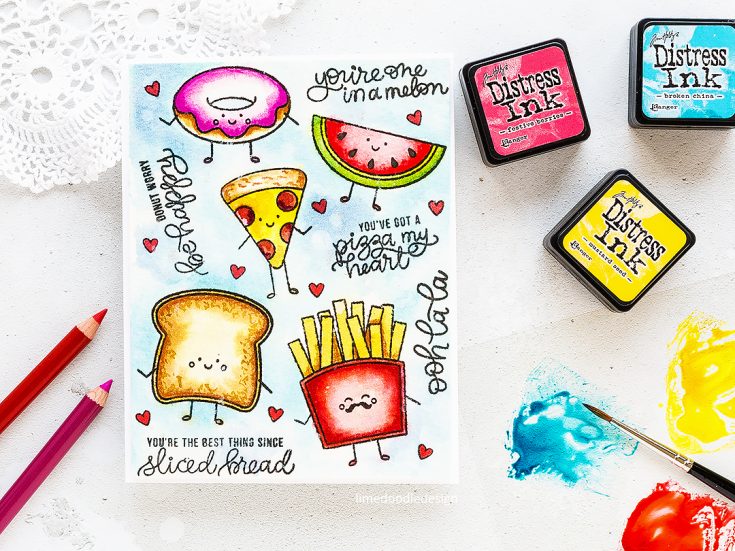
With the food characters painted I wanted to give them a nice background to really help the colours pop and so I added Broken China to my acetate palette and painted around the images. I kept it loose and uneven to add interest. The only difficulty was that as Distress Inks are so reactive with water that on occasion when my brush touched an area I’d already painted the colour bled out in to the background slightly. I added some faded jeans to the background to give some variation.
Having dried off the panel with my heat tool I then added splatters of water to the background and lifted some of the colour with a tissue. I did this a couple of times but I think because the background wasn’t highly pigmented that the lighter areas where the colour had been lifted weren’t as obvious. So I resorted to my usual splatter of a solution of Perfect Pearls to give the variation that I was after.
Another of my favourite techniques currently is to add some extra depth and interest to a piece with coloured pencils. Finally I wanted to fill the gaps between the food with a small image. I looked through my stamps and spotted the perfect small heart in the Some Bunny Special set. I added that to an acrylic block and then stamped with Versafine Onyx Black ink to fill in any gaps. I pulled my acetate palette back and watercolored the hearts with Barn Door Distress Ink. I added foam adhesive to the back of the panel and mounted it to a side folding white card base.
Thanks for joining me today and I’ll see you for next month’s Doodling With Debby feature.
Watch the video:
Supplies:
 |
 |
 |
 |
 |
 |
 |
|
|
 |
 |
 |
 |
 |
 |
 |
 |
 |
 |
 |
 |
 |
Thanks for reading, and thanks to Debby for being our special guest!
Blog Candy Alert!! Follow our blog via email and comment on this post for a chance to win a special blog candy!


