Yo Ho Ho: Happy Birthday!
Hi there! Elena here, and so thrilled to be back here to share with you a fun card featuring Neat and Tangled products.
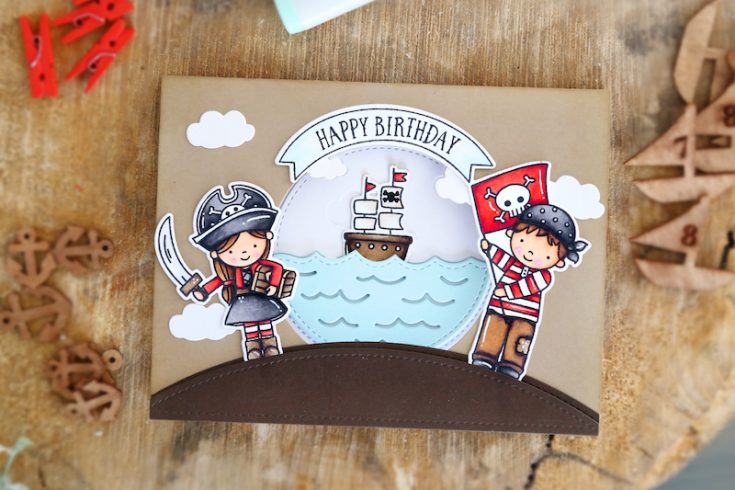
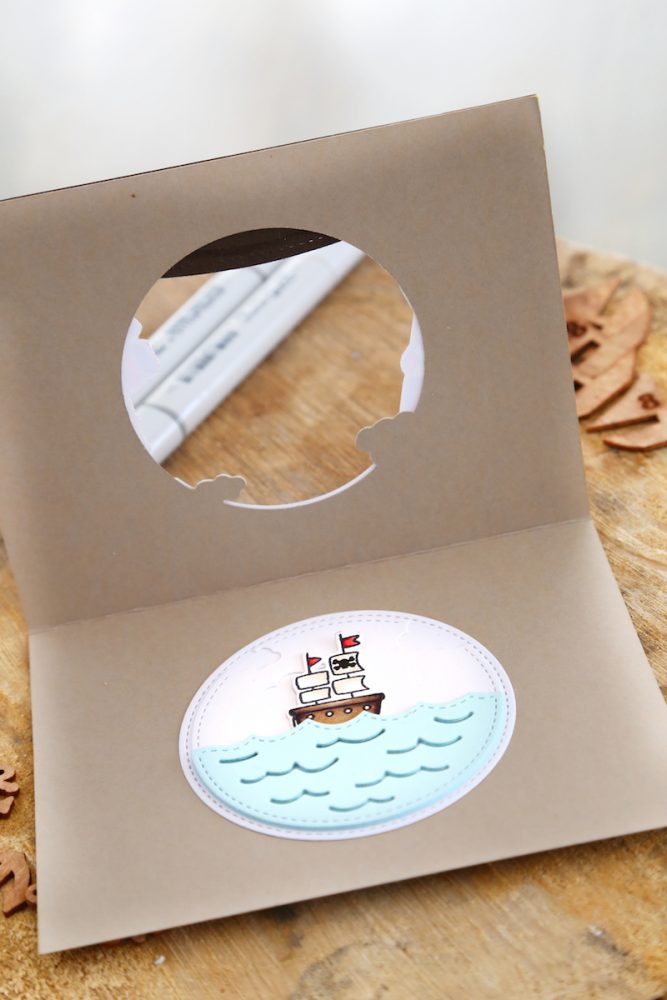
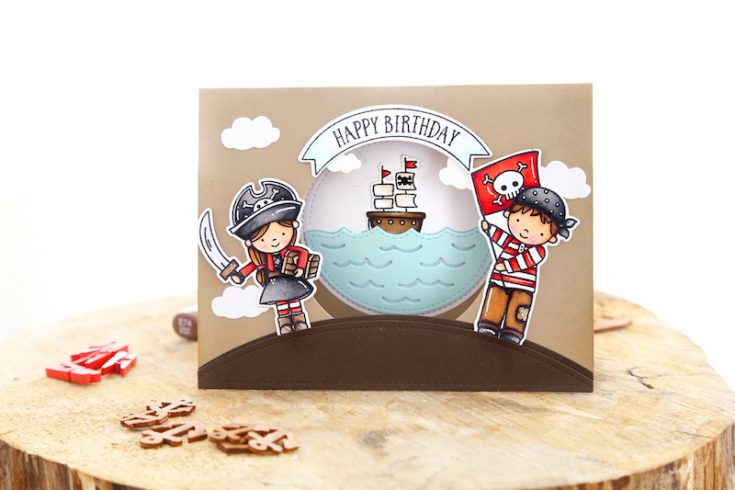
I used a set that I illustrated for the latest release, Yo Ho Ho. I drew a boy and a girl pirate, and also included some cute animals who are dressed up for pirate fun! For today’s card, I made a peekaboo opening using the Making Waves die set, and placed the pull-toy-ship on the inside of the card. Because of its size, it looks like it’s floating in the distance. I got this idea from a card that a fellow Design Team Keeway made last month, I loved it so much. She had the cat and dog at the forefront, instead of the boy and girl. The curved banner is from Mermazing, another Neat and Tangled set, and fits top of the curve so perfectly. I carefully cut away the sentiment that was inside the banner to begin with, and now I can use it for so many other cards. If you decide to cut apart your own stamps, just be careful! But it isn’t as scary as it seems.
I hope you like what I’ve shared here today!
SUPPLIES:
 |
 |
 |
 |
 |
 |
 |
 |
 |
 |
 |
 |
 |
Thanks so much for reading and to Elena for being our guest!

Blog Candy Alert!! Follow our blog via email and comment on this post for a chance to win a special blog candy!
GIVEAWAY: Enter the Simon Lotto for a chance to WIN!
Hi friends!
RUN to Instagram for a chance to win a class ticket in Group B to our Simon Says Create event! All you have to do to enter to win is comment on the Instagram post and share the image on Instagram with the (hashtag) #ssscreatelotto
The winner will be announced next week! Good luck!
For more details on the event, CLICK HERE!
Watercoloring with Suzy’s Paintables!
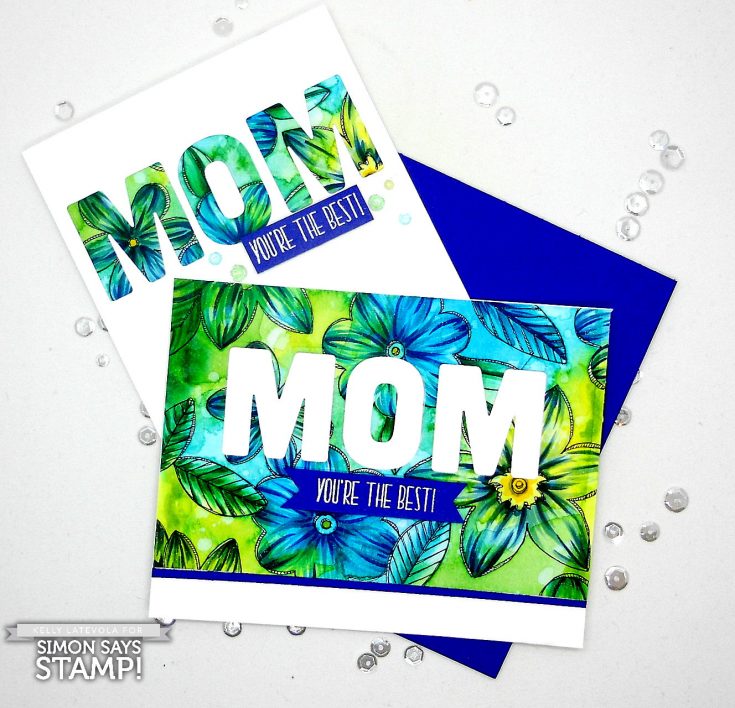
Hi friends! Thanks for stopping by today! Please welcome our special bi-monthly guest Kelly Latevola back to the blog with this bright bold and blue card inspiration! Read on for more information and be sure to watch the video! Enjoy!
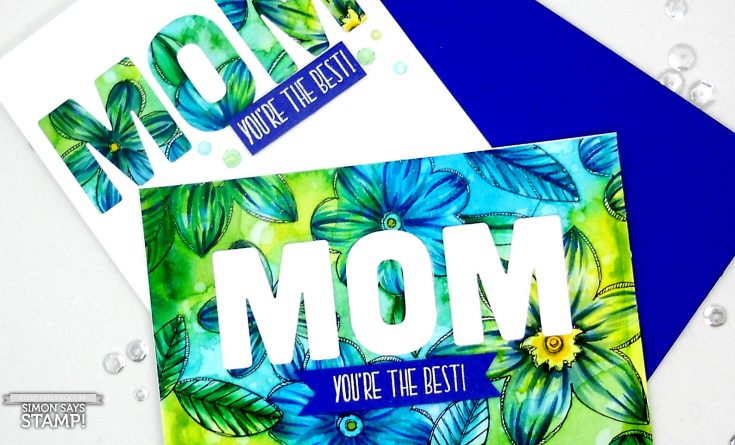
Hi guys It’s Kelly here and today we are going to be taking a different approach to Suzy’s Paintables! I think often times we look at Suzy’s paintables as a complete card, and they totally can be, but often we don’t really add anything to make them our own. You could add your own doodling, or die cutting, almost any technique you use when you start with blank cardstock can be used to change up the paintables.
Today I decided to do a bit of watercoloring before I started coloring with markers. Just creating the background makes such a huge difference! You can use any watercolor medium but I always love the bright pigments in Distress Ink so I opted for them. You can use just one layer for a soft look or multiple layers for bolder color. I’m a big fan of bold color so I went with two layers. After everything was good and dry I went in with my Copic markers to start adding some dimension to the flowers and leaves.
I hope you enjoy seeing the images come to life and are inspired to create something in your own style!
Watch the video:
Supplies:
 |
 |
 |
 |
 |
 |
|
 |
 |
 |
 |
 |
 |
 |
 |
 |
 |
 |
 |
|
 |
 |
 |
|
 |
 |
 |
 |
 |
 |
 |
 |
 |
 |
 |
 |
 |
 |
 |
 |
 |
 |
 |
 |
 |
 |
 |
Blog Candy Alert!! Follow our blog via email and comment on this post for a chance to win a special blog candy!
Congrats! Blog Candy Winners!
From: Studio Monday with Nina-Marie: Quick and Easy Emoji-tional Cards!: Cindy Aguirre!
From: Doodling with Debby: Watercoloring with Distress Inks: Jackie Hedlund!
From: Yippee for Yana: Customizing Patterned Paper: Hamutal Shafrir!
From: Make a rainbow… for a chance to win $50!: Debbie Hallamek!
From: Amore Laura Fadora: Artsy Flower Parts: Denise Bryant!
Please email [email protected] with your mailing address (if applicable), the name of the blog you won from, and the prize you won to claim your prize!


