Simon Brand Flash Sale
Happy 4th of July weekend, friends! We’re celebrating all things SUMMER! In celebration, we’re having a very rare discount code offering of our house brand! Use code SSSFLASH at checkout to take 15% off all Simon branded products for a limited time. Please shop early for the best selection and enjoy!

Color Coordinates: Soft Colors for Year Round Cardmaking

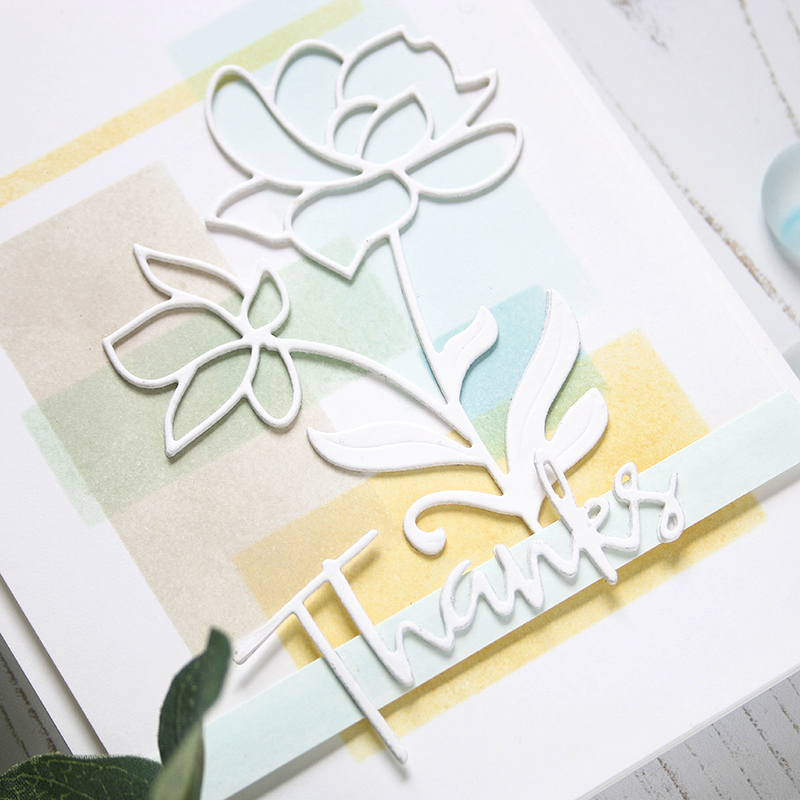
Welcome to the blog my friends! It’s Shari here with a new color coordinate combination. I have been waiting to do a color blocking background using an ink blending tool, so I chose some colors that sit well on top of each other.
They are all pastels and are pleasant for many occasions.
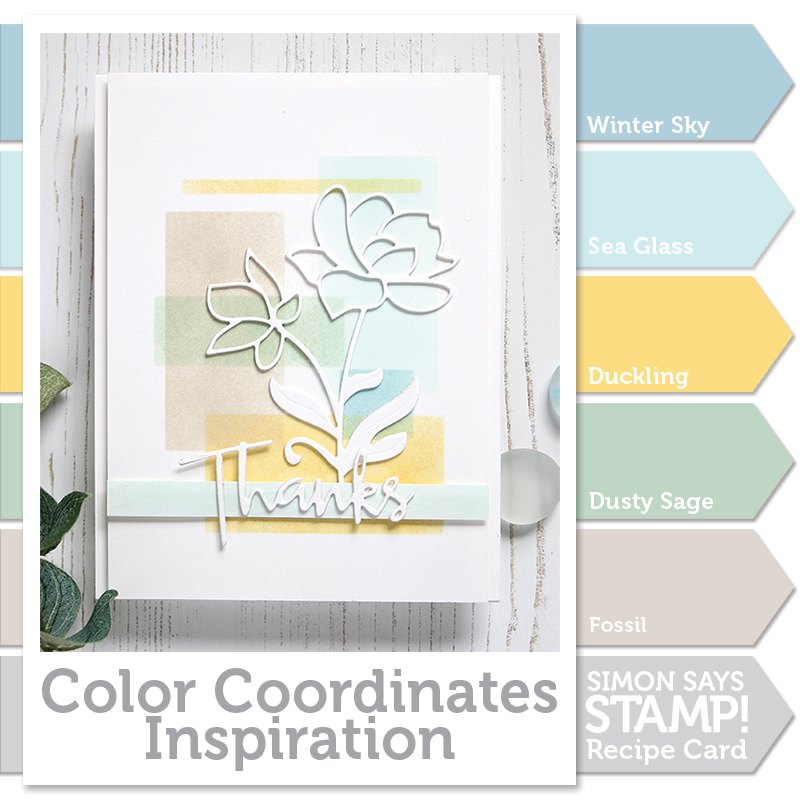
The technique used is quite simple and is a great jumping point for those of you wanting to ink up a quick background. I started out by using my Rectangle dies cut from cardstock to create a quick stencil. I also used some Post-It tape to adjust the size of the openings to get a variation of the rectangles.
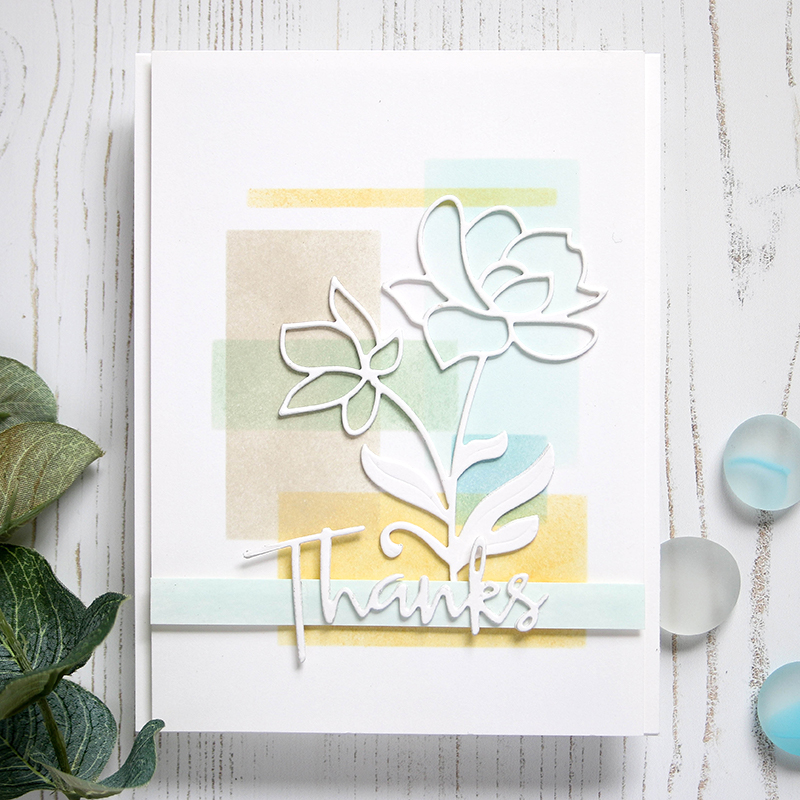
Once I had the background colors blocked out, I trimmed up the panel and put it on a top folding notecard. Next, I die cut the Bright Blossoms die from Neenah card stock three times and glued them together. This gives the flowers nice dimension. I did the same with the Script Thanks die and mounted it to a strip of cardstock colored with Sea Glass ink.
I filmed a video that you can view below or on our YouTube channel HERE.
Blog Candy Alert!! Follow our blog via email and comment on this post for a chance to win a special blog candy!

Thanks for stopping by. Have a great day!!
 |
 |
 |
 |
 |
 |
 |
 |
 |
 |
 |
 |
 |
 |
 |
 |
 |
 |
Yippee for Yana: Dry Embossing with a Stencil

Hi everyone, this is Yana Smakula and I’m excited to bring you another episode from my by-monthly “Yippee For Yana” video series! In today’s video I’m showing how to use a stencil to create a subtle textured background for a card with the help of dry embossing!
Let’s jump right in. I’m going to start by saying that you can most definitely dry emboss with stencils. The depth of impression will depend on how thick the material out of which the stencil is made of is, Simon’s stencils are pretty thick and durable so they always leave a nice and visible impression on the paper. If you use a thinner stencil the embossing and debossing you’ll get might not be as deep.
To dry emboss with a stencil you’ll need to use a die cutting machine and an embossing mat. I used my Platinum 6” machine from Spellbinders but this can be done in any die cutting machine. I followed the sandwich instructions for dry embossing with dies in my machine and I also added a paper shim (regular paper folded in half, so 2 sheets thick).
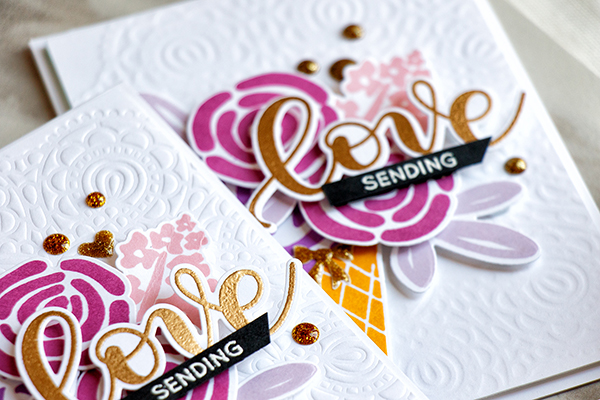
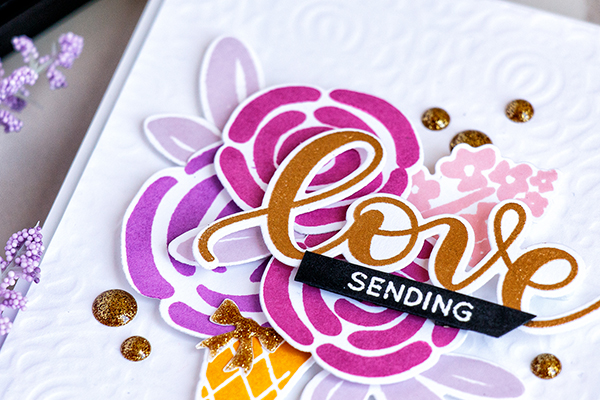
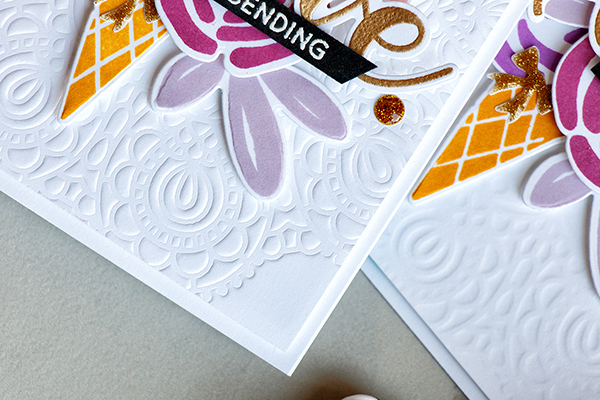
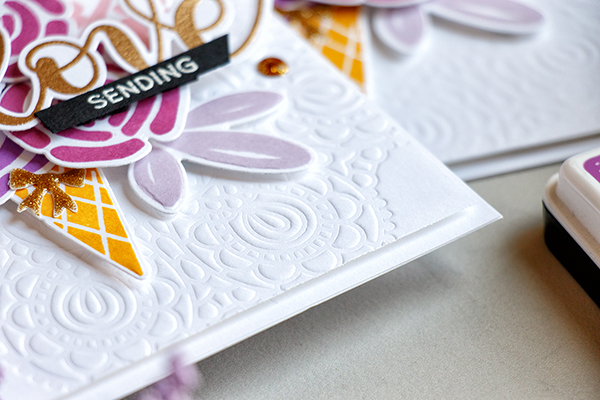
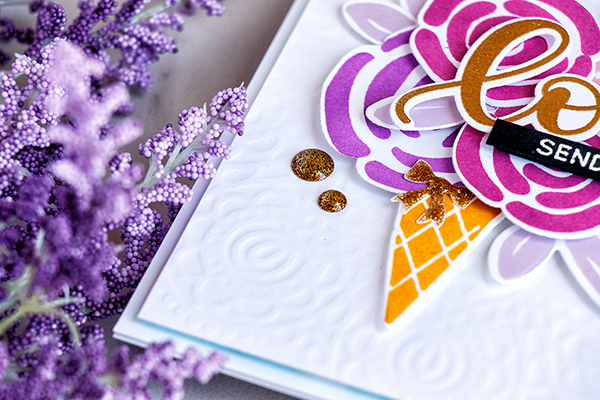
I cut my white cardstock to 4 x 5 ¼” and aligned it in the center of Circular Lace stencil; you can also have it offset to the side if you like. After running it through my machine and ended up having a gorgeous textured background with an embossed and debossed side.
You can use a background like this for just about any card, you can also make these backgrounds on colored cardstock, not just white; they look fabulous on kraft.
To finish this card I stamped a few images and created a floral arrangement. Using my mini MISTI I stamped ice cream cone in Sunshine, large flower in Hot Mama, small flowers in Magnolia, floral branch in Twirling Tutu and leaves in Thistle.
I also heat embossed the word “Love” in Simon’s Antique Gold embossing powder and cut all images out using coordinating dies.
After having all of the parts and pieces ready I foam mounted my dry embossed background onto an A2 top folding card base and foam mounted all of my die cuts in place creating a floral arrangement. I doubled up foam adhesive in some places to add more dimension. Lastly, I adhered the large heat embossed “Love” and added “Sending” heat embossed in white on black, so my sentiment reads “Sending Love”.
Which background do you like better? The crisp embossed or less detailed debossed one? Please, comment below! Have fun stamping!
WATCH THE VIDEO:

Supplies:
 |
 |
 |
 |
 |
 |
 |
 |
 |
 |
 |
 |
 |
 |
 |
 |
 |
 |
 |
 |
 |
 |
 |
 |
|
Thanks for reading, and thanks to Yana for being our guest!