Studio Monday with Nina-Marie: Lawn Fawn Pop Up Holiday Gift Card

Hello everyone, Nina-Marie here with you today for my latest Studio Monday video! I’m sure most of you are busy creating your Christmas and Holiday cards and I thought this would be a perfect time to share a gift card idea featuring some beloved Lawn Fawn products!
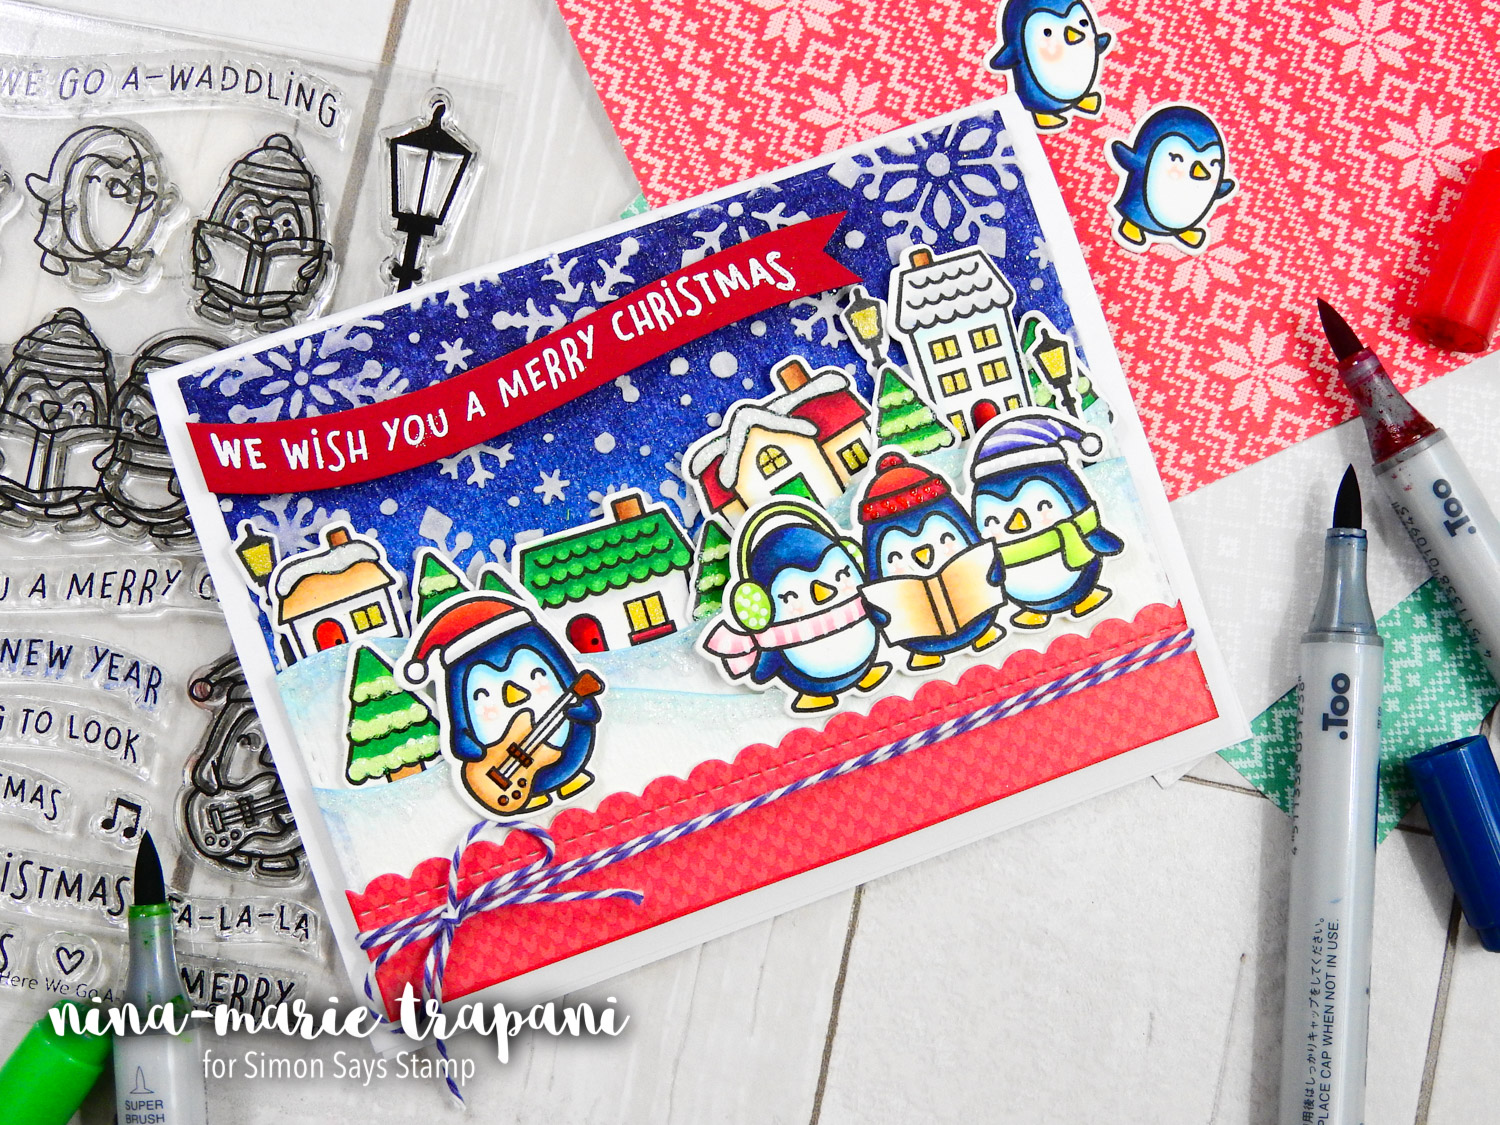
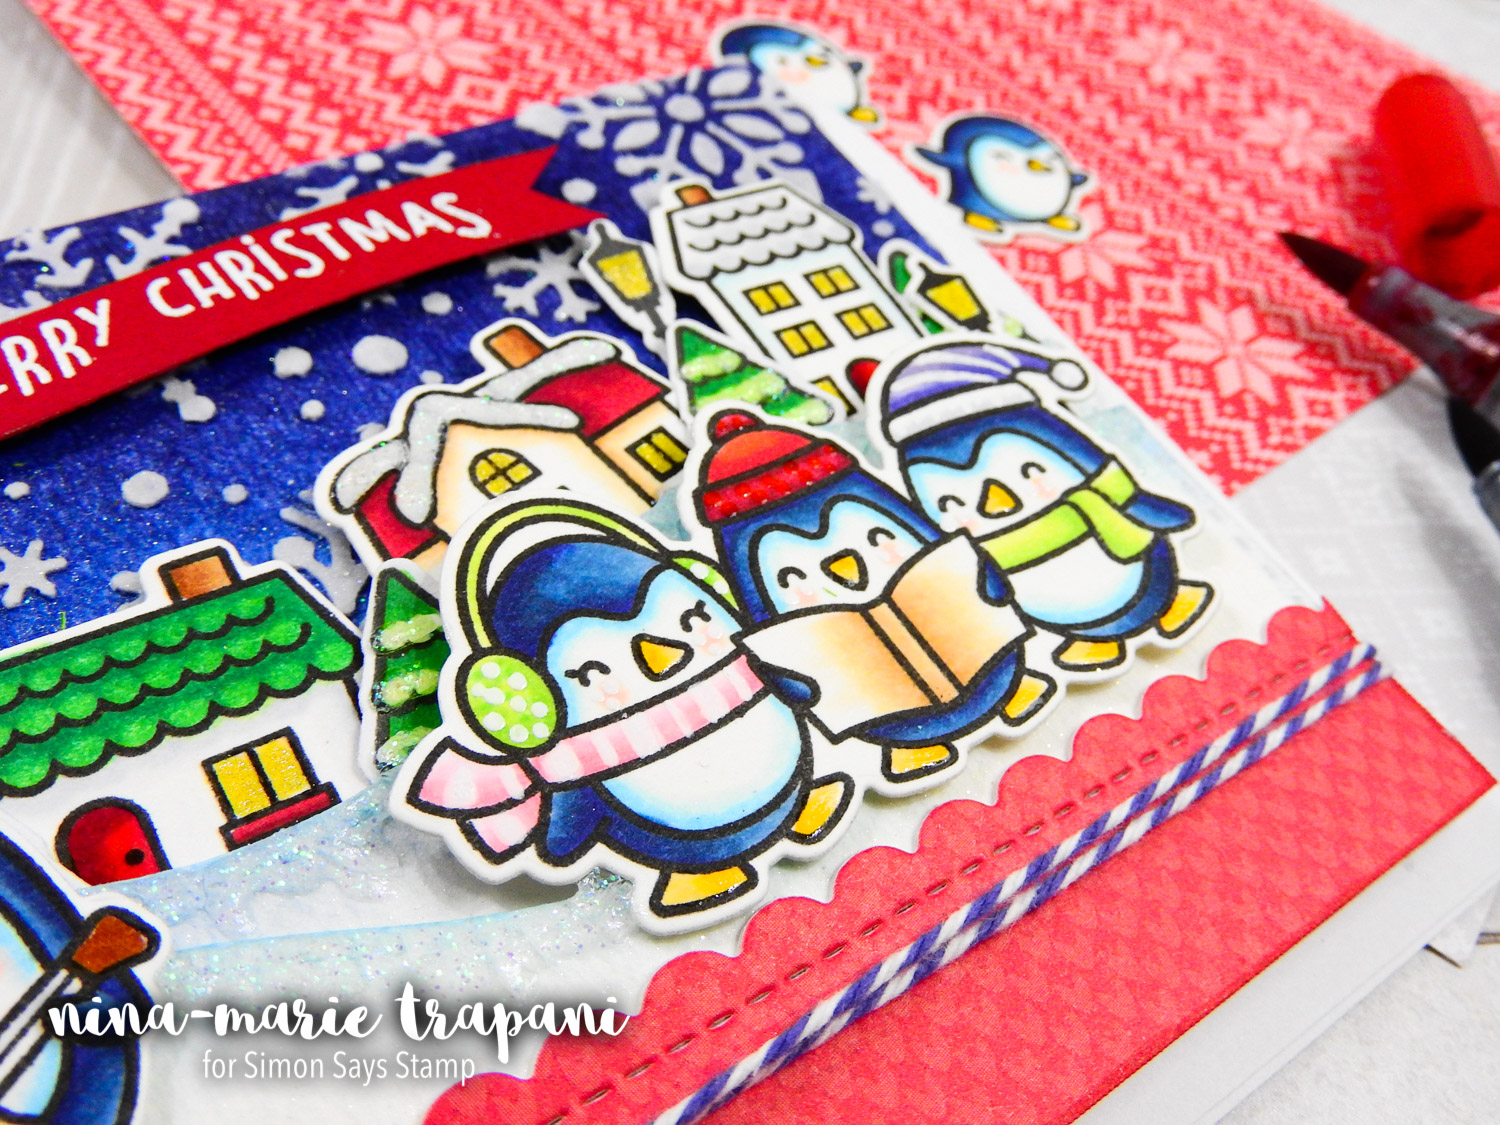
Aren’t those penguins adorable?? They are from the new Here We Go A Waddling stamp set from Lawn Fawn. You’ll also notice the sweet village scene behind them, which I used the Winter Village stamp set to create. I love how Lawn Fawn stamps are sized to work with each other so well!
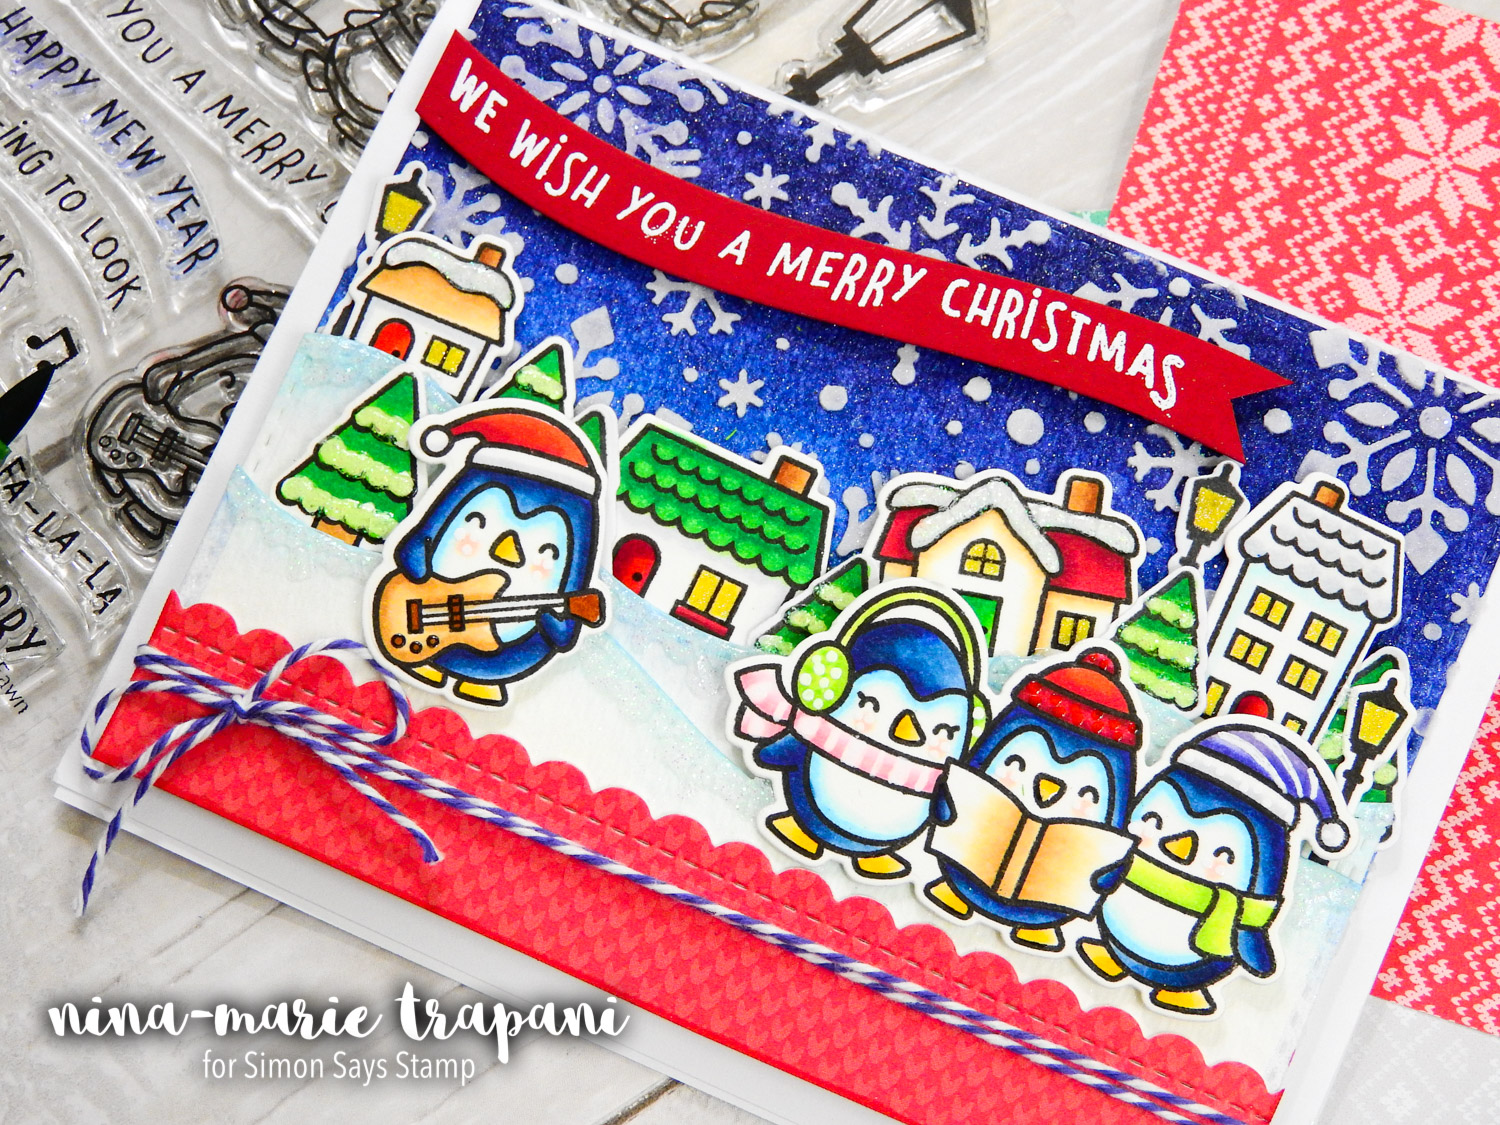
While this card may look like just a standard scene card (with lots of color and fun details!), there is an interactive surprise on the inside! With the help of the clever Gift Card Pop Up die, you can present your gift cards for those hard-to-buy-for people on your list with ease!
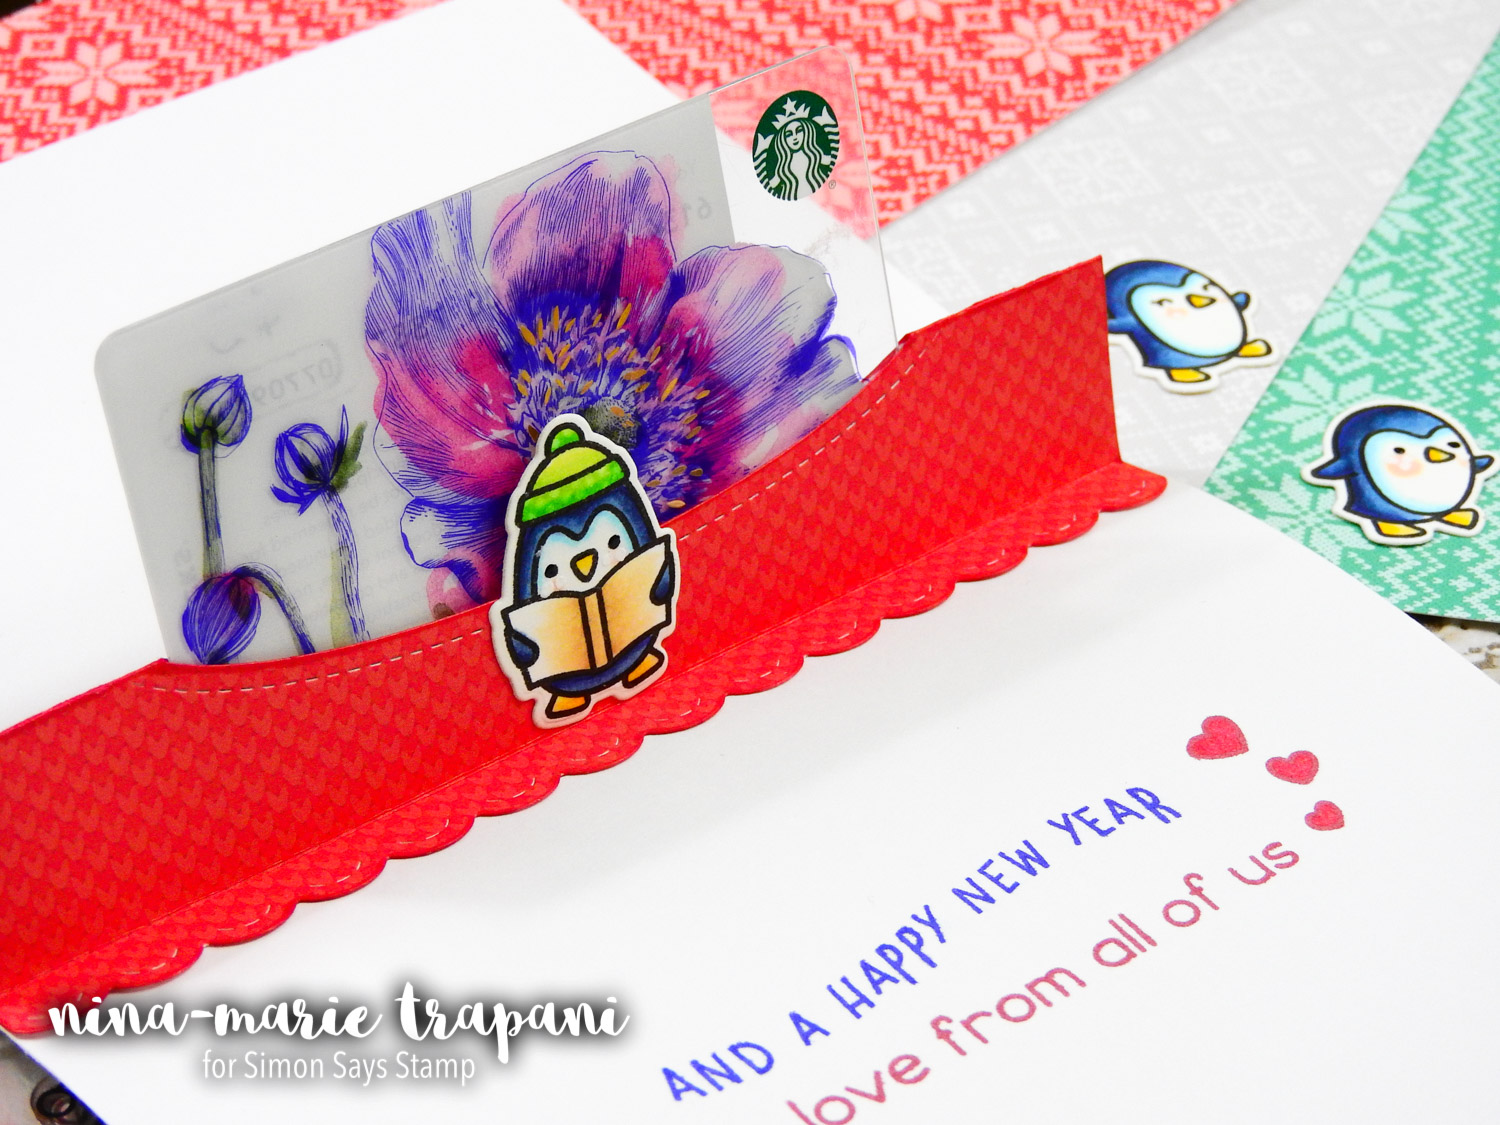
I really love how cute and fun this is, and I can’t wait for you to check out the video below to see how I put it all together! Hopefully it will inspire you to try out the Gift Card Pop Up die from Lawn Fawn, as I know this will aid you in your holiday gift-giving!
Thanks for visiting with me today… I will be back again next week with a new video to share!
WATCH THE VIDEO
SUPPLIES
|


Blog Candy Alert!! Follow our blog via email and comment on this post for a chance to win grab bags and blog candy! Remember to tag your awesome projects with #simonsaysstamp on social media so we can see what you are creating!

A Tim Holtz Winter Wonderland by Richele Christensen
Hi friends! Happy Sunday! Please join me in welcoming back the PHENOMENAL Richele Christensen as a guest on our blog today! She has crafted up an amazing 3D Holiday decor piece that is just stunning!! Please be sure to keep scrolling for step by step photo shots and additional info! Enjoy!
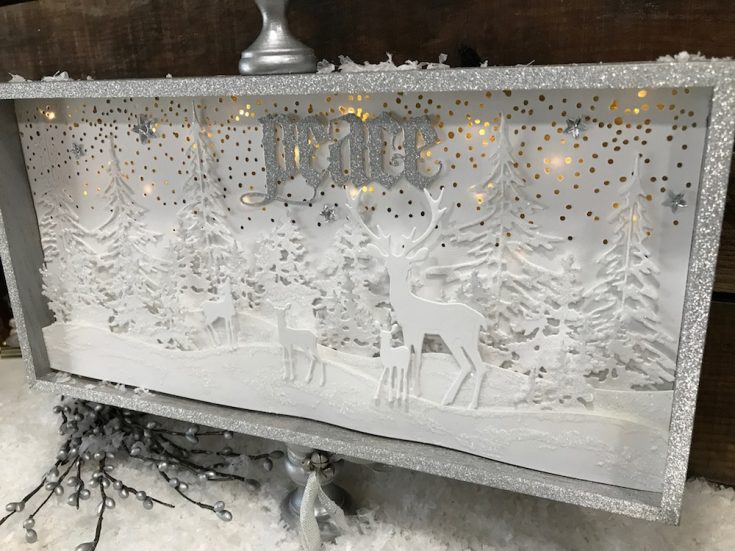
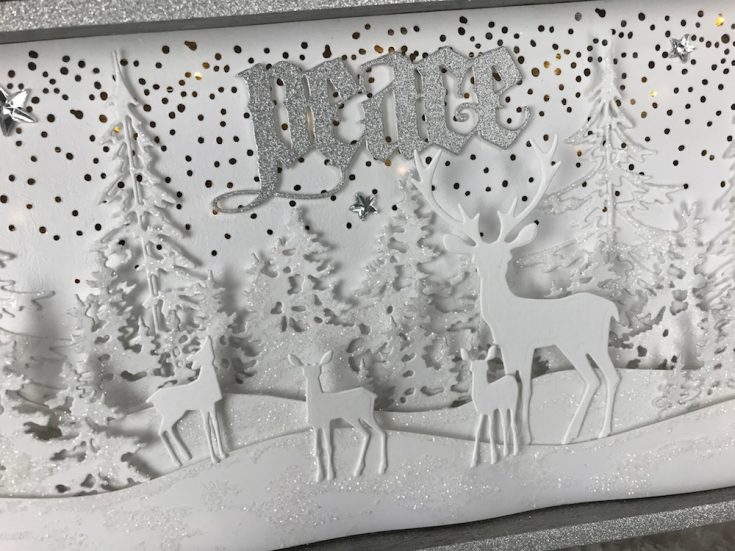
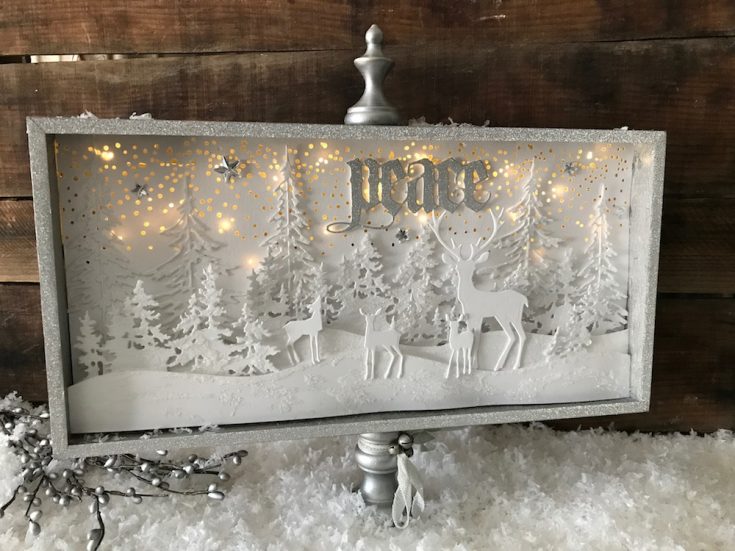
Hello friends, this is Richele. Thank you so much for stopping by today I’m happy to be here sharing my Winter Wonderland Vignette Tray. I have always loved the look of white on white, it’s classic, very elegant and so beautiful. This project features several Sizzix Alterations dies from the Tim Holtz holiday collection. I had so much fun creating this Winter Wonderland.
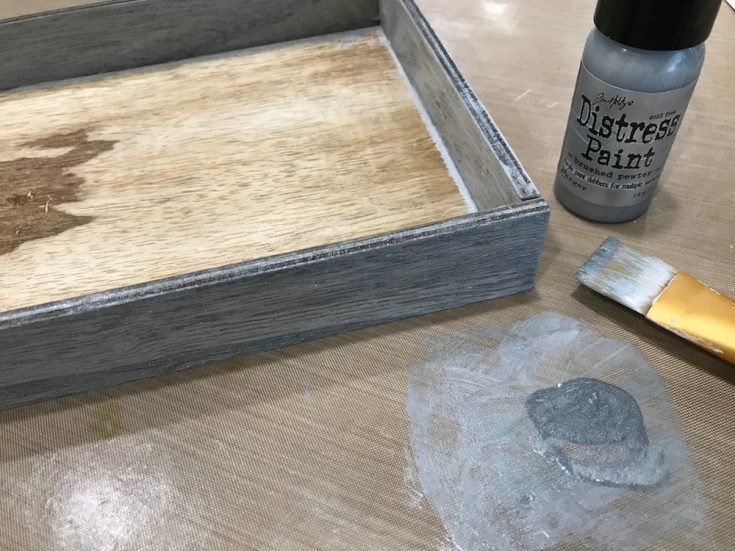
1. Paint the sides of the outside and inside of the Vignette Tray with Brushed Pewter Distress Paint. Repeat with another coat of paint if desired and let dry.
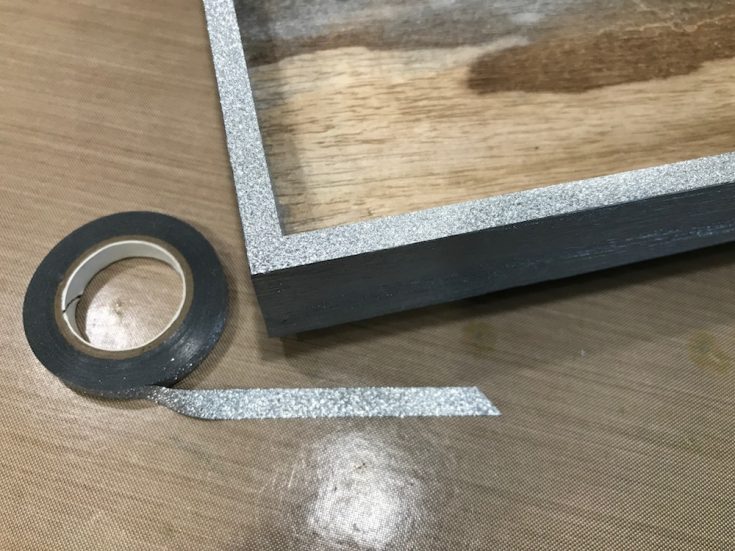
2. Adhere the skinny silver Deco Tape to the top edge of the Vignette Tray lining up the outside edges.
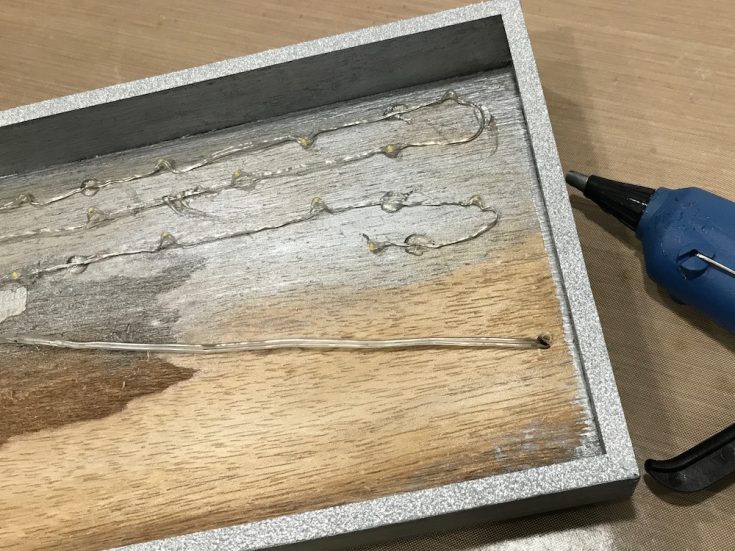
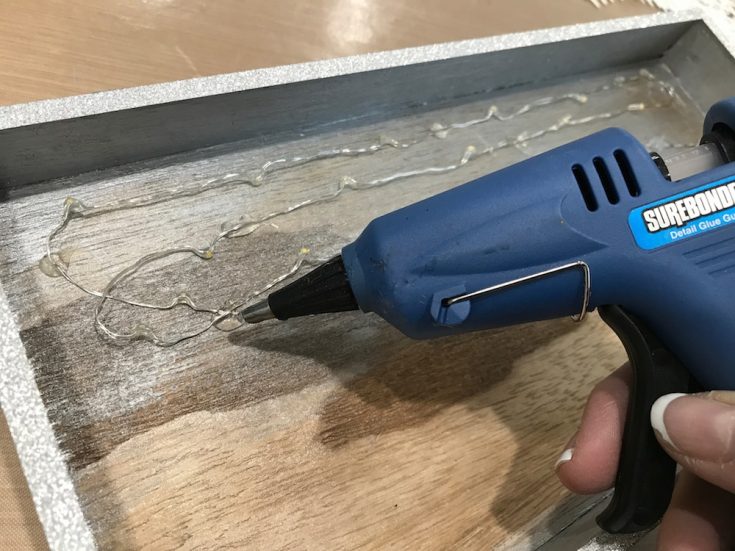
3. Drill a small hole in the lower right corner and feed the Lights through the hole to the inside of the tray. Adhere lights with a glue gun taking care to only glue where the bare wire is. Be careful not to glue at the lights or the part of the wire that’s coated. Velcro battery pack to the back of the tray.
4. Adhere a few lines across the top of the Vignette Tray.
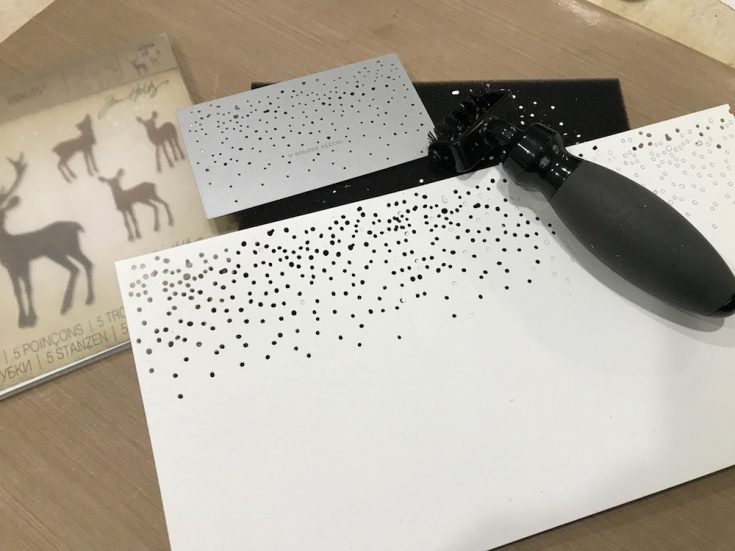
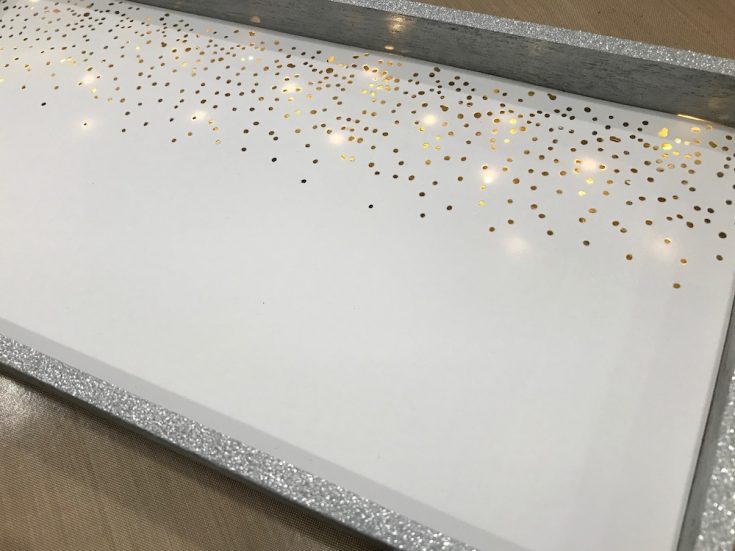
5. Cut Watercolor Cardstock to 5 1/2” x 11 1/2” and die cut a row of stars at the top of the cardstock. (I had to add a little piece to one end which was covered later with a tree.)
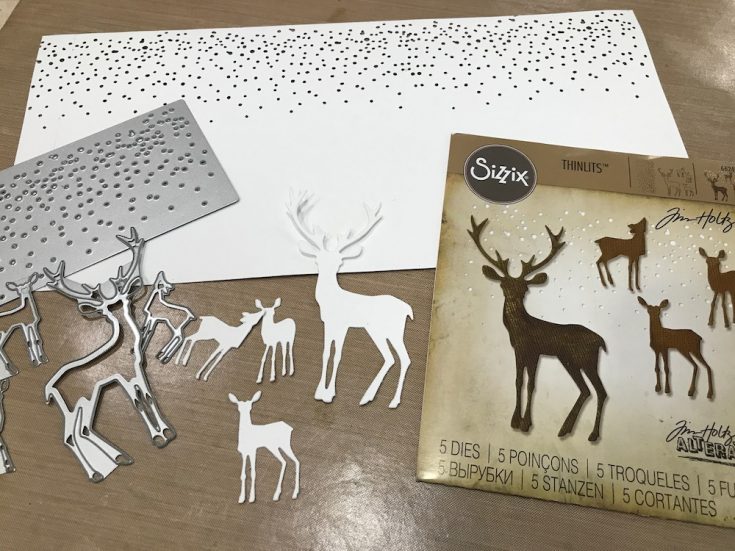
6. Die cut Deer from Watercolor Cardstock using the Winter Wonderland Thinlits set.
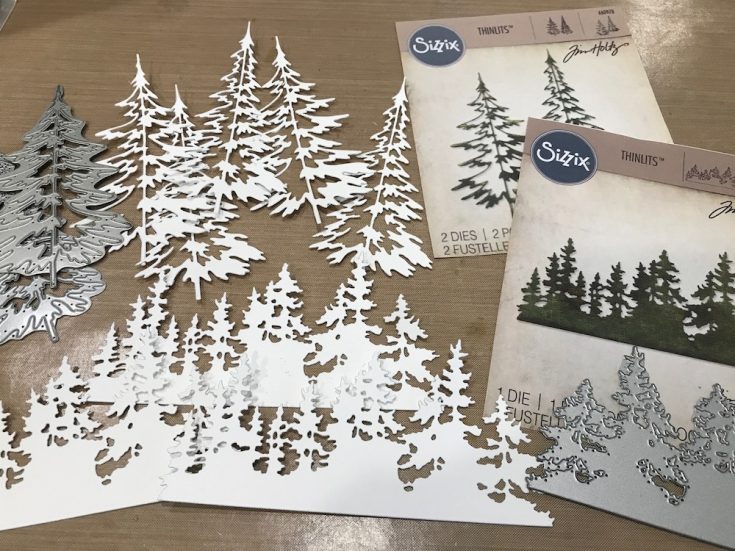
7. Die cut several Trees from the Tree Line and Woodlands Thinlits Sets.
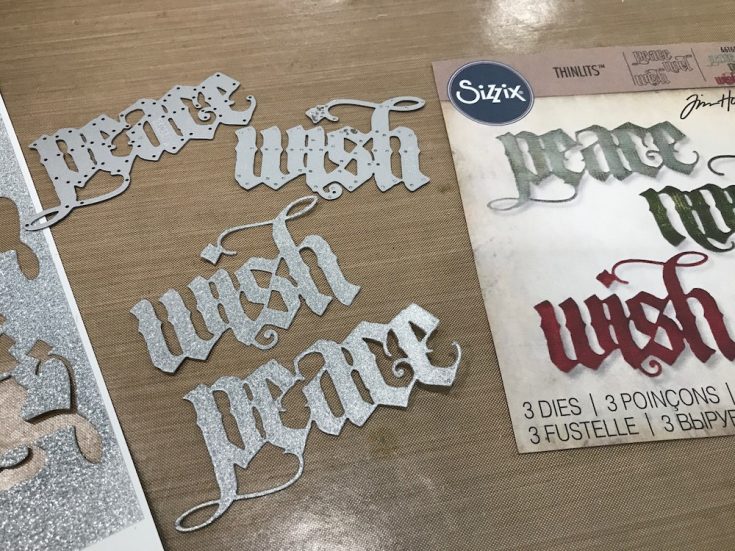
8. Adhere Deco Sheet sticker to a piece of Cardstock. Die cut Peace, Wish or Noel using the Vintage Tidings Thinlits set.
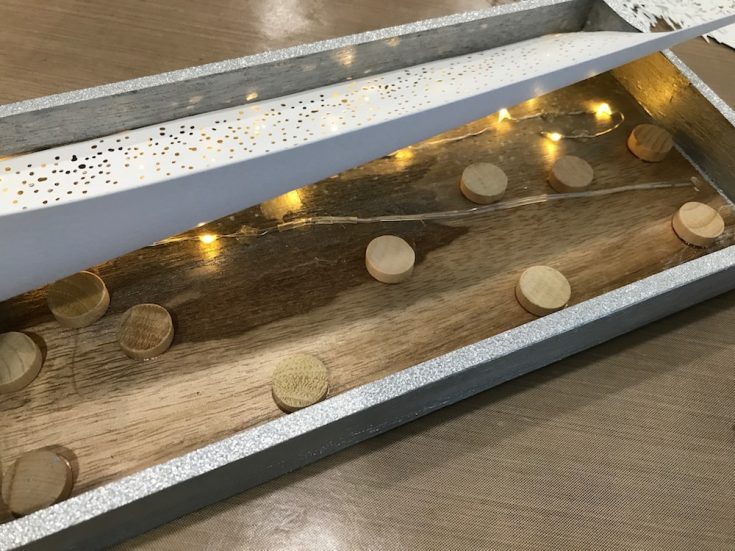
9. Adhere game pieces or several layers of foam tape and adhere background stars to the inside of the Vignette Tray.
10. See the magical lights shinning through the little die cut stars.
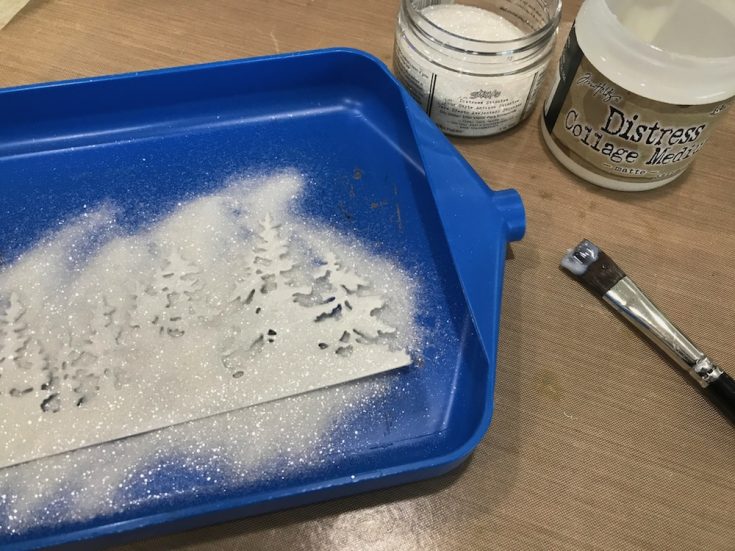
11. Randomly paint Distress Collage Medium on the trees, pour on Distress Stickles Glitter, shake off excess.
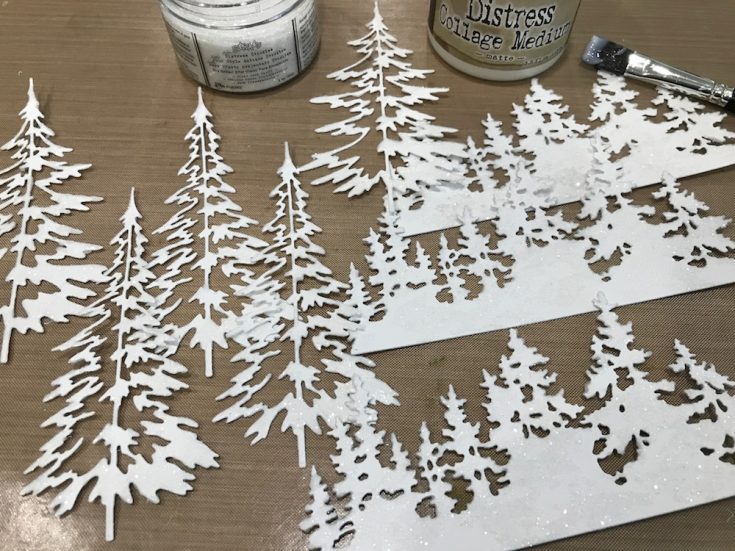
12. Continue adding Glitter to all the trees and let dry.
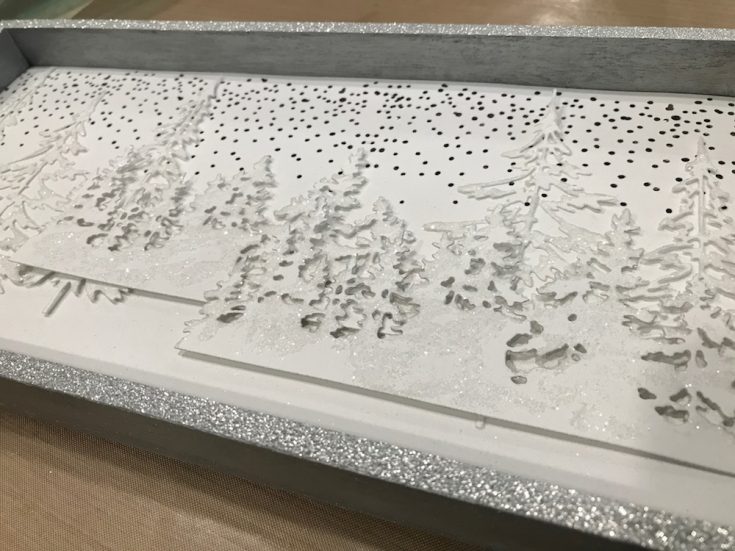
13. Start layering the Trees and Tree Line die cuts to the background using Distress Collage Medium or foam tape.
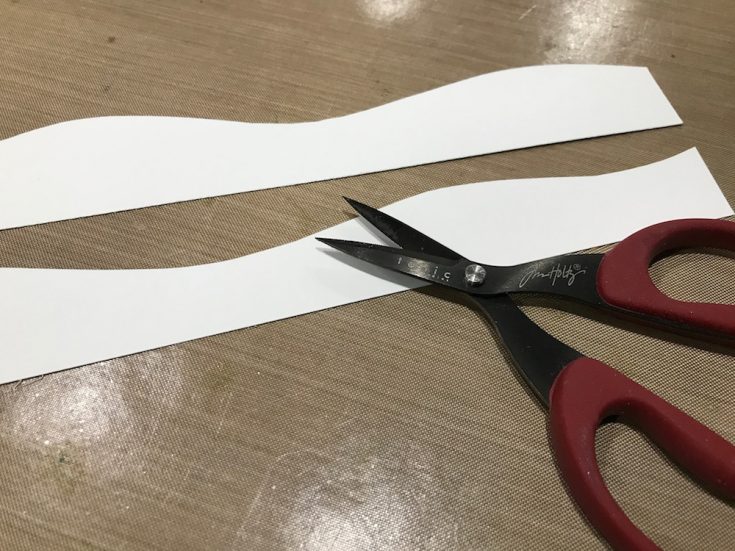
14. Cut a small strip of cardstock in to 2 snowbanks, add Distress Glitter and let dry. Adhere snowbanks to background at 2 different levels using several layers of foam tape.
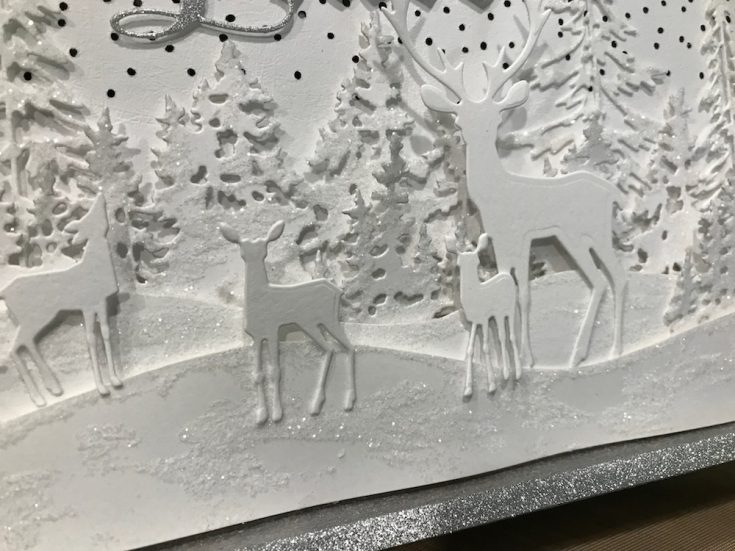
15. Adhere Deer with Distress Collage Medium and foam tape.
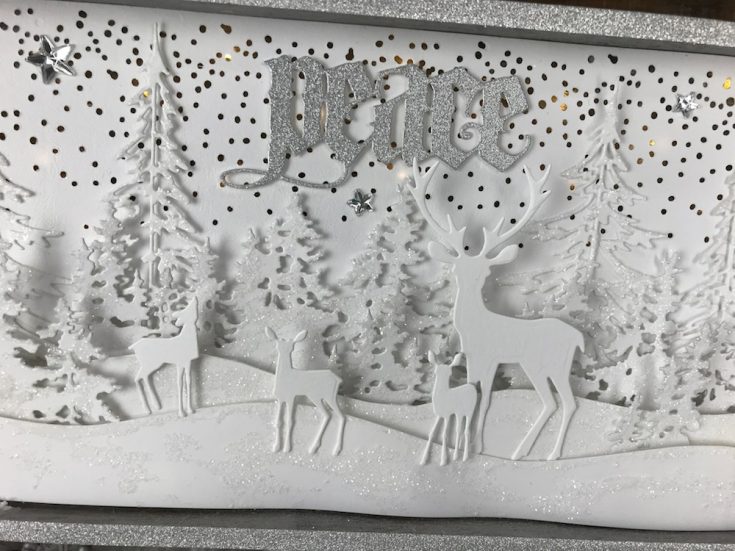
16. Adhere Peace using foam tape. Adhere Mirrored Stars in the sky with Distress Collage Medium.
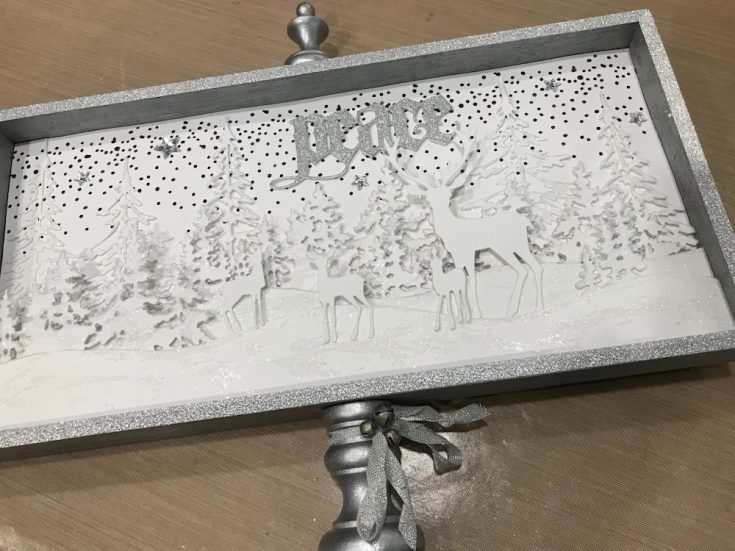
17. Paint Vignette Finials with Brushed Pewter Distress Paint and let dry. Adhere to Vignette Tray with Distress Collage Medium.
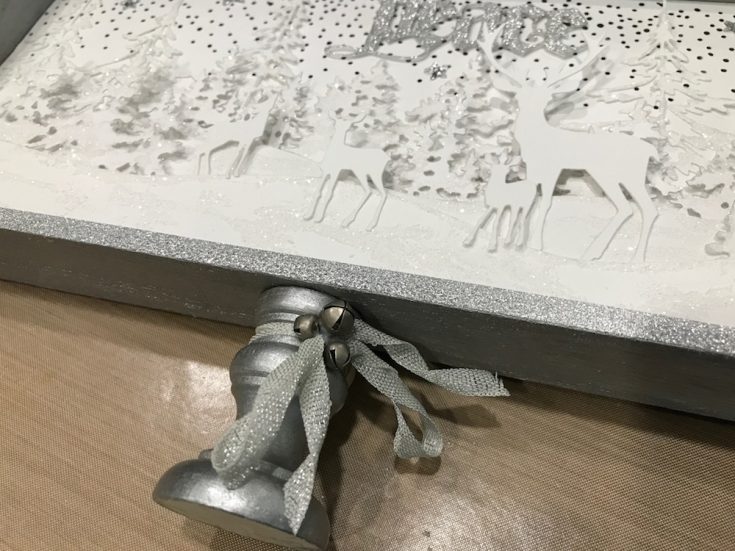
18. Tie a bow around the Vignette Finial and embellish with a few Jingle Bells.
Thanks again for stopping by! Happy Holidays!
SUPPLIES:
|


Thanks so much for reading, and thanks to Richele for being our guest!
Blog Candy Alert!! Follow our blog via email and comment on this post for a chance to win a special blog candy!
Yippee for Yana: Christmas Lights in Blue and White
Hi friends! Happy Saturday! Thanks so much for stopping by today! Please join me in welcoming back the amazingly talented Yana Smakula in her bi-monthly Yippee for Yana series! Antique Gold embossing on black cardstock really packs a punch! Please be sure to watch the video, and enjoy!
Hi everyone, this is Yana Smakula and I’m excited to bring you another episode from my bi-monthly “Yippee For Yana” video series! In today’s episode I wanted to go back to pencil coloring on black cardstock, but offer a simpler & easier to make and color idea.
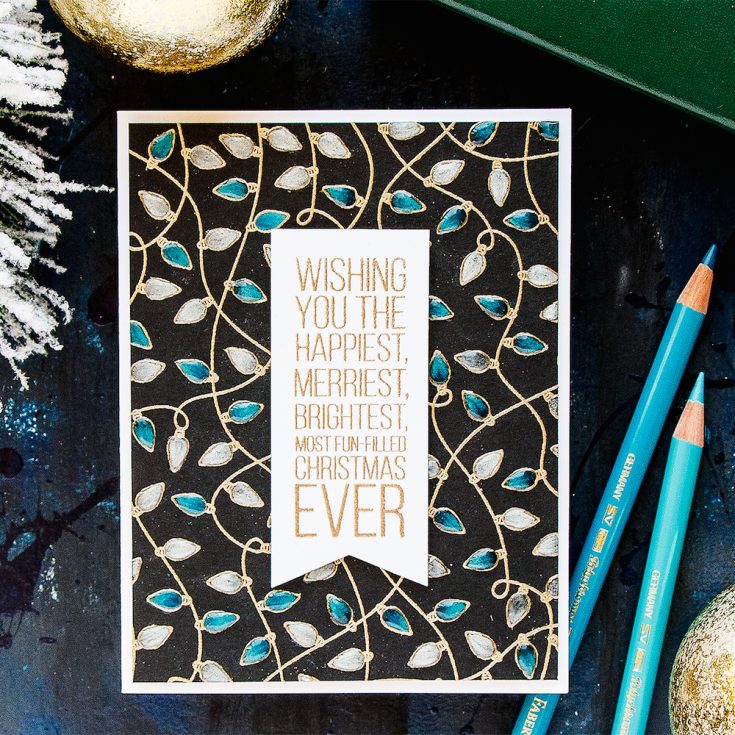
I decided to use a fun background stamp from Hero Arts – Christmas Lights Bold Prints and I heat embossed it in Simon’s Antique Gold embossing powder onto Simon’s black cardstock. This cardstock is smooth, but still has a bit of tooth to it and it’s crucial to make sure your paper has some tooth as this is what will effect your coloring with colored pencils.
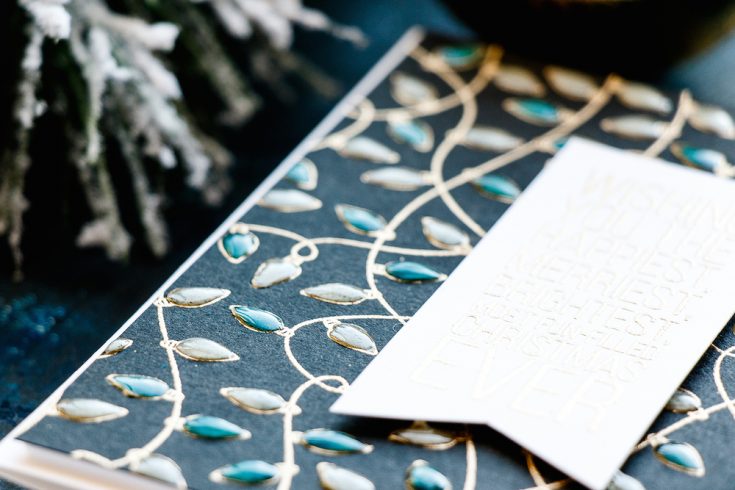
For my coloring I picked Polychromos pencils from Faber Castell, you can also use Prismacolors. I used 2 blue – a light and dark and 2 white – a white and light gray pencils for my coloring. If you watched some of my previous videos where I shared pencil coloring on black cardstock and felt intimidated – this is a much much simpler version, the same approach, the same look, but really a simpler version of a colored background. I encourage you to give this idea a try – if you don’t have this particular background stamp, look through your stash – maybe you have a similar stamp, or just a string of lights that you can heat emboss multiple times and go ahead and color. It’s fun and it’s relaxing.

Quick tip of you – if you make a mistake and accidentally color where you aren’t suppose to -you can erase some of the pencil with a pencil eraser. I’m not sure if this will work on white cardstock, but this has worked for me a few times on black and it’s been very helpful.
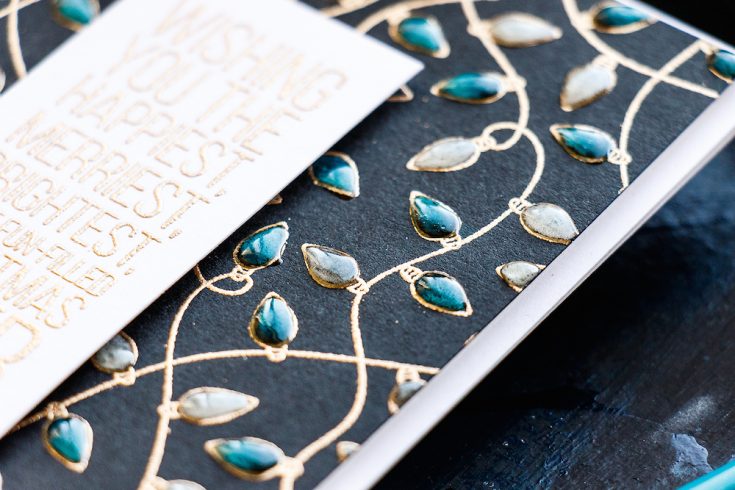
My coloring process took about 20 minutes and I was really happy with how this background turned out. This card idea was actually inspired and prompted by a card I did earlier using same stamp set – I was writing a blog post for it and I thought about coloring these lights with pencils and as soon as my post was done I went and tested my idea out and it worked!
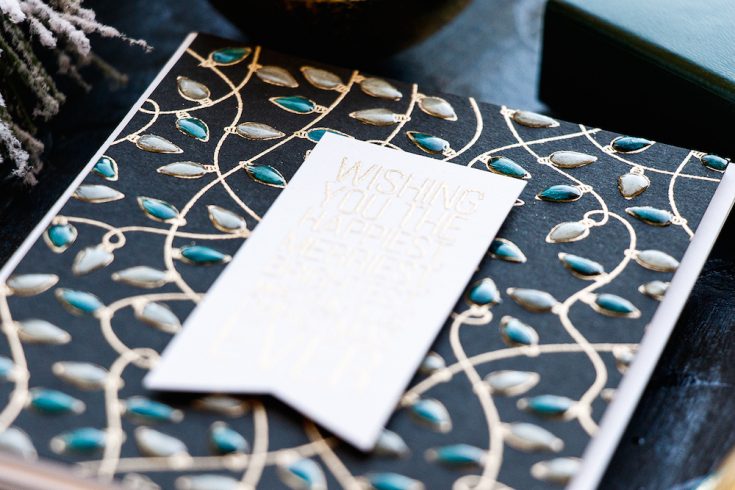
To create a sentiment for this card I used one of Simon’s Peace on Earth set and heat embossed a long skinny sentiment that reads Wishing You The Happiest, Merriest, Brightest, Most Fun Filled Christmas Ever. Next, I foam mounted my background and my sentiment onto a card base. To spice this card up I colored each light using a Wink of Stella Glitter Pen and finally coated each light with Glossy Accents. This really made my card pop and pulled the entire project together. I hope you’ll give this idea a try. Have fun stamping!
WATCH THE VIDEO:
SUPPLIES:
|


Thanks for reading today, and thanks so much to Yana for being our guest!
Blog Candy Alert!! Follow our blog via email and comment on this post for a chance to win a special blog candy!


