Amore Laura Fadora: Stripes Card Wrap Thanks
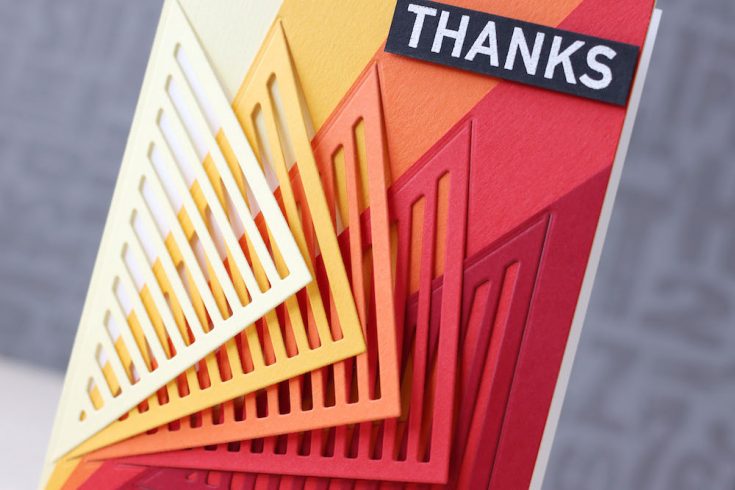
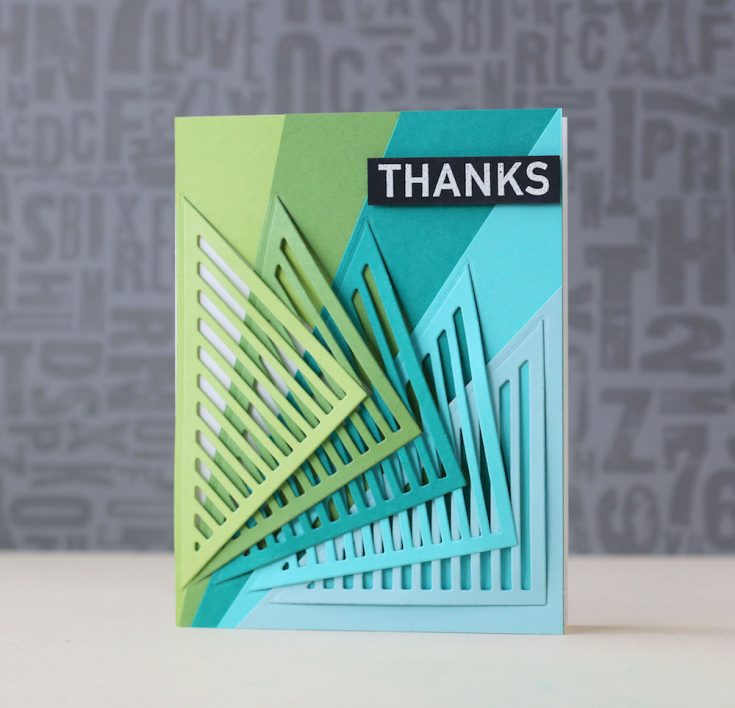
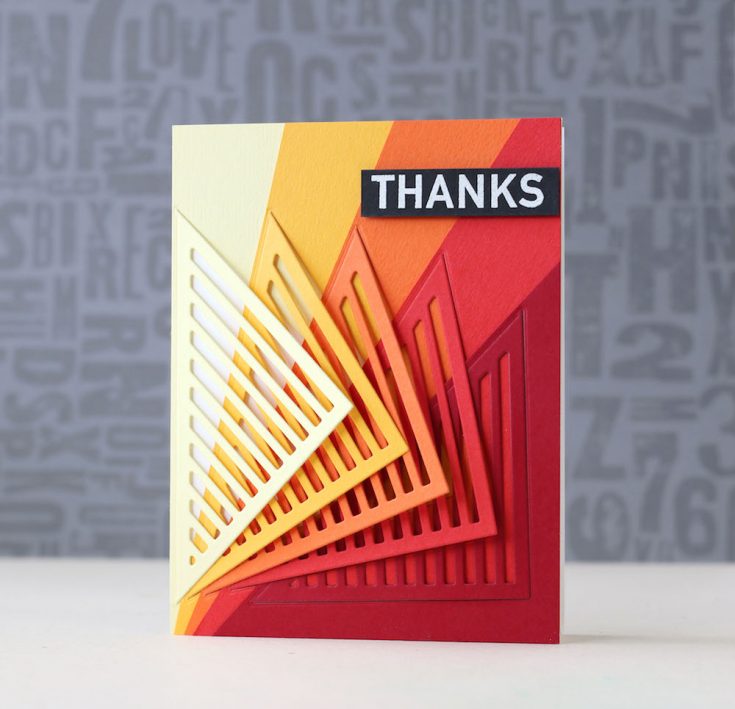
Hi friends! TGIF! Welcome to the latest edition of the amazing Laura Bassen‘s bi-monthly series on our blog called “Amore Laura Fadora“. On this feature Laura uses our Stripes Card Wrap die and select colors of our exclusive Simon Says Cardstock to make some really bold and beautiful Thank you cards! The card is polished off with a white embossed Thanks sentiment which she pulled from the You + Me clear stamp set.
Be sure to watch the video for more information, and enjoy!
WATCH THE VIDEO:
SUPPLIES:
|


Thanks for reading, and thanks to Laura for being our guest!

Blog Candy Alert!! Follow our blog via email and comment on this post for a chance to win special blog candy!
Congrats! Blog Candy Winners:
From: Signs of Spring Notebook: books and scraps!
From: Yippee for Yana: Center Cut Heart Love Card: Cathy Lillie!
From: Adhesives: A Review with Shari Carroll: Cynthia Clark!
From: Floral Bliss POP of Distress Oxide Color!: Kristine Boydstun!
From: Rainbow Strips Background Featuring February 2018 Card Kit!: Janice Carl!
Please email [email protected] with the name of the blog you won from, the prize you won, and your address (if applicable) to redeem your prize(s)!
Come See Our Brand NEW Exclusive LOVE Collection!
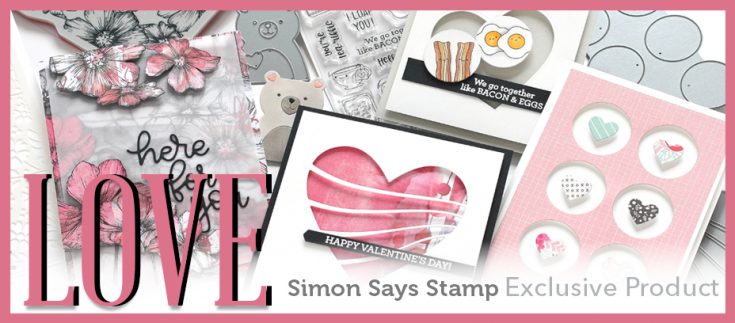
Hi friends! Happy Day! We’re so excited to share our latest exclusive collection called “Love” with you! You know I don’t think I’ve ever said this before…. this is my most favorite Simon release EVER! It’s cute, whimsical, perfect for the time of year – not to mention many occasions! All of the products in this collection were hand designed with love and care and we hope that you can find a new piece or two that speaks to your heart!
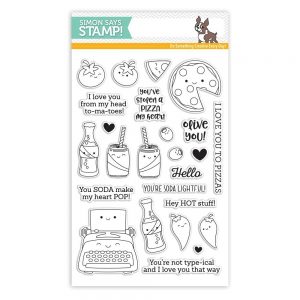
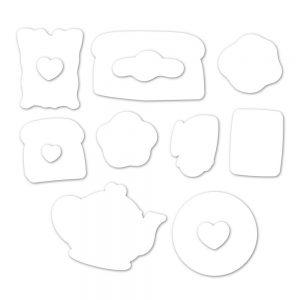
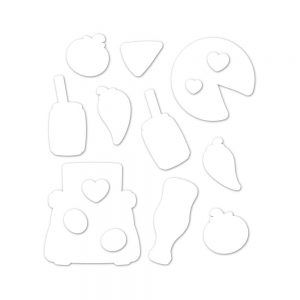
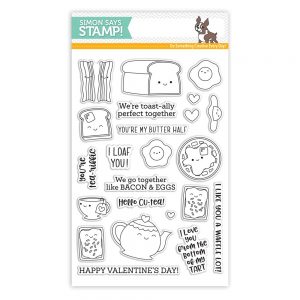
You may recognize the “Foodie Friends” stamp set that we revealed alongside our Limited Edition Valentine Kit on Monday January 15th! By popular demand, we are now also releasing the coordinating die set! There were just SO many images from the So Punny Doodlebug collection that inspired “Foodie Friends” that we decided to make one more stamp and die set with Doodlebug’s permission! Say hello to “Breakfast Buddies” stamps and dies! We hope you LOAF them as much as “Foodie Friends”! ?


We are so IN LOVE with you! You are the heartbeat that keeps us alive and inspired and give us the opportunity to do what we love! We’ve decided to give away 5 gift cards each in the value of $50 to random commenters below. Please tell us what YOU love about our industry and paper crafts. Let’s share the love, spread the love, feel the love…. ALL the loves!
*PS: If you left a comment before 5am EST, please leave another. There was a technical issue so those comments no longer appear :( Thank you!
Love, Heidi
Signs of Spring Notebook
Hi friends! Happy Wednesday! I hope your week is going really well so far! If you live in an area with Winter weather, you may feel like me in that you are ready for Spring! That being said, special guest designer Anna-Karin Evaldsson‘s subject of her project really spoke to me! Read on for more imagery and details. Enjoy!
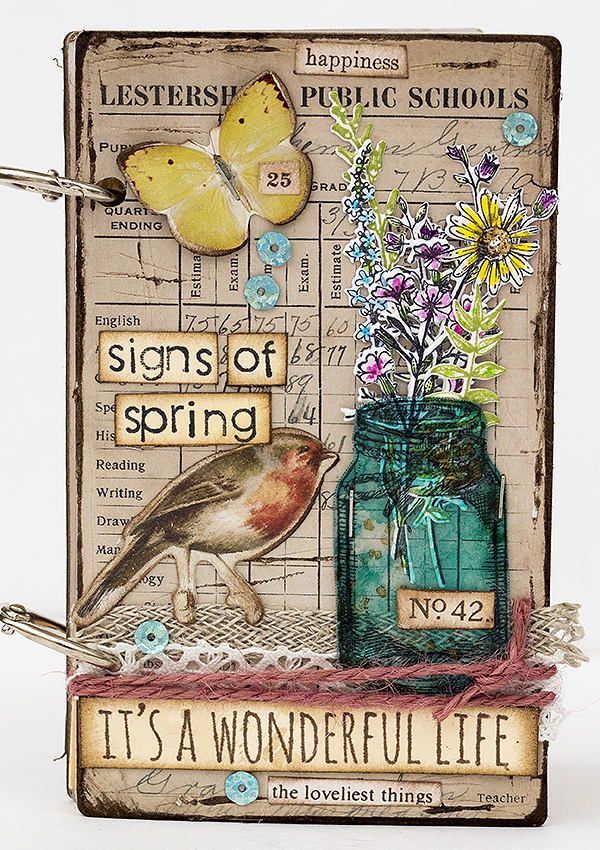
Hi everyone! I am so happy to be here today with a fun and easy tutorial. We have had a usually warm winter so far, and therefore, also dark and grey, which inspired me to do a springtime project for this post. Sometimes, in the middle of winter, you really need some flowers. As I was finishing up my notebook, snow started to fall and now the world is pretty outside my window.
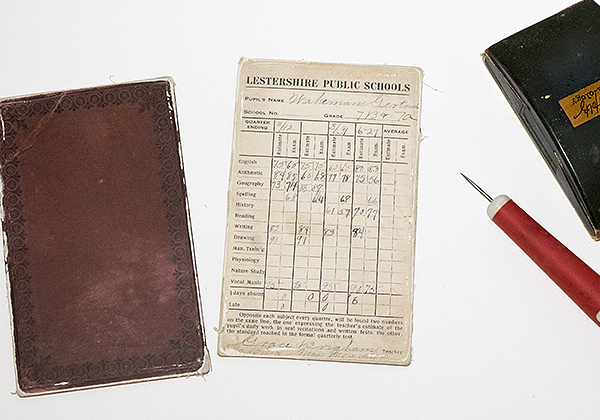
I love to make my own notebooks and journals, and got the idea to make a little book to document signs of spring. It is small (5 x 3 in) and easy to take along. You can make this notebook for any theme, it doesn’t have to be a spring book. Change the sentiments, colors and stamps for a completely different look. For the covers, I used Tim Holtz’s baseboards, which work great for journal covers.
Start by distressing two baseboards with sandpaper and by scratching them with a craft pick. You can also use two of the larger baseboards, if you want to make a larger journal.
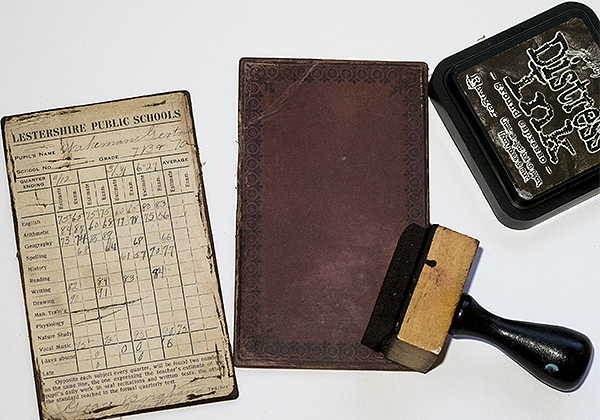
Ink the panels with Ground Espresso and an ink-blending tool. The ink will stick to the areas where the upper layer was sanded or scratched off, creating a distressed effect.
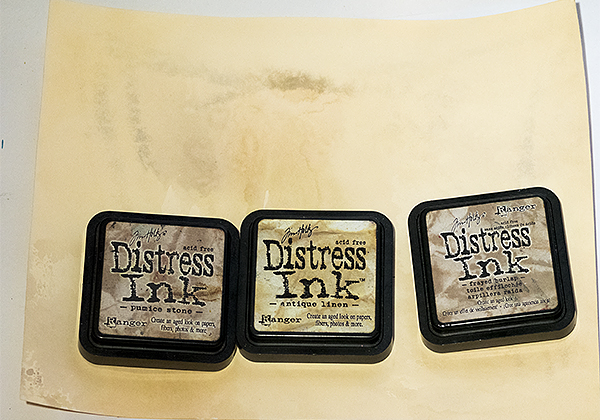
Prepare papers for the inside by smearing Antique Linen, Frayed Burlap and Pumice Stone Distress Ink on a non-stick craft sheet, misting them with water and pressing the paper into the ink. Repeat on the other side of the paper. You can use, for example, Ranger’s Mixed Media, Heavystock or Manila cardstock. I inked three sheets of paper.
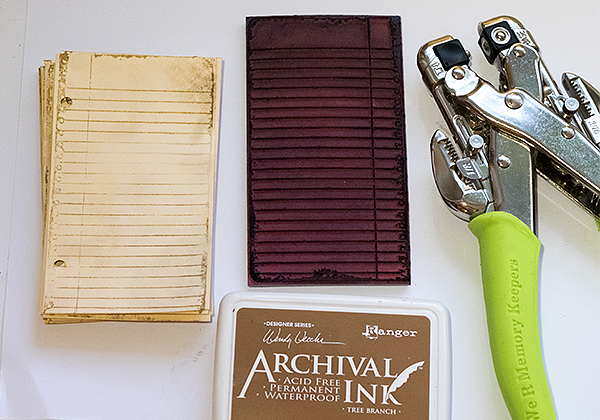
Cut the inside pages slightly smaller than the covers and make as many as you need. Stamp them roughly with the ledger stamp from Tim’s School Desk set and Tree Branch ink. I only stamped one side of each page, since I wanted the other side blank, in case I will add some sketches of flowers and other signs of spring. Punch holes with a Crop-a-dile about 1 inch from the edges.
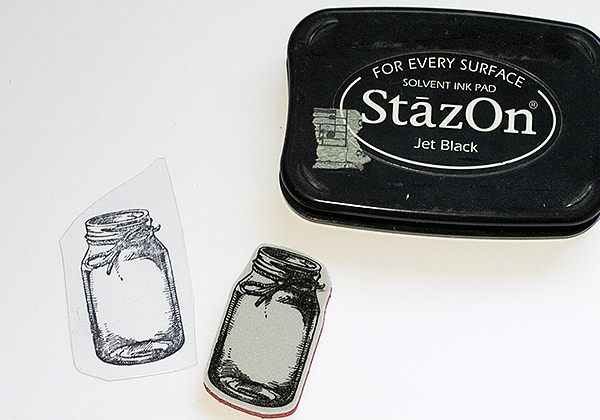
Stamp the larger jar from the Flower Jar set on Clearly For Art Modeling film, or acetate. If you want to, you can carefully heat the Modeling Film with a heat tool and shape it into a dimensional jar. It looks really cool and keeps its shape perfectly. I decided not to do that here, since I wanted my notebook to be relatively flat, but if you want to see a dimensional version, check out my Wildflower Mason Jar Tag.
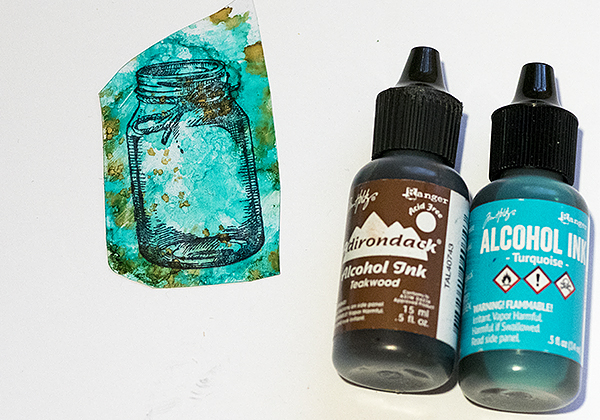
Ink the back of the jar with Turquoise and just a tad of Teakwood alcohol ink. It is important to work on the back, or you will smear the stamping.
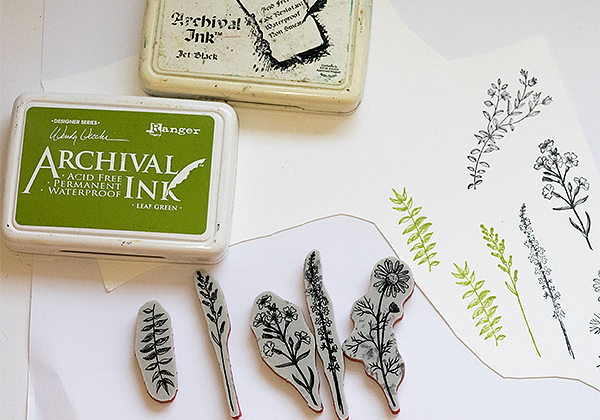
Stamp flowers and leafy branches from the Flower Jar set on the smooth back of Ranger’s watercolor paper. I used Jet Black and Leaf Green Archival Ink. You need to use a waterproof ink.
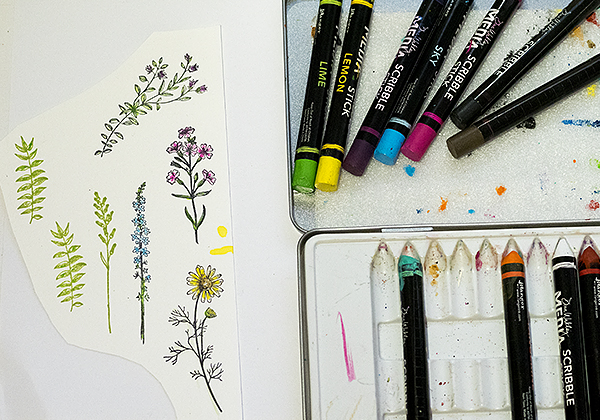
Watercolor the flowers by dipping a fine paint brush in water and picking up color directly from the tip of Dina Wakley’s Scribble Sticks.
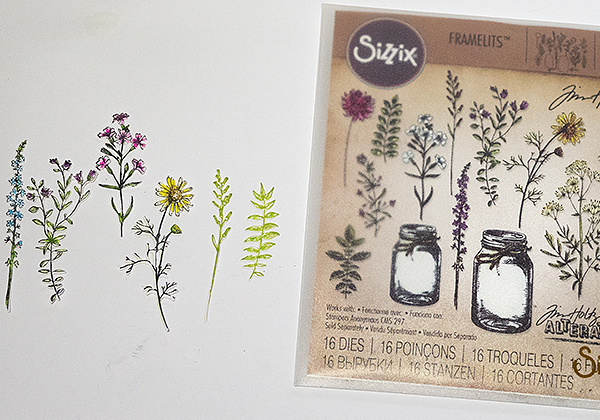
Die cut with the coordinating dies in the Sizzix Flower Jar set. Use this sandwich: Sizzix Magnetic Platform, Cutting Pad, paper, die facing down, second Cutting Pad.
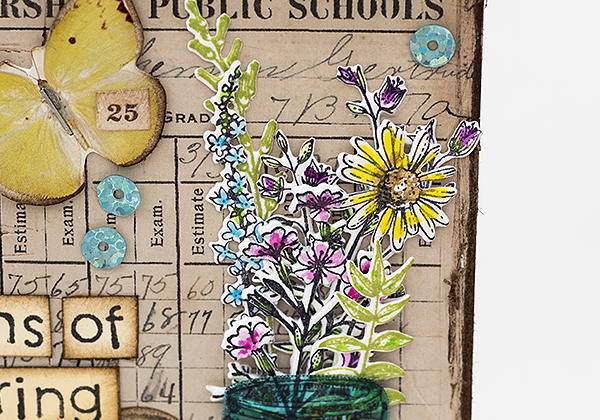
These flowers are very delicate and pretty, especially when die cut with the coordinating dies. Tuck them all into the jar. I attached the jar with two tiny staples.
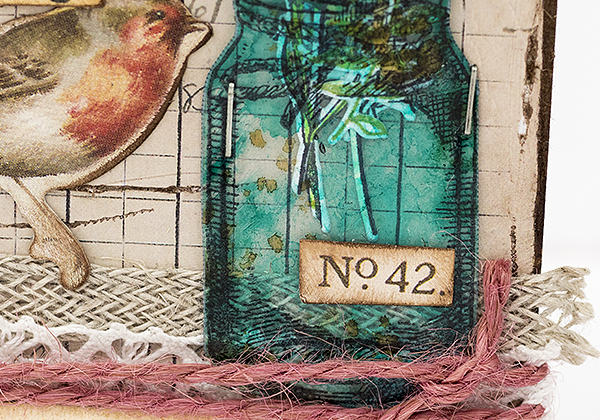
Below the jar, there is a piece of Linen Ribbon, a piece of lace trim and a pink piece of twine, which are meant to look like a table cloth. I also stamped a sentiment on a left-over piece of paper from the inside pages. The sentiment comes from a winter/Christmas set, but works great all year around.
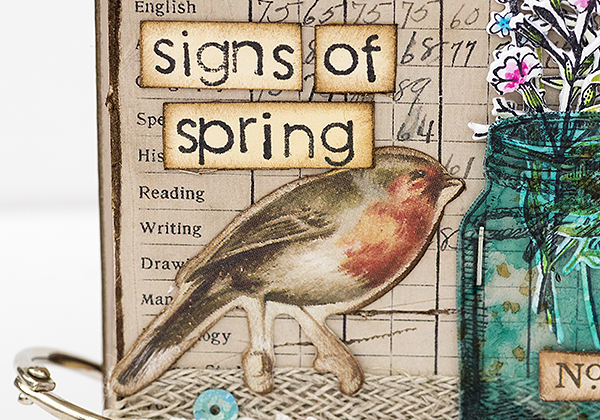
The title of the notebook was stamped on more left-over inked paper, using alphabet stamps. I also used a sweet bird from the Botanical Layers embellishment pack.
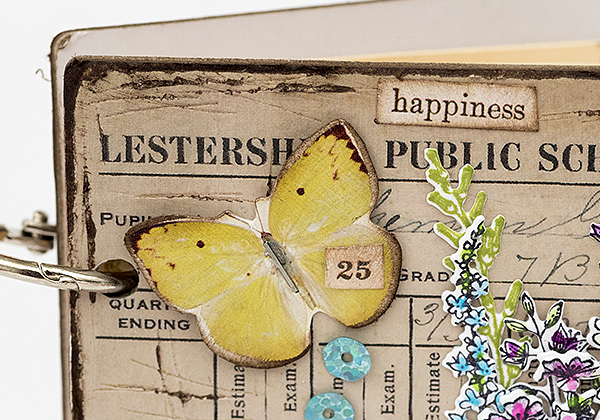
The butterfly also comes from Botanical Layers. I used some words and numbers from the Clippings Stickers set for additional text. For a bit of bling, there are a few sequins from the SSS Frosted set.

The back of the book looks like this. The book was bound with Tim Holtz Mini Book Rings, which also means that I can add and remove pages easily.
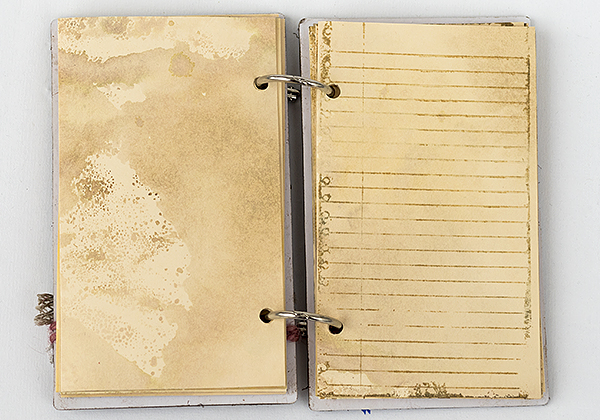
Here’s a look at the inside of the book. You could decorate it with more stamping or maybe by adding Botanical Layers images.
I hope you enjoyed this project and that it inspired you to make some notebooks or journals. Not only are they great fun to make, but they are also fun to use and they make really nice gifts. I am keeping this one for myself though and I will start using it when I spot that first sign of spring.
Thank you so much for looking!
Happy crafting!
Anna-Karin

SUPPLIES:
|


Thanks for reading, and thanks to Anna-Karin for being our guest!


