Signs of Spring Notebook
Hi friends! Happy Wednesday! I hope your week is going really well so far! If you live in an area with Winter weather, you may feel like me in that you are ready for Spring! That being said, special guest designer Anna-Karin Evaldsson‘s subject of her project really spoke to me! Read on for more imagery and details. Enjoy!
Hi everyone! I am so happy to be here today with a fun and easy tutorial. We have had a usually warm winter so far, and therefore, also dark and grey, which inspired me to do a springtime project for this post. Sometimes, in the middle of winter, you really need some flowers. As I was finishing up my notebook, snow started to fall and now the world is pretty outside my window.
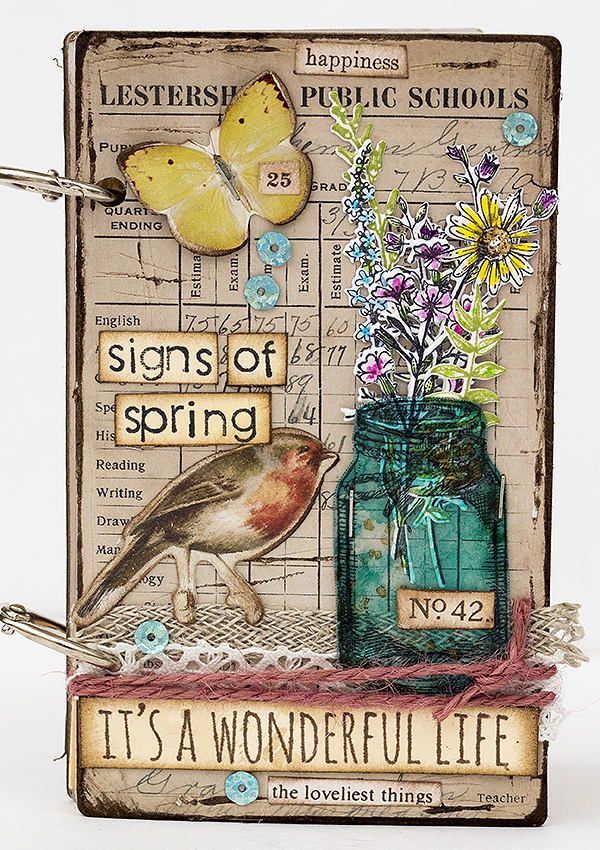
I love to make my own notebooks and journals, and got the idea to make a little book to document signs of spring. It is small (5 x 3 in) and easy to take along. You can make this notebook for any theme, it doesn’t have to be a spring book. Change the sentiments, colors and stamps for a completely different look. For the covers, I used Tim Holtz’s baseboards, which work great for journal covers.
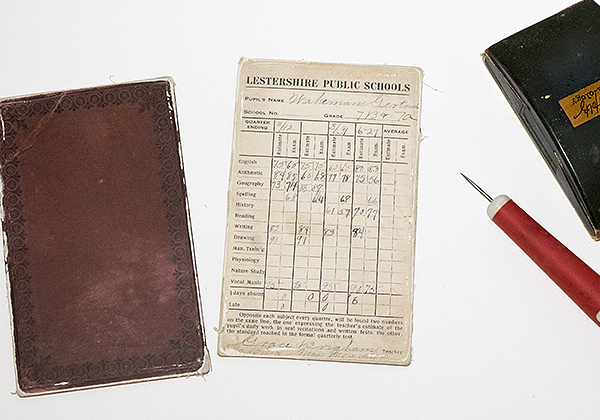
Start by distressing two baseboards with sandpaper and by scratching them with a craft pick. You can also use two of the larger baseboards, if you want to make a larger journal.
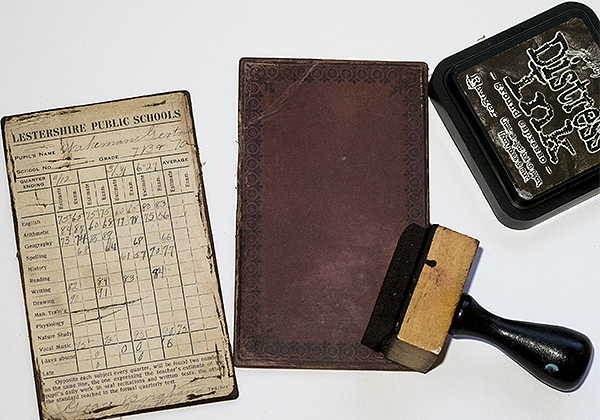
Ink the panels with Ground Espresso and an ink-blending tool. The ink will stick to the areas where the upper layer was sanded or scratched off, creating a distressed effect.
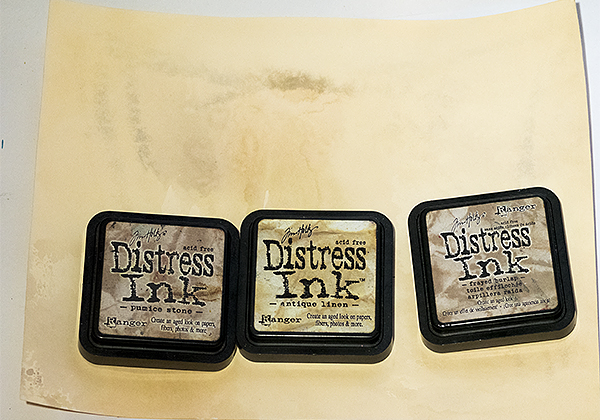
Prepare papers for the inside by smearing Antique Linen, Frayed Burlap and Pumice Stone Distress Ink on a non-stick craft sheet, misting them with water and pressing the paper into the ink. Repeat on the other side of the paper. You can use, for example, Ranger’s Mixed Media, Heavystock or Manila cardstock. I inked three sheets of paper.
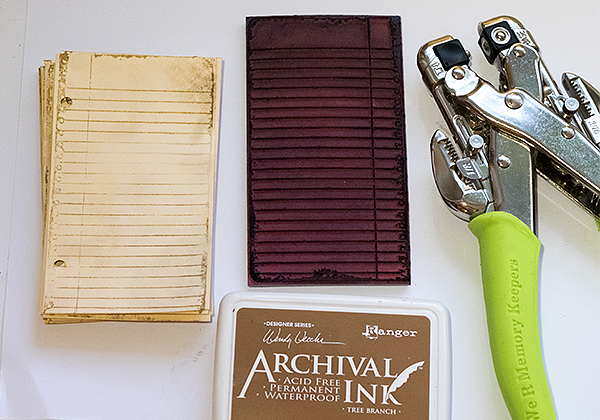
Cut the inside pages slightly smaller than the covers and make as many as you need. Stamp them roughly with the ledger stamp from Tim’s School Desk set and Tree Branch ink. I only stamped one side of each page, since I wanted the other side blank, in case I will add some sketches of flowers and other signs of spring. Punch holes with a Crop-a-dile about 1 inch from the edges.
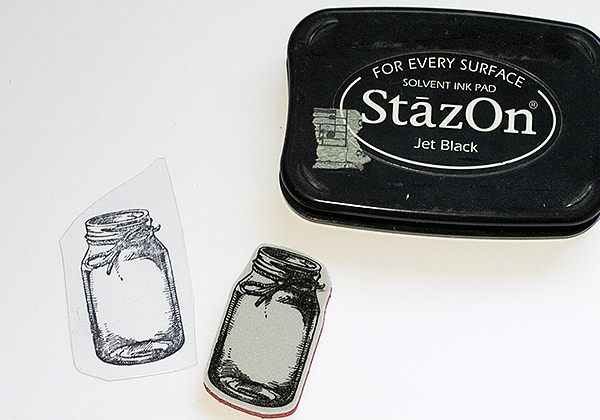
Stamp the larger jar from the Flower Jar set on Clearly For Art Modeling film, or acetate. If you want to, you can carefully heat the Modeling Film with a heat tool and shape it into a dimensional jar. It looks really cool and keeps its shape perfectly. I decided not to do that here, since I wanted my notebook to be relatively flat, but if you want to see a dimensional version, check out my Wildflower Mason Jar Tag.
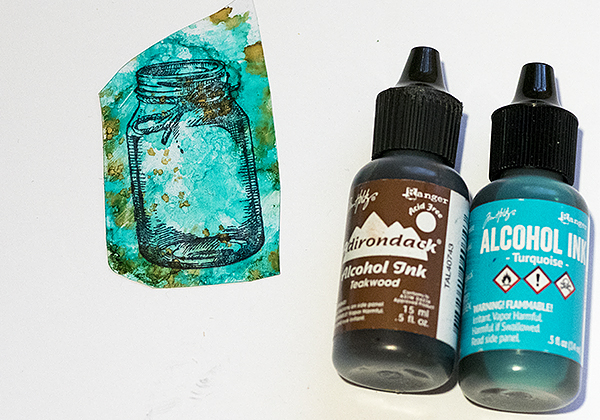
Ink the back of the jar with Turquoise and just a tad of Teakwood alcohol ink. It is important to work on the back, or you will smear the stamping.
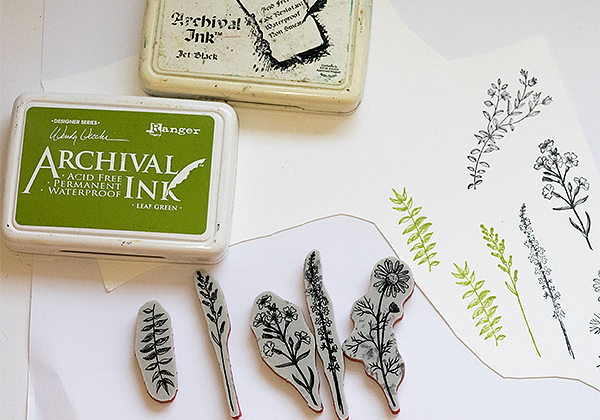
Stamp flowers and leafy branches from the Flower Jar set on the smooth back of Ranger’s watercolor paper. I used Jet Black and Leaf Green Archival Ink. You need to use a waterproof ink.
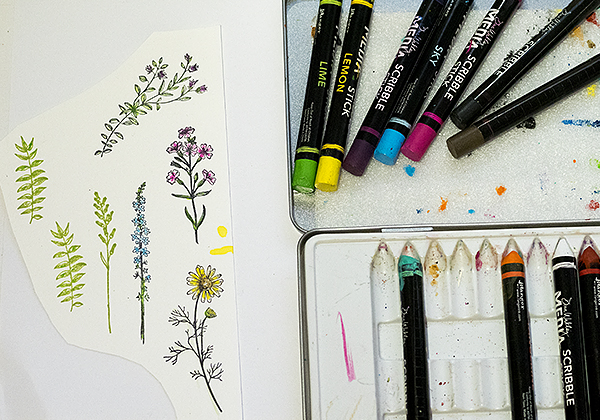
Watercolor the flowers by dipping a fine paint brush in water and picking up color directly from the tip of Dina Wakley’s Scribble Sticks.
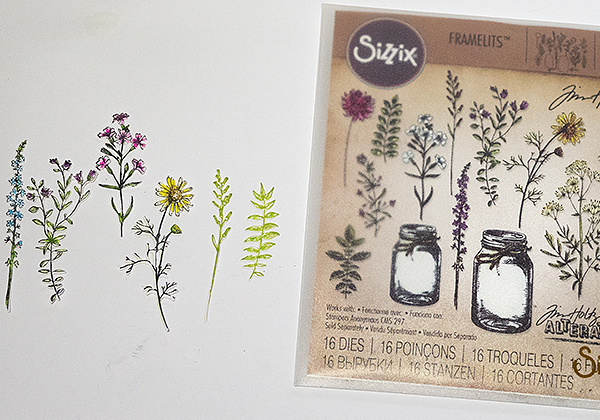
Die cut with the coordinating dies in the Sizzix Flower Jar set. Use this sandwich: Sizzix Magnetic Platform, Cutting Pad, paper, die facing down, second Cutting Pad.
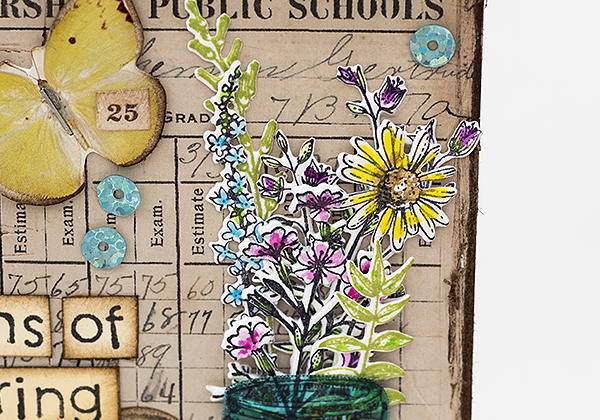
These flowers are very delicate and pretty, especially when die cut with the coordinating dies. Tuck them all into the jar. I attached the jar with two tiny staples.
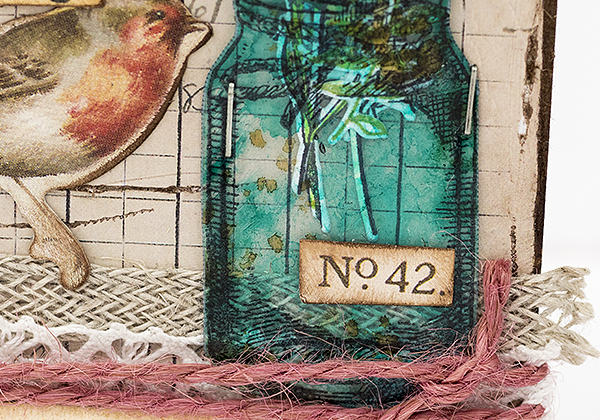
Below the jar, there is a piece of Linen Ribbon, a piece of lace trim and a pink piece of twine, which are meant to look like a table cloth. I also stamped a sentiment on a left-over piece of paper from the inside pages. The sentiment comes from a winter/Christmas set, but works great all year around.
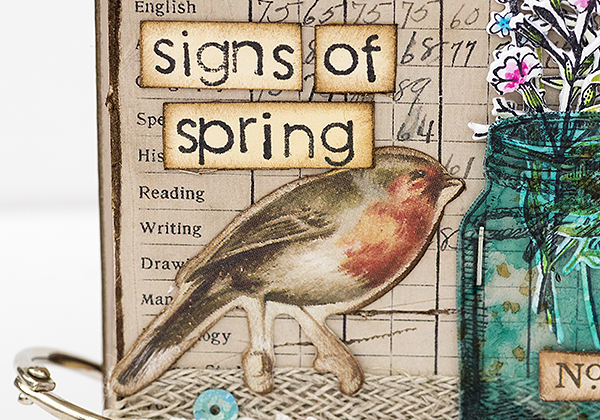
The title of the notebook was stamped on more left-over inked paper, using alphabet stamps. I also used a sweet bird from the Botanical Layers embellishment pack.
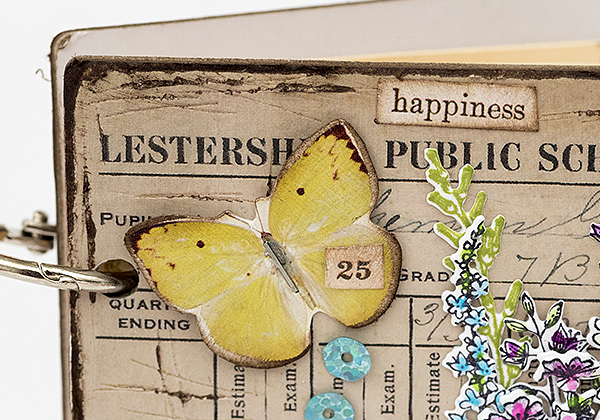
The butterfly also comes from Botanical Layers. I used some words and numbers from the Clippings Stickers set for additional text. For a bit of bling, there are a few sequins from the SSS Frosted set.

The back of the book looks like this. The book was bound with Tim Holtz Mini Book Rings, which also means that I can add and remove pages easily.
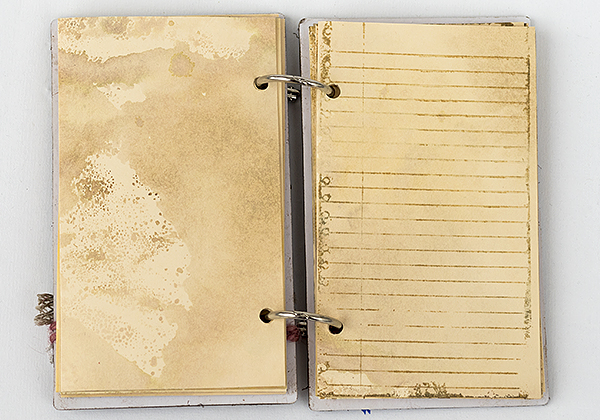
Here’s a look at the inside of the book. You could decorate it with more stamping or maybe by adding Botanical Layers images.
I hope you enjoyed this project and that it inspired you to make some notebooks or journals. Not only are they great fun to make, but they are also fun to use and they make really nice gifts. I am keeping this one for myself though and I will start using it when I spot that first sign of spring.
Thank you so much for looking!
Happy crafting!
Anna-Karin

SUPPLIES:
|


Thanks for reading, and thanks to Anna-Karin for being our guest!

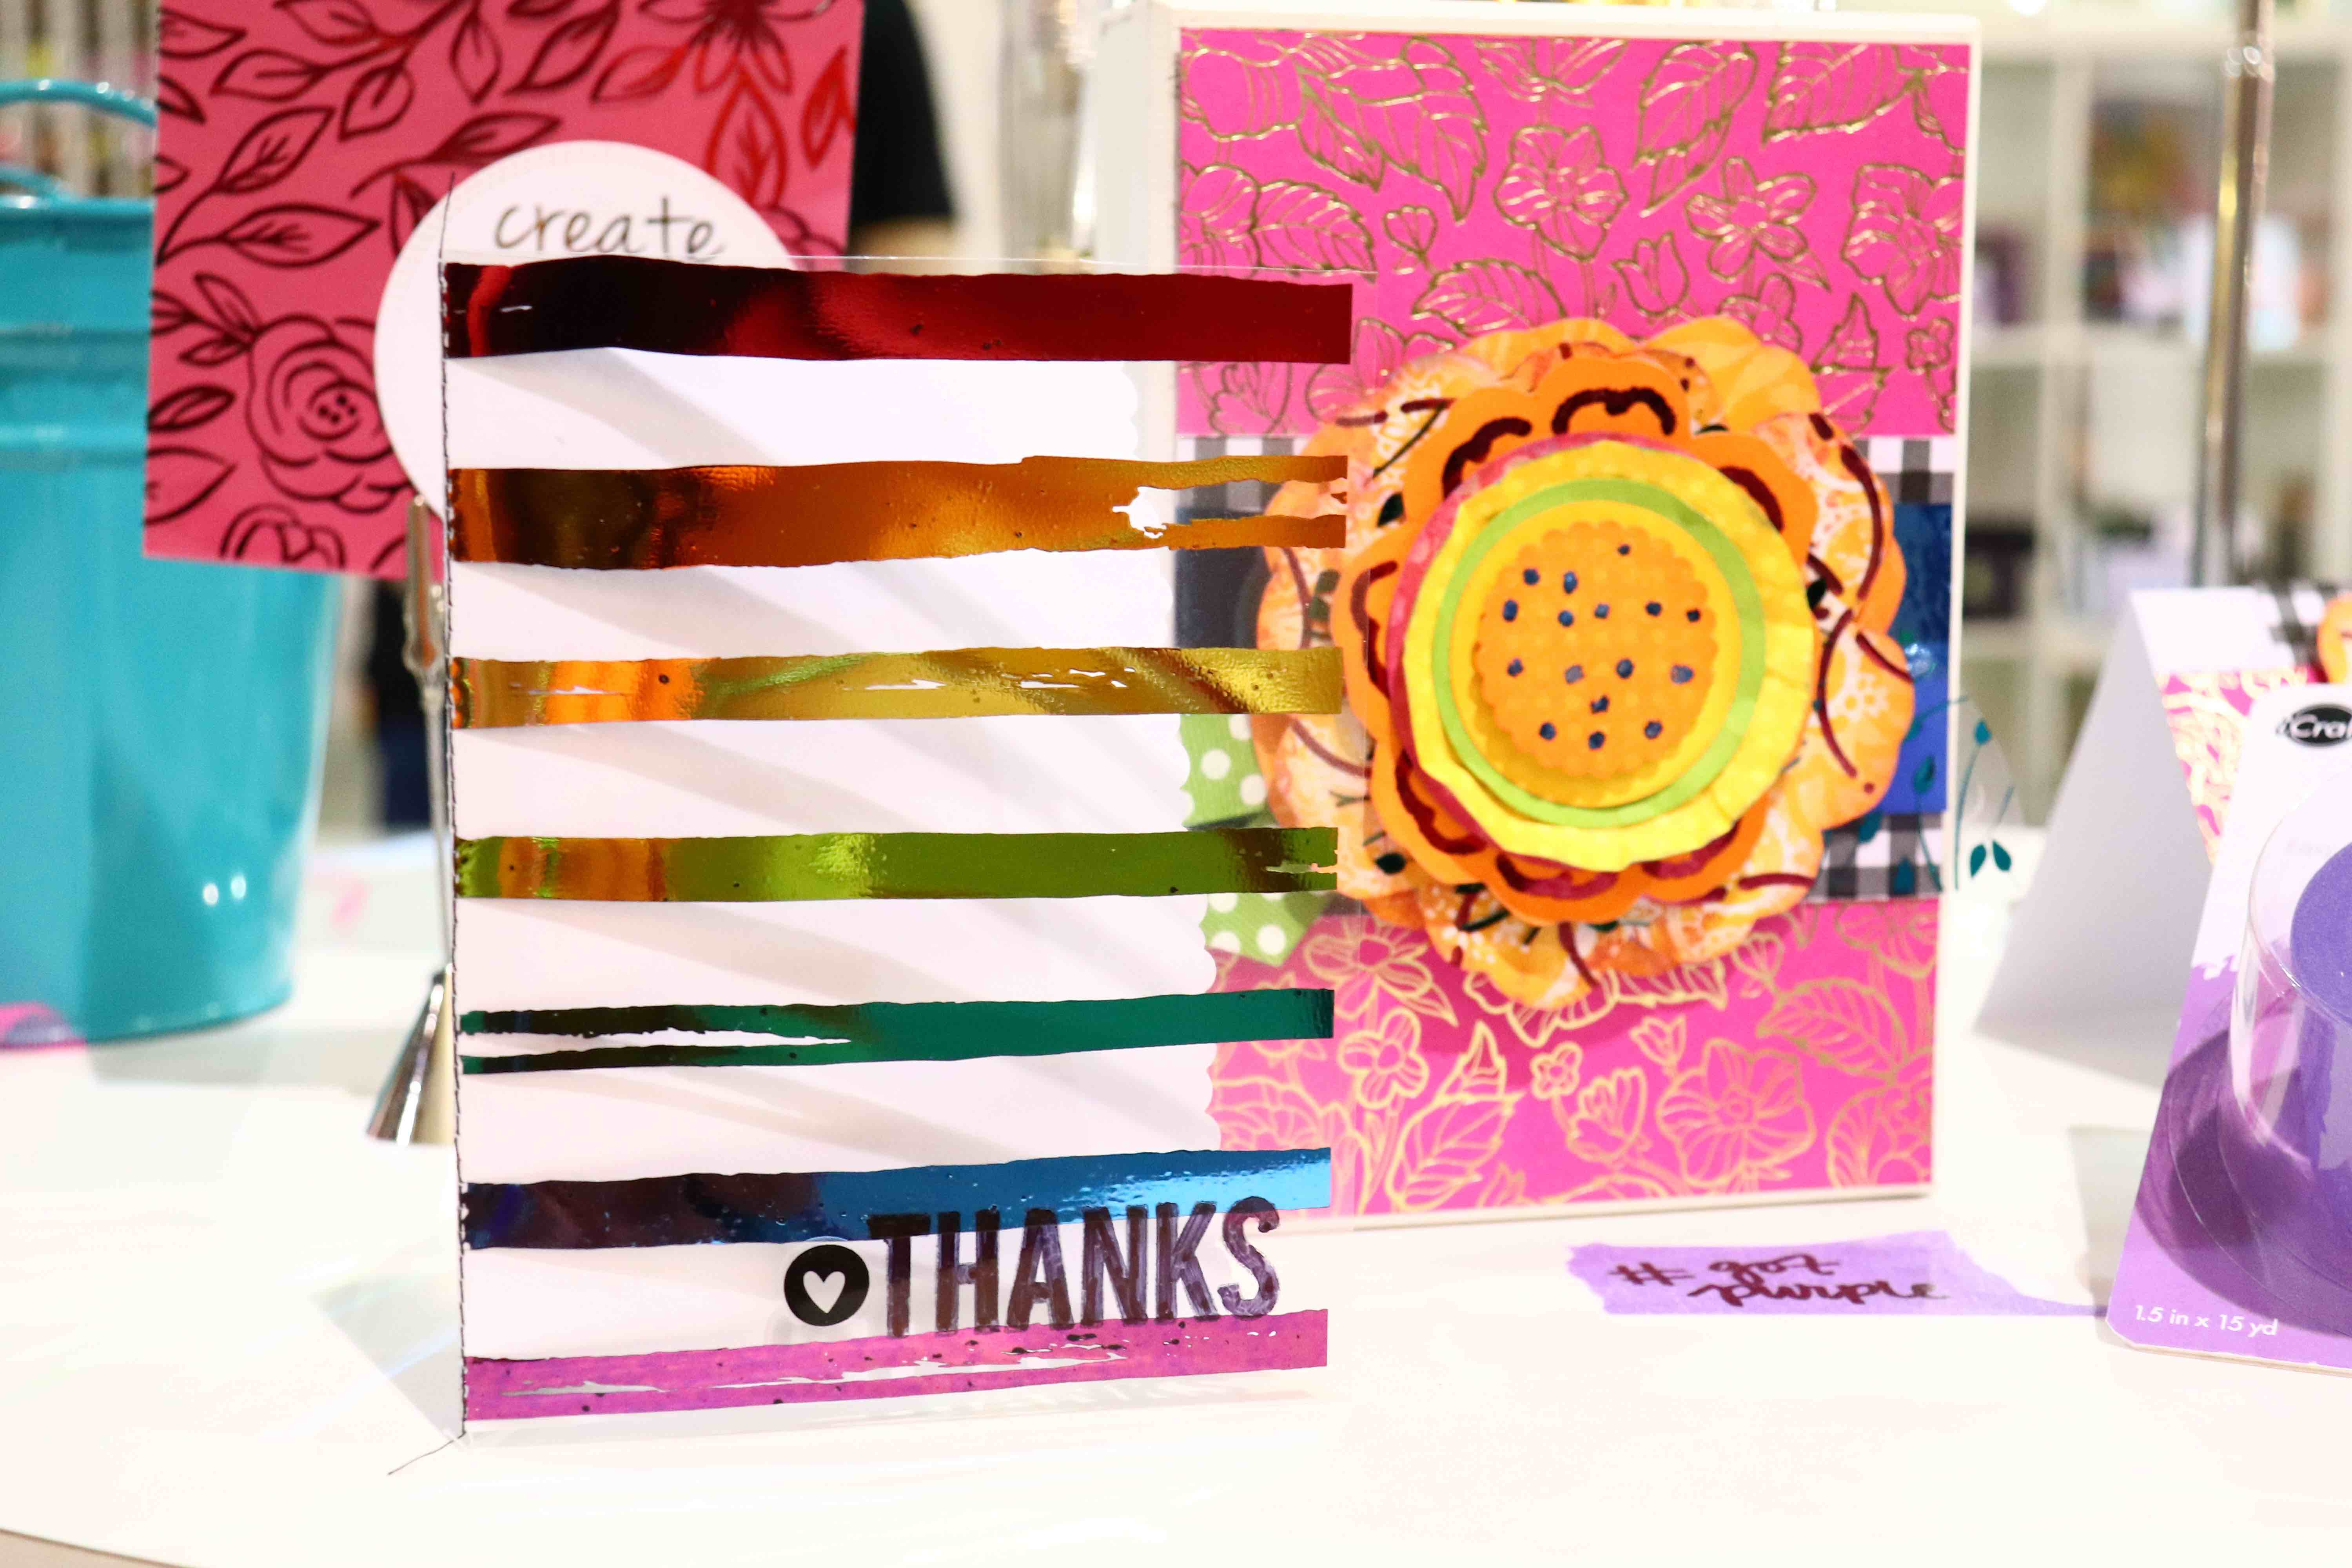
Yippee for Yana: Center Cut Heart Love Card

Hi friends! Happy Tuesday! Welcome to the latest installment of “Yippee for Yana” with the super talented and awesome Yana Smakula! As we get closer to Valentine’s Day, it’s all about L-O-V-E! In my opinion, it should be all about love all the time! :D Be sure to read on for all the details on creating this gorgeous kraft card and watch the video! Enjoy!
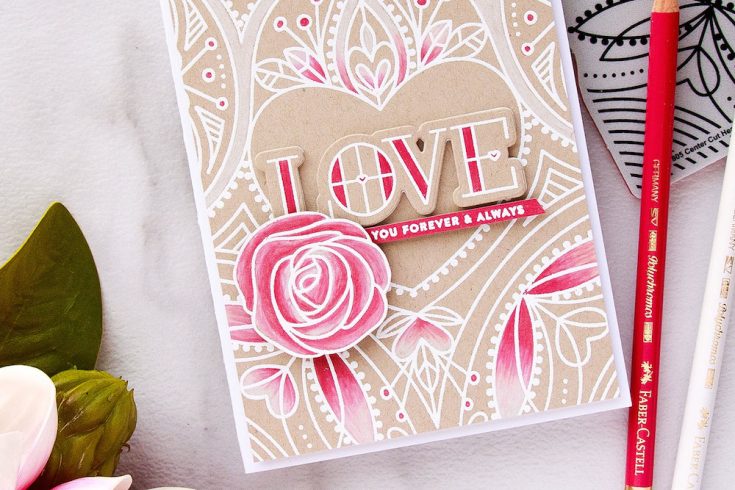
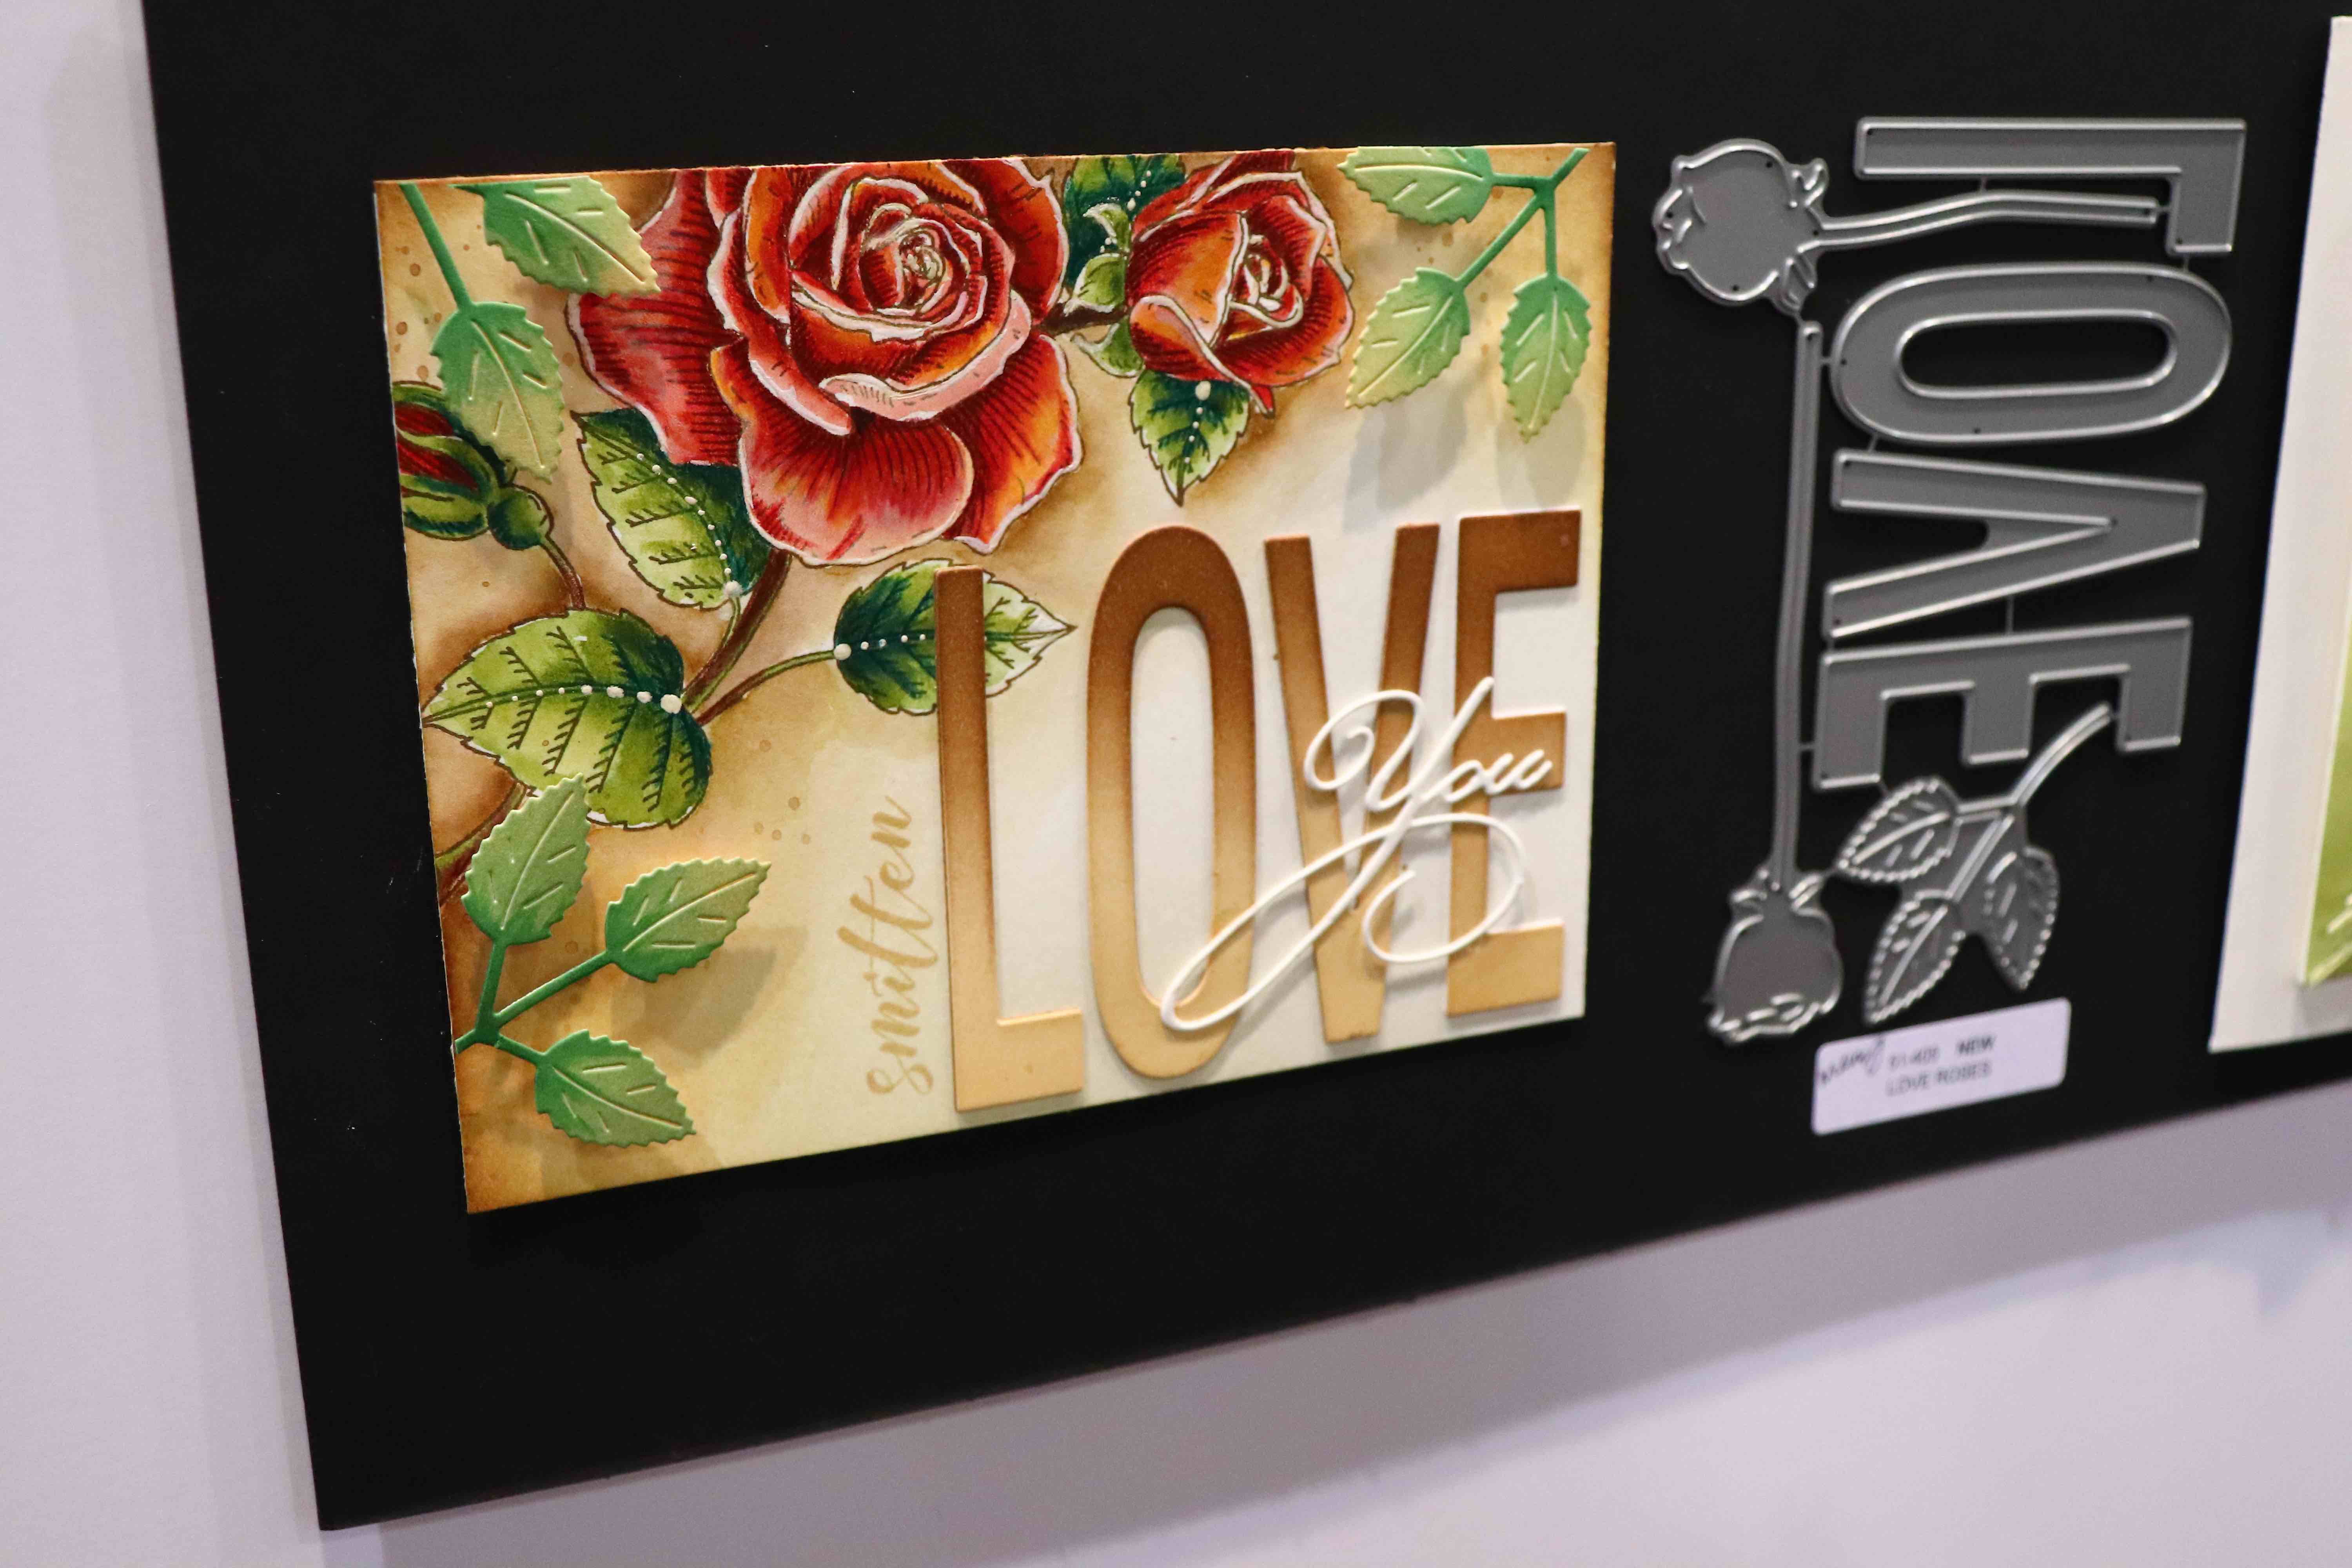
Hi everyone, this is Yana Smakula and I’m excited to bring you another episode from my by-monthly “Yippee For Yana” video series! In today’s episode I’m sharing a delicate Love You card featuring selective pencil coloring.
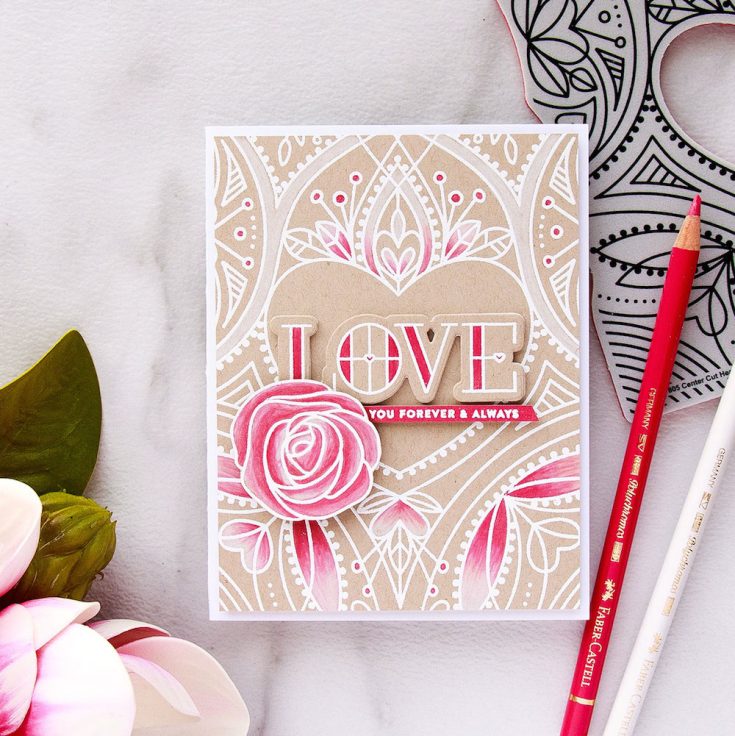
I’ve already showcased the technique I’m using for this card in one of my previous videos, be sure to watch it if you haven’t yet seen it. I am still very much fond of pencil coloring, so I decided to play with this technique once again and do some partial coloring.
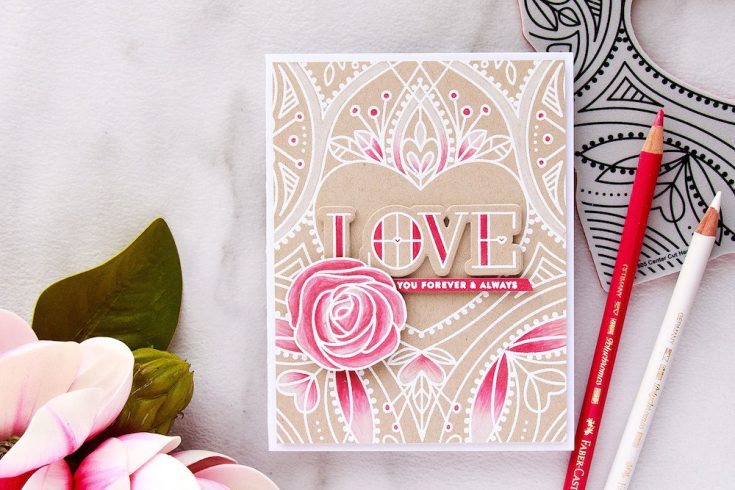
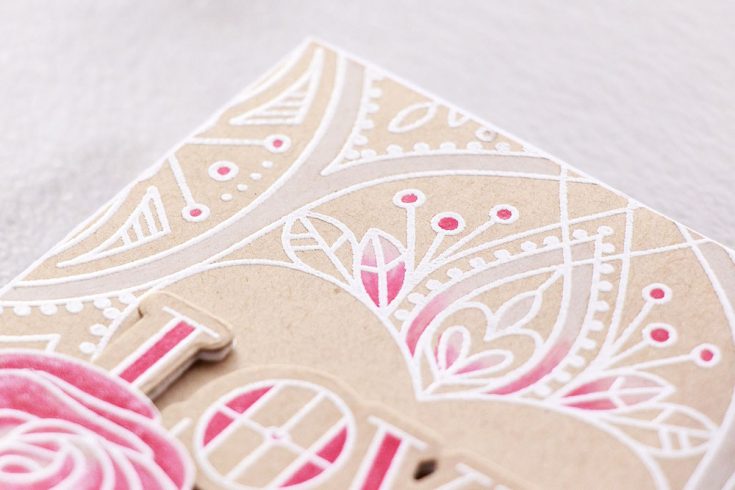
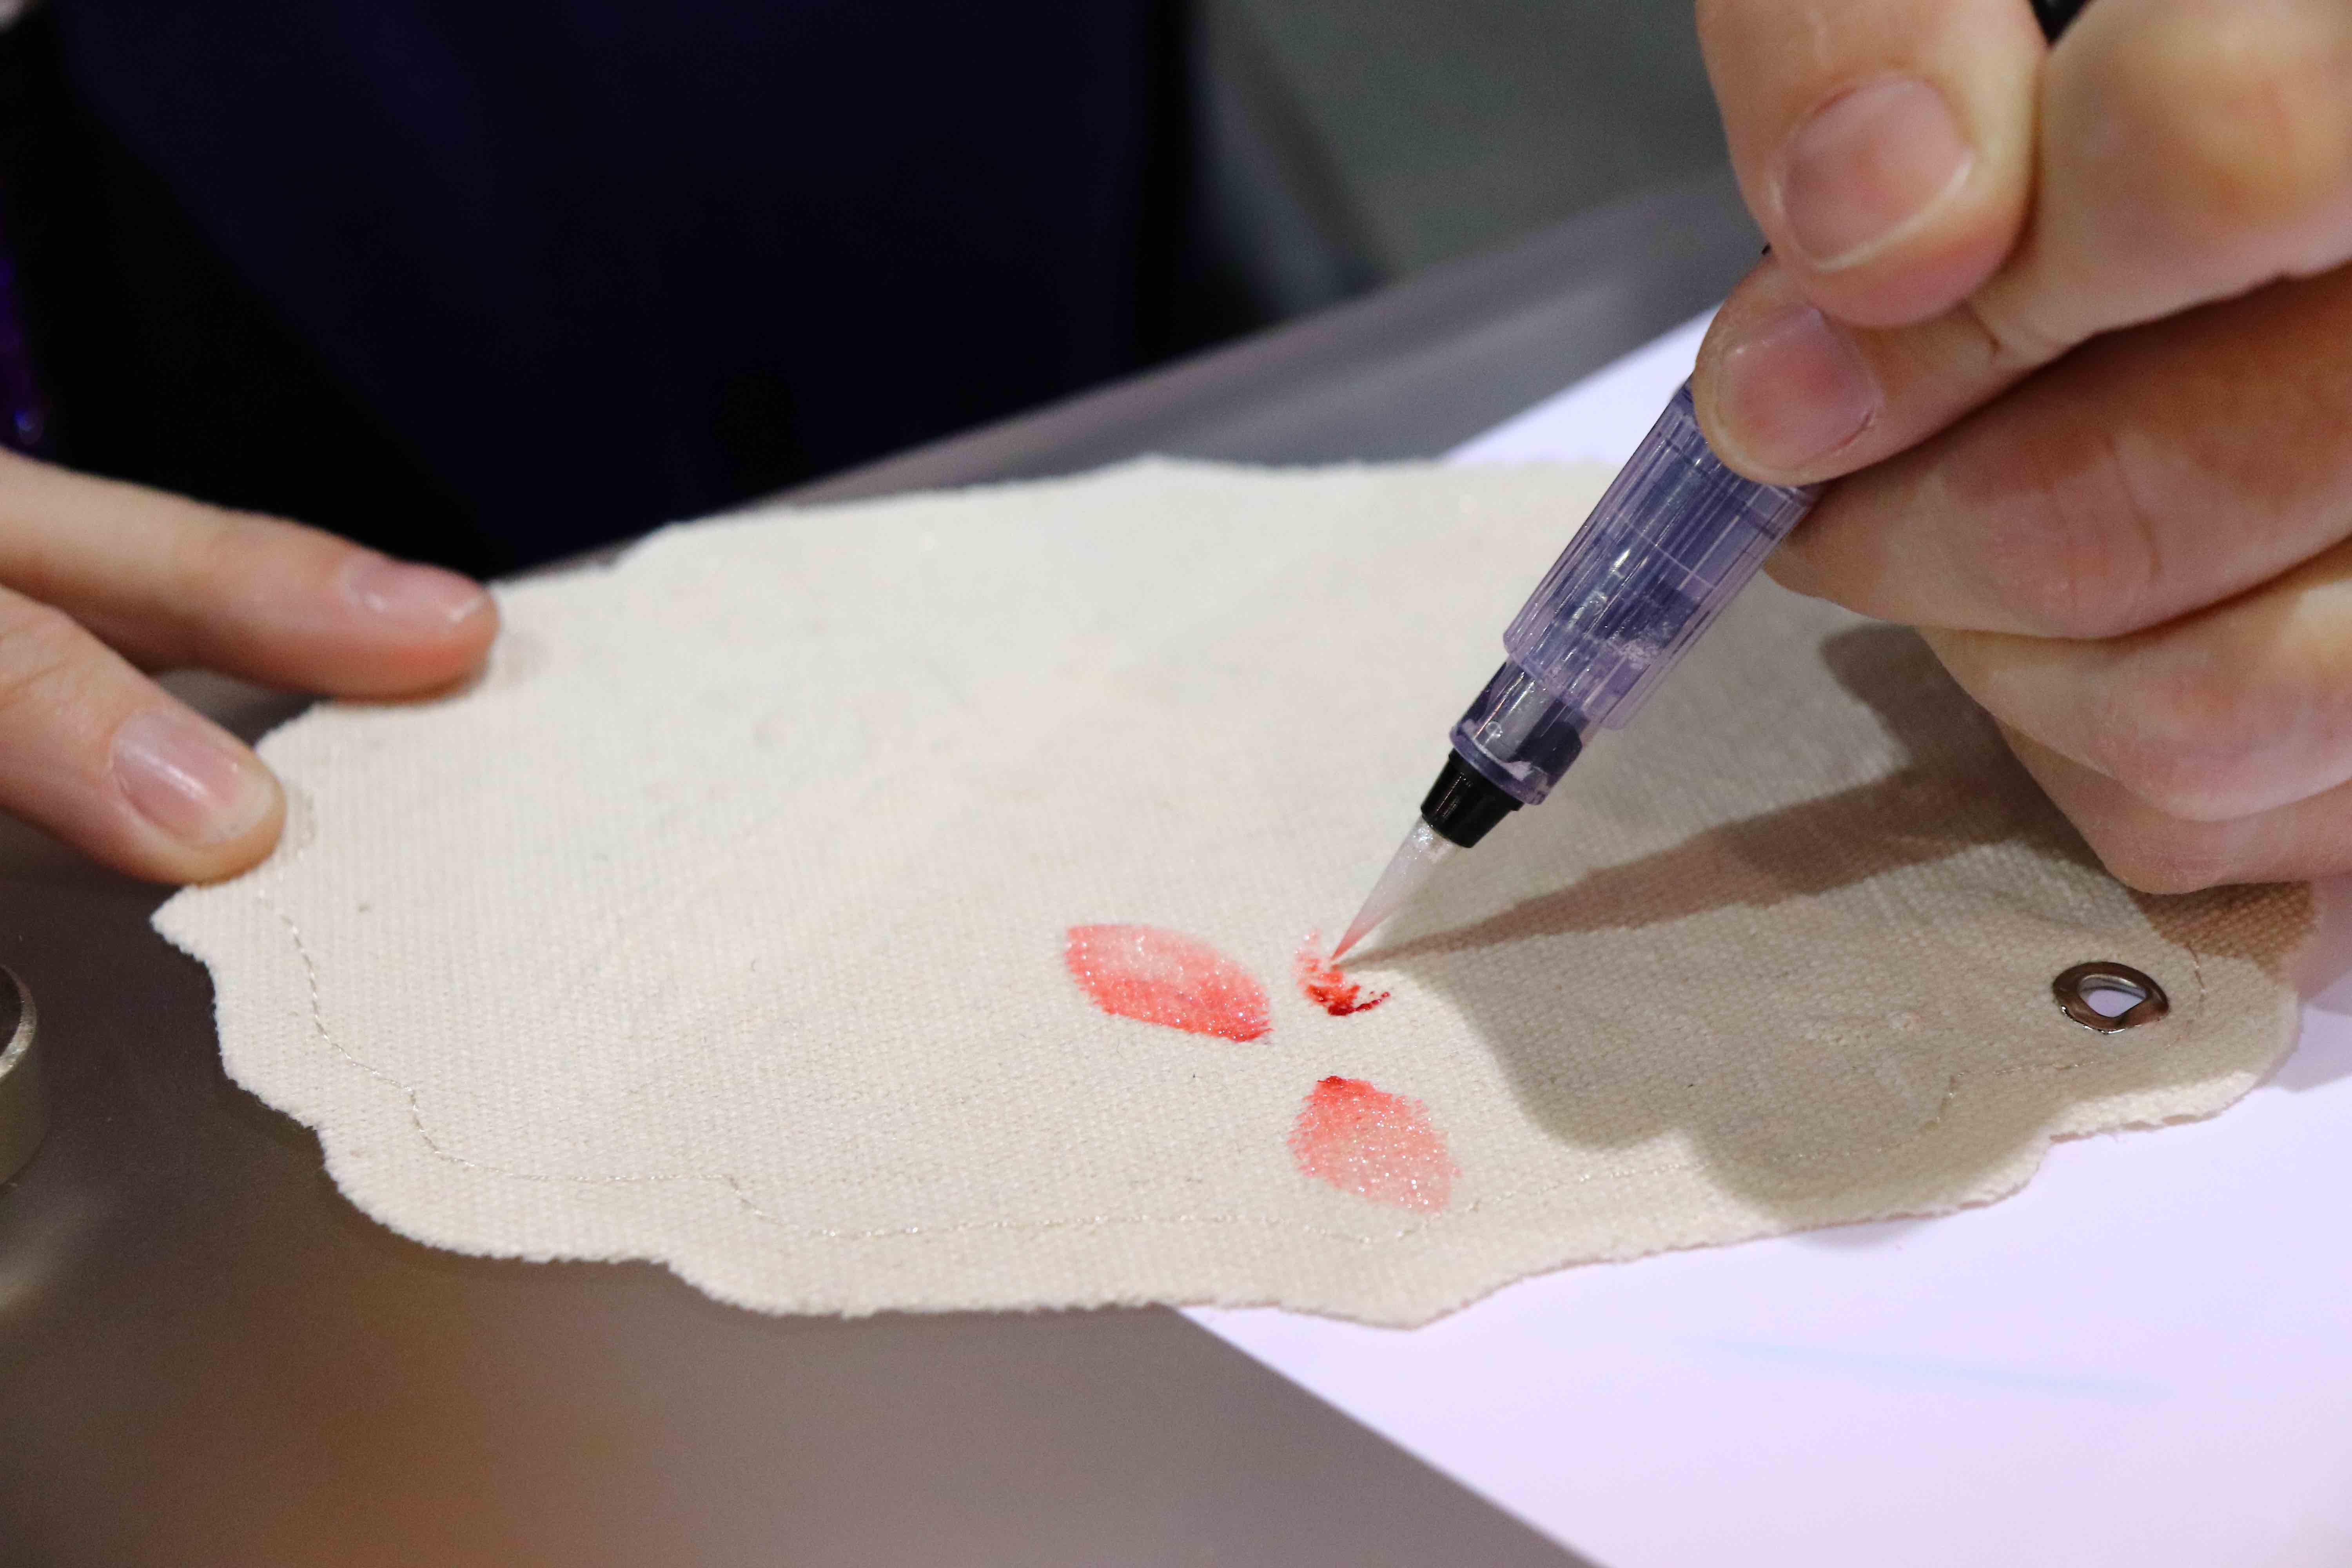
I started to work on my card by stamping a beautiful Center Cut Heart background stamp in watermark ink onto Neenah Desert Storm cardstock to have a faint impression on my paper, I wanted to heat emboss this background in white embossing powder, but I also wanted to color parts of this background with my colored pencils and to make it easier for me to color I first stamped the image using a stamp positioner tool, colored it while there was no embossing powder and later added embossing powder over the coloring.
I was going for a very soft, feminine look and for my coloring I used just two pencils – White and Rose Carmine (there are Polychromos pencils). I’ve mentioned this many times in the past – I simply adore these pencils and I use them all the time.
I have a smaller 36 set of pencils and in that set there’s only one hot pink an no lighter pink. When I color I like to have a light and a dark shade of one color to have nice gradual transitions. So I used white pencil instead and I blended the hot pink into a lighter pink and finally into white with the help of the white pencil only.
I didn’t want to color the entire background as a), that would have taken too long, and b), this is not what I had in mind for this card. I wanted to have a lot of kraft, a lot of white and also hints of pink.
What I love a lot about Polychromos pencils is that they are erasable in a way. You can take a regular pencil eraser and erase some of the color if you made a mistake. It’s a very cool and valuable quality of this product, I think. Sometimes I change my mind, or the coloring doesn’t look the way I want it to look or I’ve accidentally colored over something I wasn’t planning to color so I just use pencil eraser to correct my coloring.
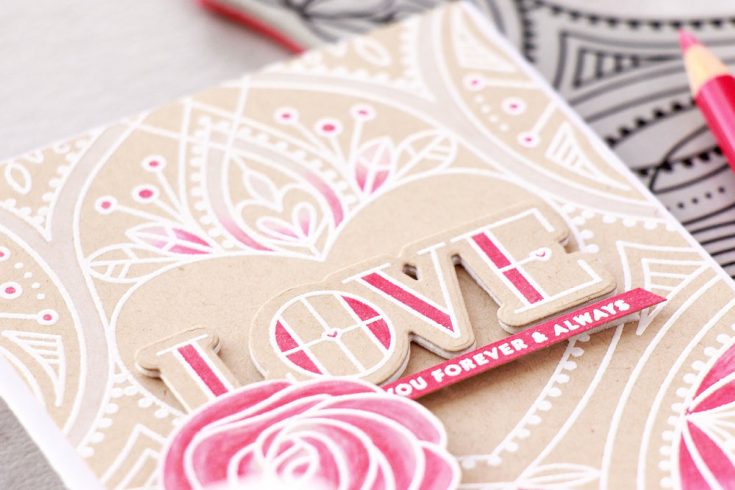
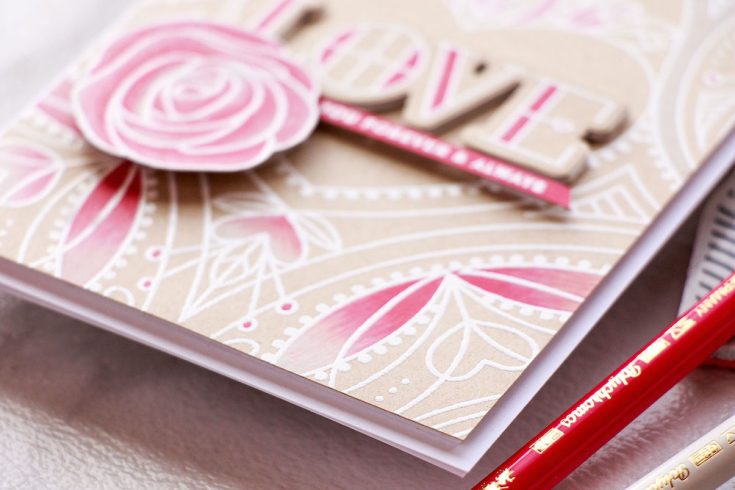
Once my coloring was done I heat embossed the background image in white embossing powder. I also created several additional elements for my card following the same technique. I used a rose image from the Best Mom Ever stamp set and also the word LOVE from the Stained Glass Love stamp set.
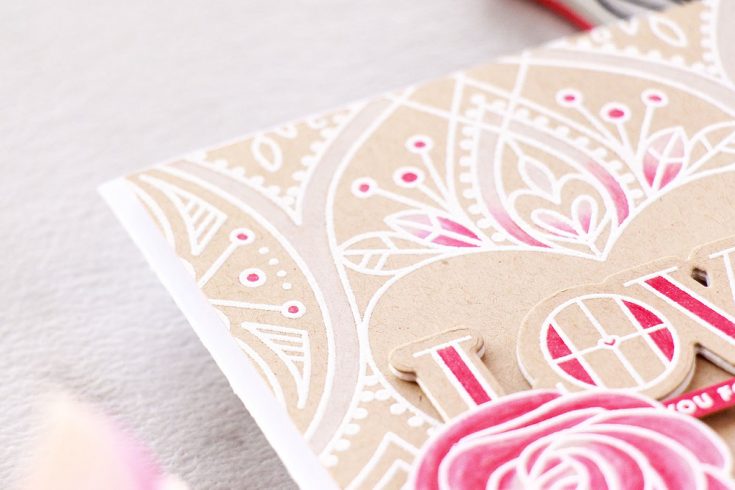
I trimmed my background to 4 x 5 ¼”, foam mounted it onto an A2 side folding card base, foam mounted the word “Love” and also foam mounted the pencil colored rose.
I wanted to add “You Forever & Always” part of the sentiment but I wanted to heat emboss it in white on pink. I didn’t have any pink cardstock that matched in color to the pink coloring, so I made my own little piece of pink paper by coloring a piece of kraft paper using my pencil.
I always do this with my Copic markers and sometimes do this with my watercolors so why not do it with the pencils? Right? It matched perfectly, I heat embossed the sentiment and trimmed it into a skinny strip using my Tonic Trimmer, foam mounted onto the card. Lastly, I coated the flower using my Tonic Studios Aqua Shimmer pen and that finished my project.
Have fun stamping!
WATCH THE VIDEO:
SUPPLIES:
|


Thanks so much for reading, and thanks to Yana for being our guest!
Blog Candy Alert!! Follow our blog via email and comment on this post for a chance to win a special blog candy!
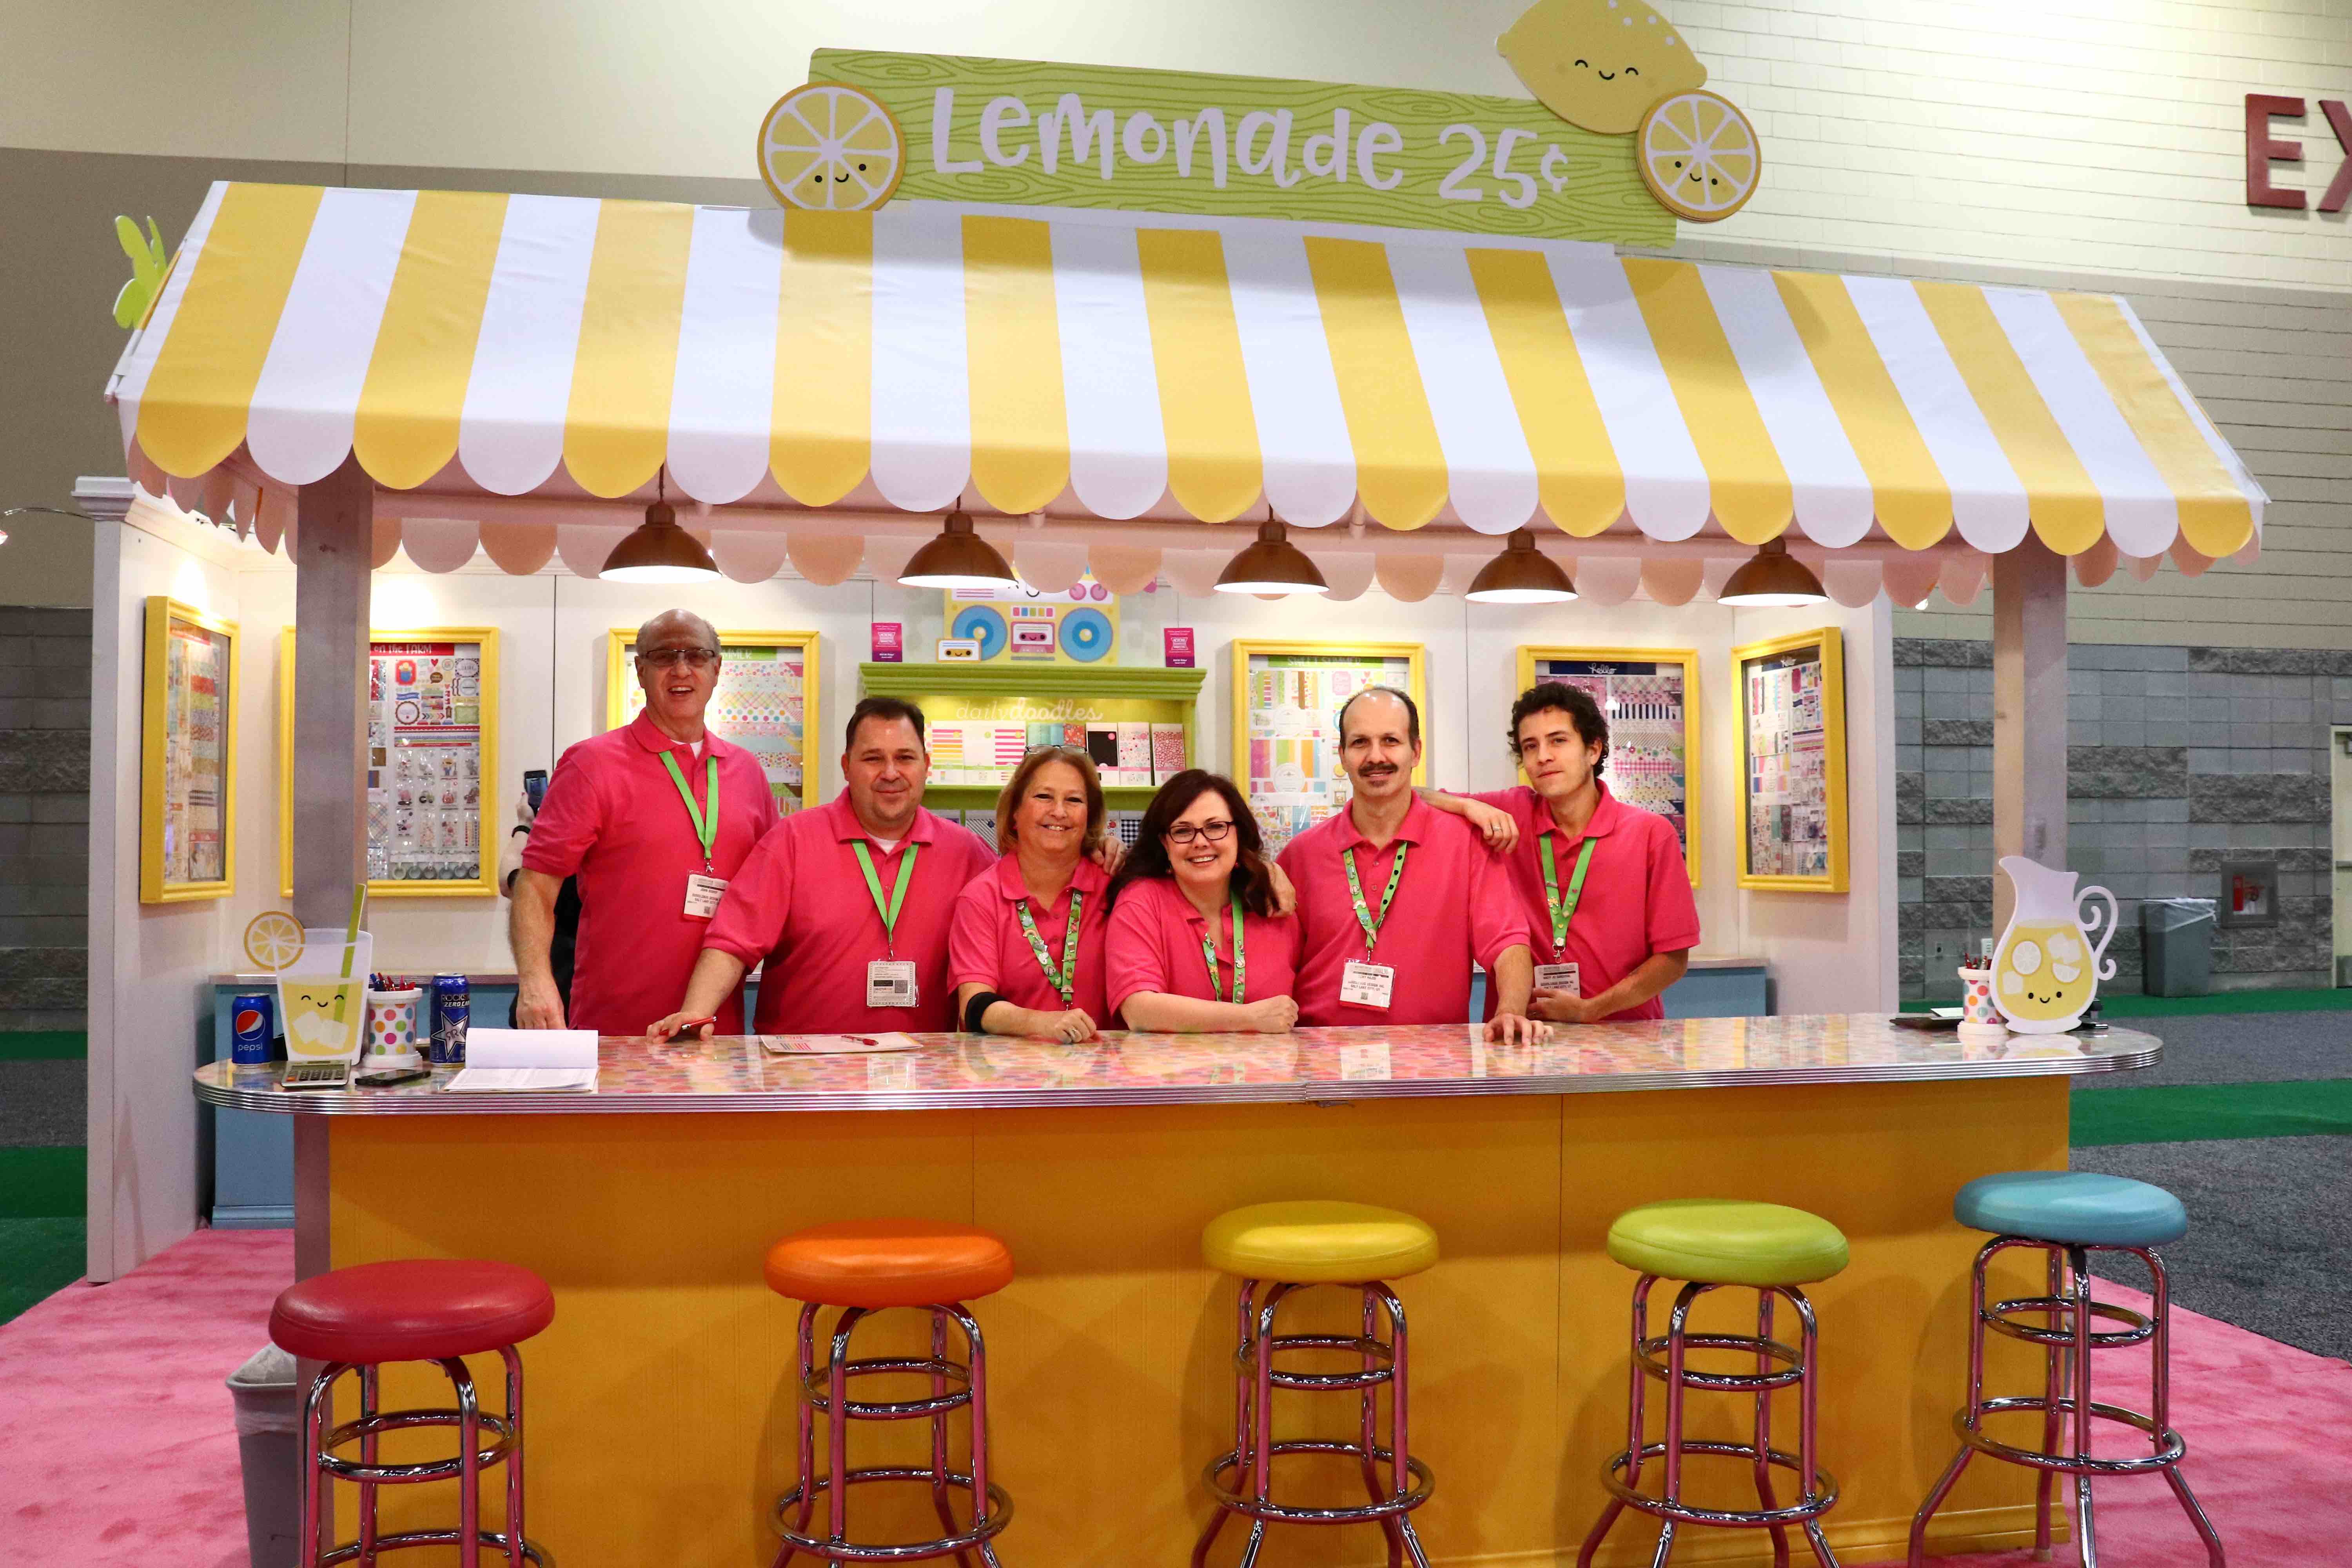
A Look at ALL the Amazing Creativation Awesomeness!
Hello crafters! Are you ready for some amazing Creativation recap-action?! There are TONS of new products coming out this year that you are definitely going to want to put on your must-have list!
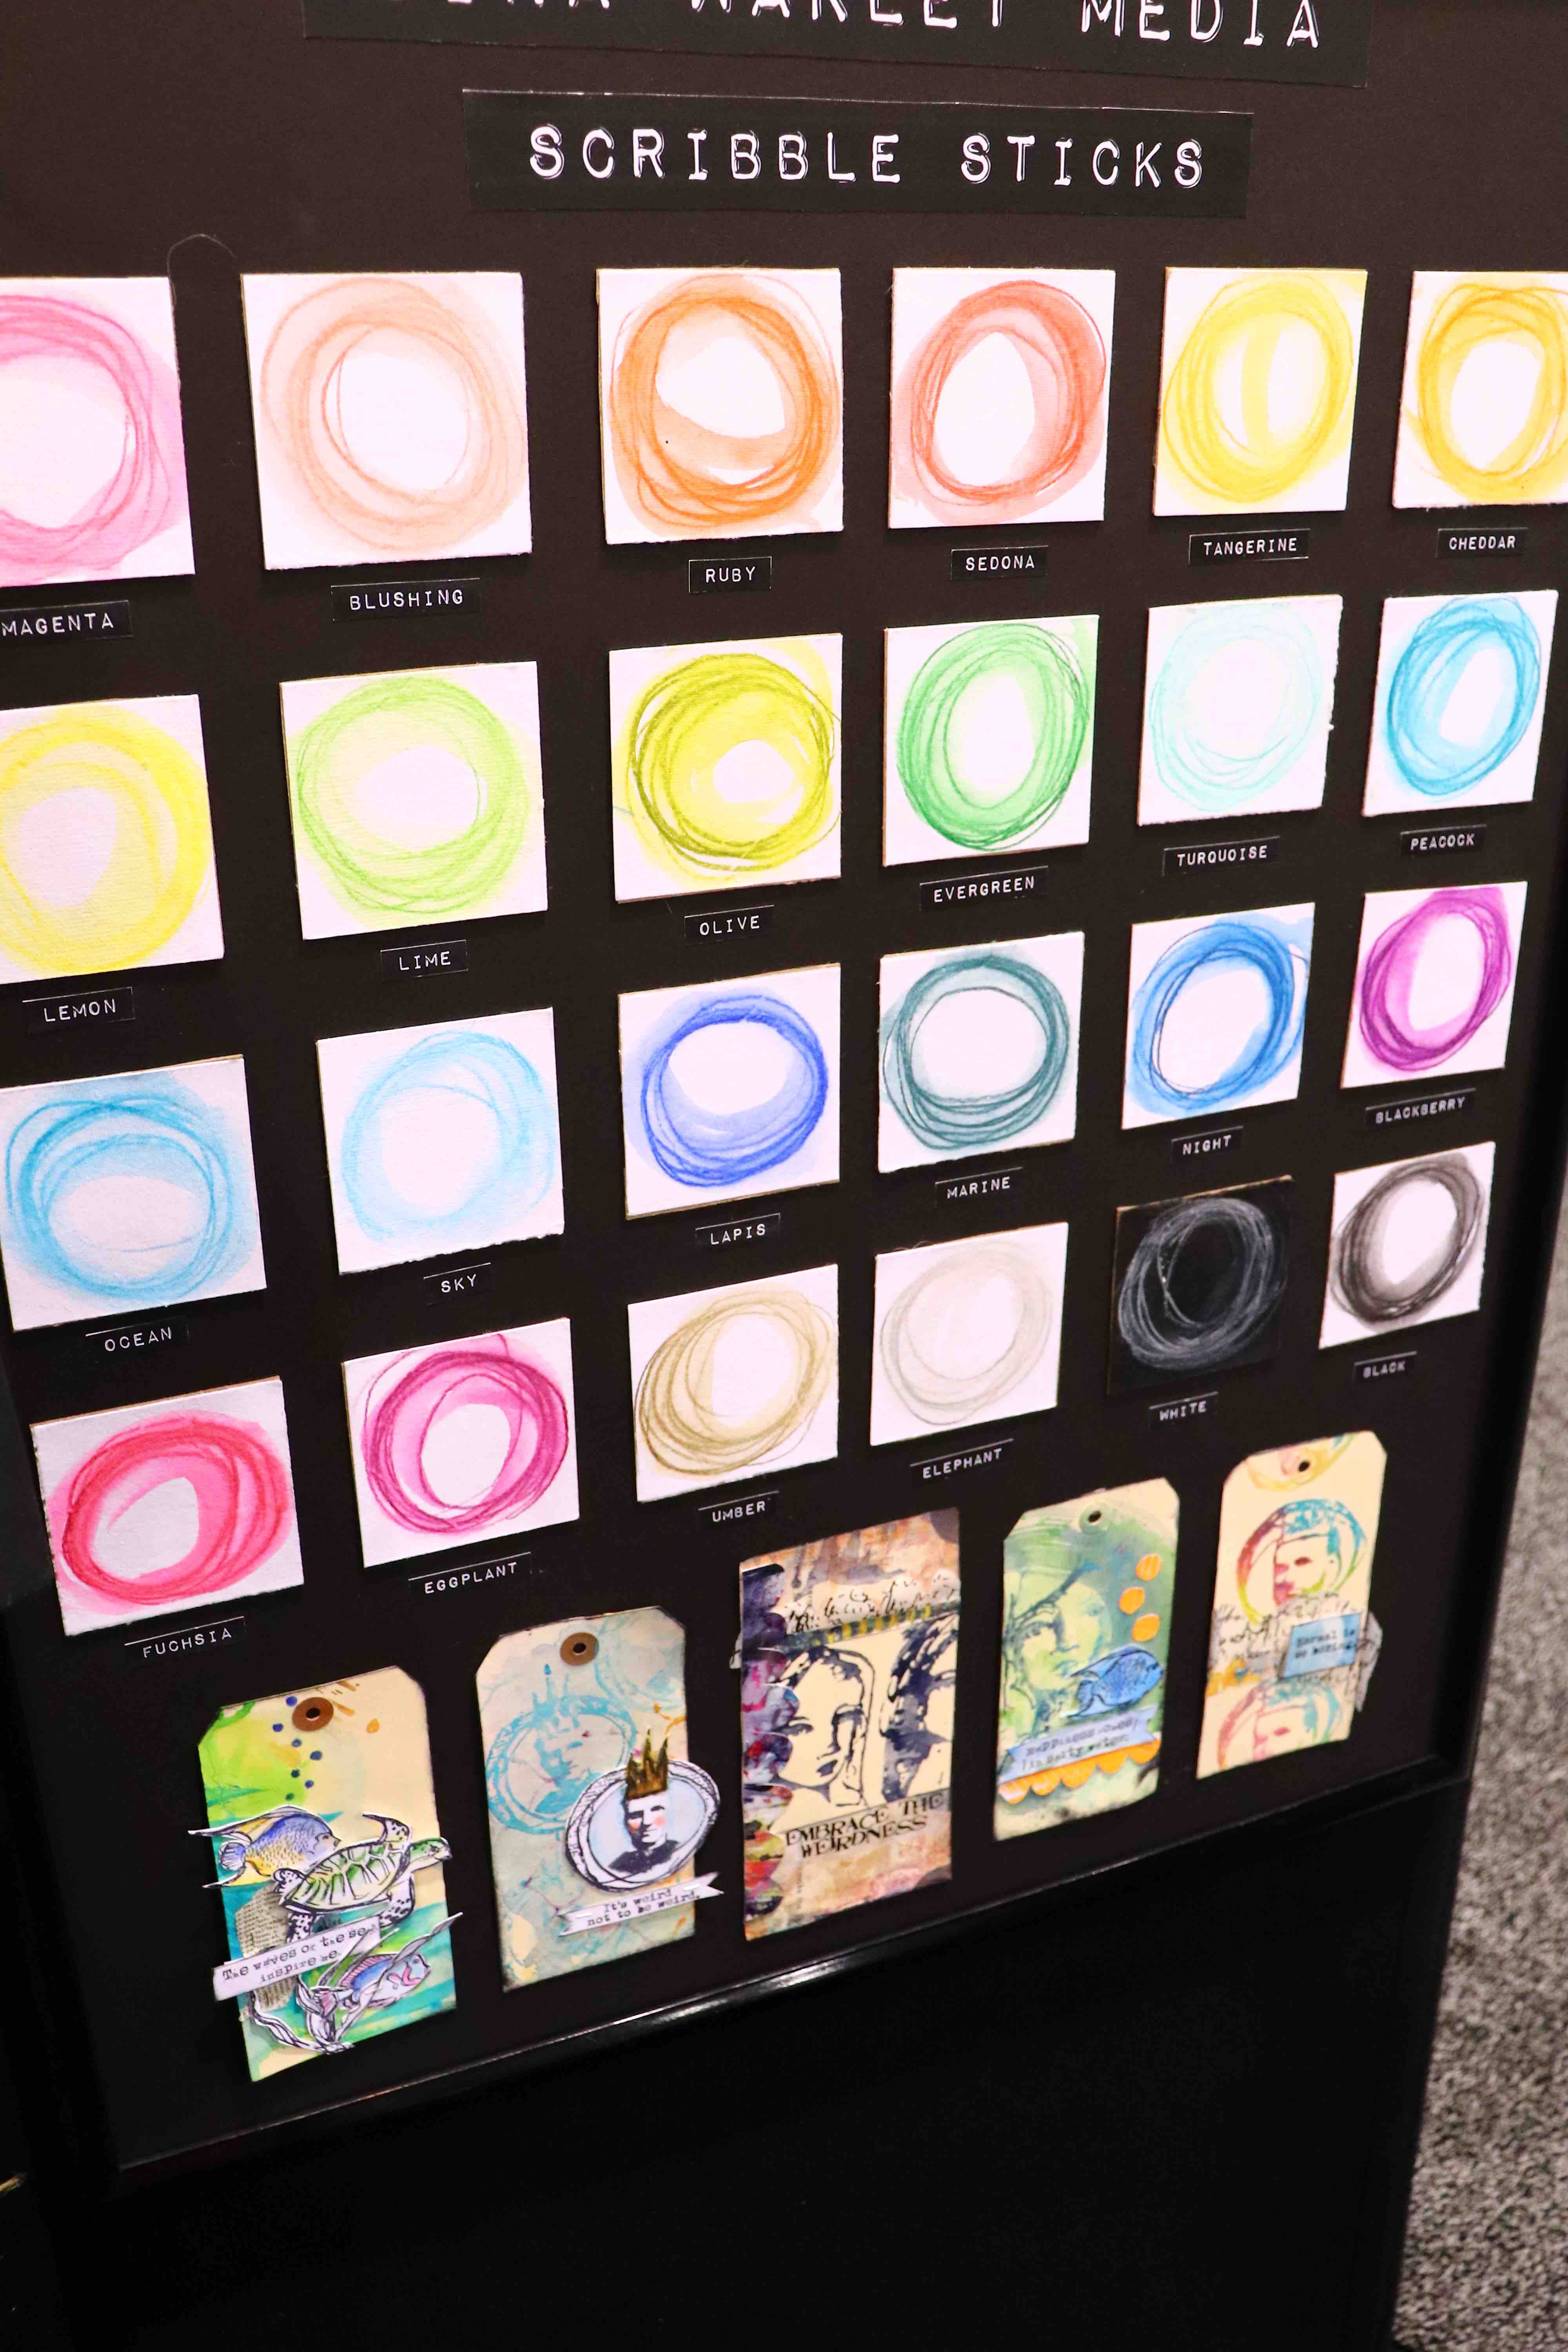
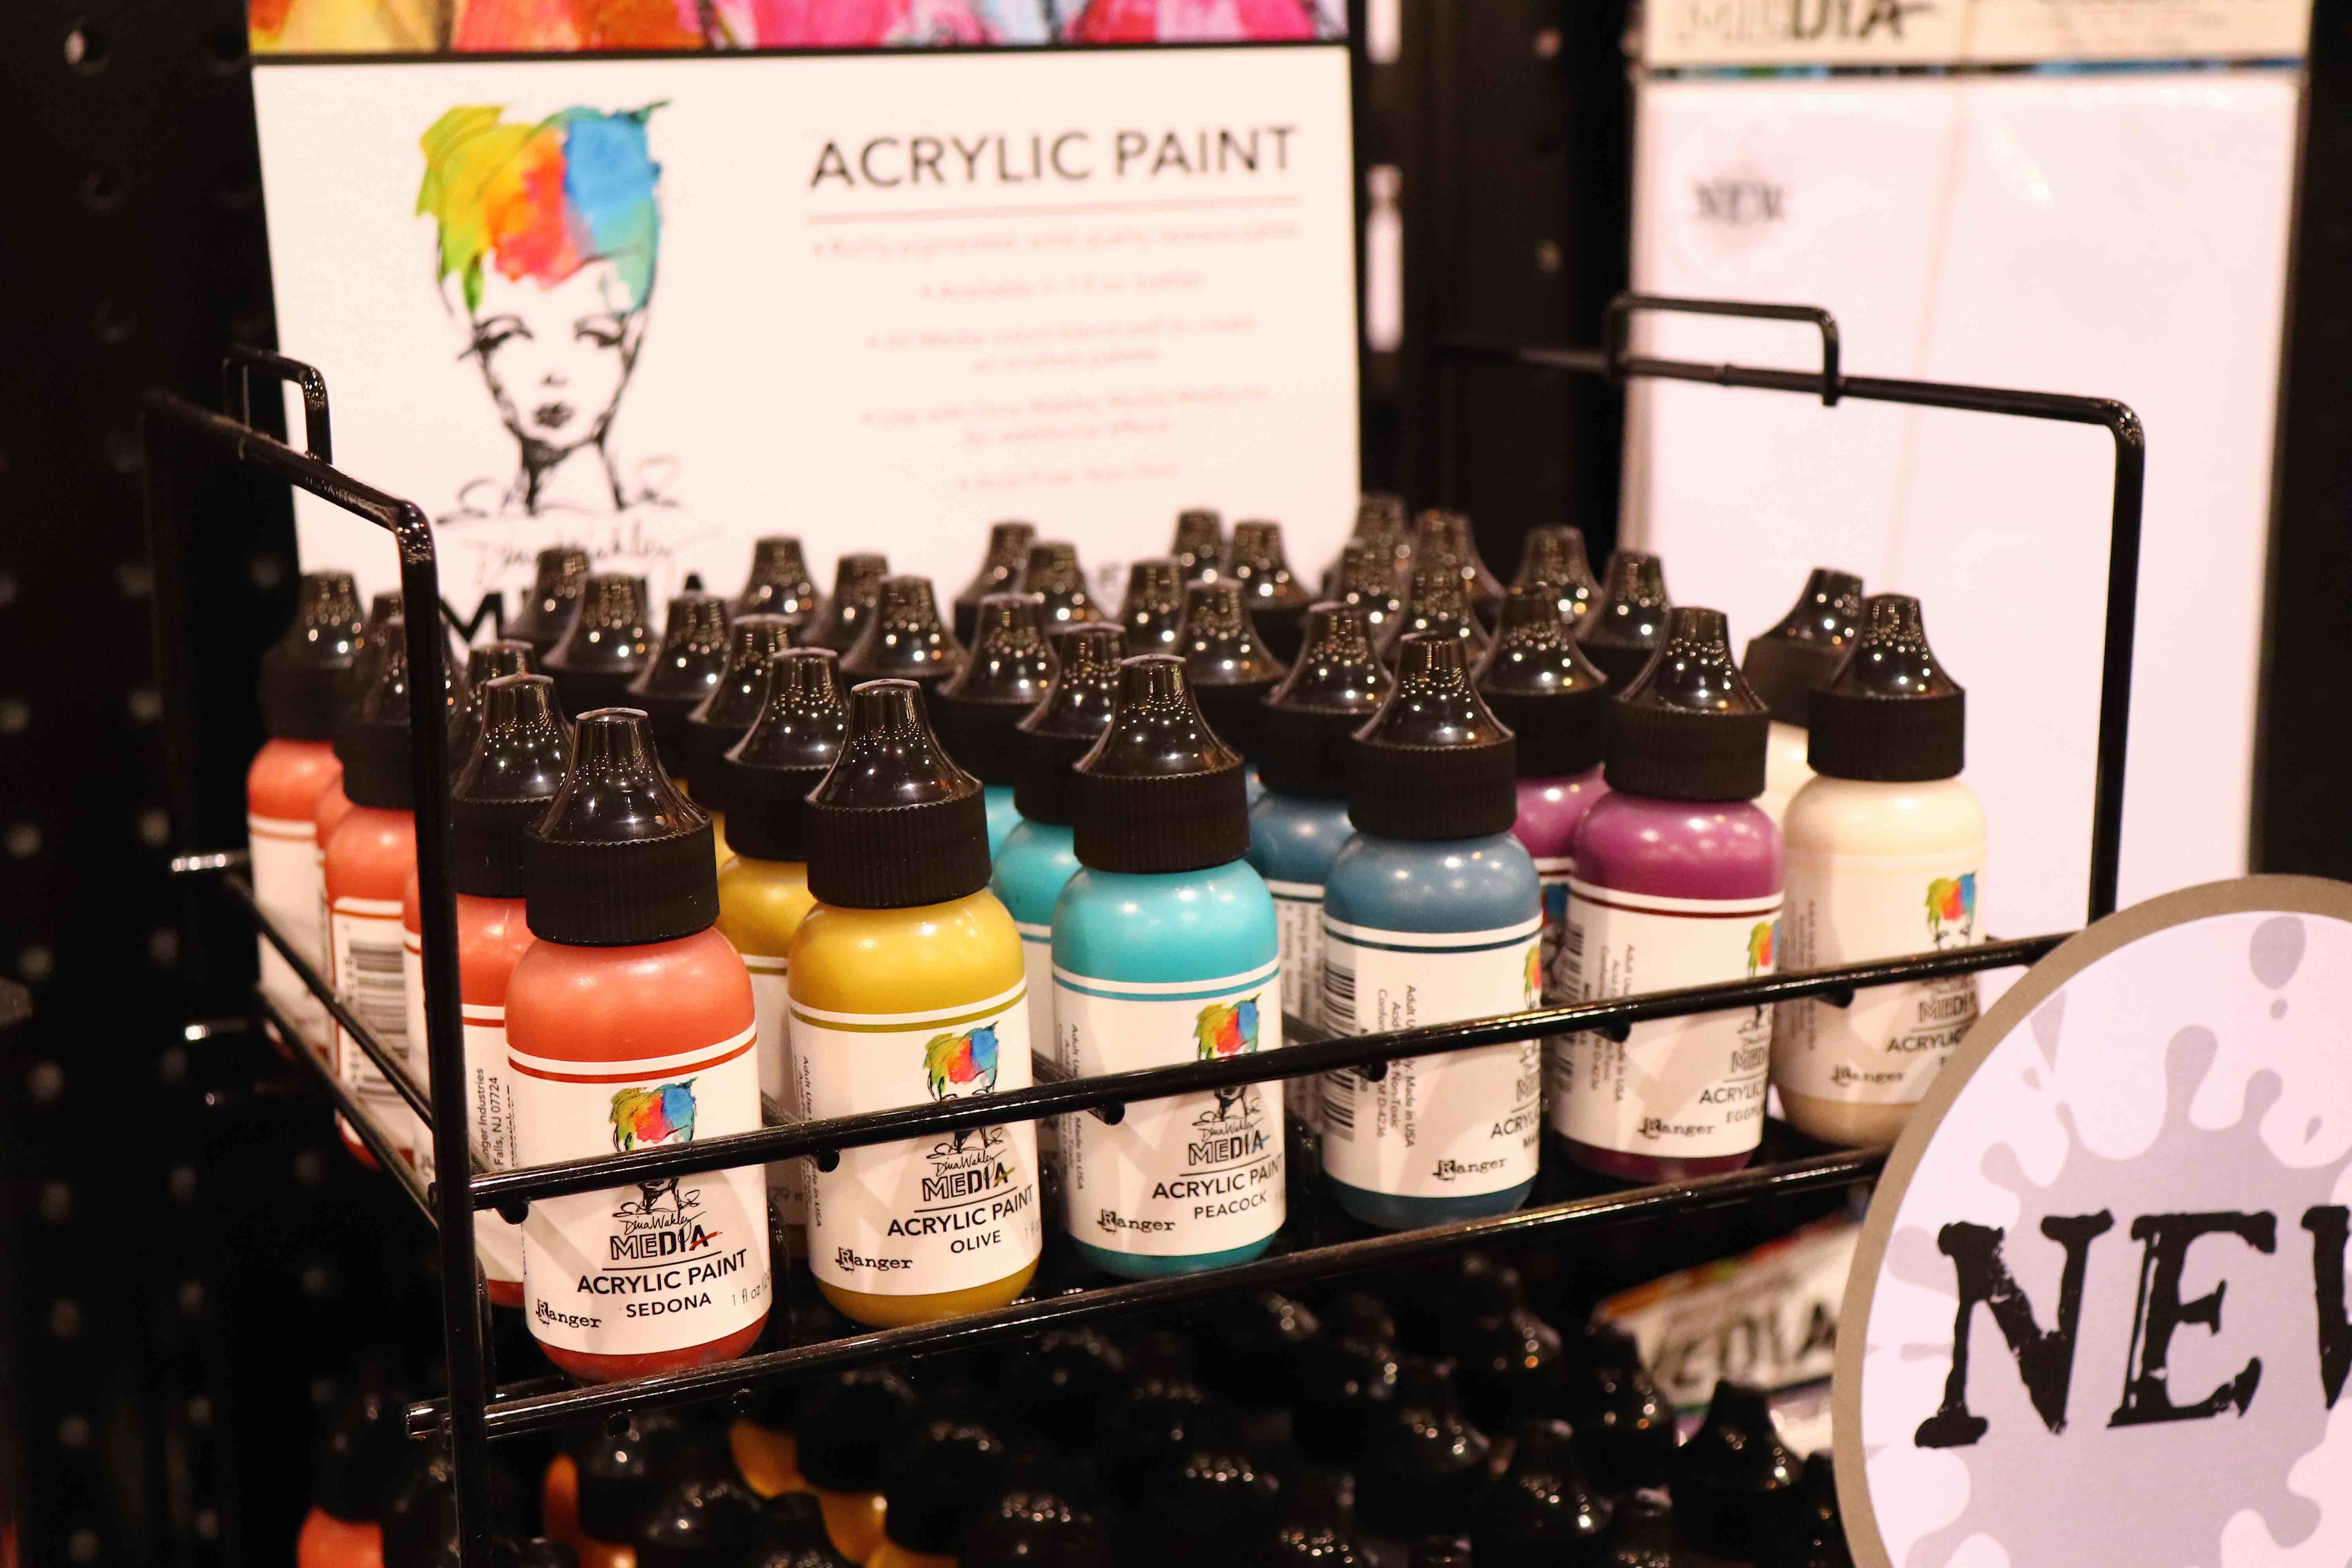
Ranger brought us some exciting new products, such as gorgeous Scribble Stick colors with Dina Wakely! Look at the stunning rainbow of color! Dina also has some stunning new colors for her acrylic paint line!
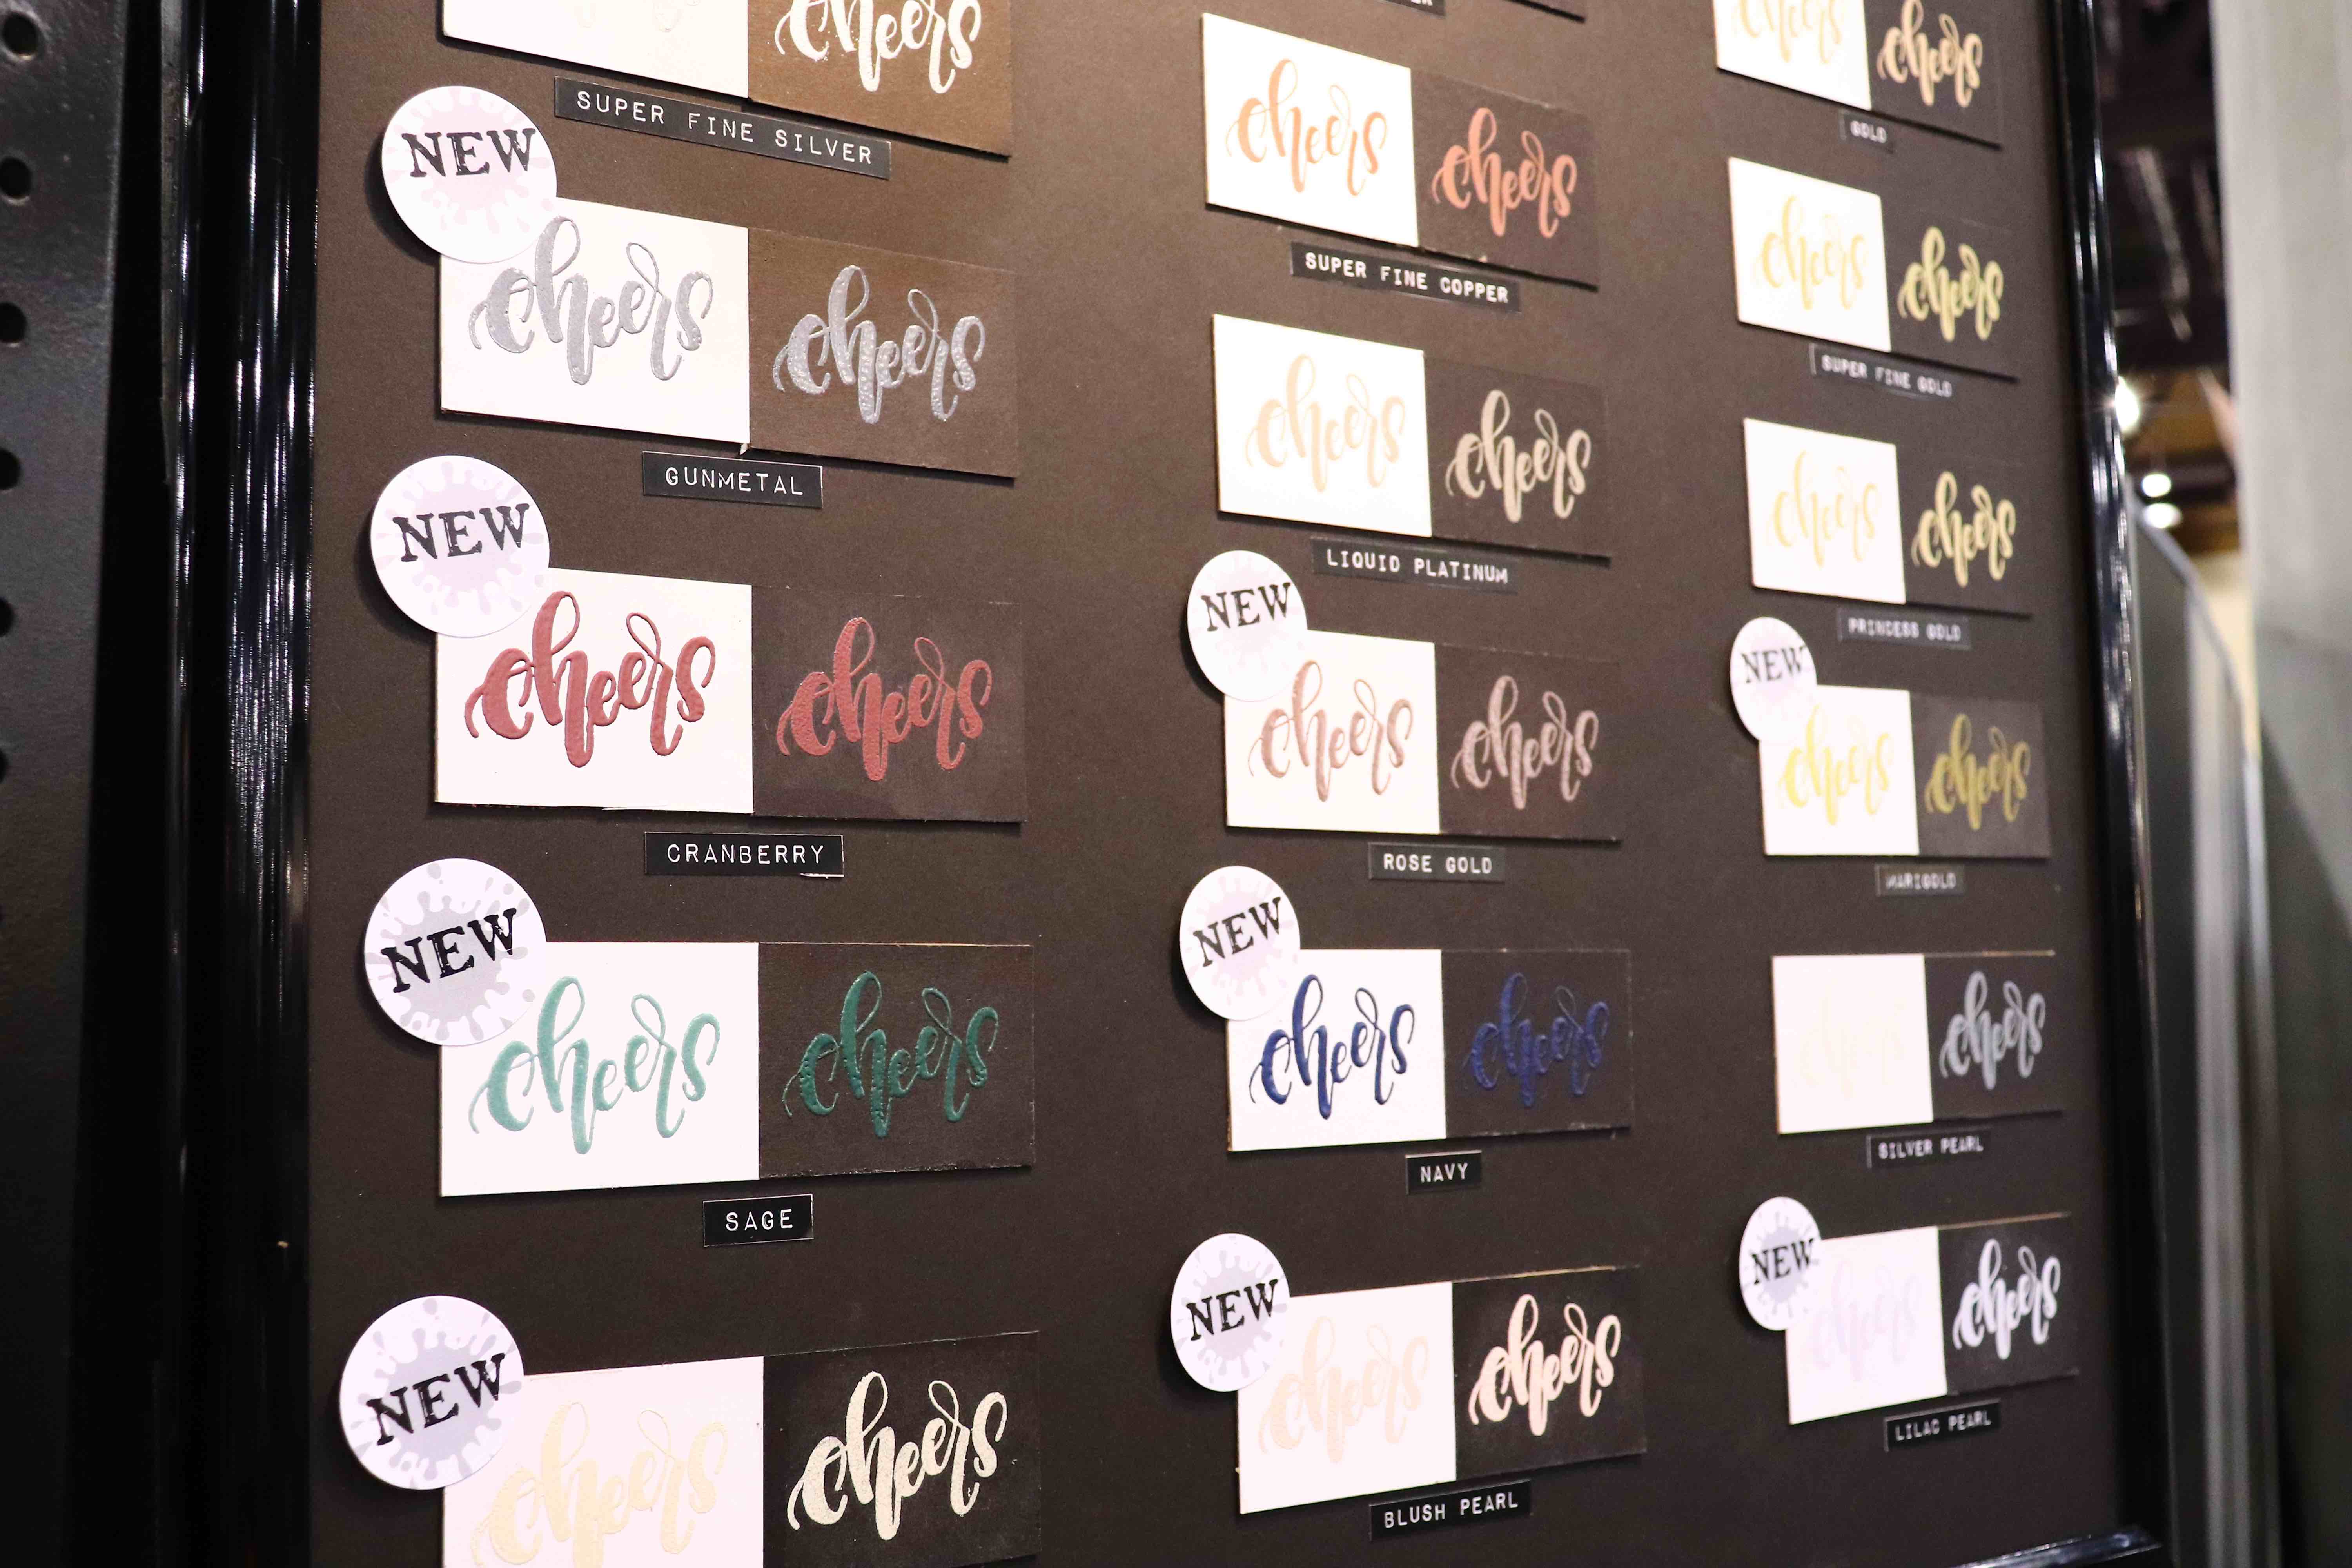
These new colored and metallic embossing powders are breathtaking from Ranger as well! Rose Gold anyone? YES PLEASE!!!
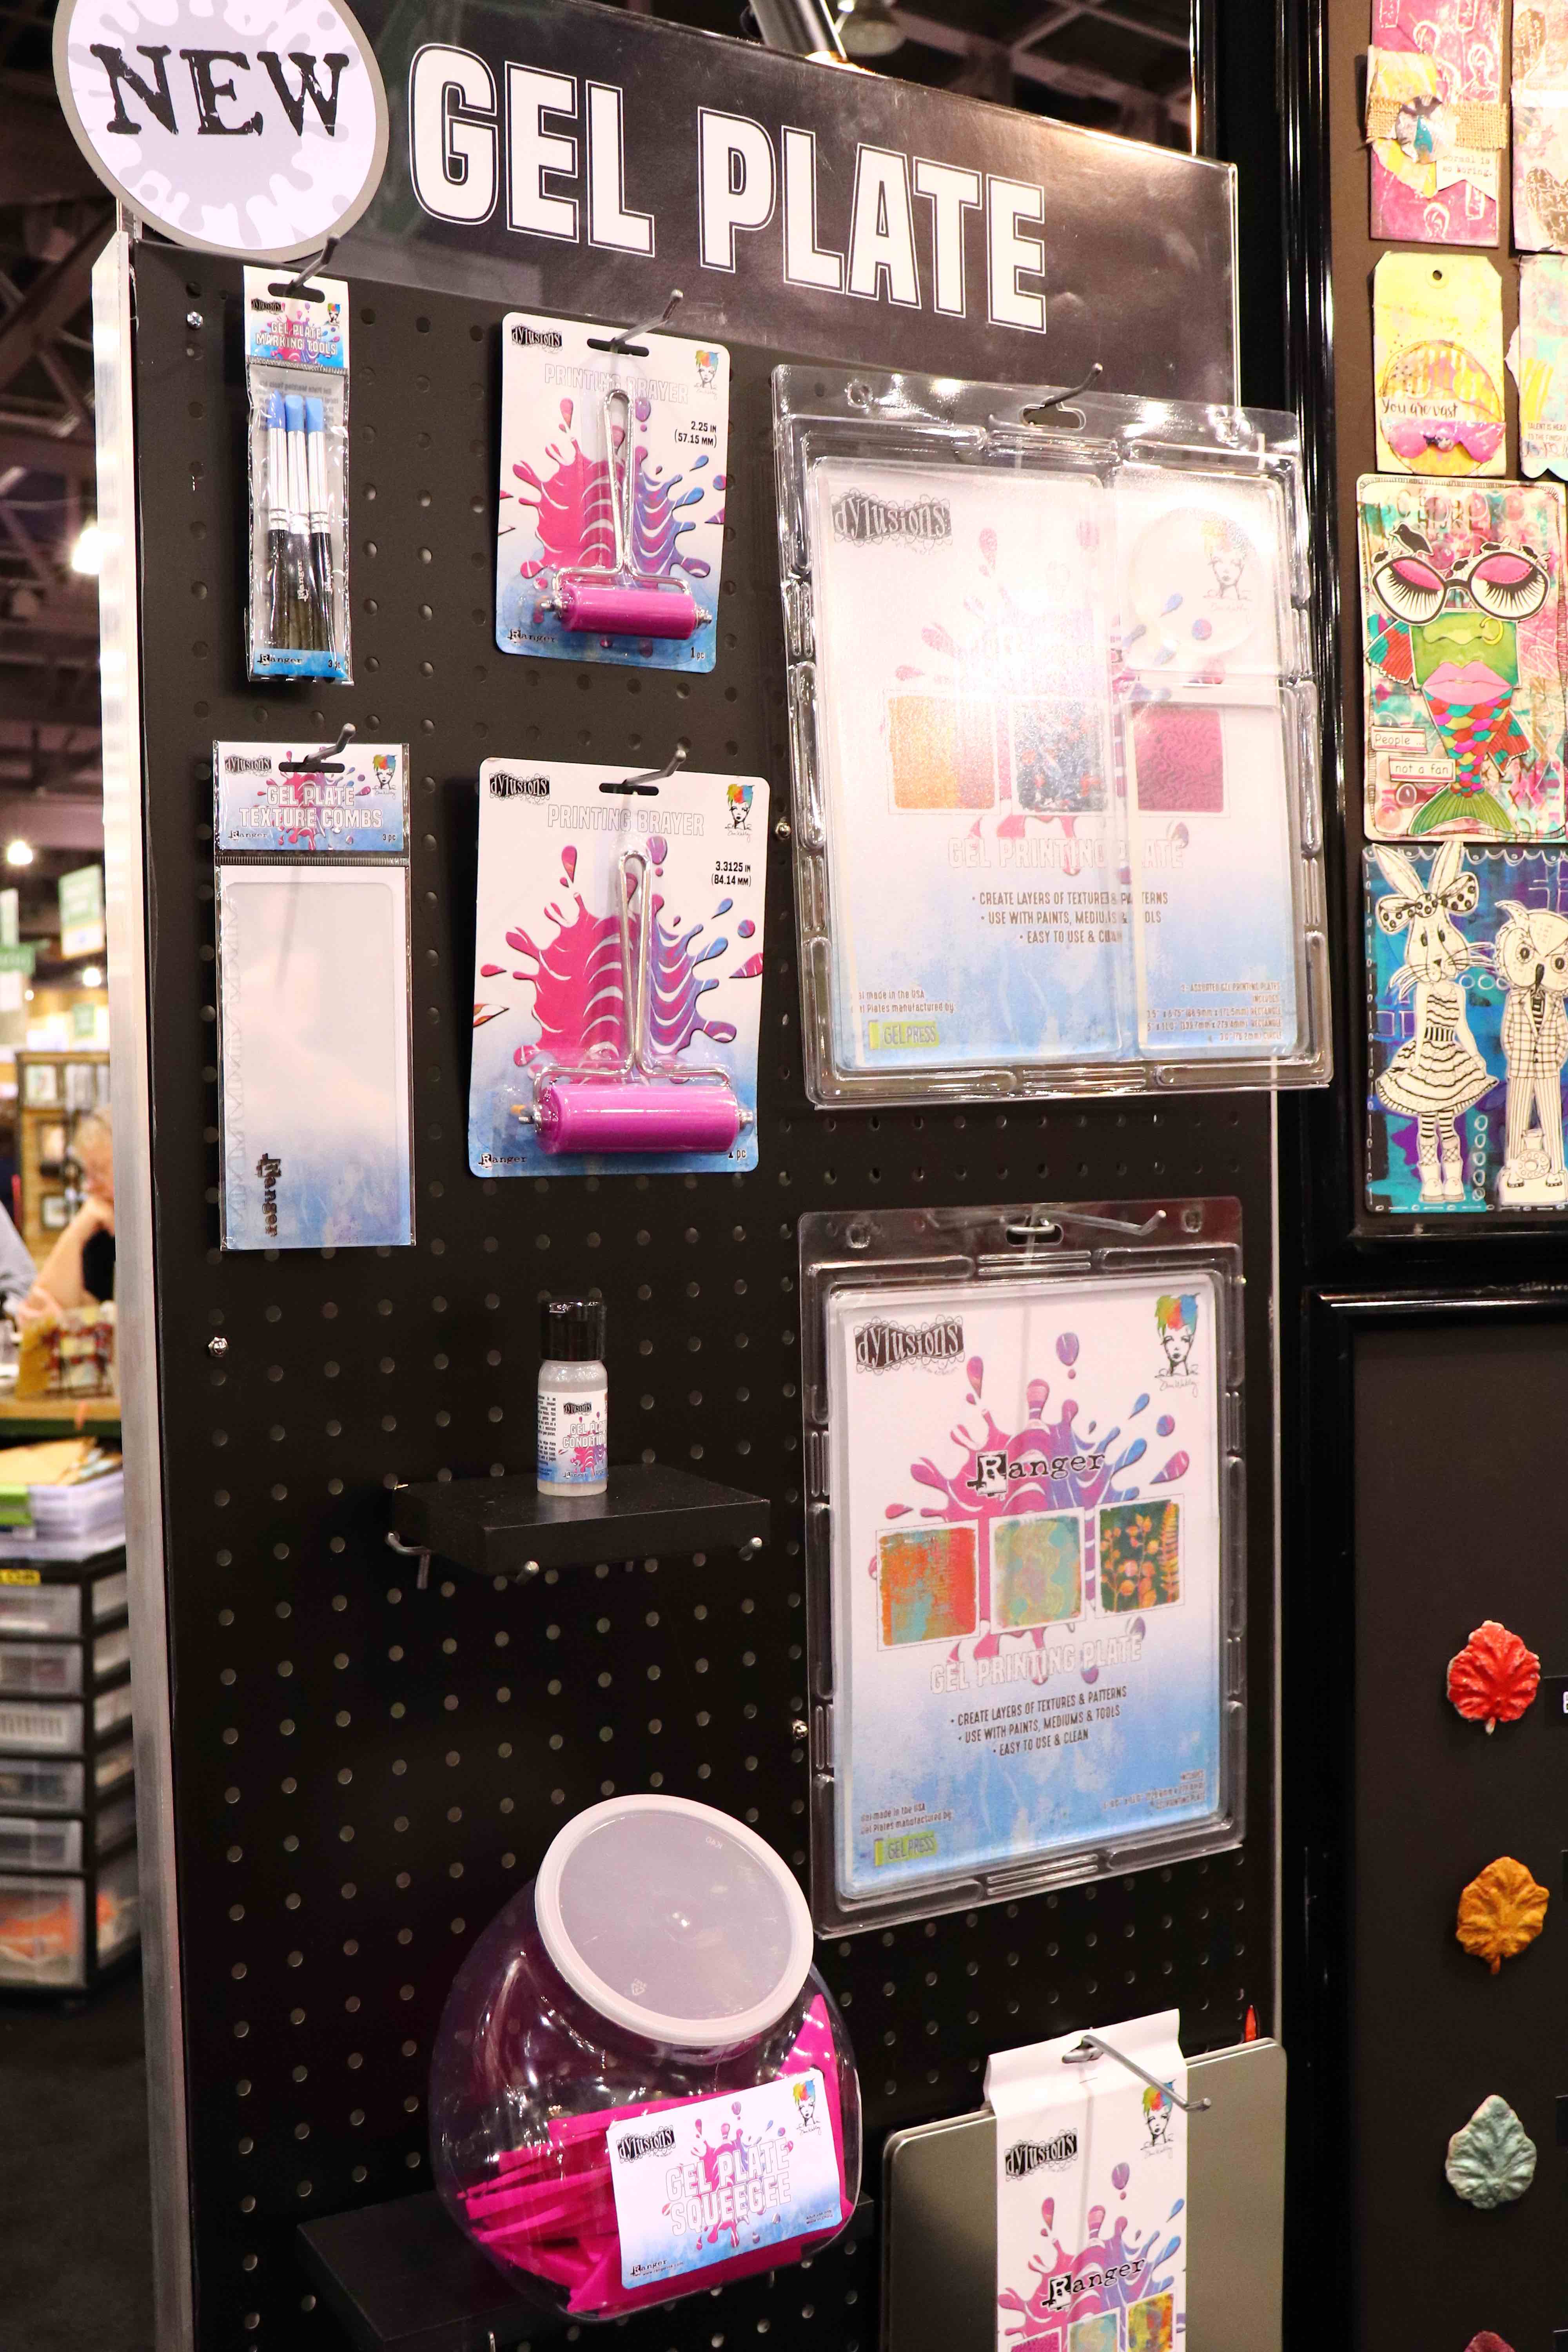
And we all know how much Dyan Reaveley loves to get inky! Check out her awesome gel plate products, hot off the press!
Plus, a bit of mixed media inspiration to get your Ranger-creativity flowing…!
Have you seen Tim Holtz demo his new Blending Brushes? These are fabulous for ink blending and stenciling! Watch the video below to see why these brushes are so innovative!
Check out the NEW Stencil Brushes from Tim Holtz and Ranger
There are so many new things from Tim Holtz and Ranger! Tim's innovative blending brushes are a DREAM! The Blending Brushes are available for reserve NOW! http://bit.ly/2DsmypJ
Posted by SimonSaysStamp.com on Saturday, January 20, 2018
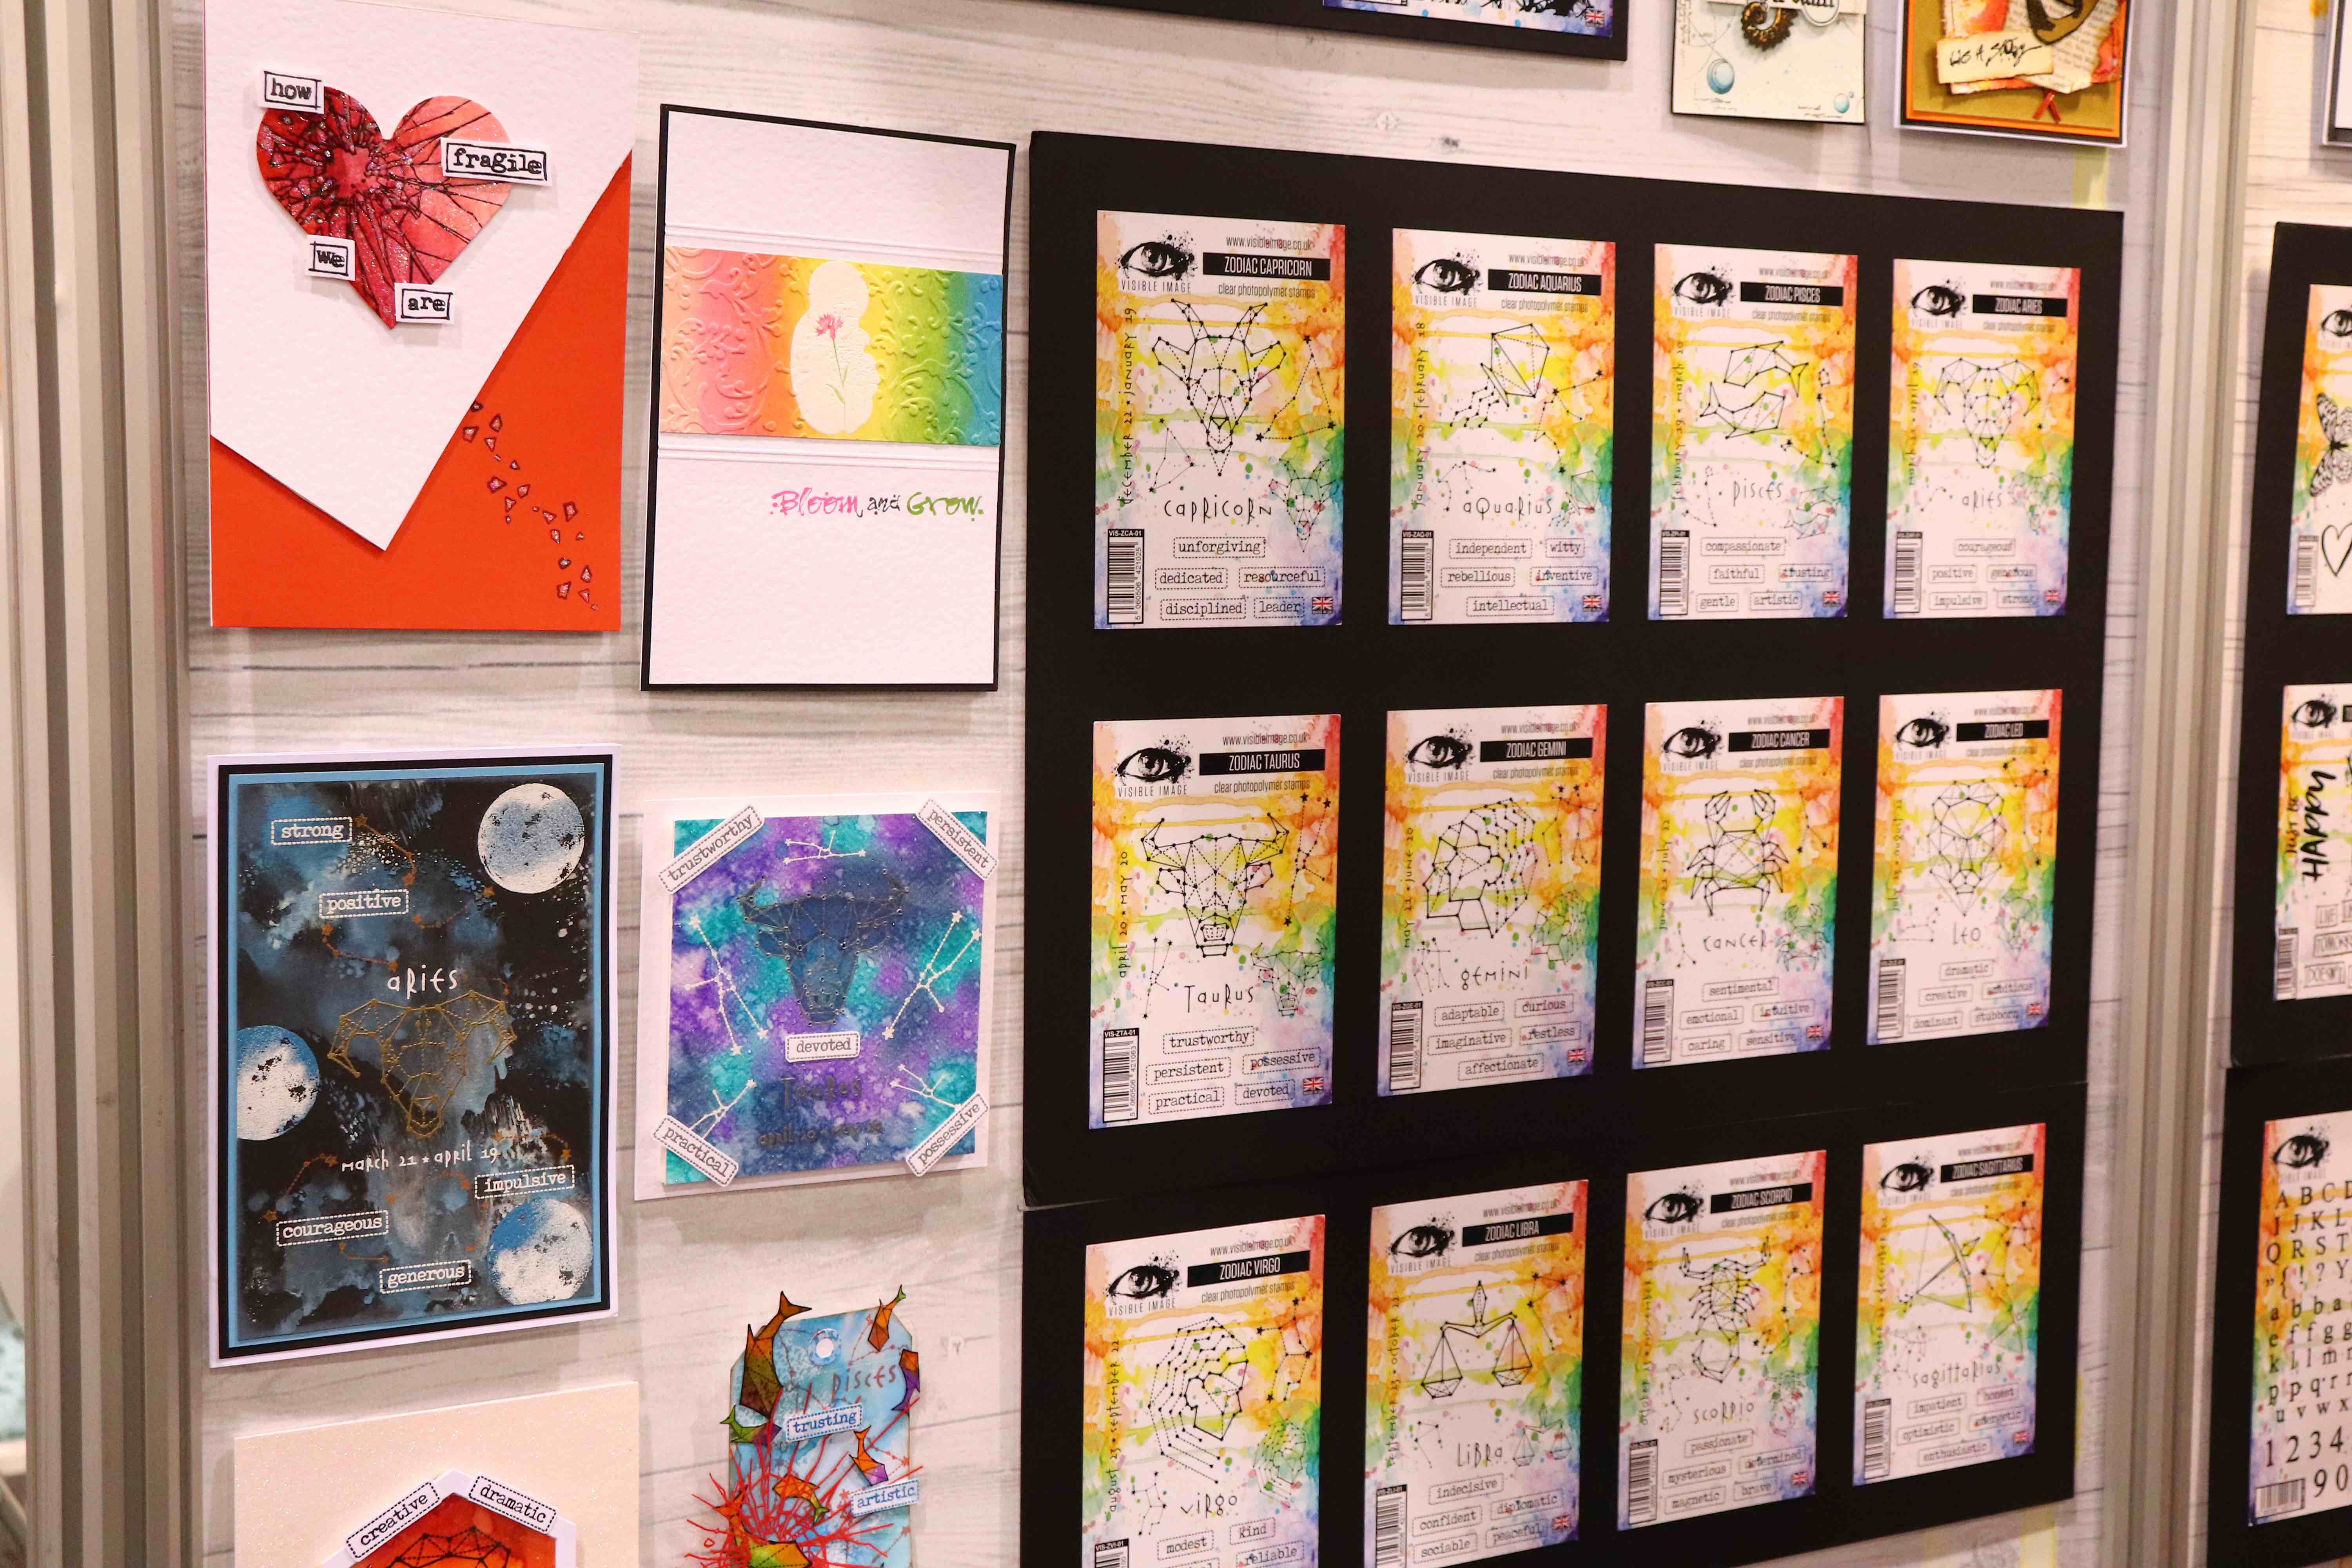
We are super excited about a couple of NEW brands to our Simon Says Stamp store, including Vision Image! Check out their detailed and unique stamp and stencil designs!

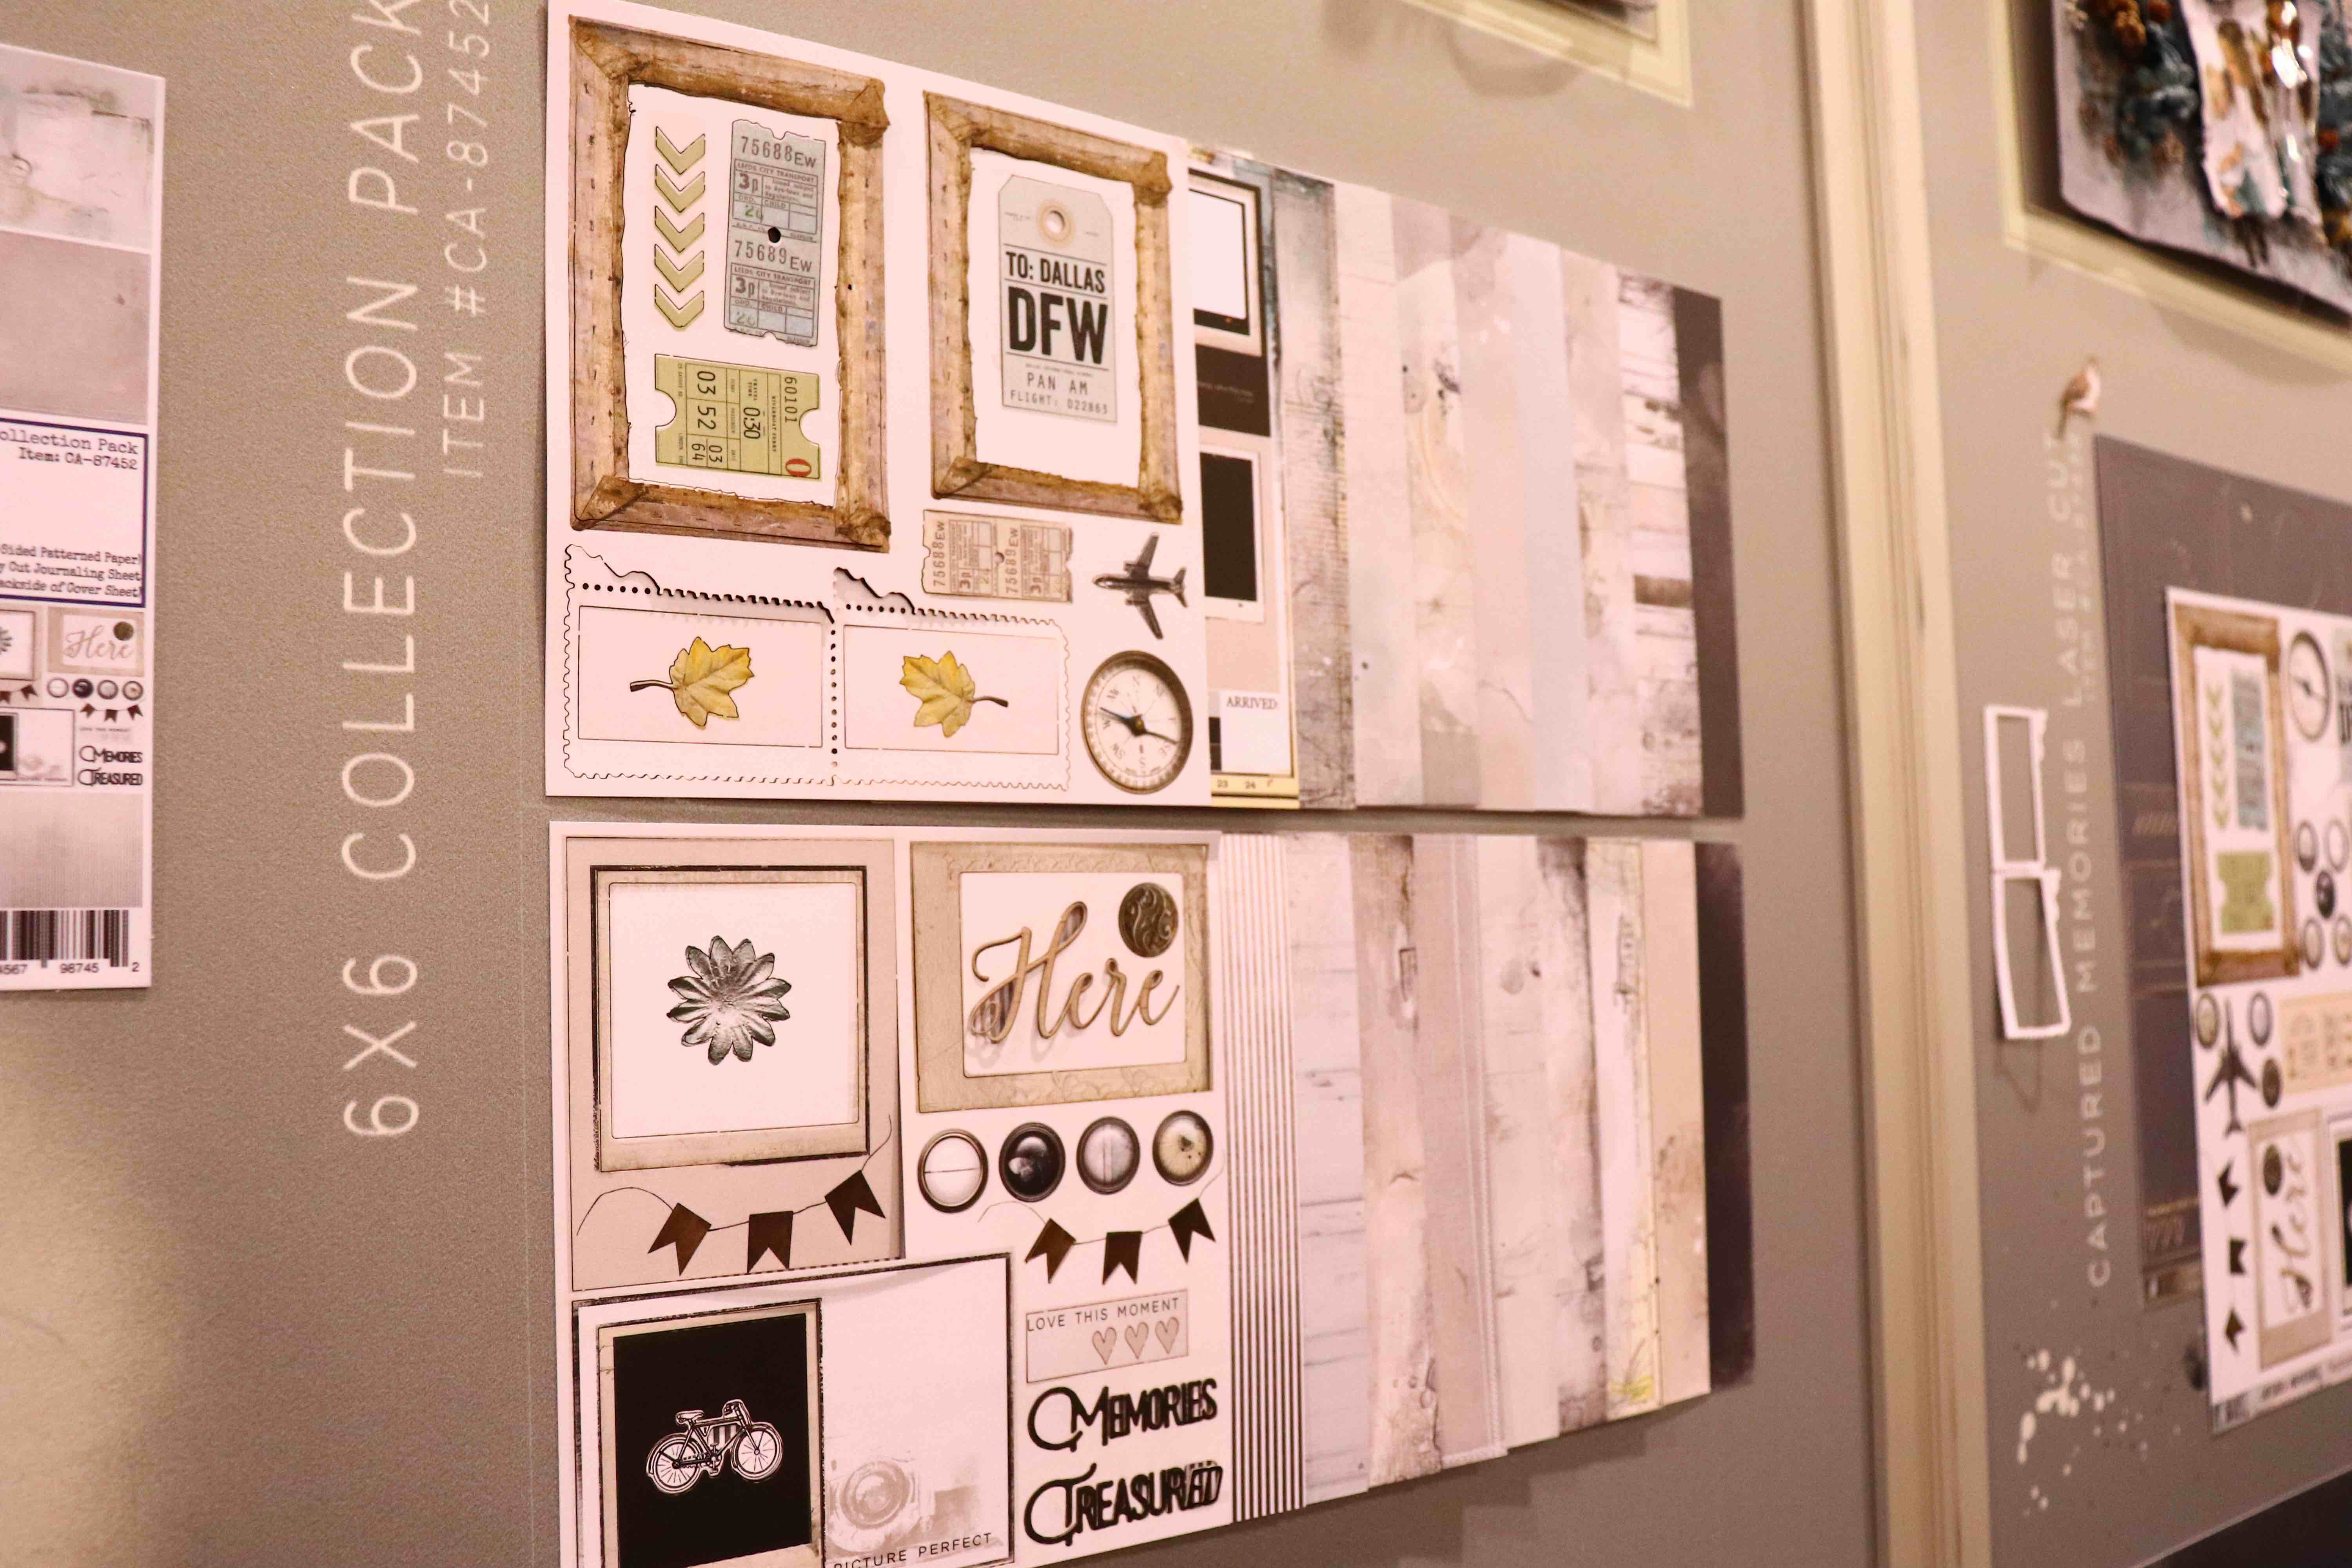
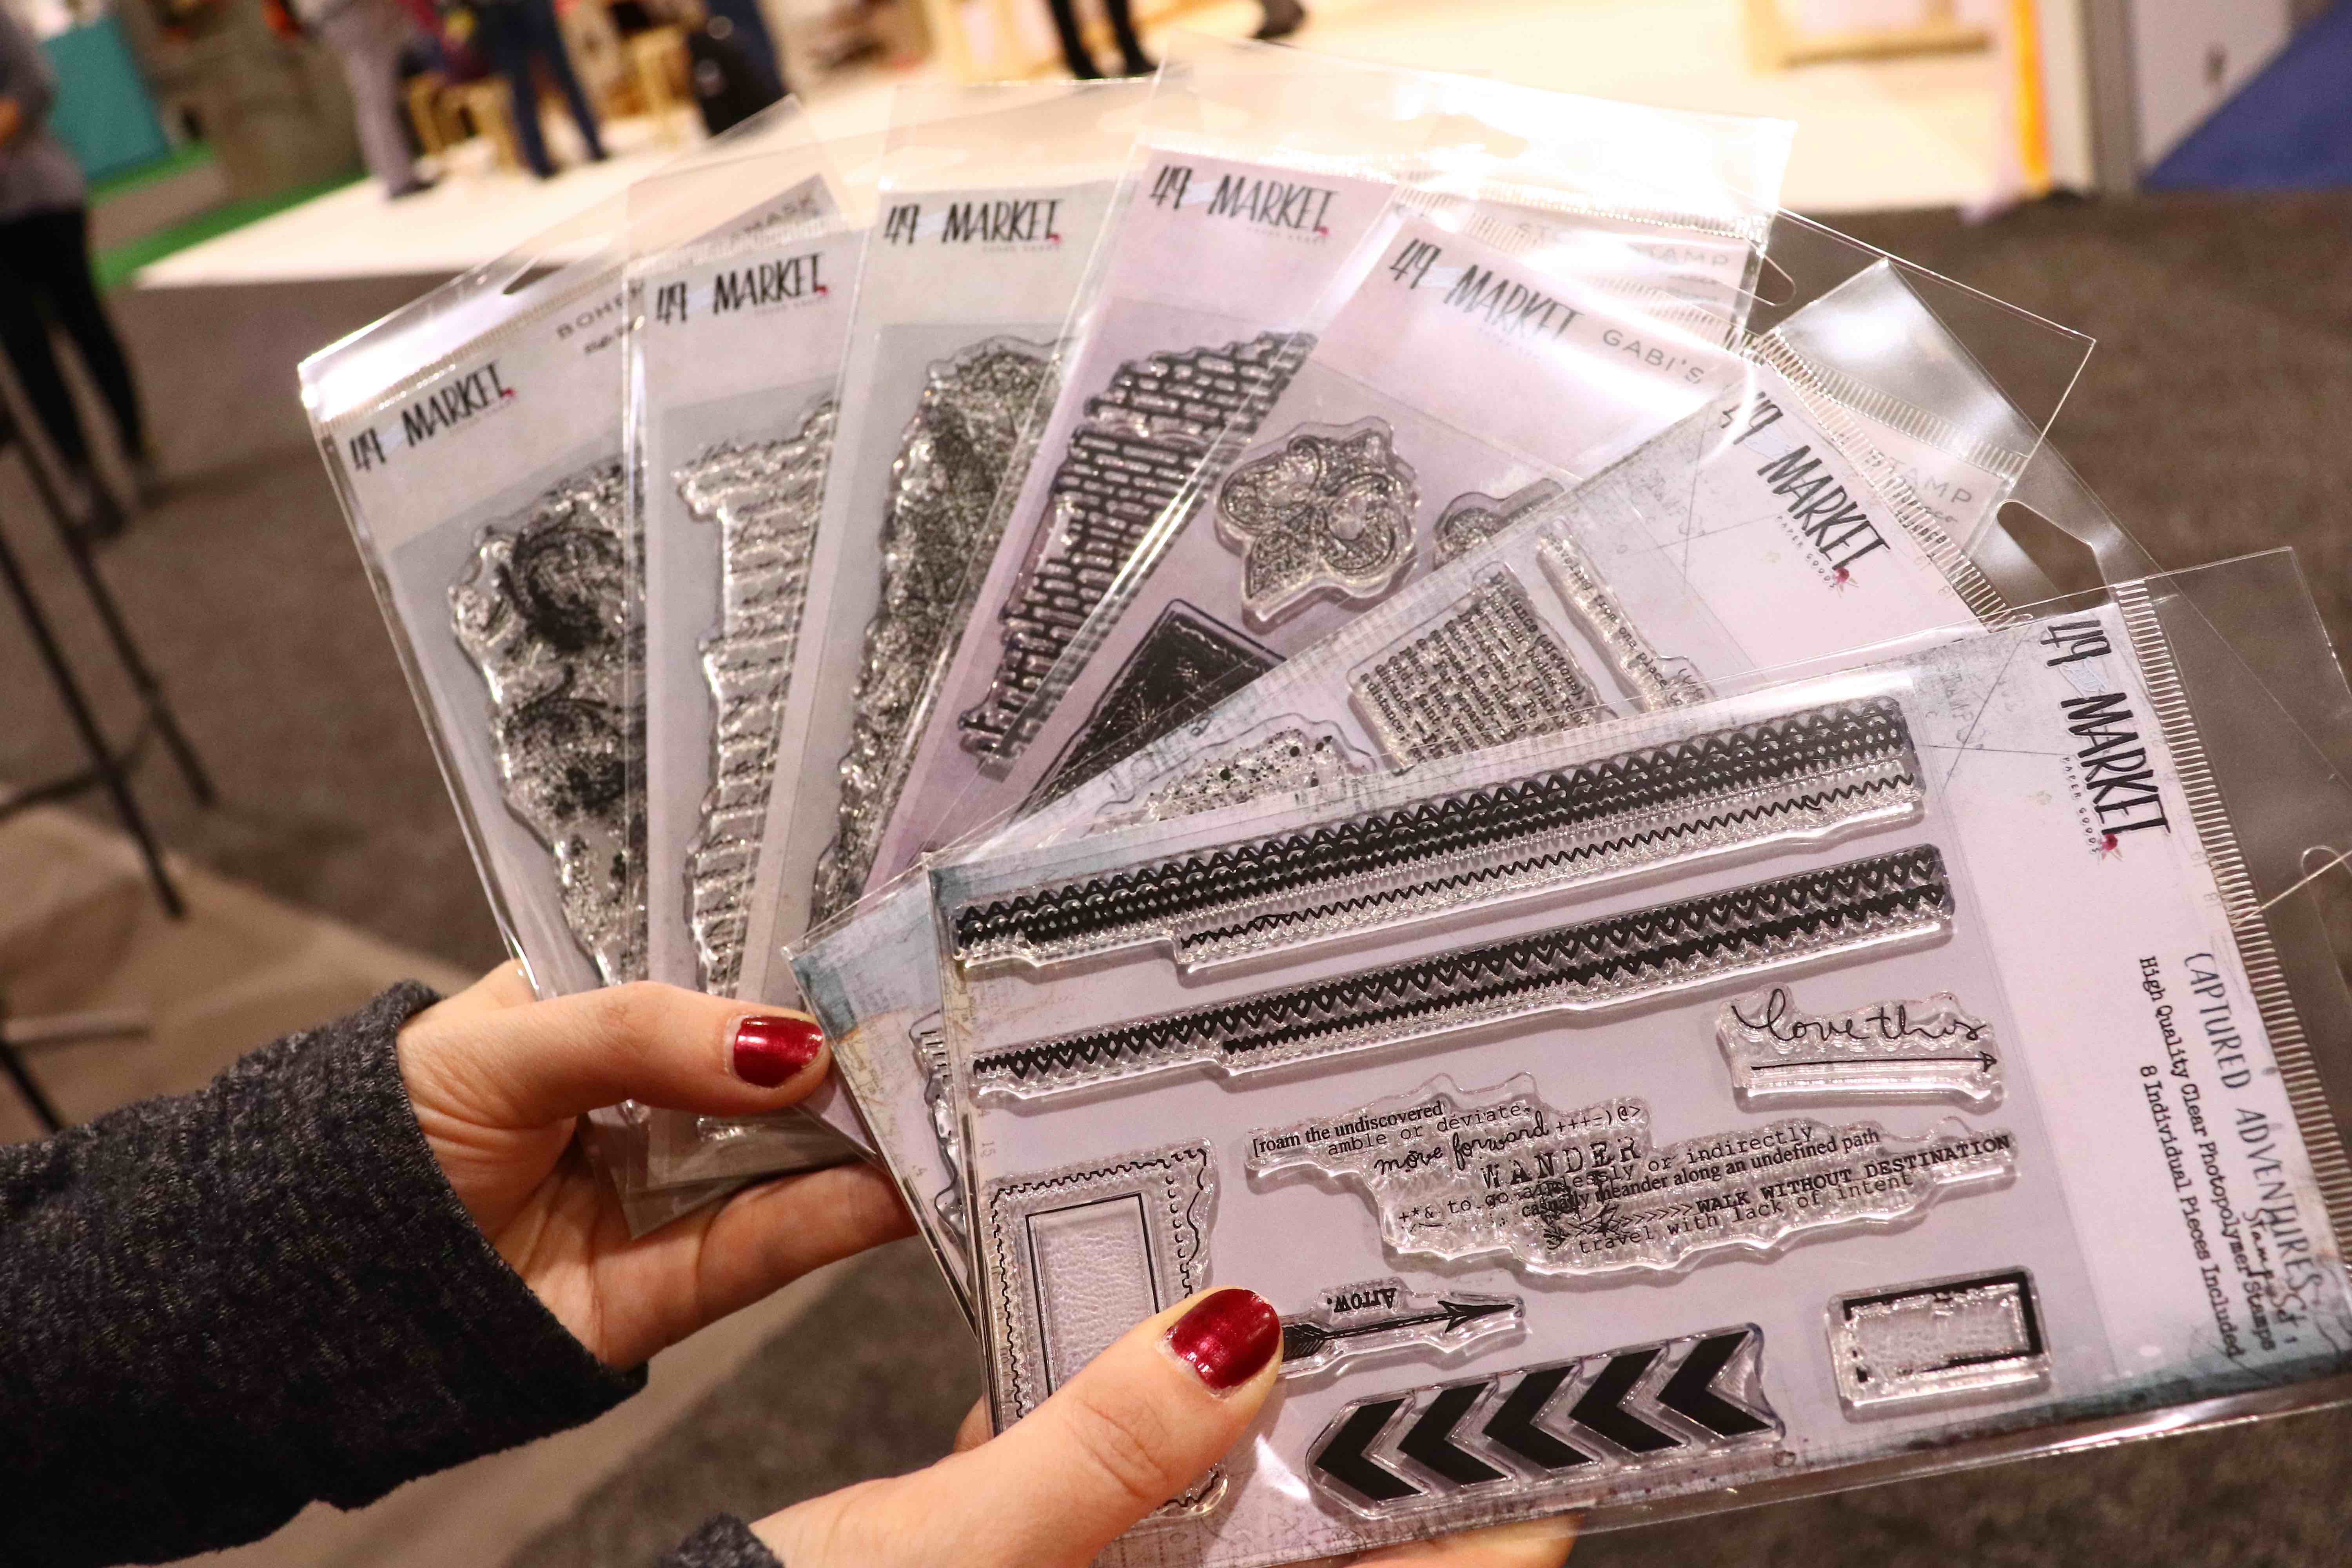
Another brand we are thrilled to be bringing to you is 49 Market! Their papers are STUNNING and come in 6×6 pads; the pads even include super detailed laser die cut images to embellish with! The style is PERFECT for those of you that love the look of mixed media but don’t want to create a mess!
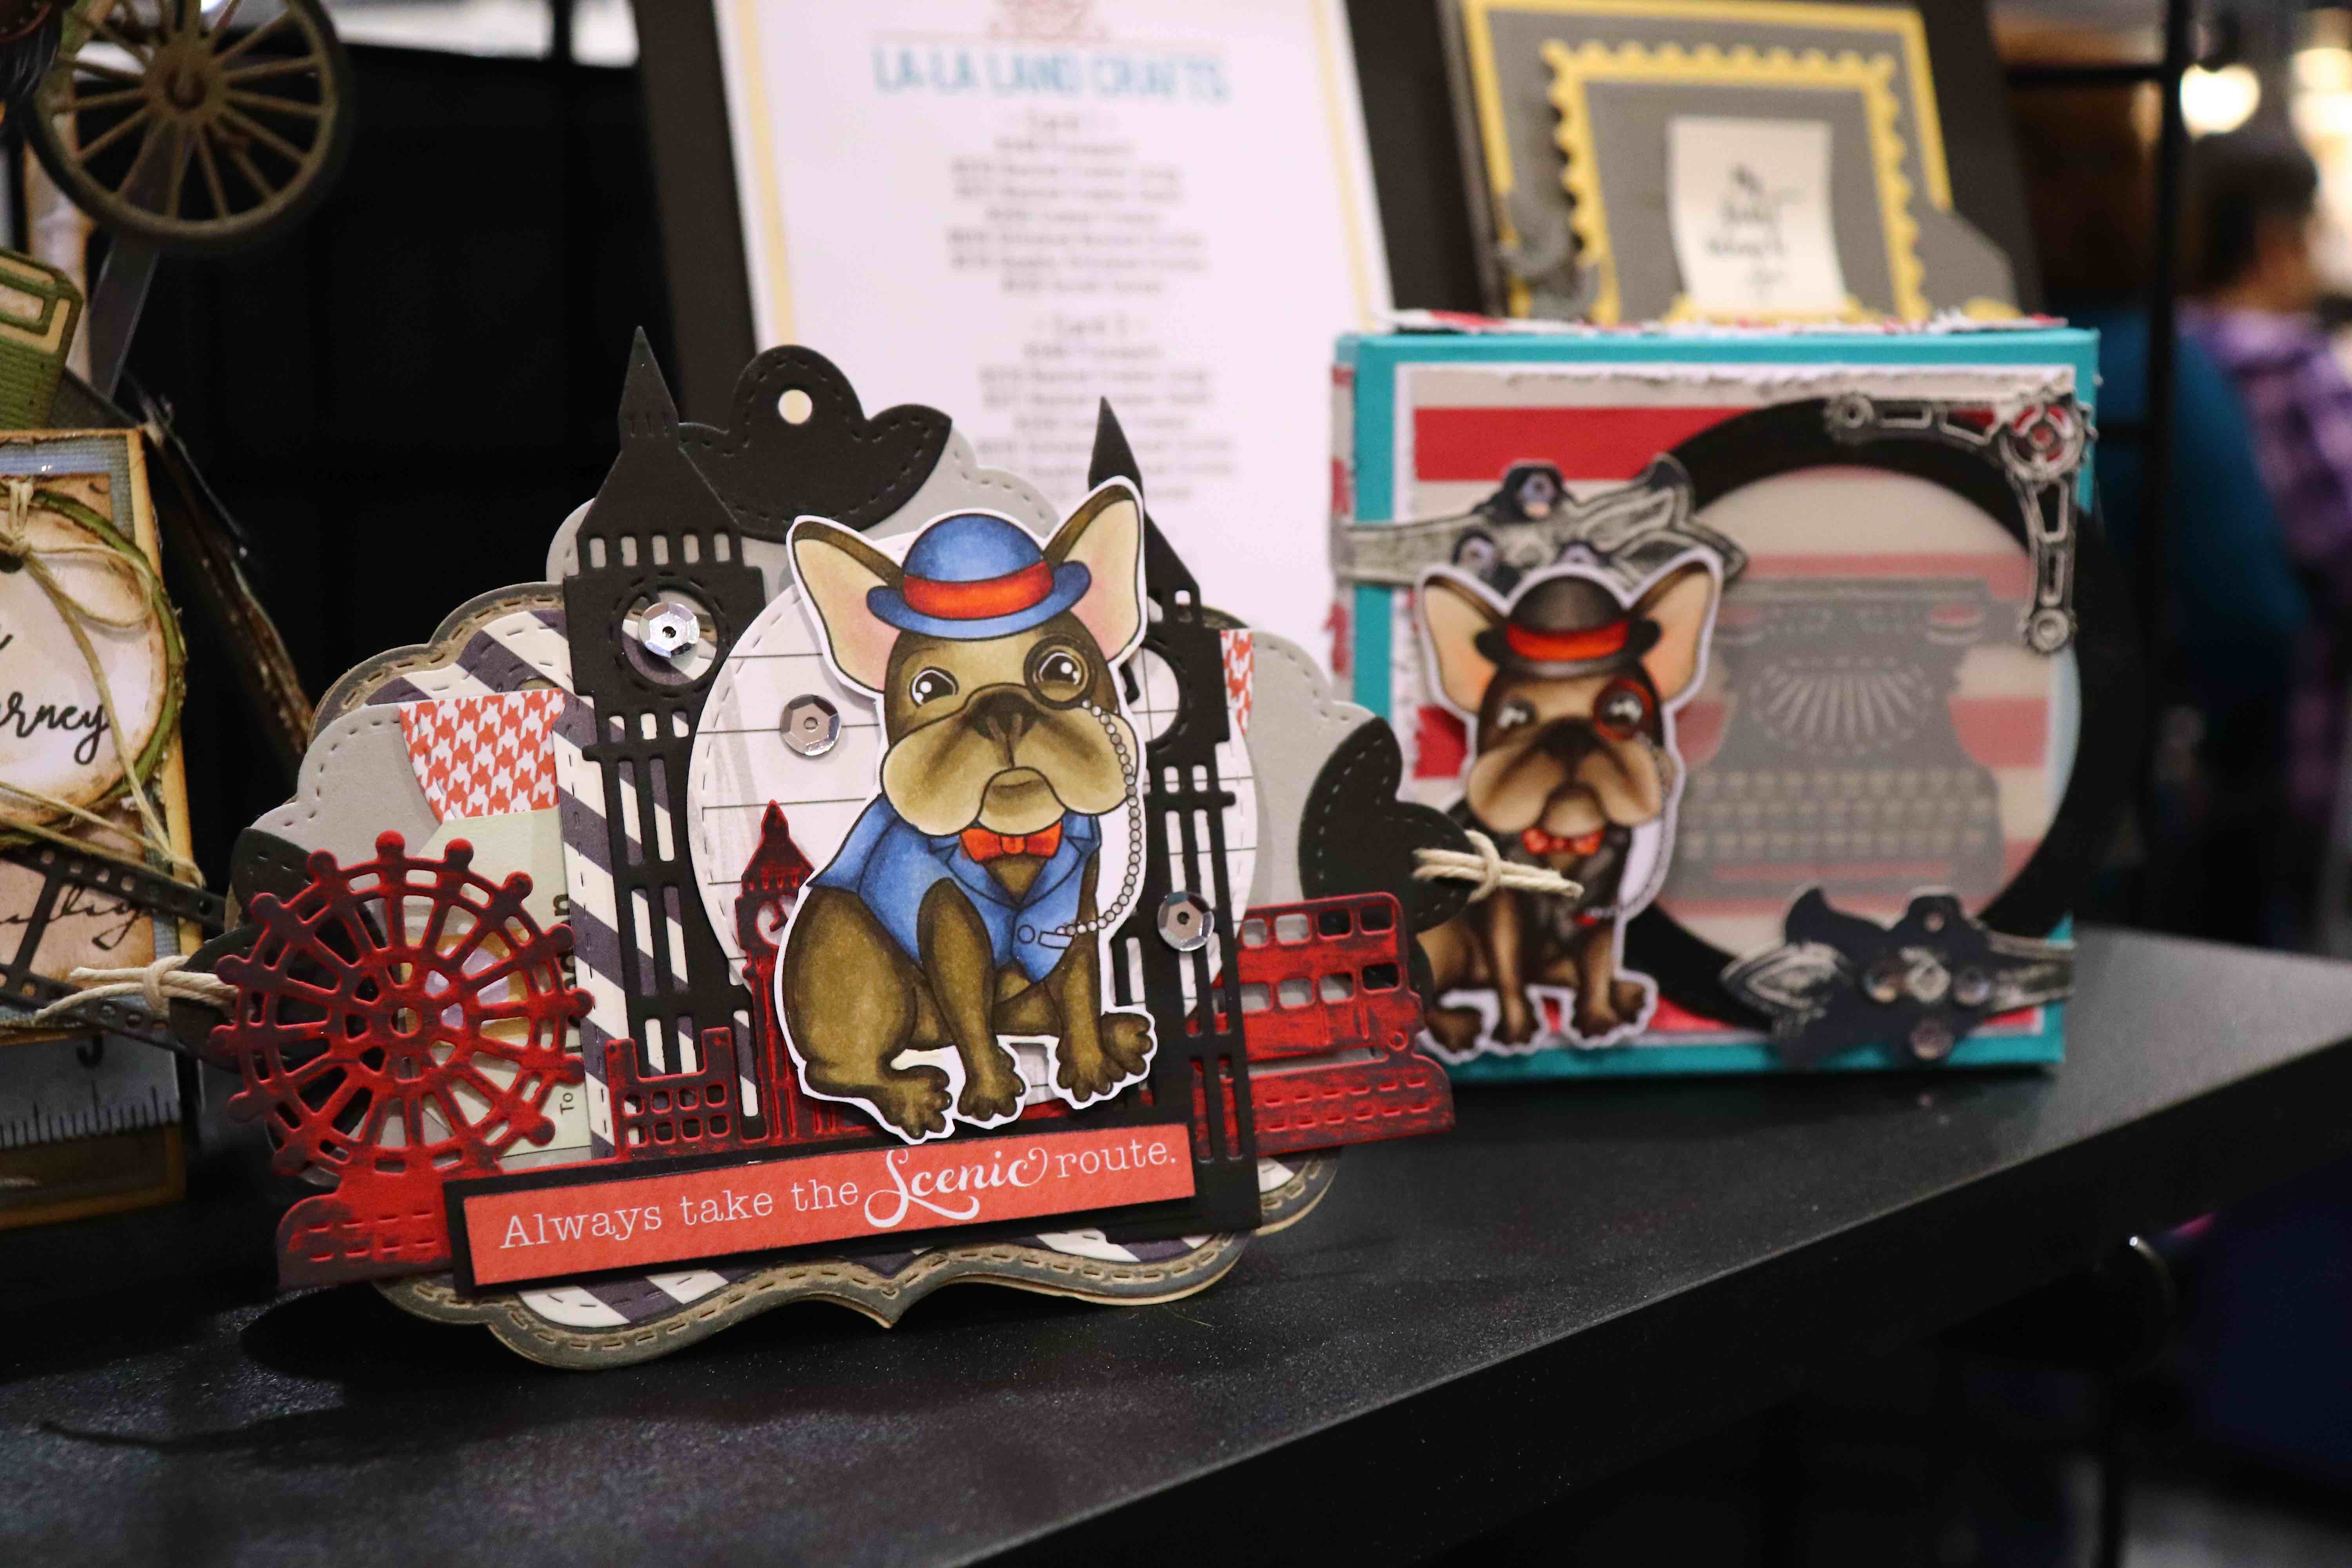
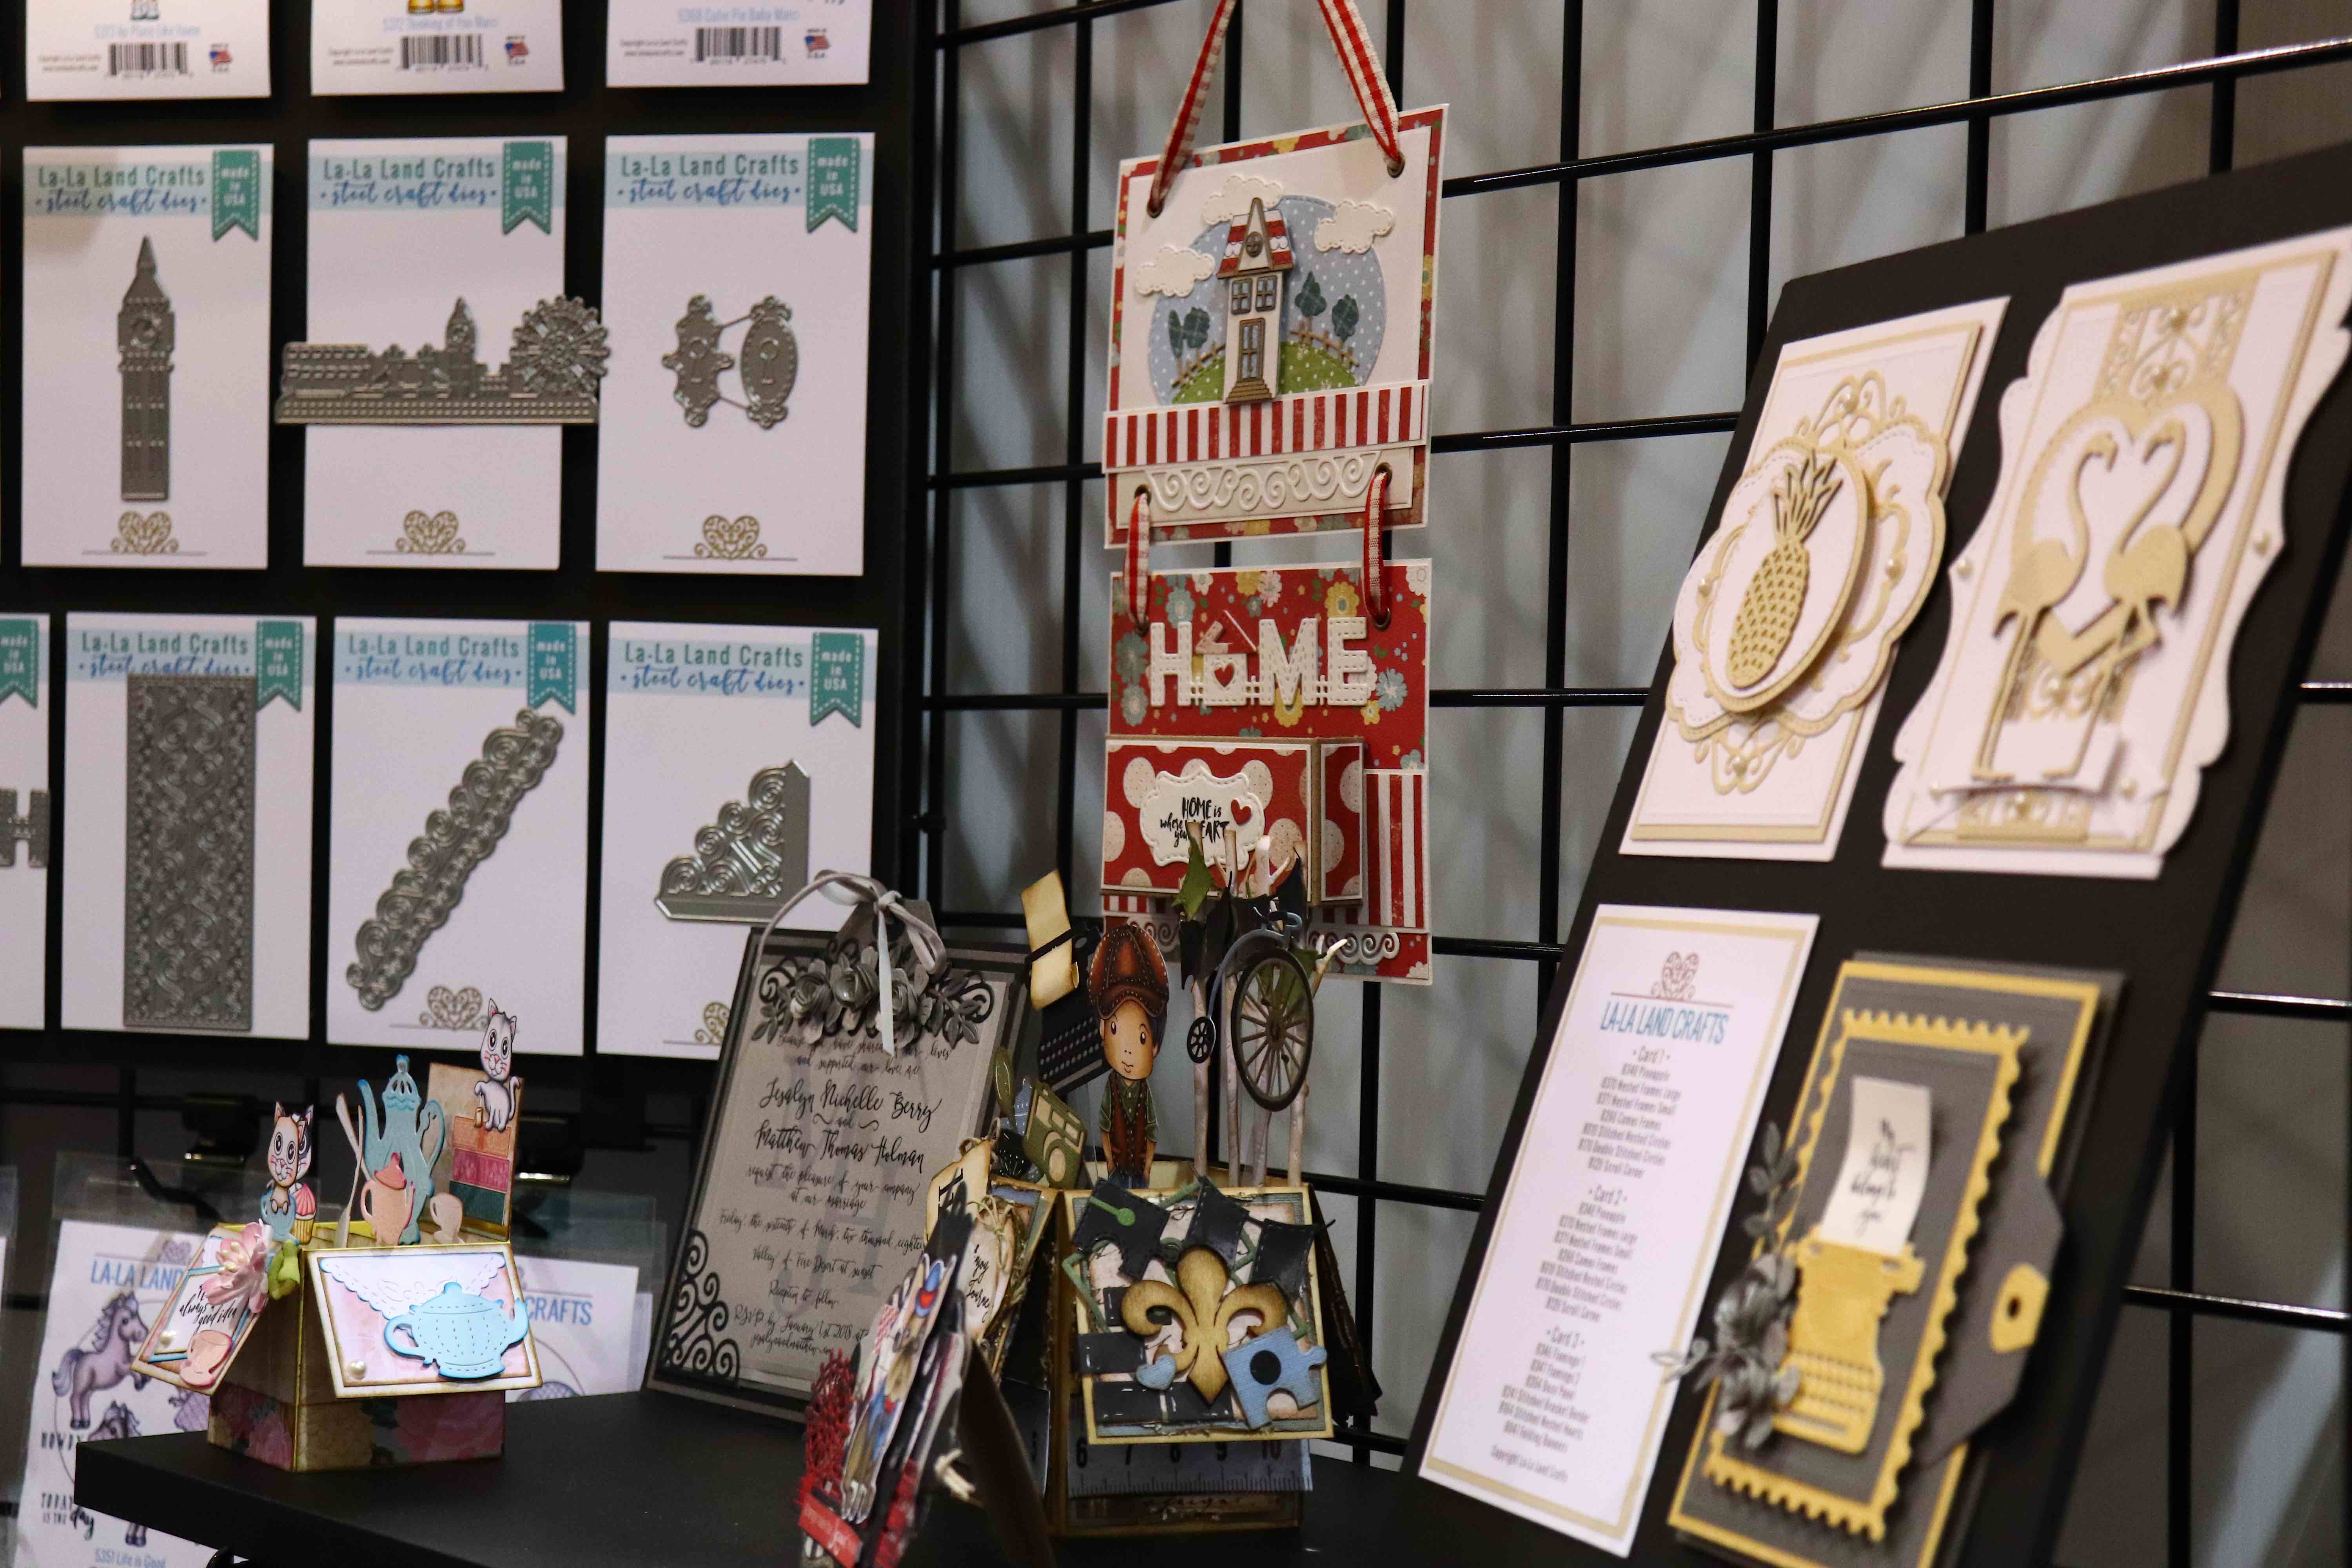
Adorable and brand new La La Land Crafts products are too precious for words! That French Bulldog with the monocle? OH MY!!
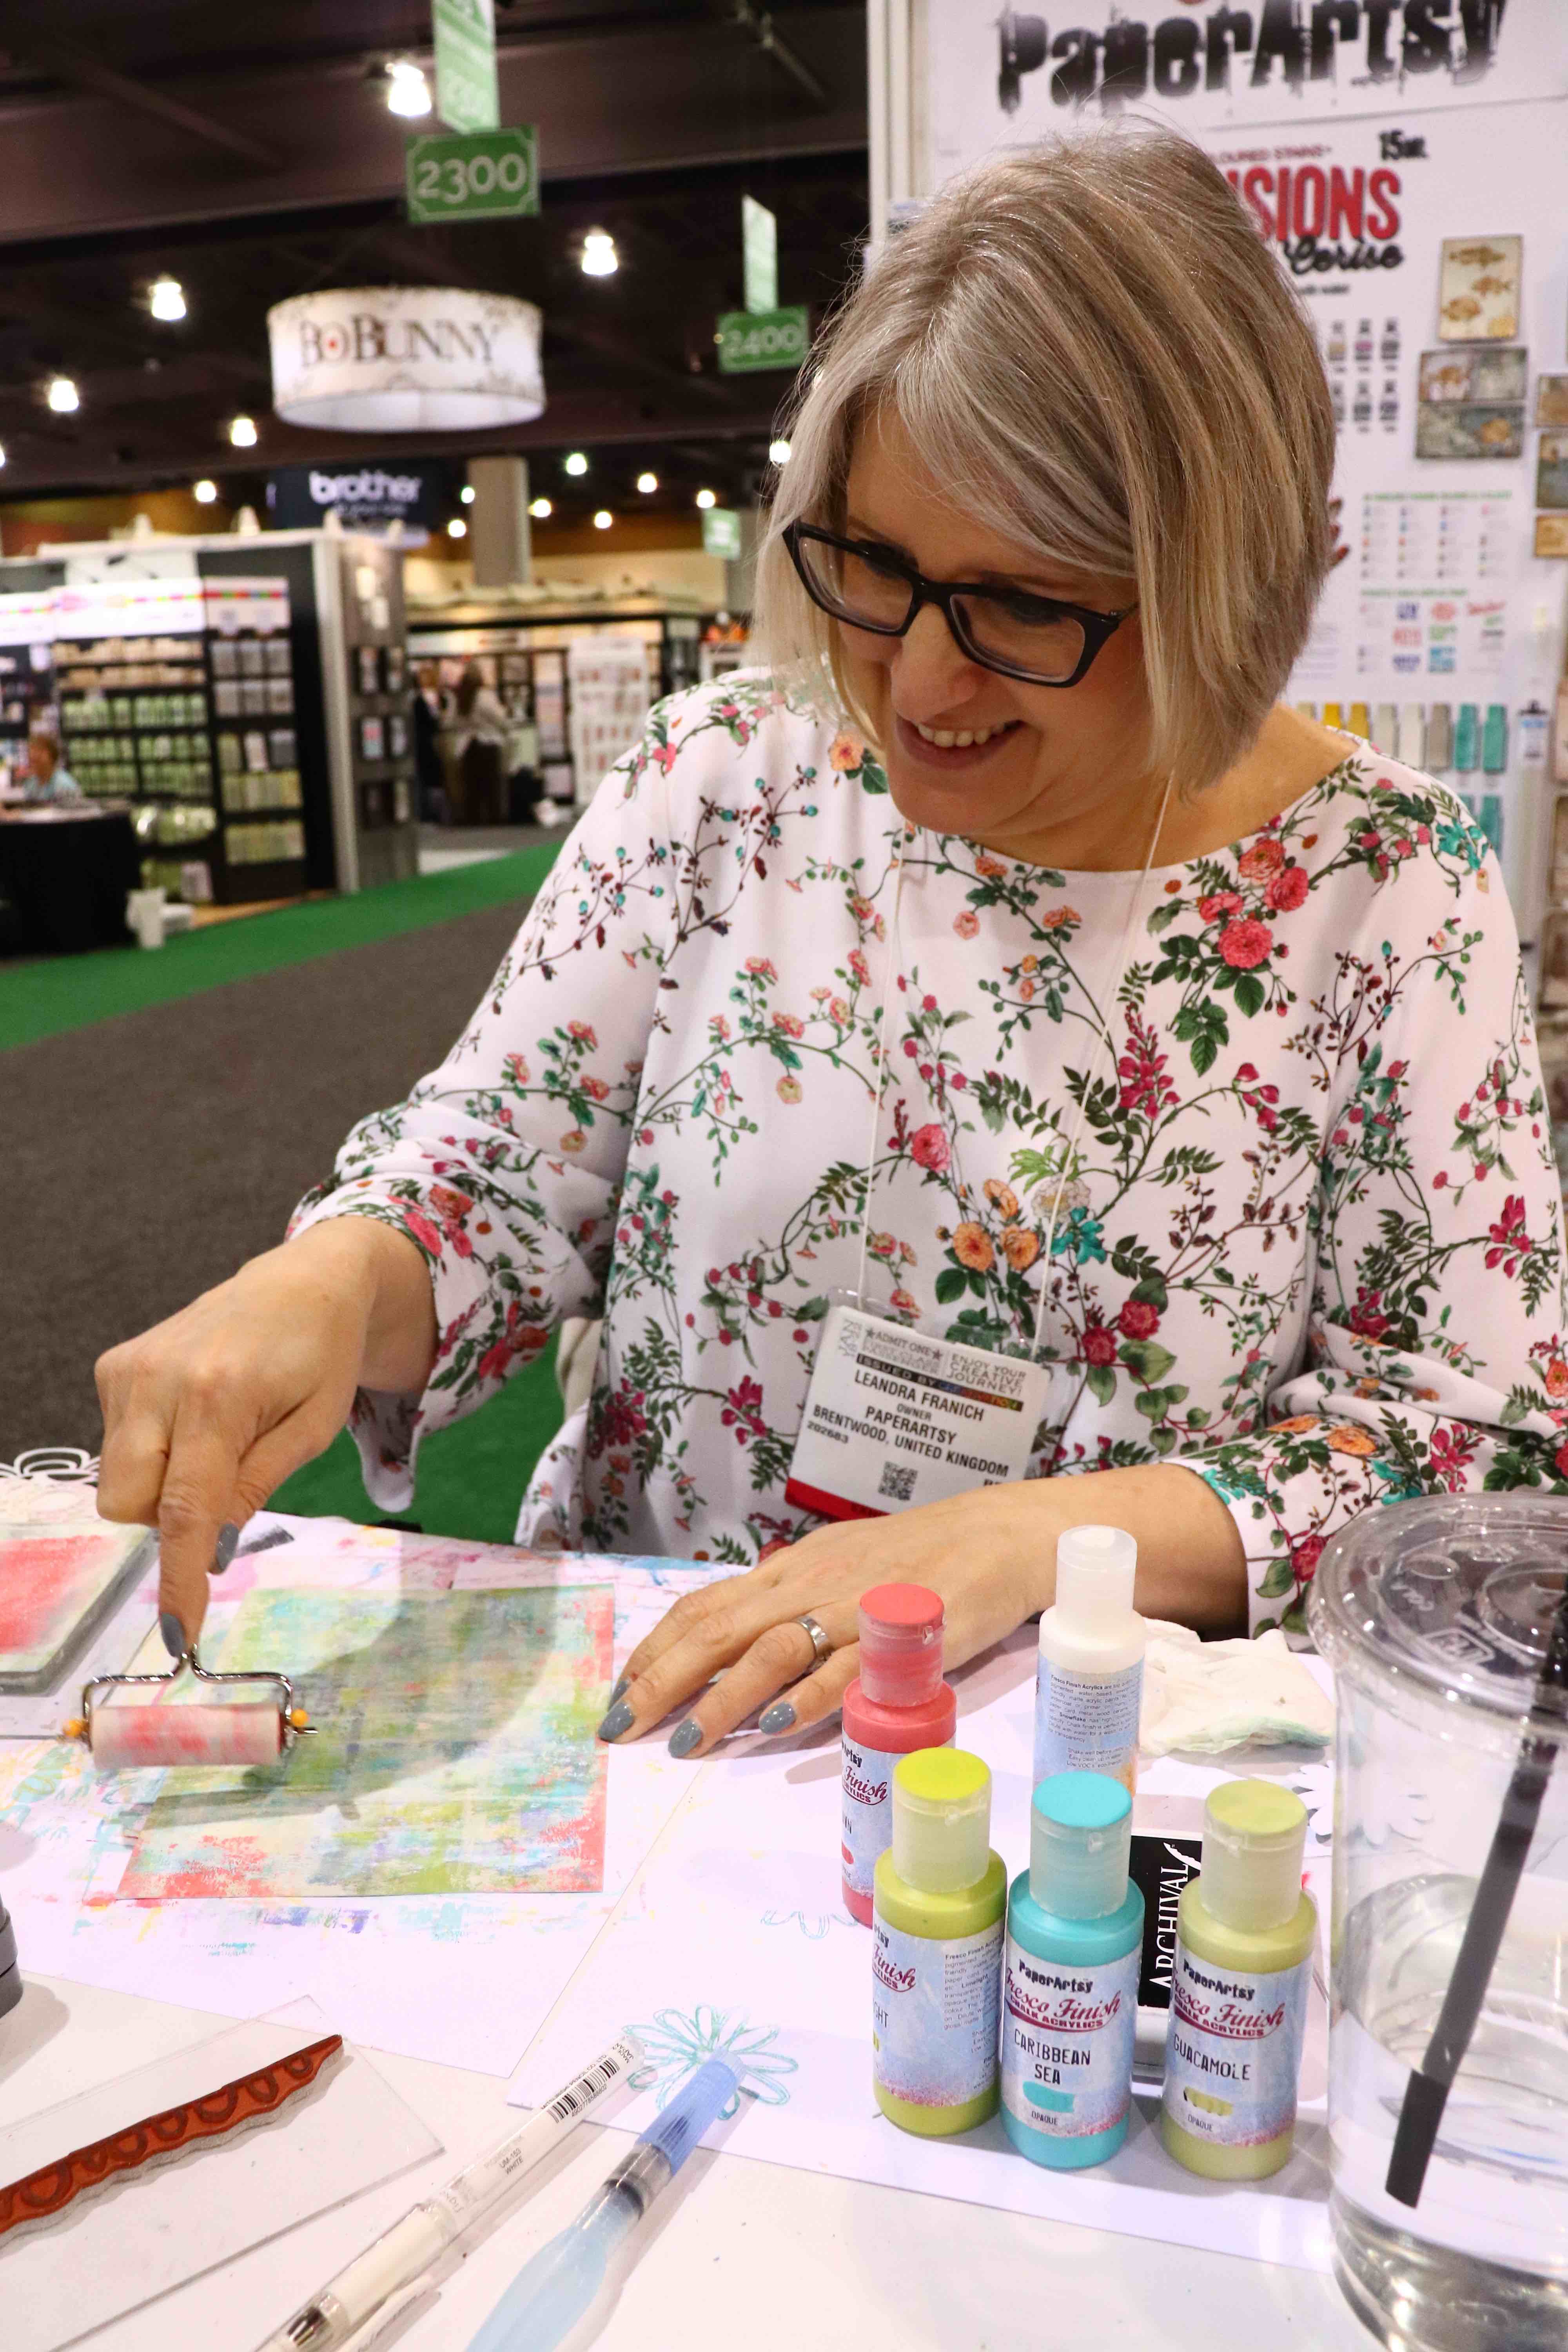
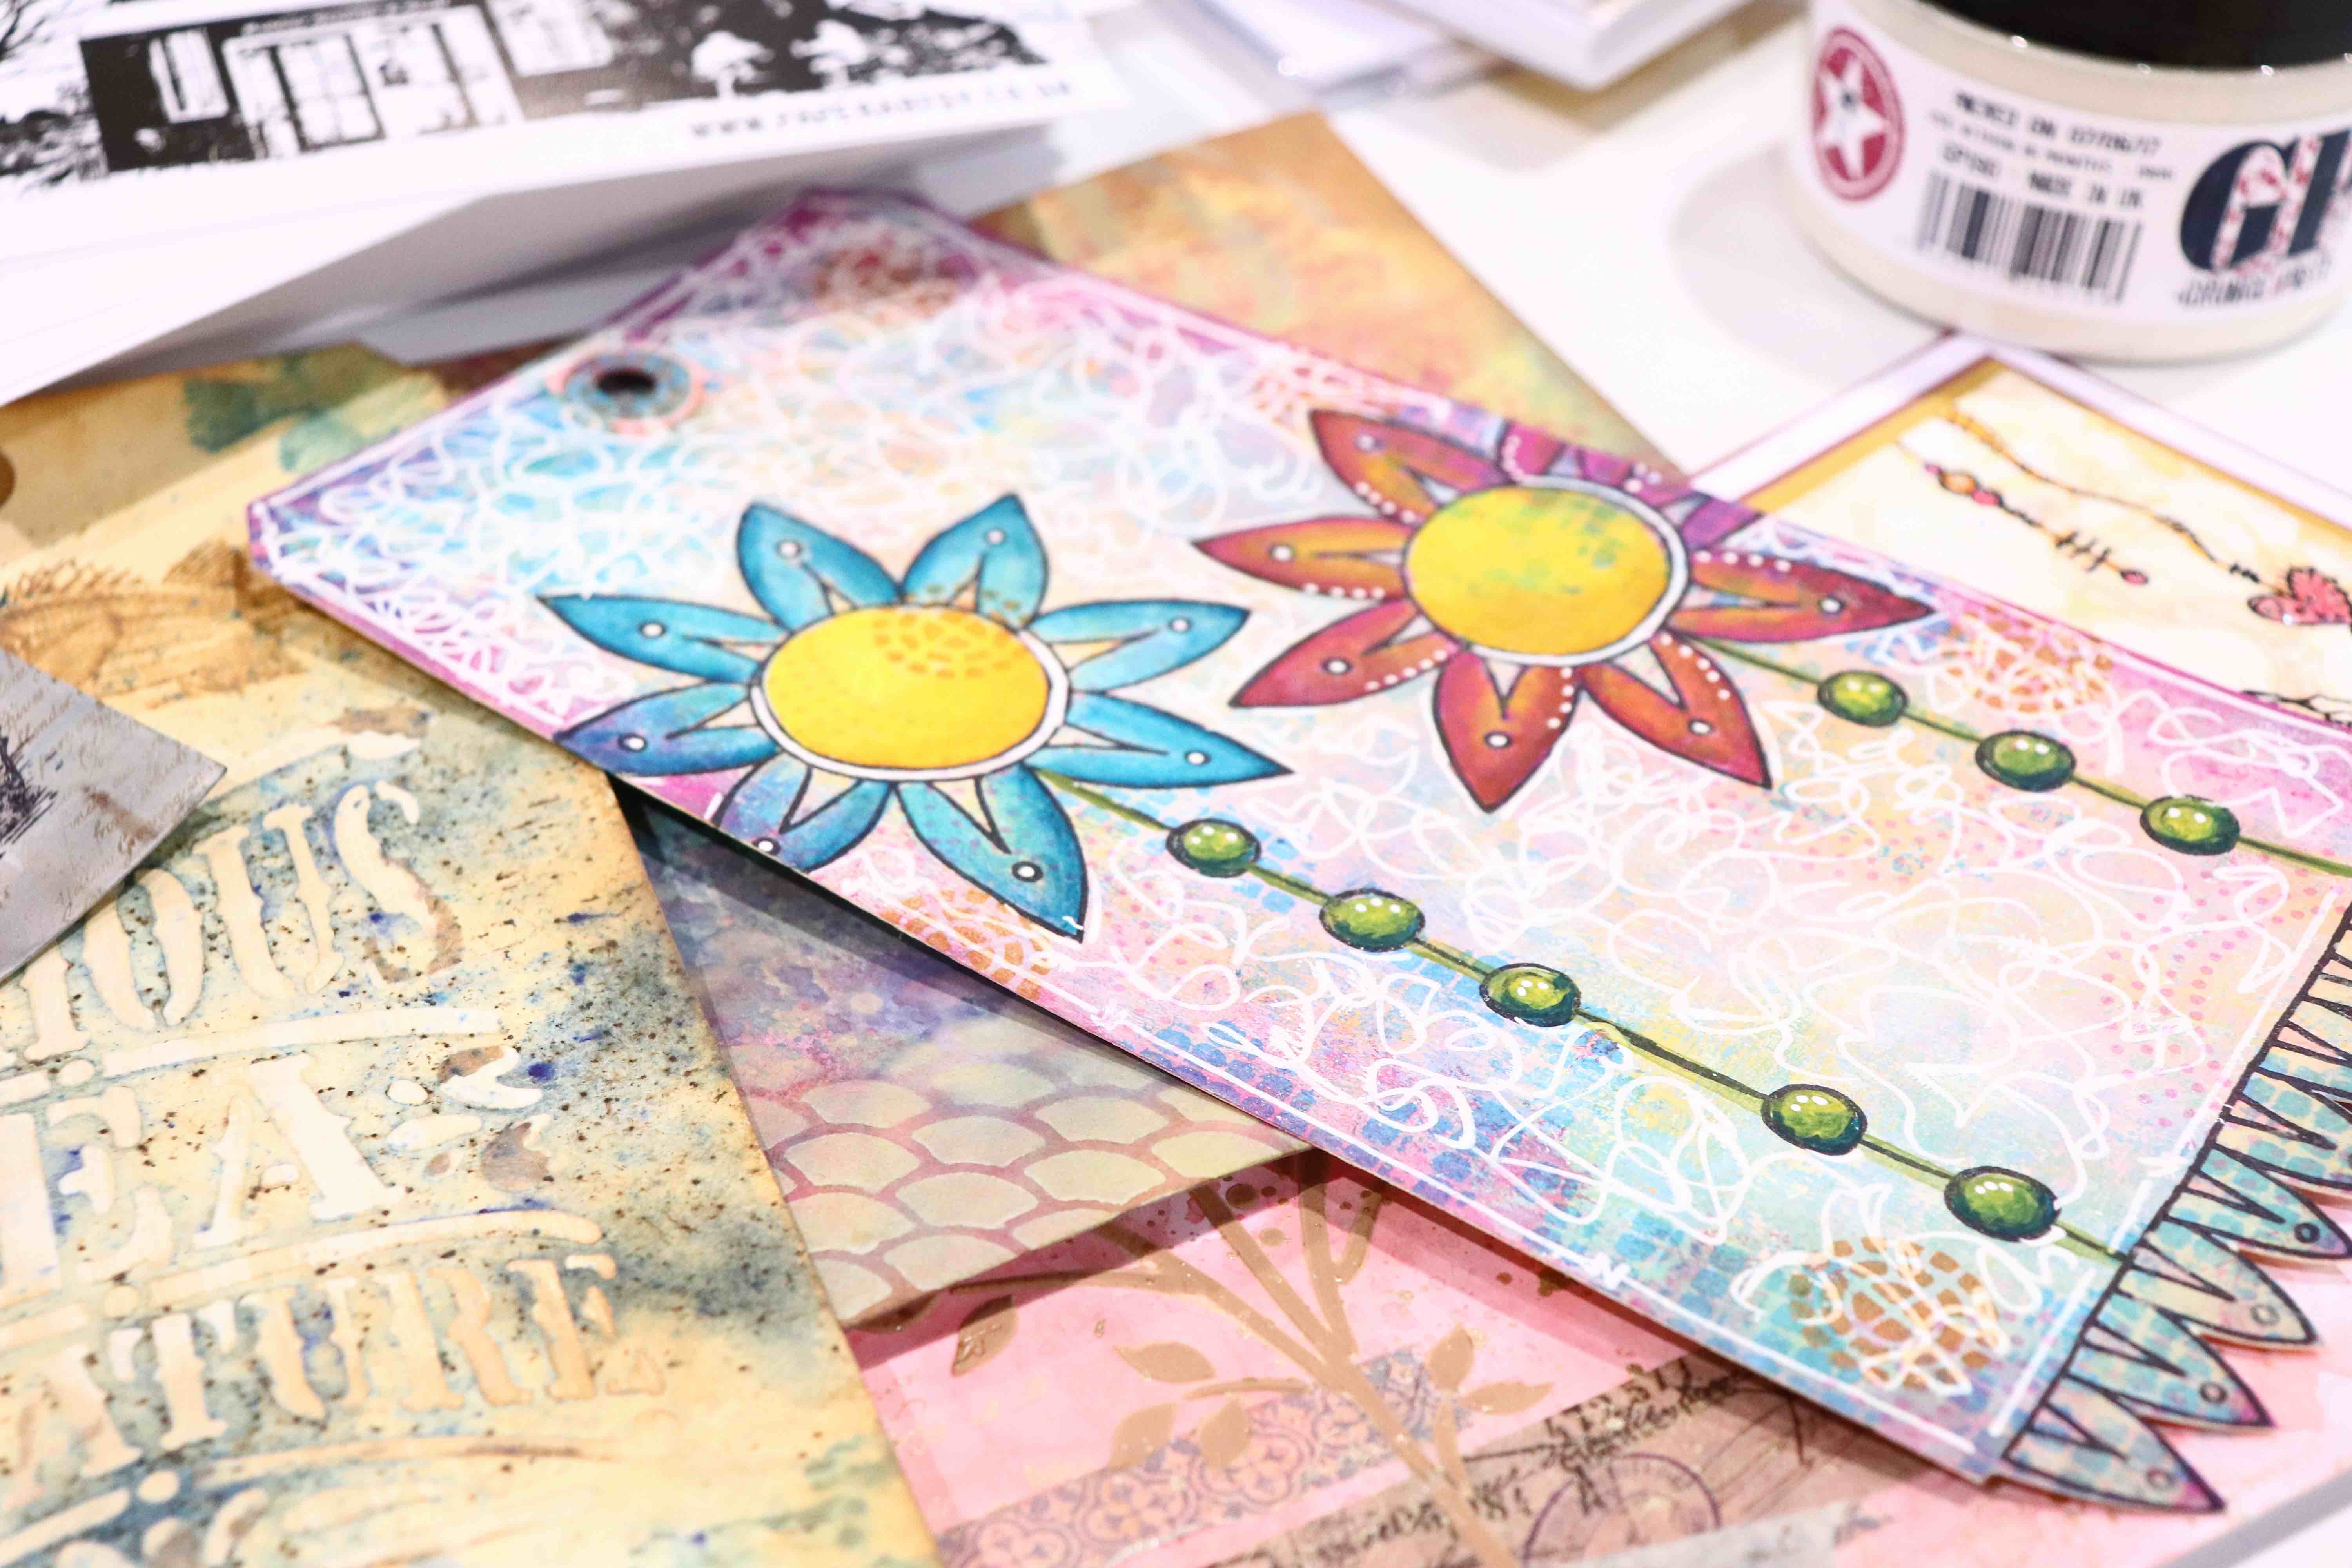
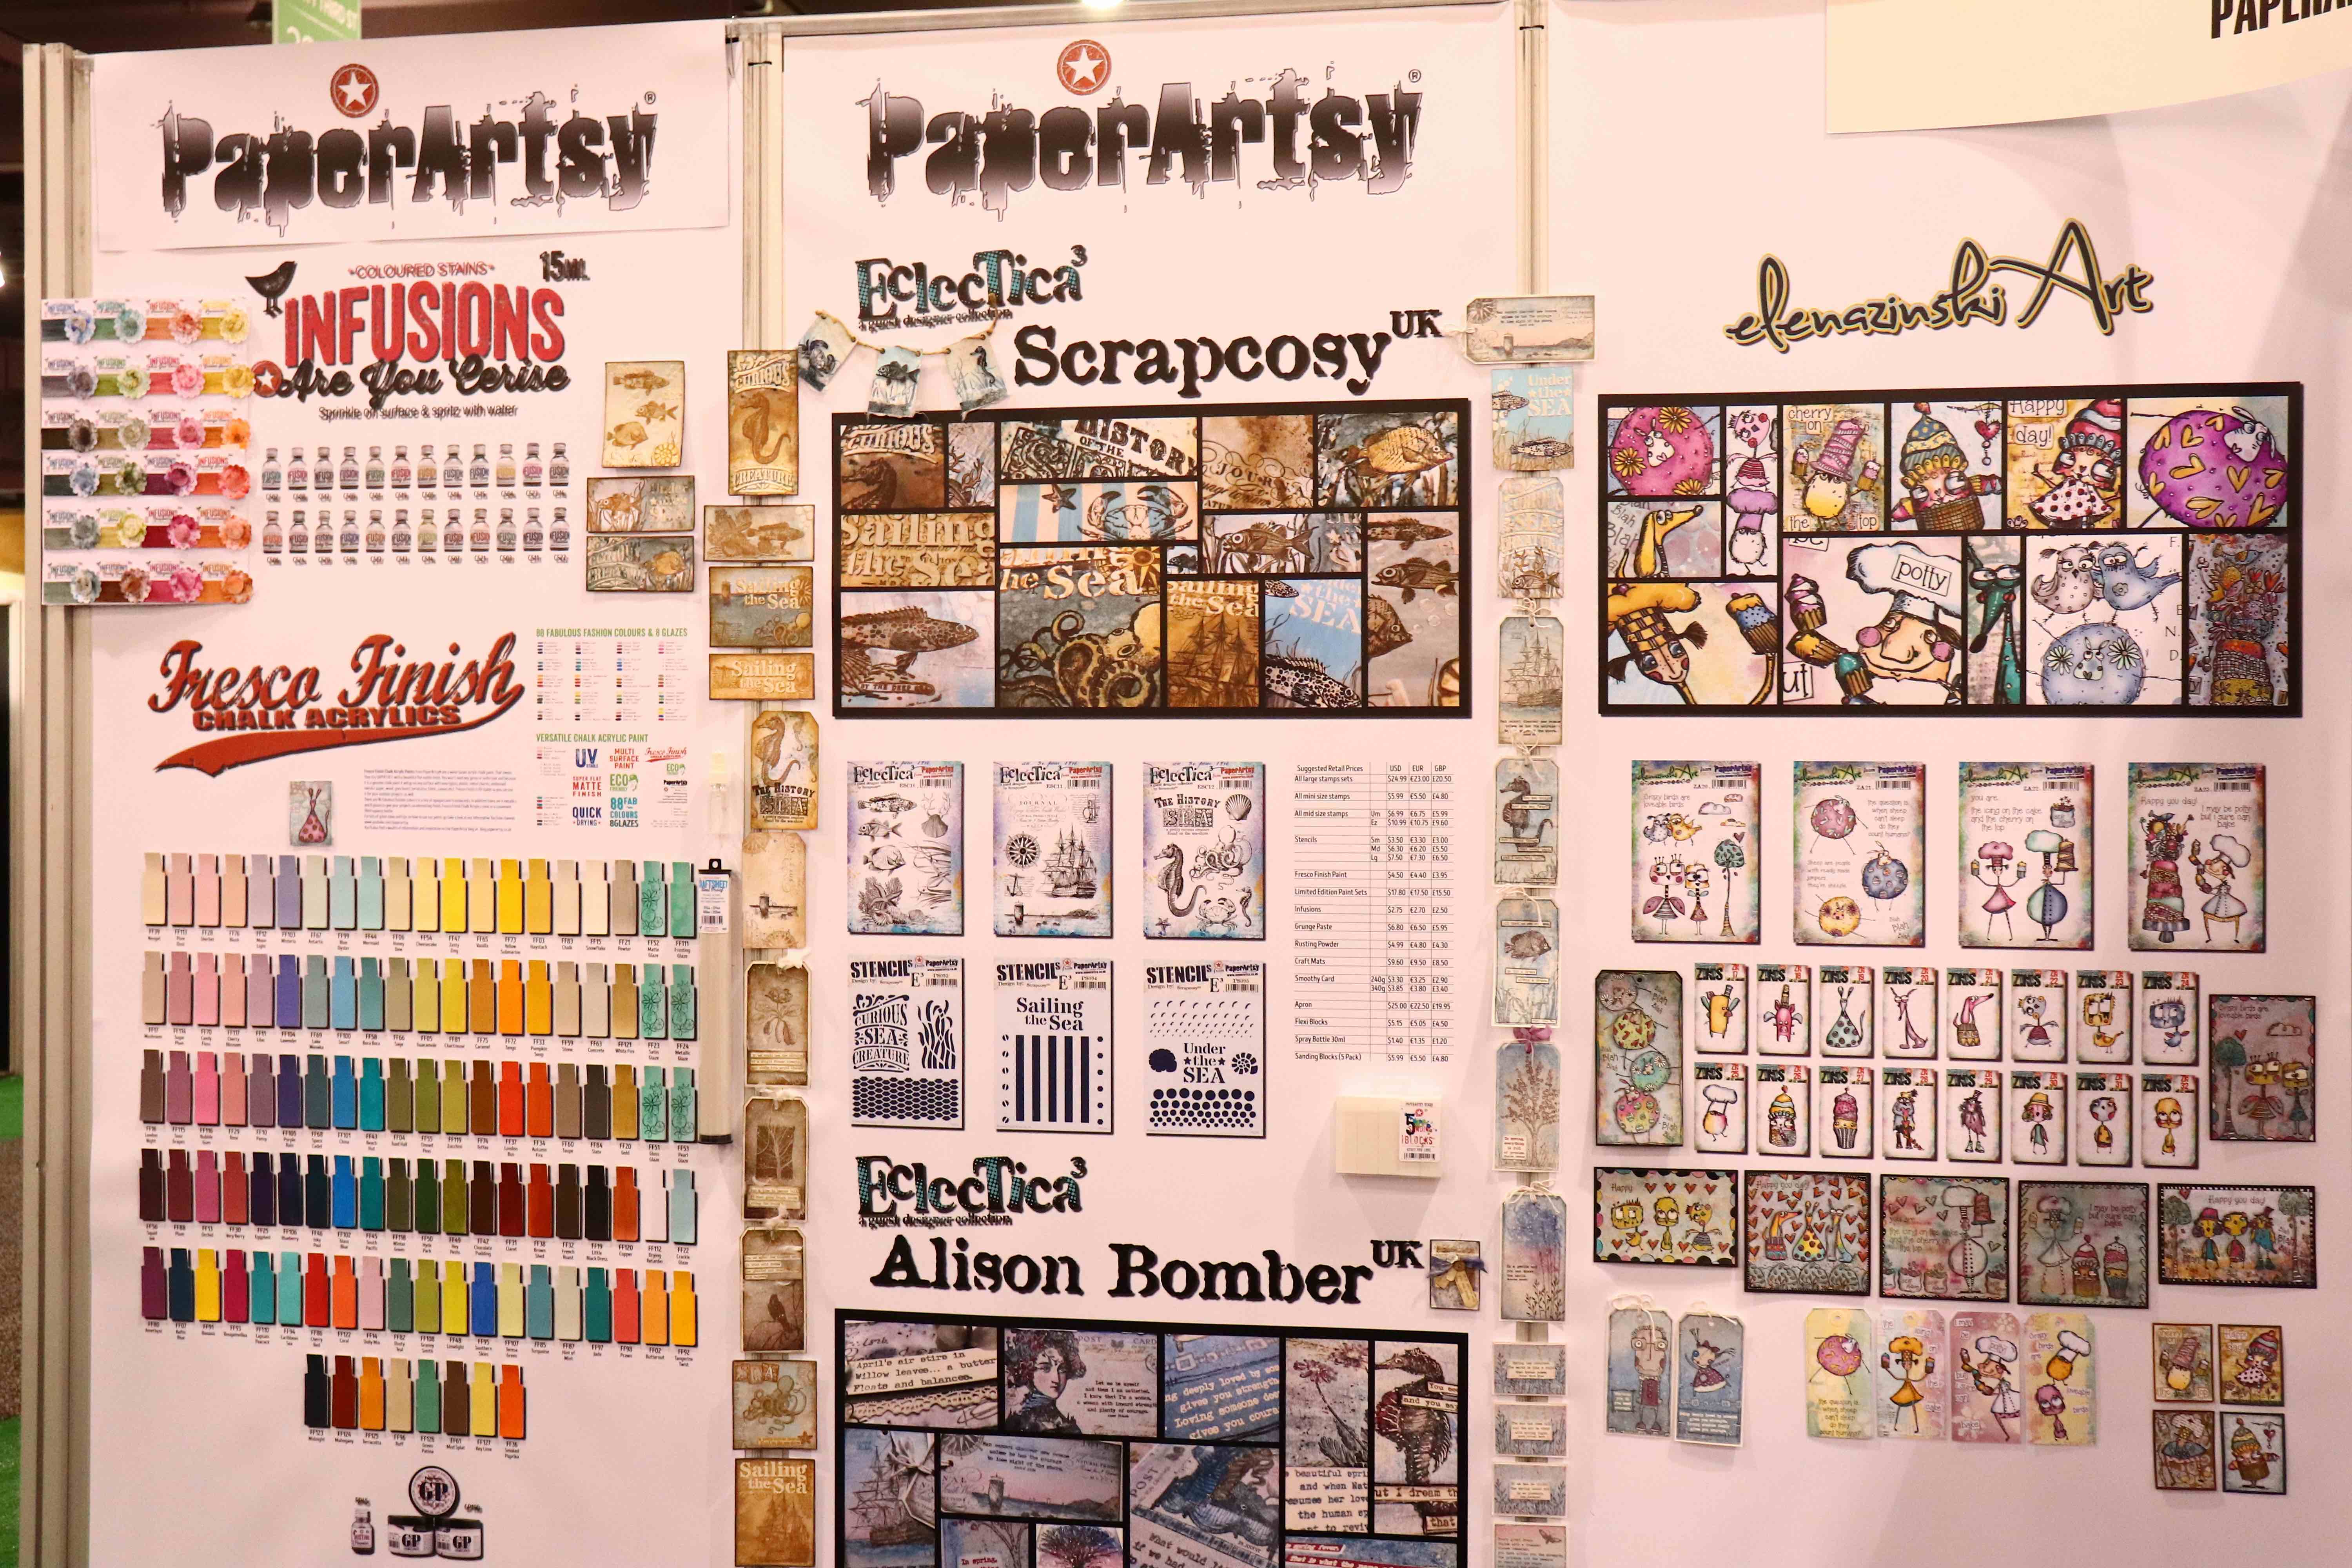
Paper Arty was showing off their Fresco Finish Chalk Paints with their latest mixed media stamps and stencils! Look at these stunning backgrounds and inspiration pieces!
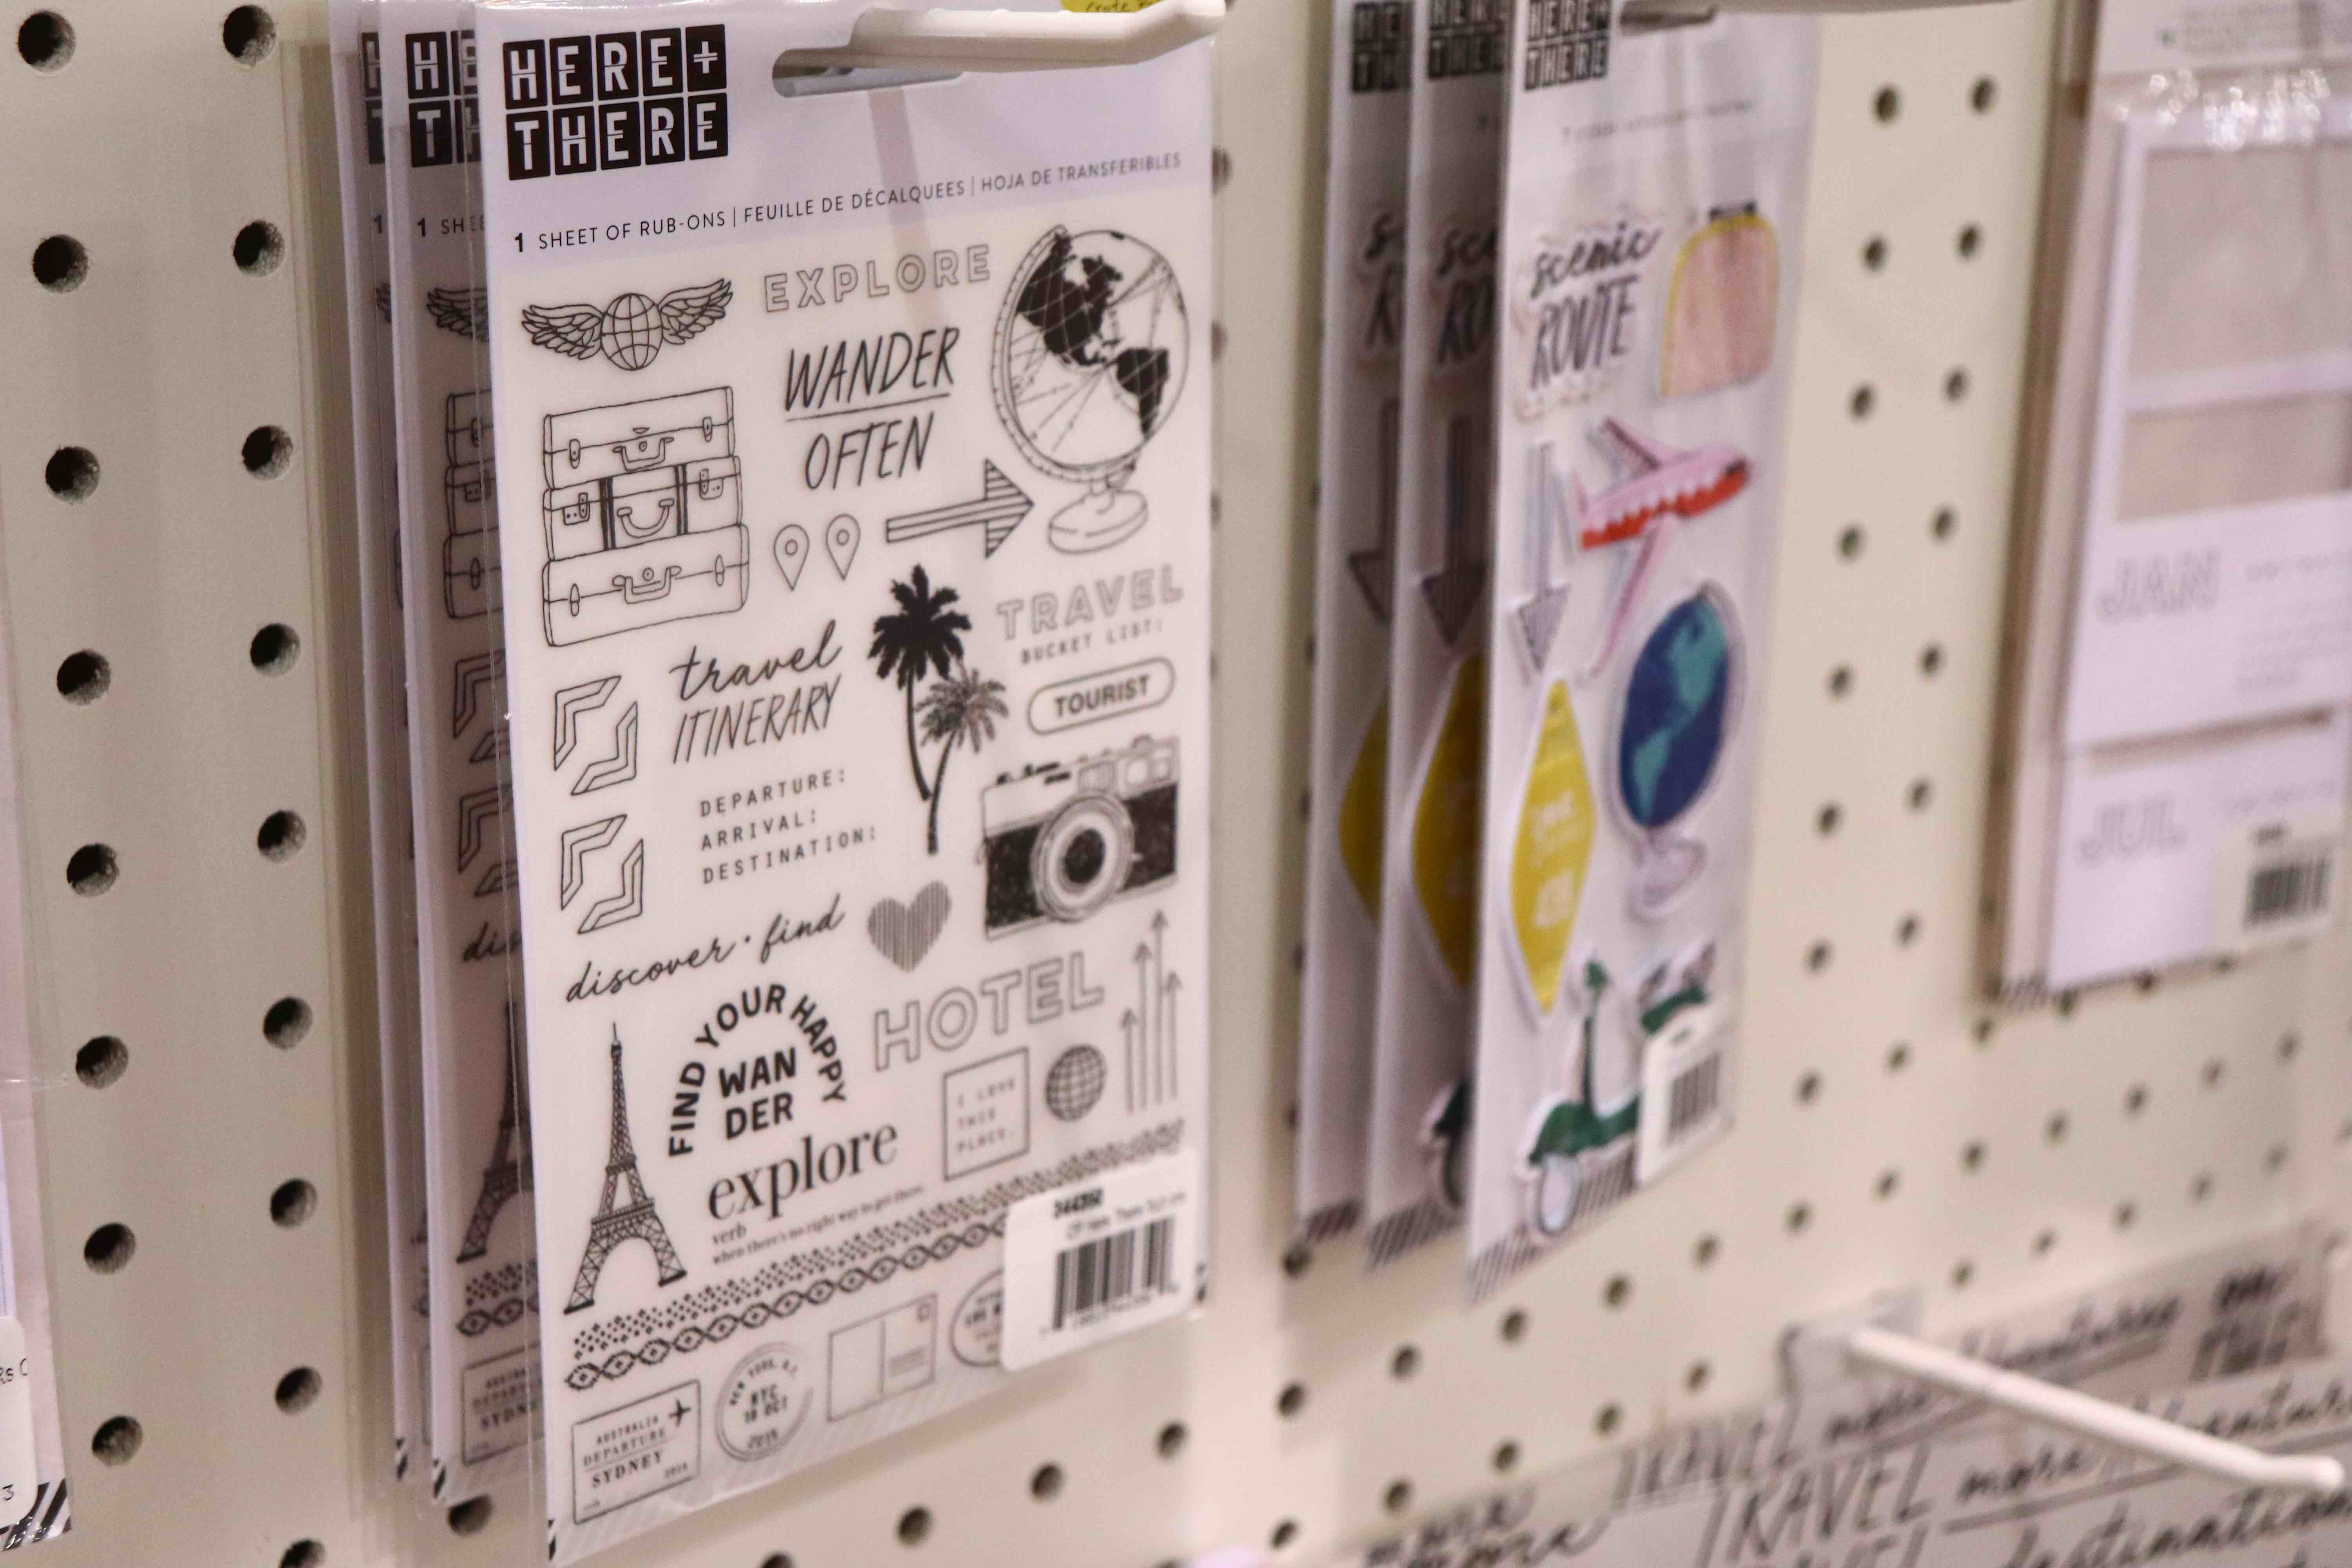
How about these fabulous new products from Crate Paper?? I love the travel theme of their Here + There collection, like with the rub ons you see below…
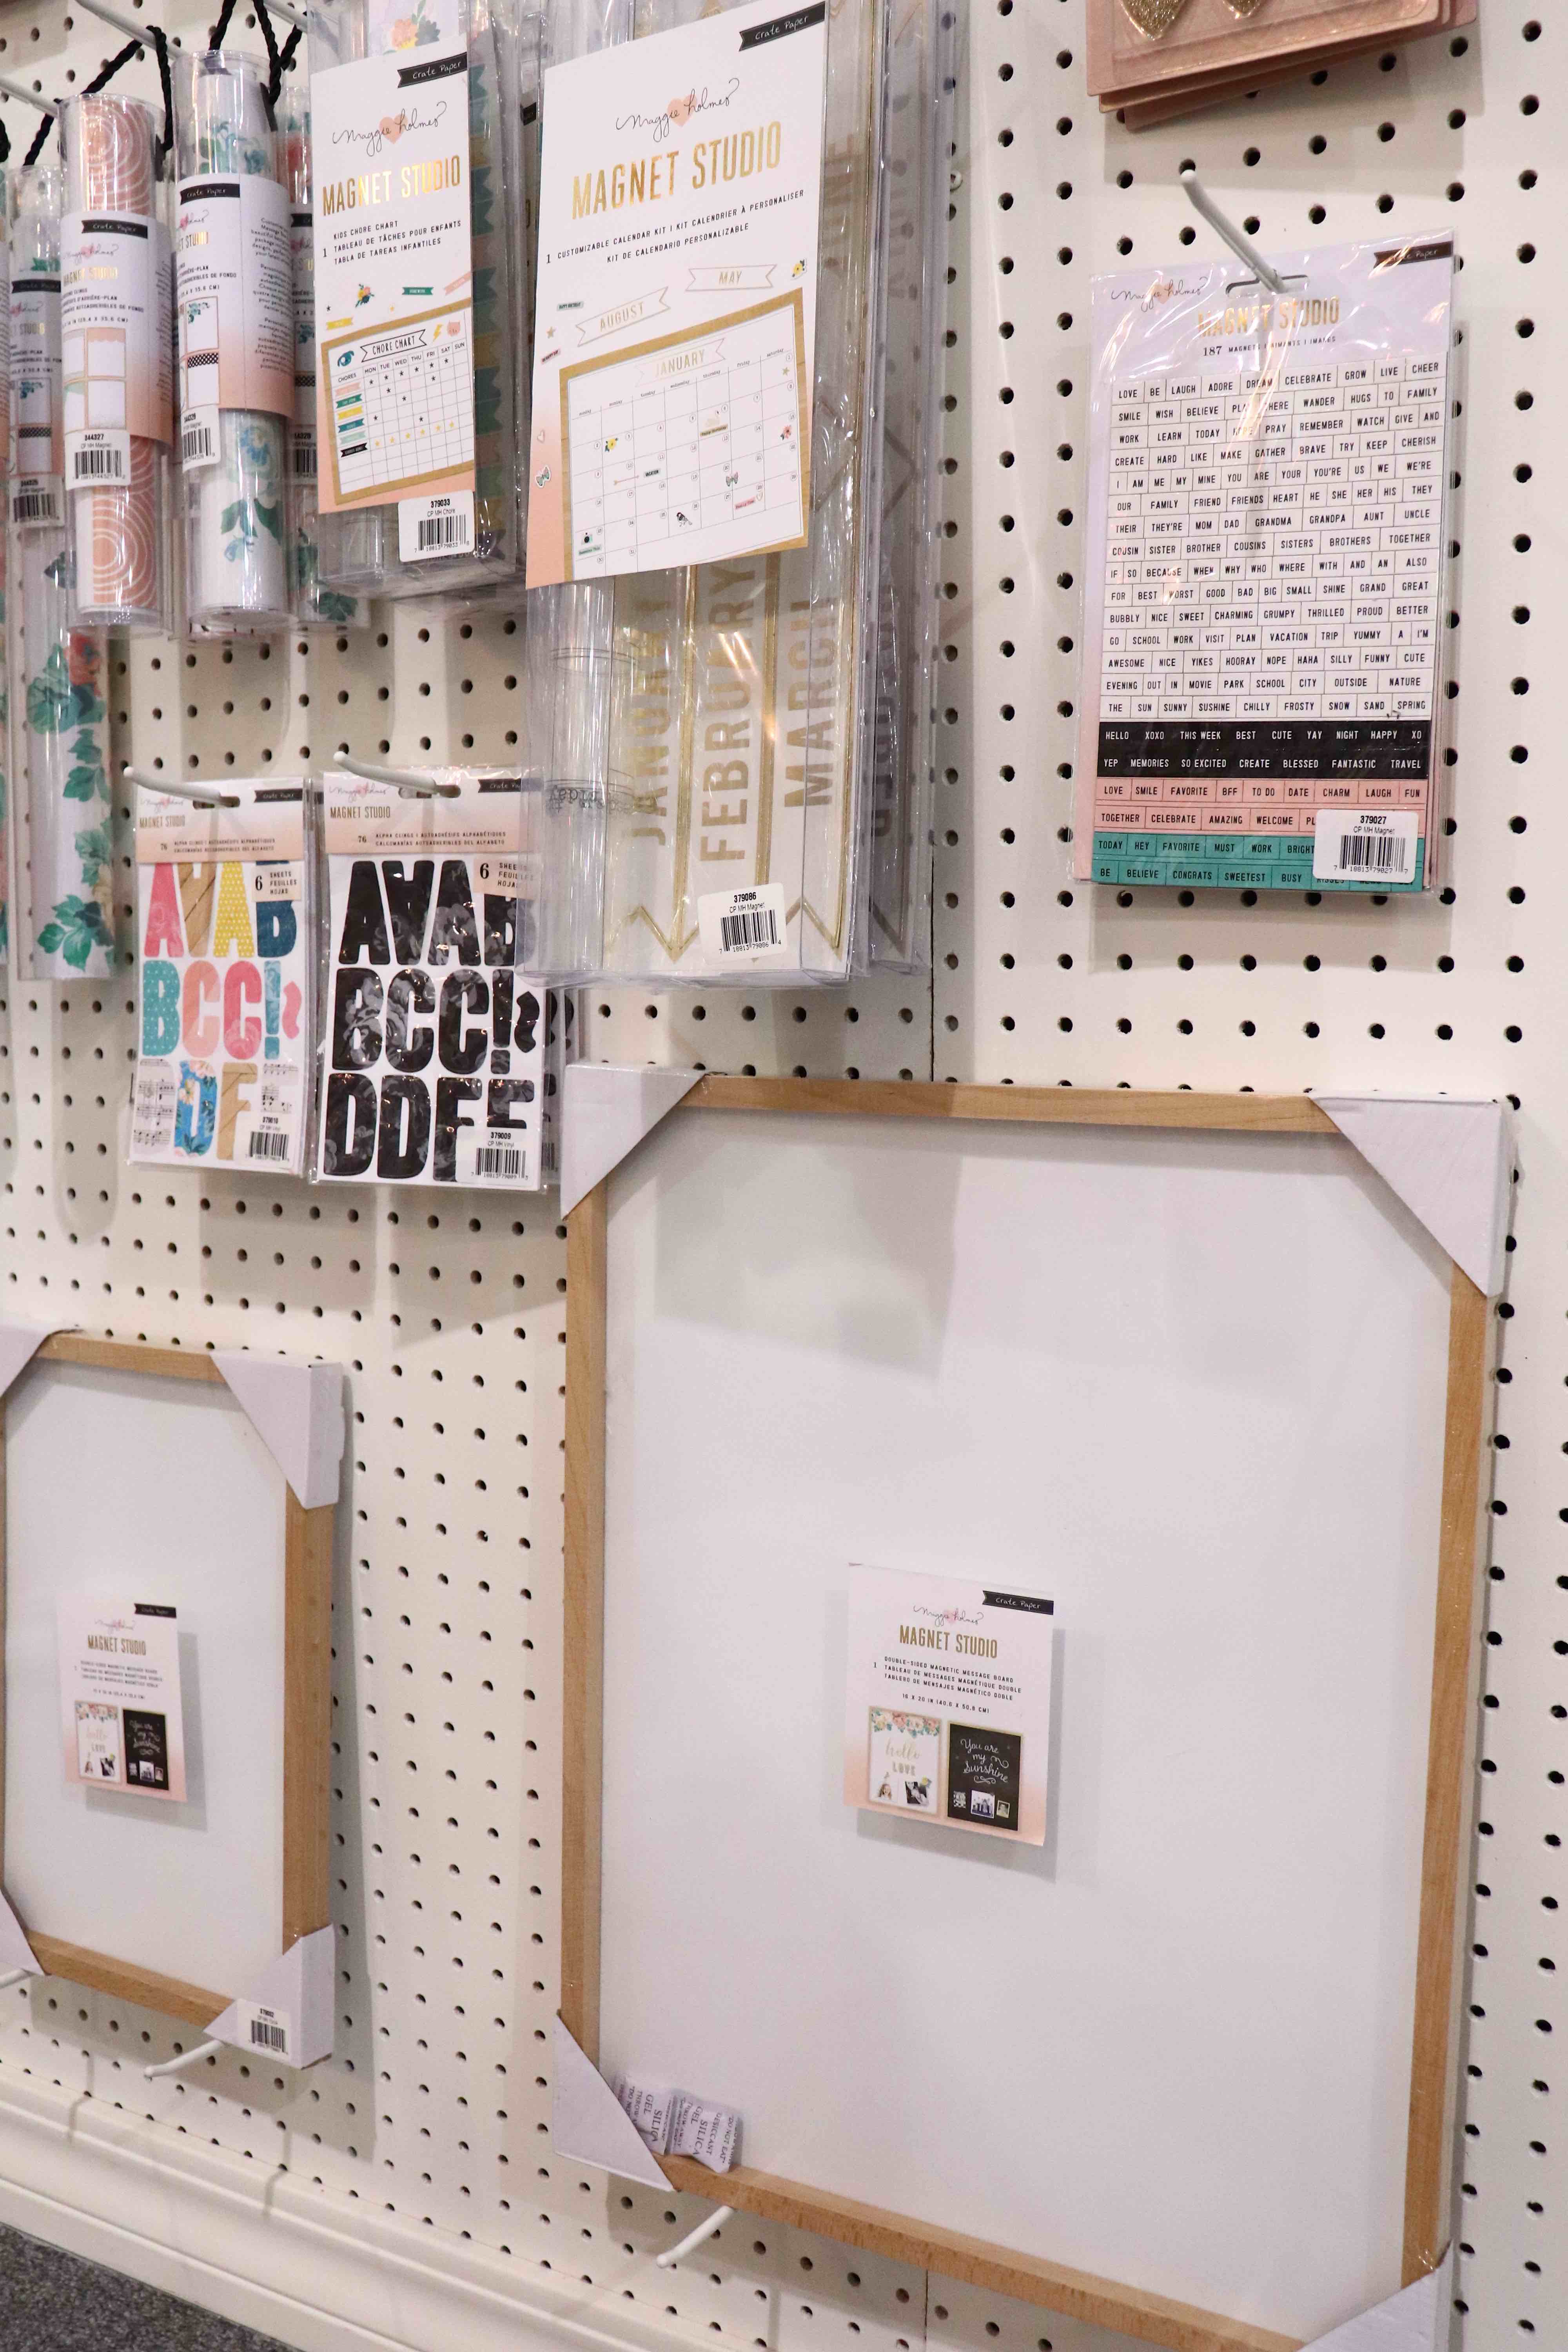
And how cool is this Magnet Studio board?? You can customize this craft room decor piece with special memories, notes, plans for the week and so much more!
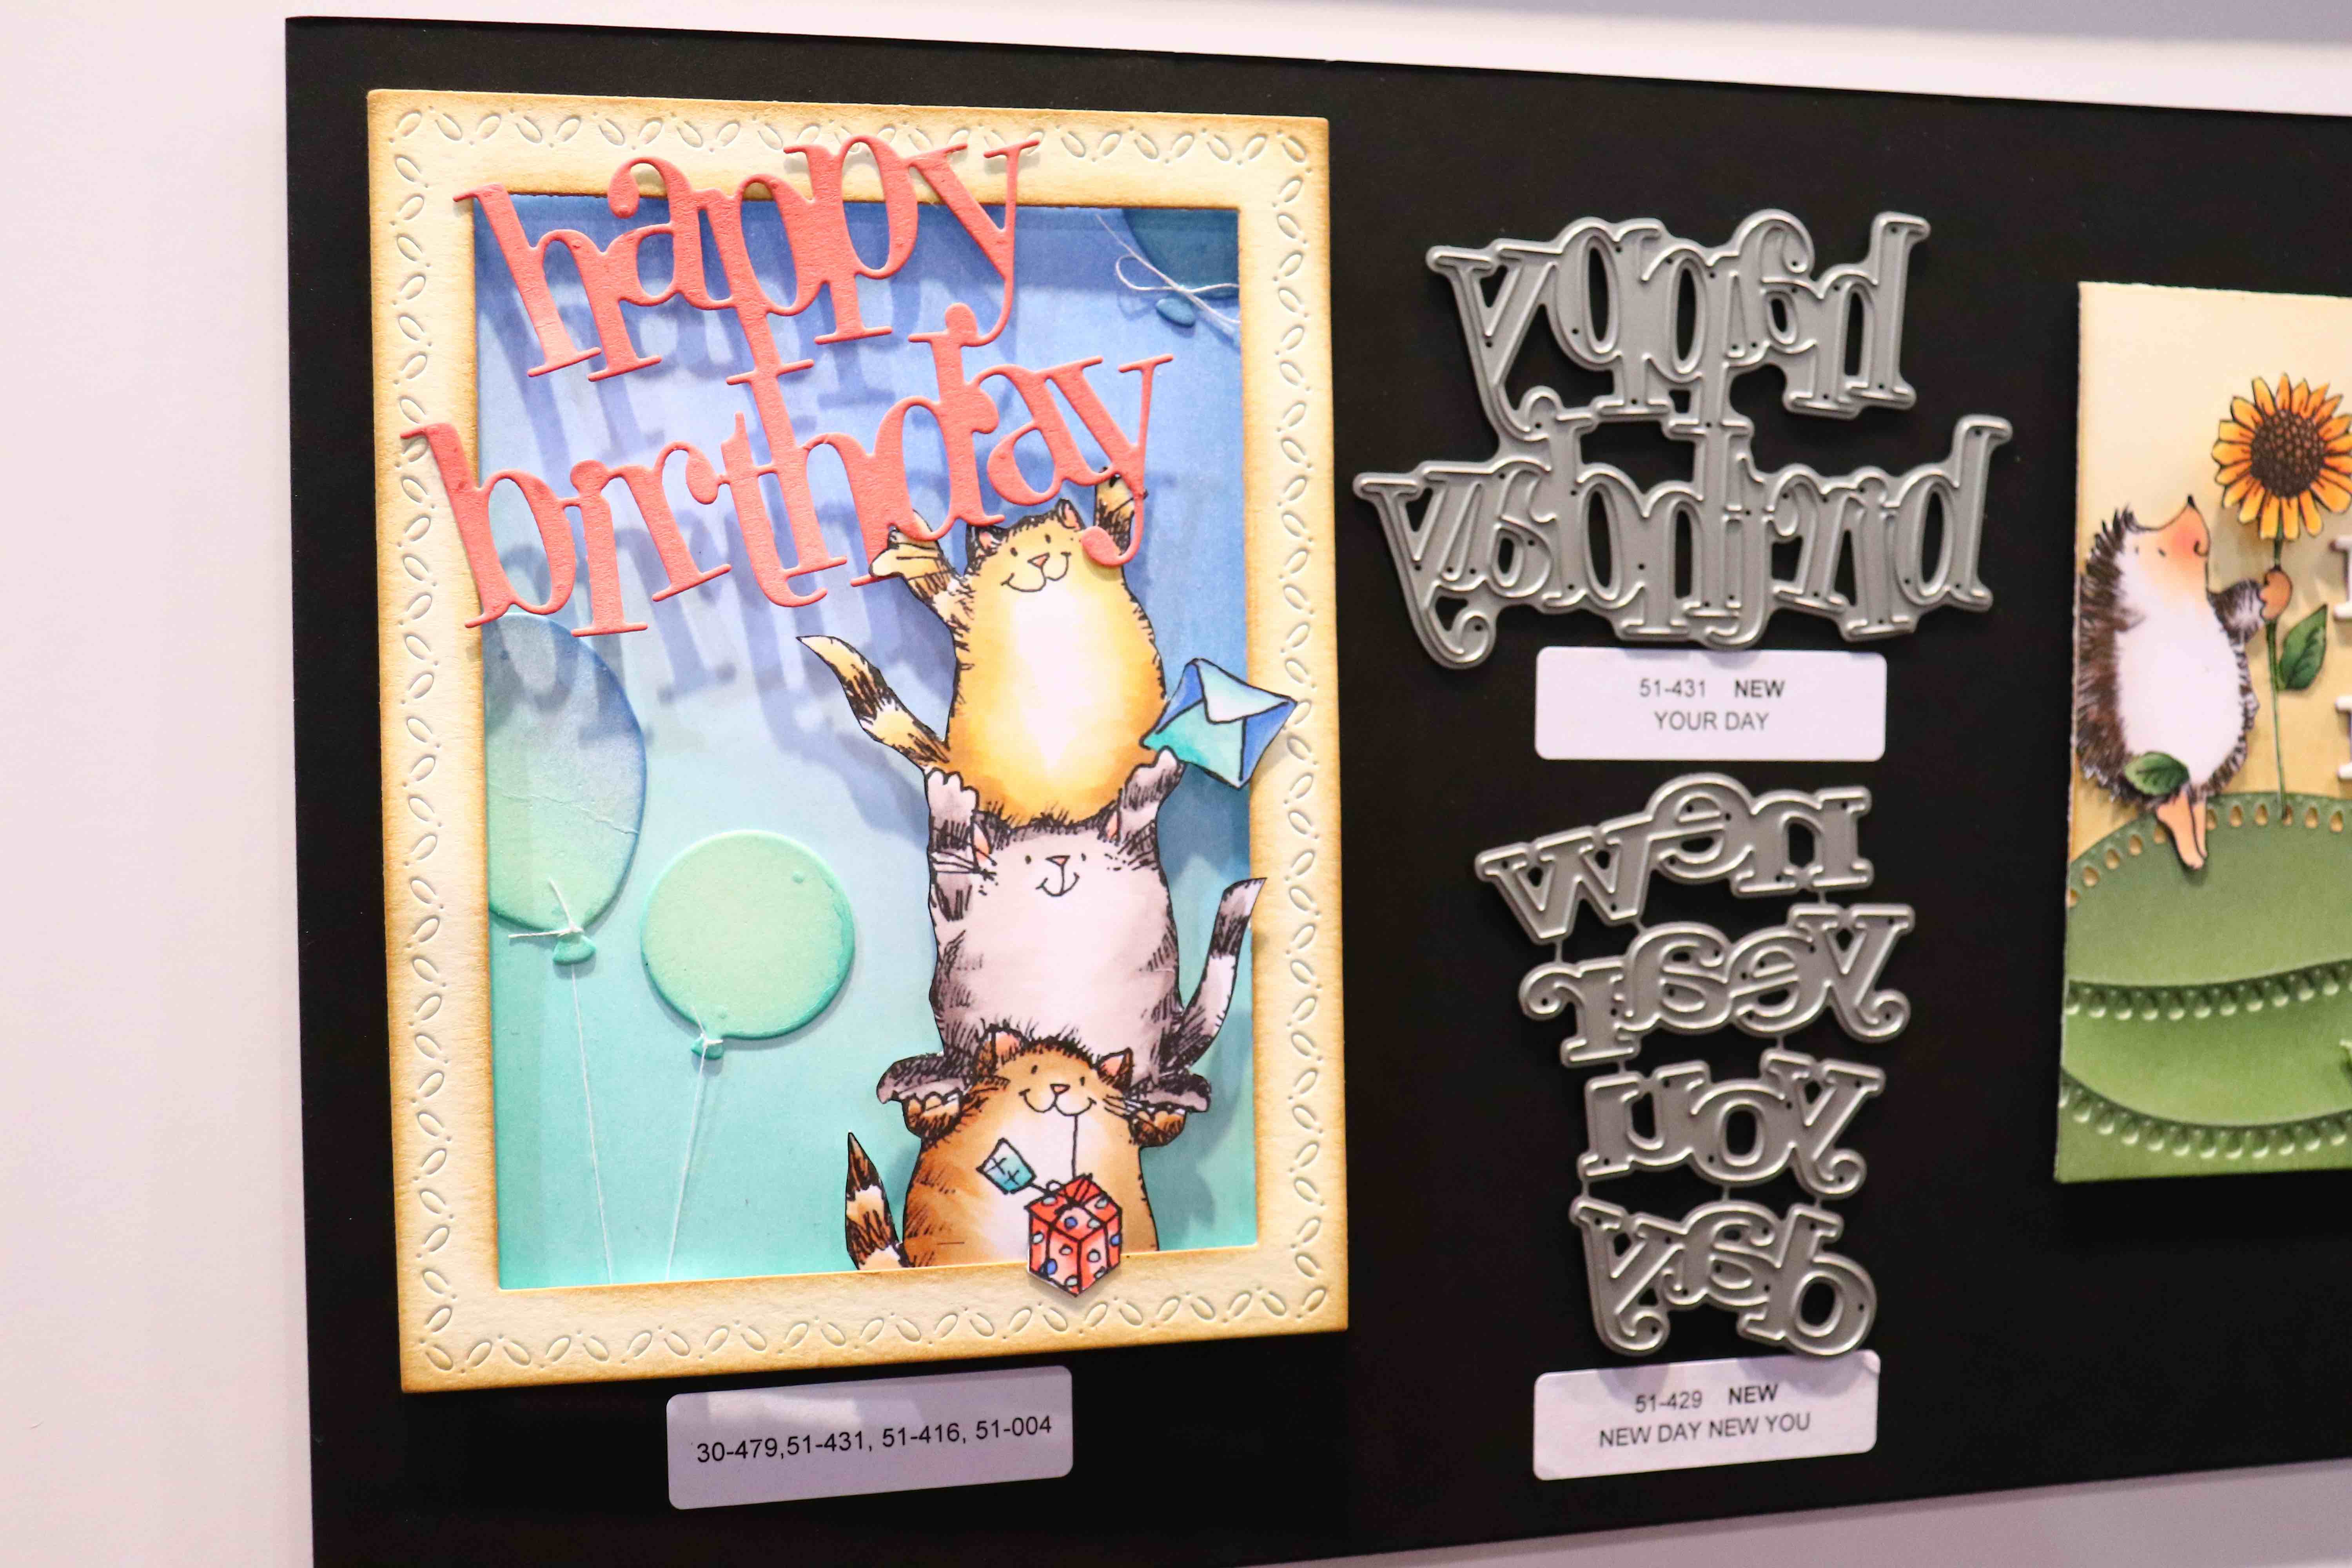
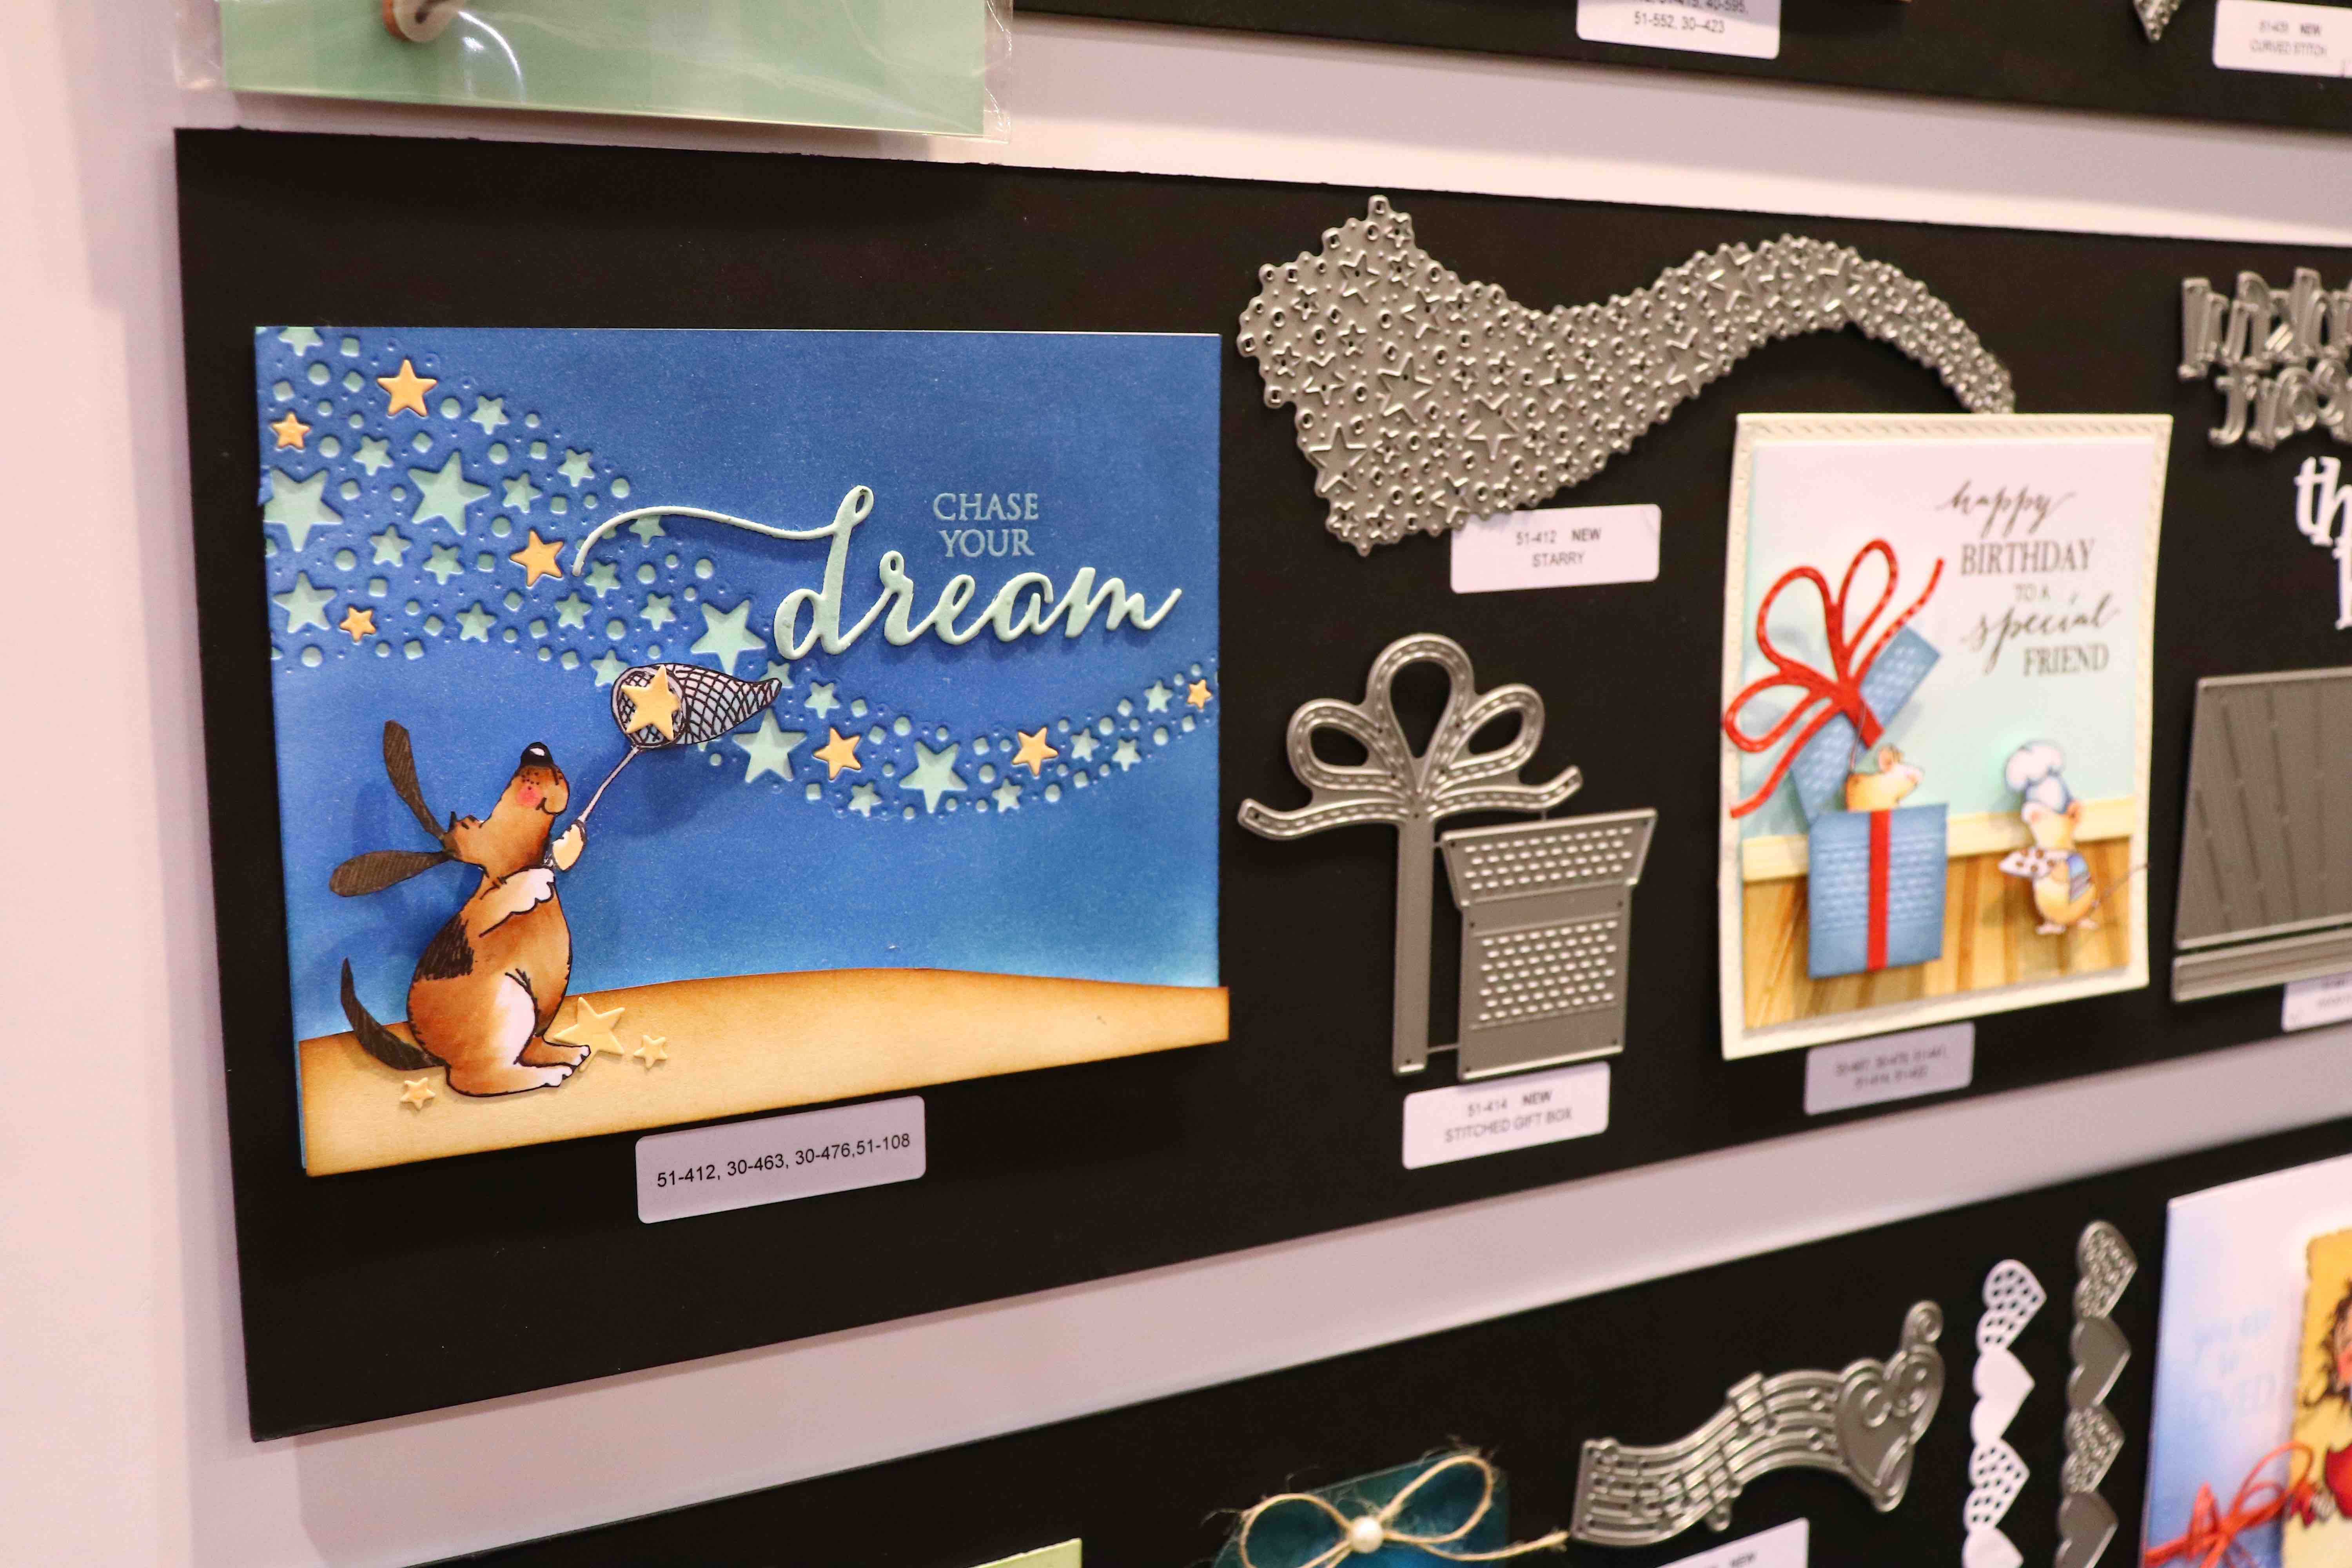
Penny Black is always bringing us loads of creative and sweet designs! Check out three of my favorite inspiration pieces that were on display with the new product at their booth!
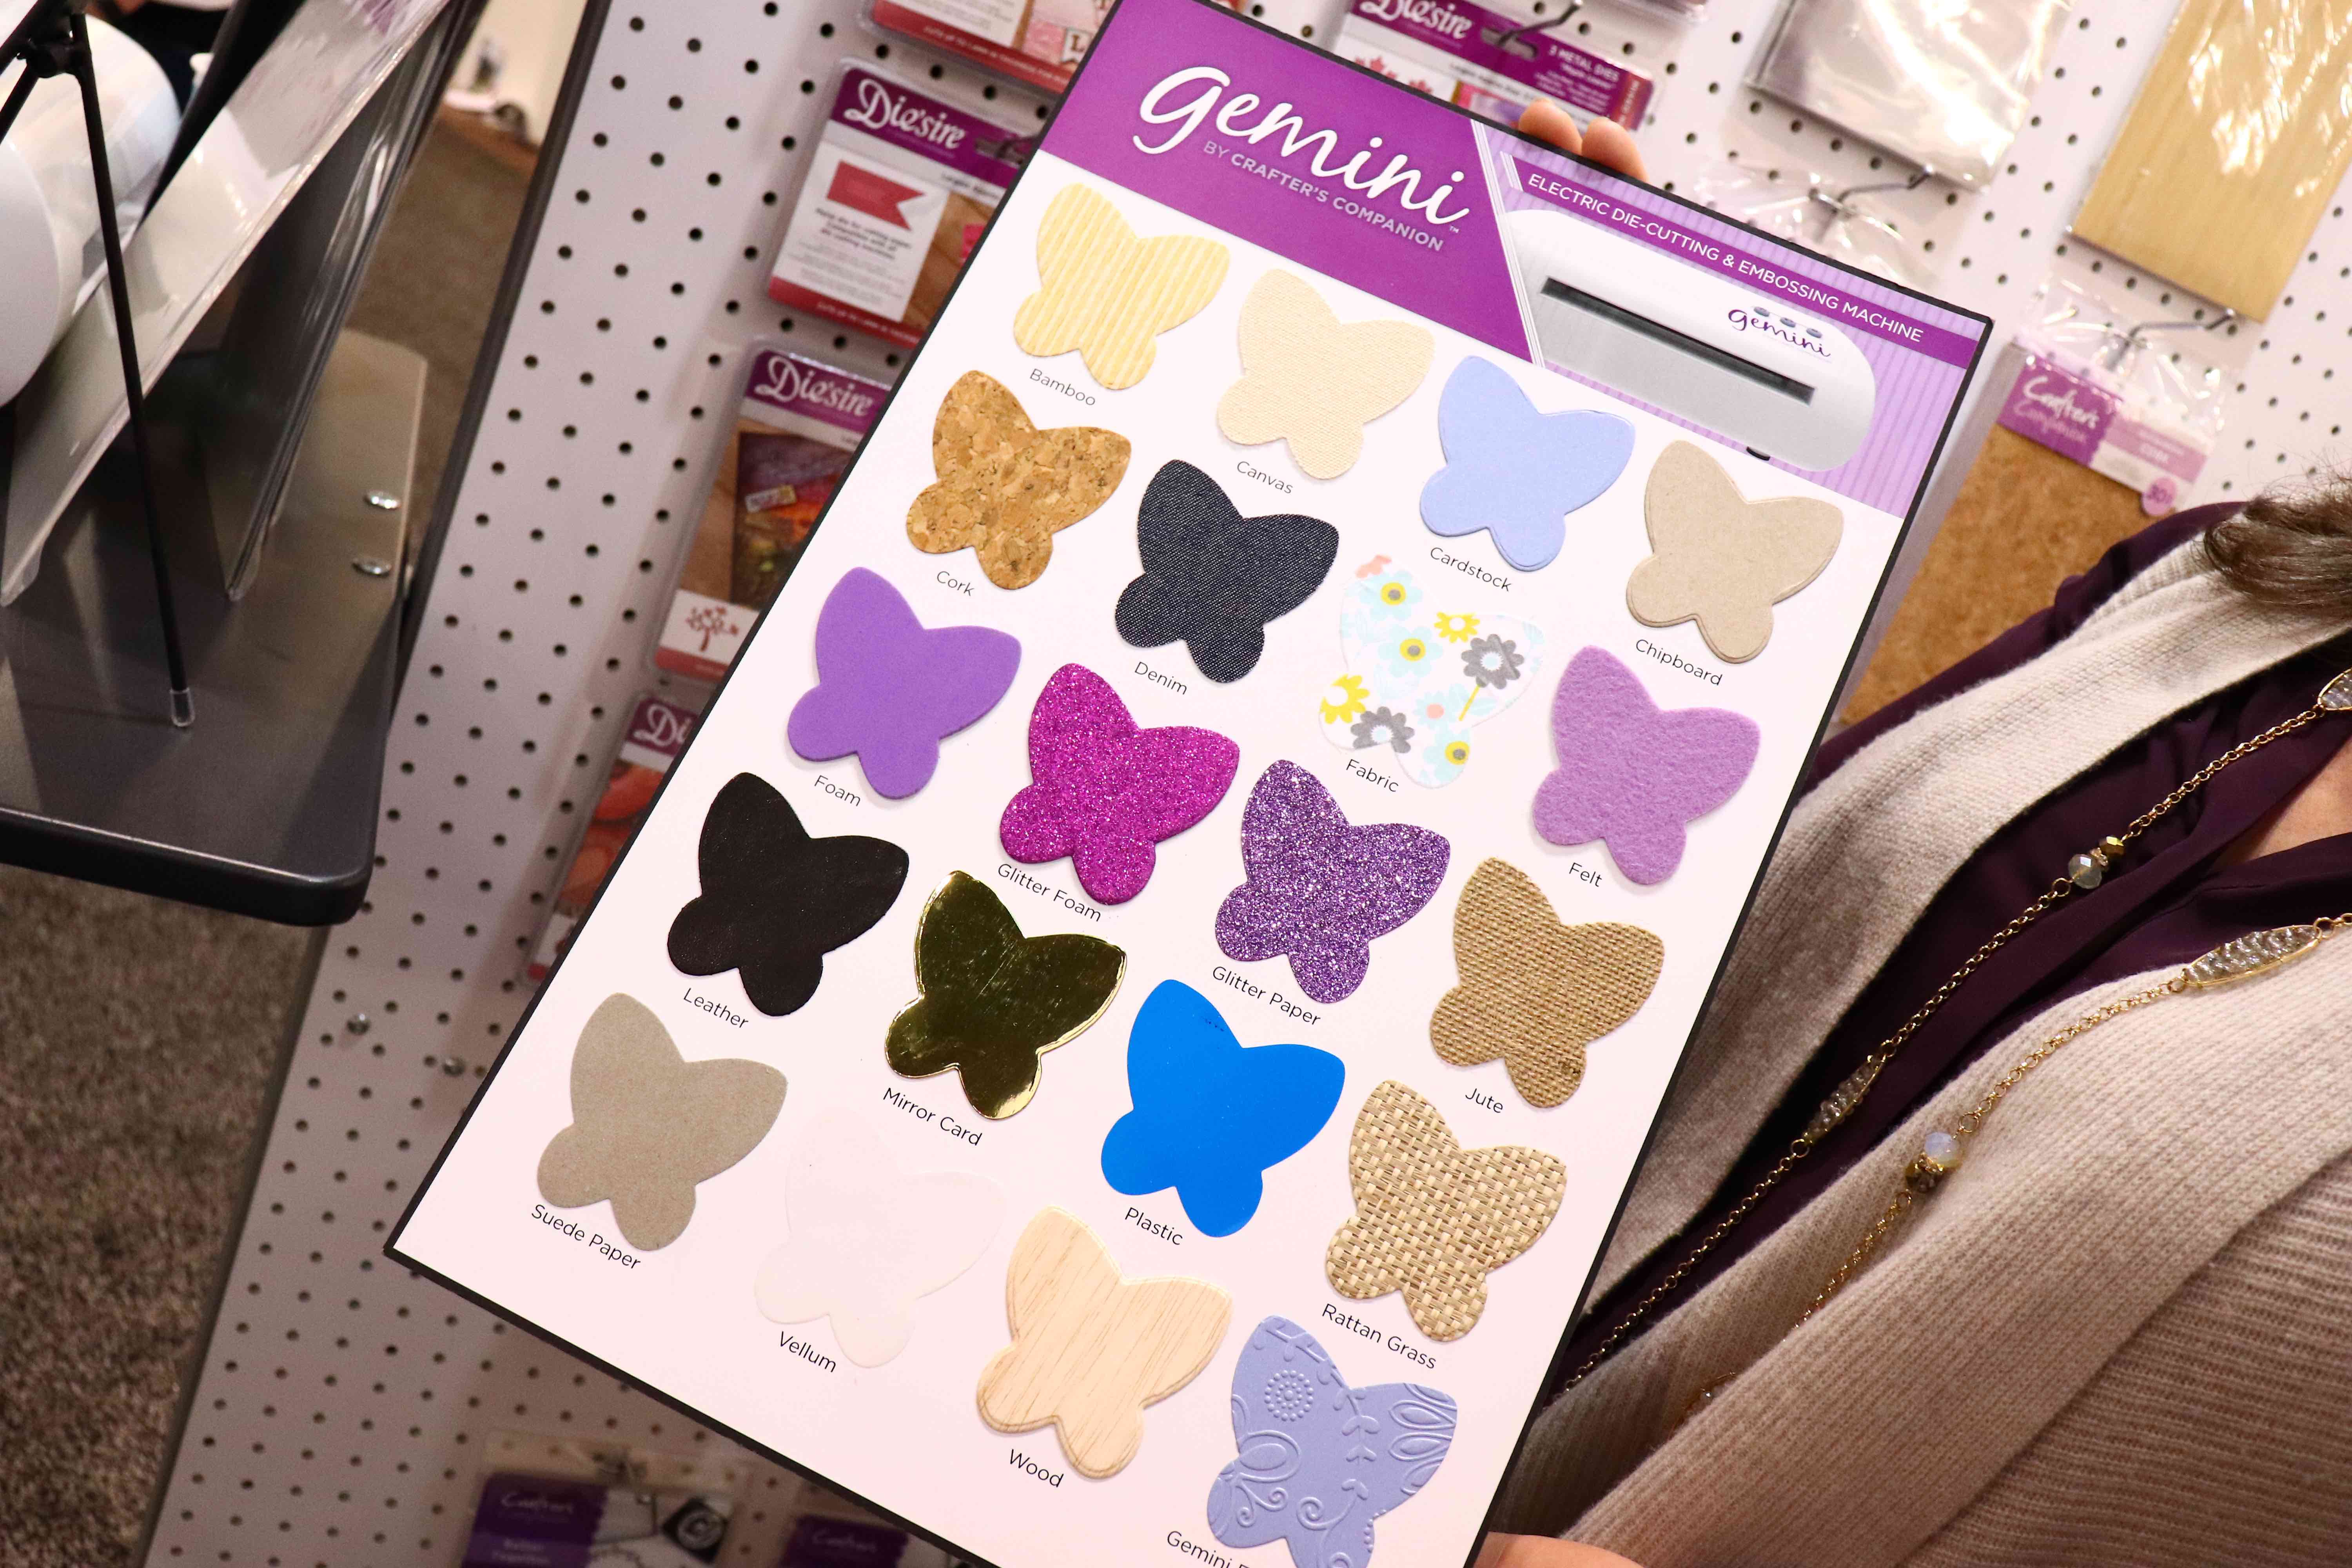
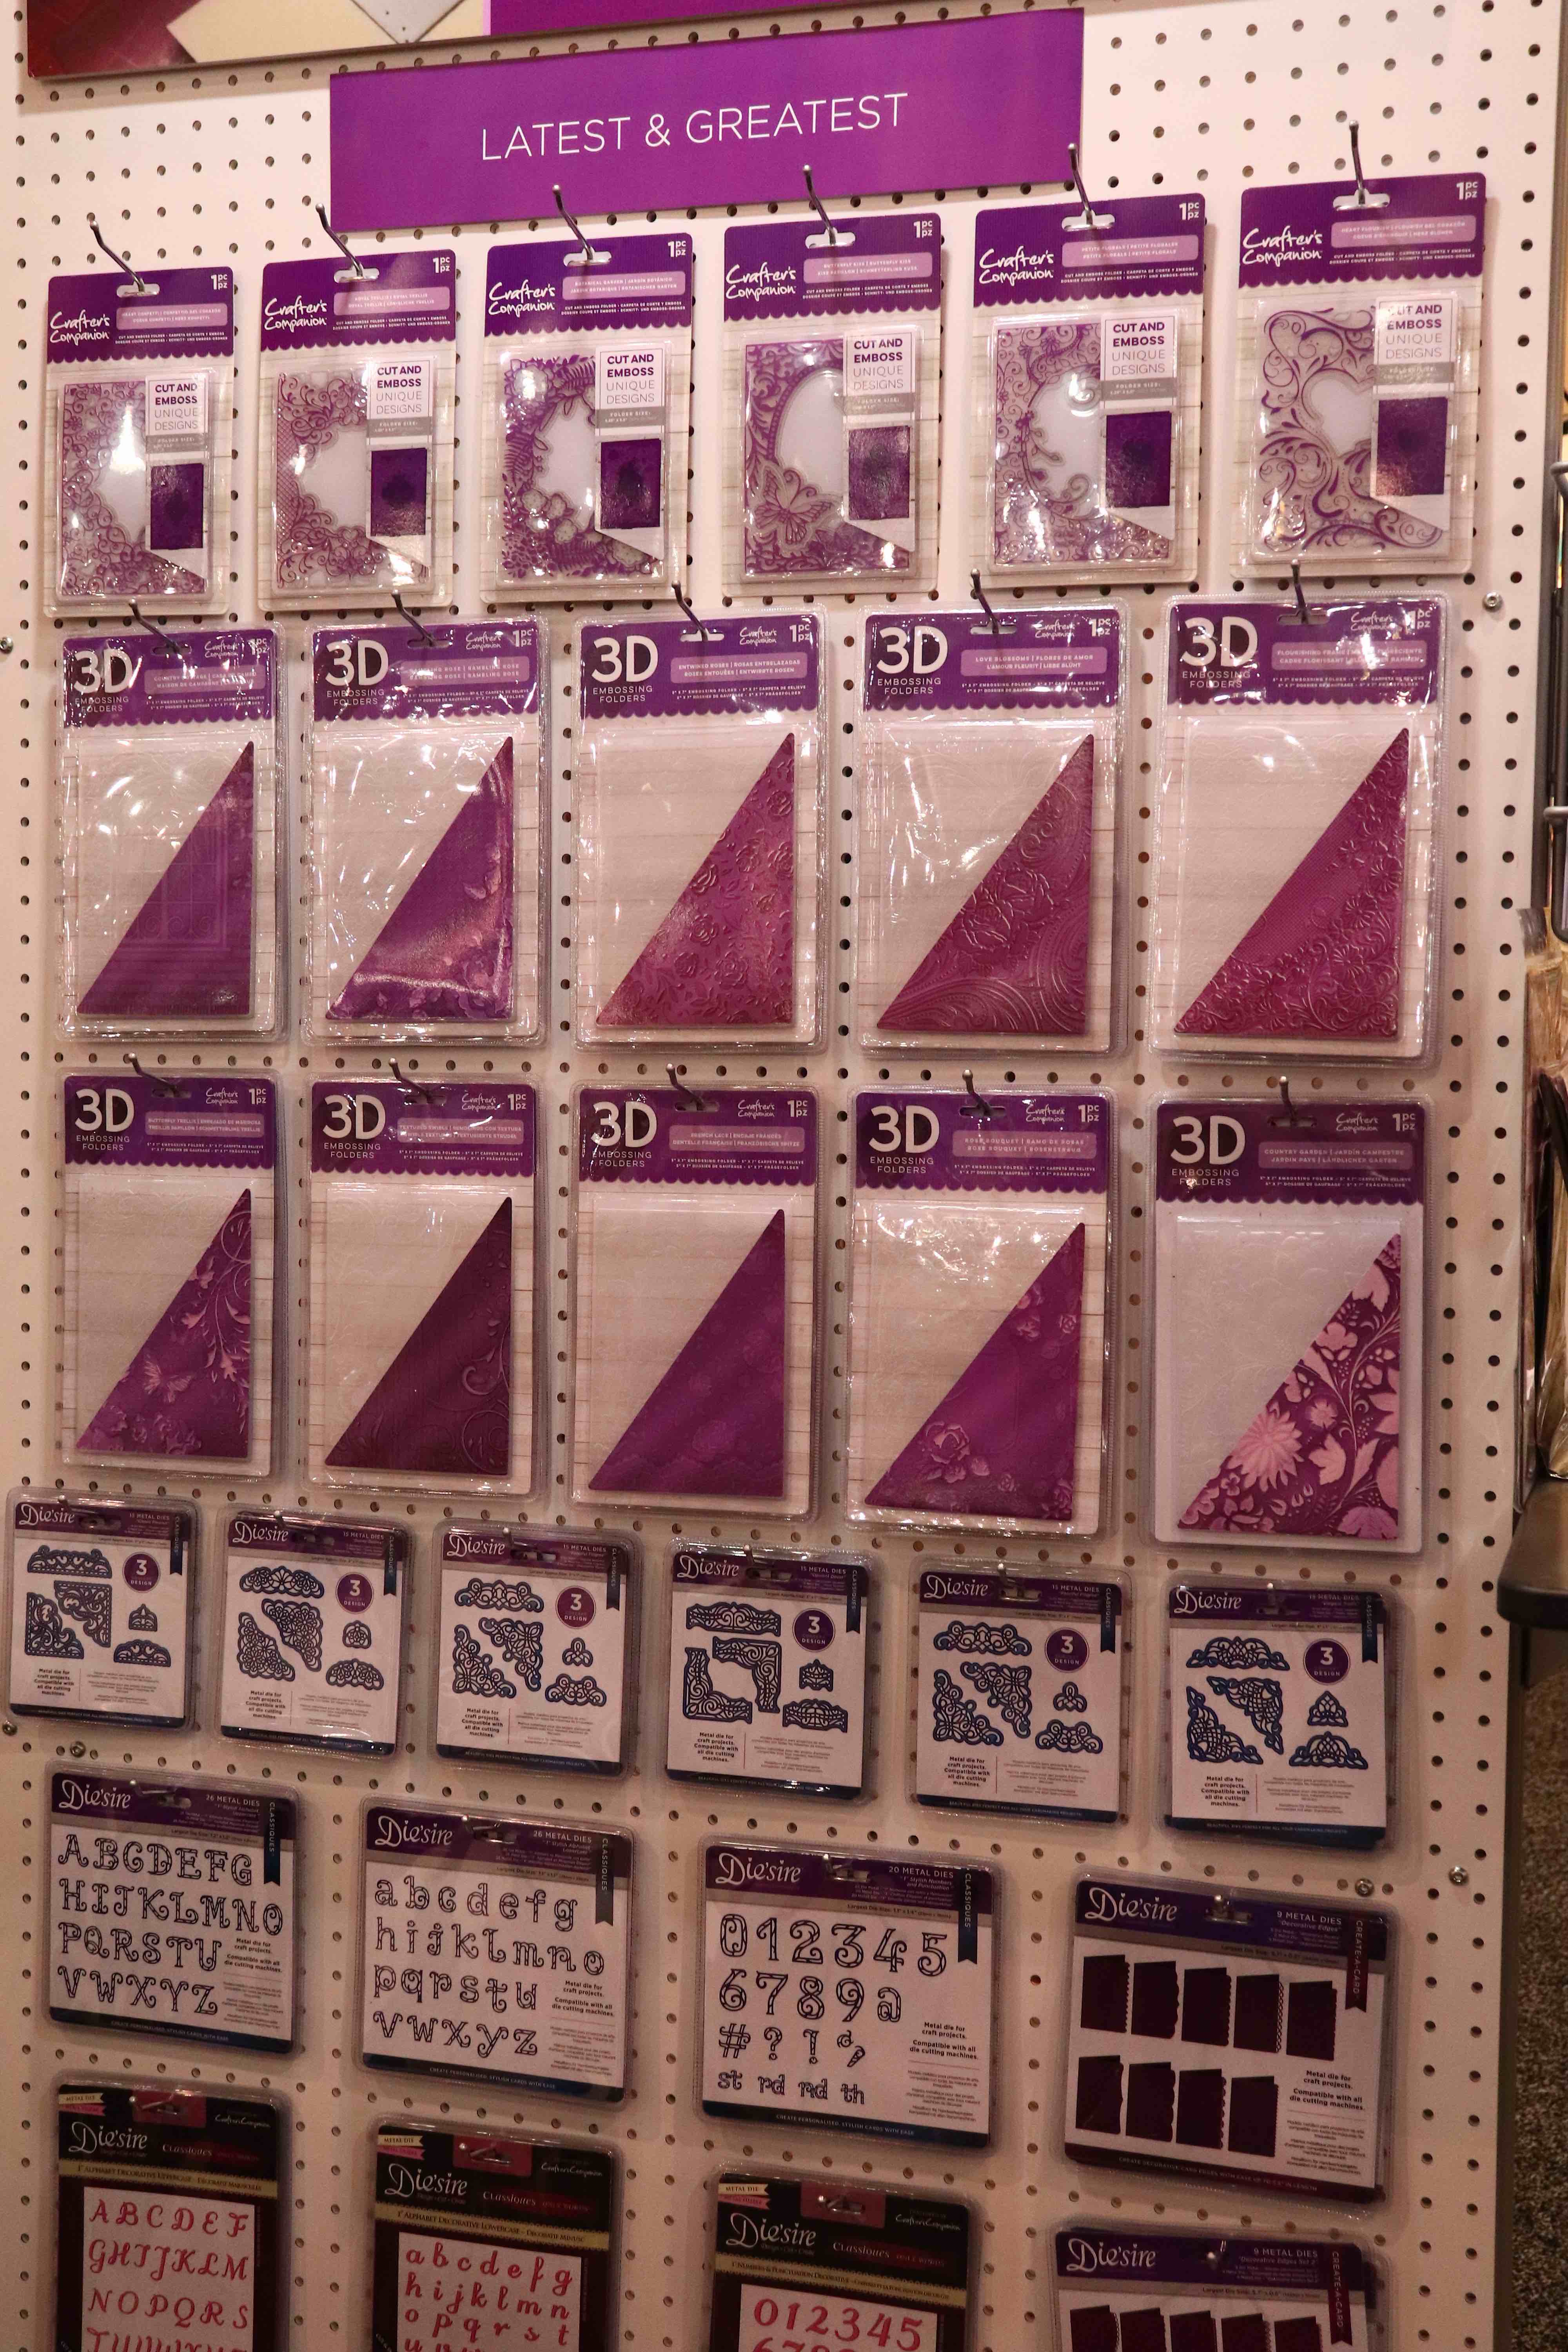
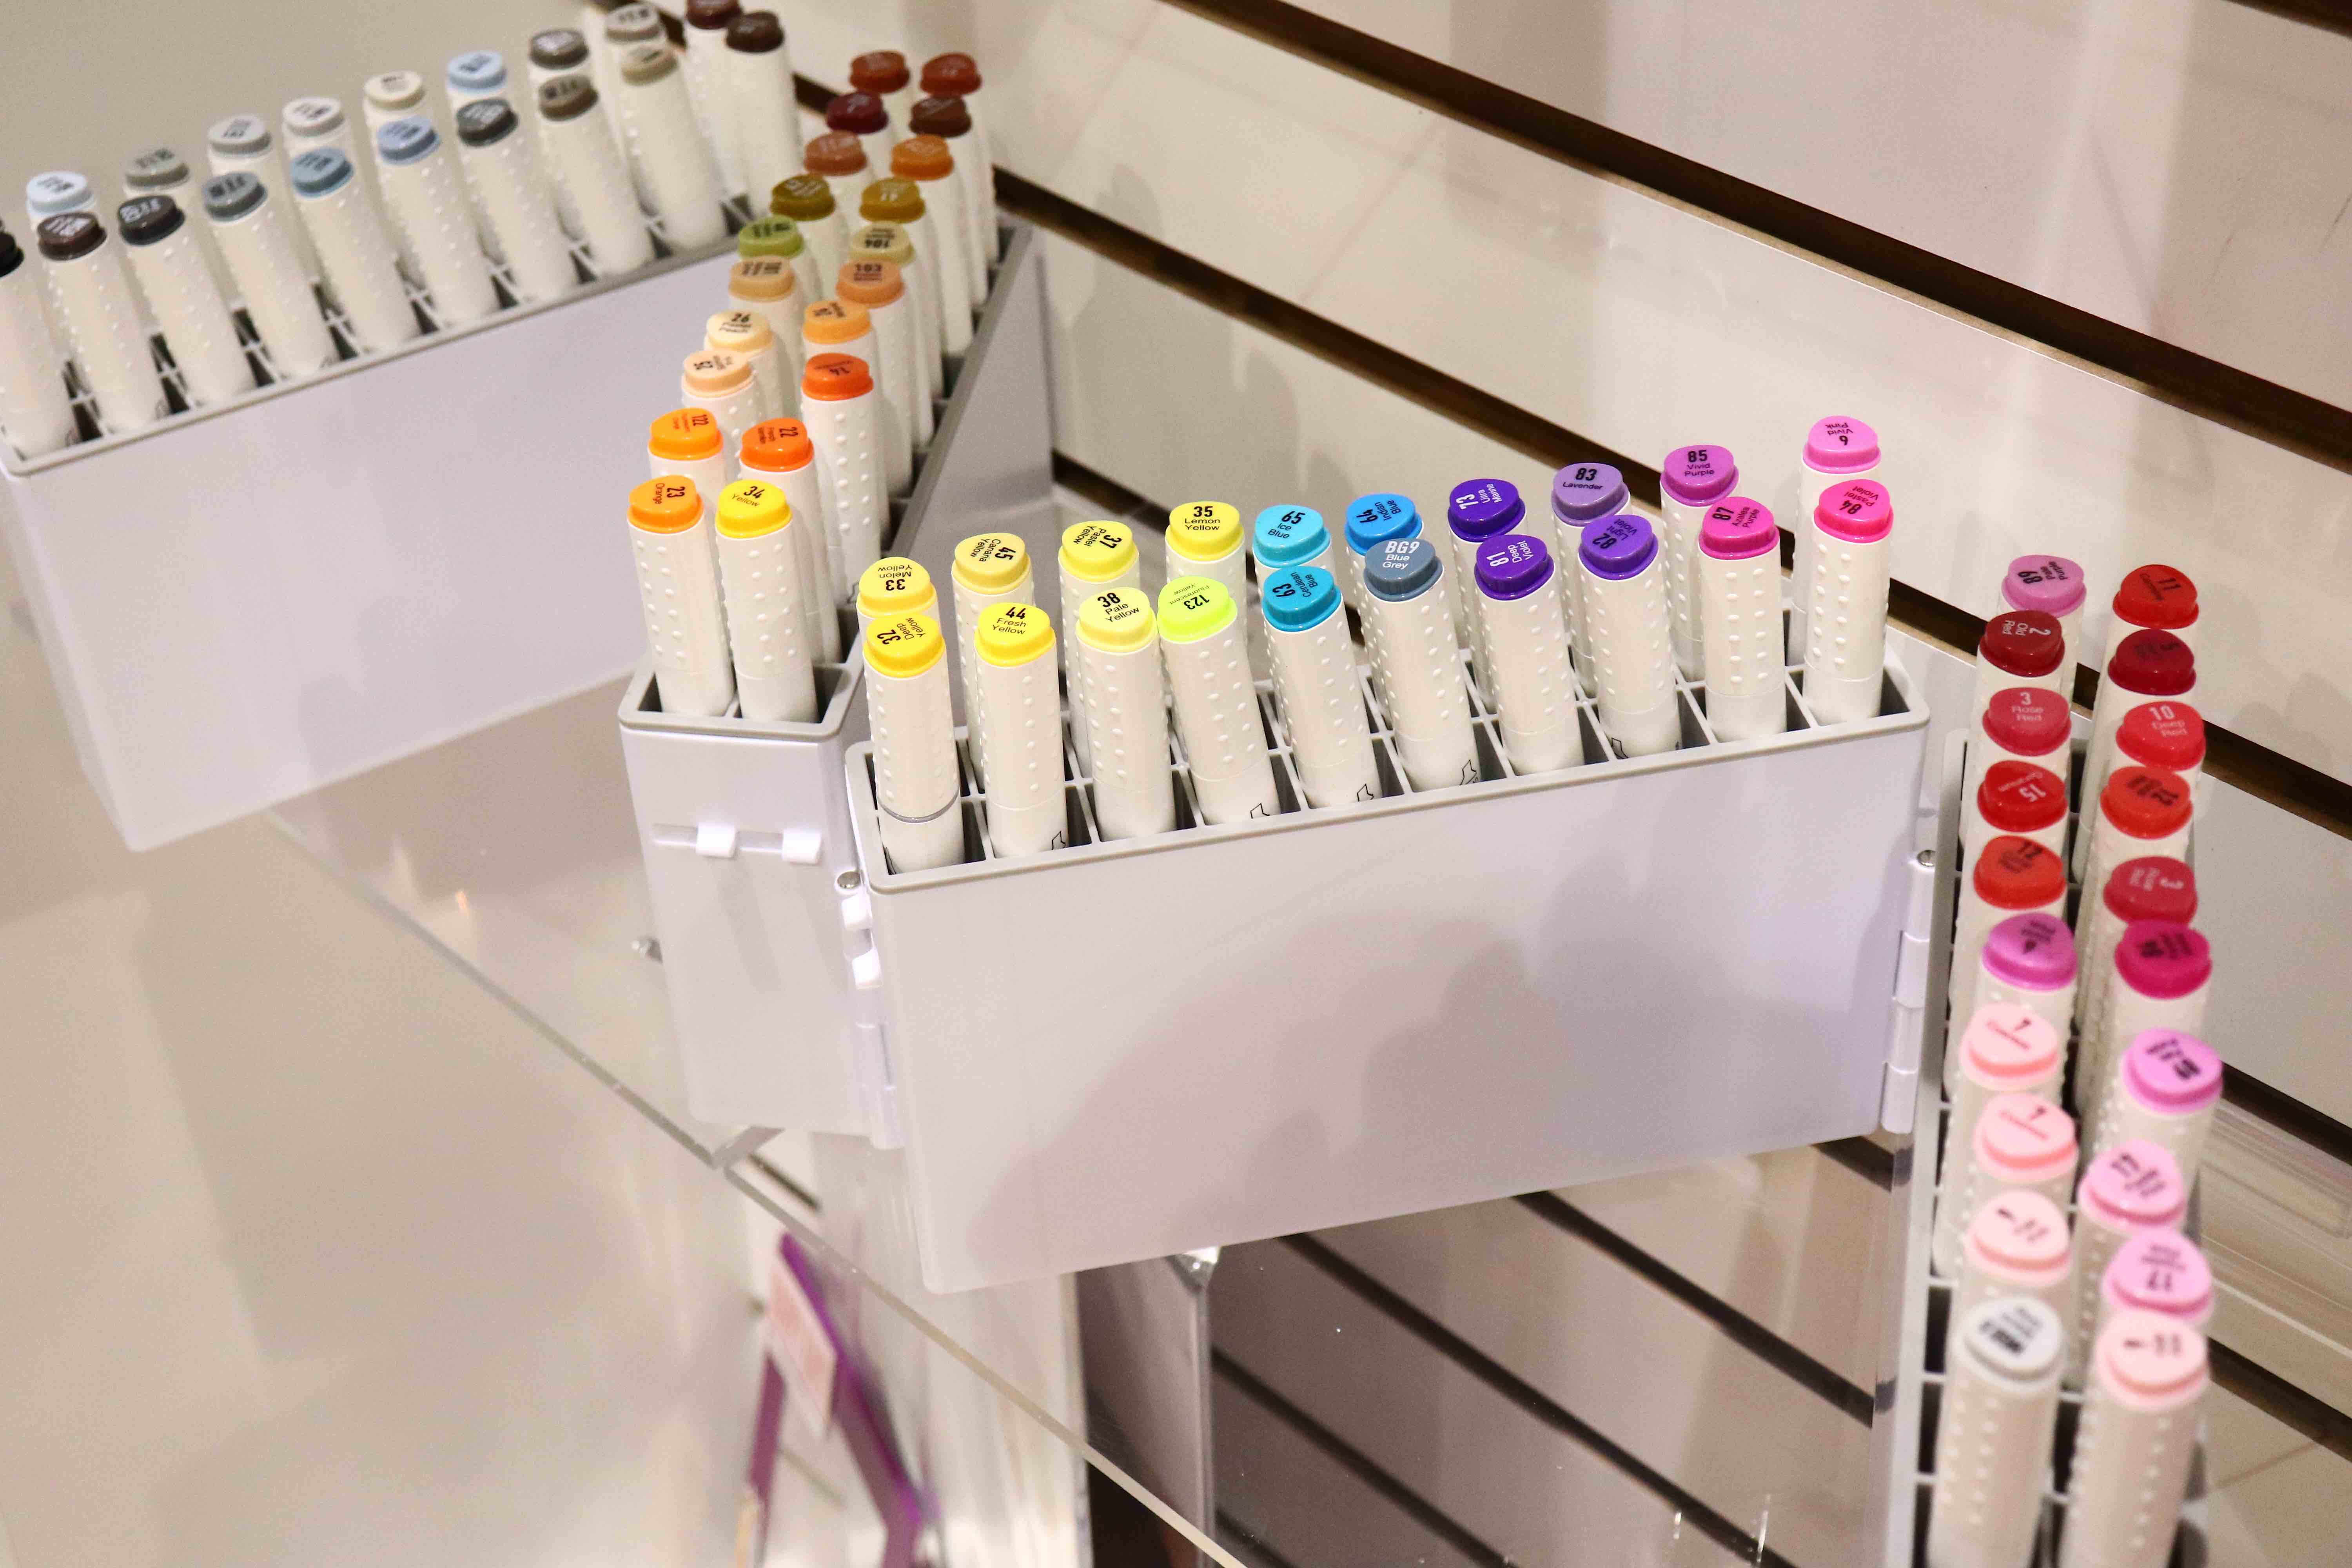
Crafter’s Companion’s Gemini and Gemini Junior Machines have been SO POPULAR in the Simon store of late and we got the scoop on all the latest coordinating Gemini products! Check out the amazing textures you can cut and emboss with! Everything from mirror card stocks, glitter paper, denim, canvas, wood veneer and more!
Can you see how stunning and detailed that embossing is?!? This sample was made with one of their Luxury card stocks and 3D Embossing Folders! Ooo la la!
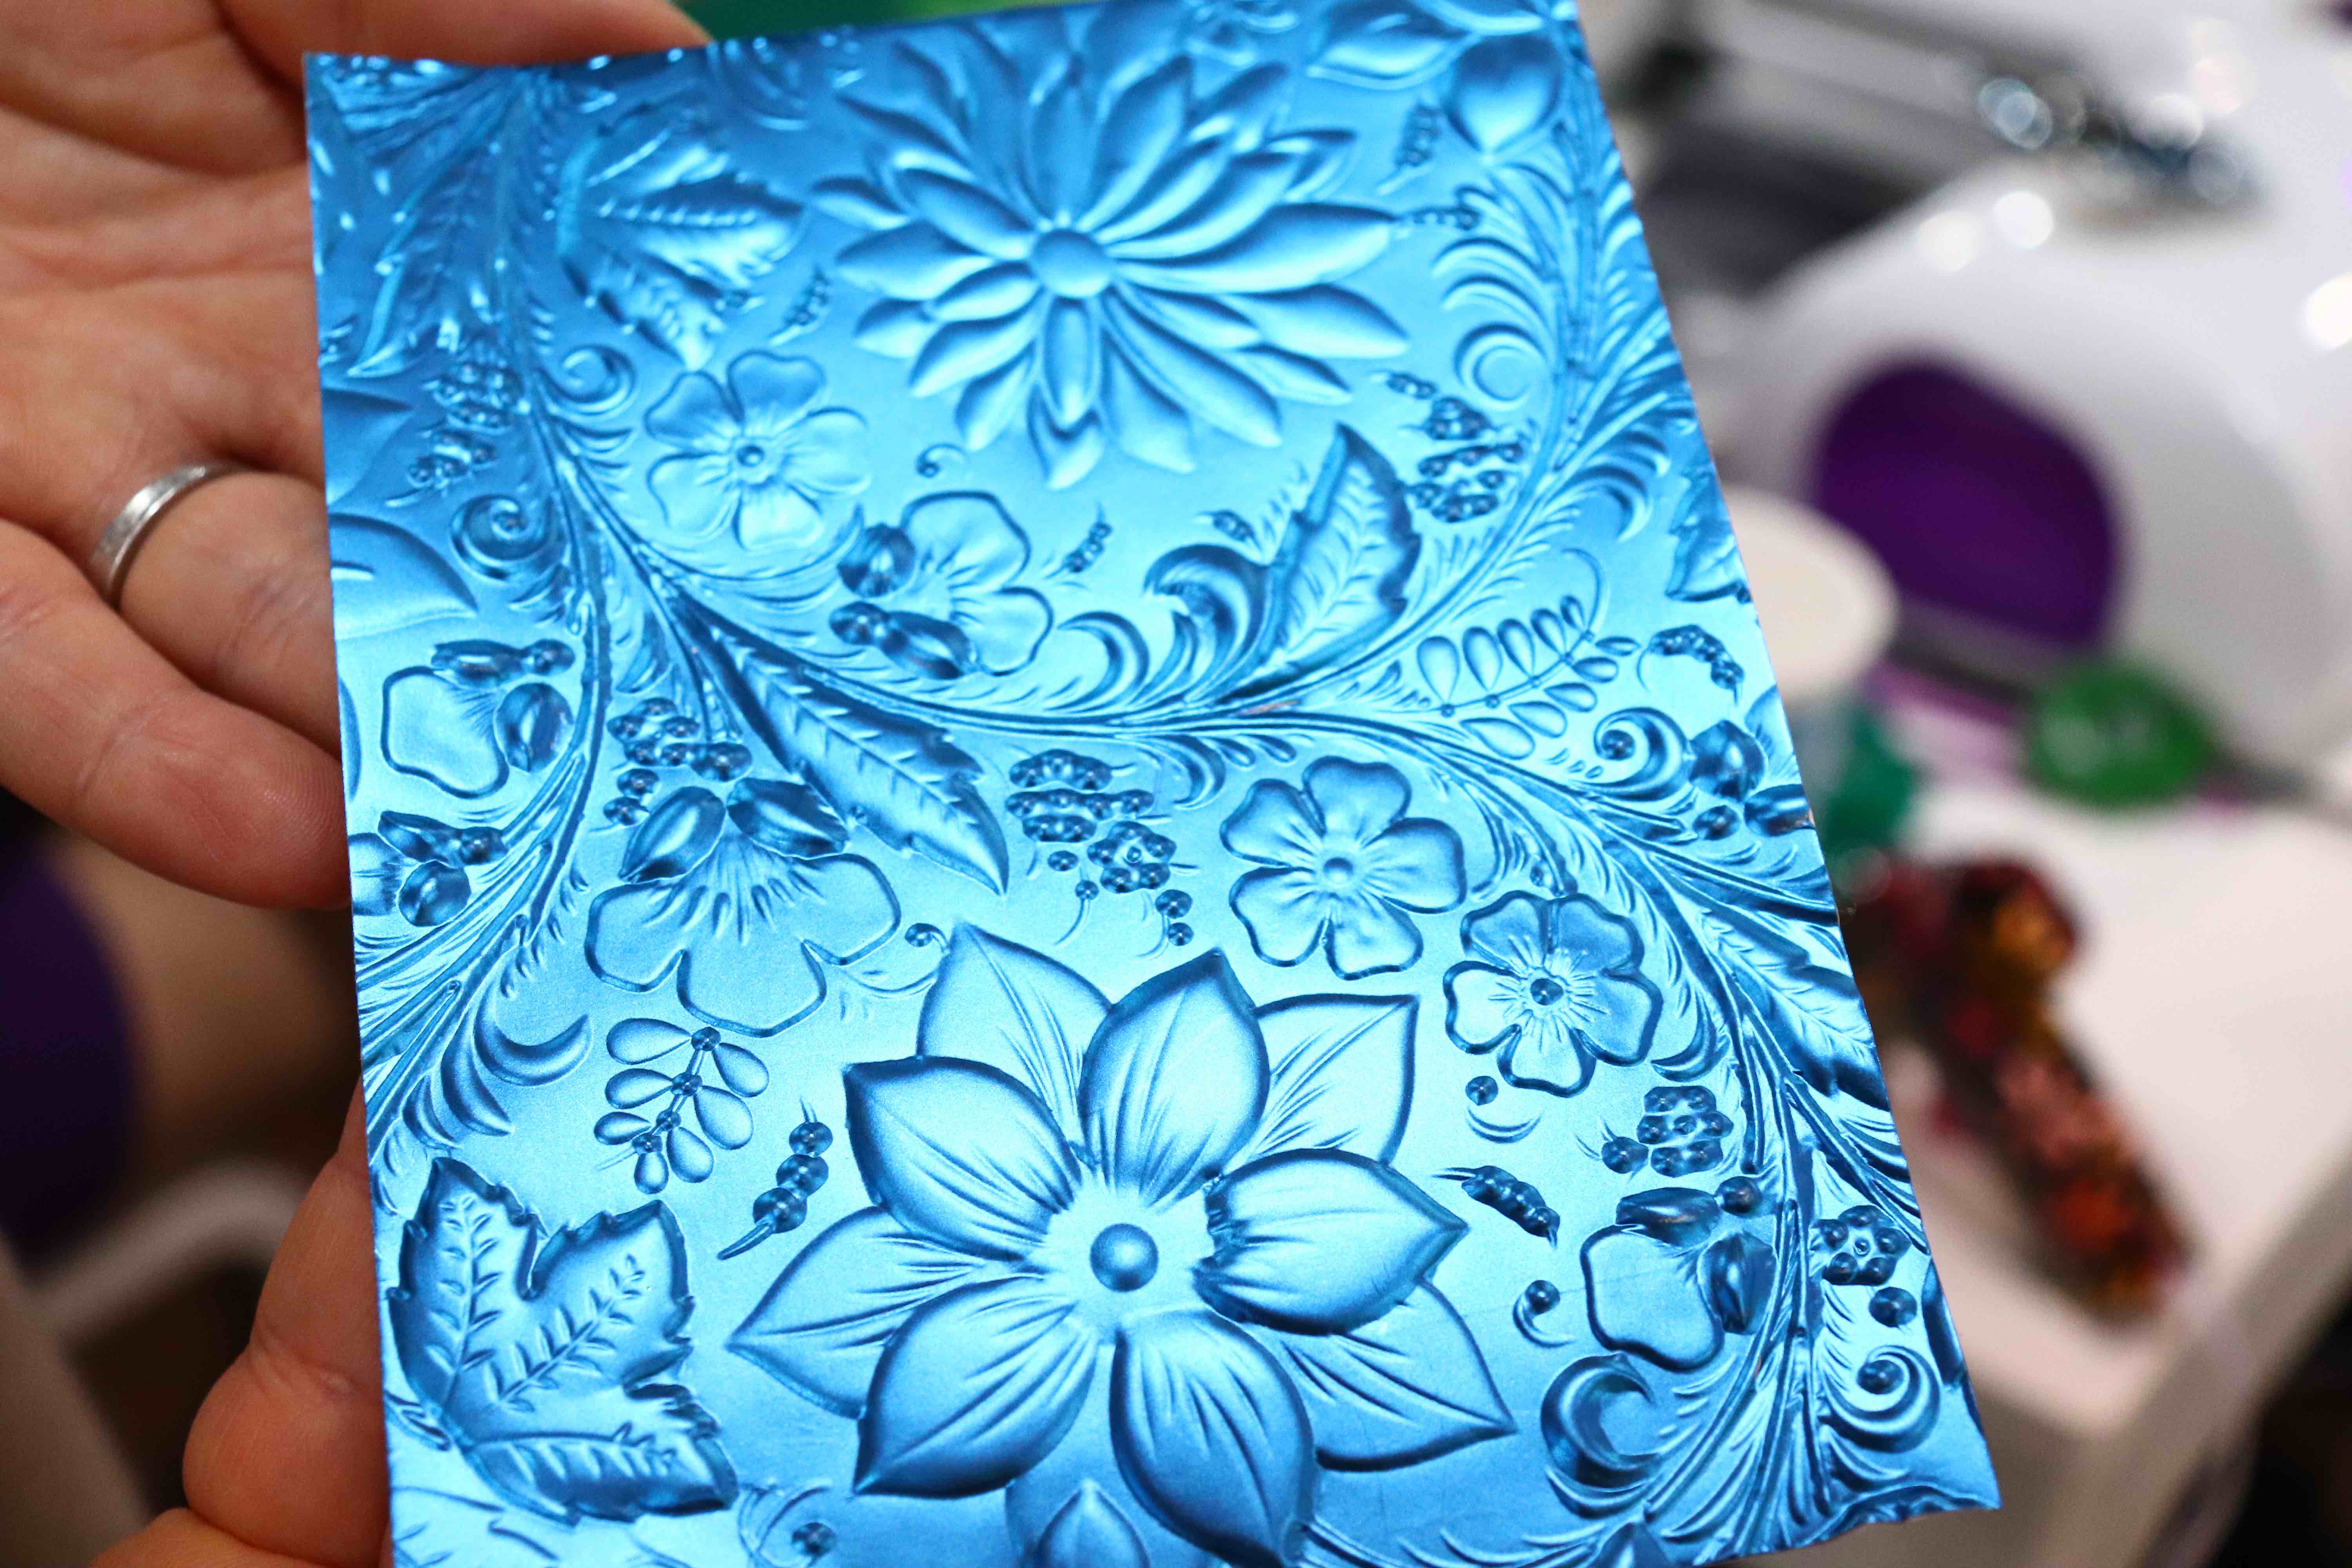
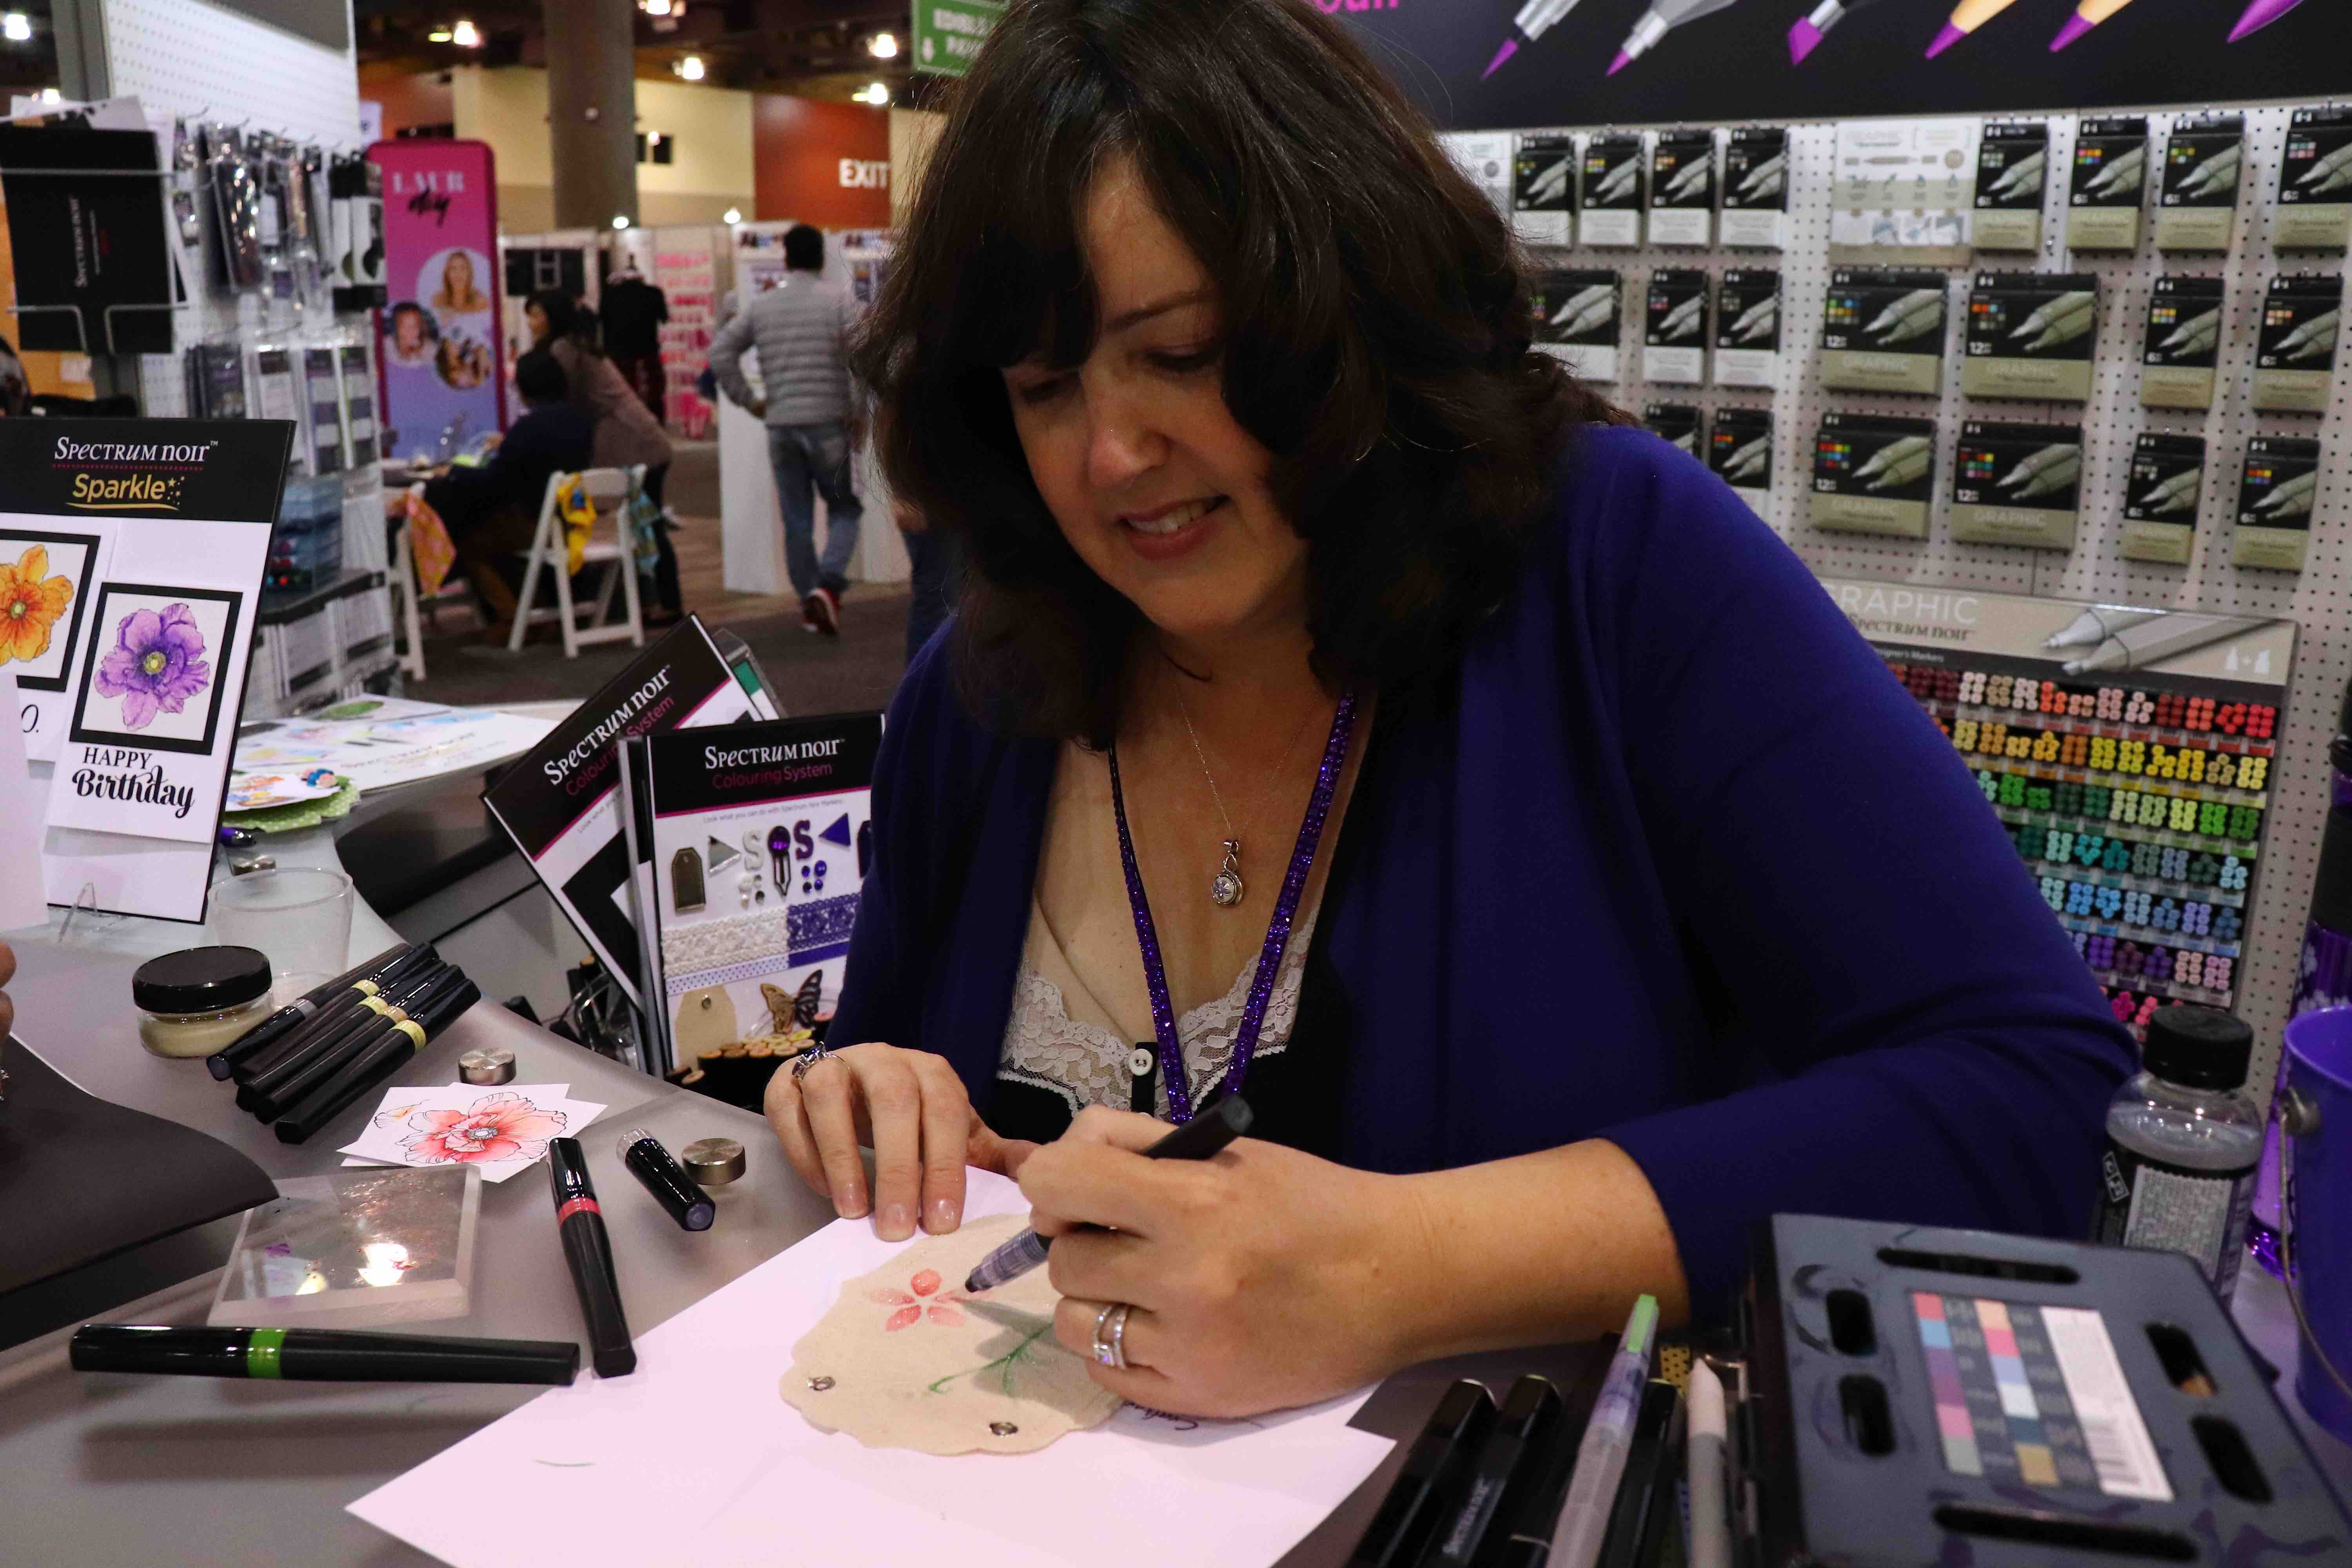
You can also use the Crafter’s Companion Spectrum Noir Sparkle Pens to color onto the 3D embossed canvas texture! Isn’t that awesome??
The latest from Hero Arts is super-exciting (as always!), and not only are there cute, new stamps with Spring-inspired inks like these…
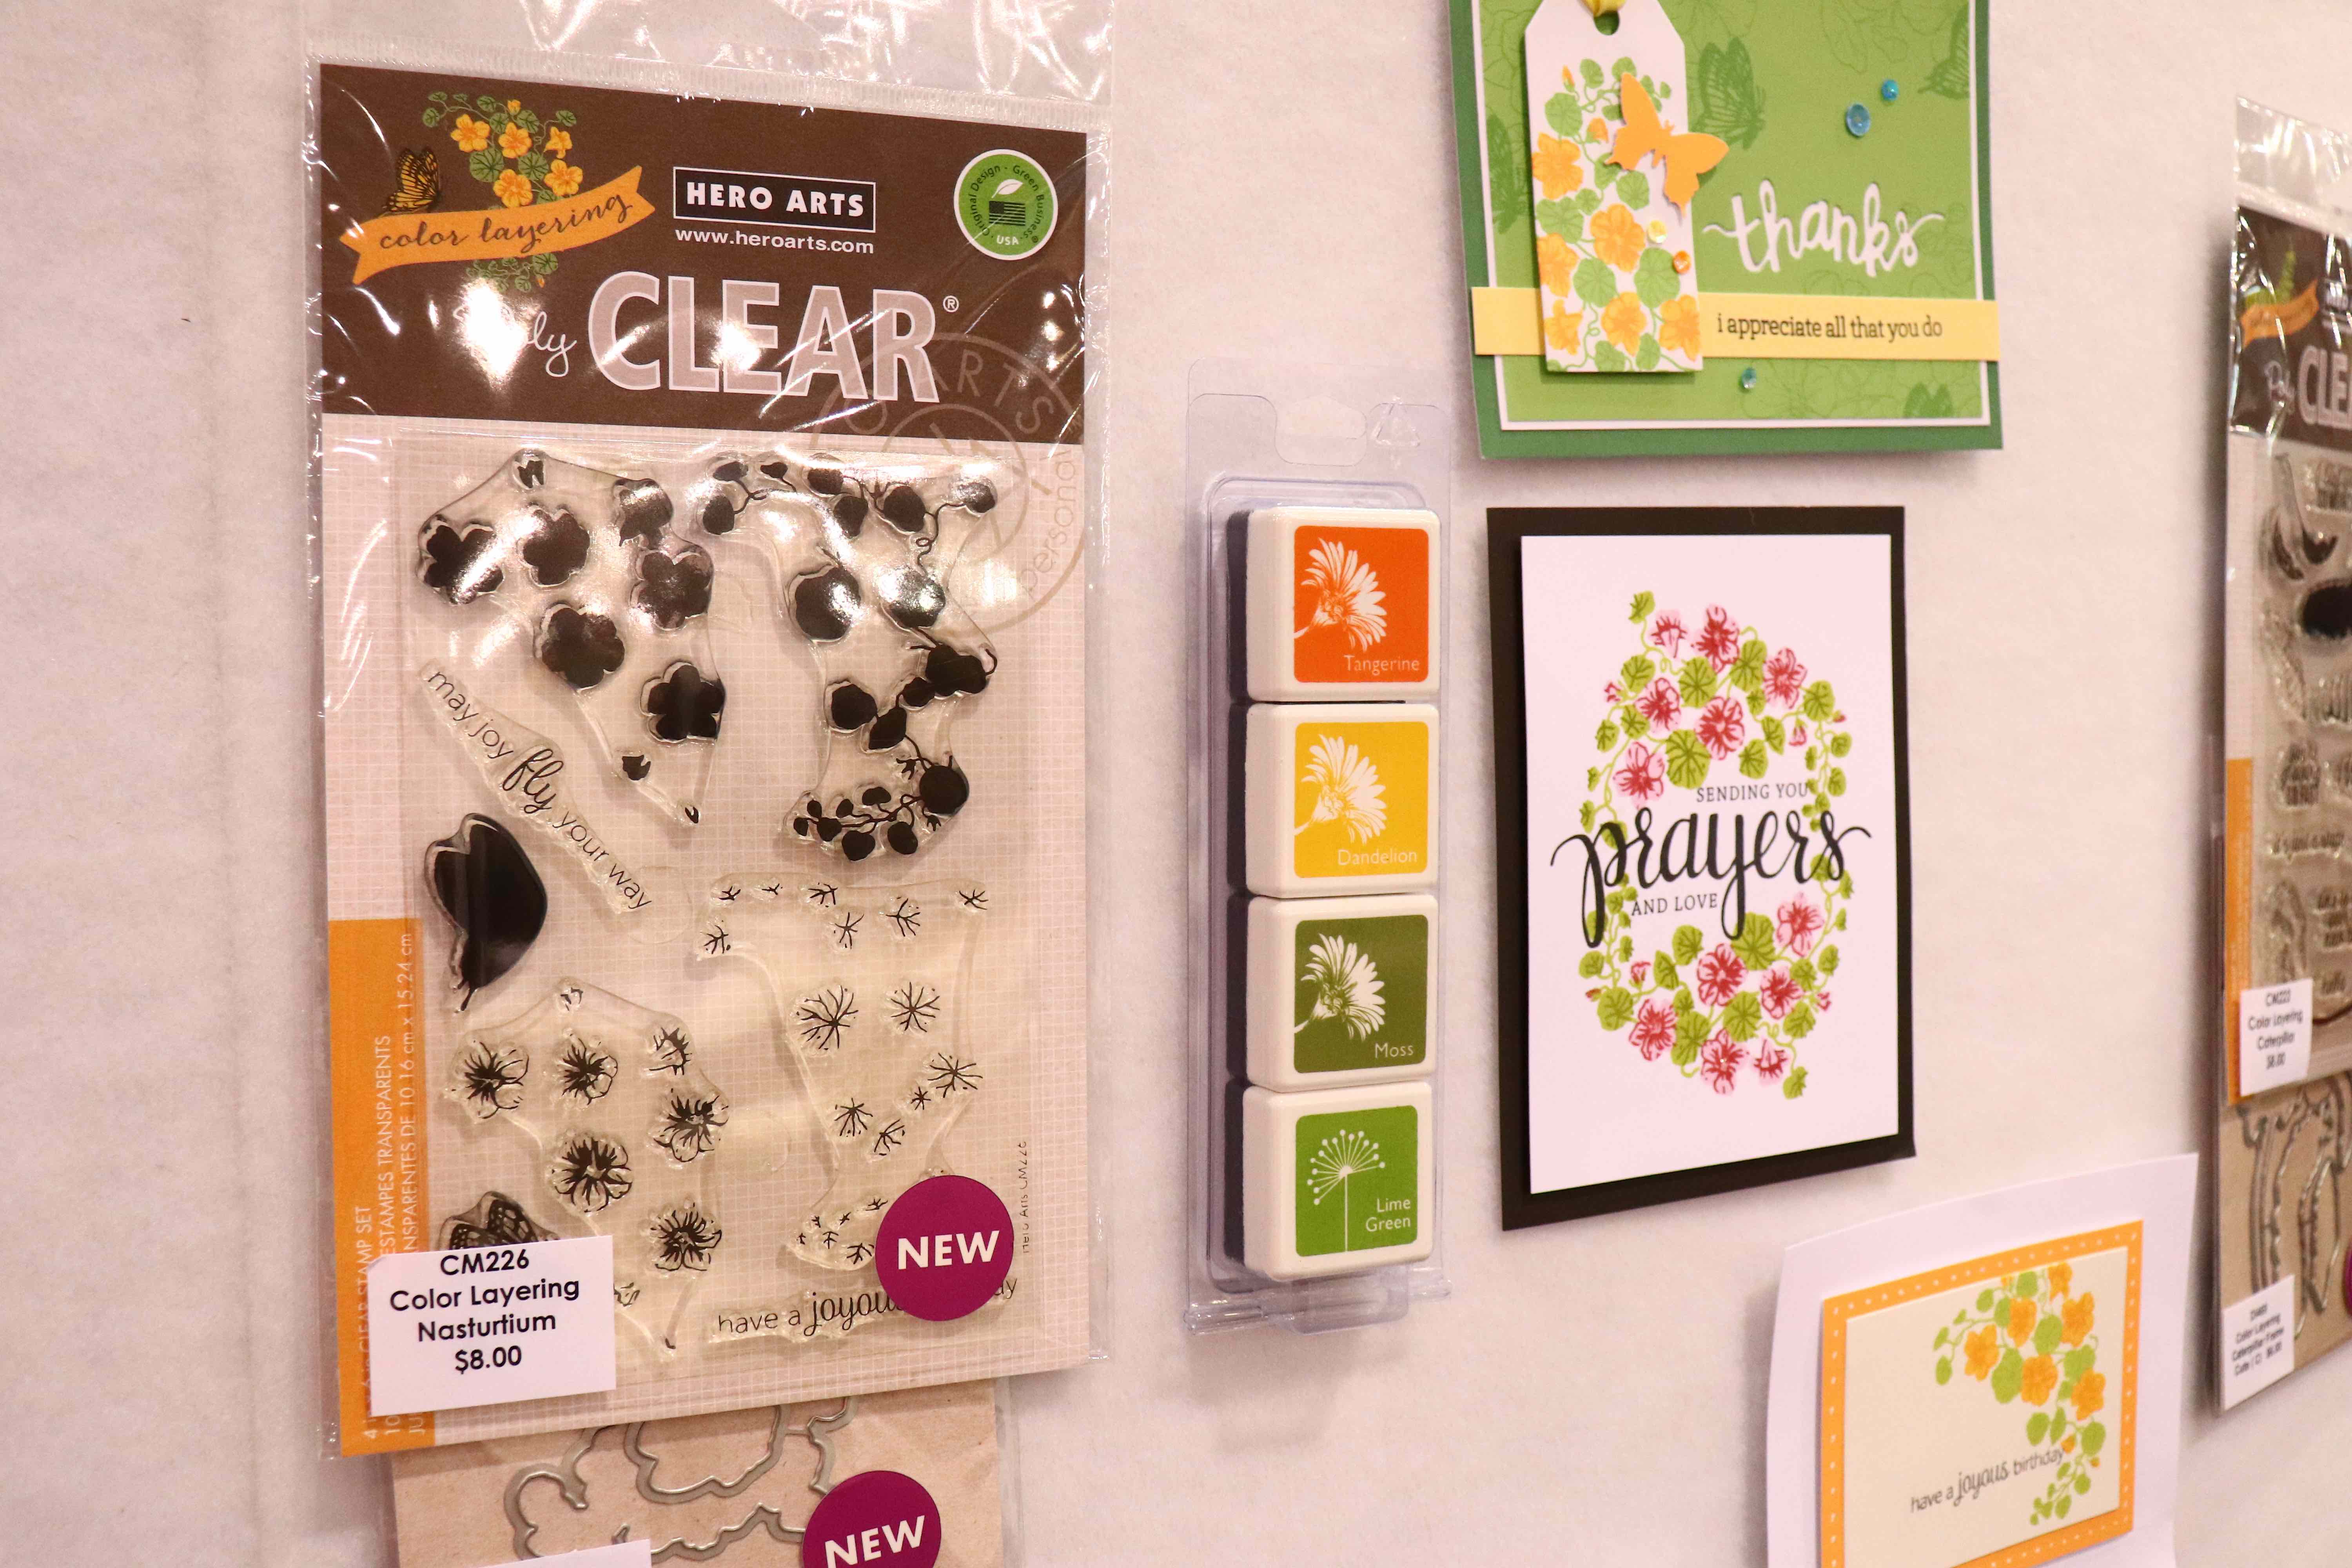
… but there are also amazing new woodblock stamps with coordinating Frame Cuts dies too! That floral image is stunning; imagine it colored with watercolors!

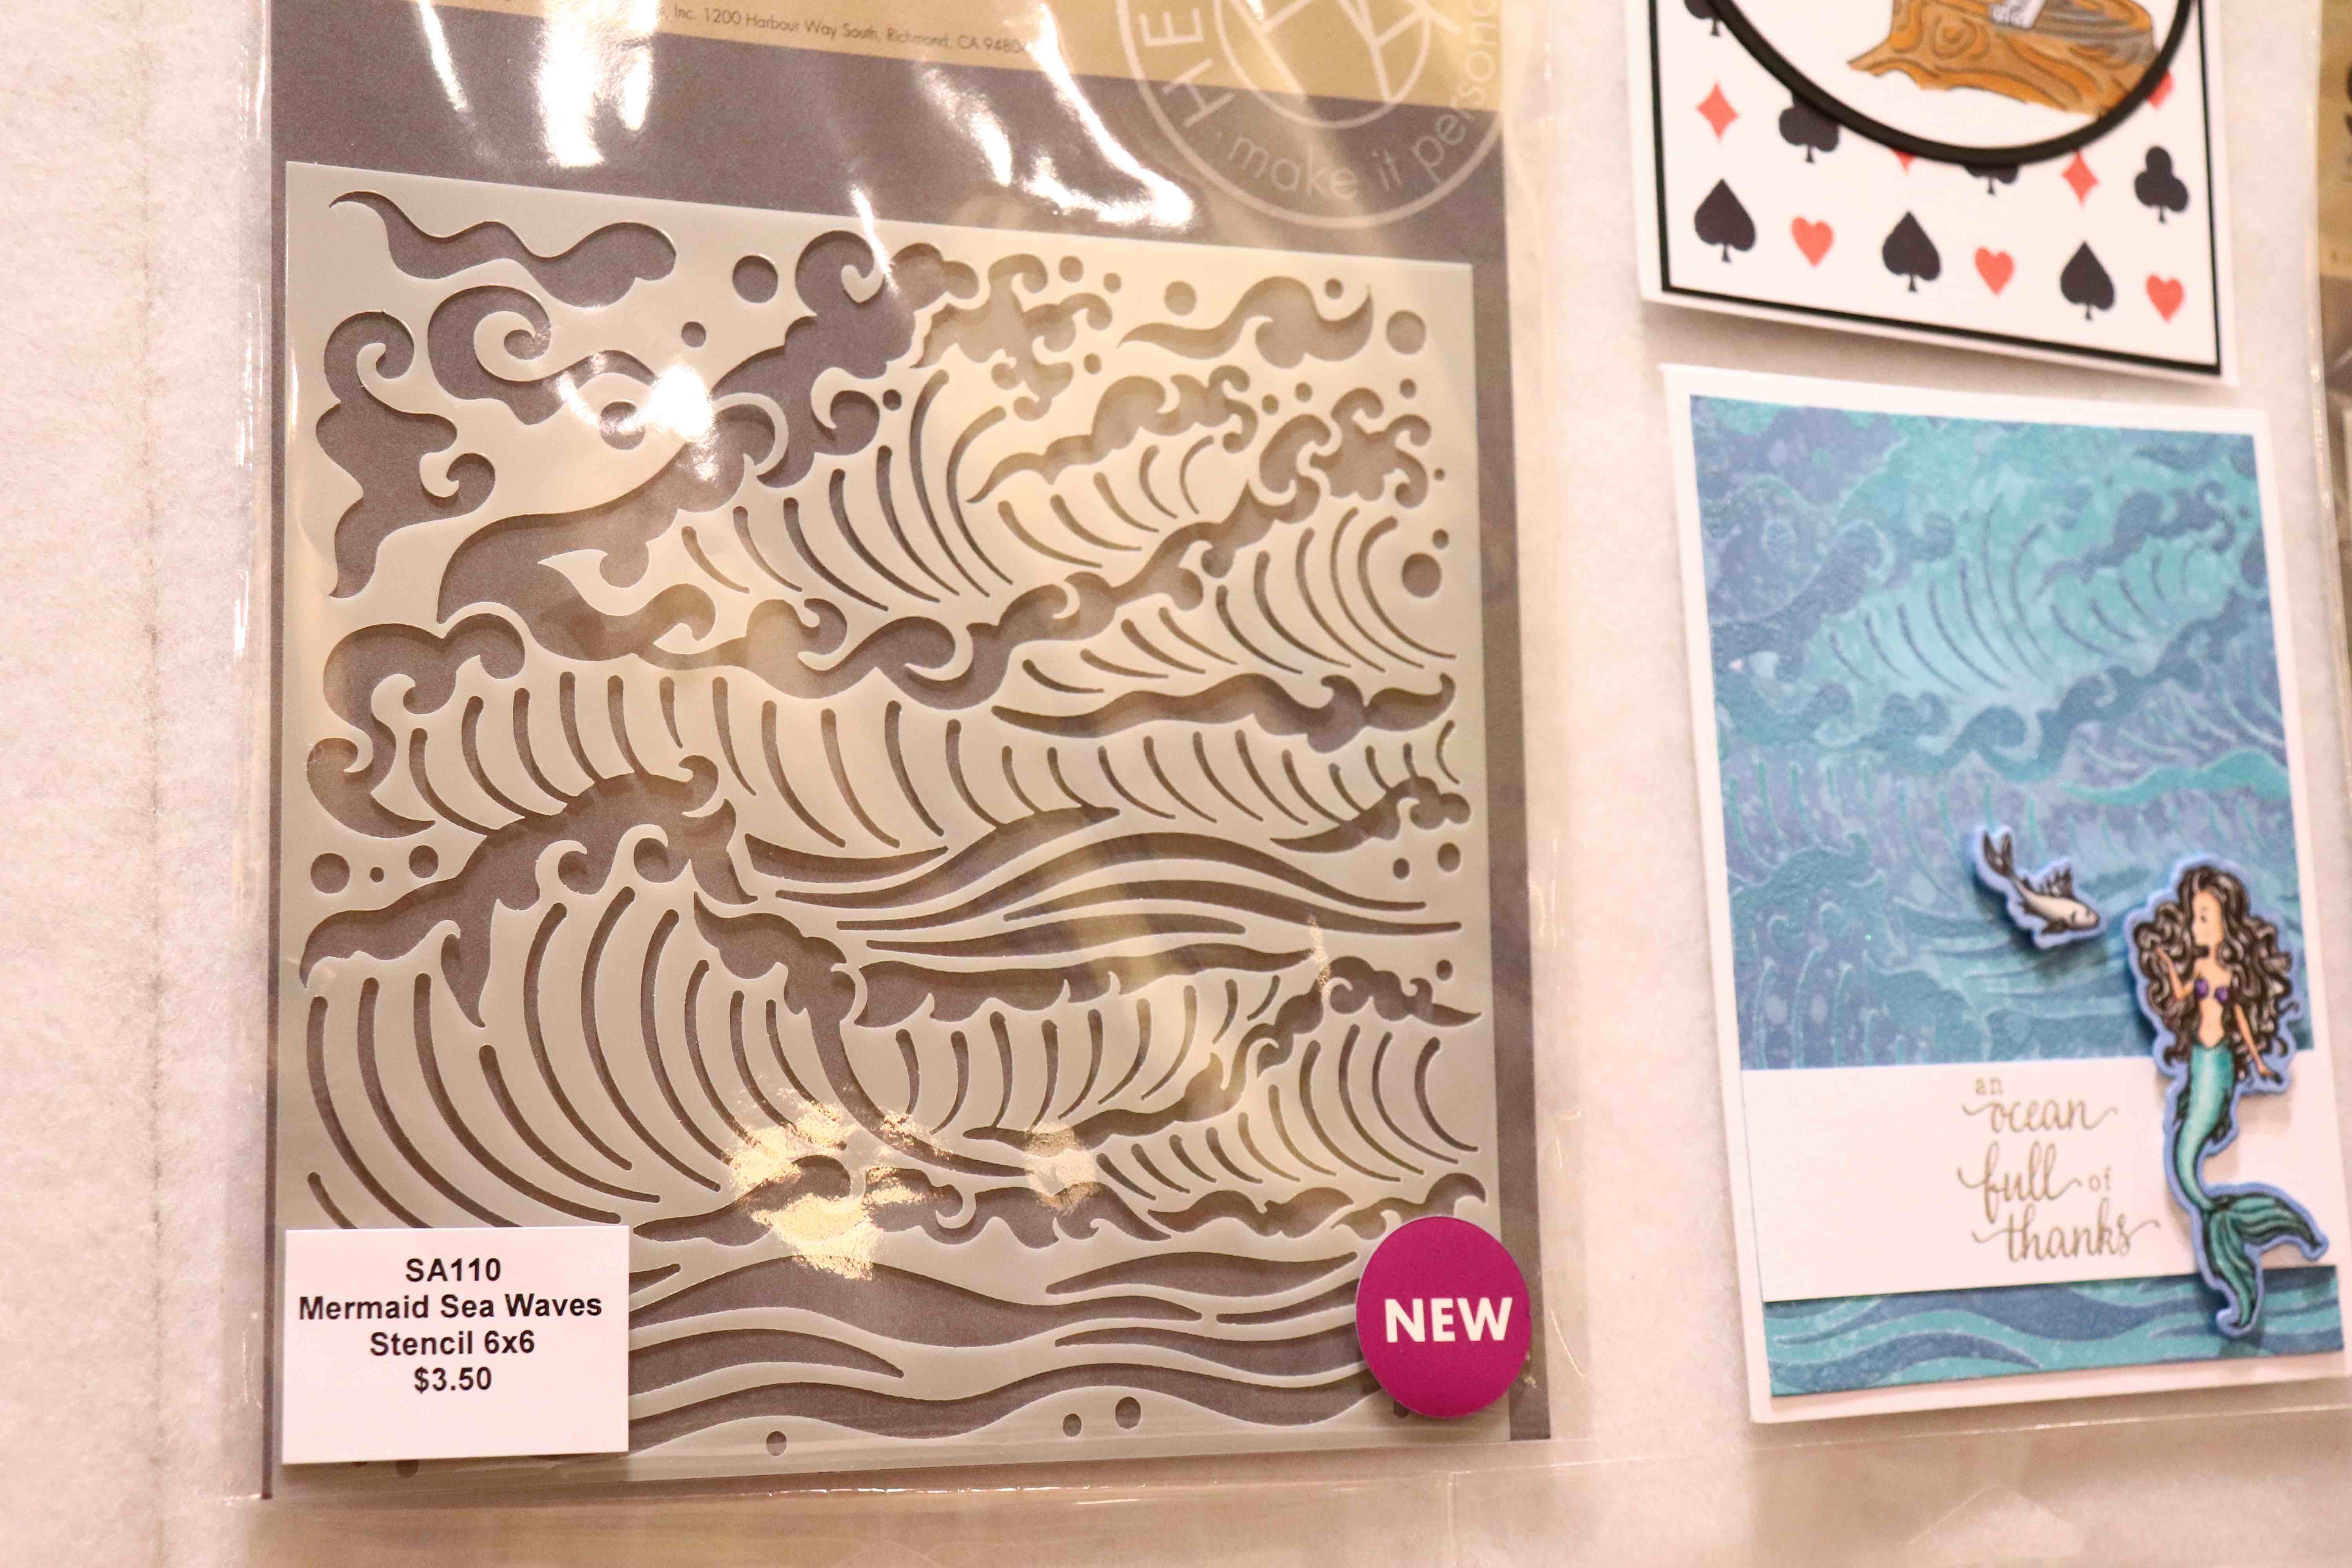
And the popular mermaid collection is back! Check out this amazingly intricate wave stencil!
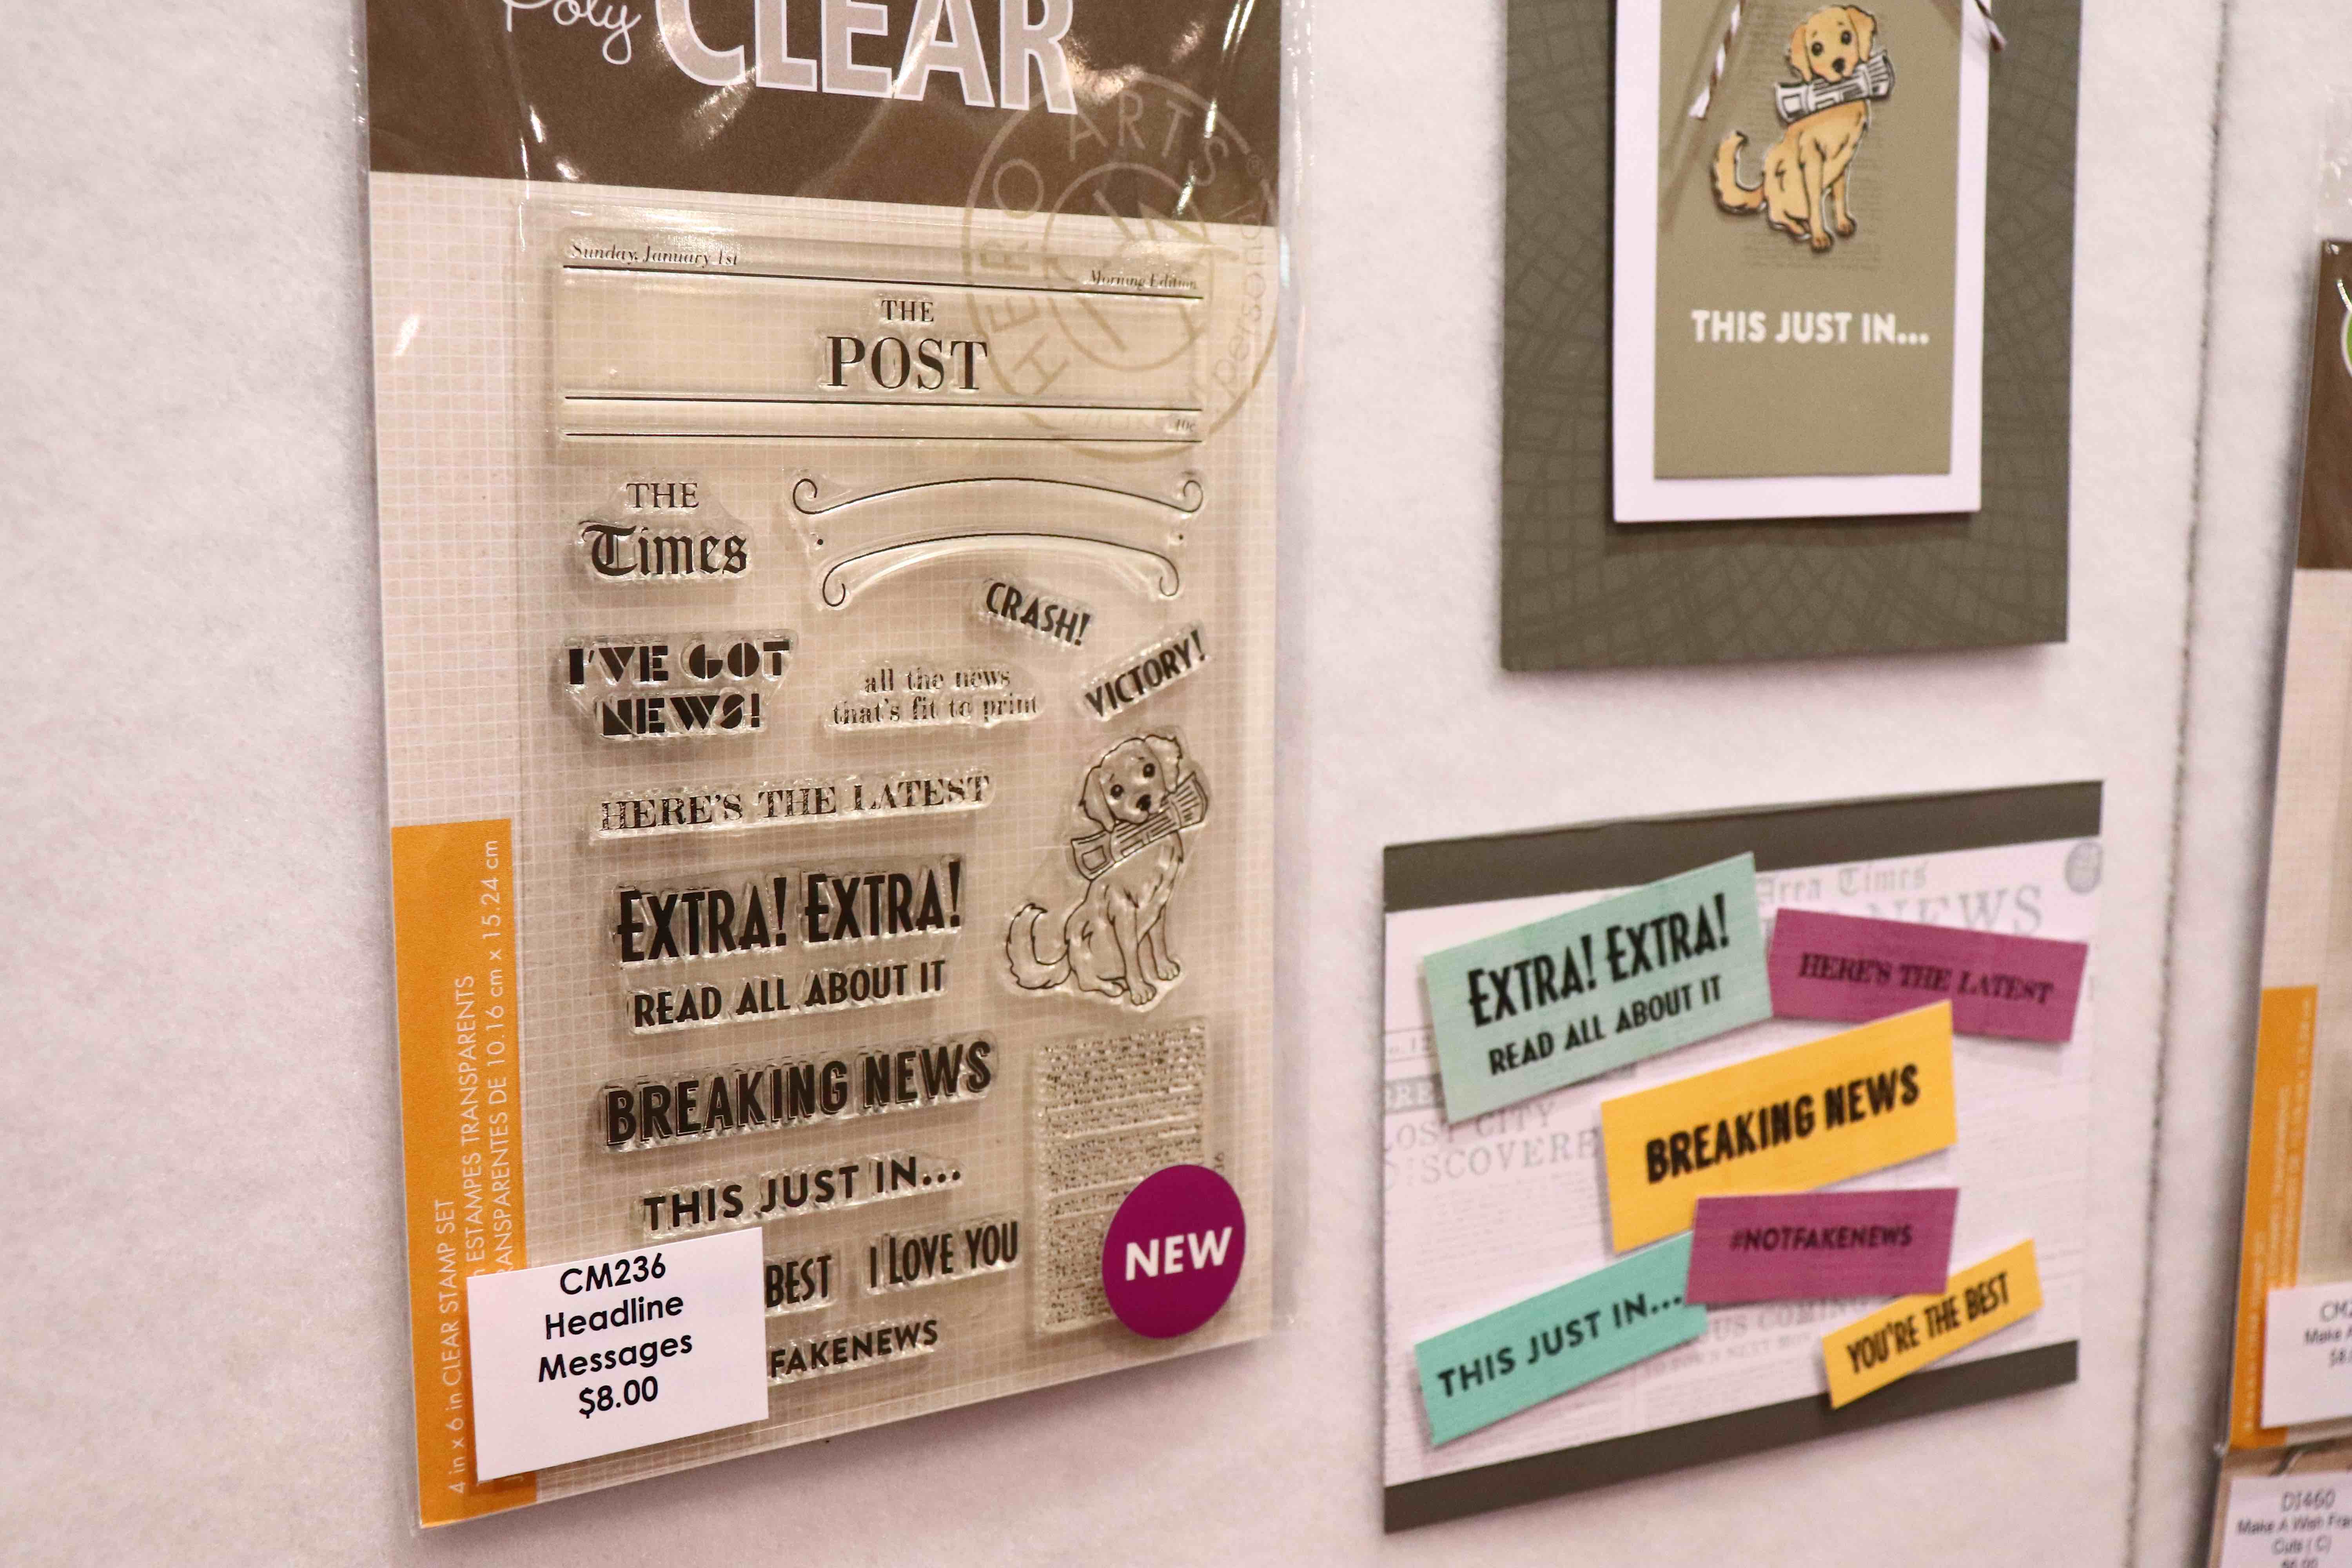
I completely adore the Headline Messages stamp set; the sentiments are fabulous and the cute pooch with its newspaper is precious!
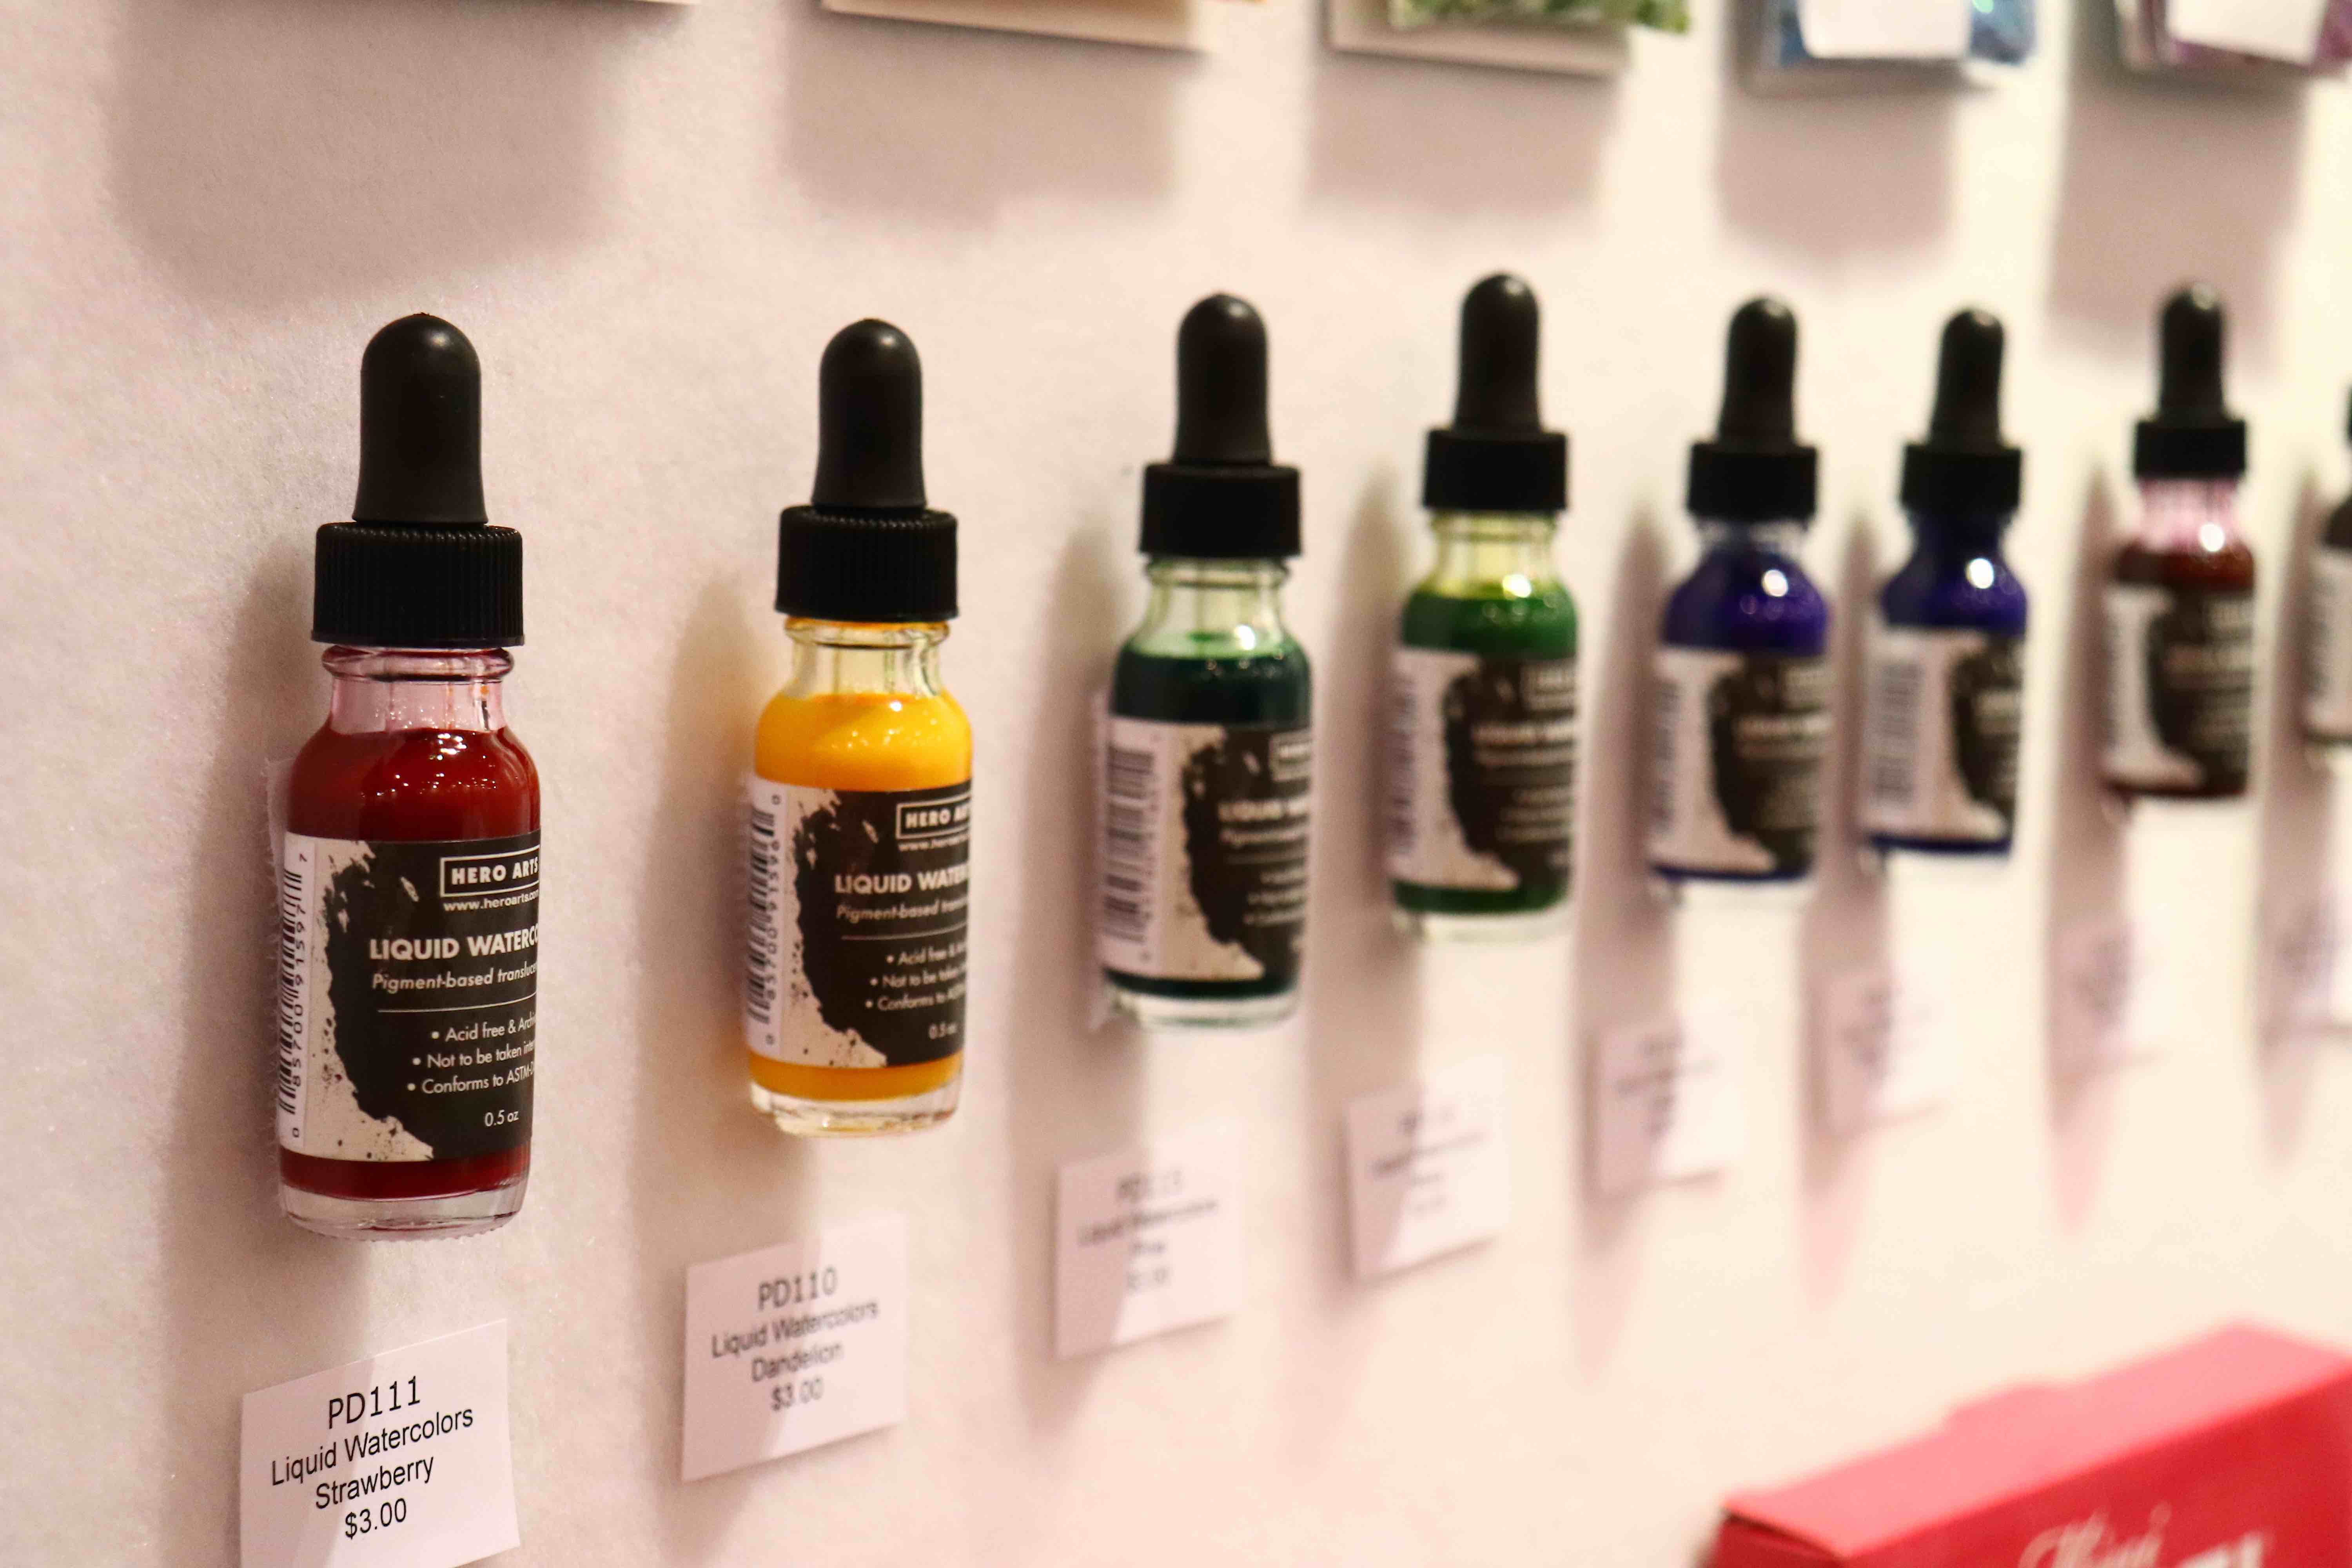
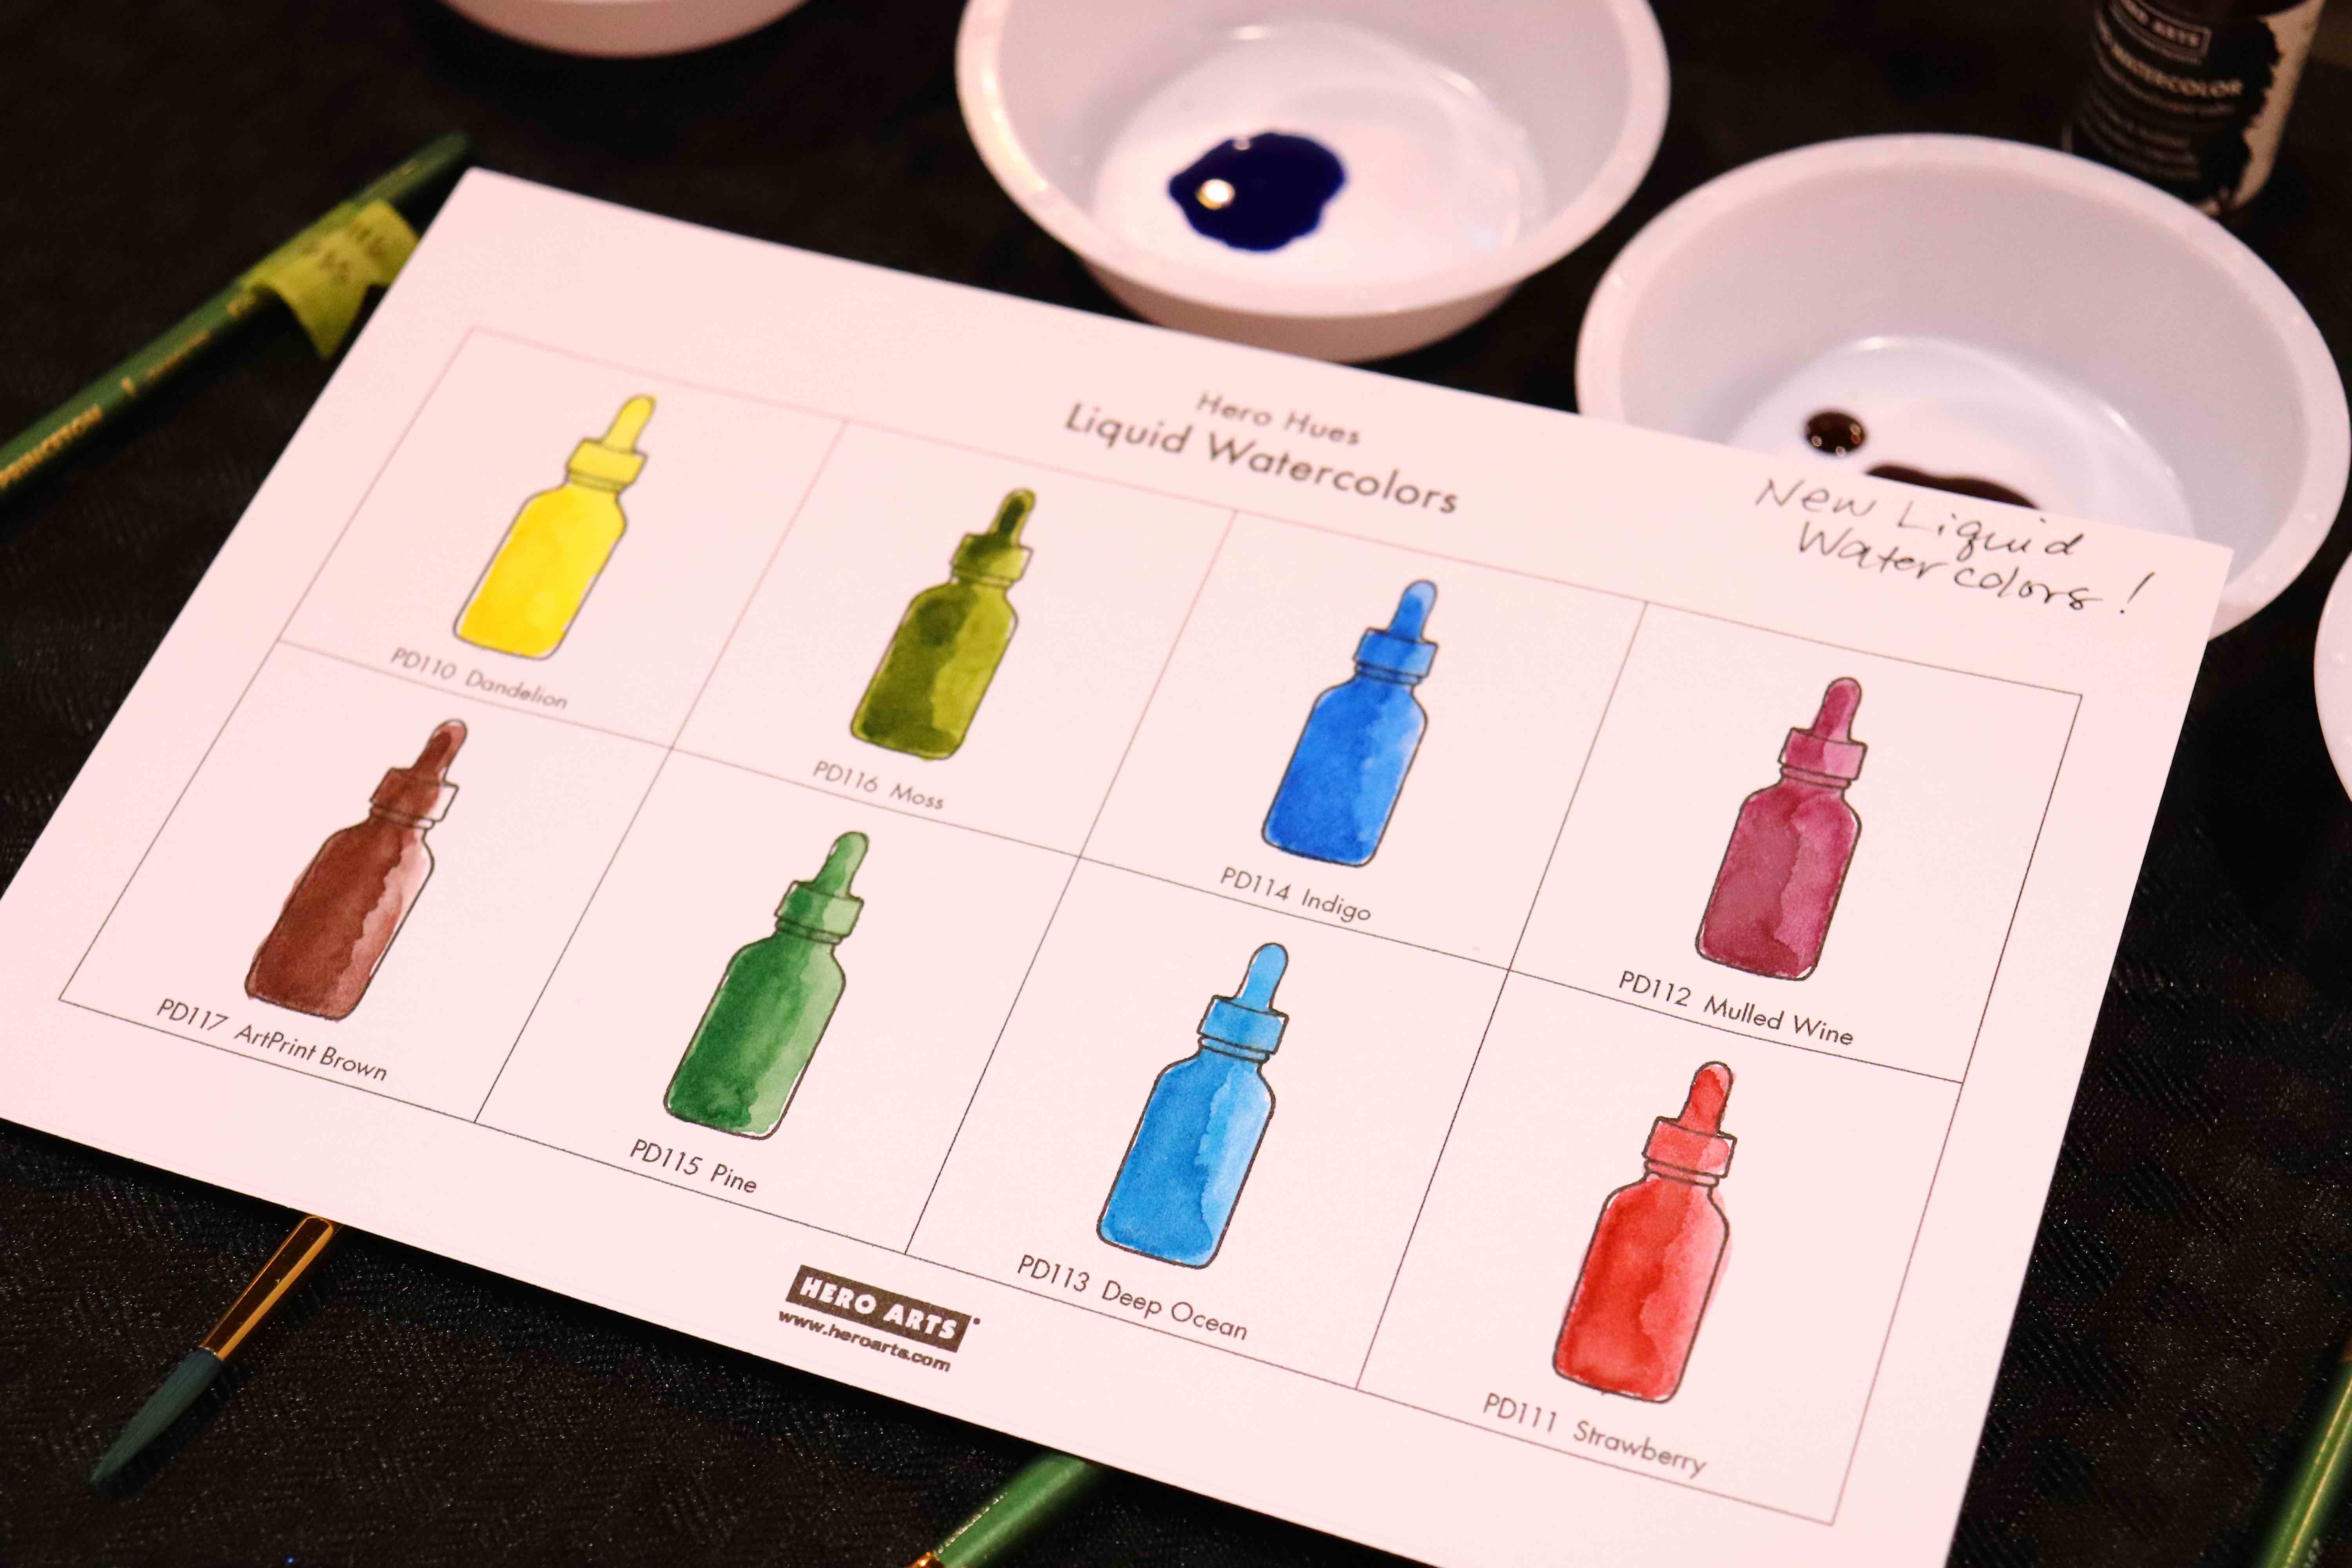
One of the most exciting products at the show from Hero Arts was the Liquid Watercolors; these are highly concentrated, liquid pigments that come in 8 vibrant colors.
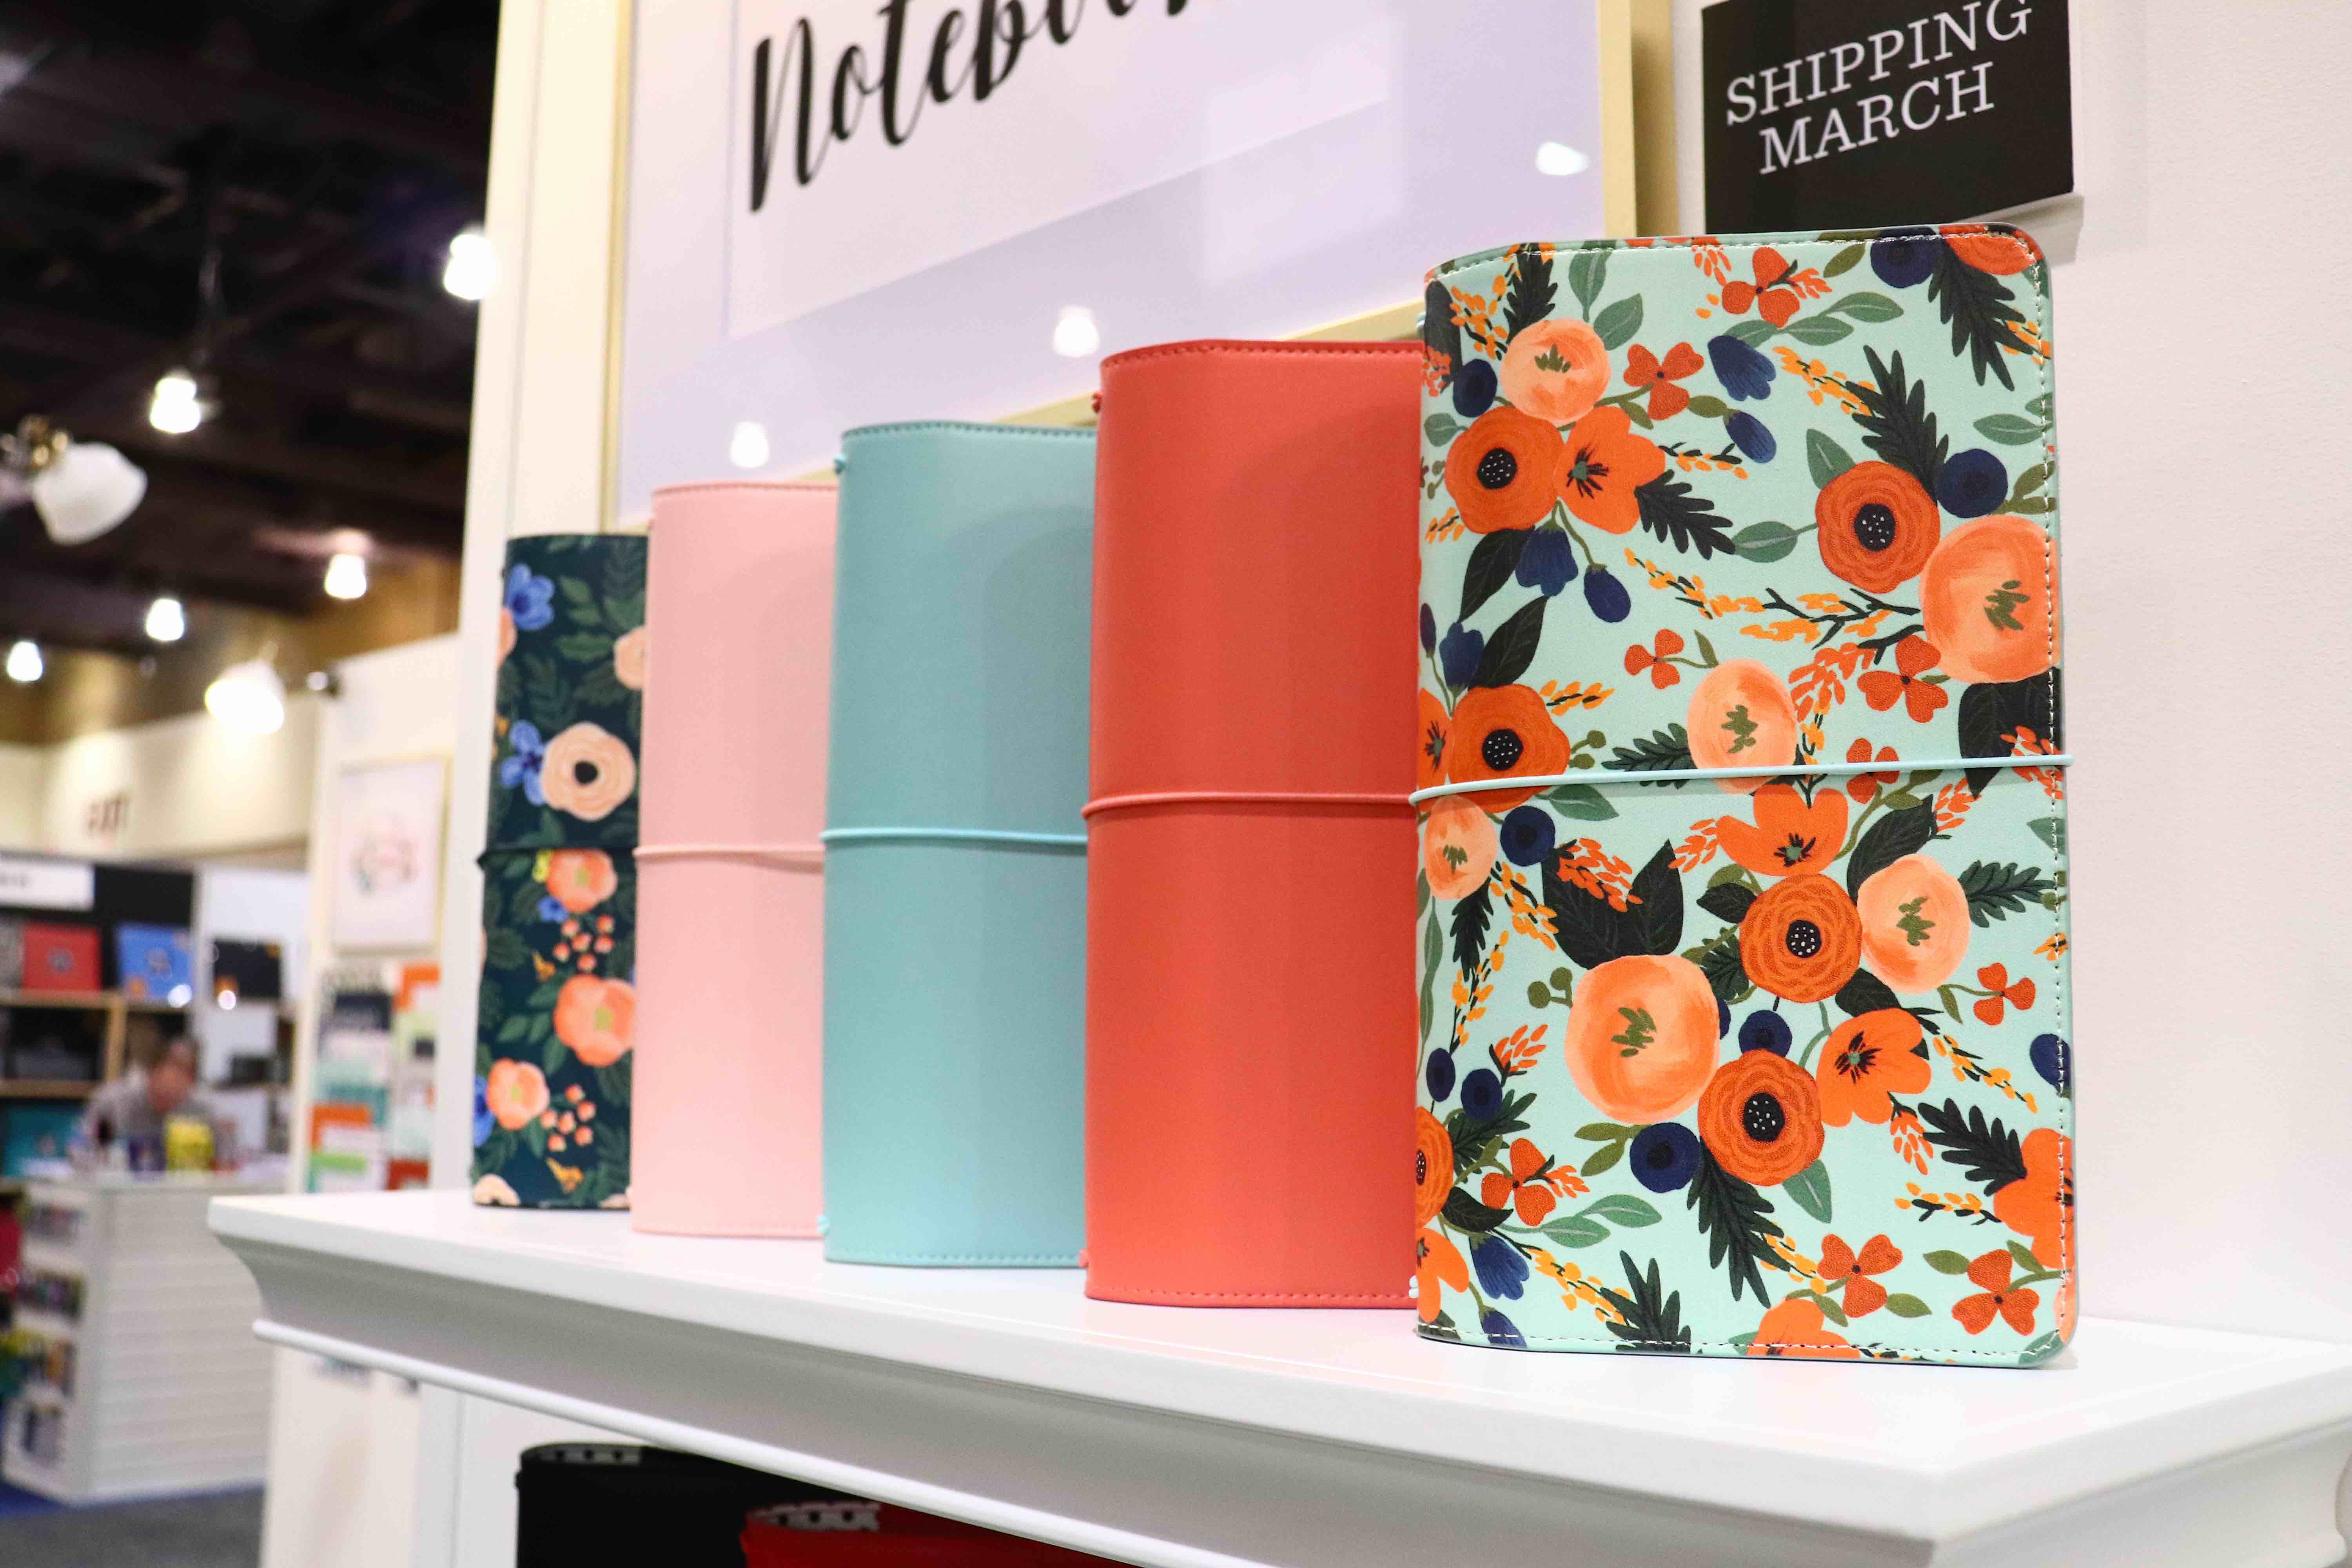
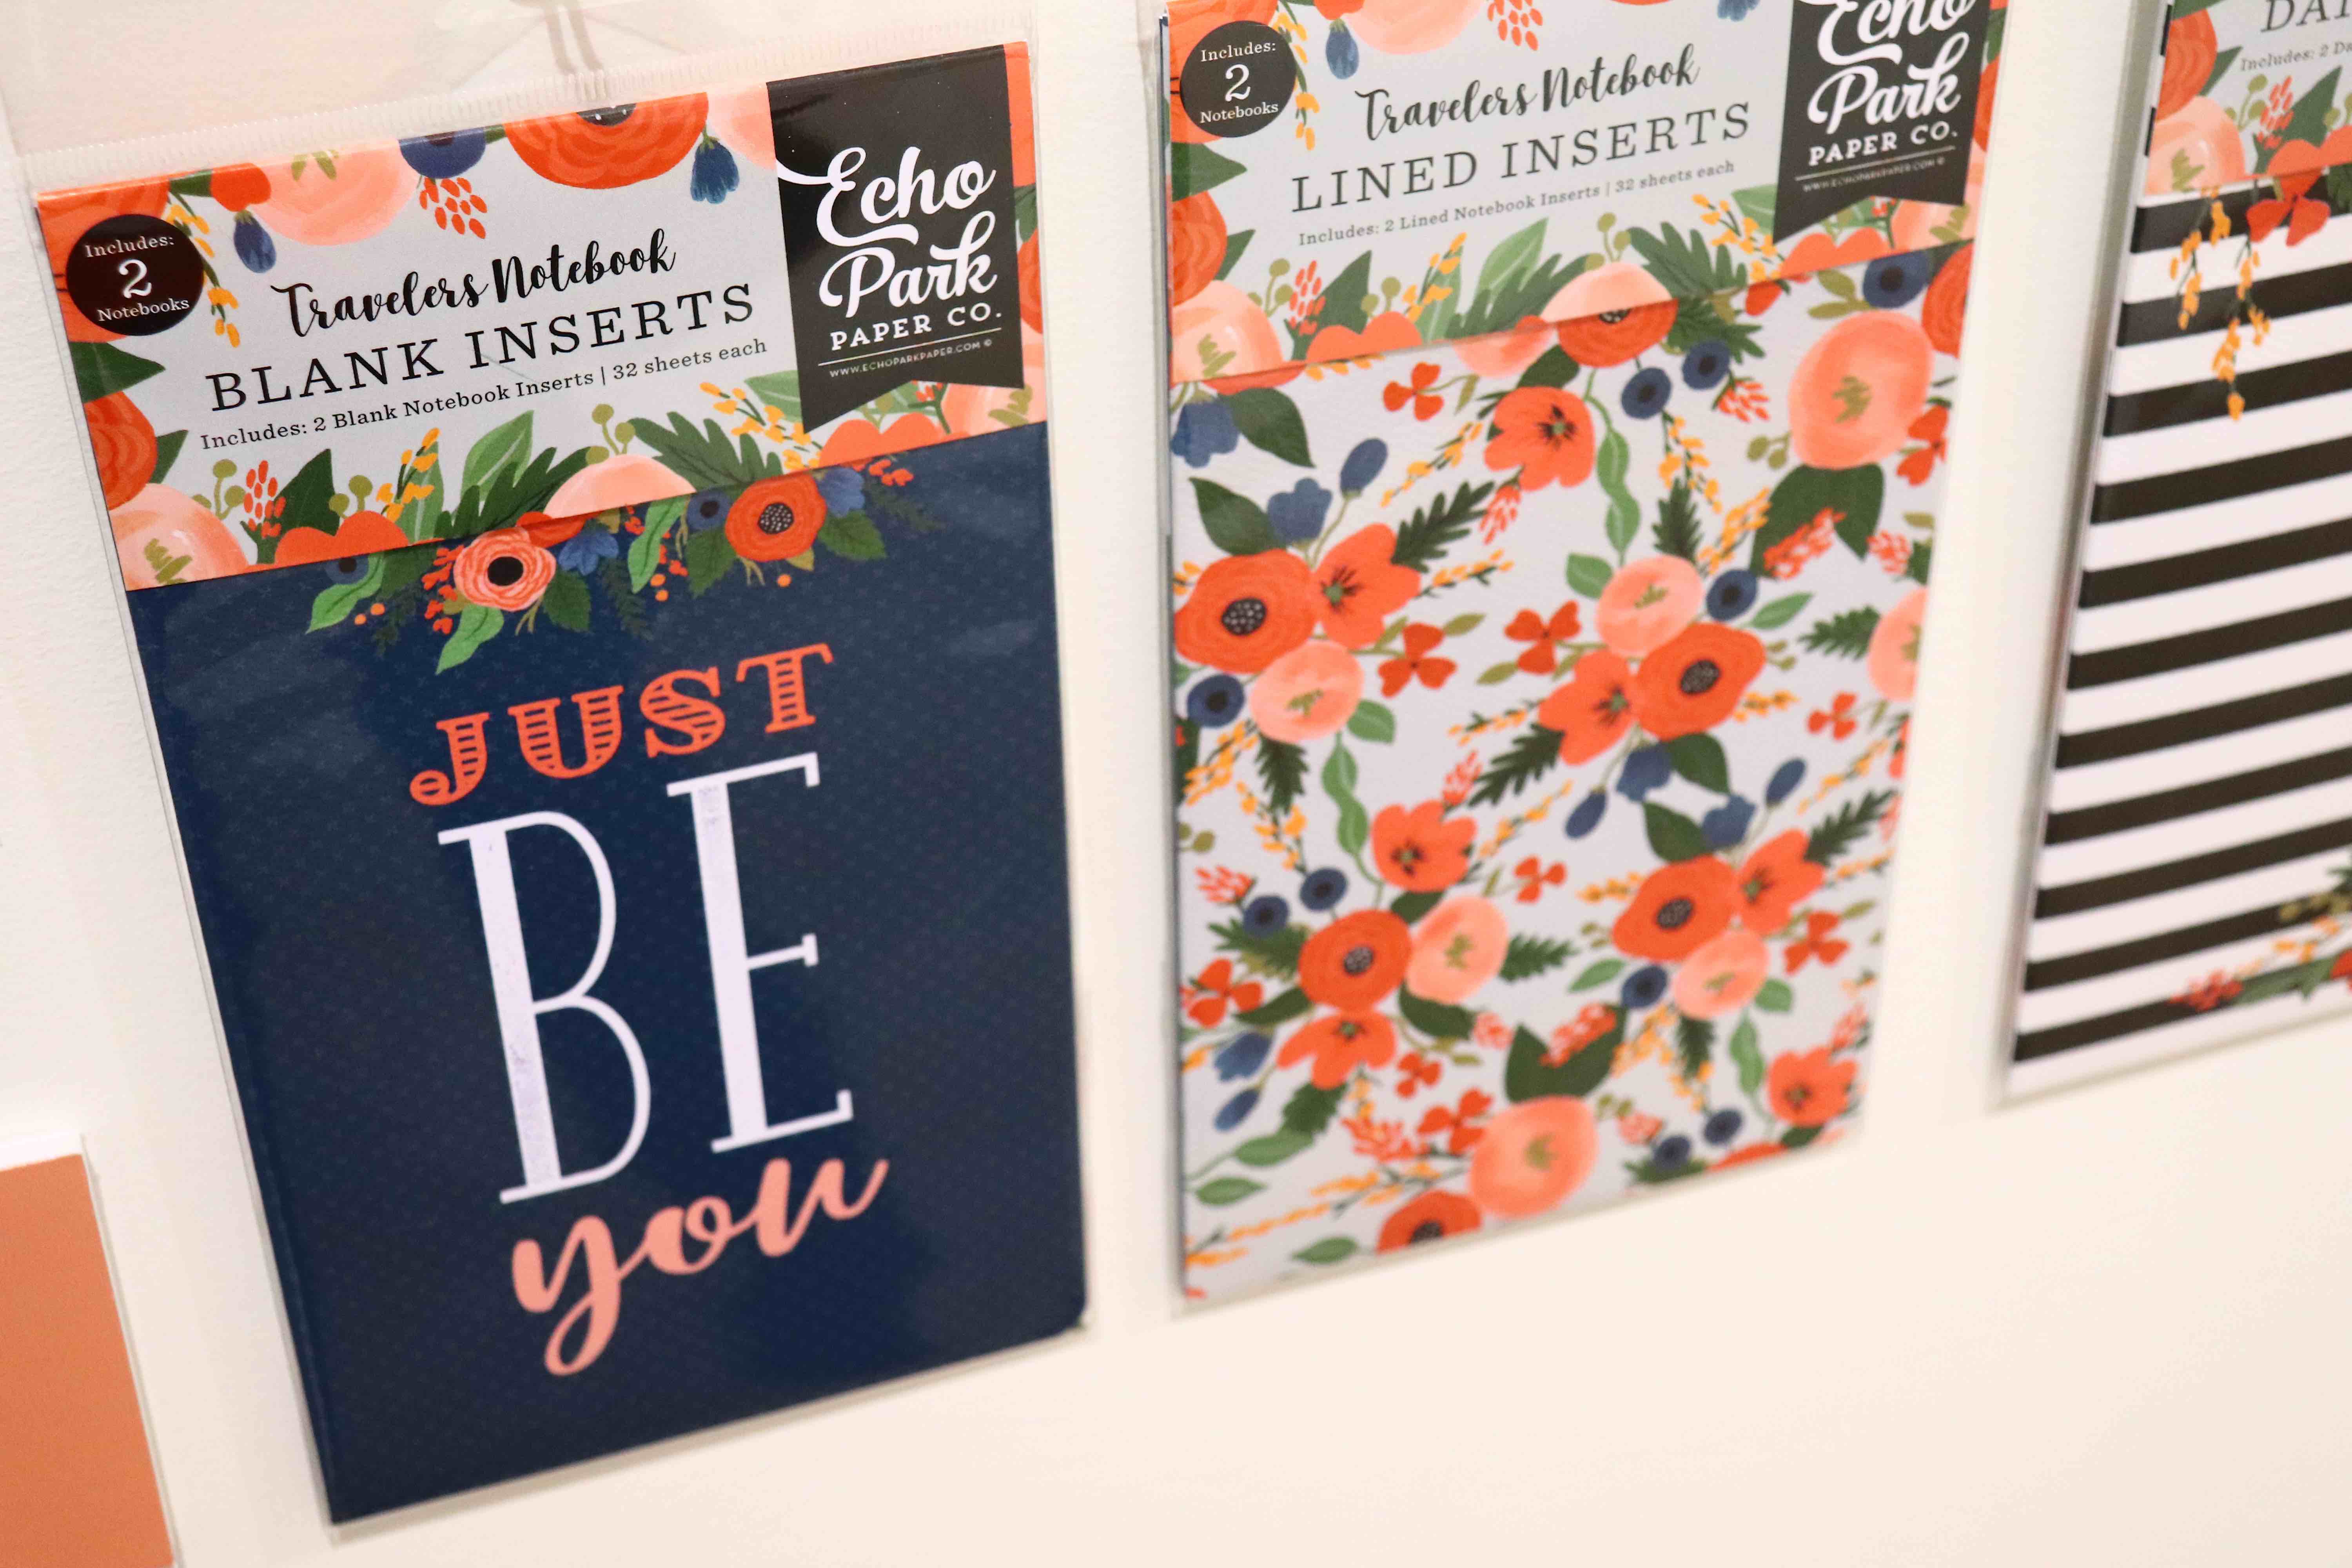
Echo Park’s gorgeous new travel notebooks are super trendy and come in so many inspiring colors and prints! And the coordinating accessories such as the blank and line inserts make the inside of your notebooks just as pretty as the outside!
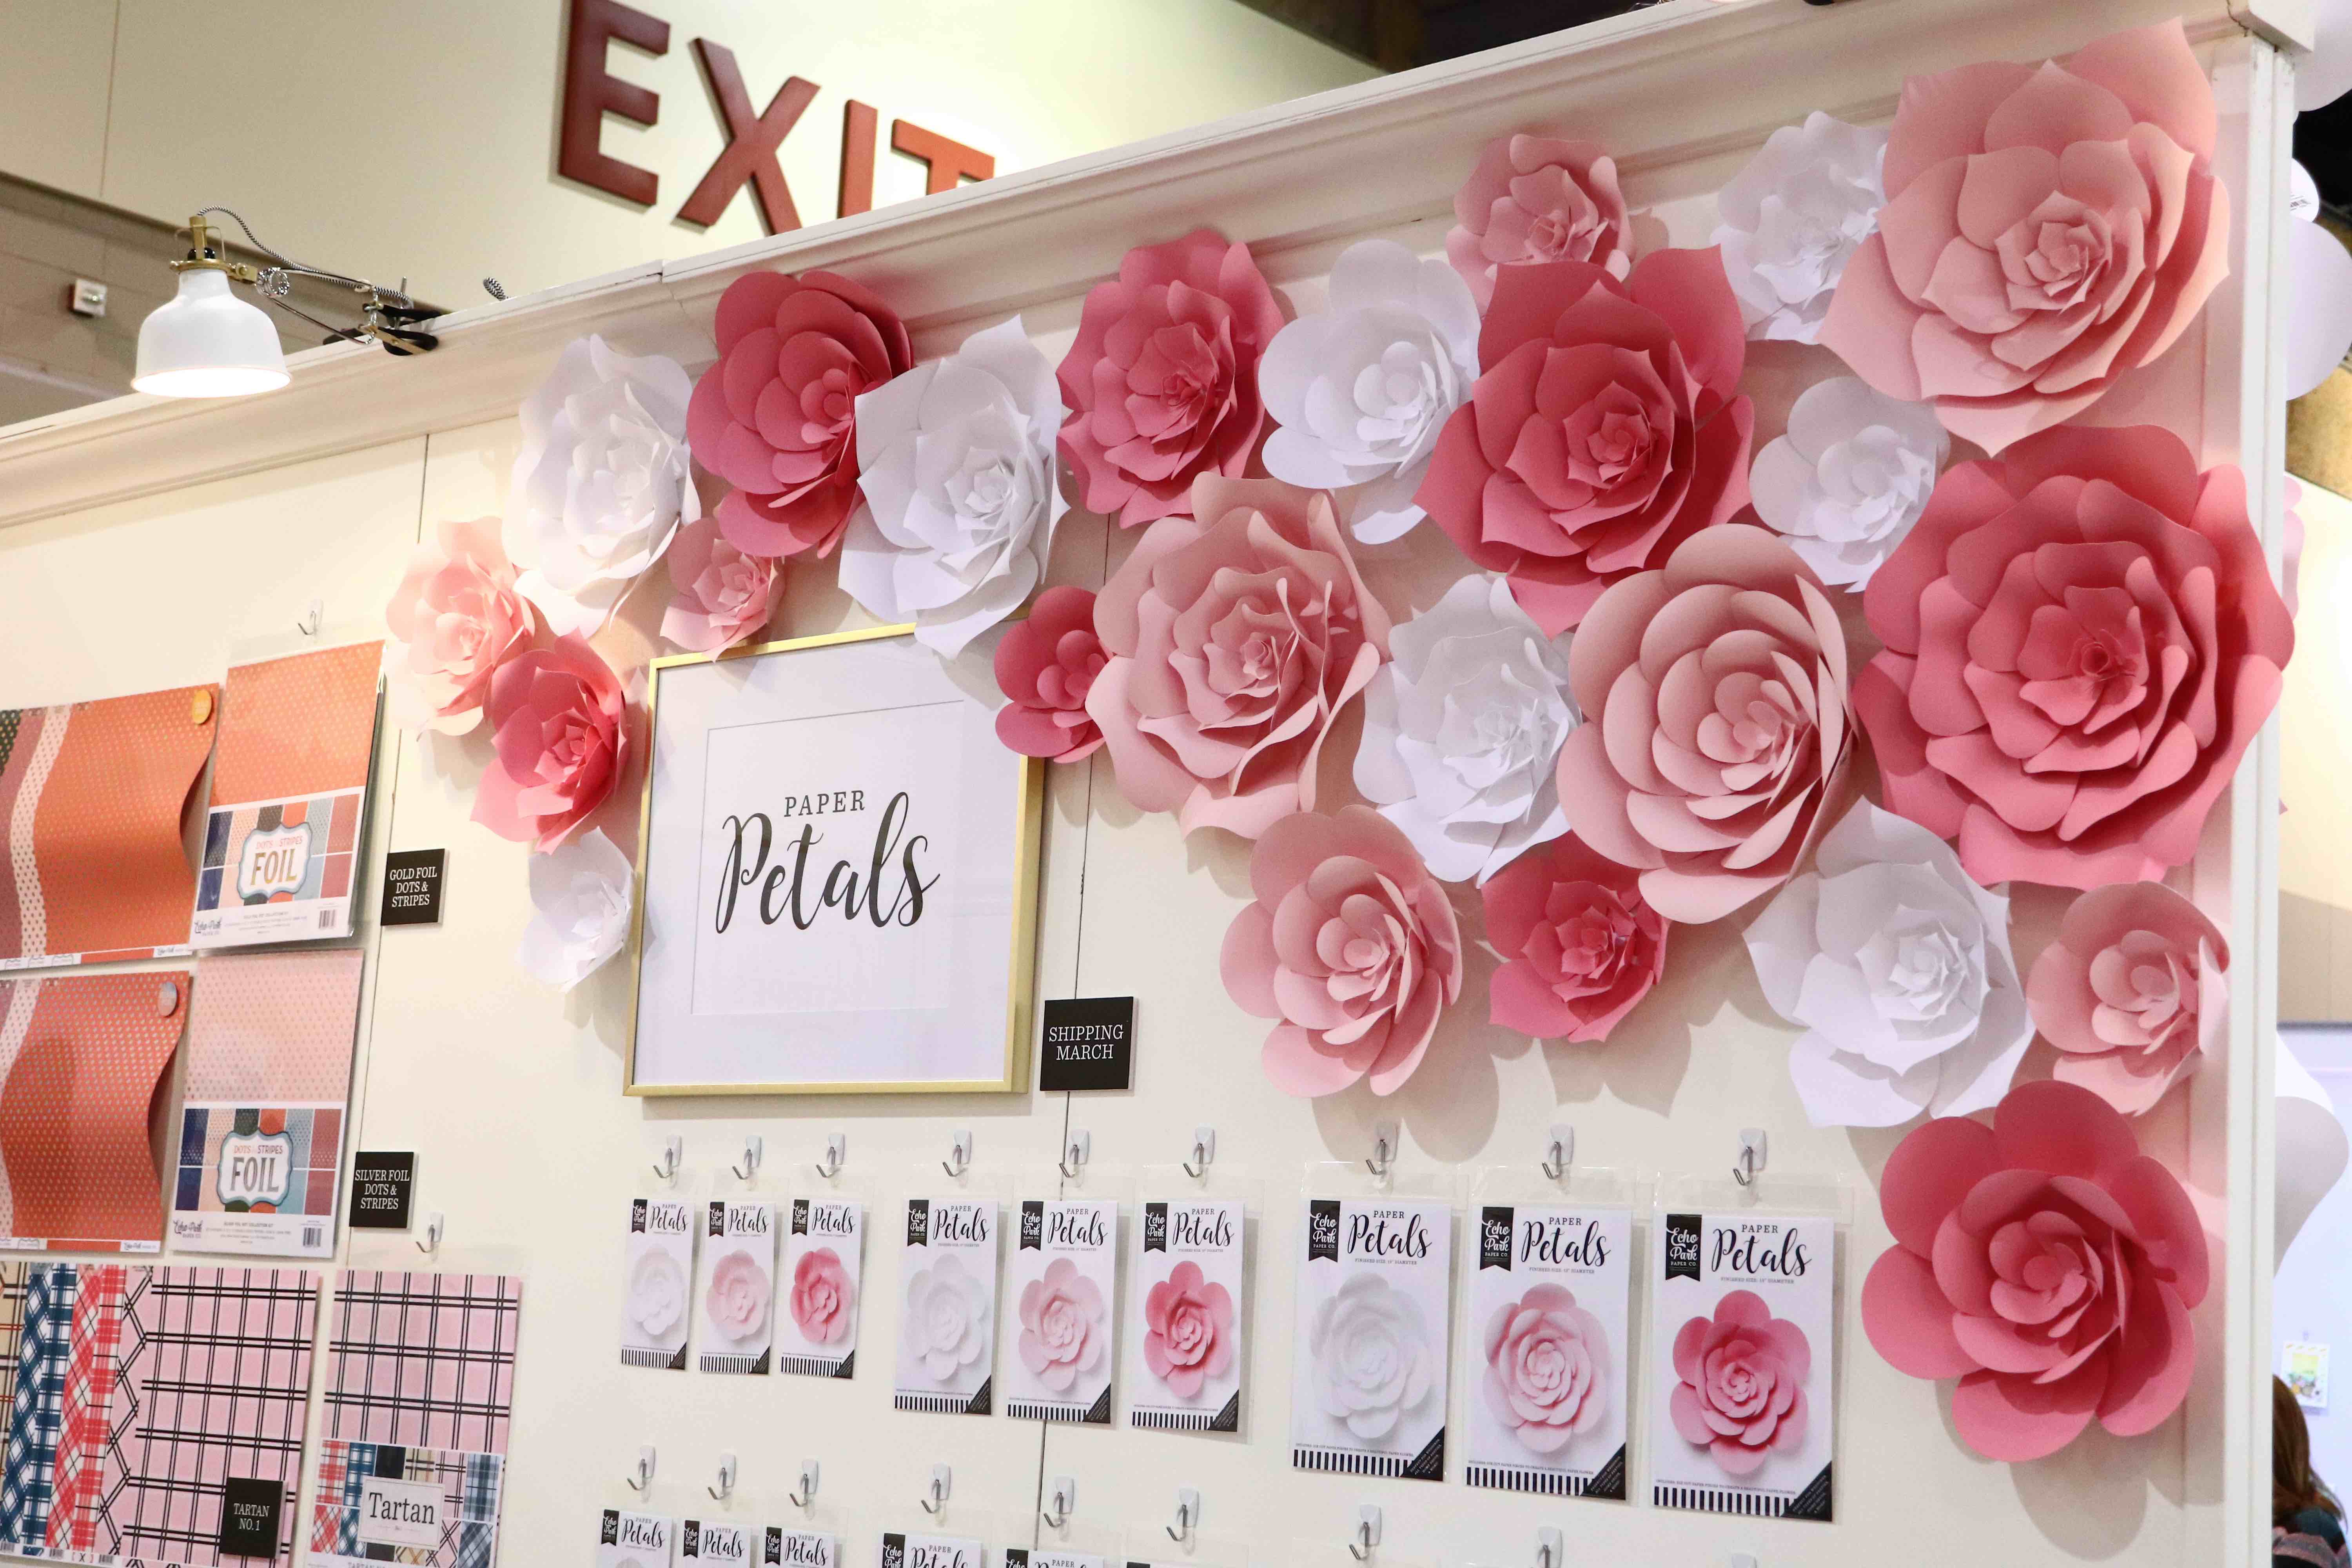
These stunning Paper Petals are simply amazing! The one side of their booth was elegantly lined with many of them in pretty pinks and white. Imagine these as party decor for a bridal or baby shower?
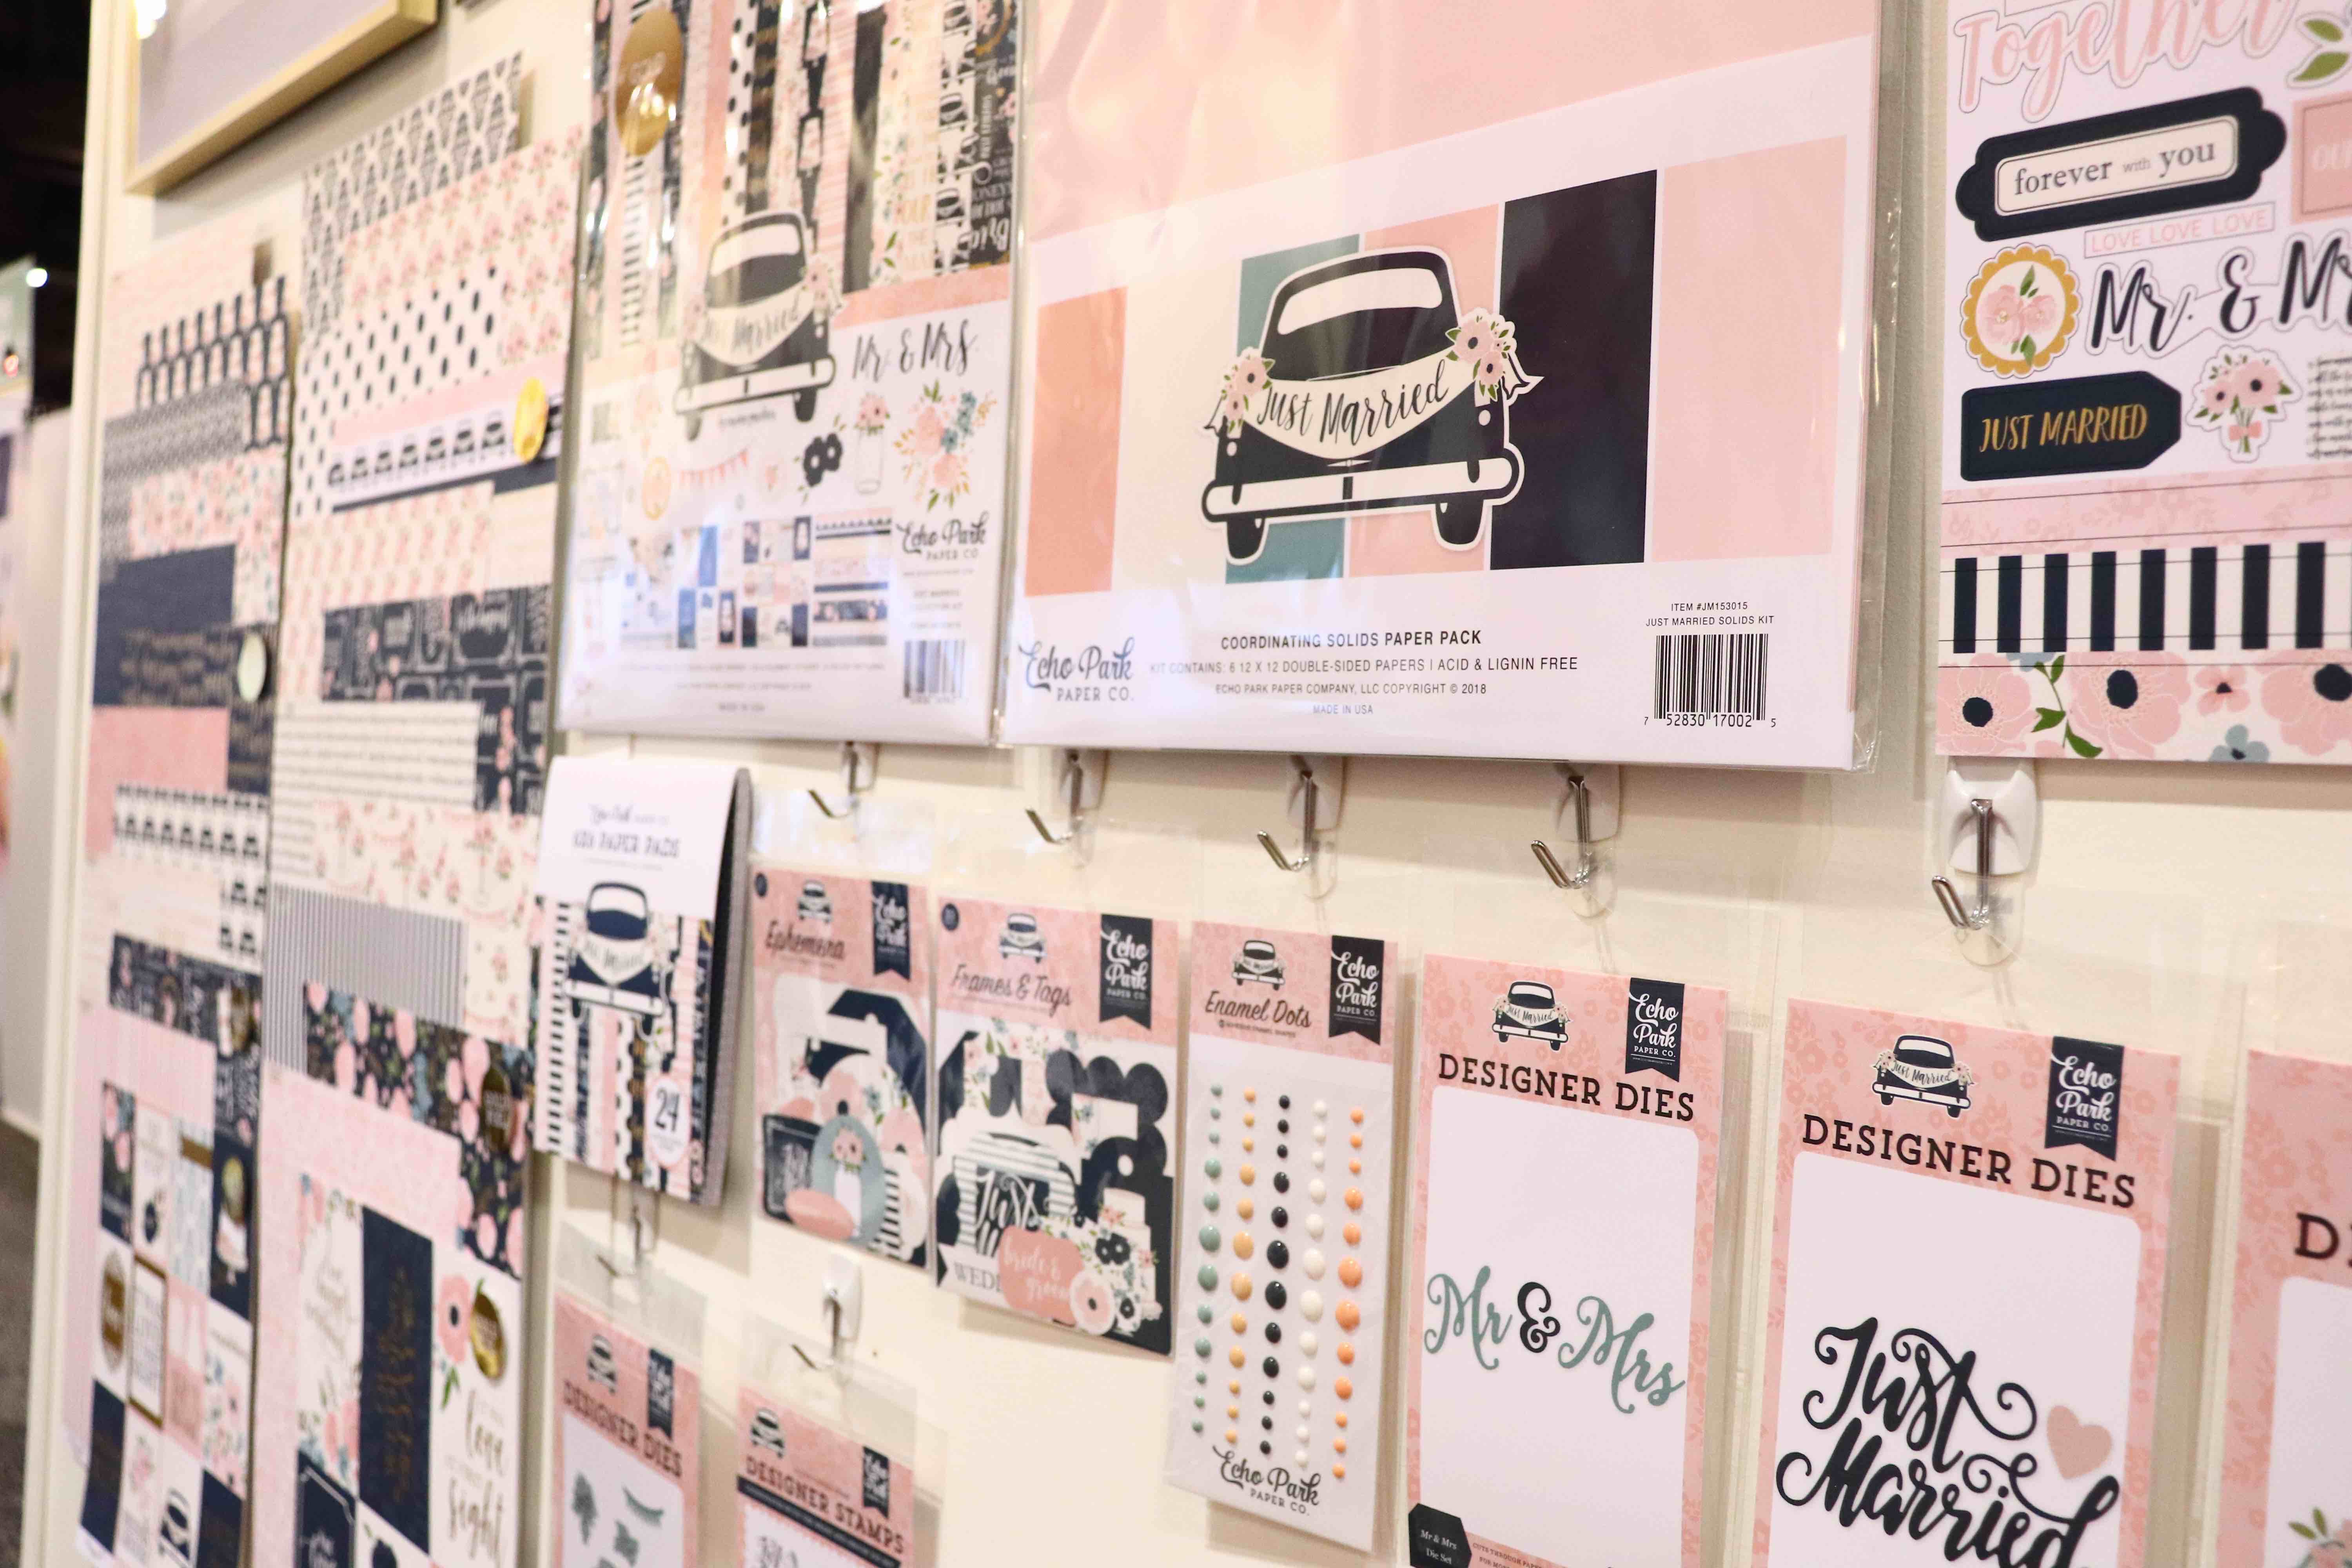
Speaking of brides, the Just Married collection features an equally elegant assortment of sophisticated colors and prints, perfect for creating a variety of projects to celebrate or document the special day!
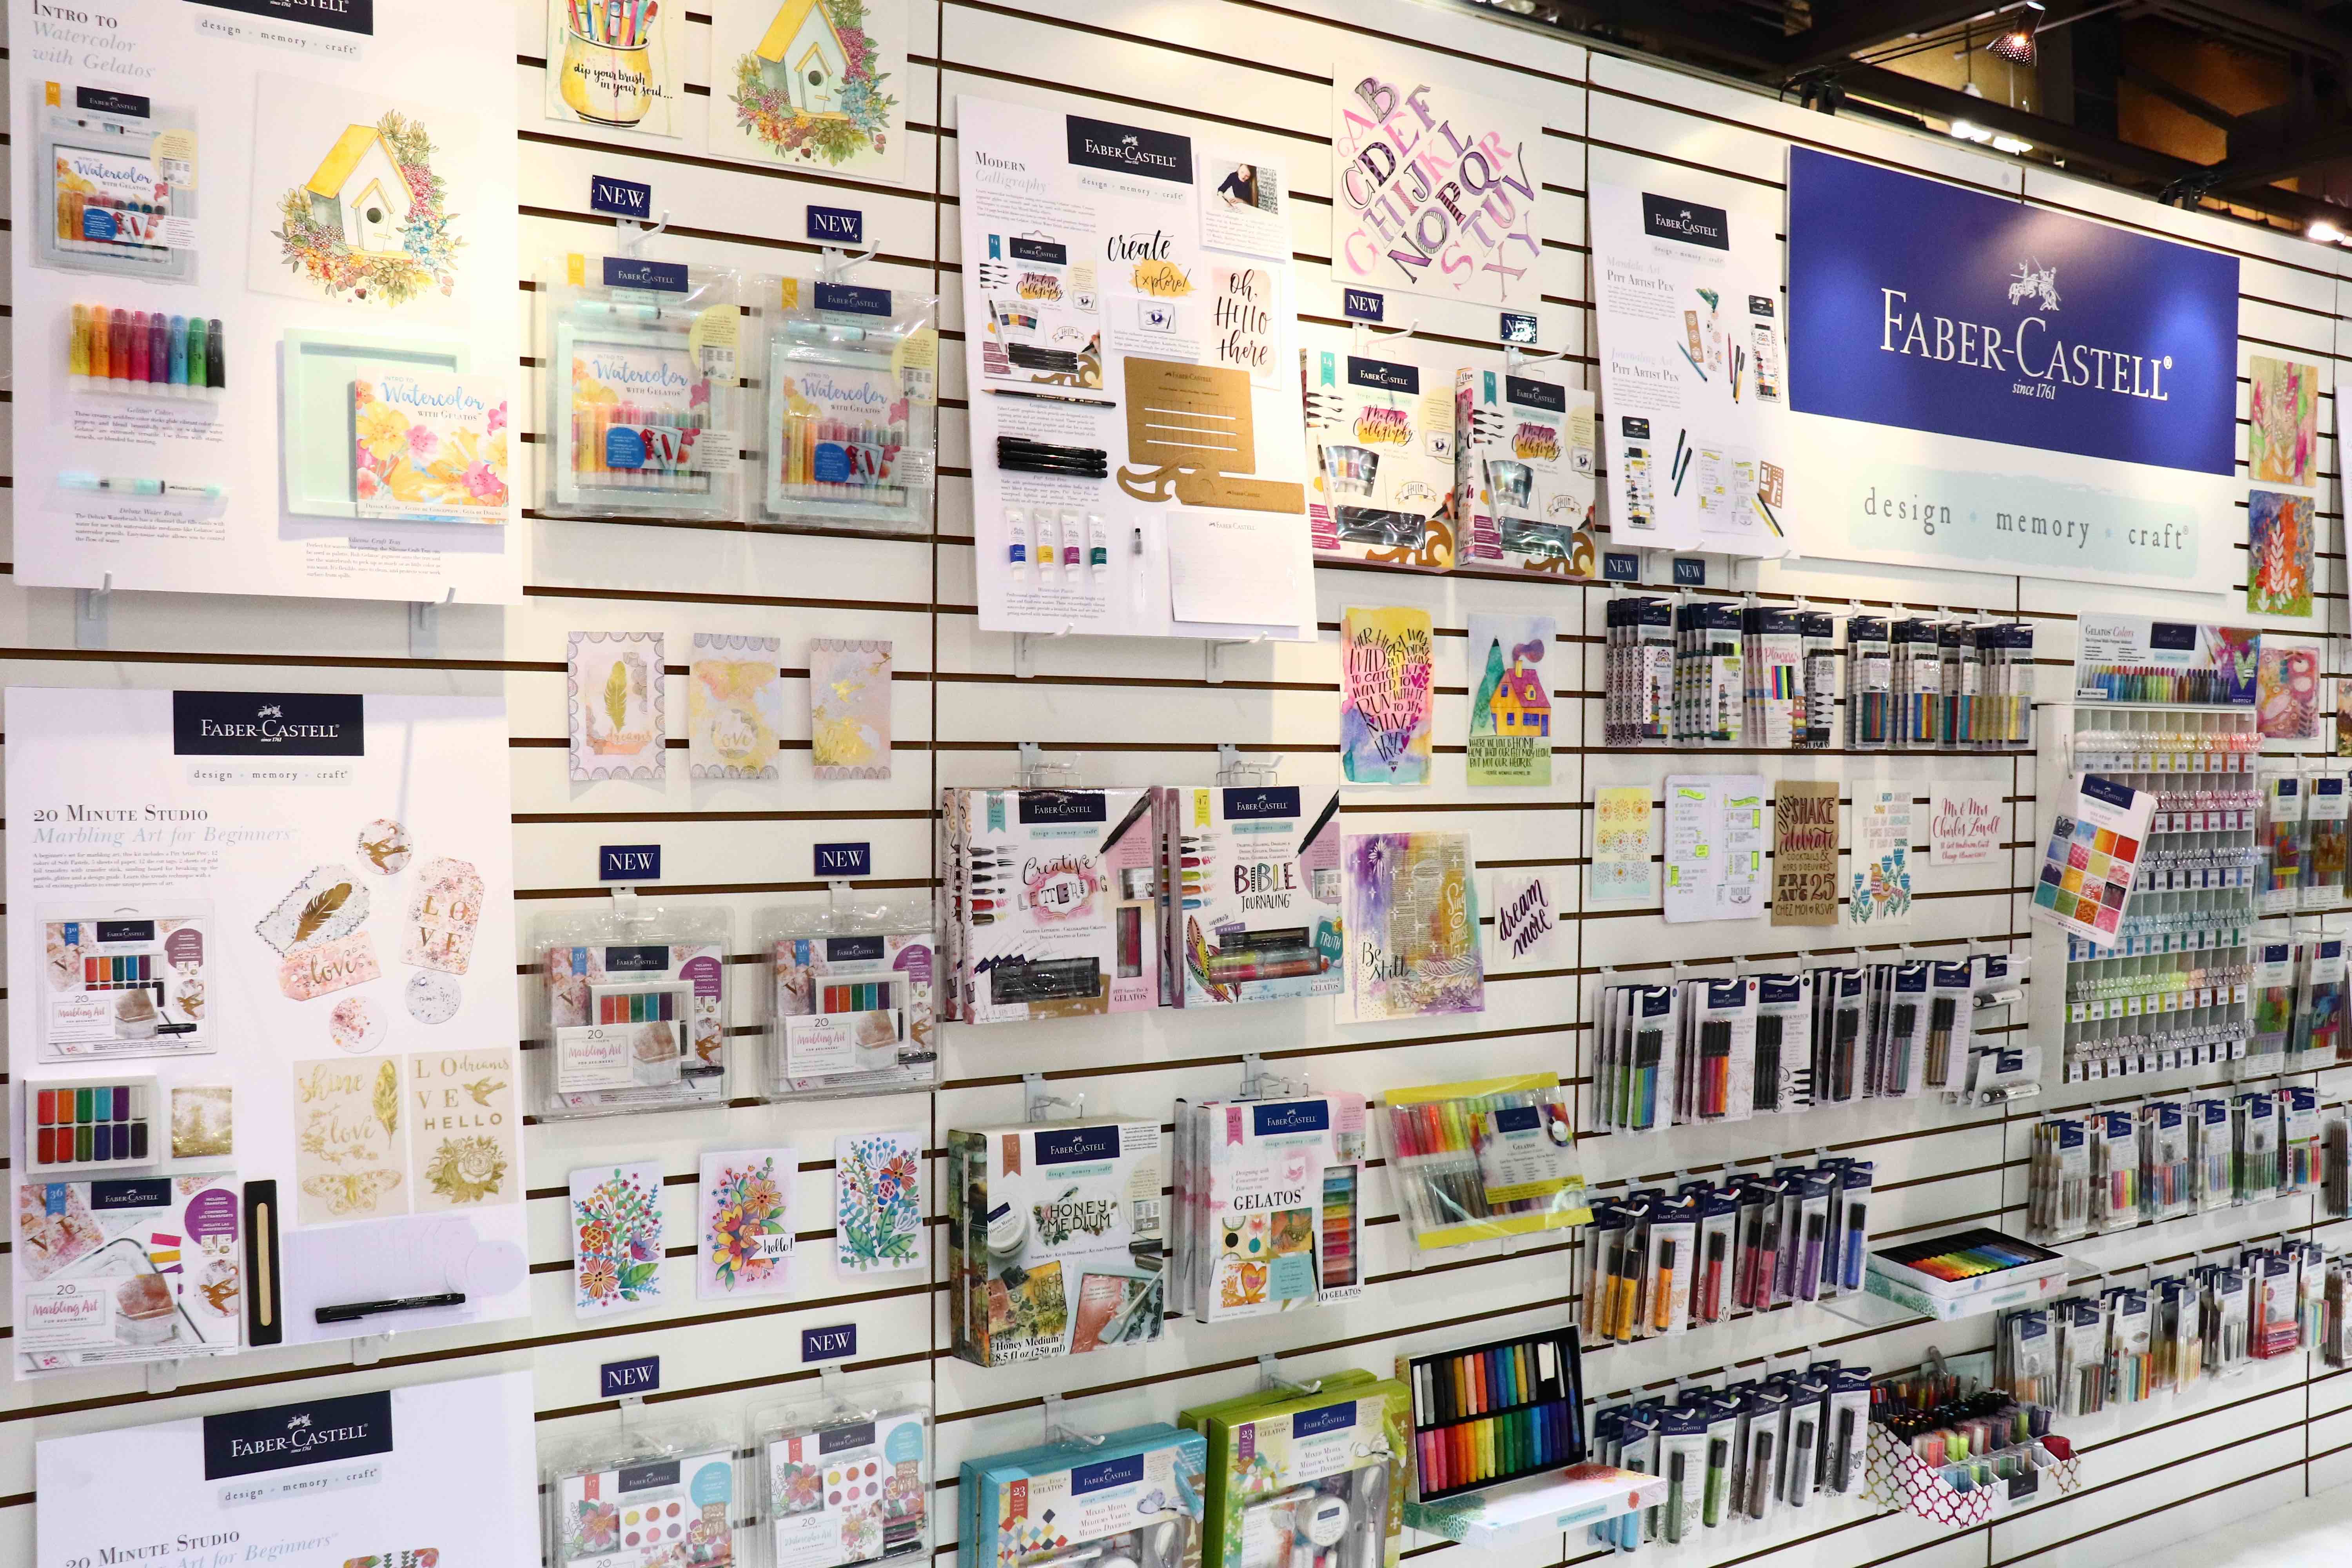
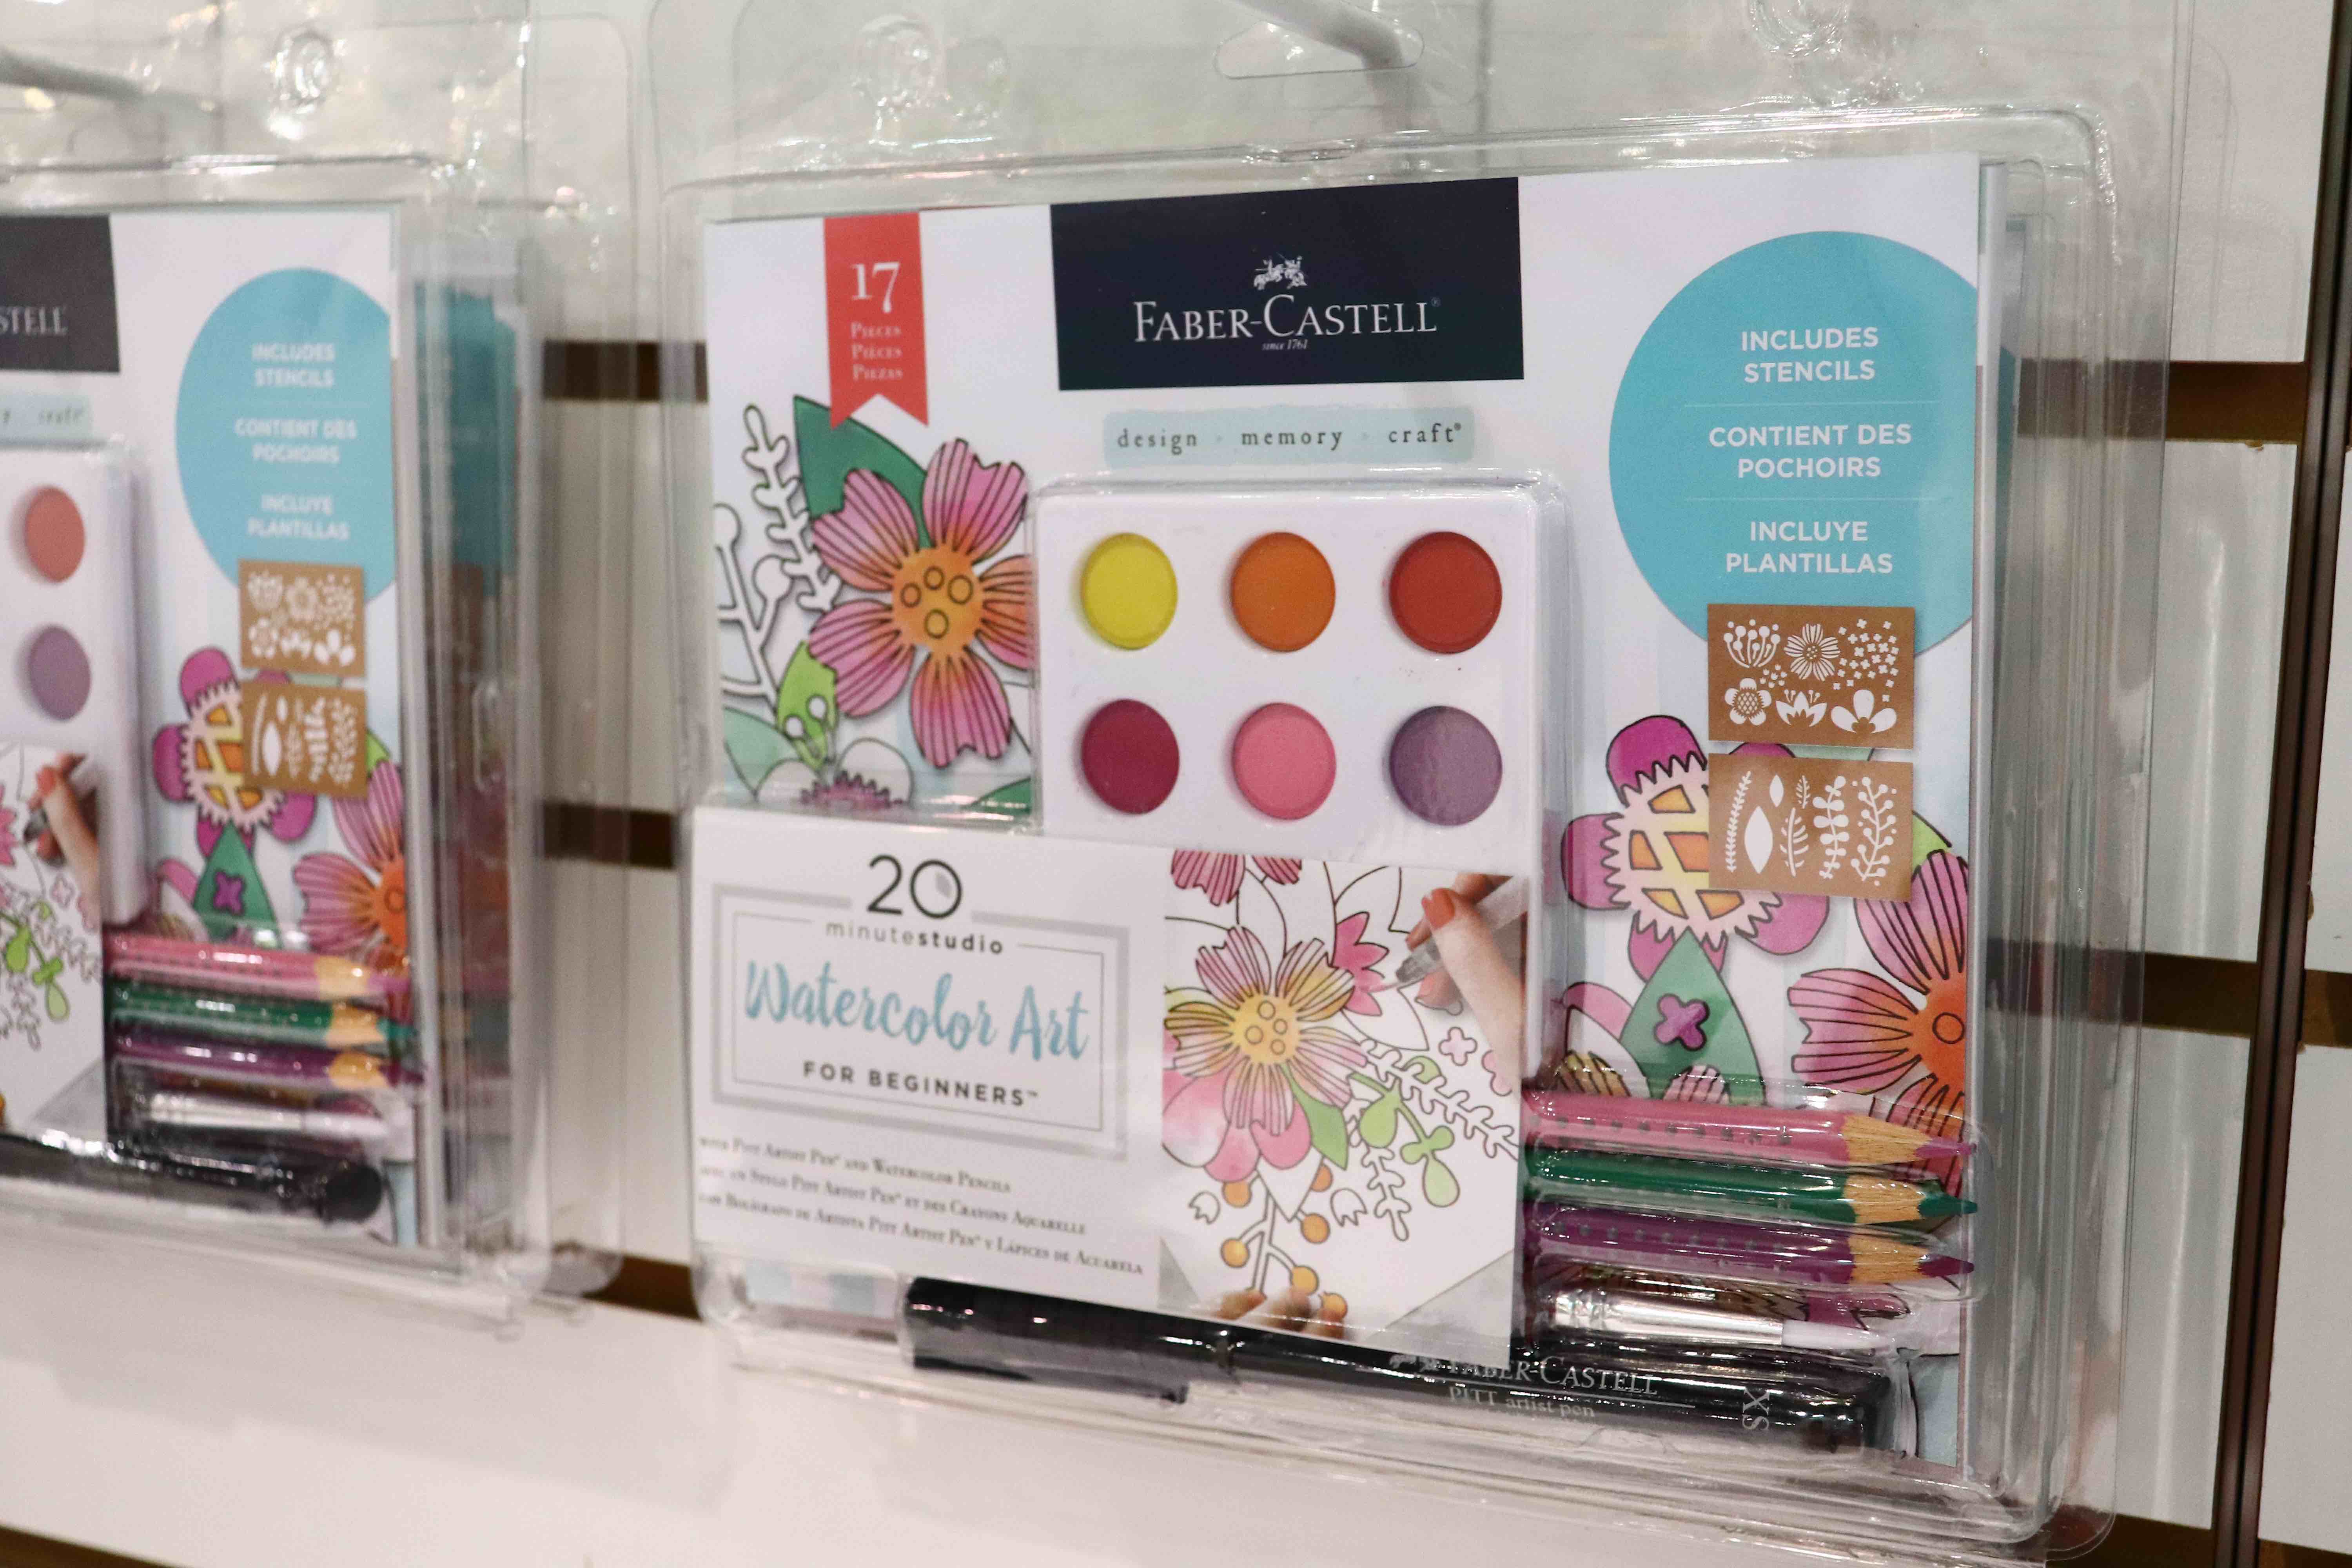
Faber Castell always has some amazing mediums to get crafty with! Check out their amazing booth with lots of new products and inspiration pieces!
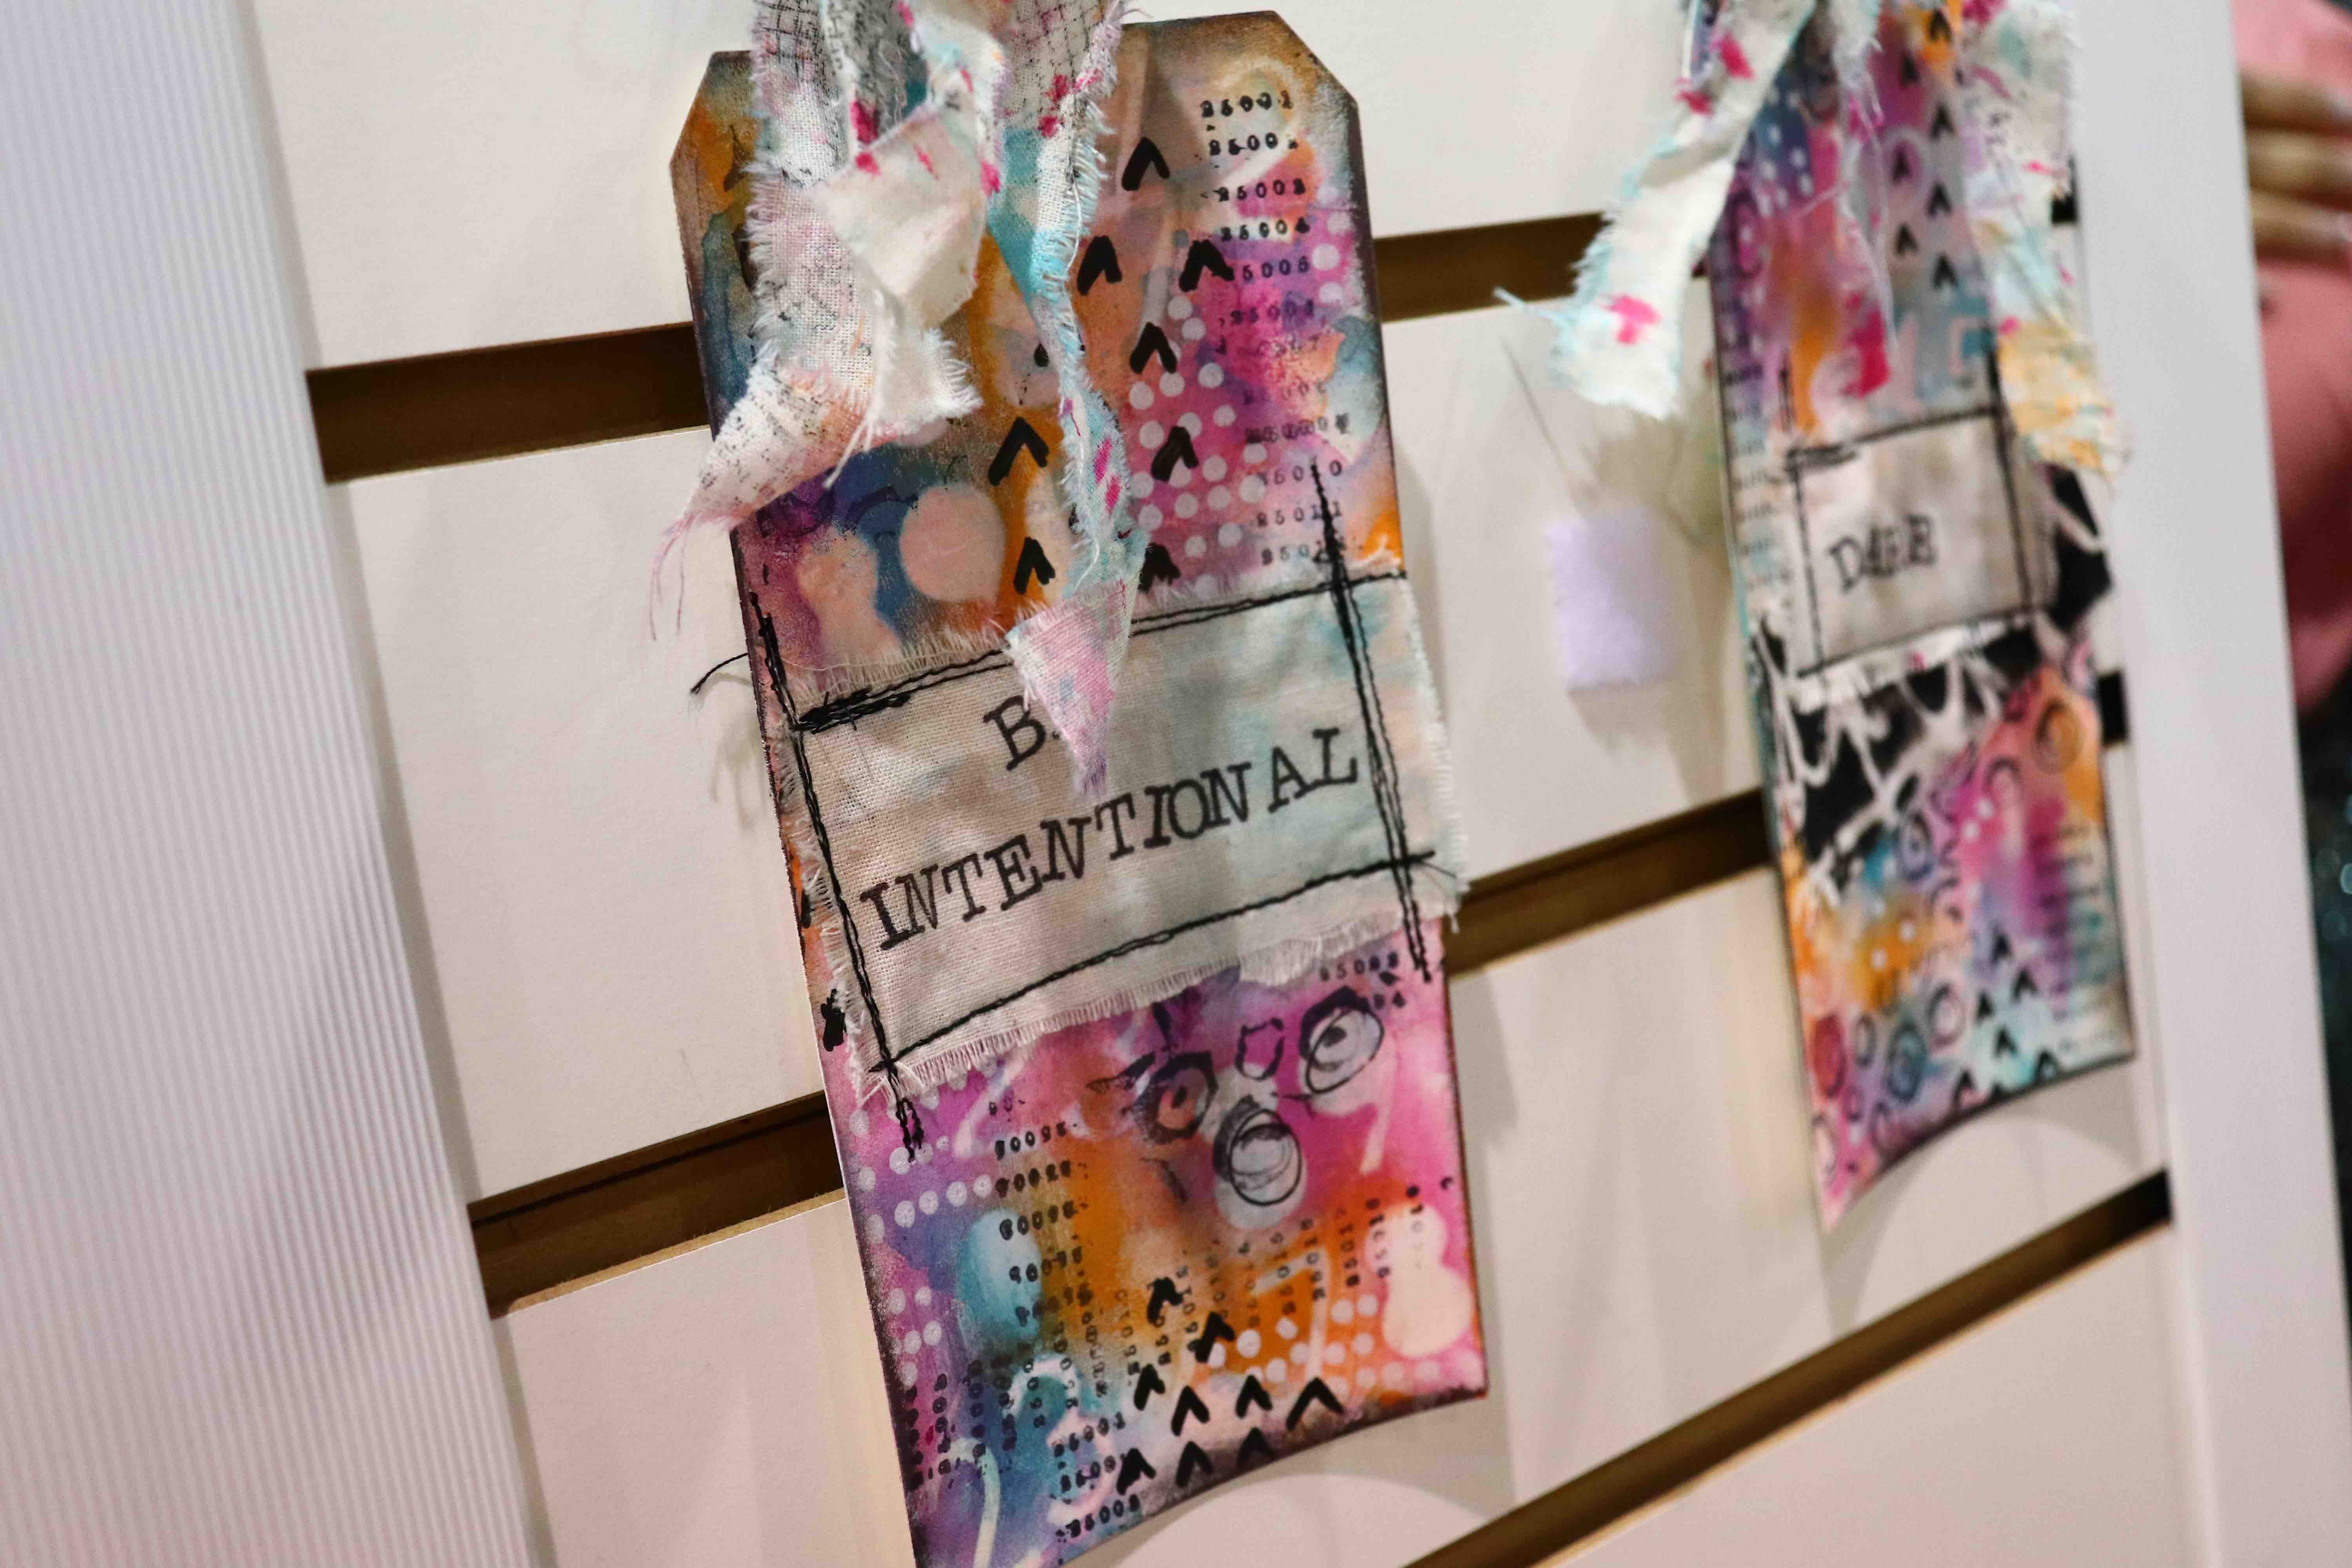
This tag is stunning; I loved the phrase “be intentional”!
These Watercolor Art palettes are beautiful and perfect for those of you who are just starting out in the world of watercolor! The kits include a palette of vibrant watercolors, stencils, Pitt pens for doodling and watercolor pencils! Everything you need to get started is at your fingertips!
Gina K. Designs’ foil collection with ThermoWeb never disappoints! Her new Stamp ‘n Foil line is simply breathtaking! Check out this awesome video of her showcasing how to use the glittery Fancy Foils with the stamps and coordinating dies!
Join us as Gina K Designs demonstrates the Stamp-n-Foil technique at the Therm O Web booth! #Creativation
Posted by SimonSaysStamp.com on Sunday, January 21, 2018
Look how stunning that foiled glitter is!
ThermoWeb also has some other STUNNING foiling products being released, including the exciting and oh-so-beautiful Clear Toner Sheets!
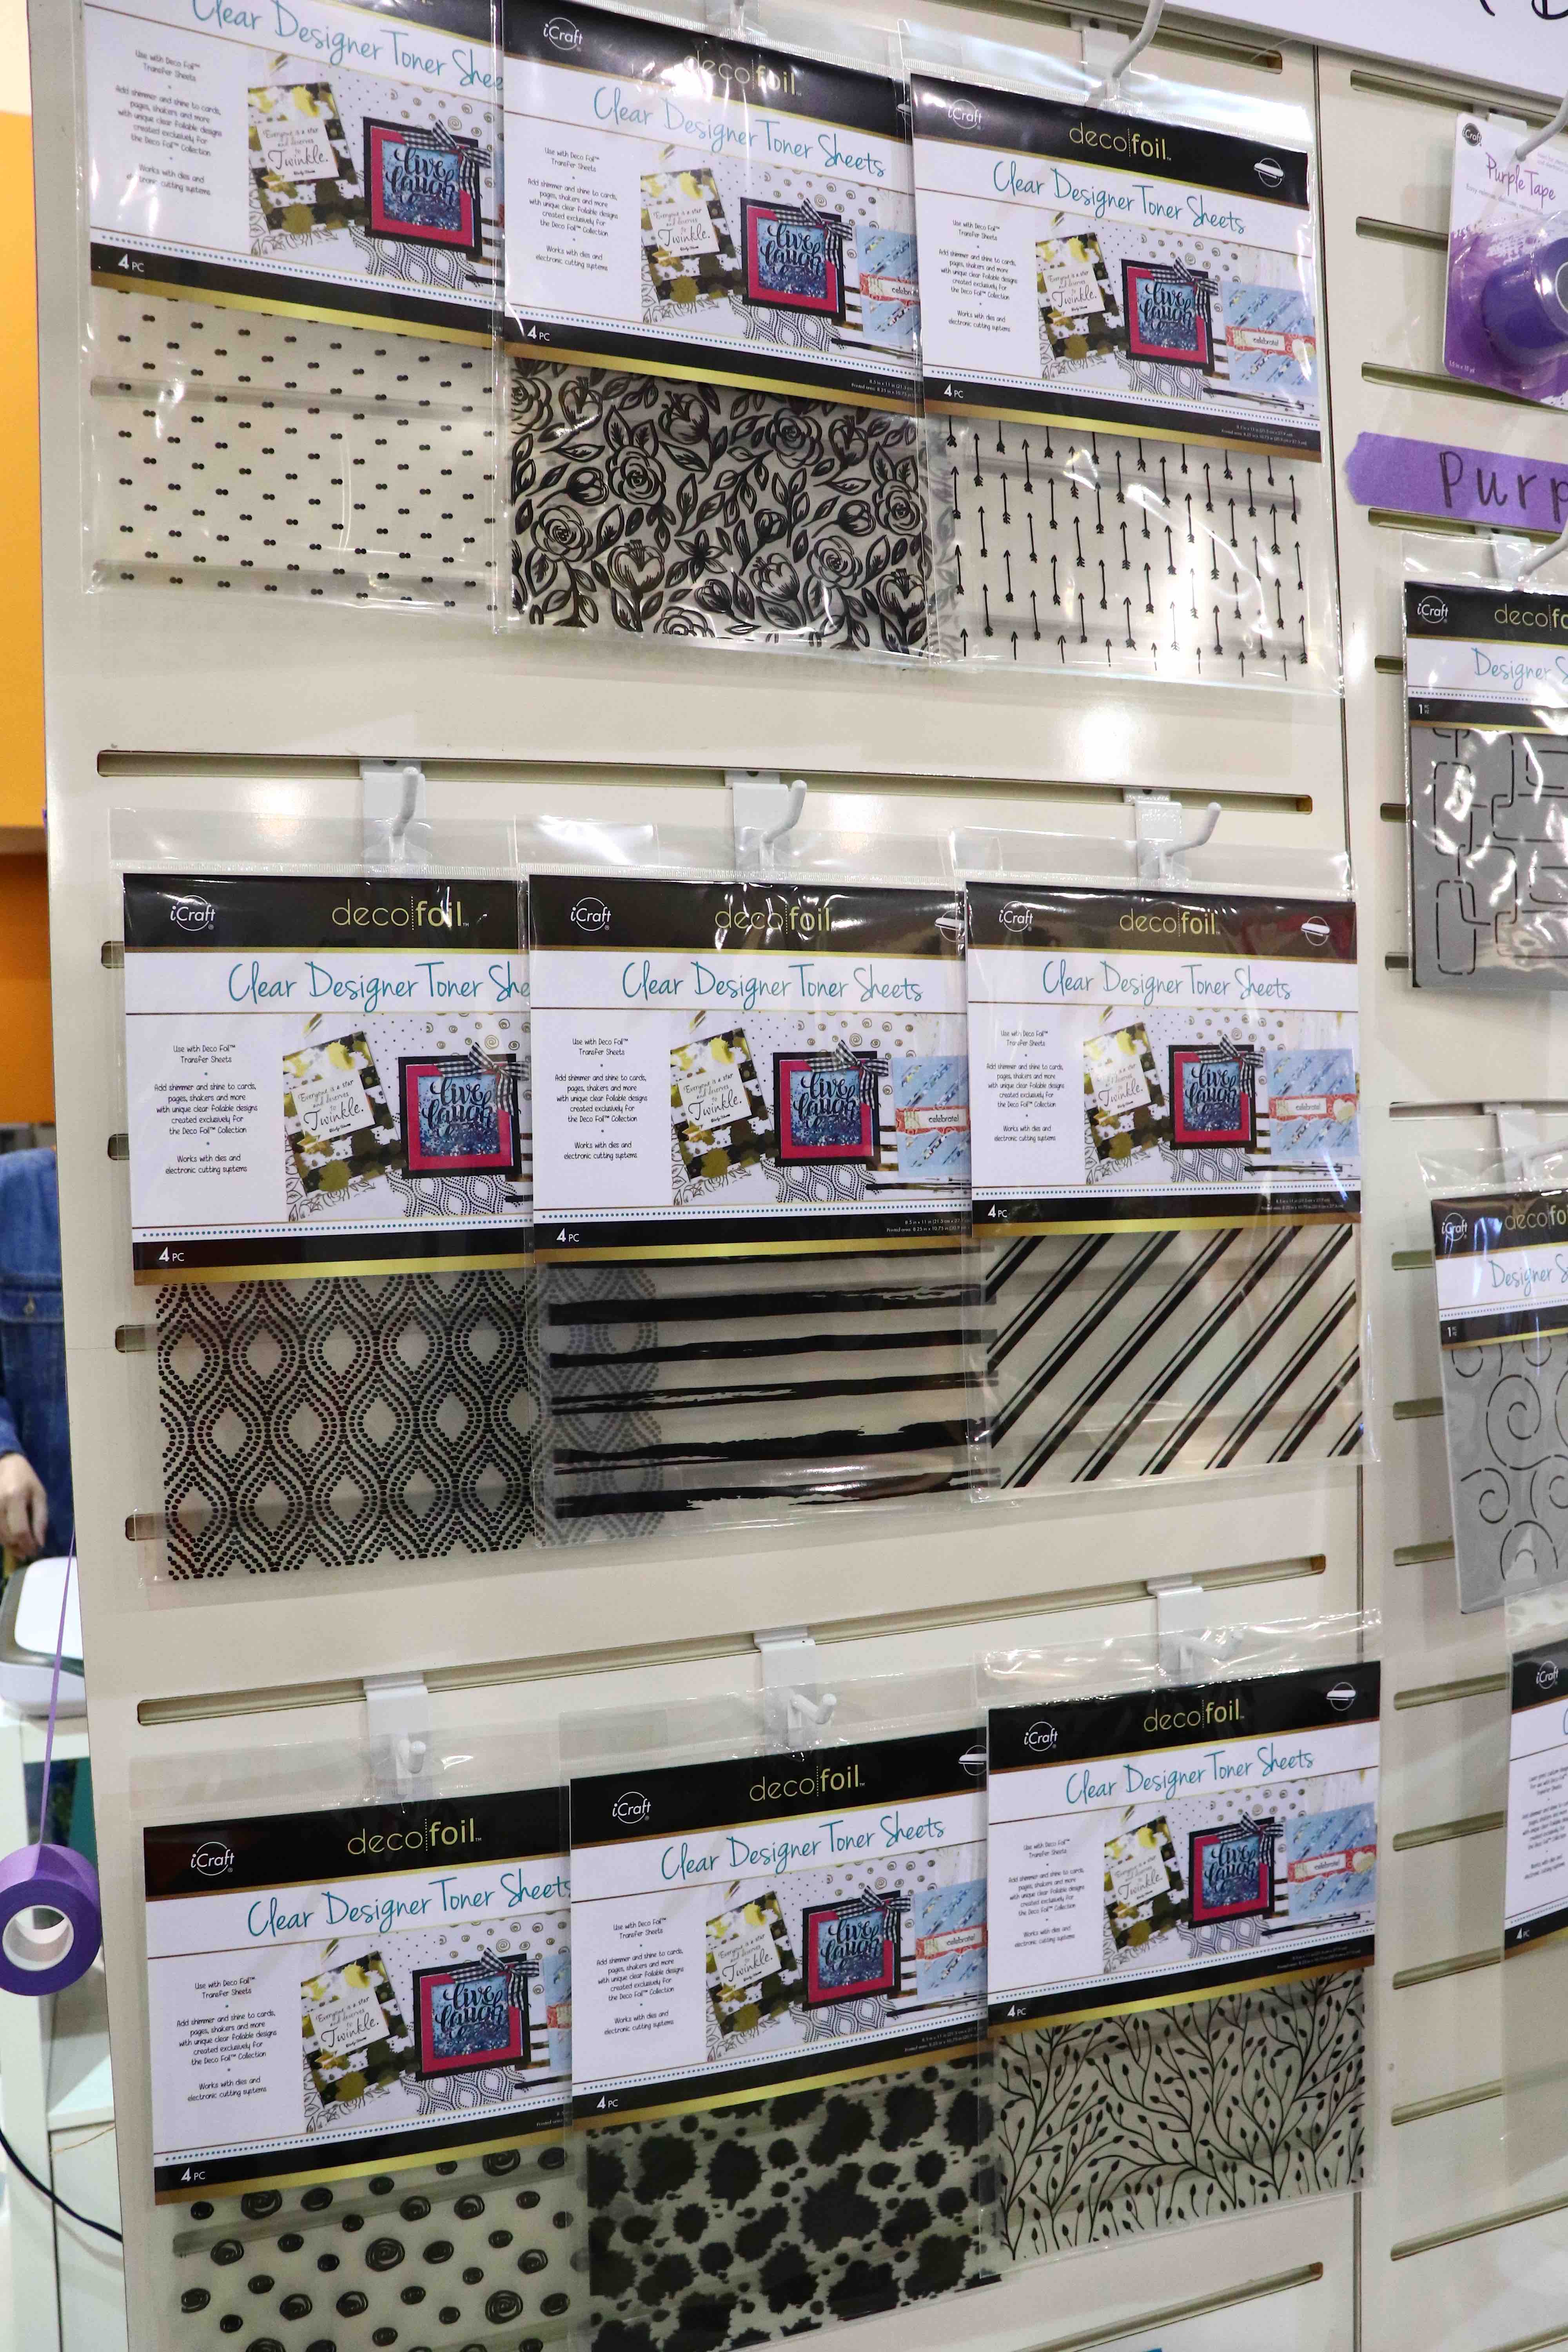
The rainbow foiling is absolutely breathtaking!
The Ultra Violet Color of the Year from Pantone was shining bright in this stunning new paper collection from Kaisercraft called Misty Mountain!

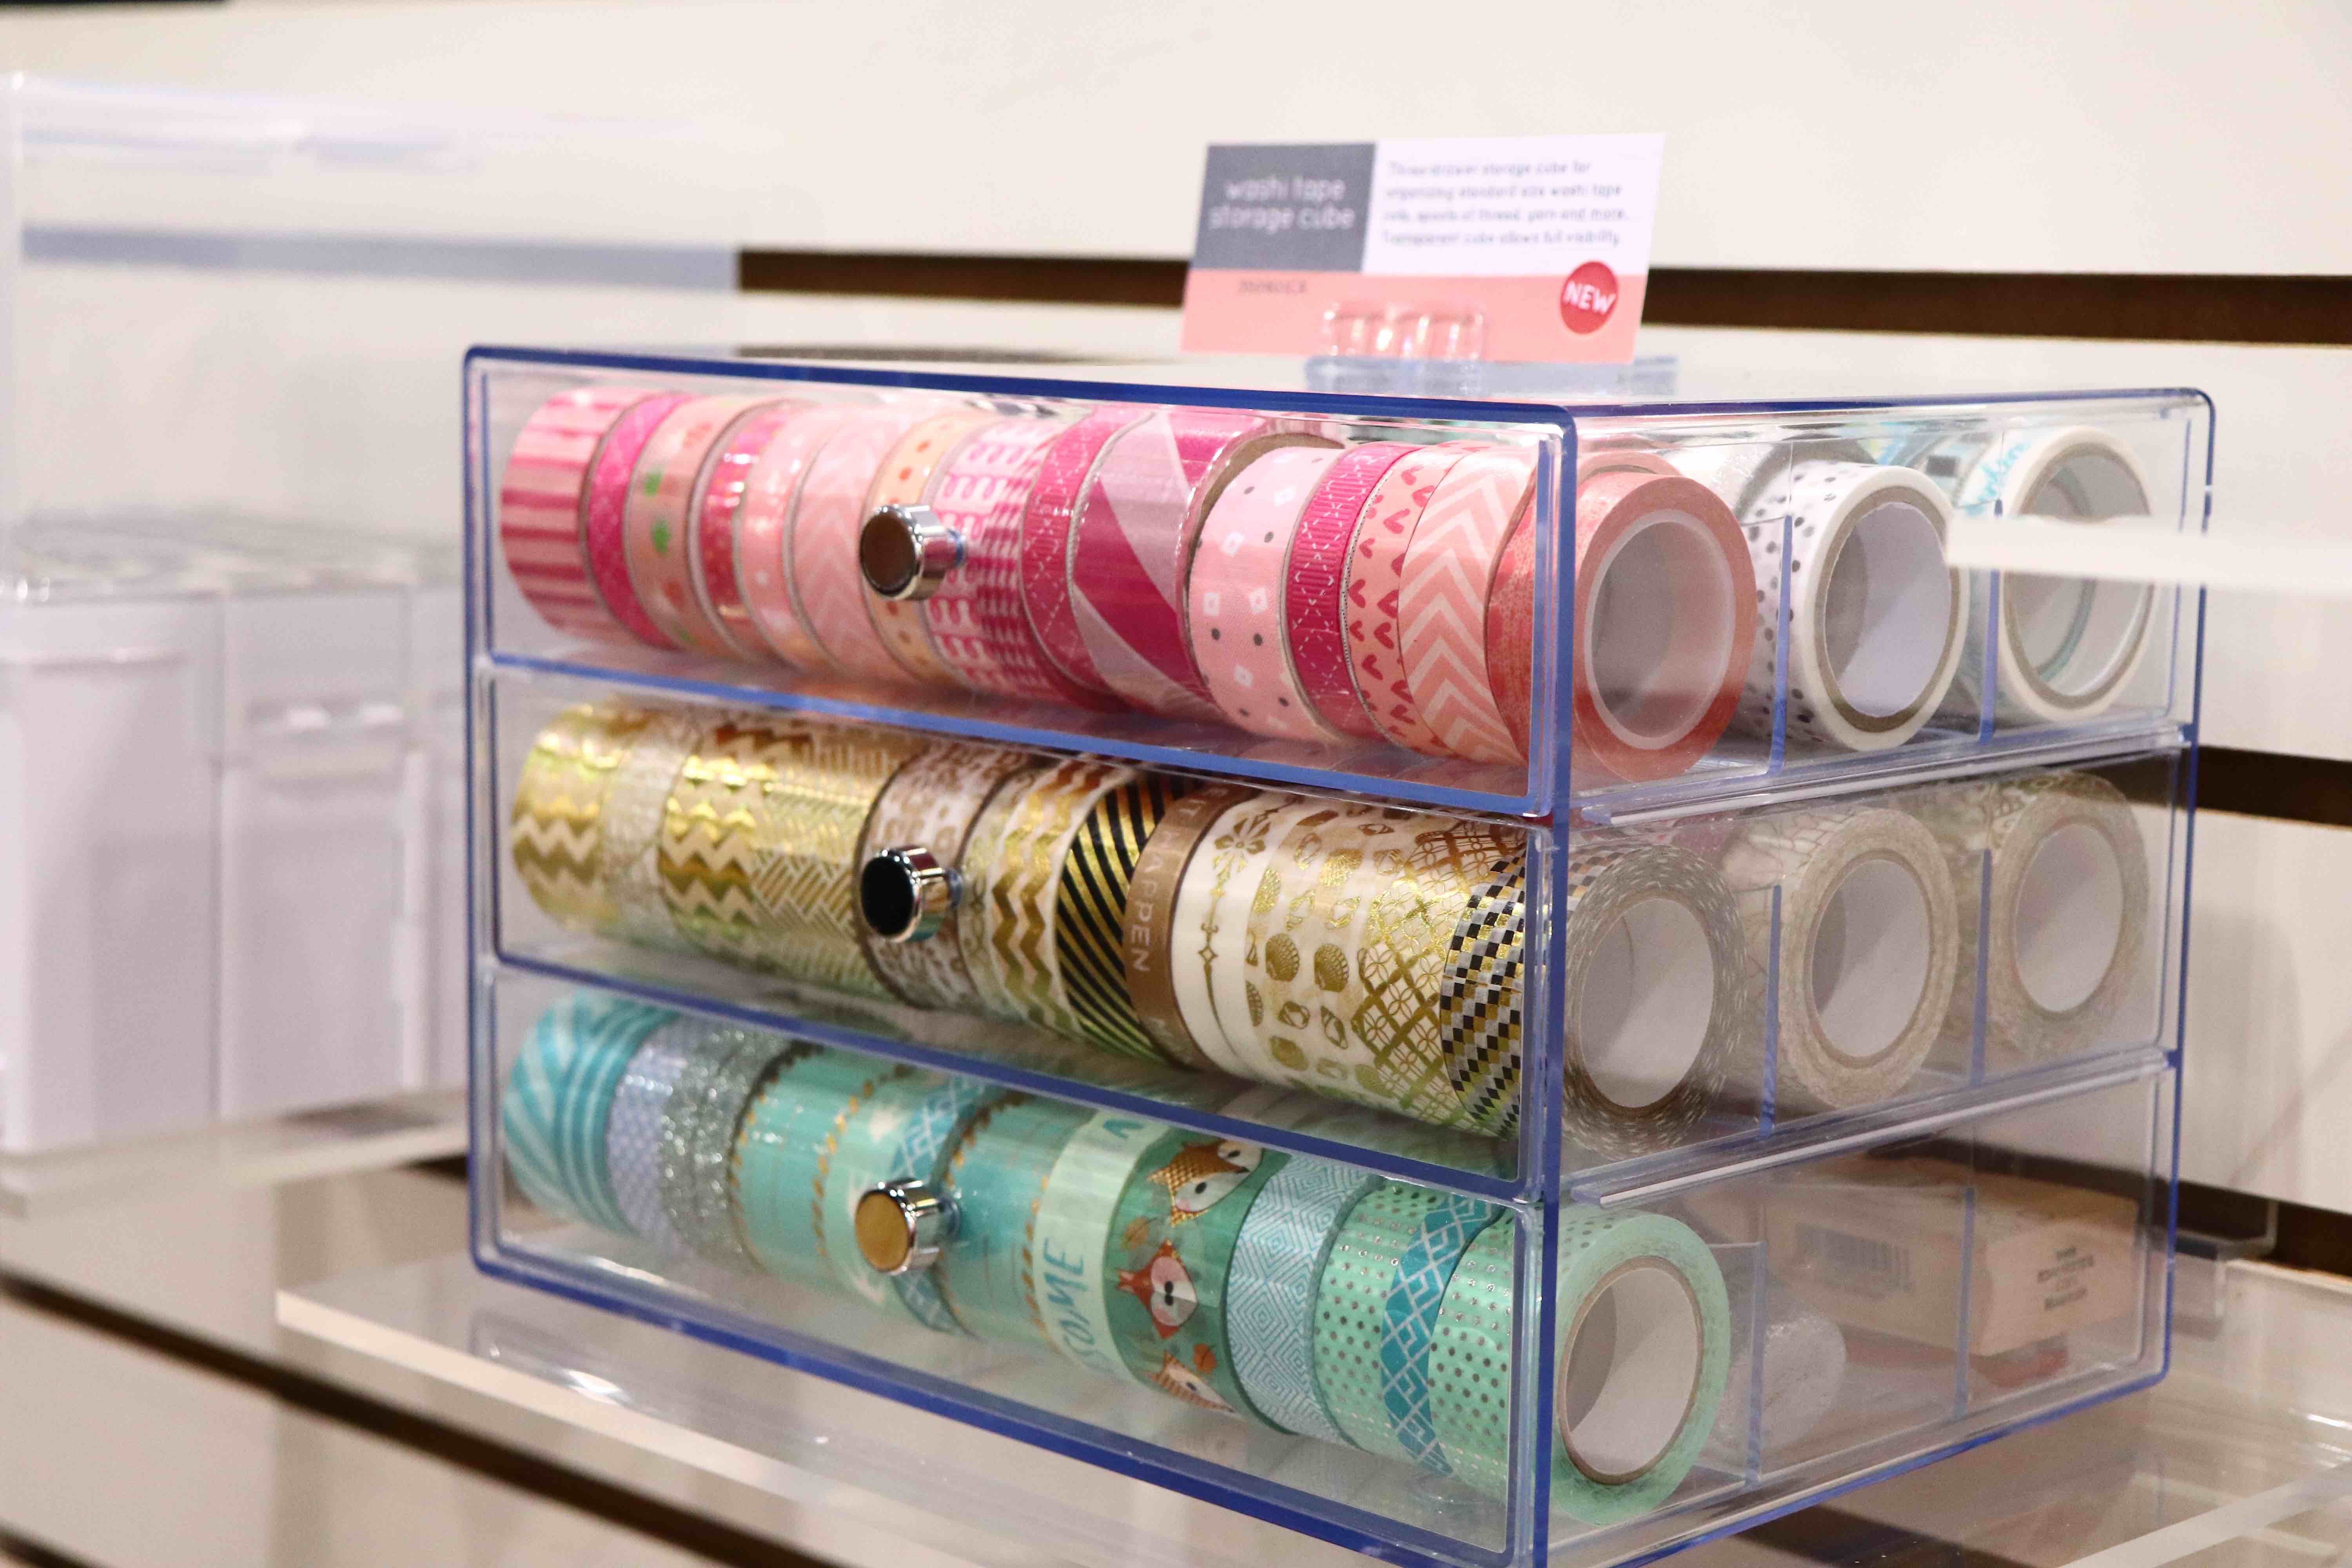
Deflecto is bringing out some fun new storage solutions, including a convenient, collapsable marker bin (will fit most alcohol marker brands, plus the unit when collapsed is stackable!). They also have new and innovative compact storage units for washi tape
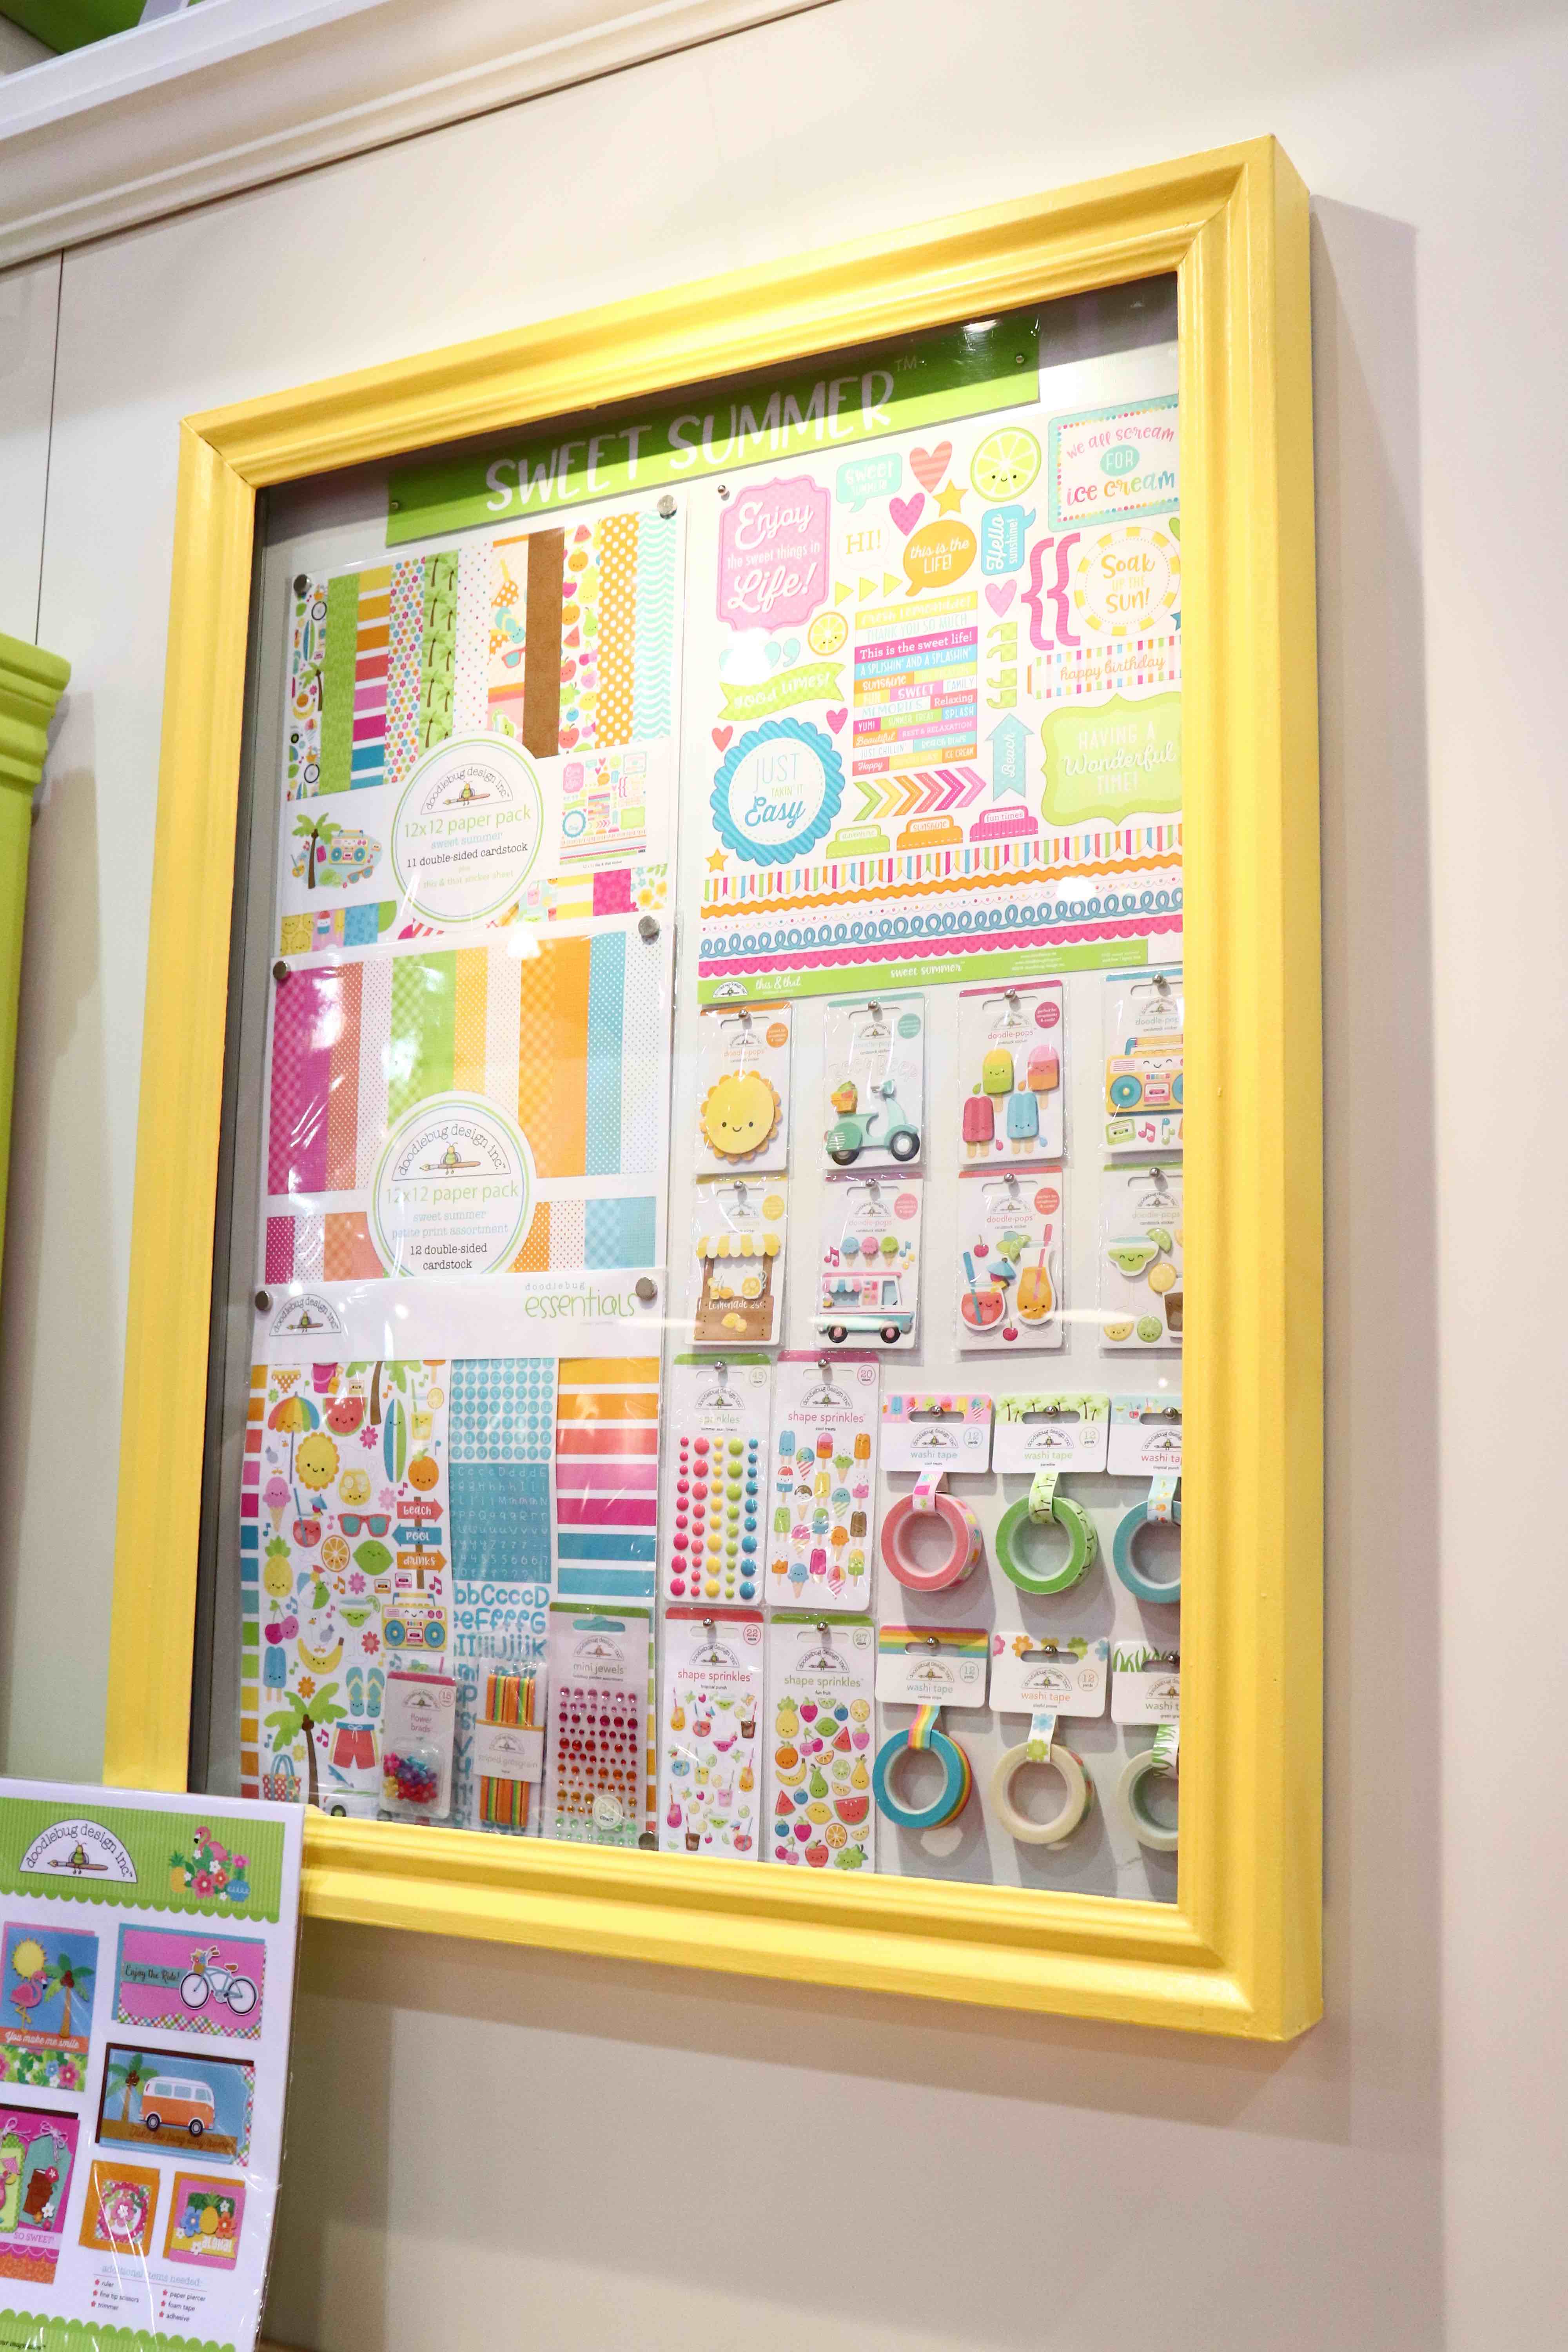
Check out the darling Sweet Summer collection from Doodlebug! Isn’t it adorable?? Even the booth was decked out with the refreshing theme of the release!
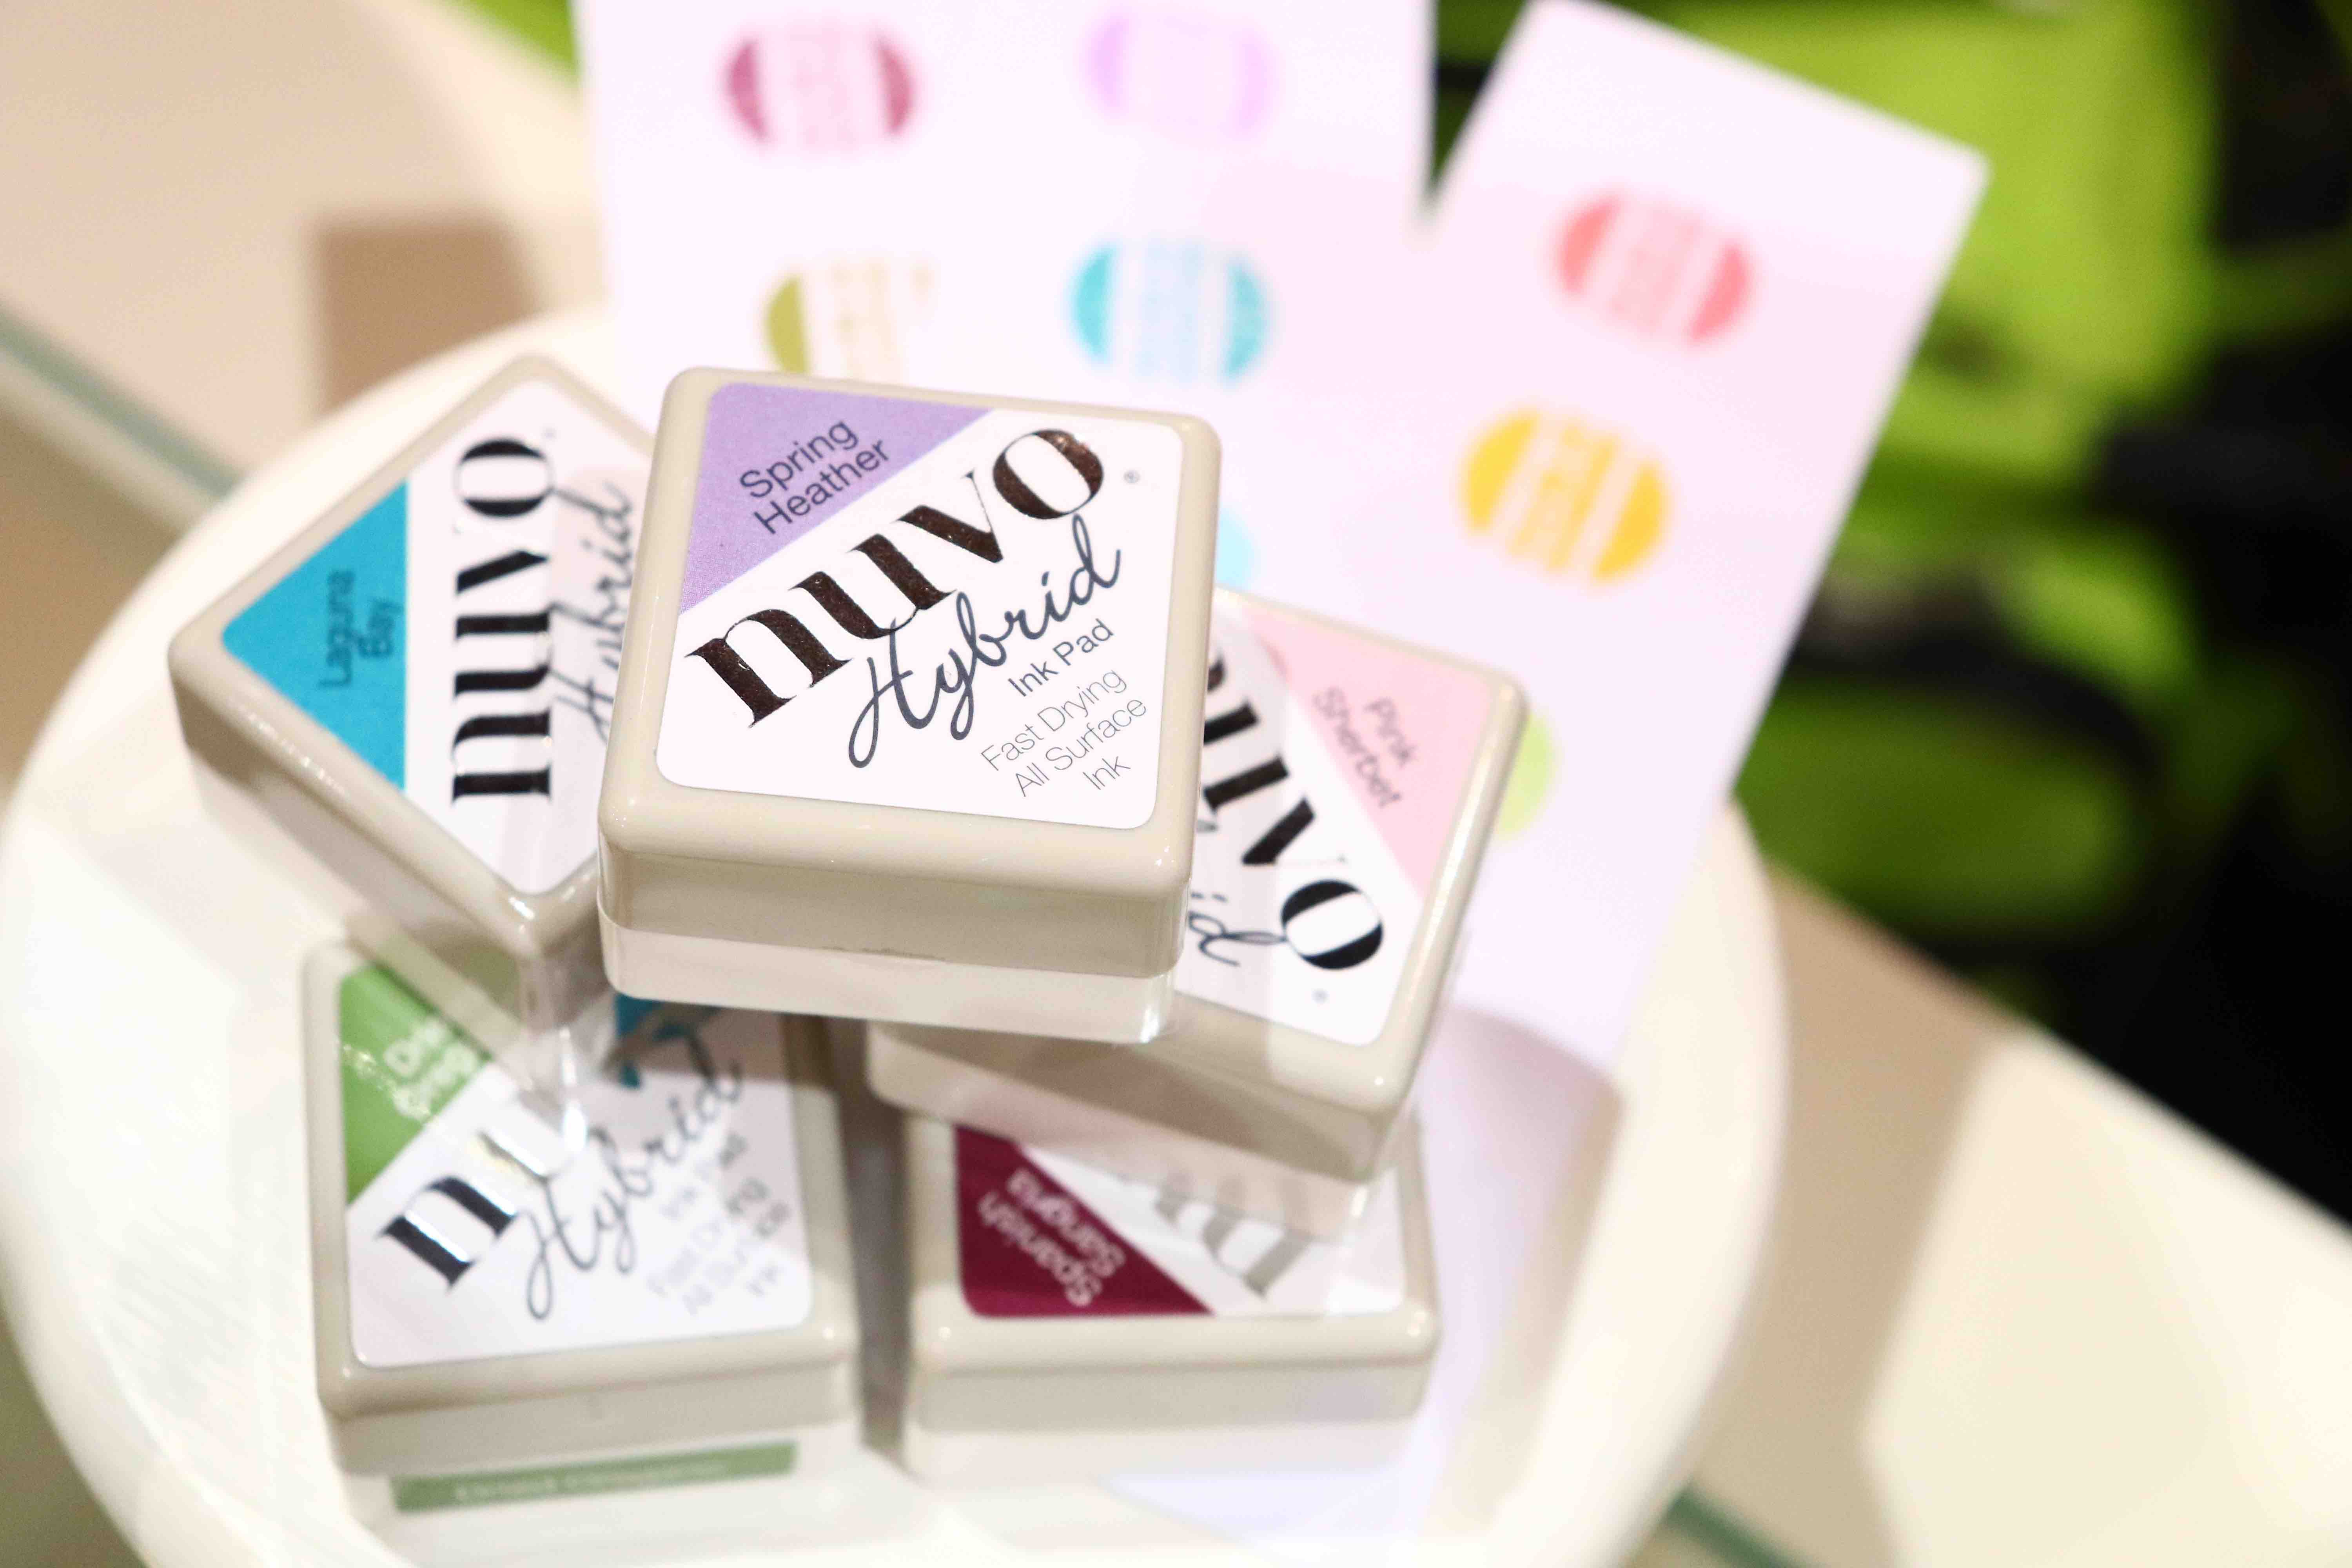
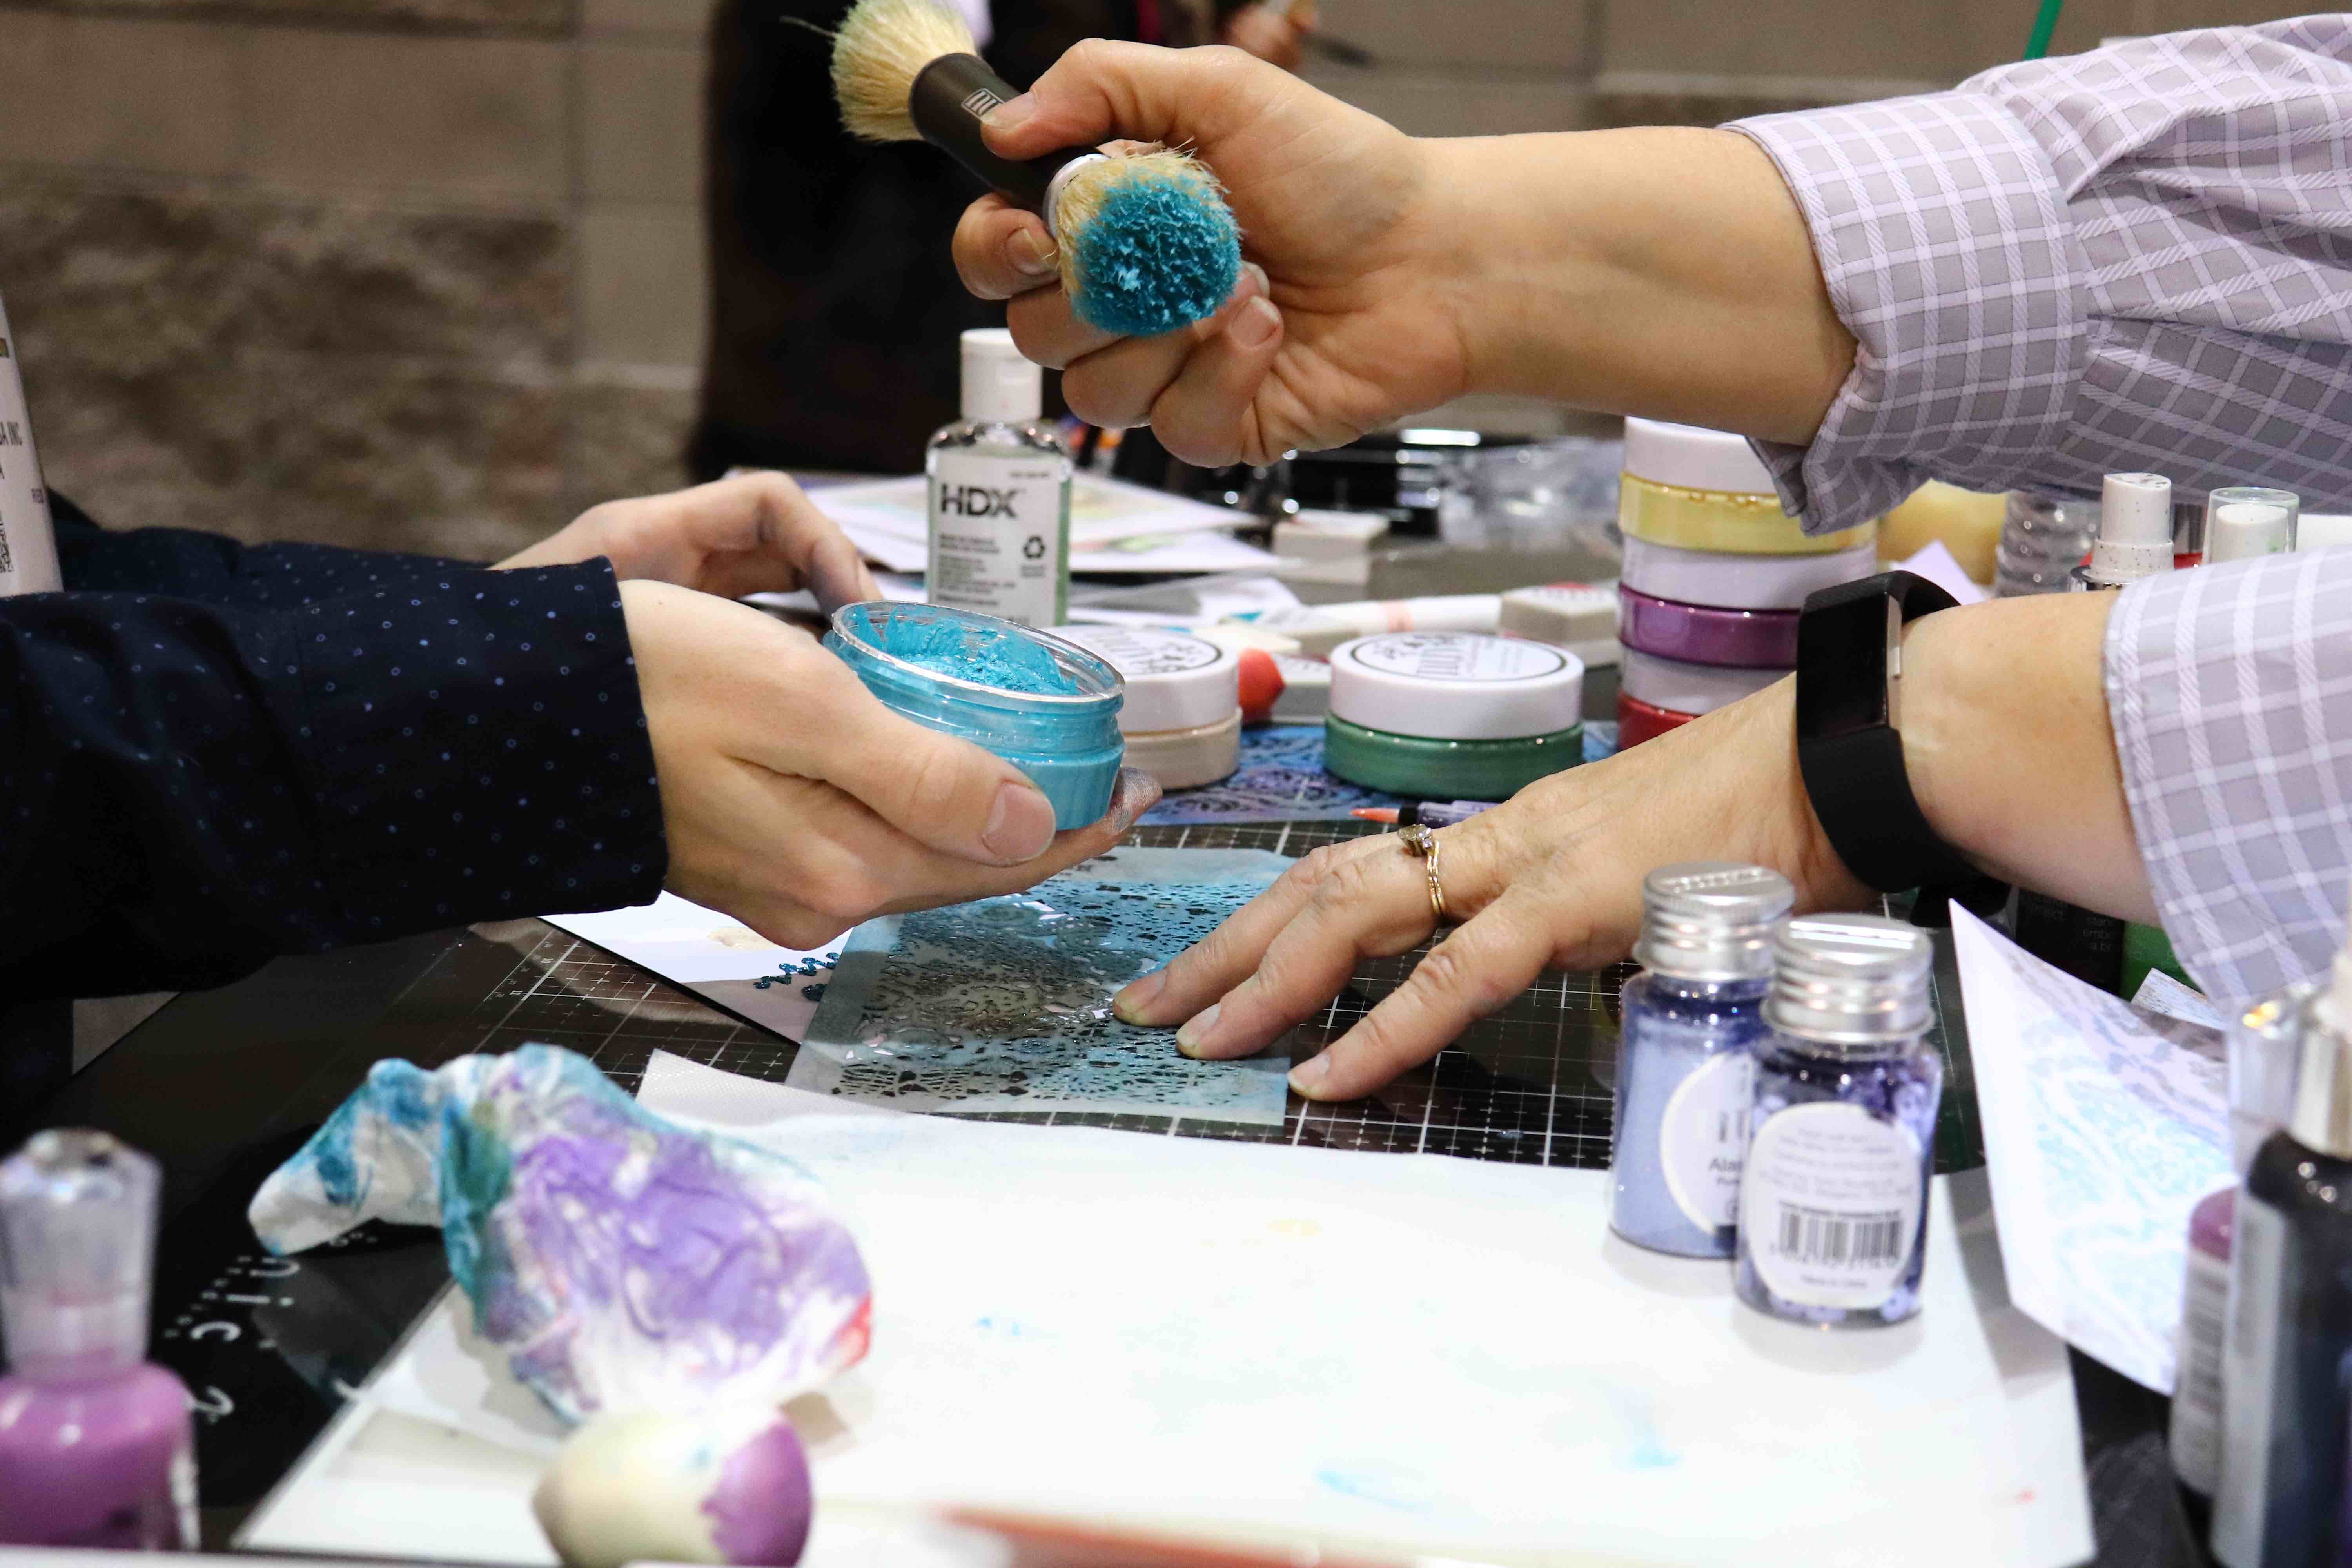
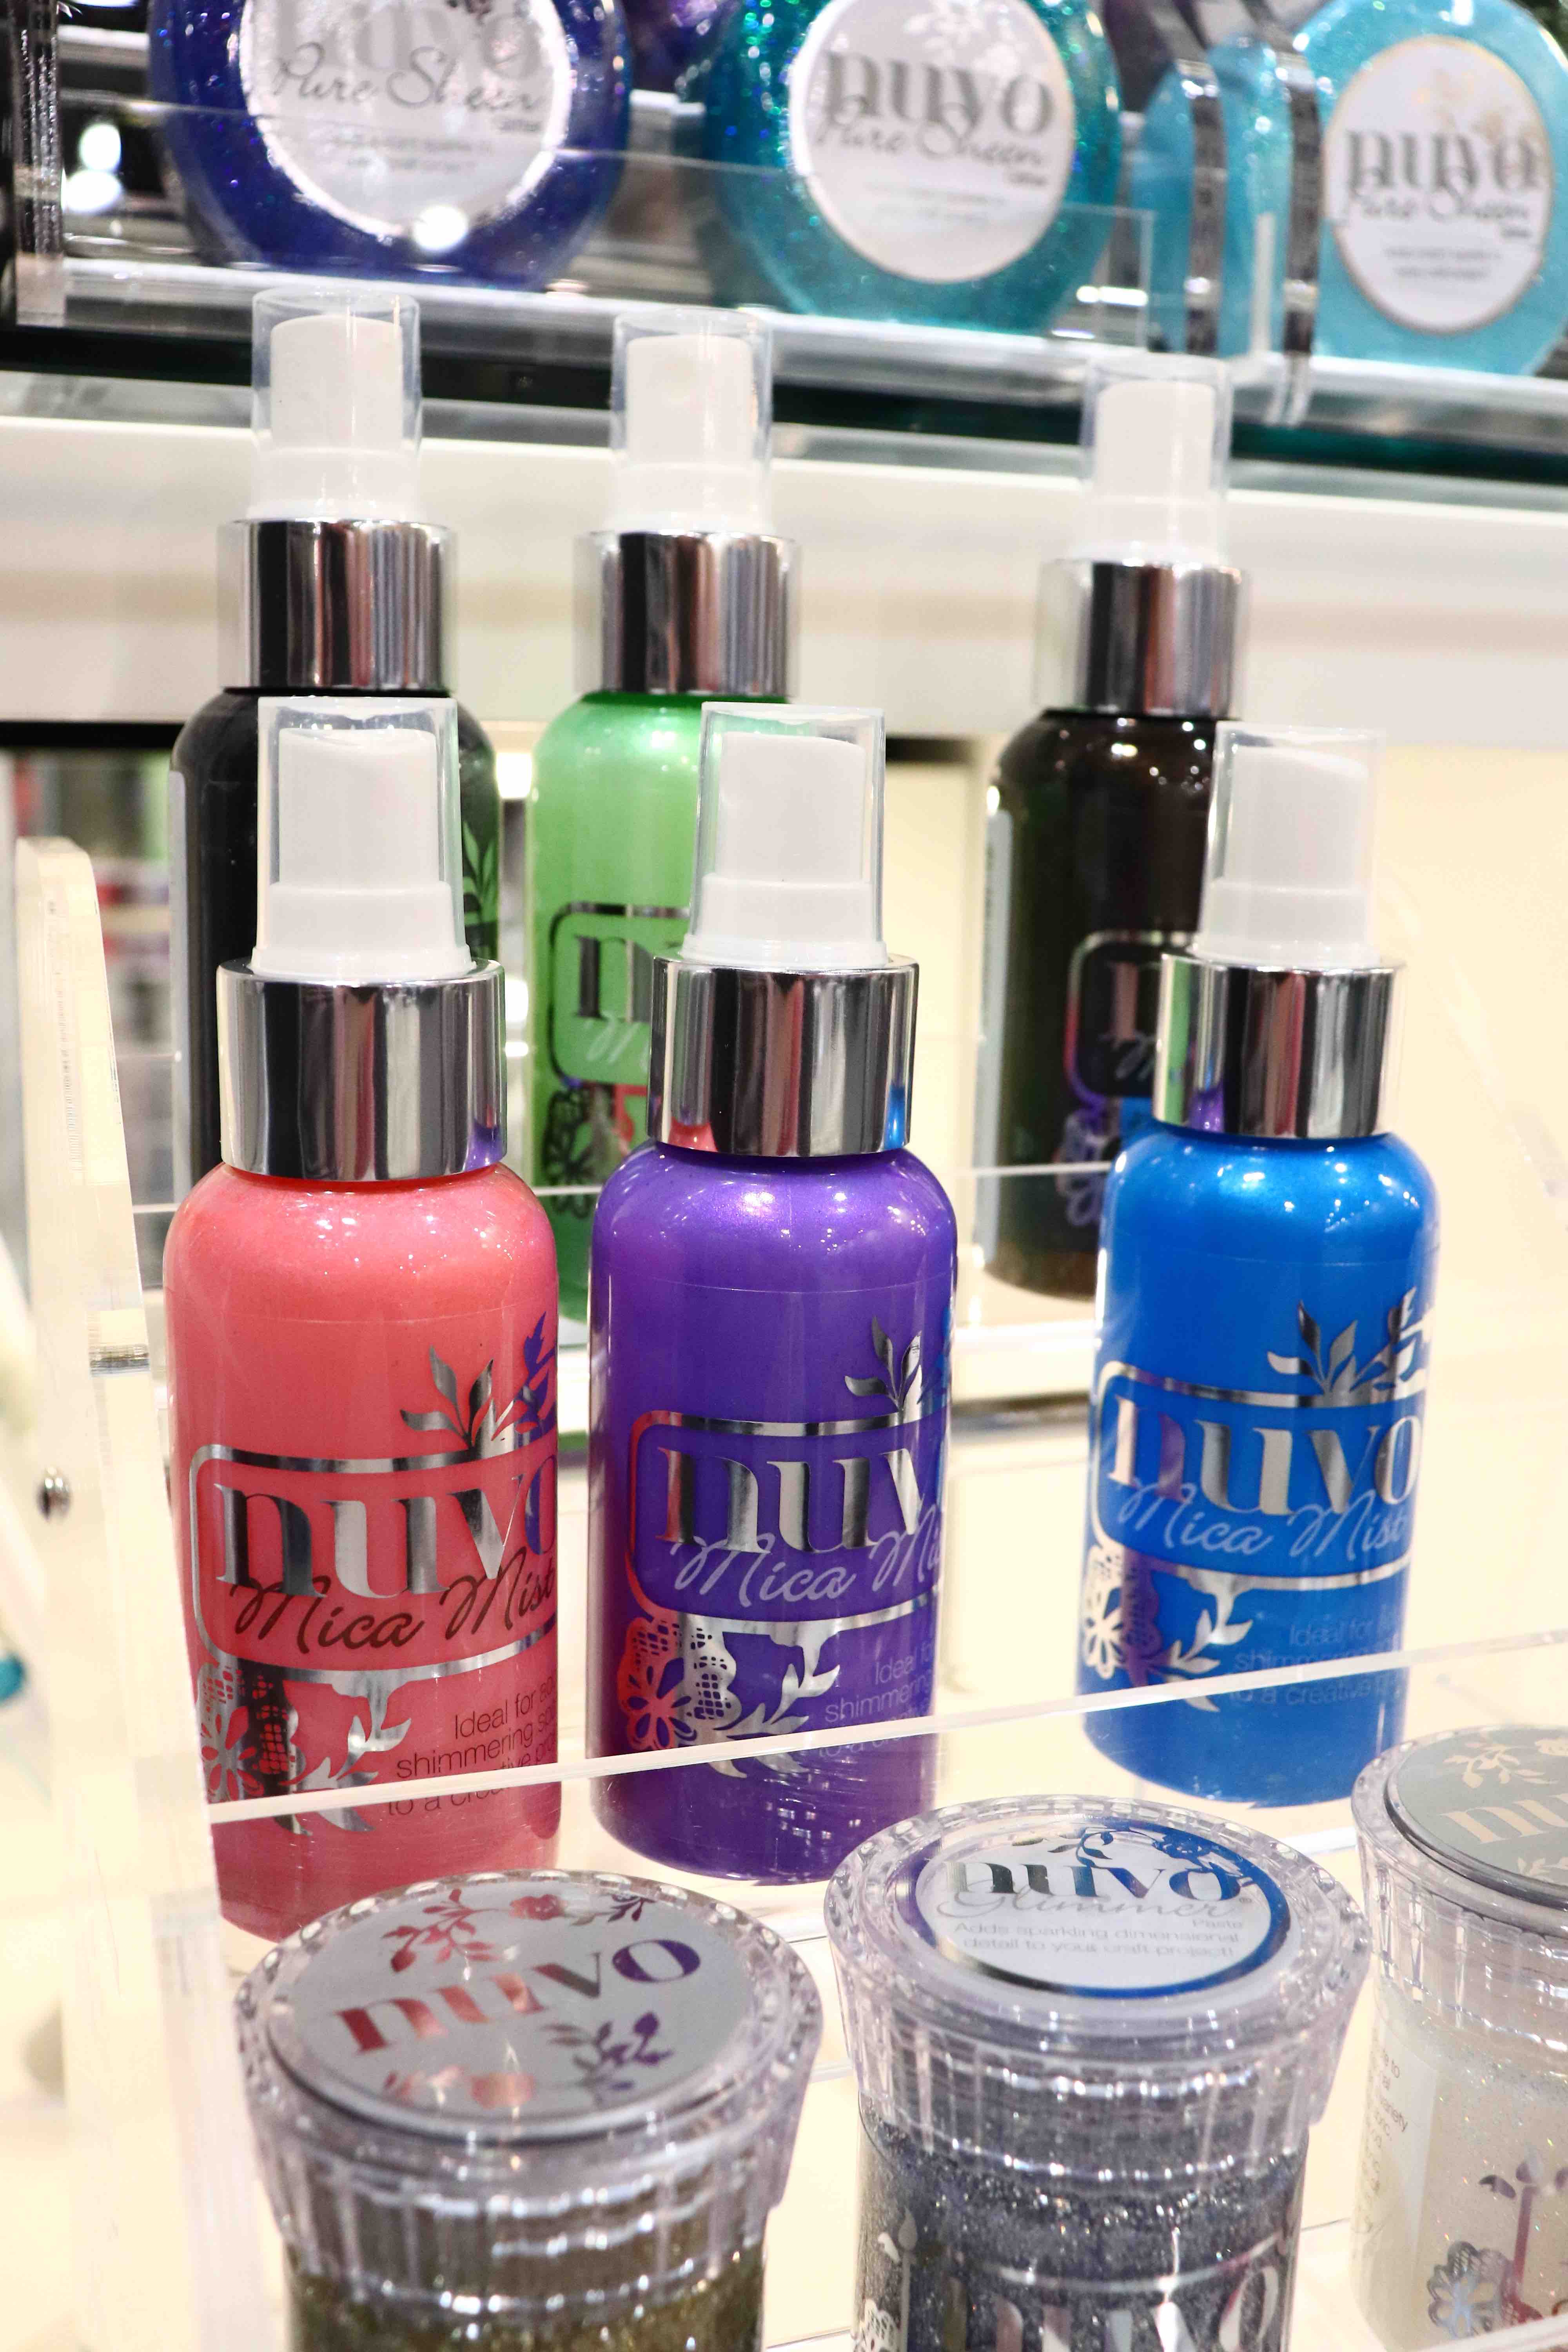
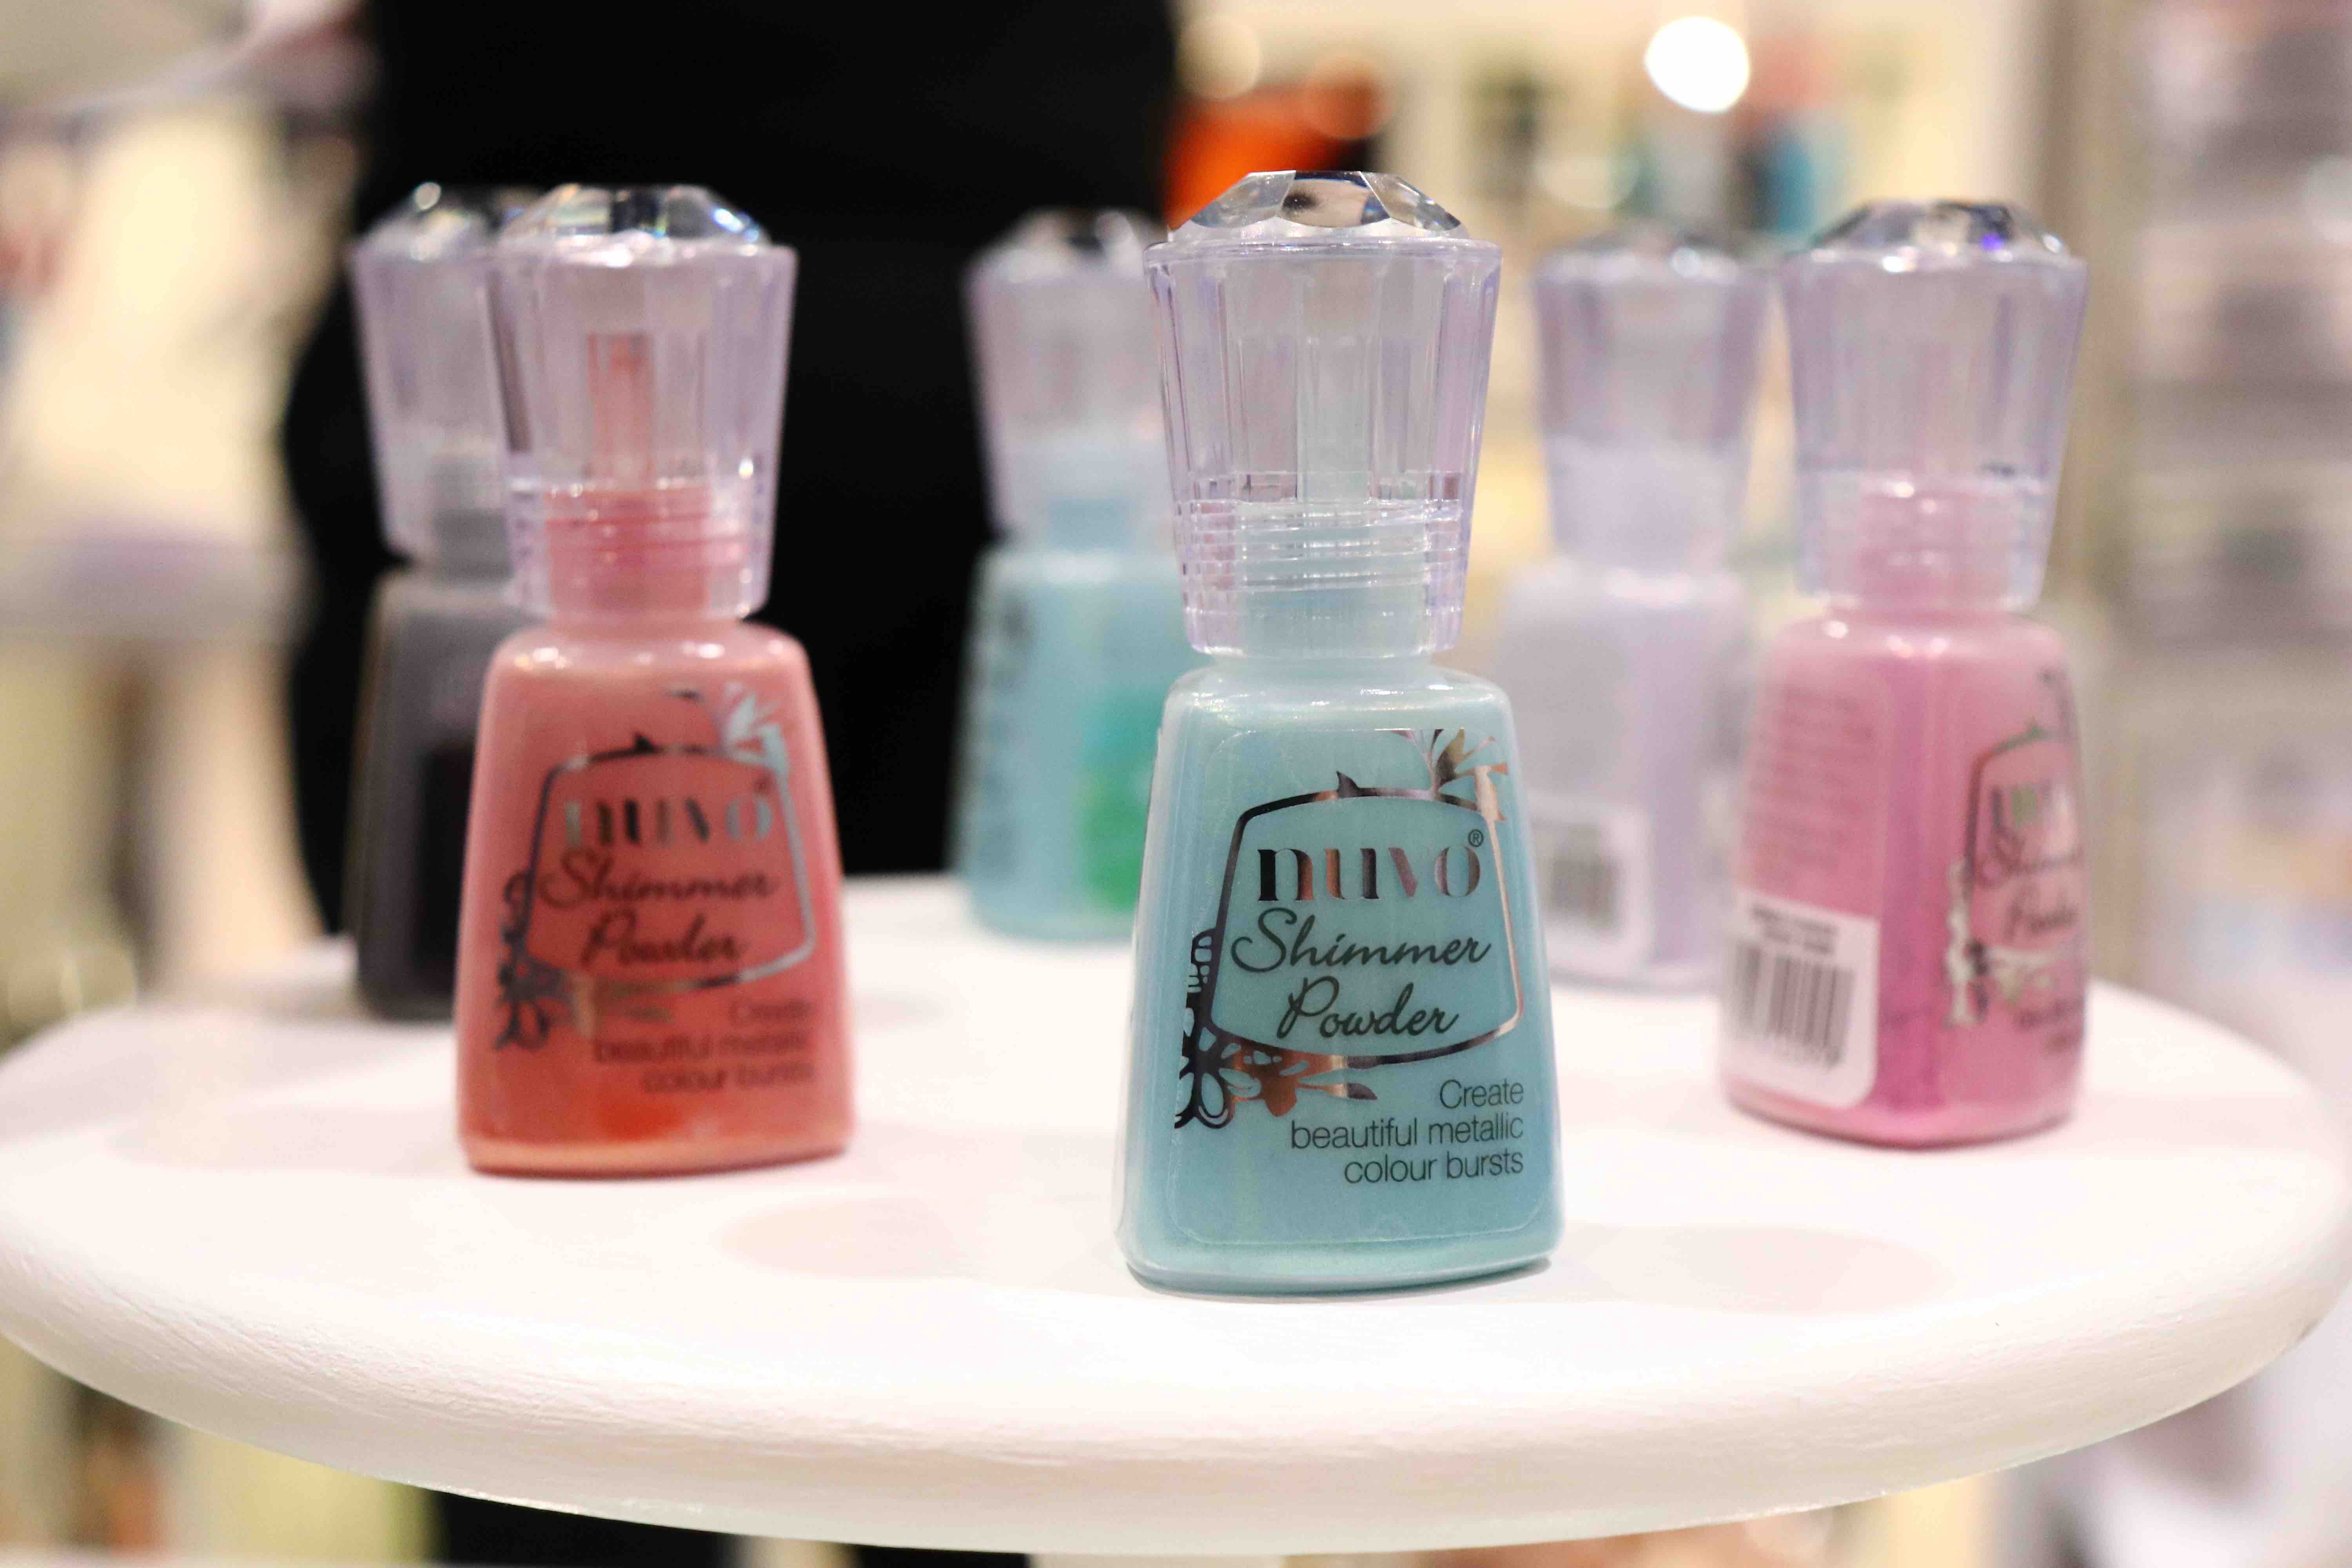
Tonic Studios’ latest Nuvo products are absolutely amazing as well! From new coordinating Nuvo collections such as Ocean Air to new Hybrid ink pads and Shimmer Powders, you’ll have so many new things to create with! Look at all the pretty products and inspiration pieces!
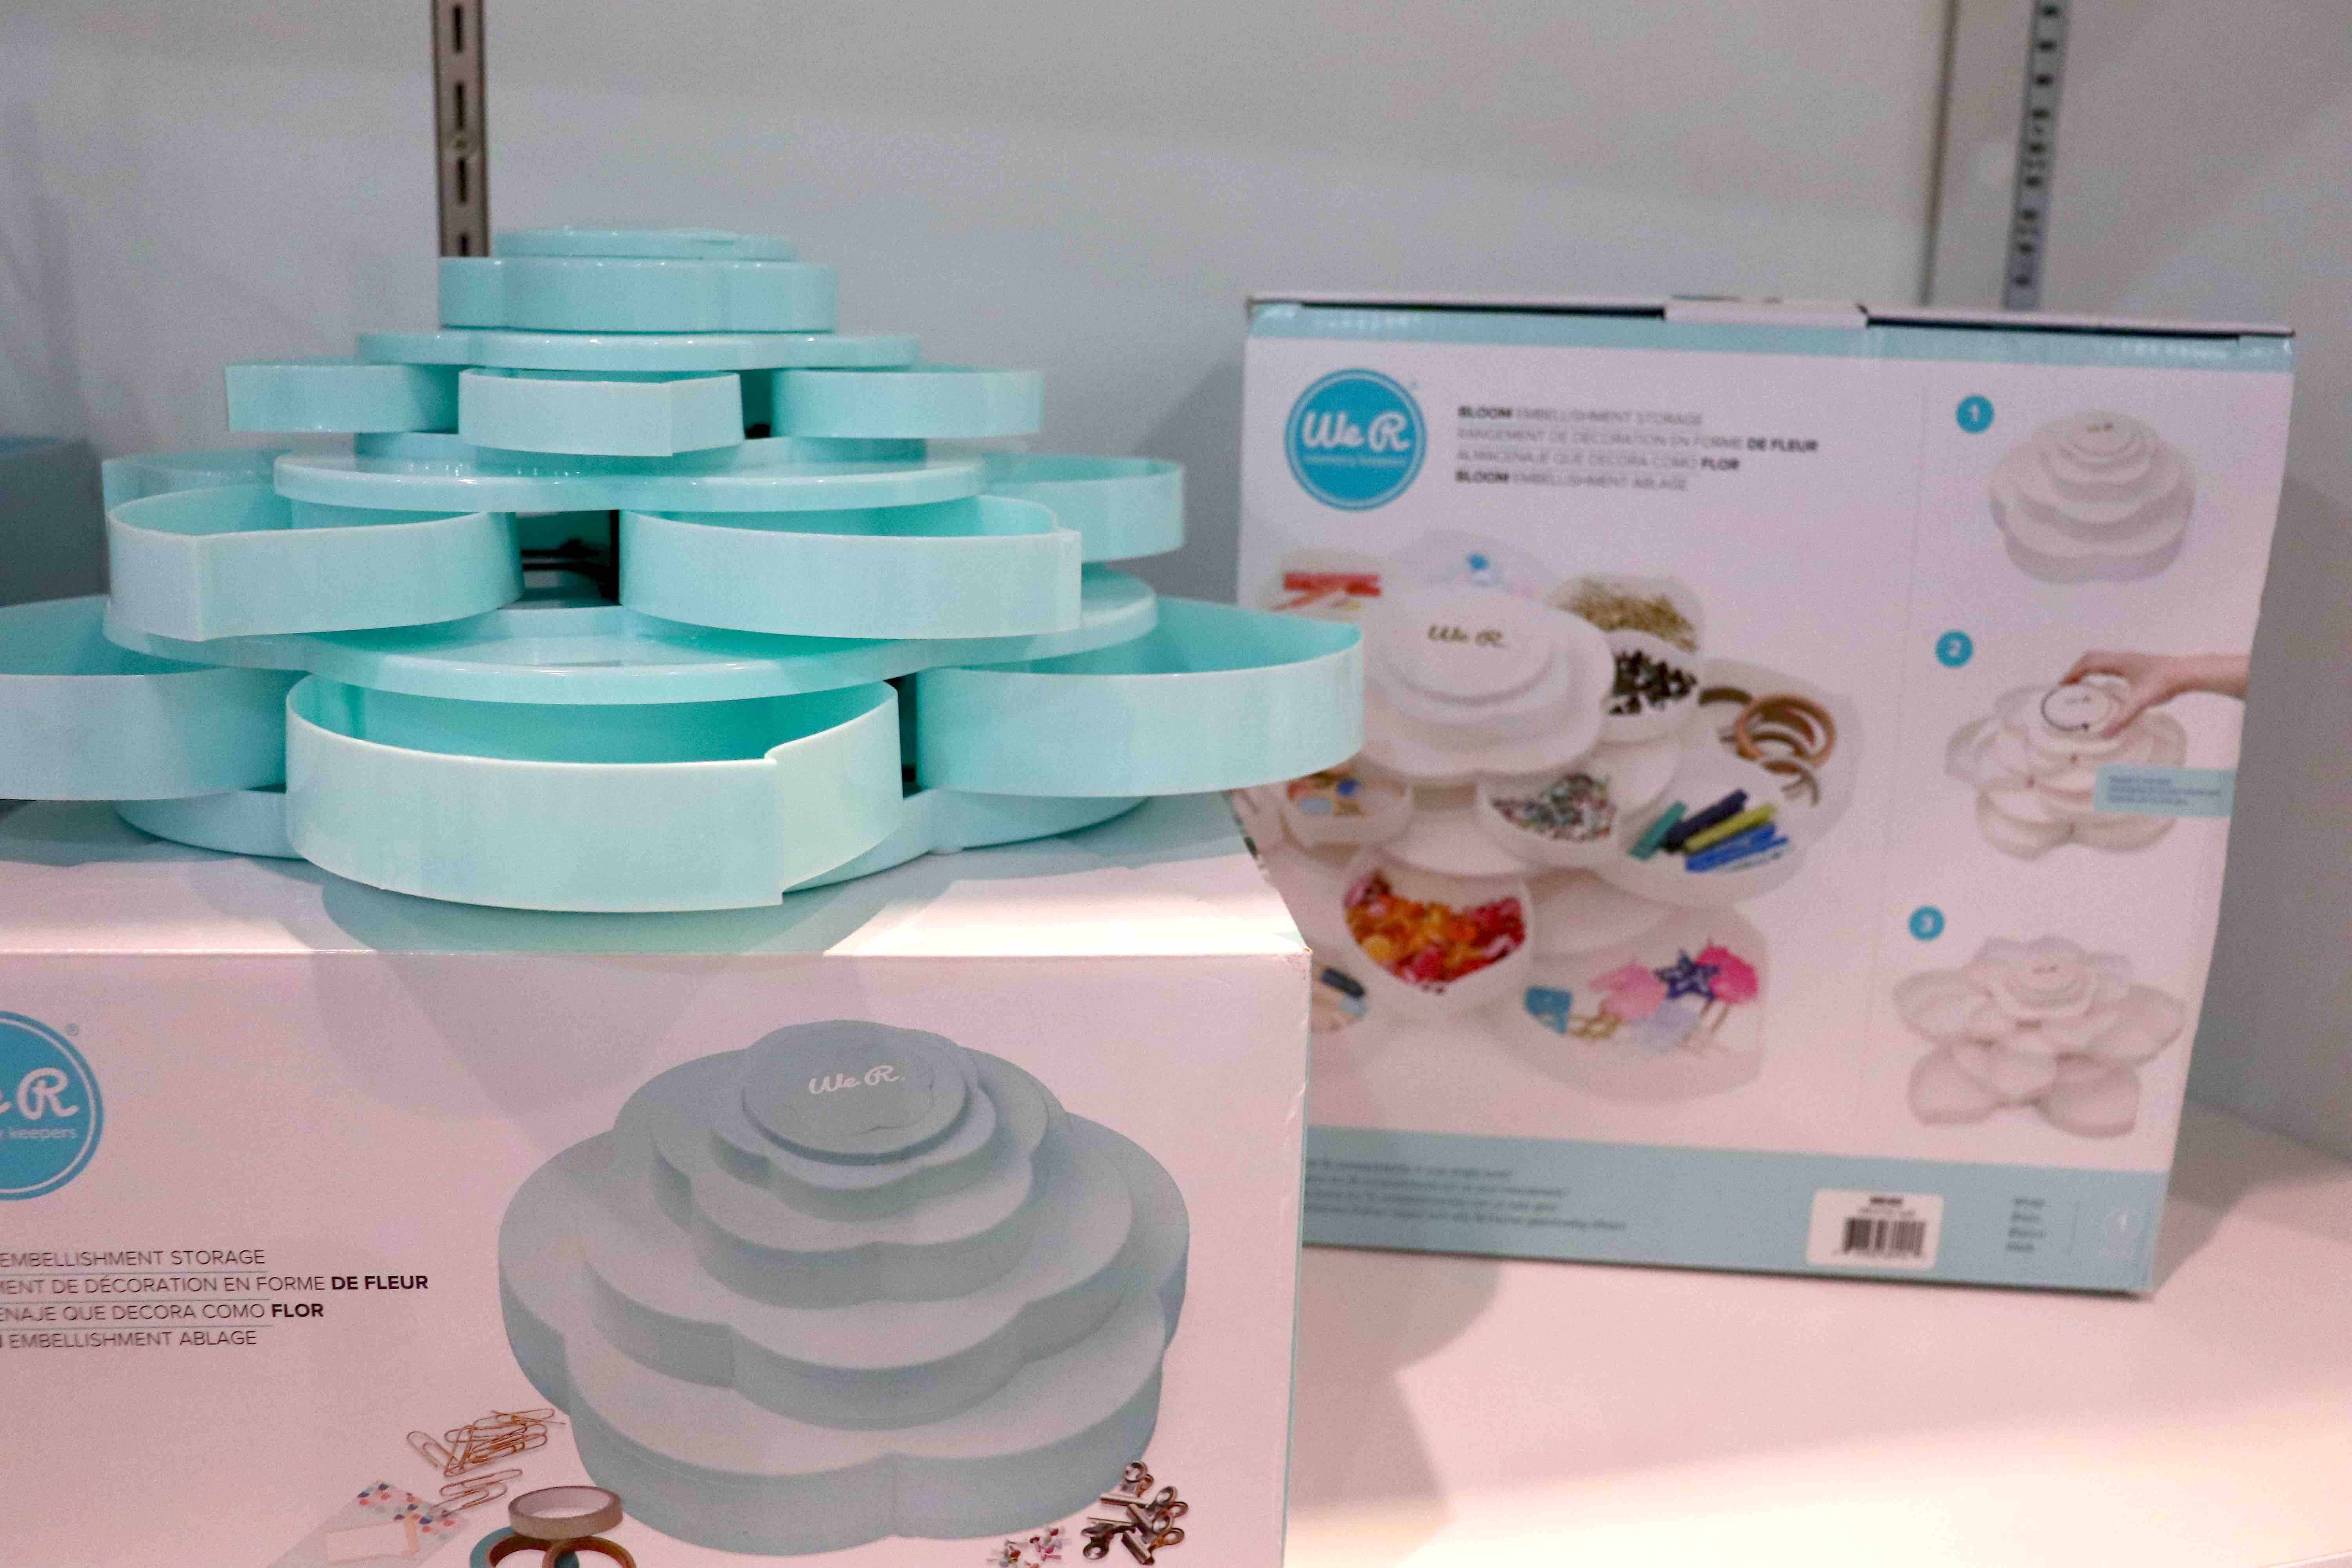
The We R Memory Keepers Blossom embellishment storage unit is super innovative and fun too! It closes into a compact shape and then opens into a full floral! It comes in both teal and white, so you even have options for coordinating the unit with your crafting space!
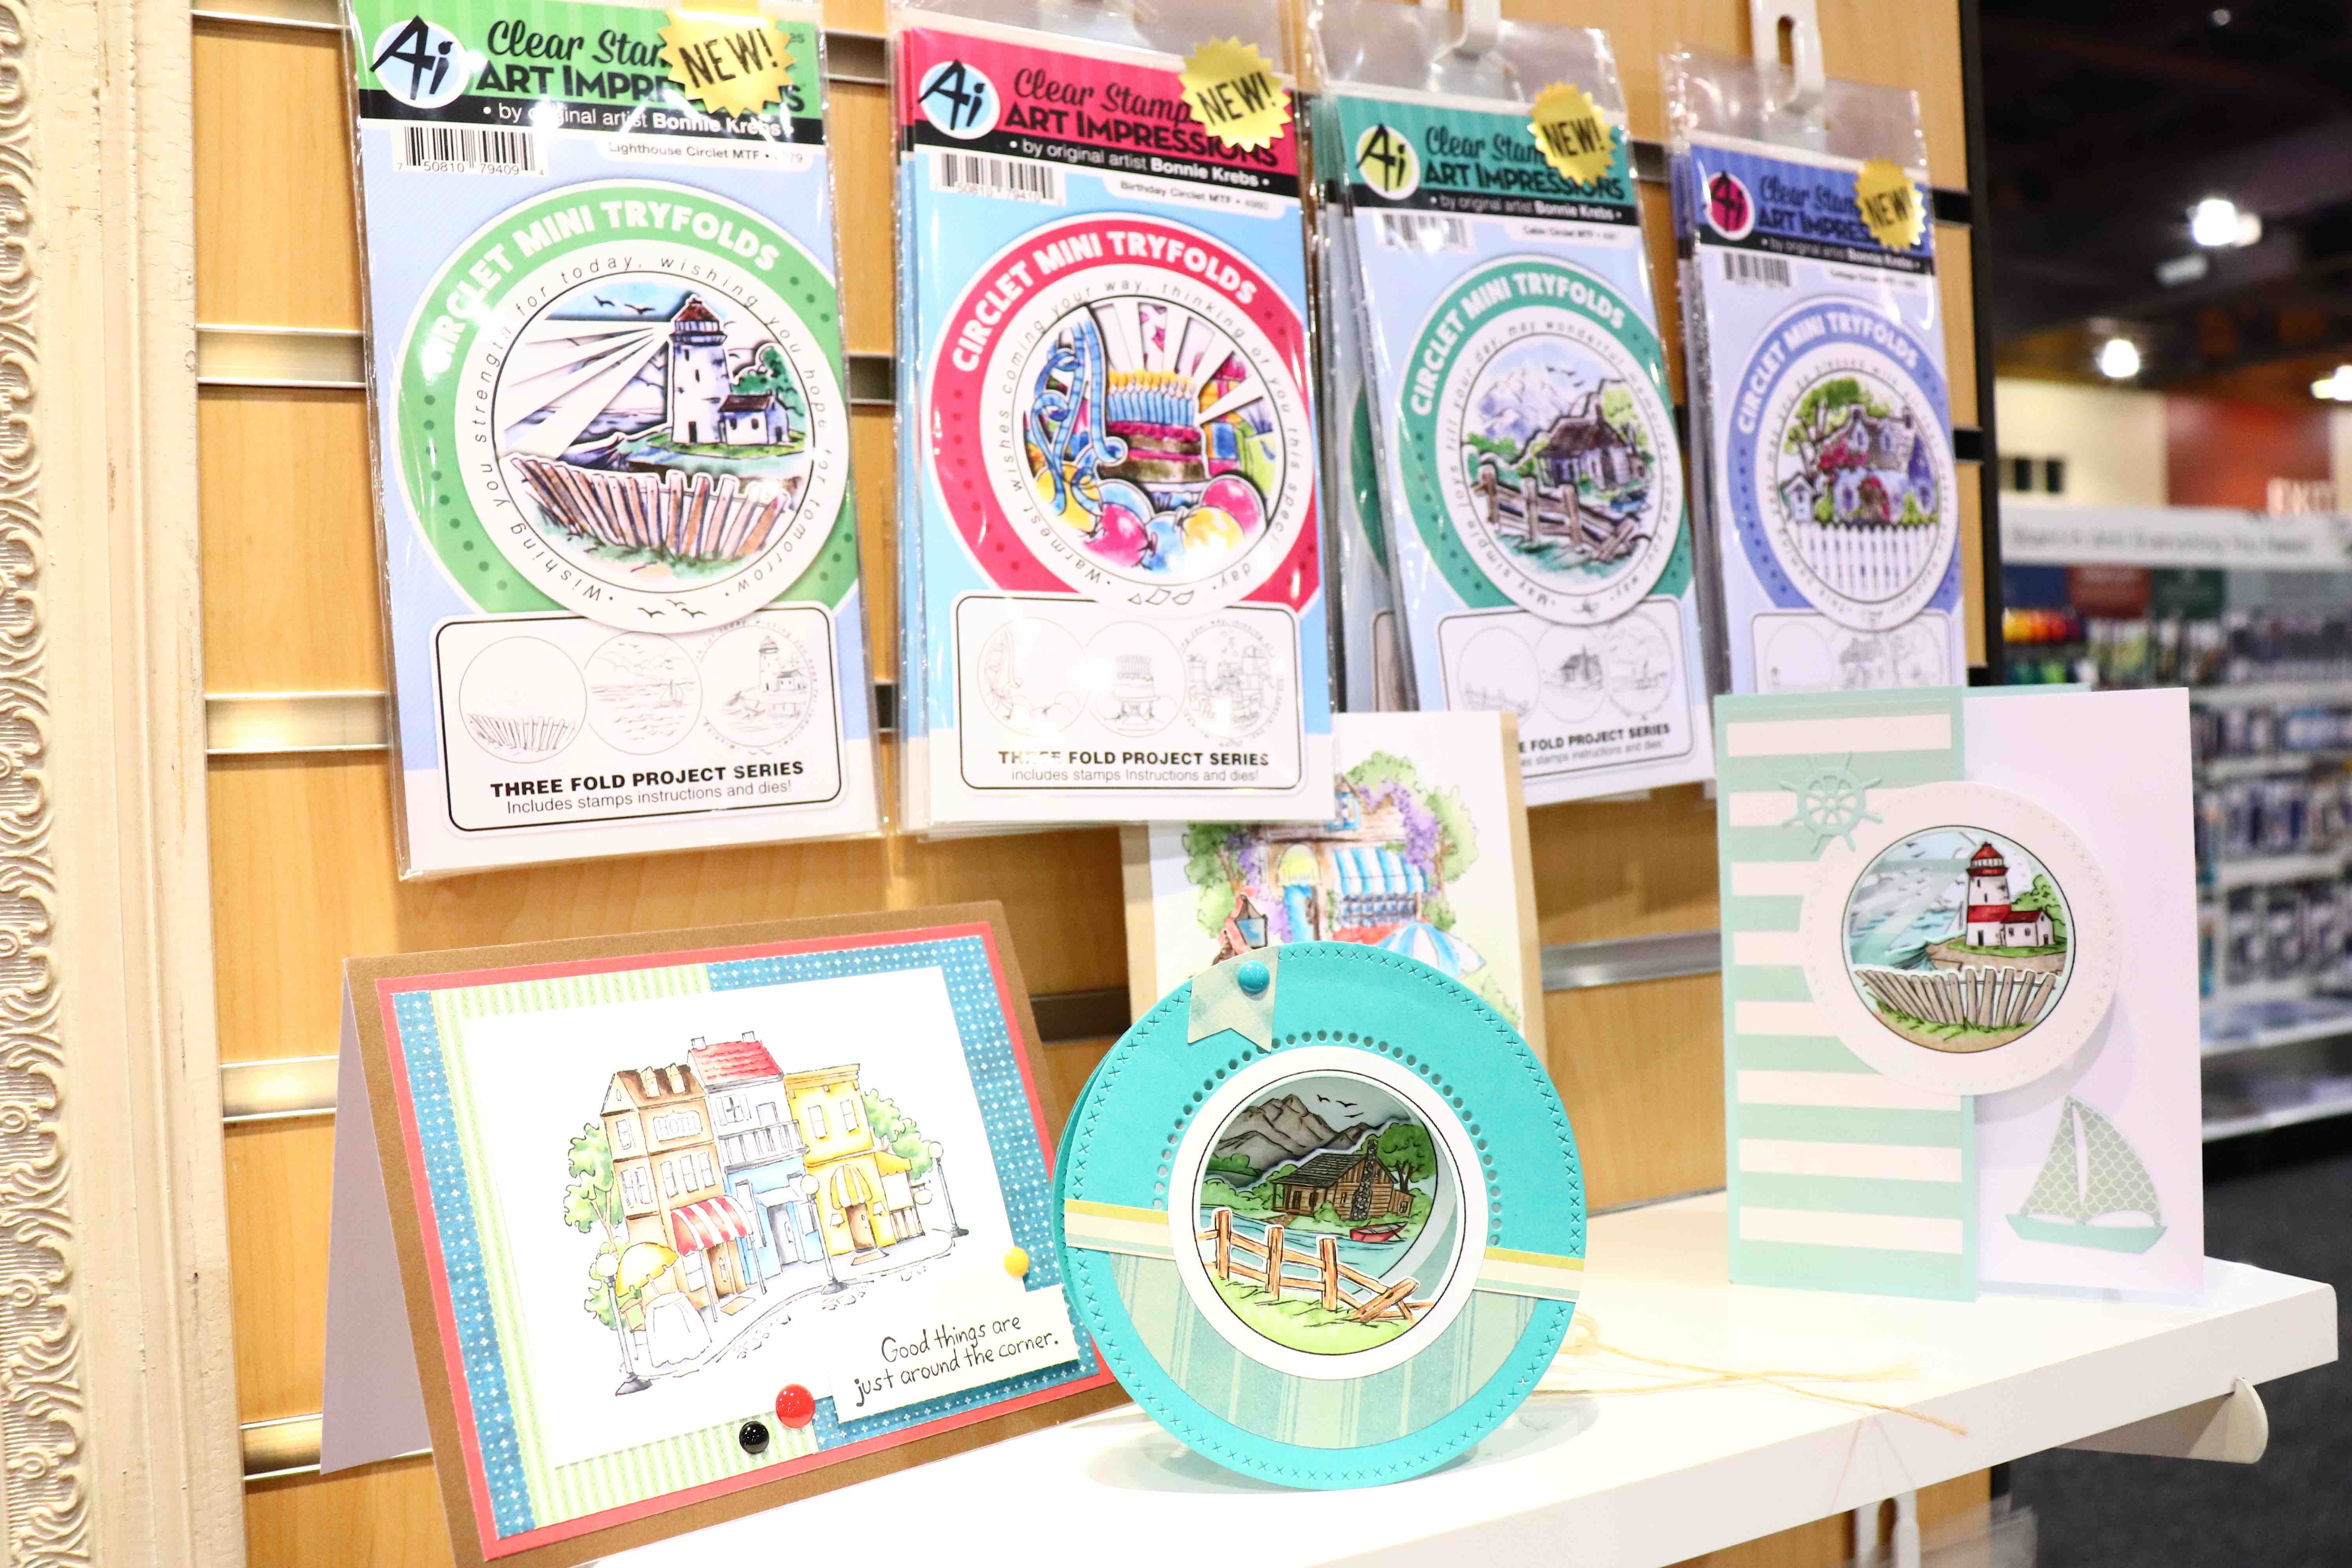
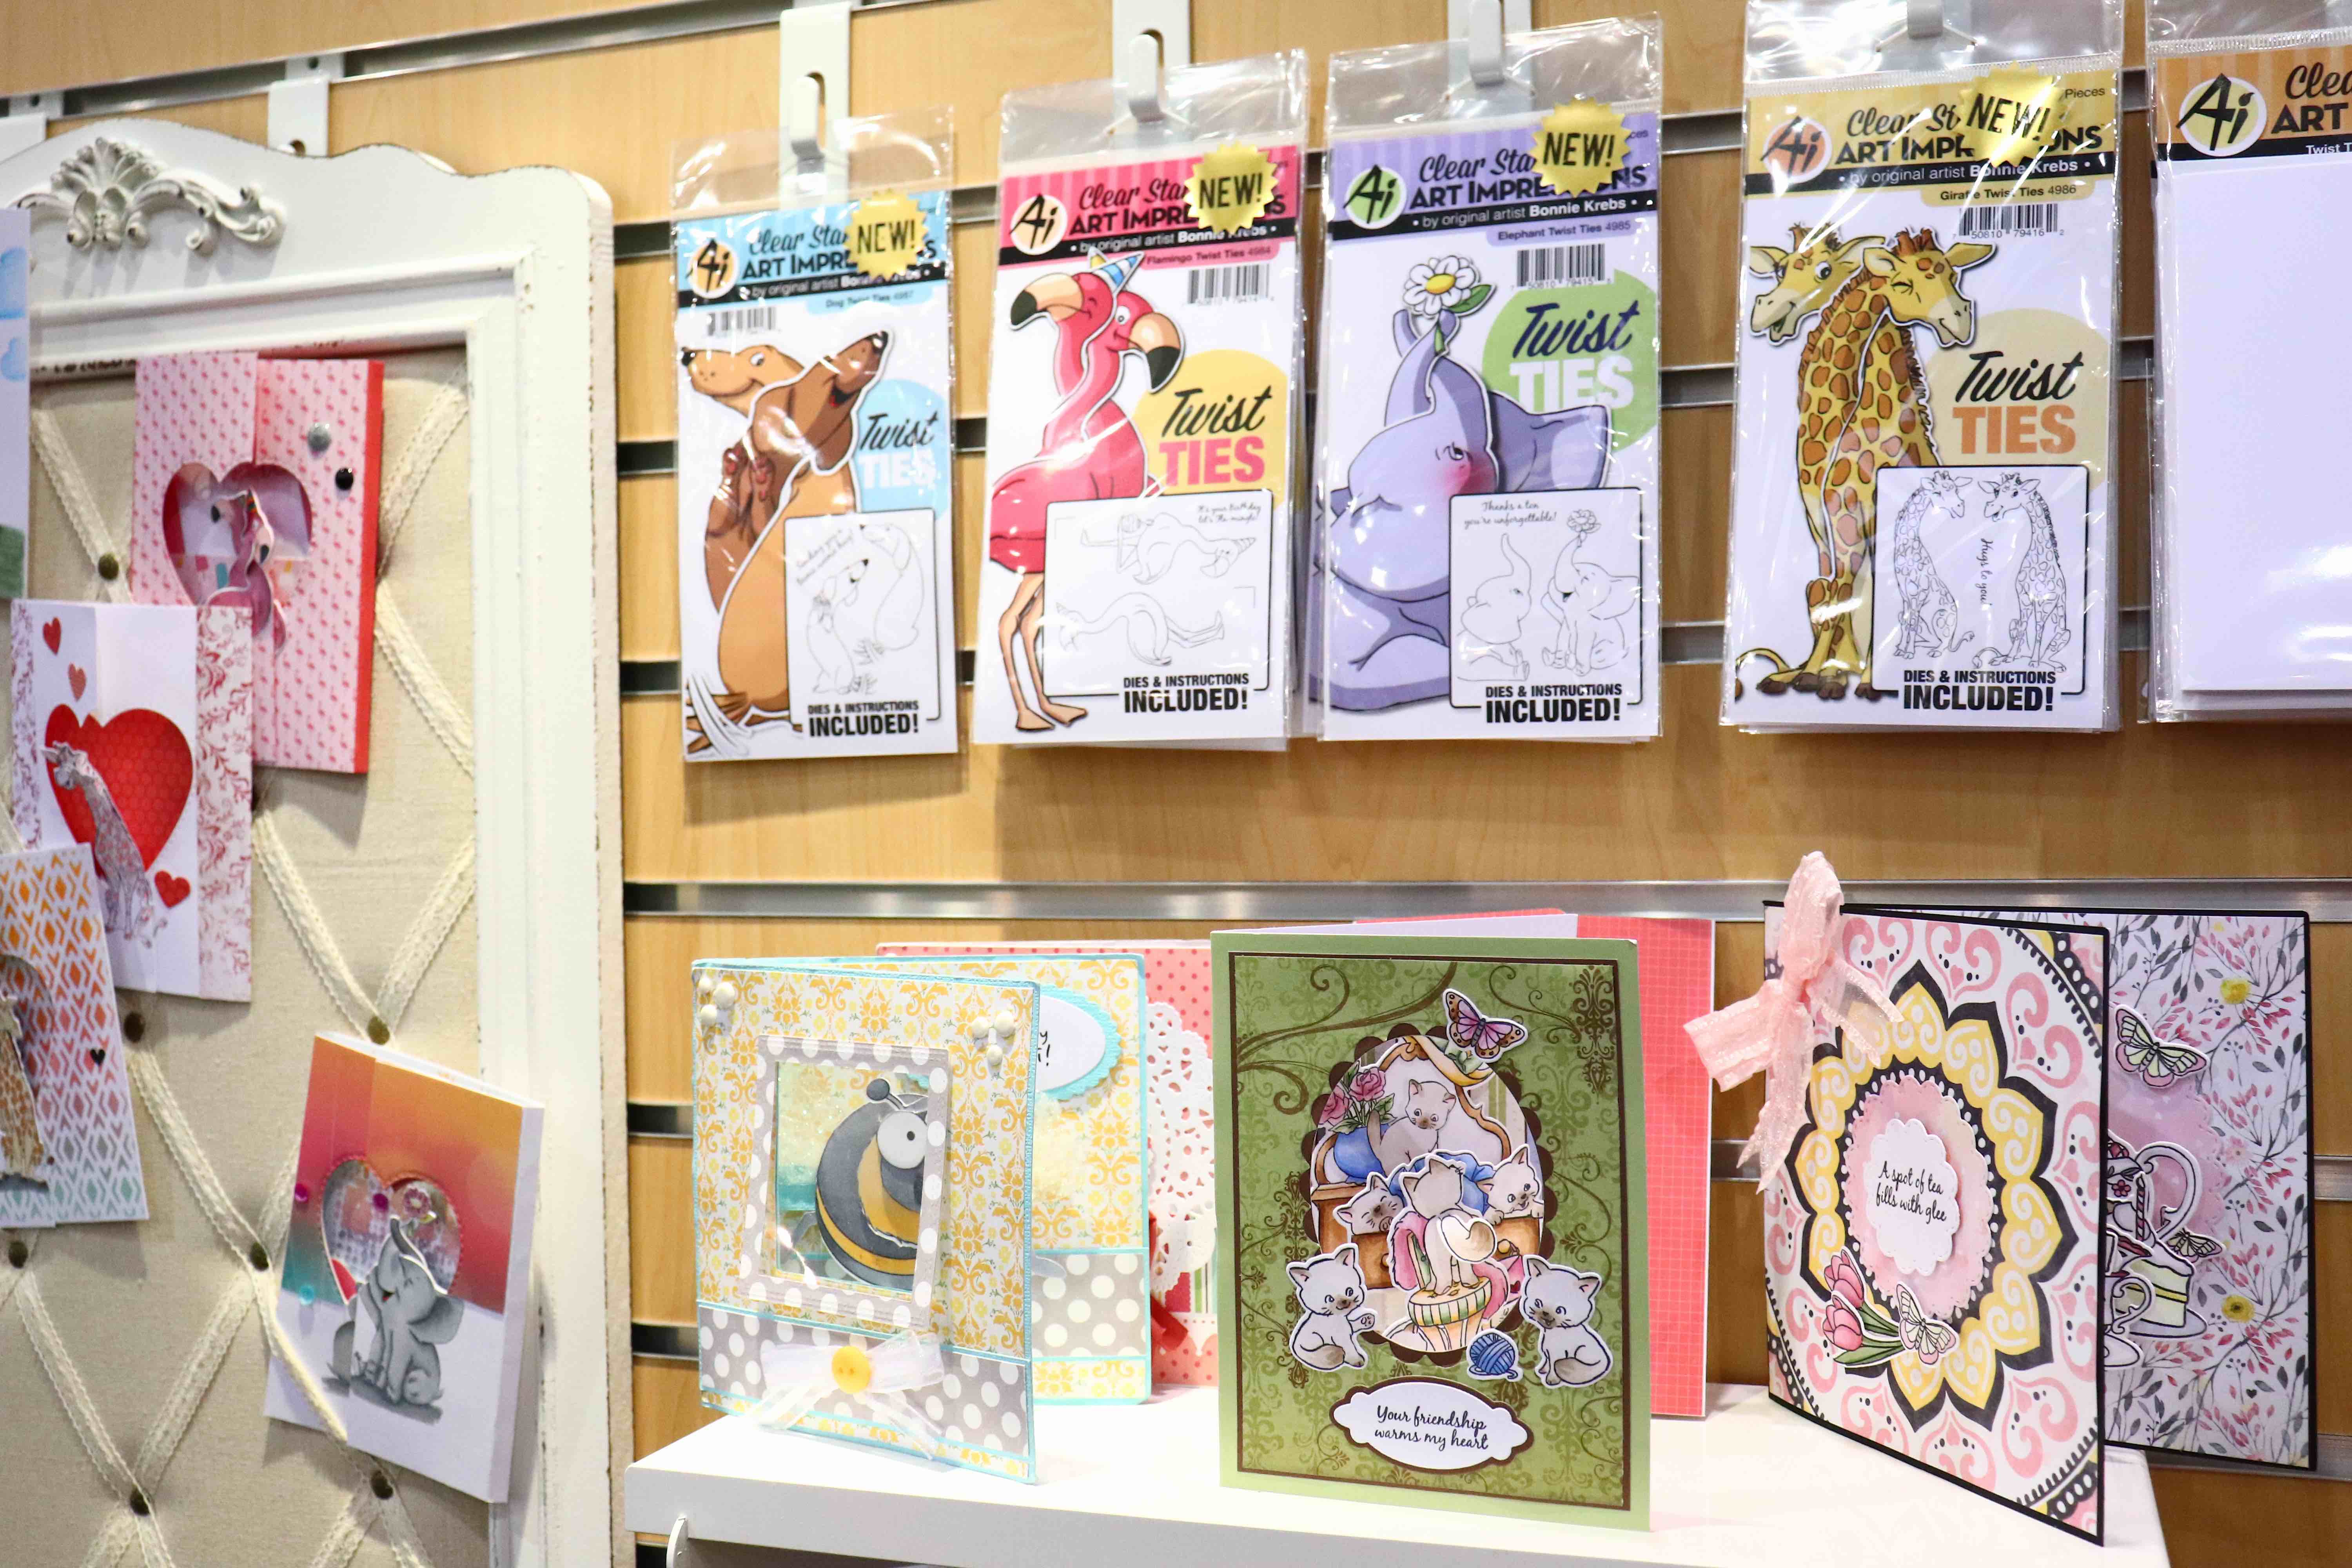
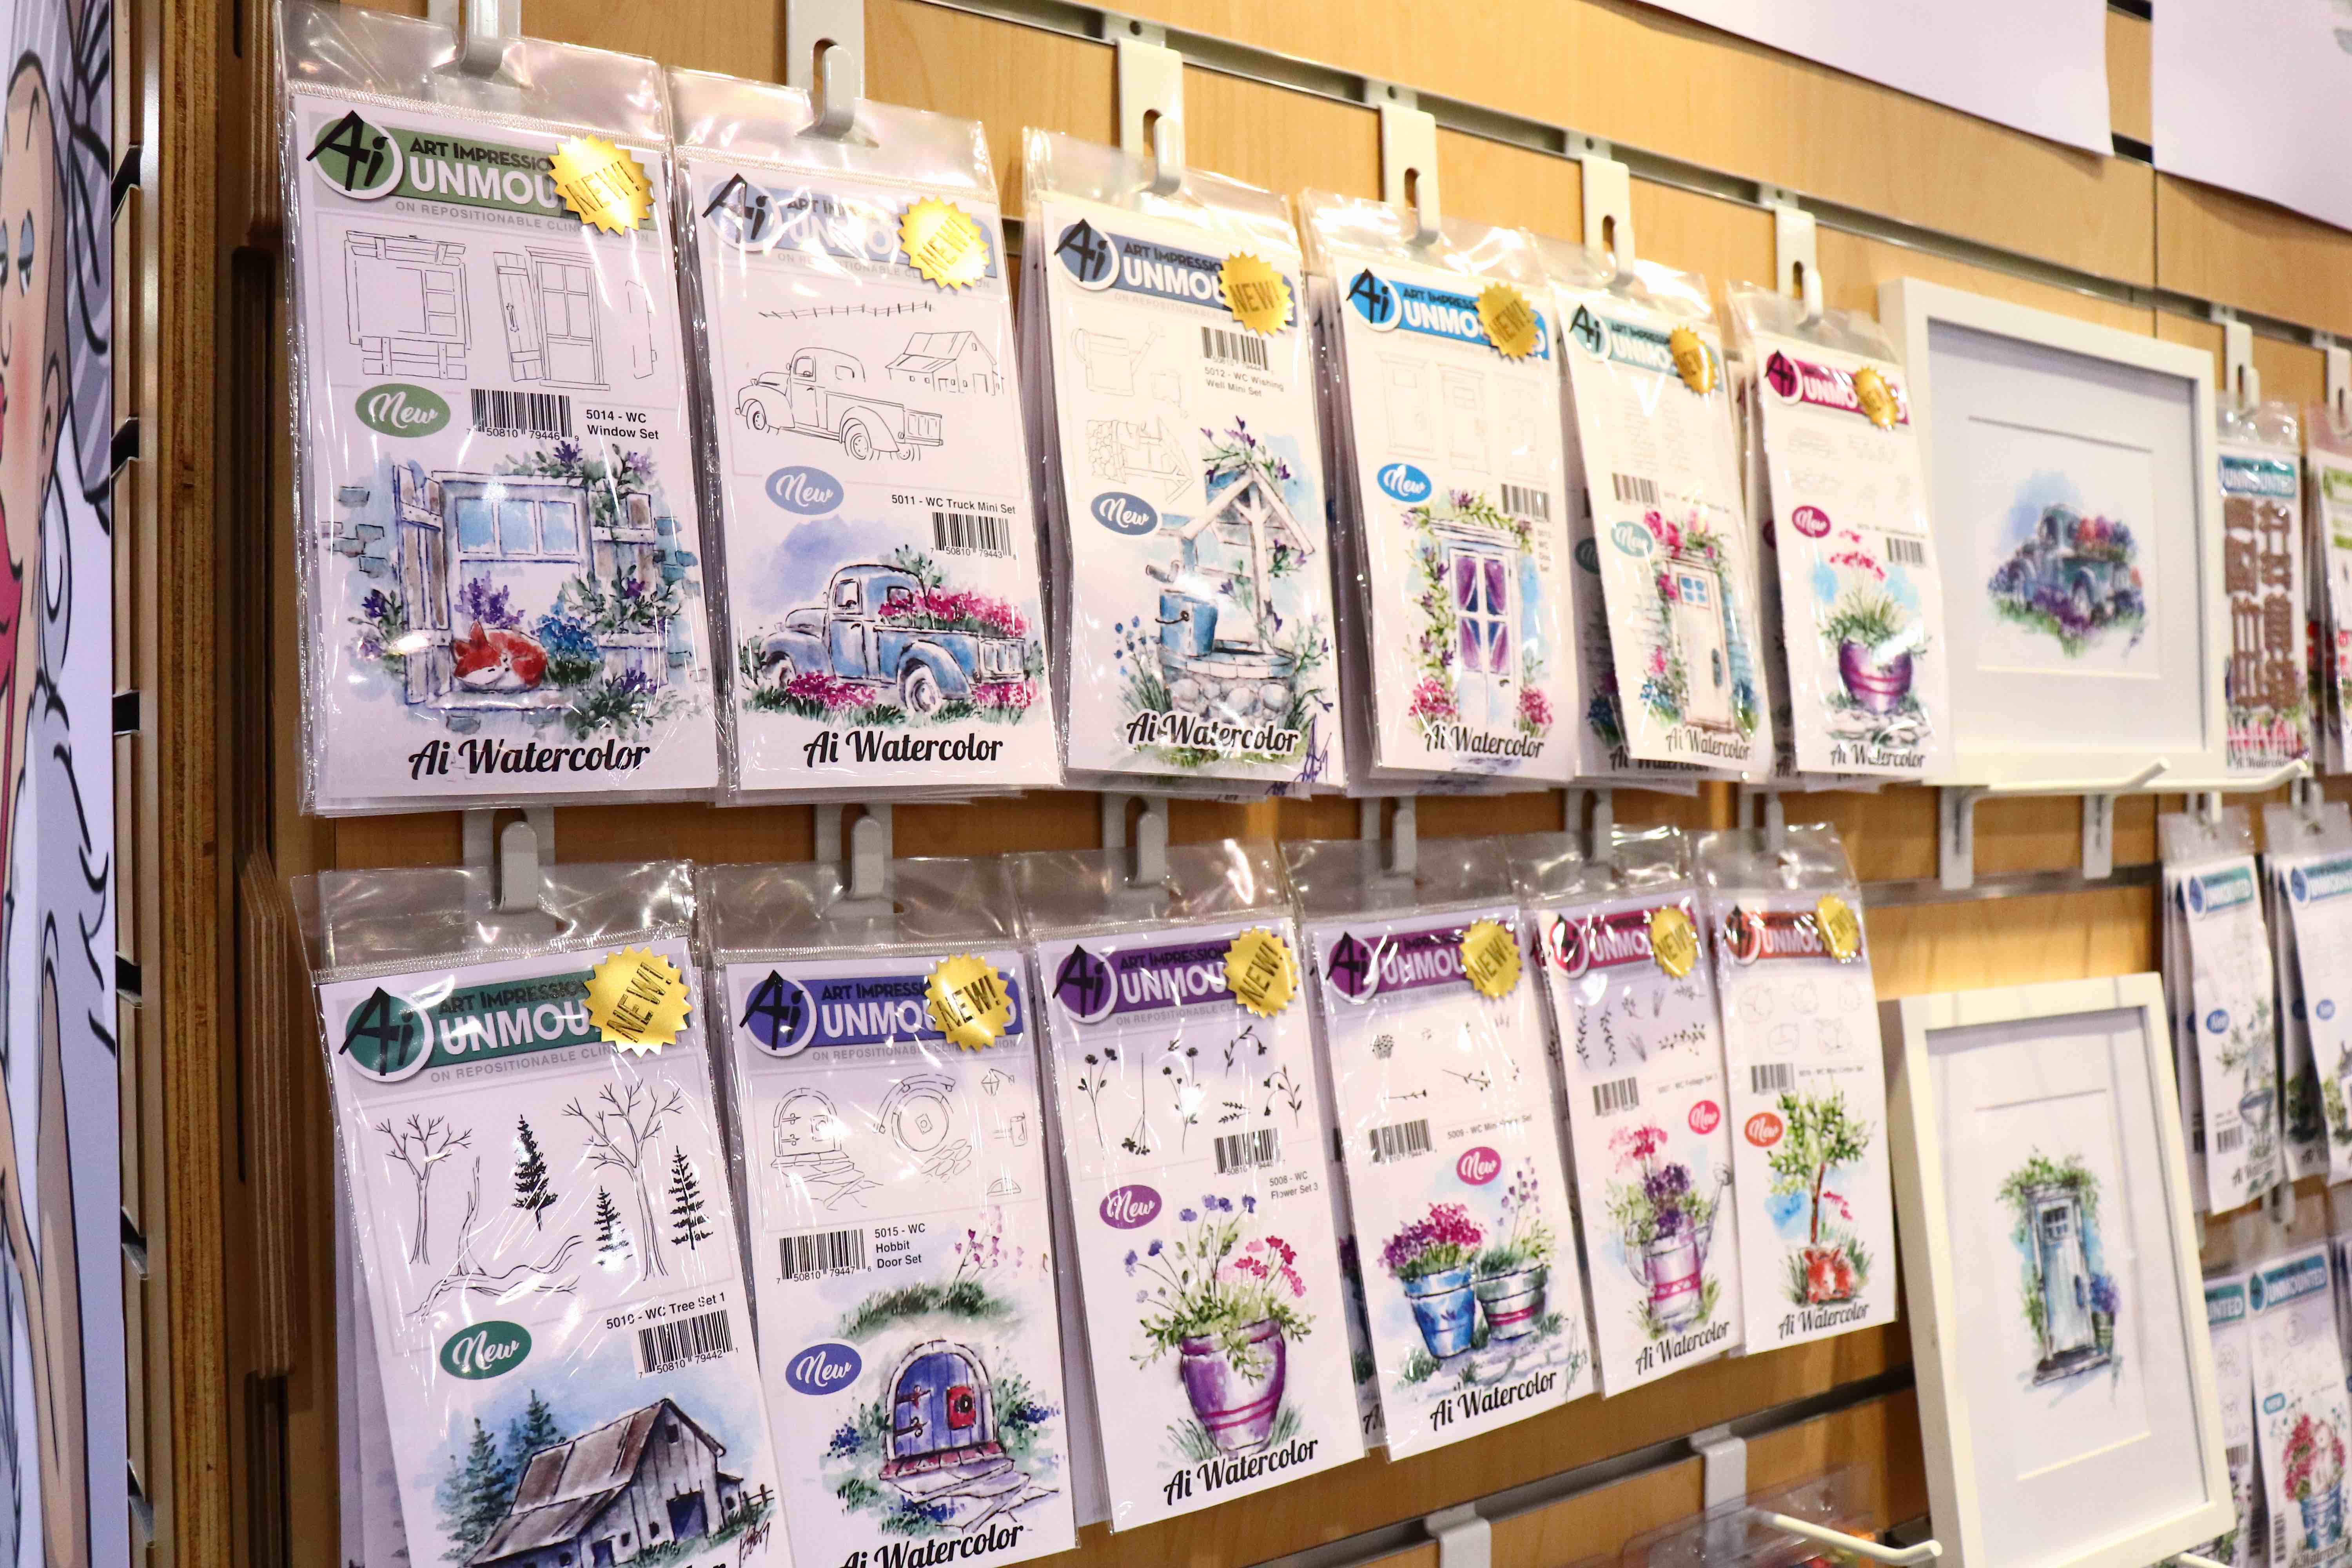
Art Impressions booth was filled with many new stamps that will fill your mind with creative ideas! Check out some of these gorgeous new stamps, as well as cute inspiration pieces!
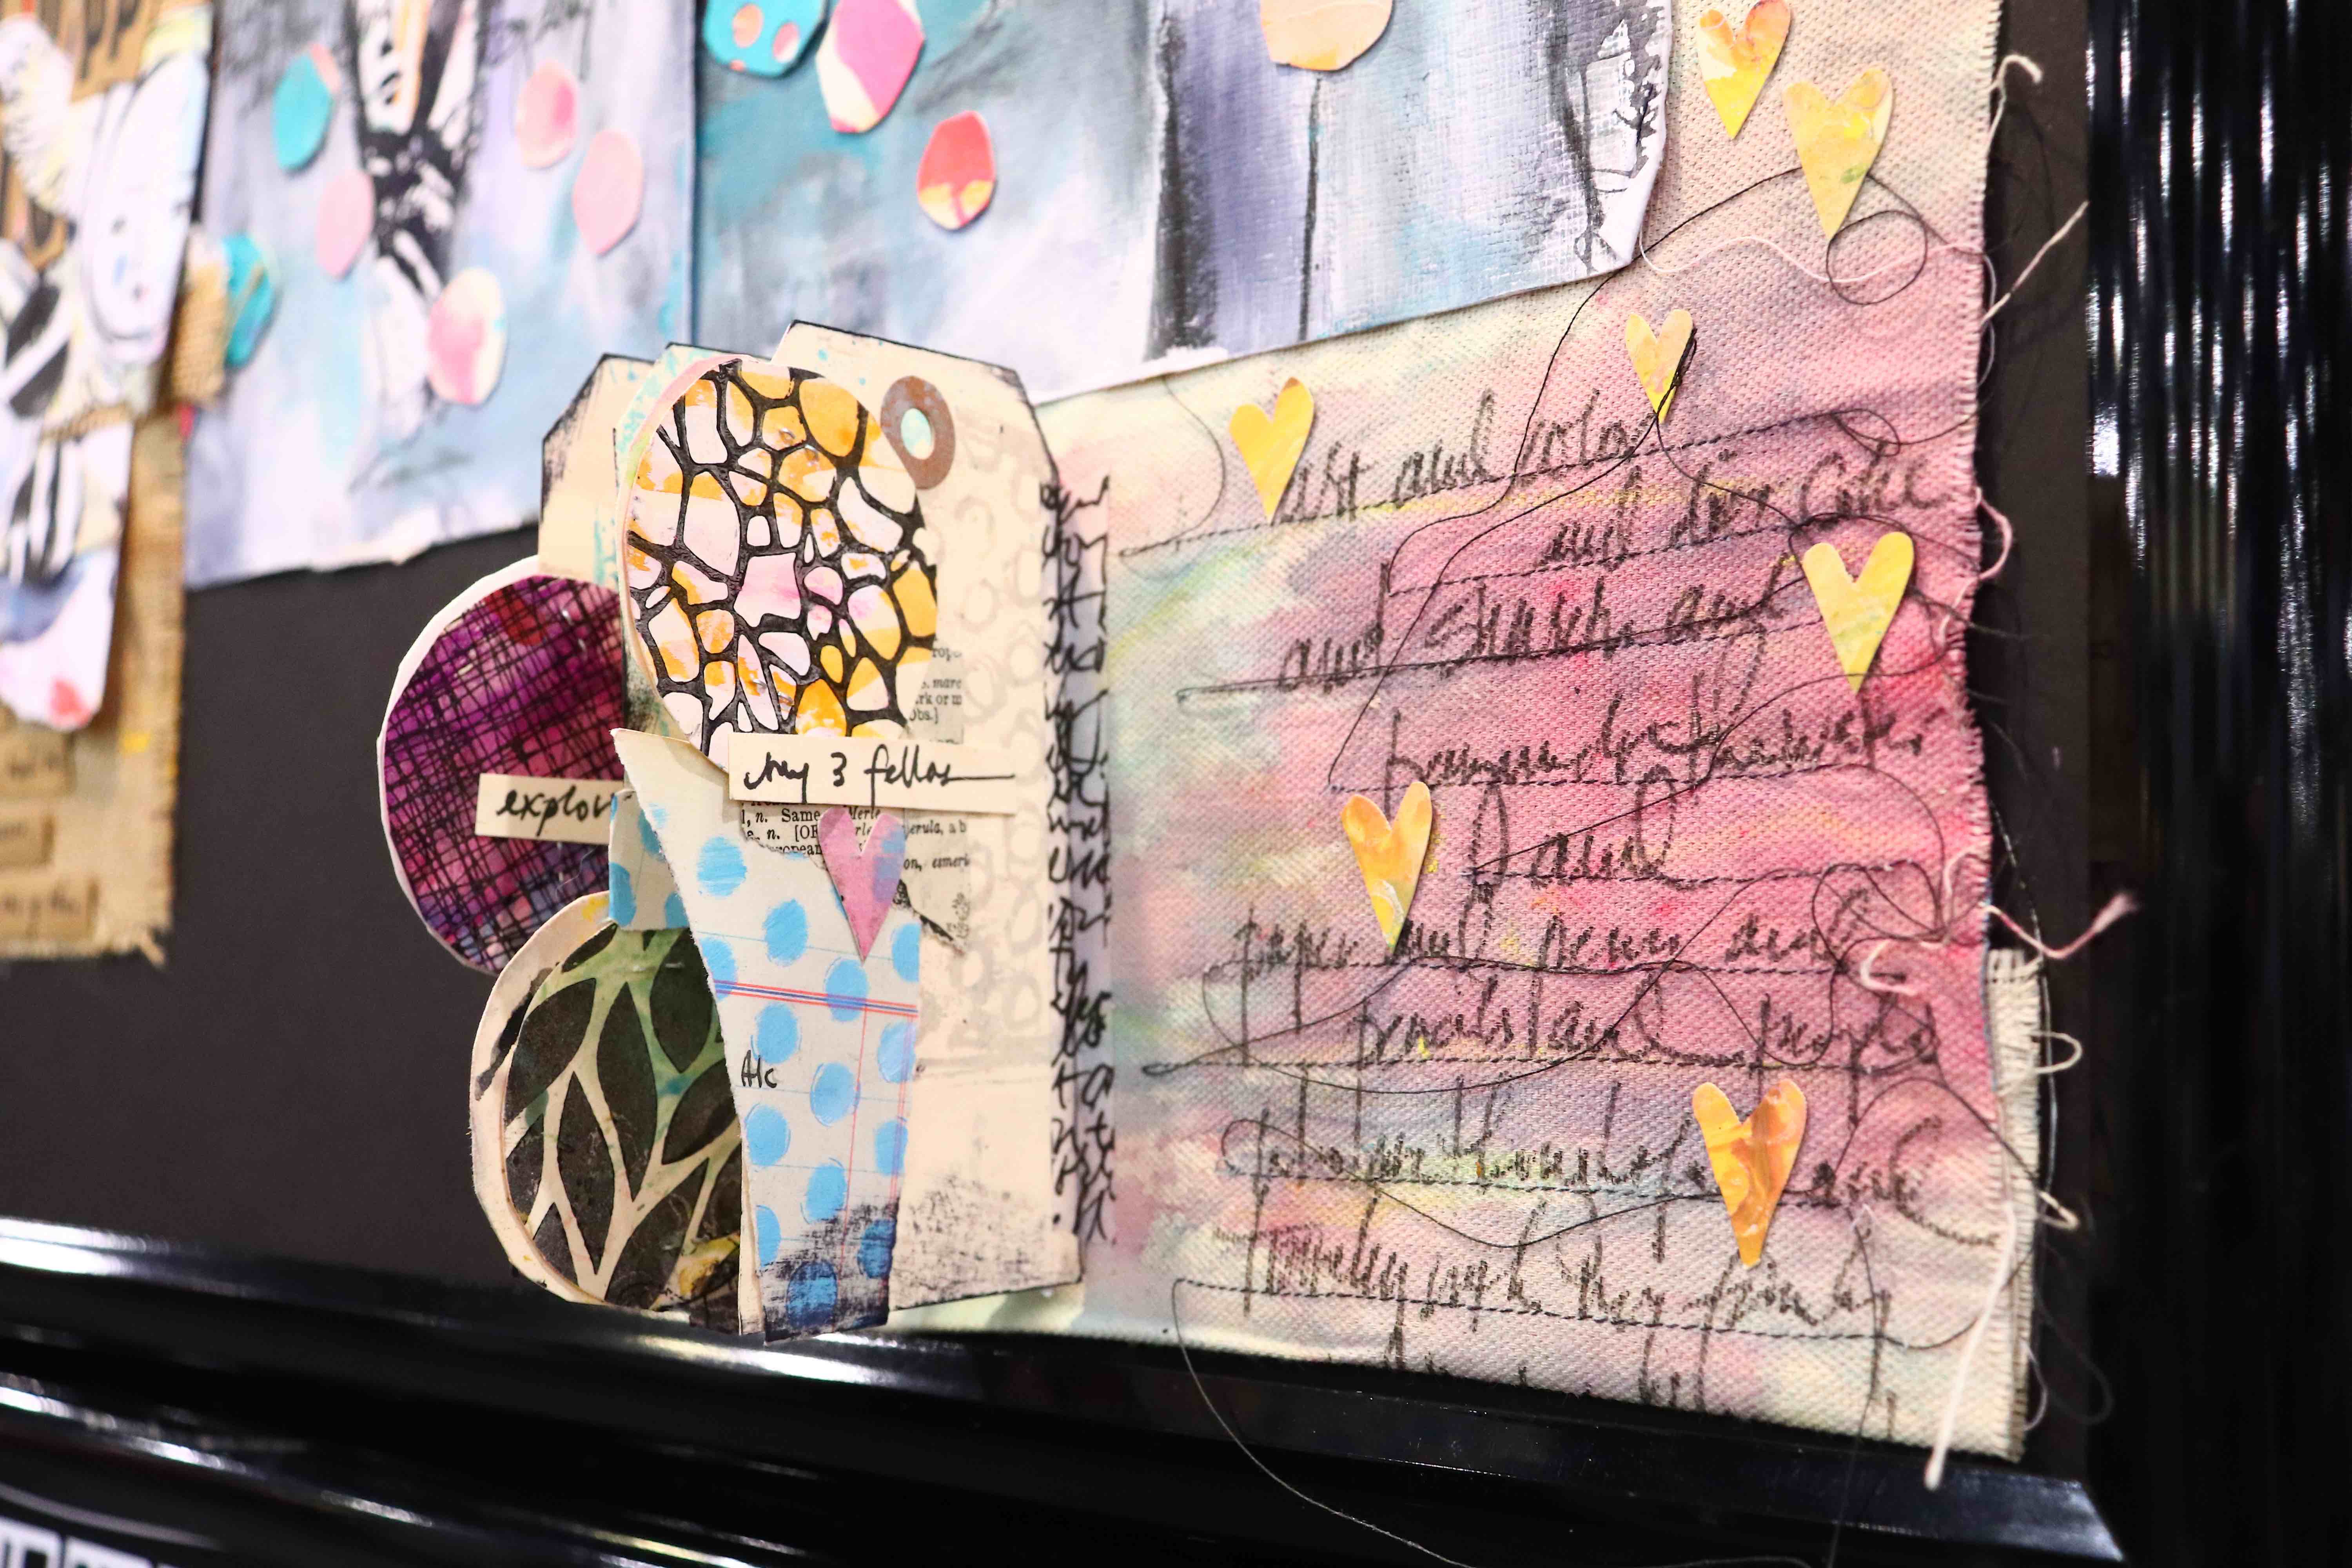
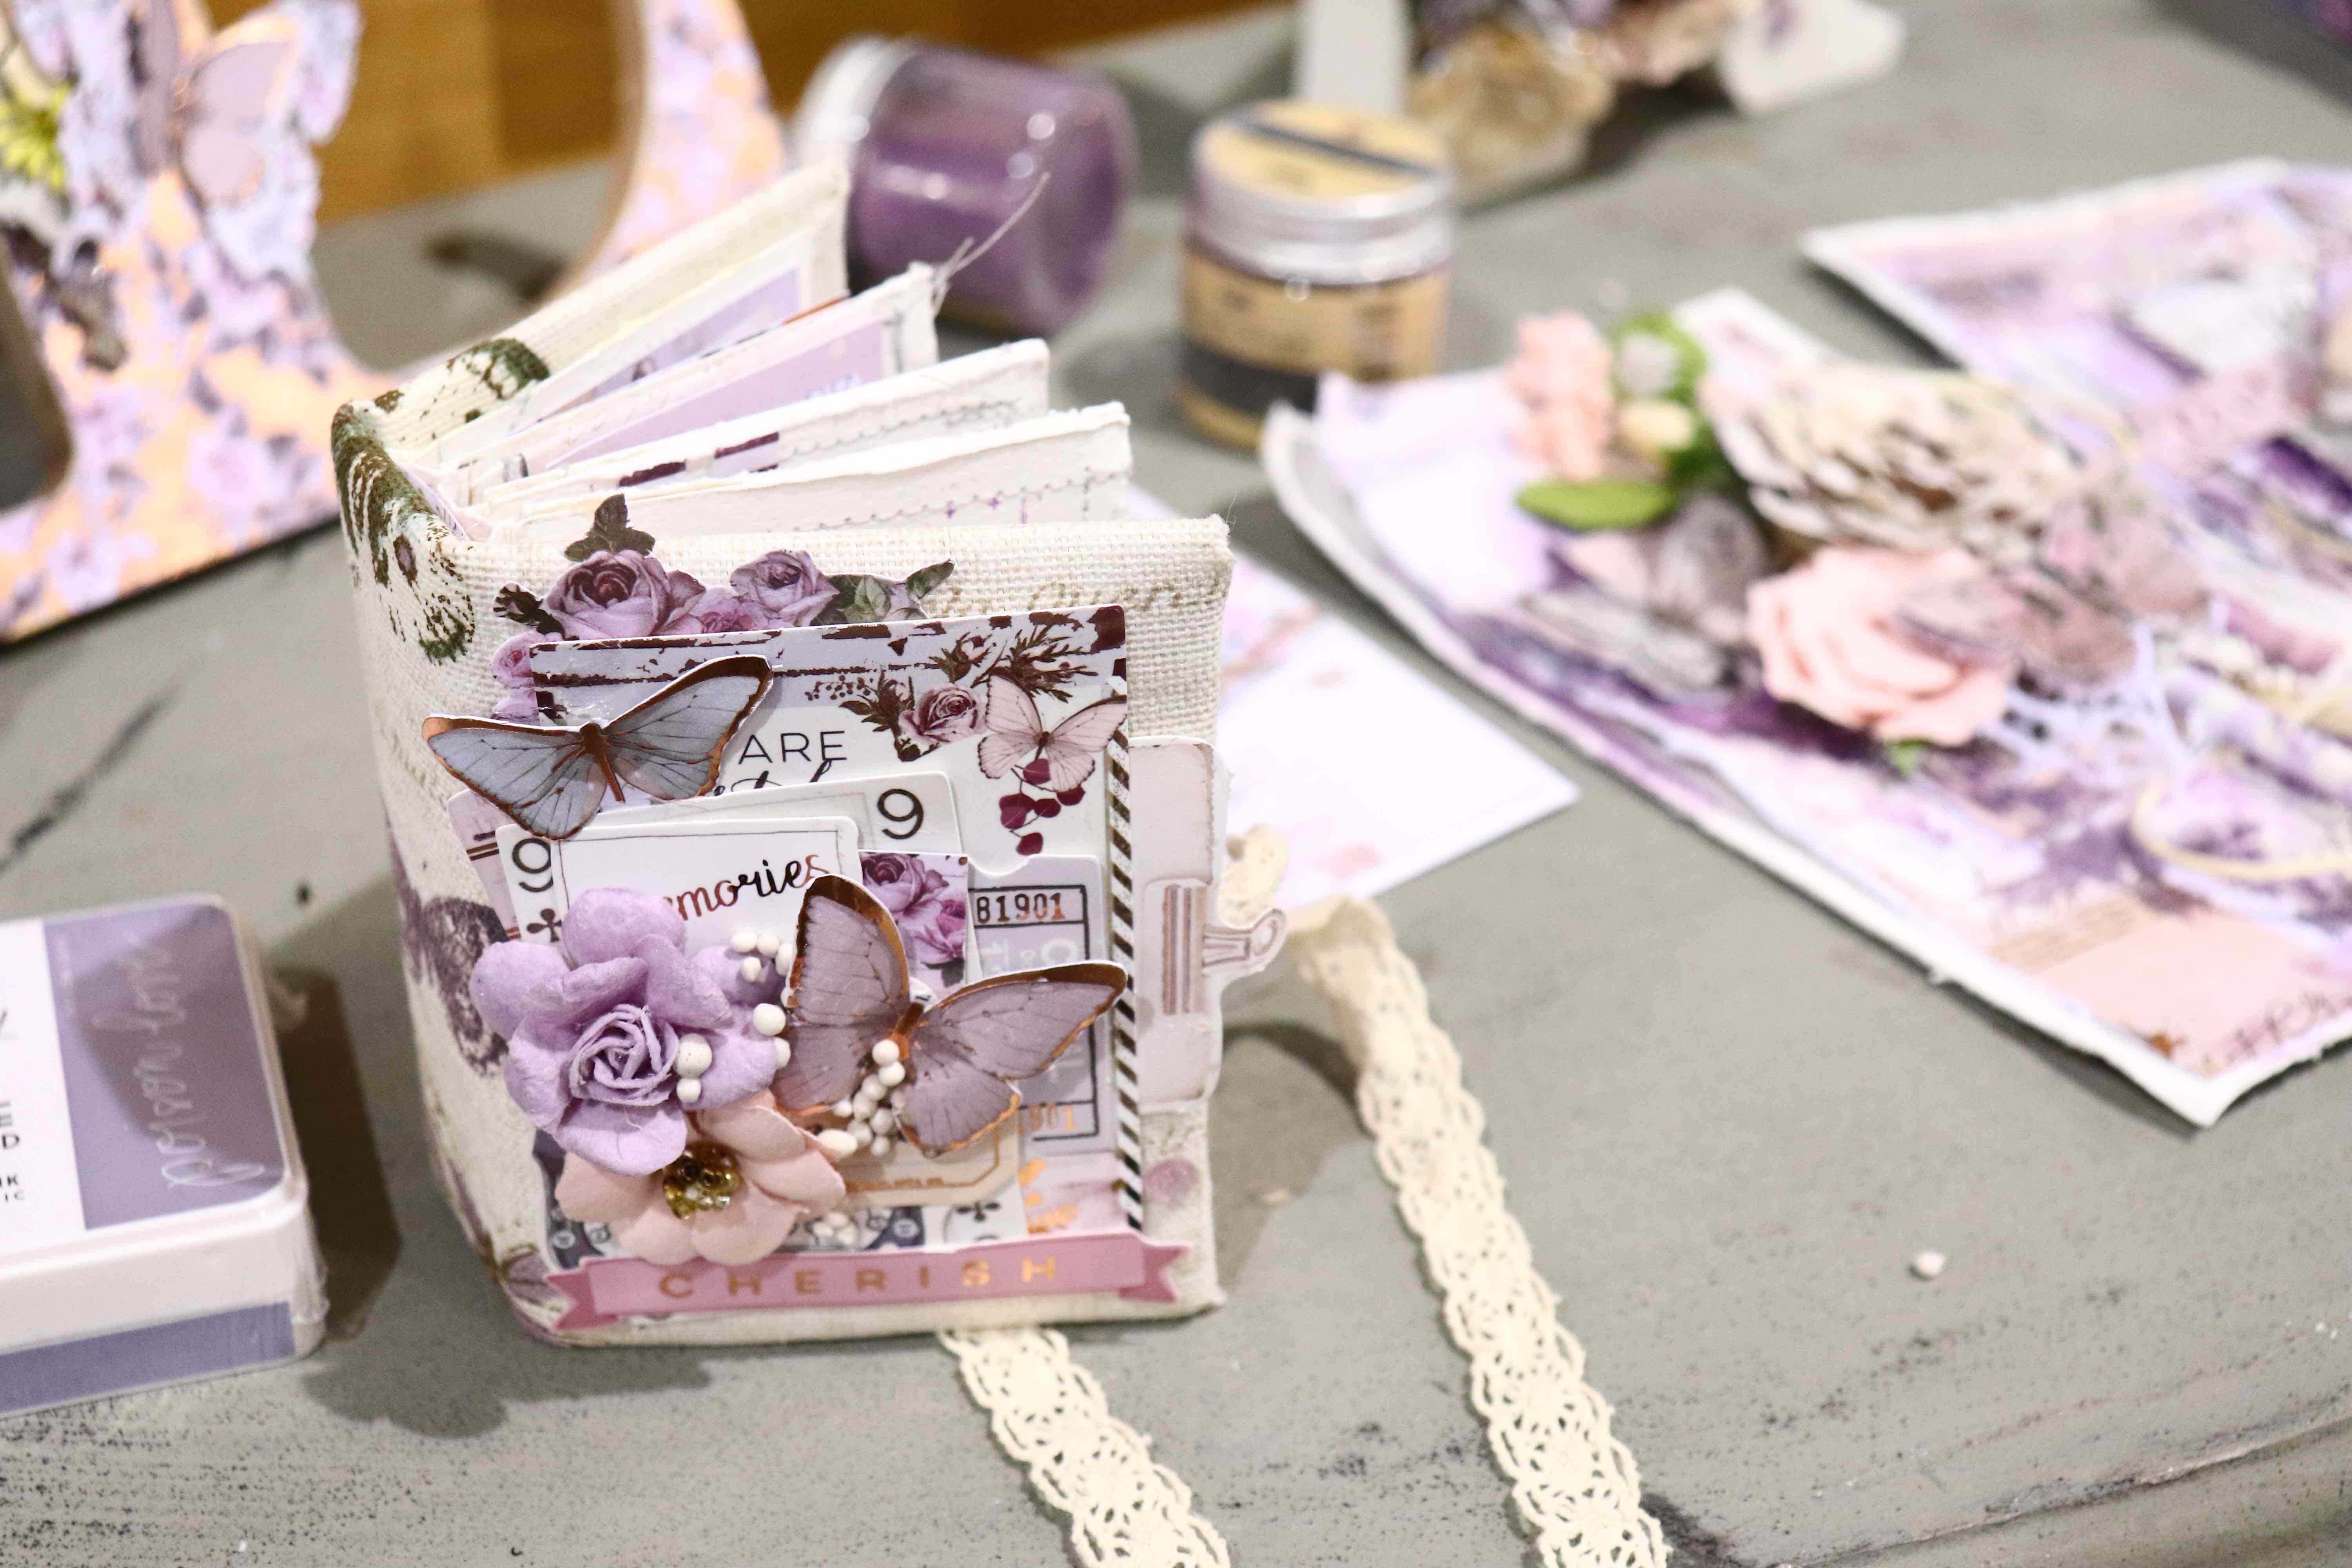
Prima had some stunning mixed media projects in their booth (as well as lots of Ultra Violet inspiration too!). Check out these amazing mini journals using some of their newest products…
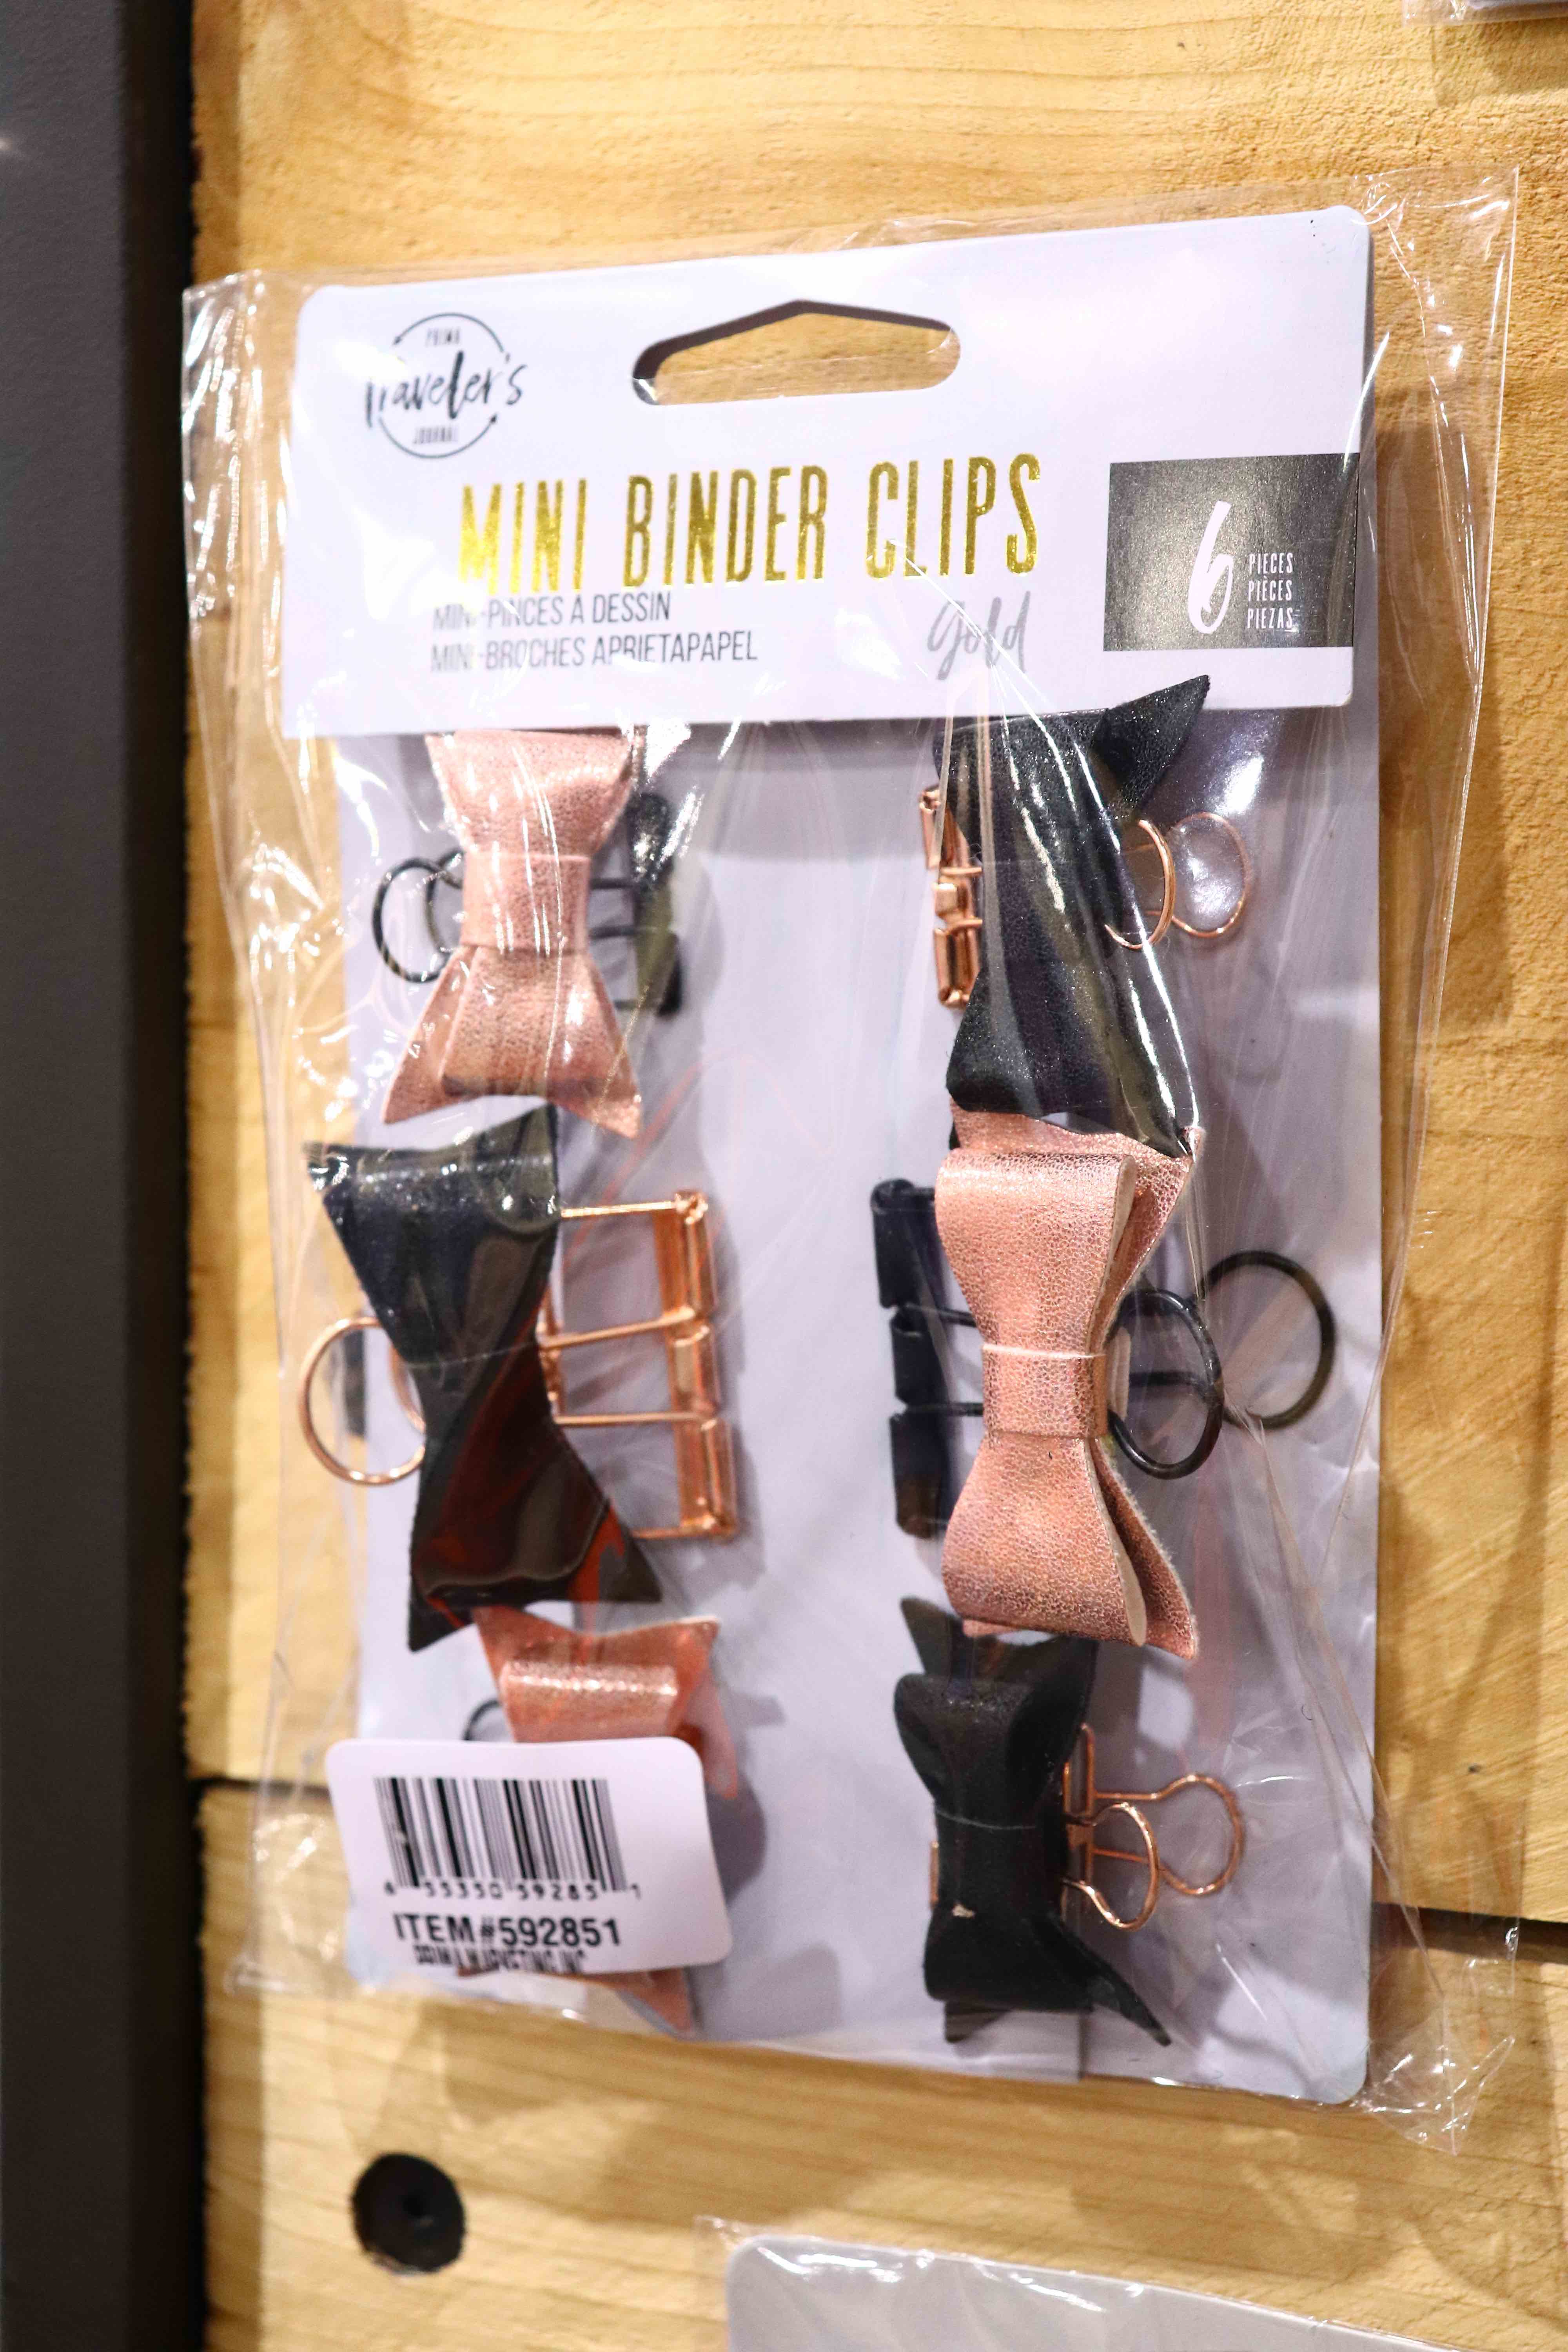
There were also some great new planner accessories as well; I adore the new paper clip bow ties with the pretty rose gold and black color scheme!
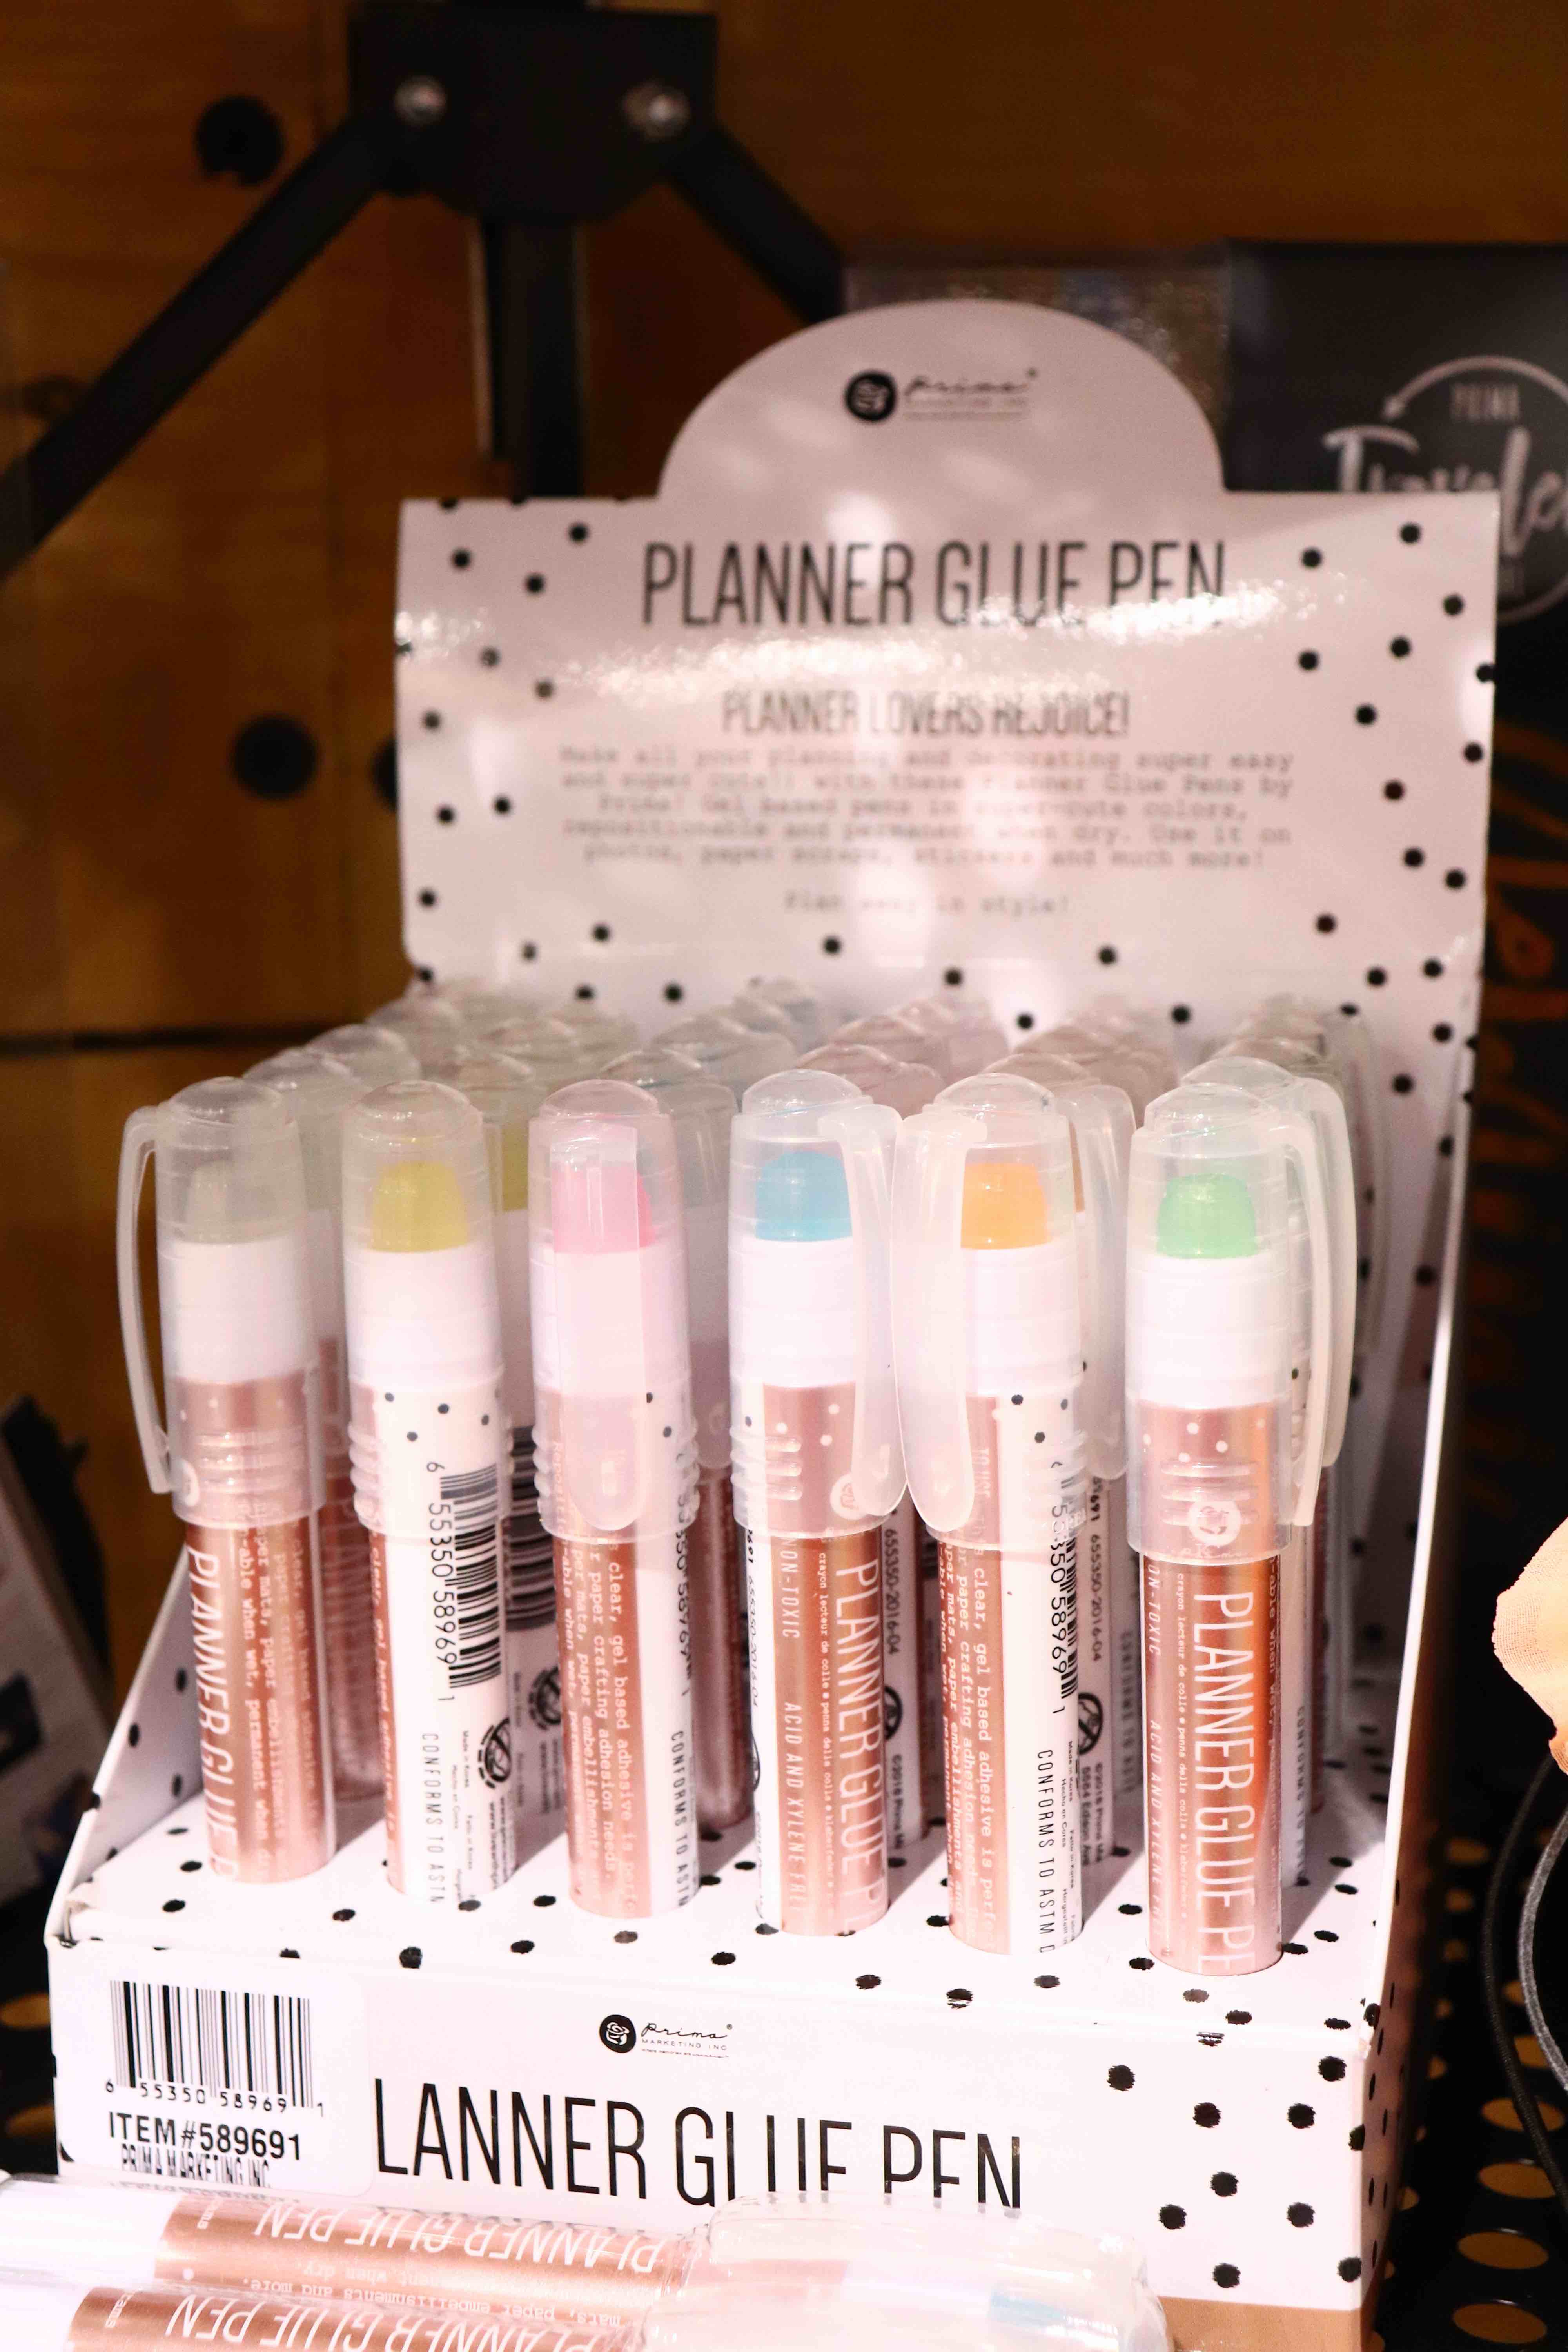
Another fun product that caught my eye were these pretty, colorful glue pens! Look at all the bright and happy colors… you can now have your favorite color as a glue stick!
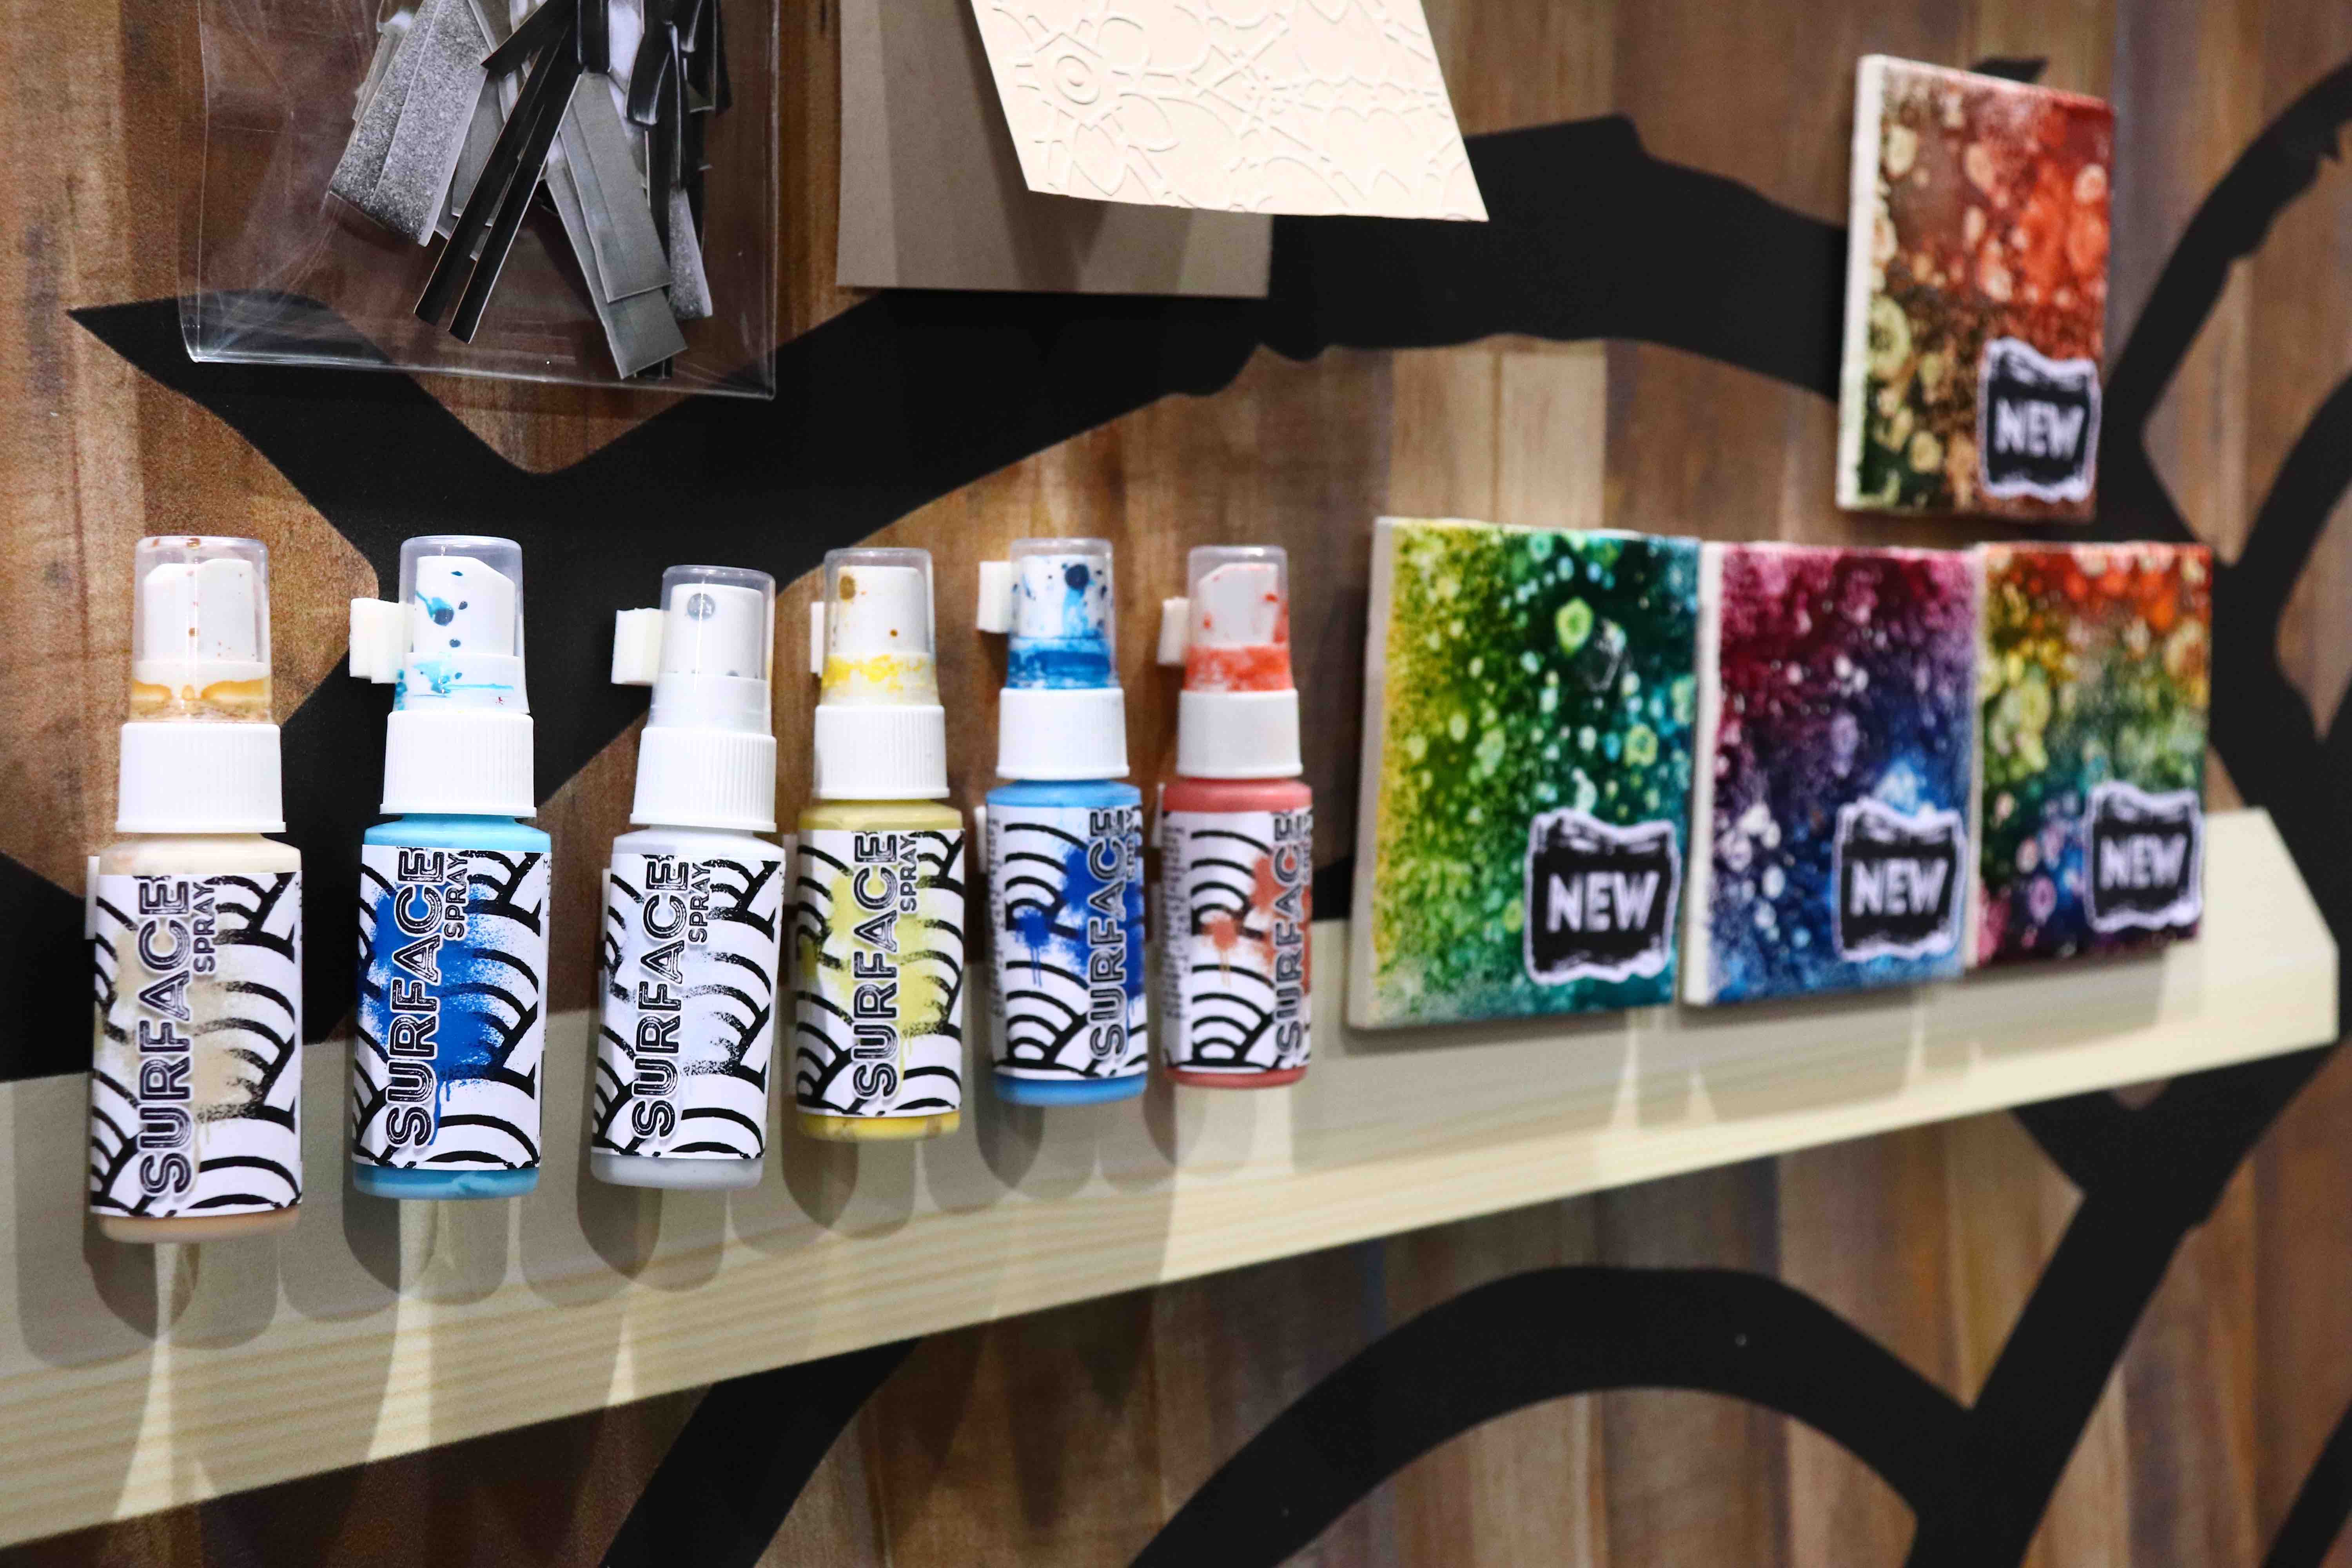
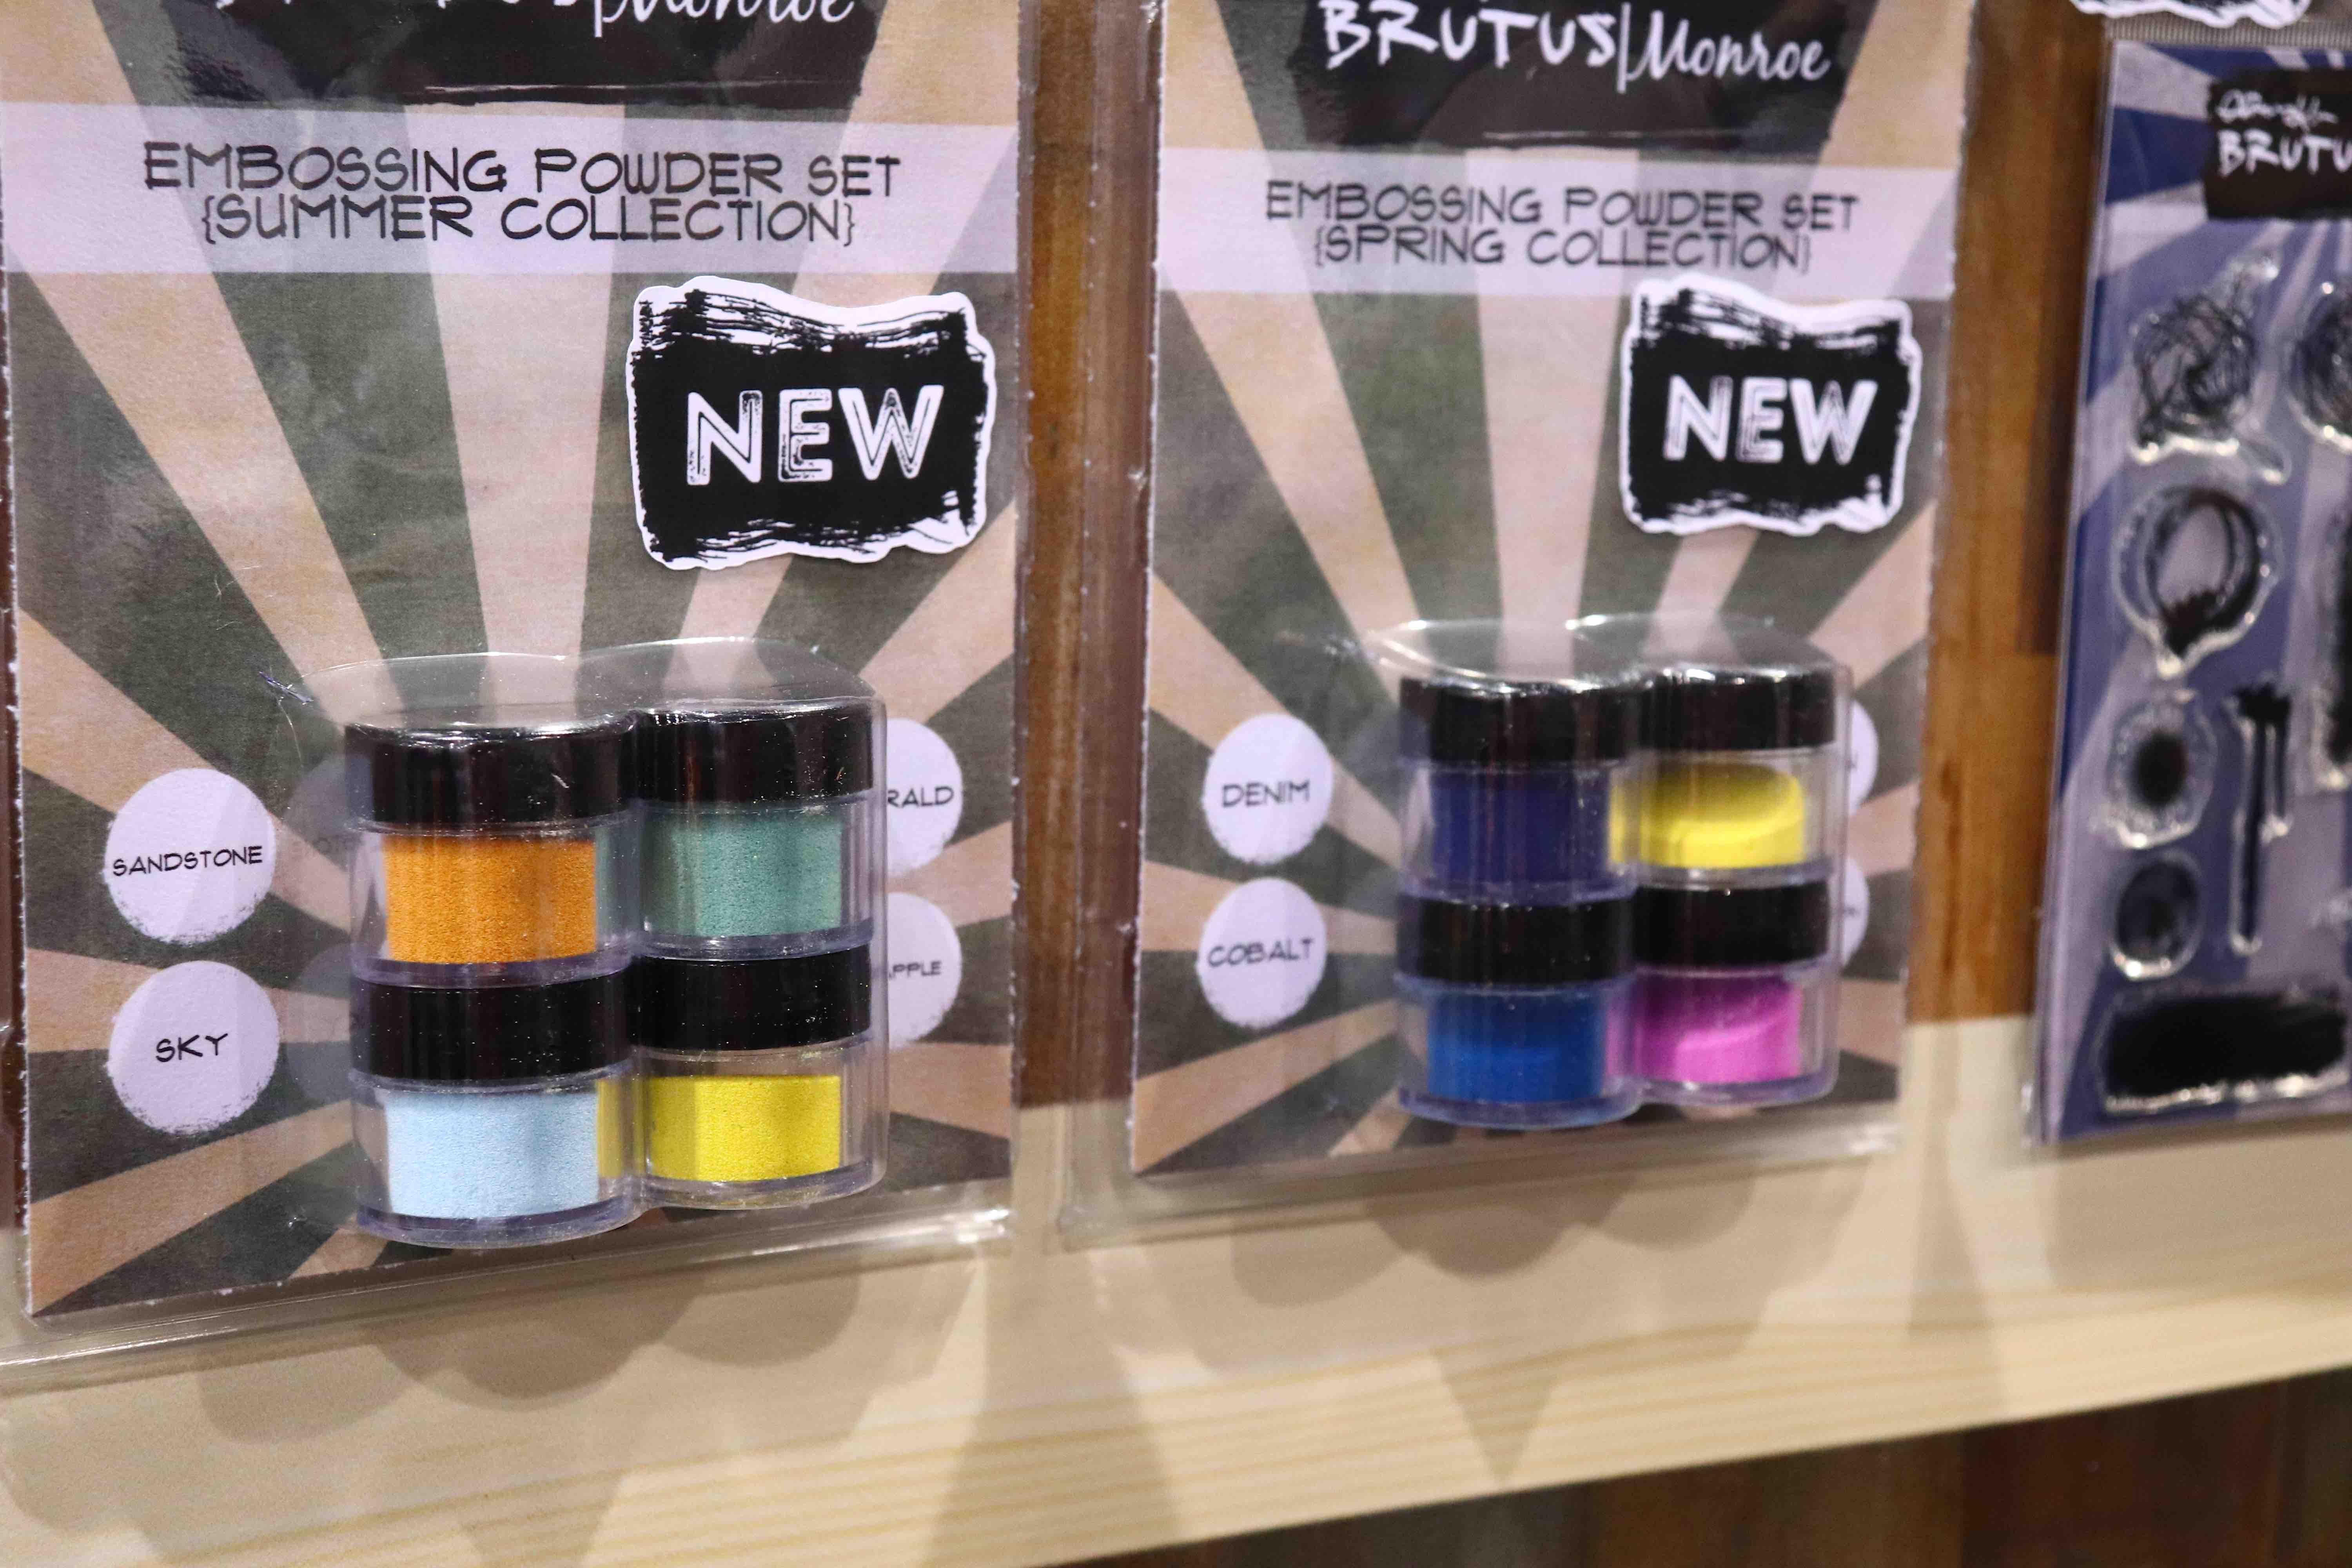
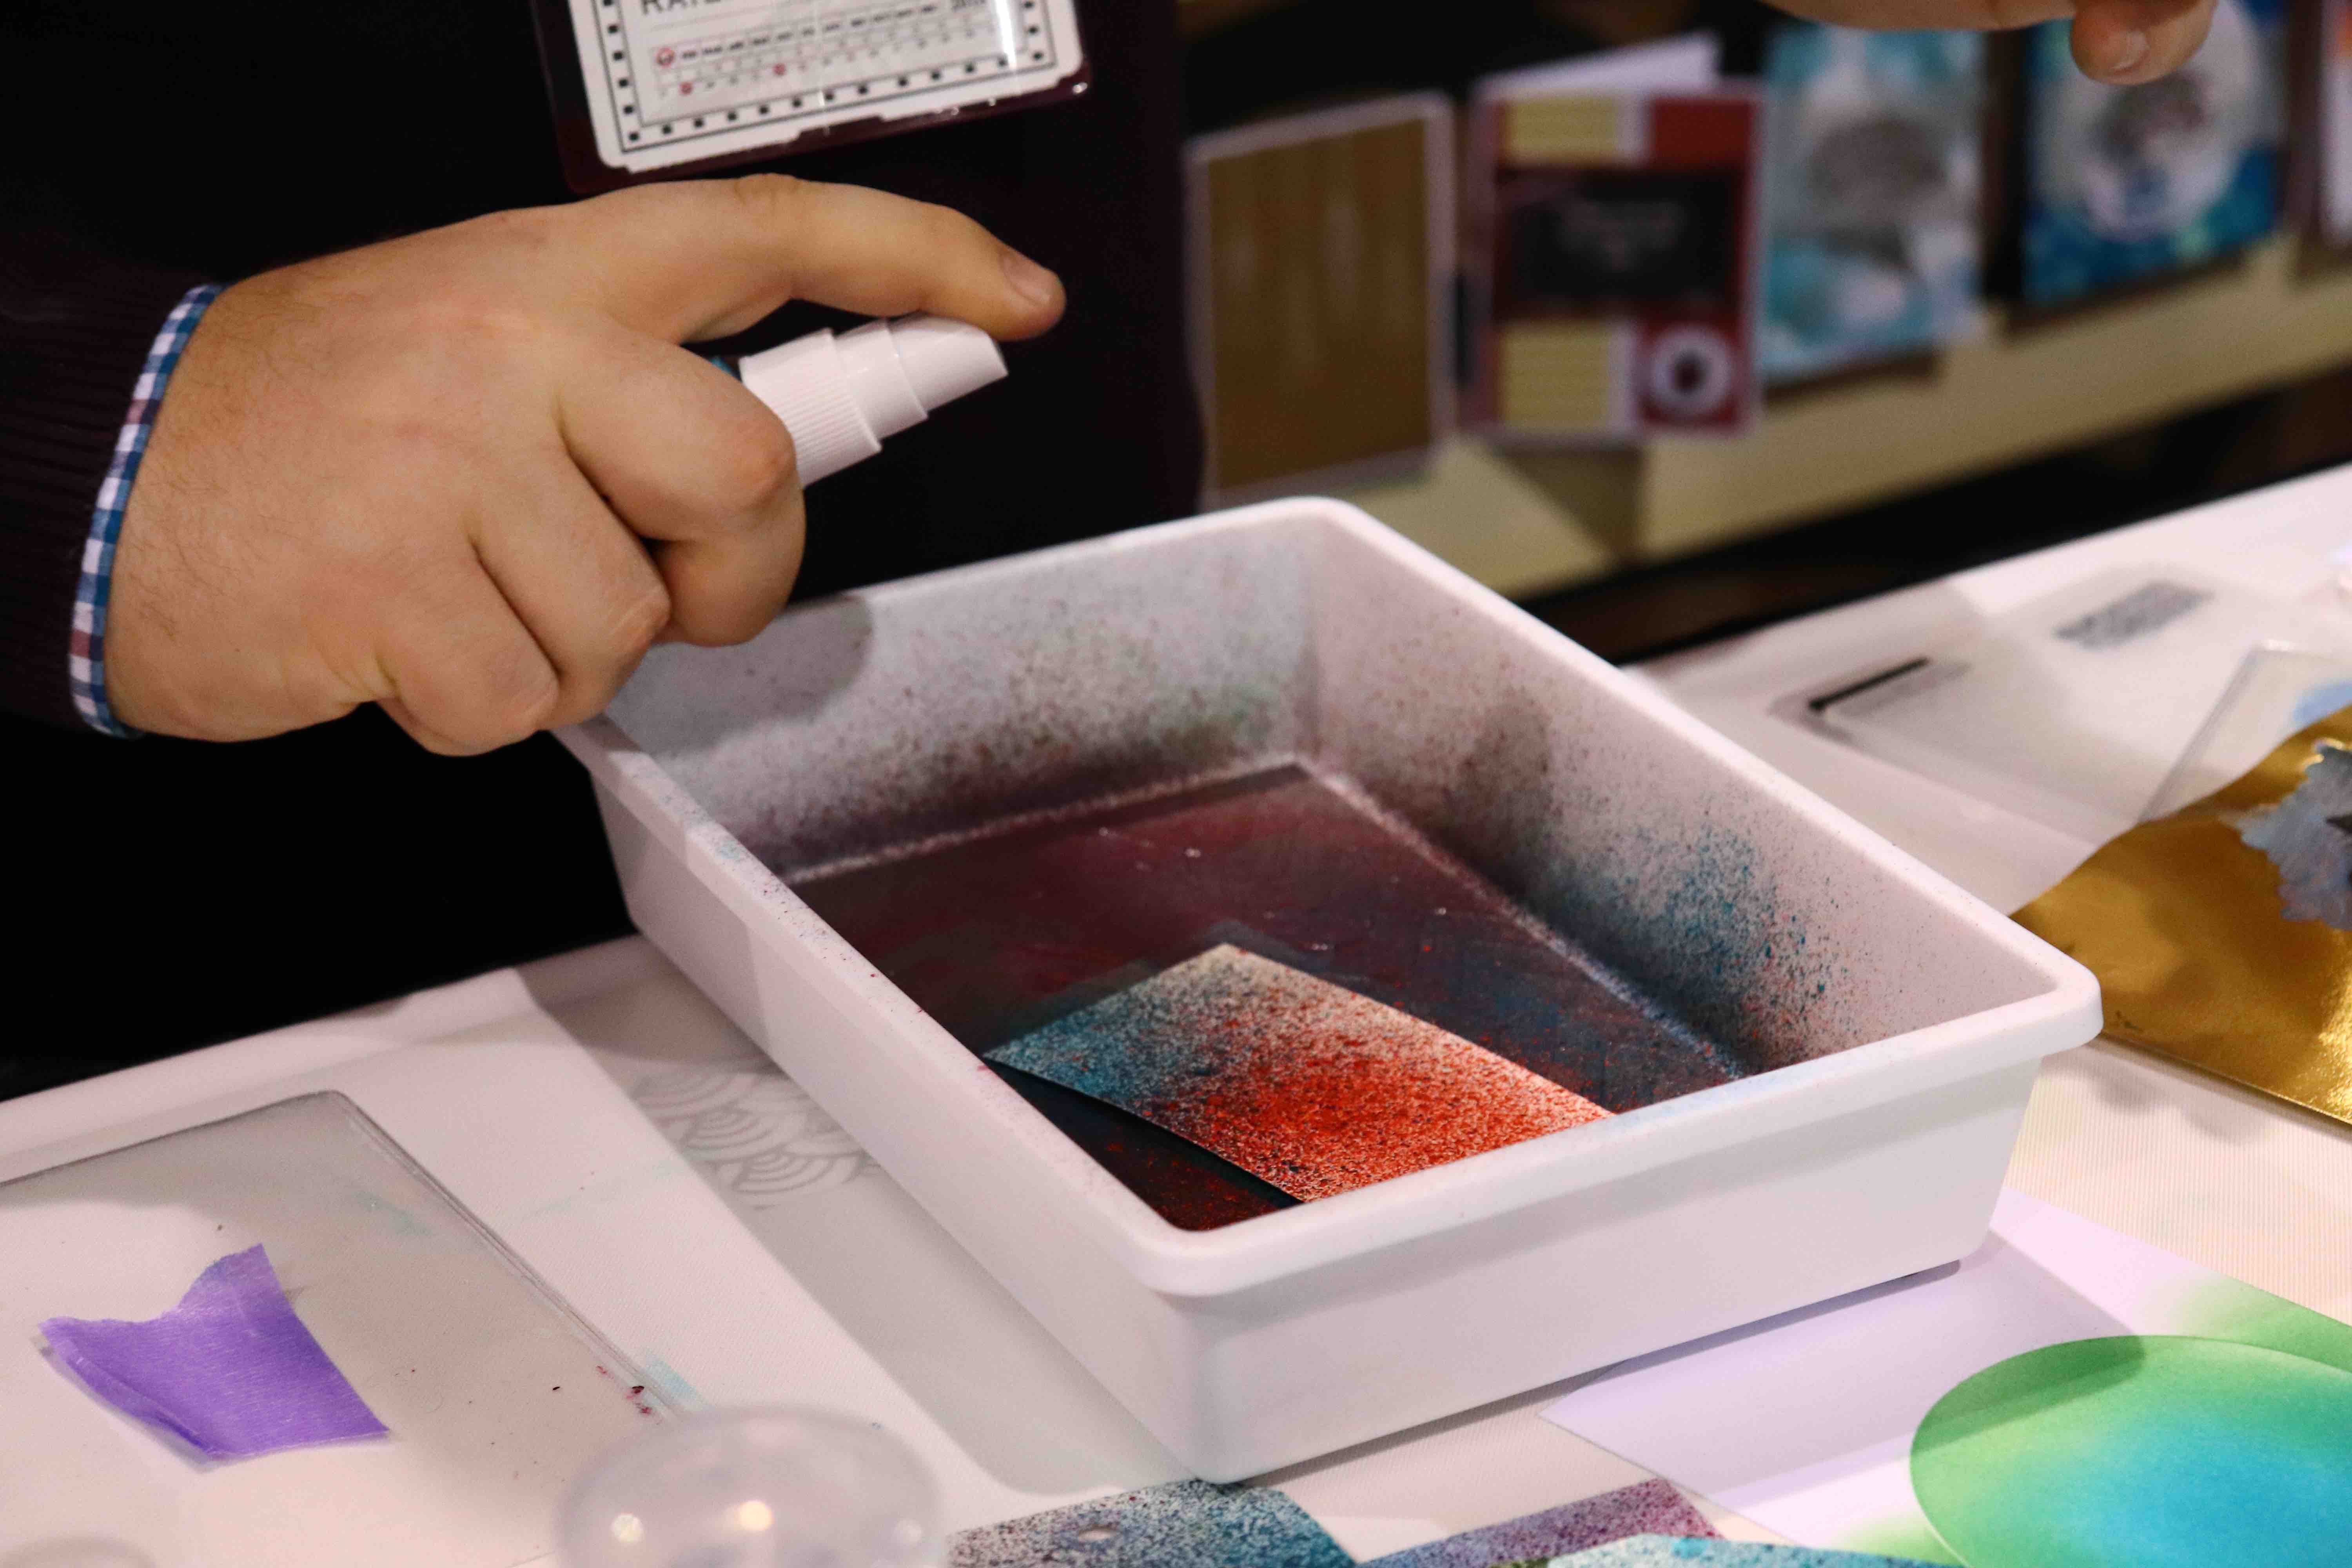
Brutus Monroe is an up and coming brand that has really taken creative mixed media and papercrafting in general to the next level! Their new Surface Sprays can literally be sprayed onto anything, including tiles! There are new embossing powders in bright and beautiful colors too!
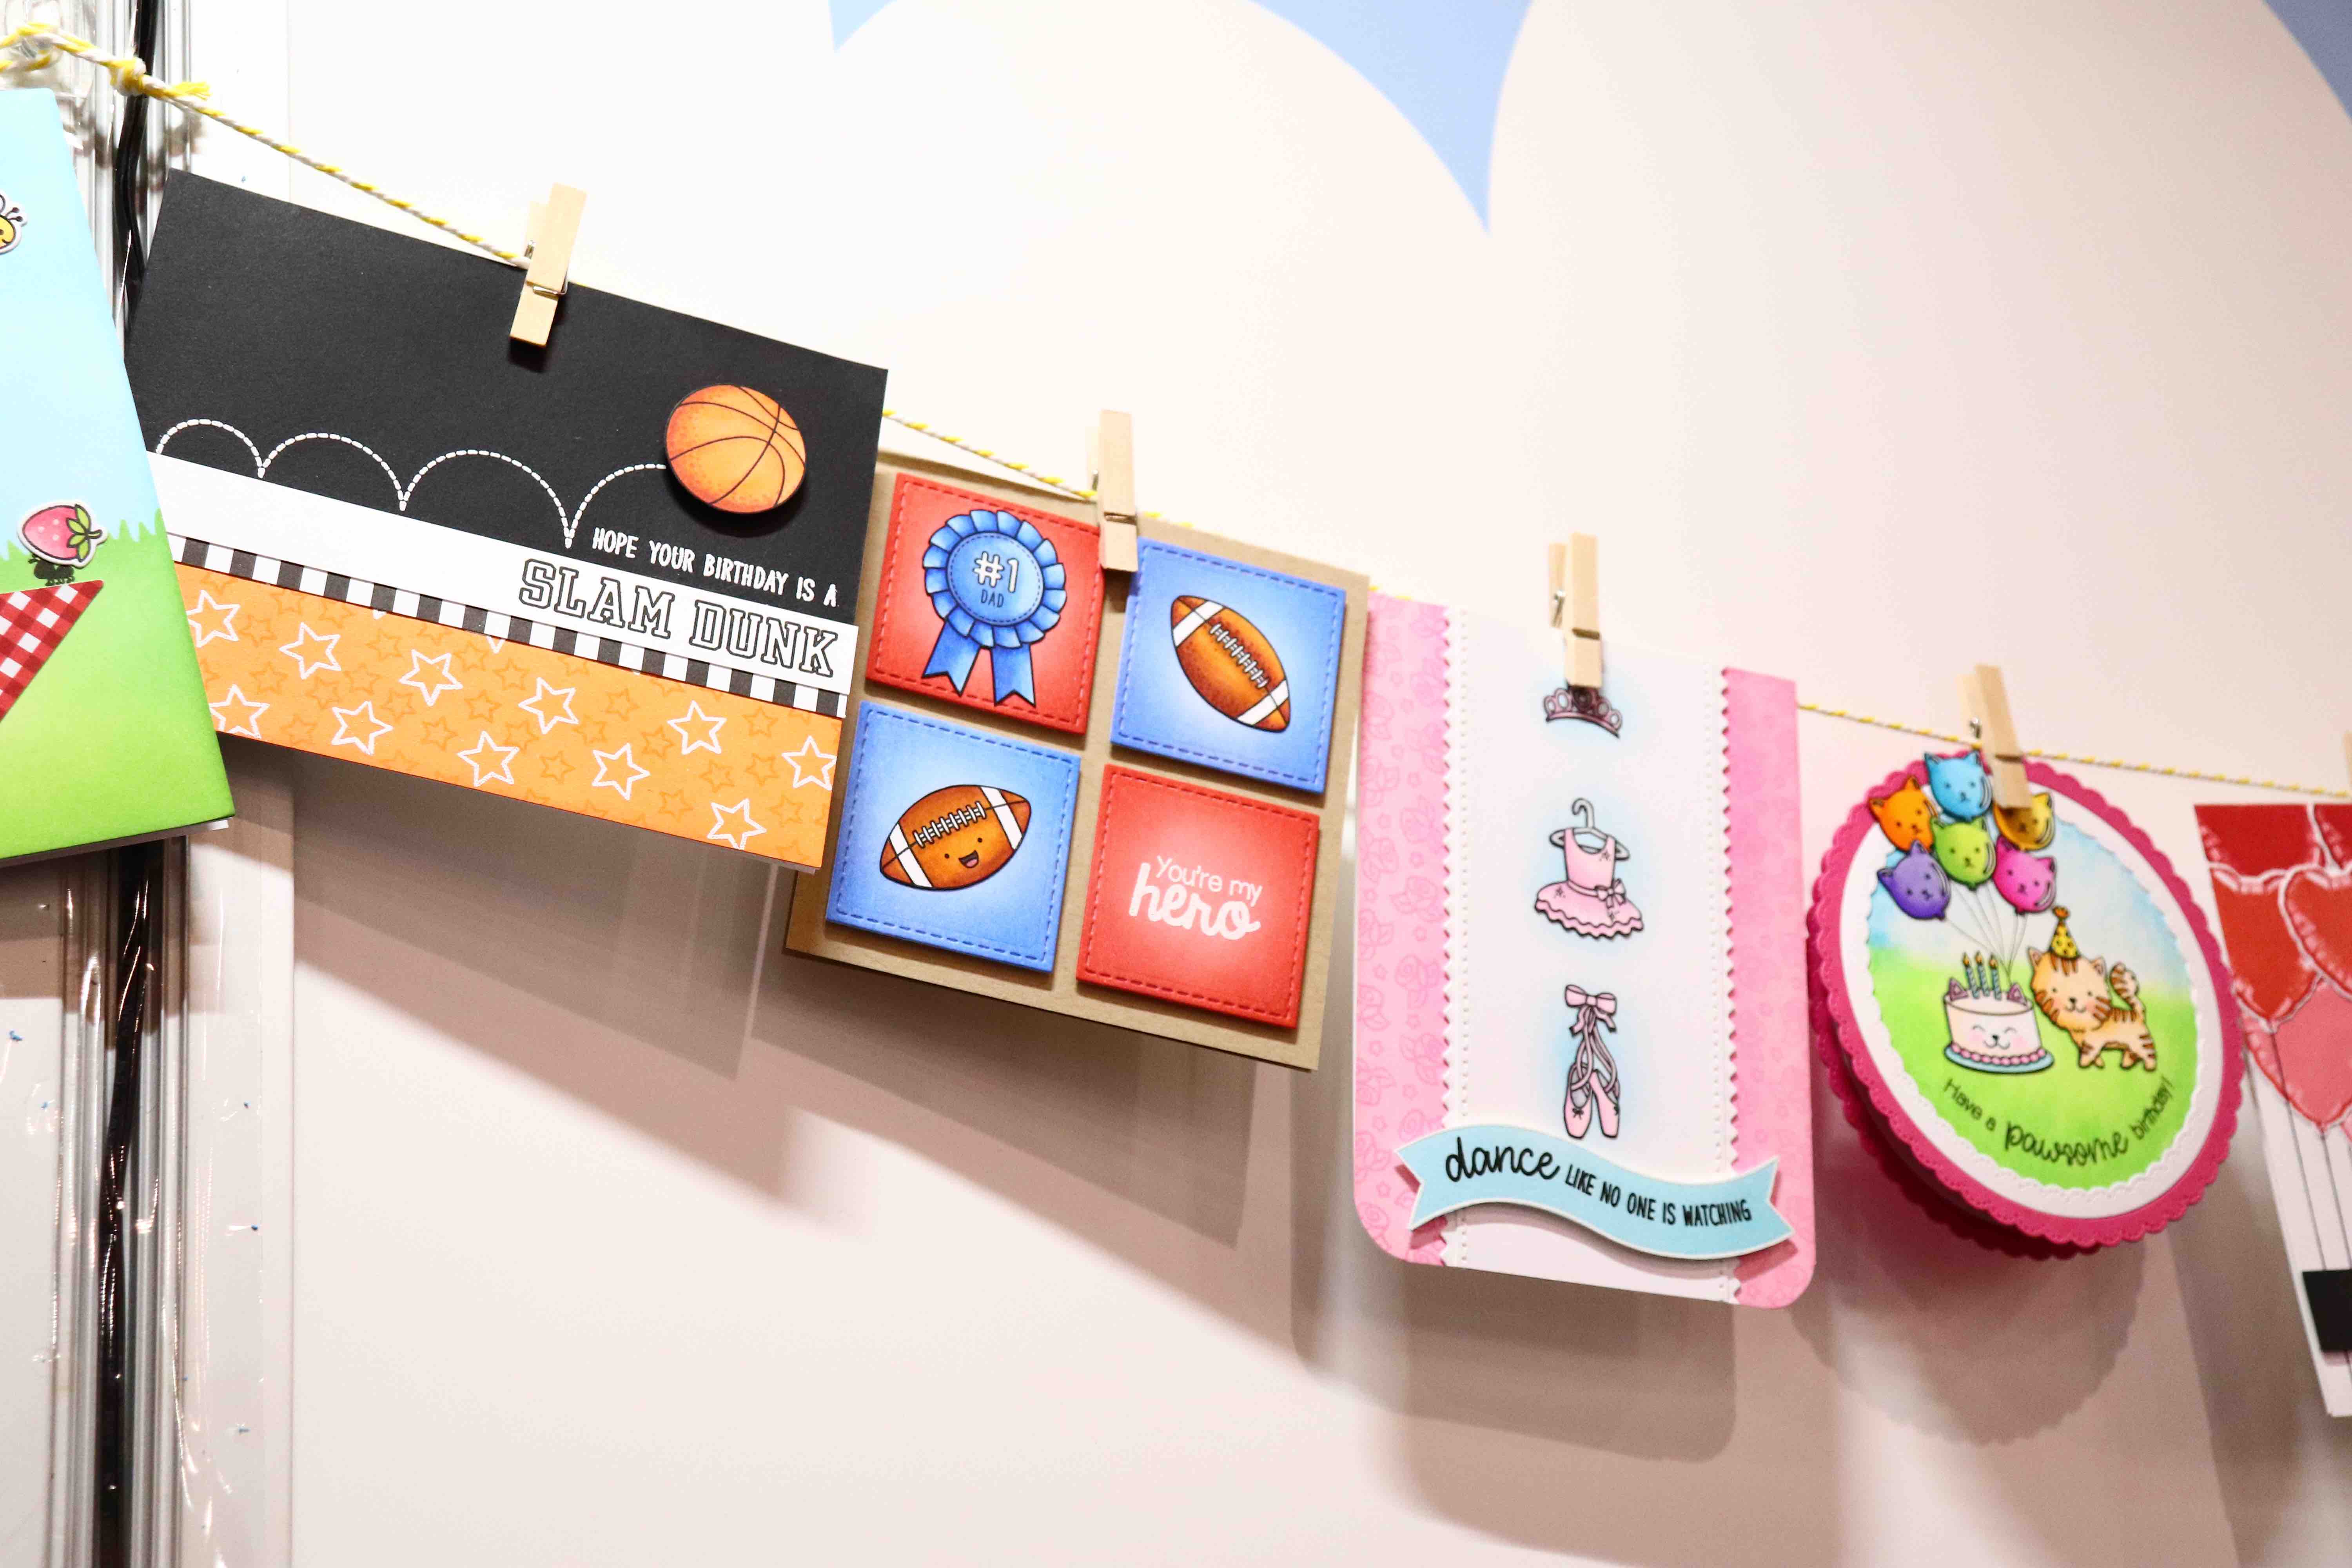
Sunny Studio Stamps’ ever-so-popular stamps and dies just hit a HOME RUN with their latest sports release. From basketball to football, you’ll have everything you need to create cards for your favorite sports hero!
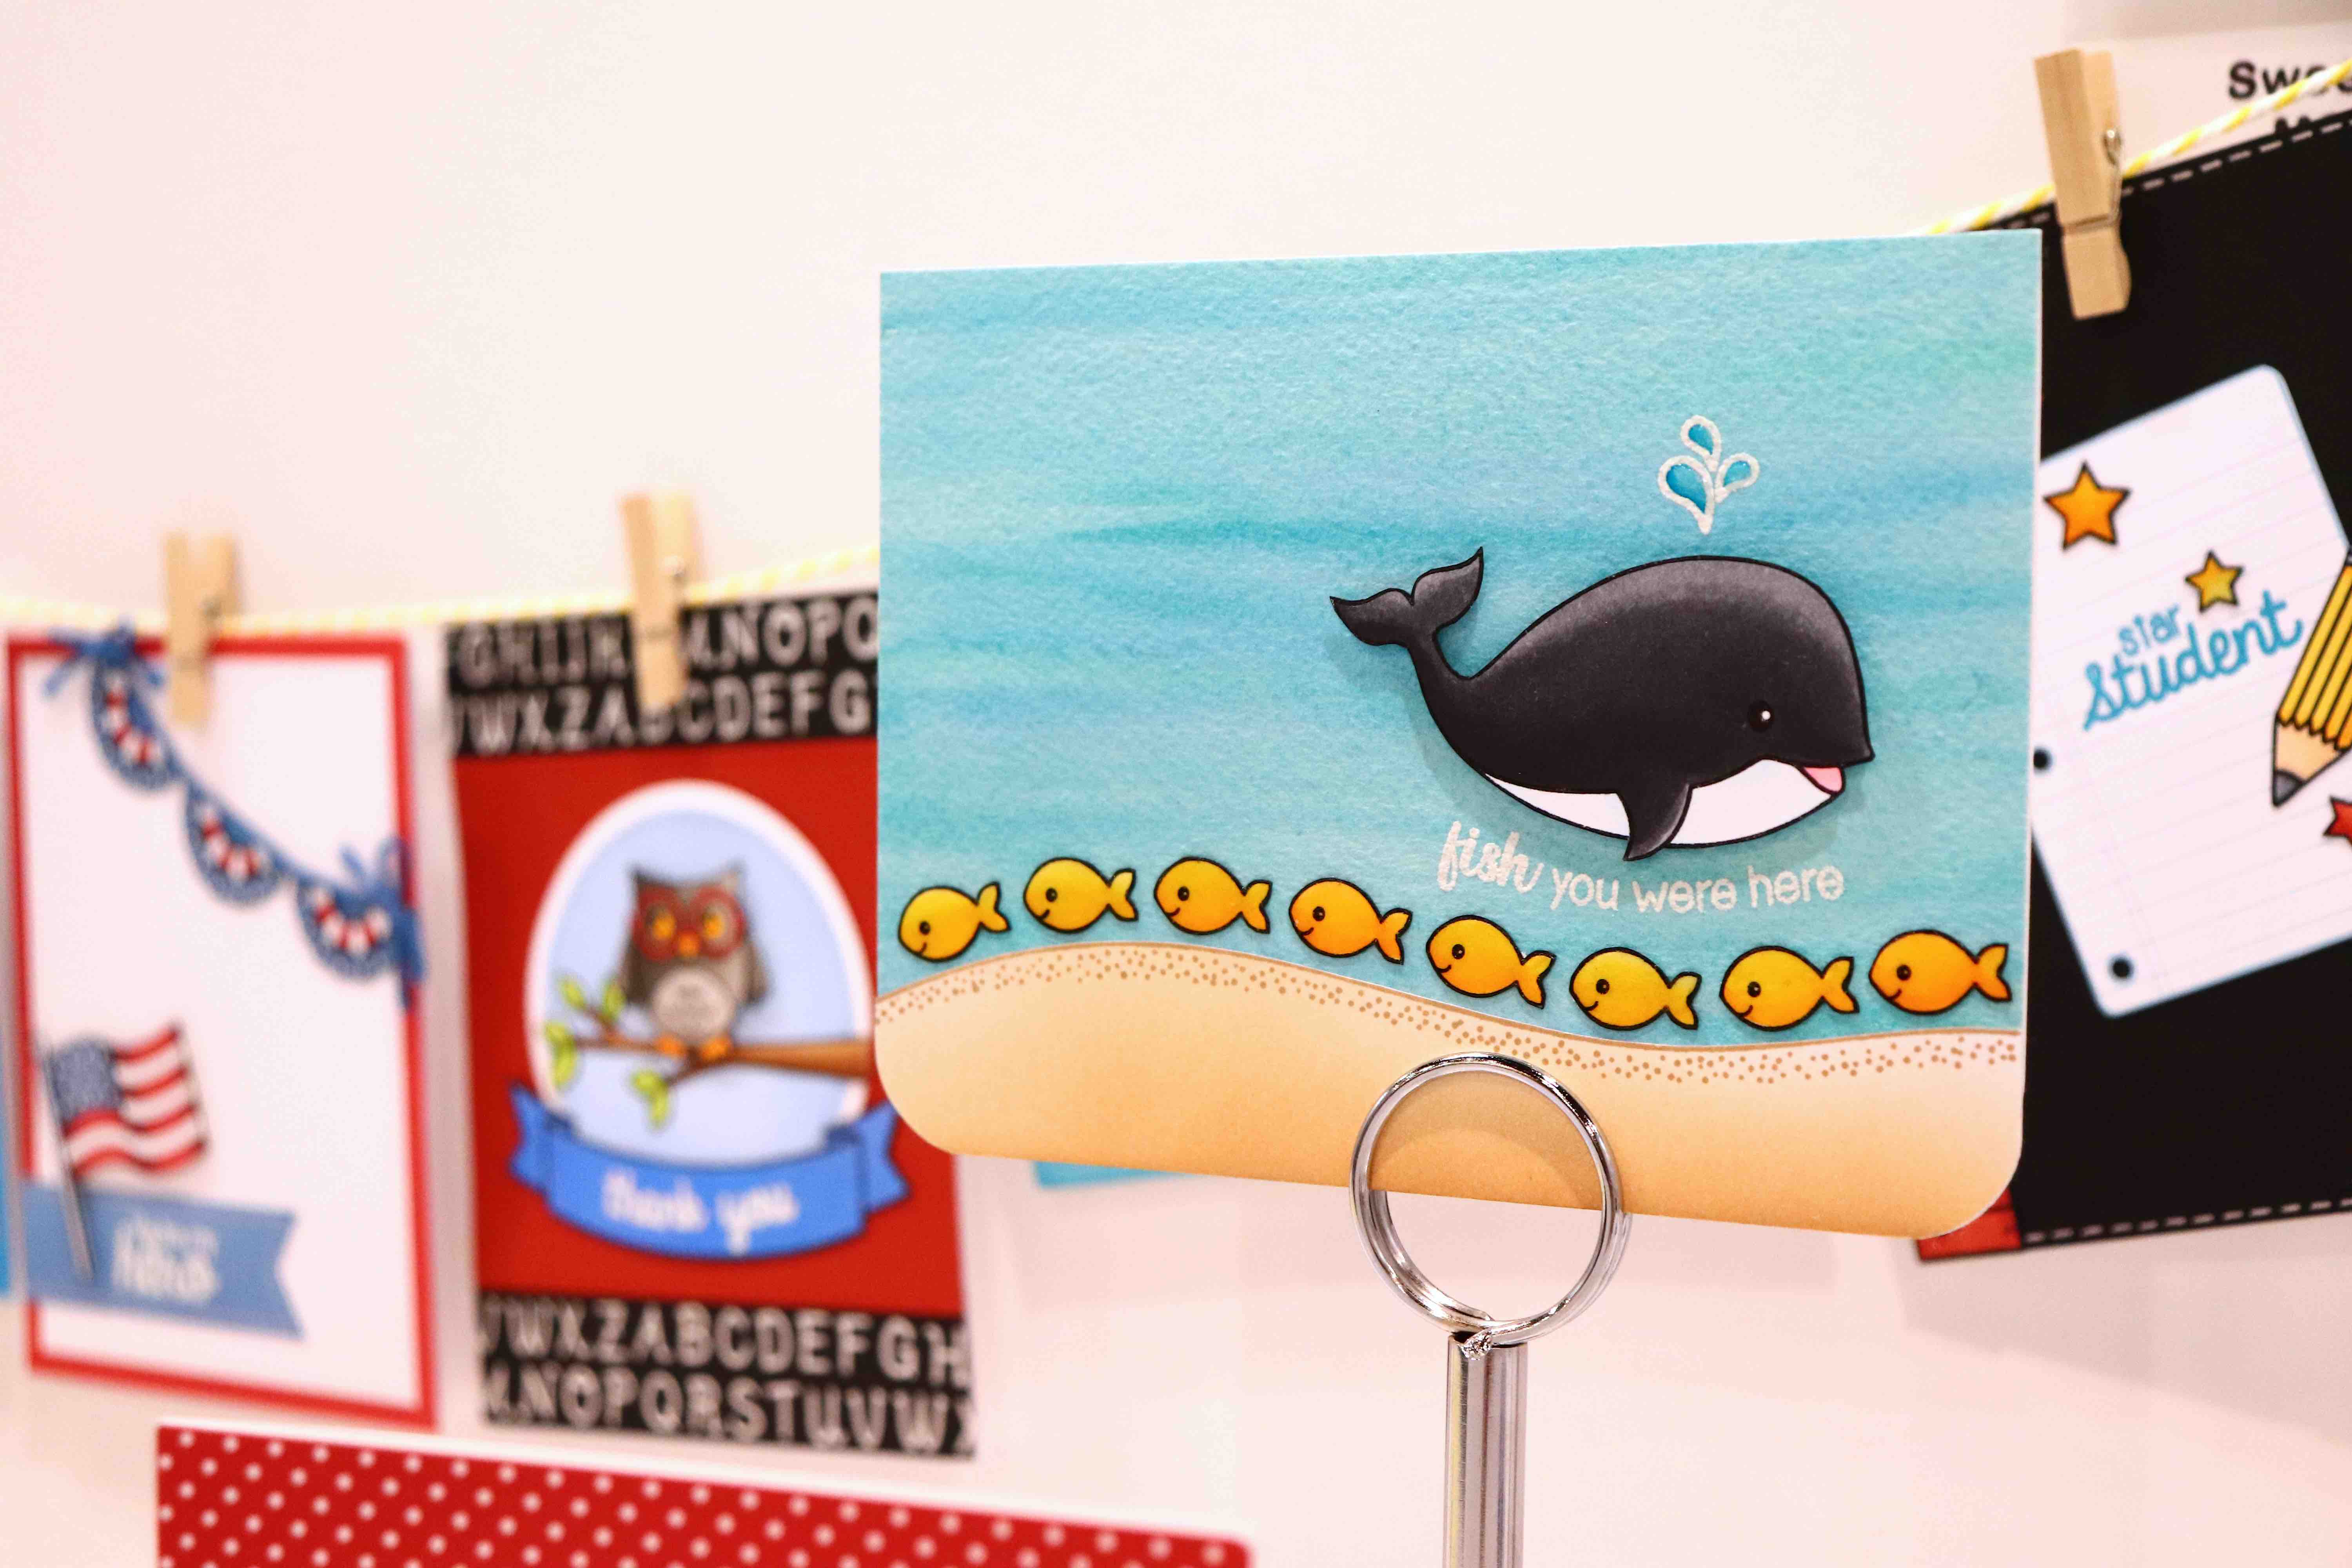
There are also some cute underwater themed sets too! Check out the whale with the border of sweet goldfish!
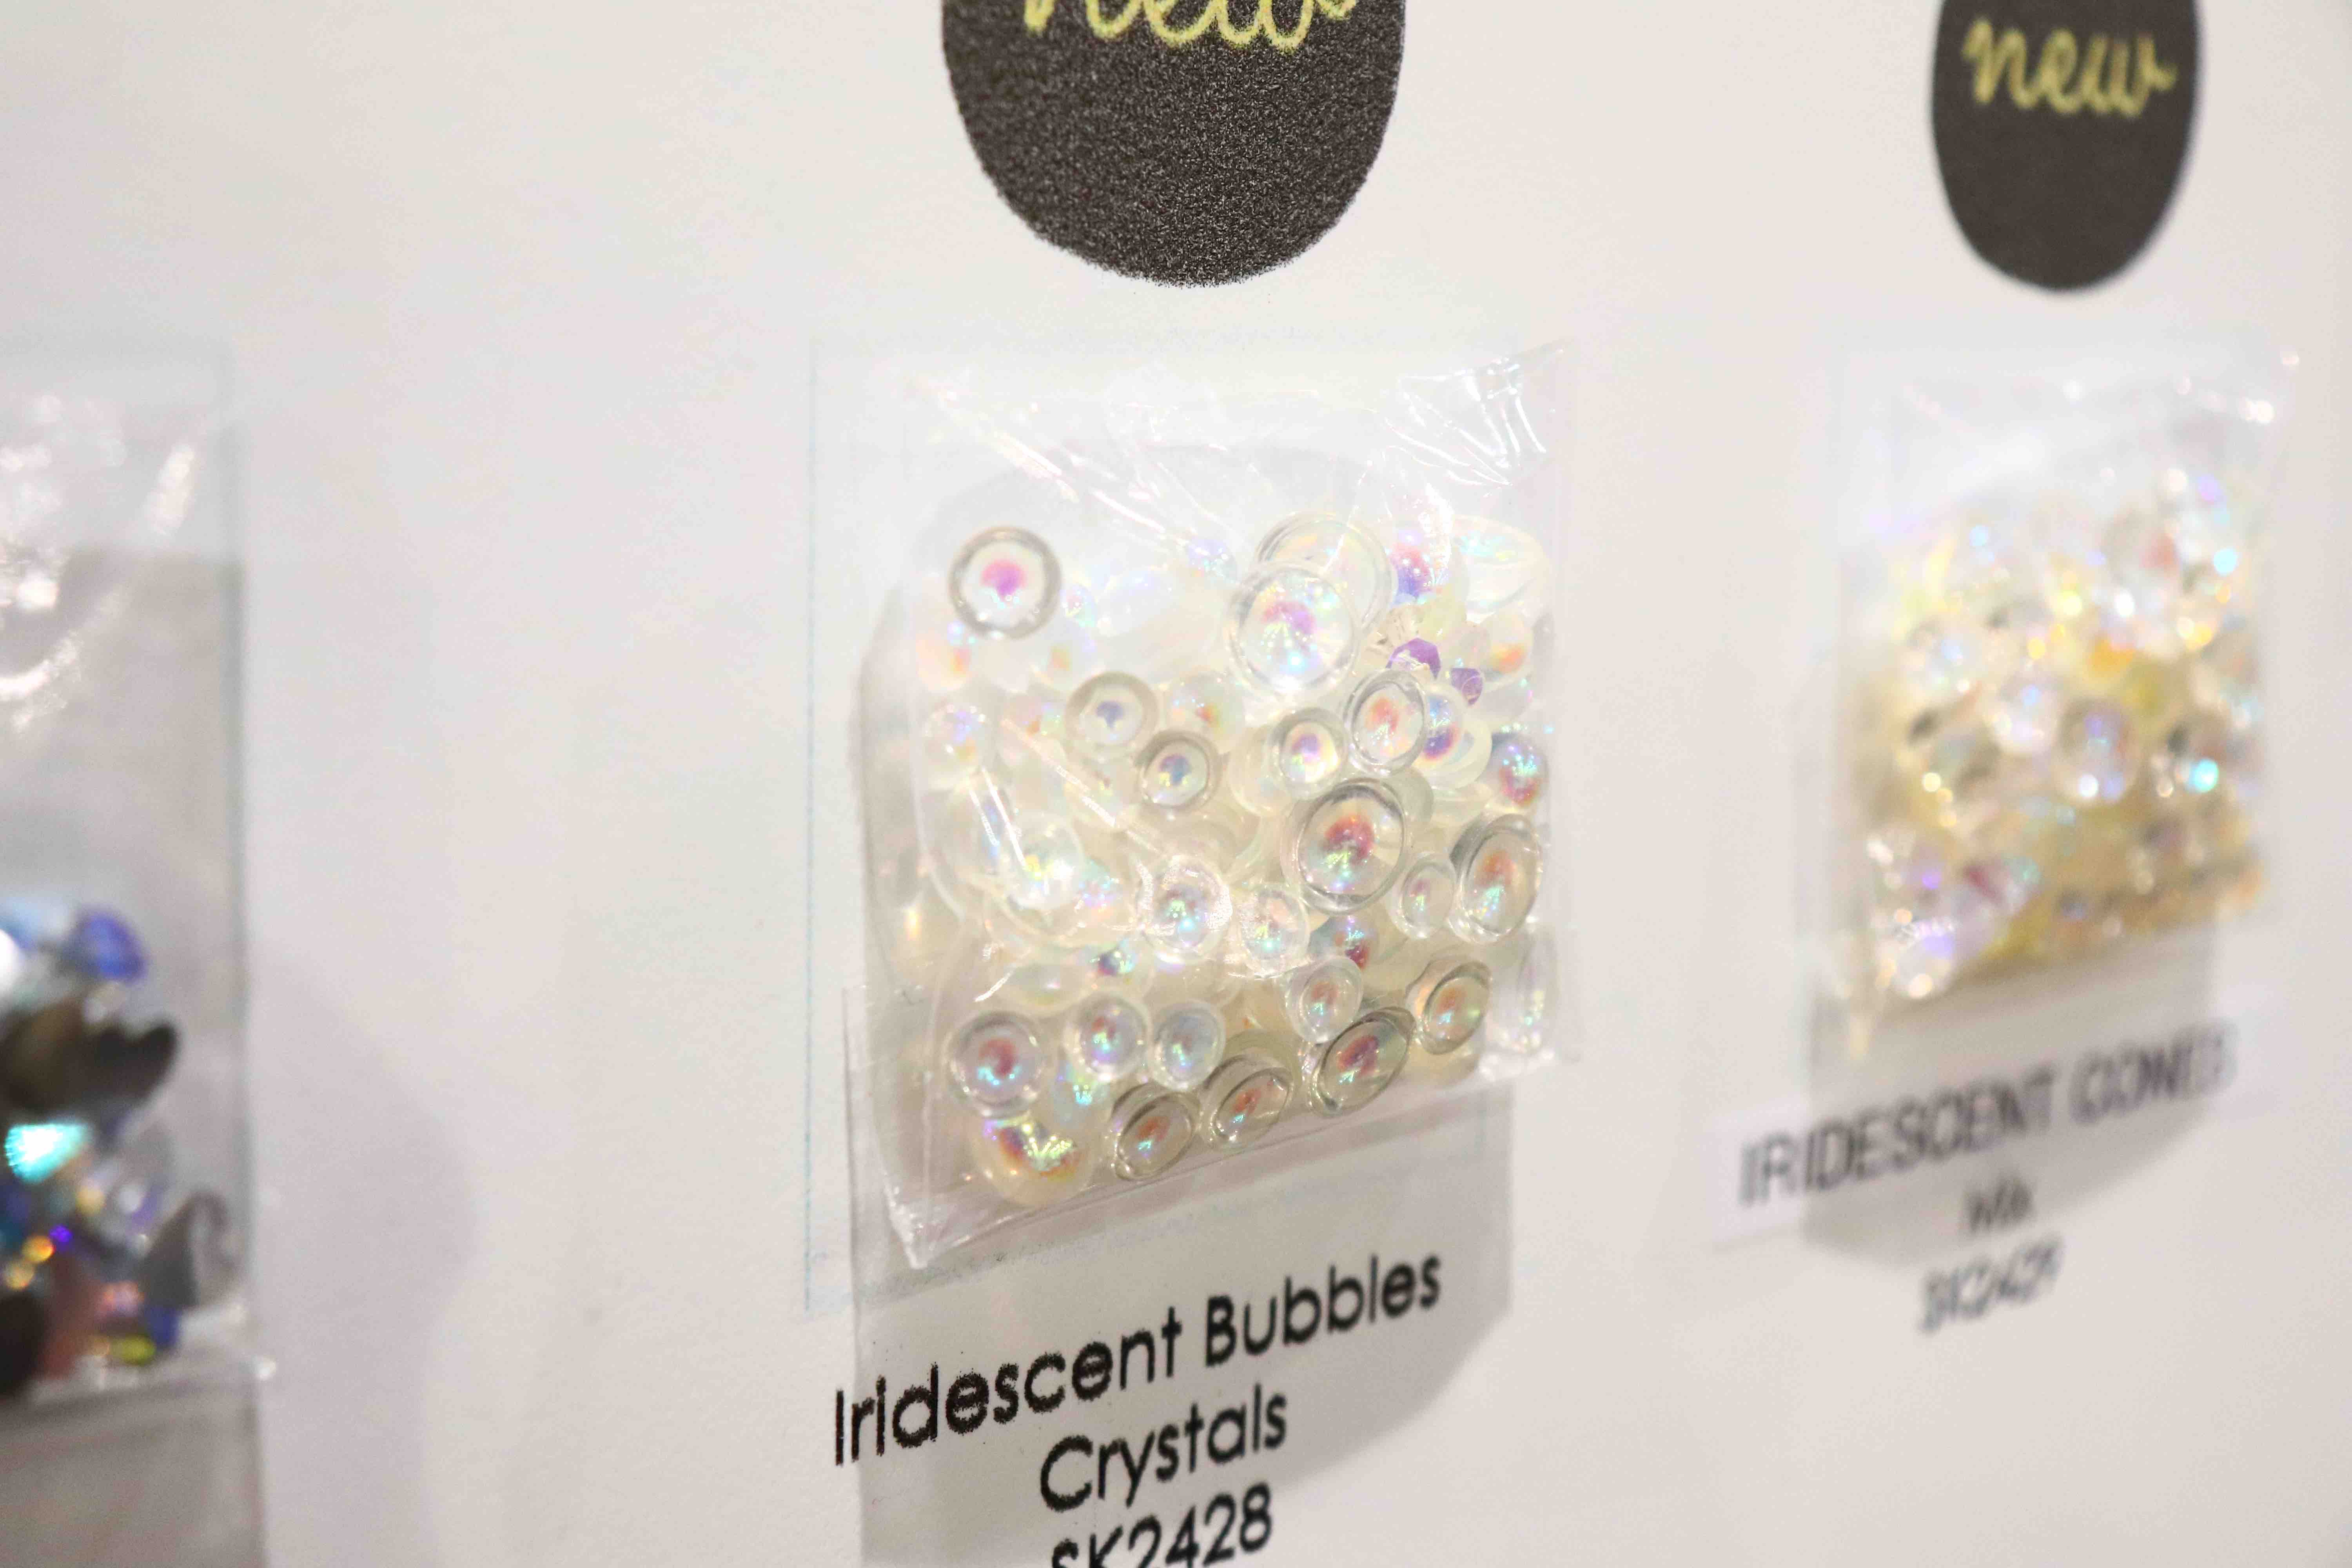
Finally, to wrap up the Creativation excitement, I wanted to share a look at the latest from Studio Katia! One of my favorite embellishments from their booth were their brand new iridescent accents; from bubbles to stars, hearts and faceted diamonds, your cards will be sparkling!
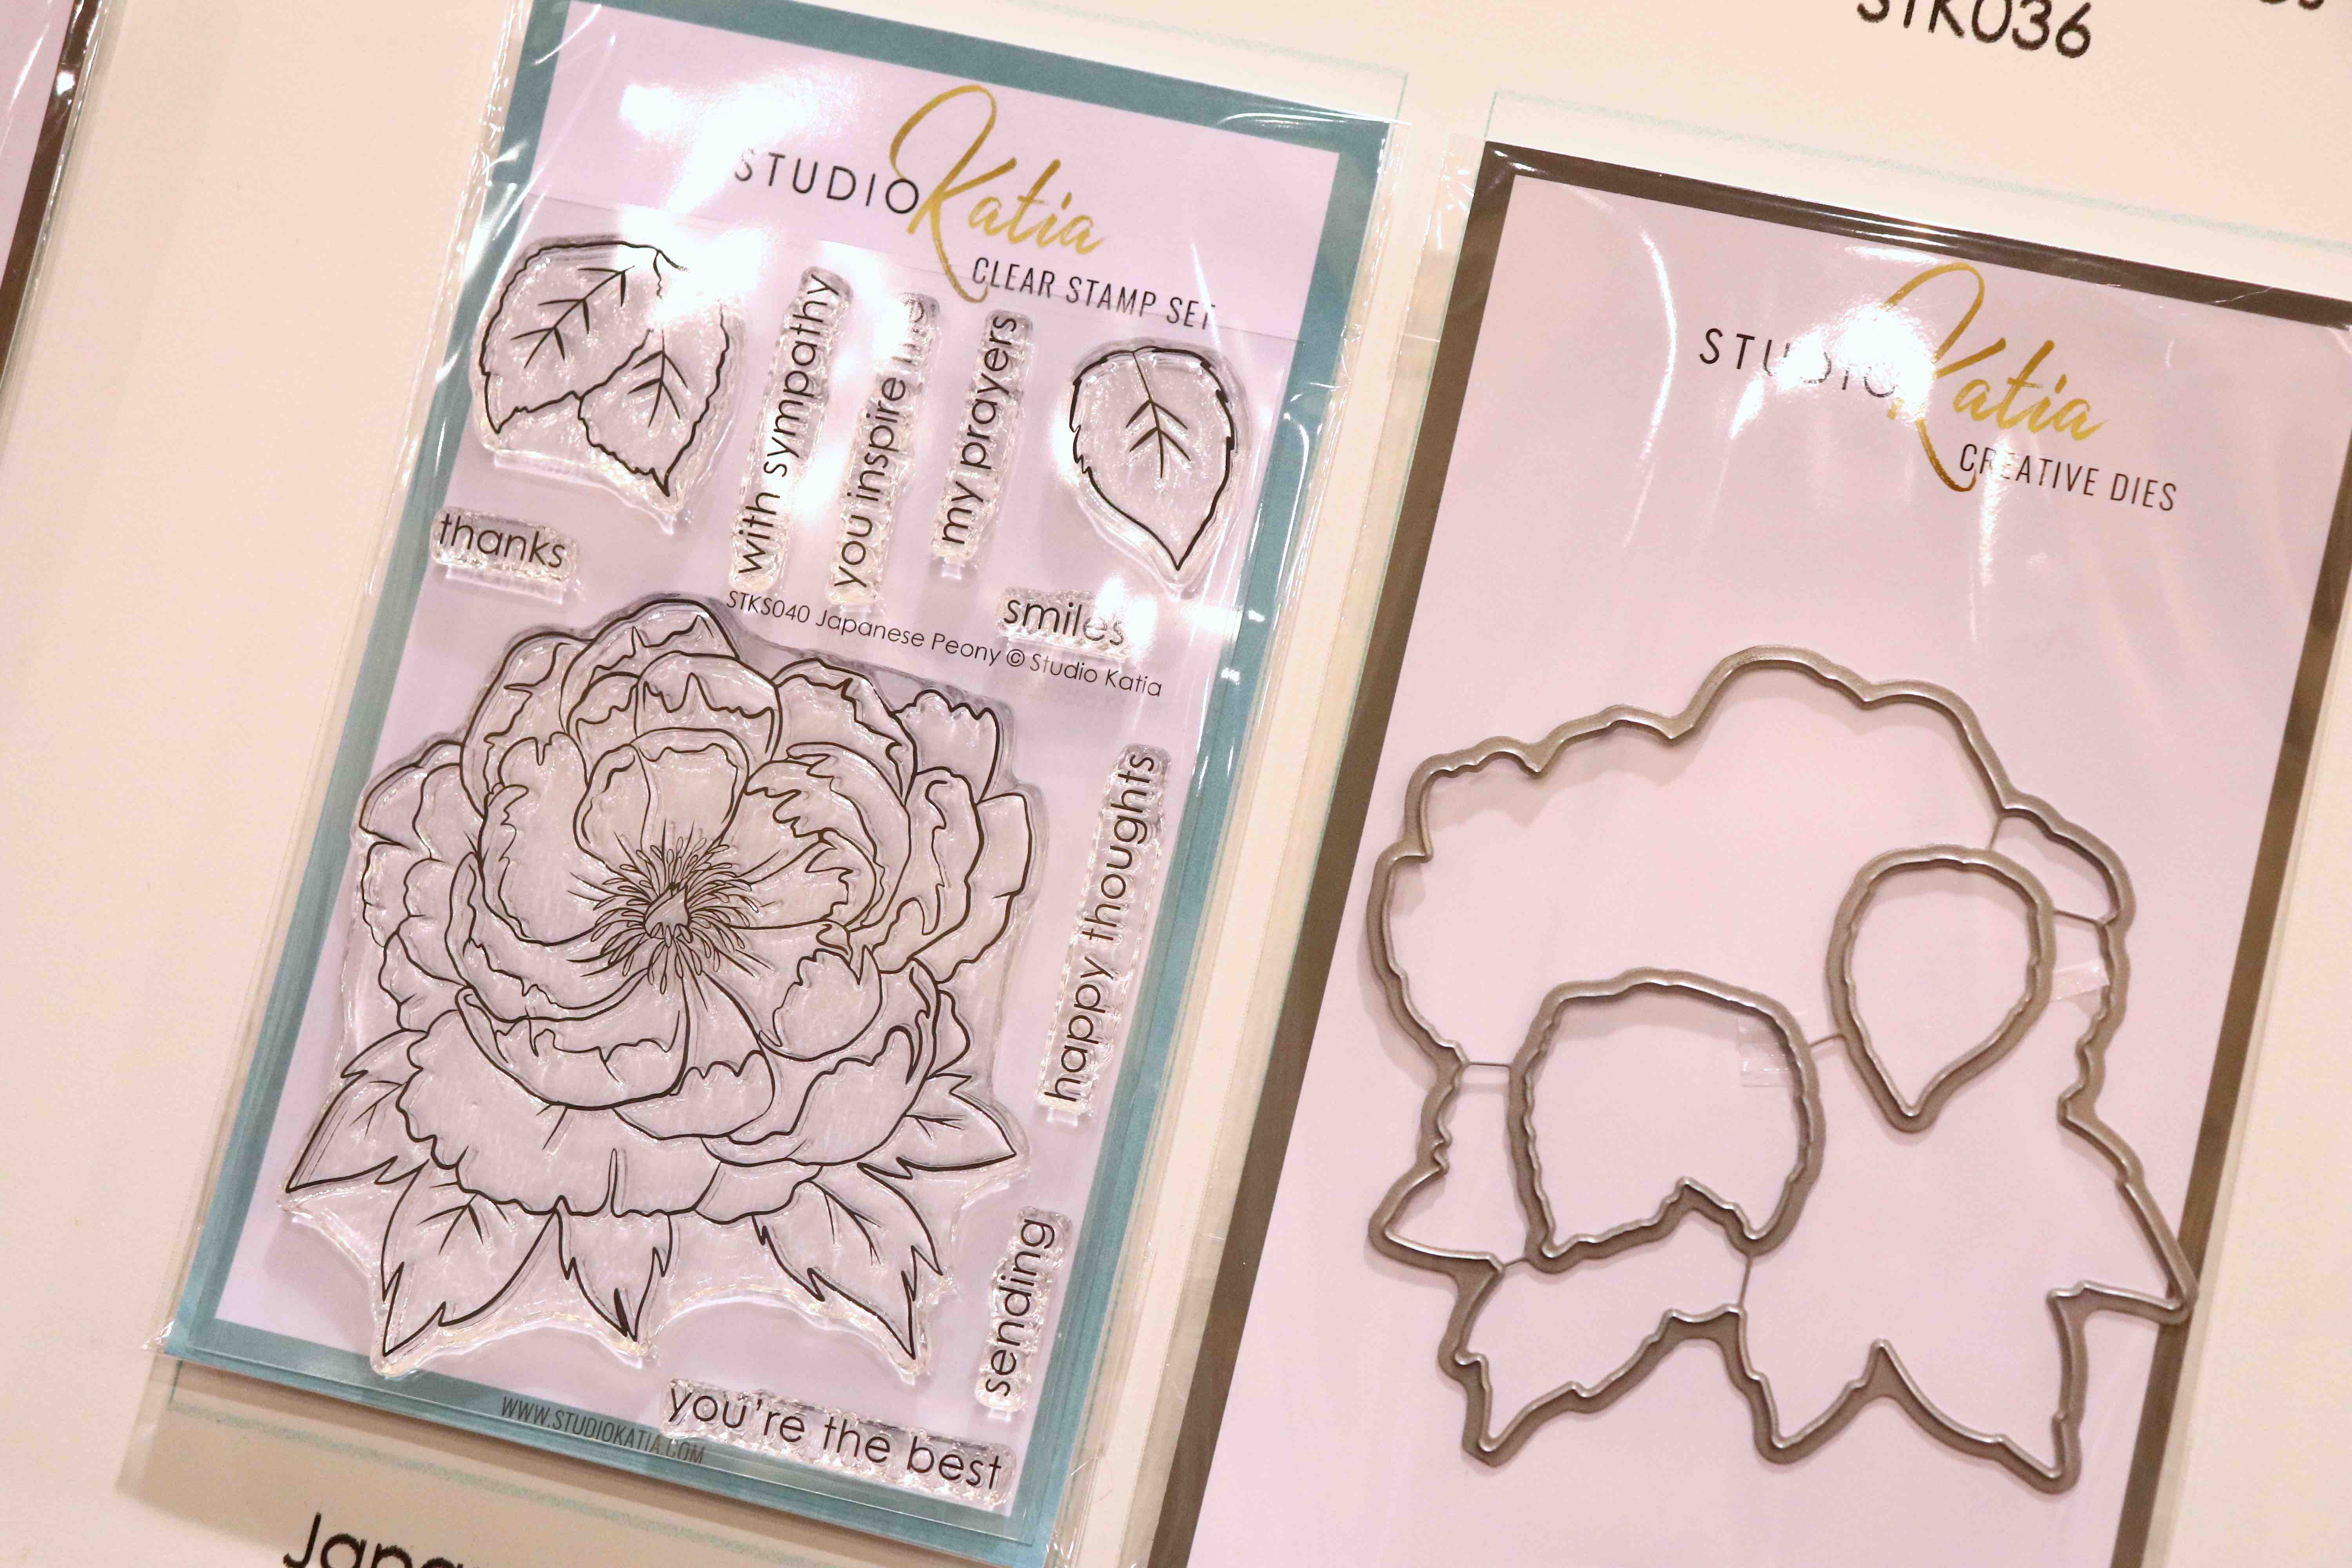
And one of their latest floral stamp and die sets is the Japanese Peony! Look at that stunning flower; with all the open space, you’ll find coloring this image loads of fun!
I hope you enjoyed this look at many of the amazing things we saw during Creativation 2018! Don’t forget to stay tuned to our blog and social media channels, as we will be getting tons of new products into the store over the next couple months!
Happy Monday and thanks for stopping by!


