Studio Monday with Nina-Marie: Dry Embossing 5 Ways

Hello and Happy Monday everyone! I am thrilled to be bringing you the latest Studio Monday video with five different ways to use the dry embossing technique! Note that today’s video is only about the techniques themselves and not a step-by-step for making the finished cards. However, you can see how I turned all of these techniques into cards in the photos! I tried to keep the finished cards fairly simple so that you could look at the photos and easily tell what I did to embellish them.
So, let’s get technique-y, shall we??
DRY EMBOSSING #1: Simple Embossing + the Faux Tin Ceiling Effect
Have you ever seen the Victorian-era tin ceilings in old homes? I live in a home that was built in the waning years of the 19th century, and in the dining room there is a beautiful tin ceiling; with its seemingly “embossed” texture, this inspired me to want to recreate a similar effect on a card. I have the Jungle Background die from Couture Creations, which to me, was a reminiscence to Victorian print. With that background die, I embossed the design into Mirror cardstock from Tonic Studios. Mirror cardstock is going to give you that “tin ceiling” effect, as the very nature of tin itself is a bit on the shiny side.
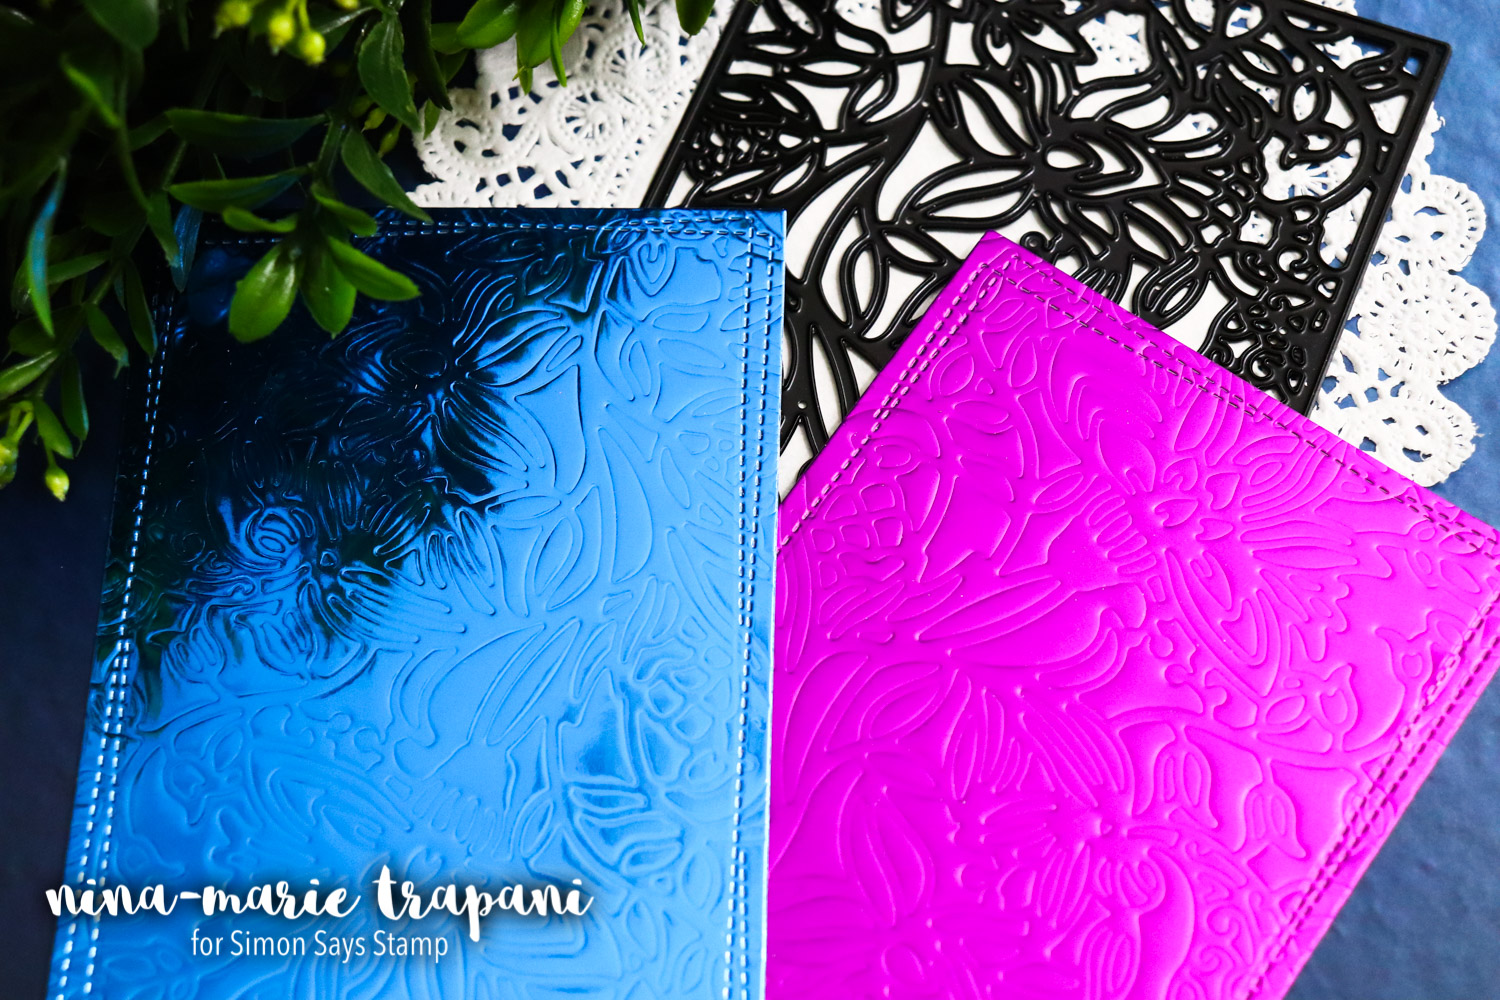
This technique is also the most-basic of all the embossing techniques, as we did nothing but embossed a design into paper. But just because the technique is basic, does not mean that it isn’t beautiful. Sometimes the most beautiful things are the ones that are simplest. Just look at that embossing!
DRY EMBOSSING #2: Enhancing with Color
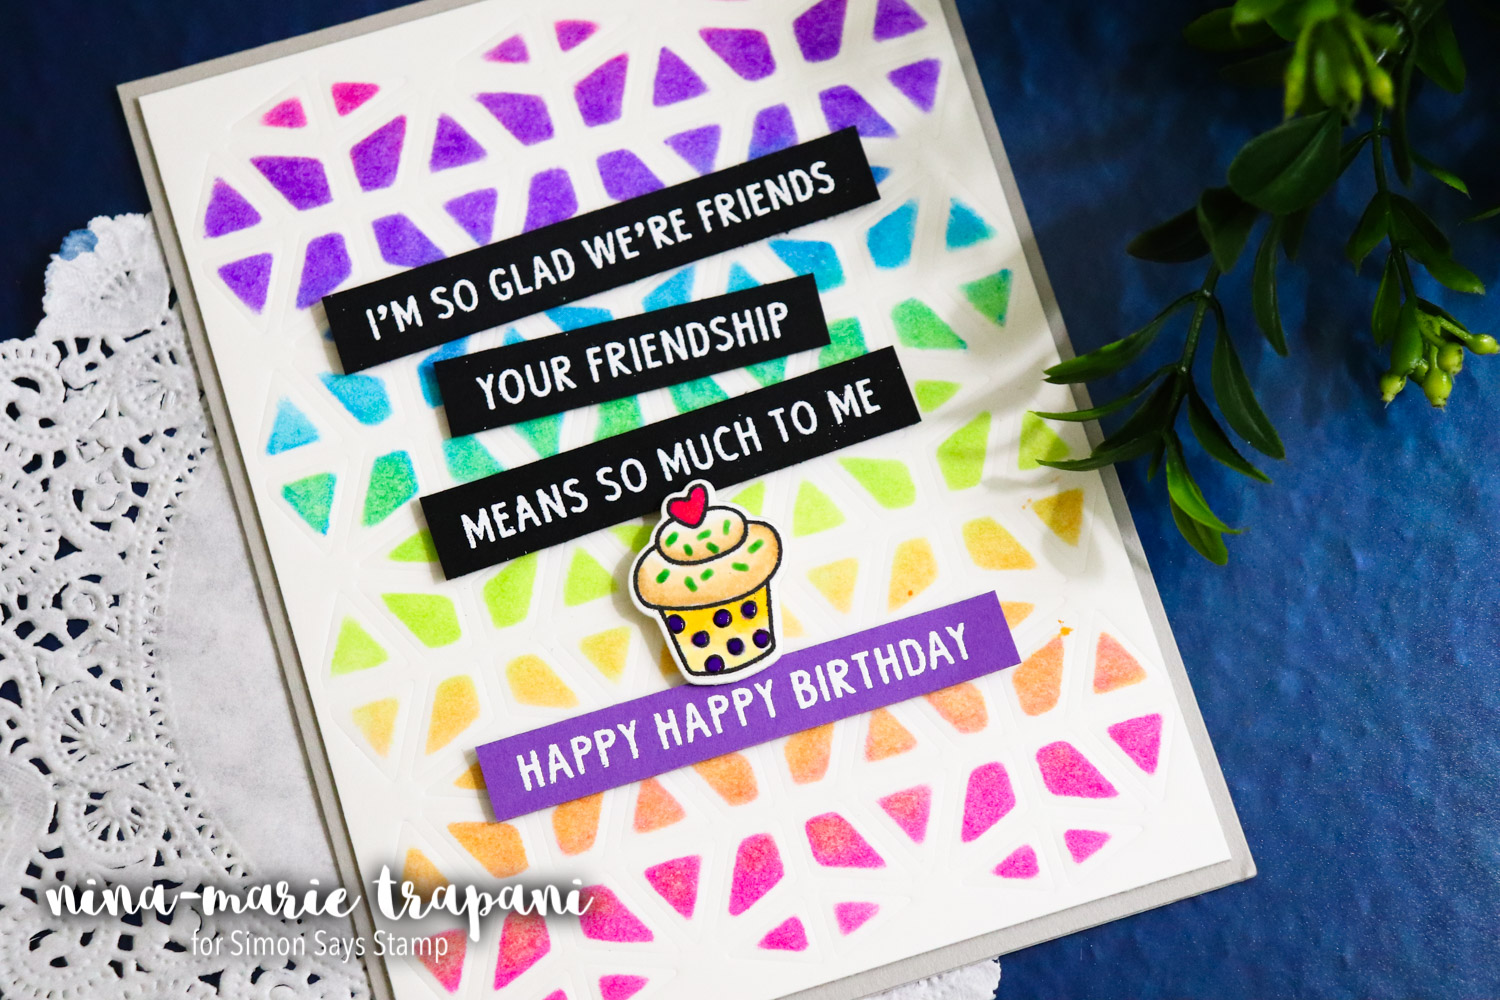
Dry embossing in of itself is a stunning technique. But have you ever tried enhancing that embossing with ink or even markers? I’ve got two examples for you today on this technique! The first uses the new Neat & Tangled Geometric die (I love the crisp, modern vibe of this die). After running it through my die cutting machine in an embossing sandwich (we don’t want to cut this, just emboss), I broke out some inks and daubers! With an assortment of bright Distress Inks, I used the die as a stencil and inked through the openings to make the raised portions of the panel colored. The result is a stunner!
The second method is to use markers. And as a bonus embossing technique, this card was embossed using lots of dies from the Modern Flowers die set; another great way to make use of the small dies you have! I embossed these florals into blue cardstock and then using 2 Copic markers, I shaded all of the raised areas of the panel. You definitely do not have to add shading on this; you could use just a single marker and get amazing results! I just am addicted to coloring and don’t know when to stop sometimes! ;)
The way the coloring looks on both of these cards with the embossed texture is mesmerizing. I love running my fingers over the paper to feel that embossed texture!
DRY EMBOSSING #3: Using Embossing Folders with and without Mediums
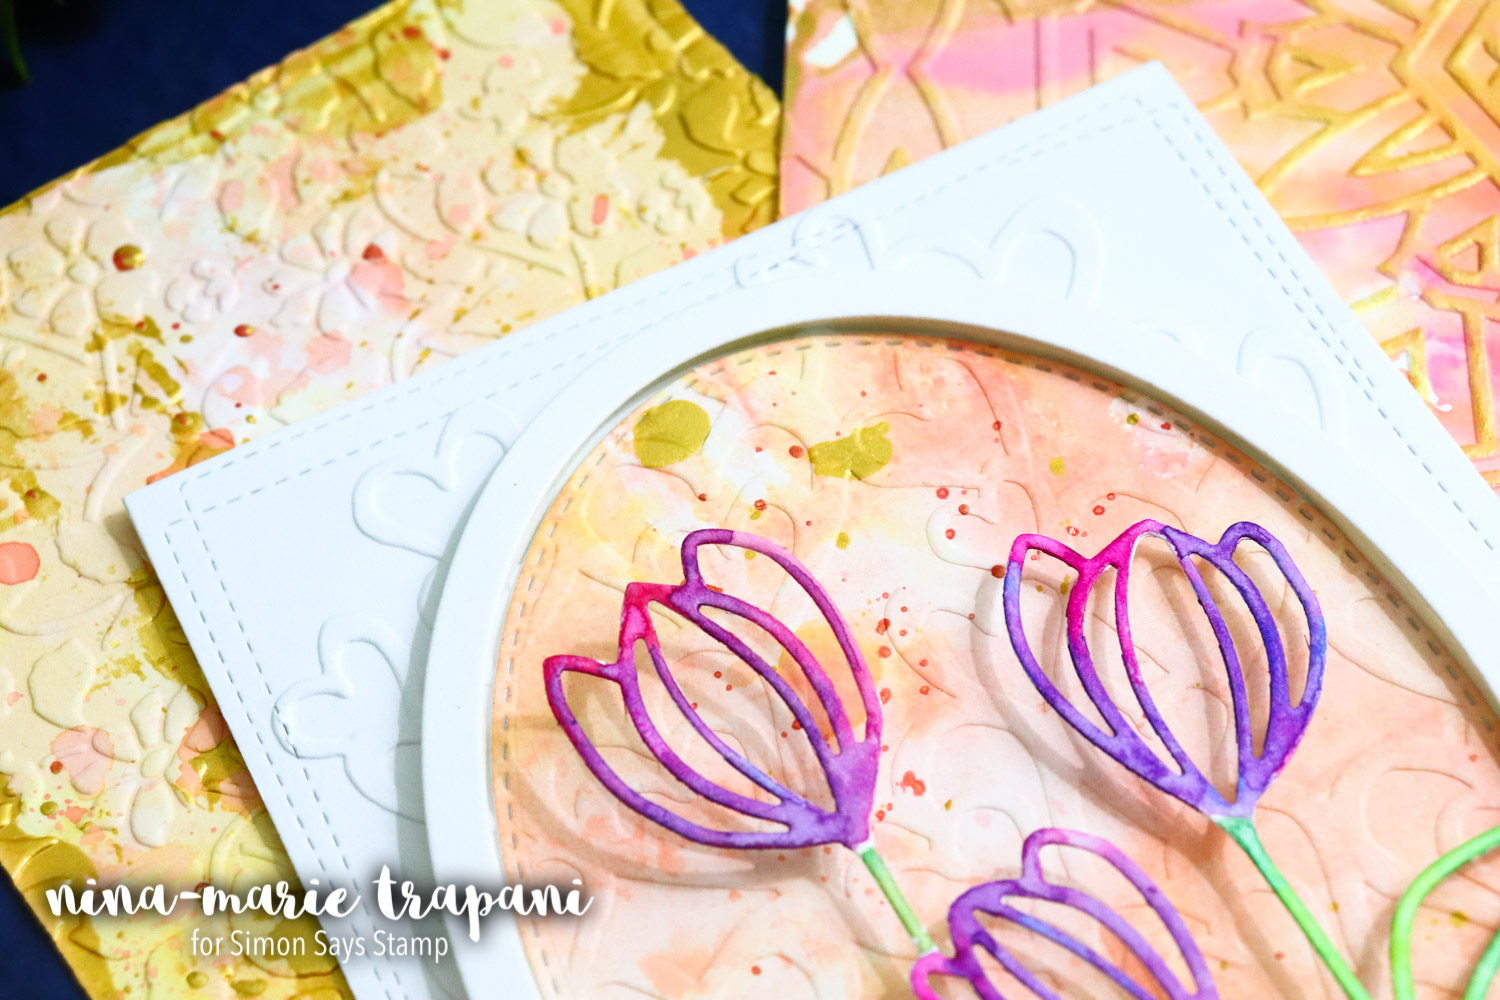
One of the most popular ways to dry emboss is with embossing folders! There are so many gorgeous ones to choose from, and really, they don’t get enough love I think! I’ve used three different folders today with backgrounds I made, to show you some fun ways you can add texture to your inked panels. Side note, all the inking was done with Distress Oxide inks and there are gold and pink paint splatters on each. The folders used here were the Couture Creations Field of Daisies and the Carabella Envolée de Coeurs. On the finished card, you see some beautiful tulips that are from Memory Box’s Floral Bloom Oval Frame die set.
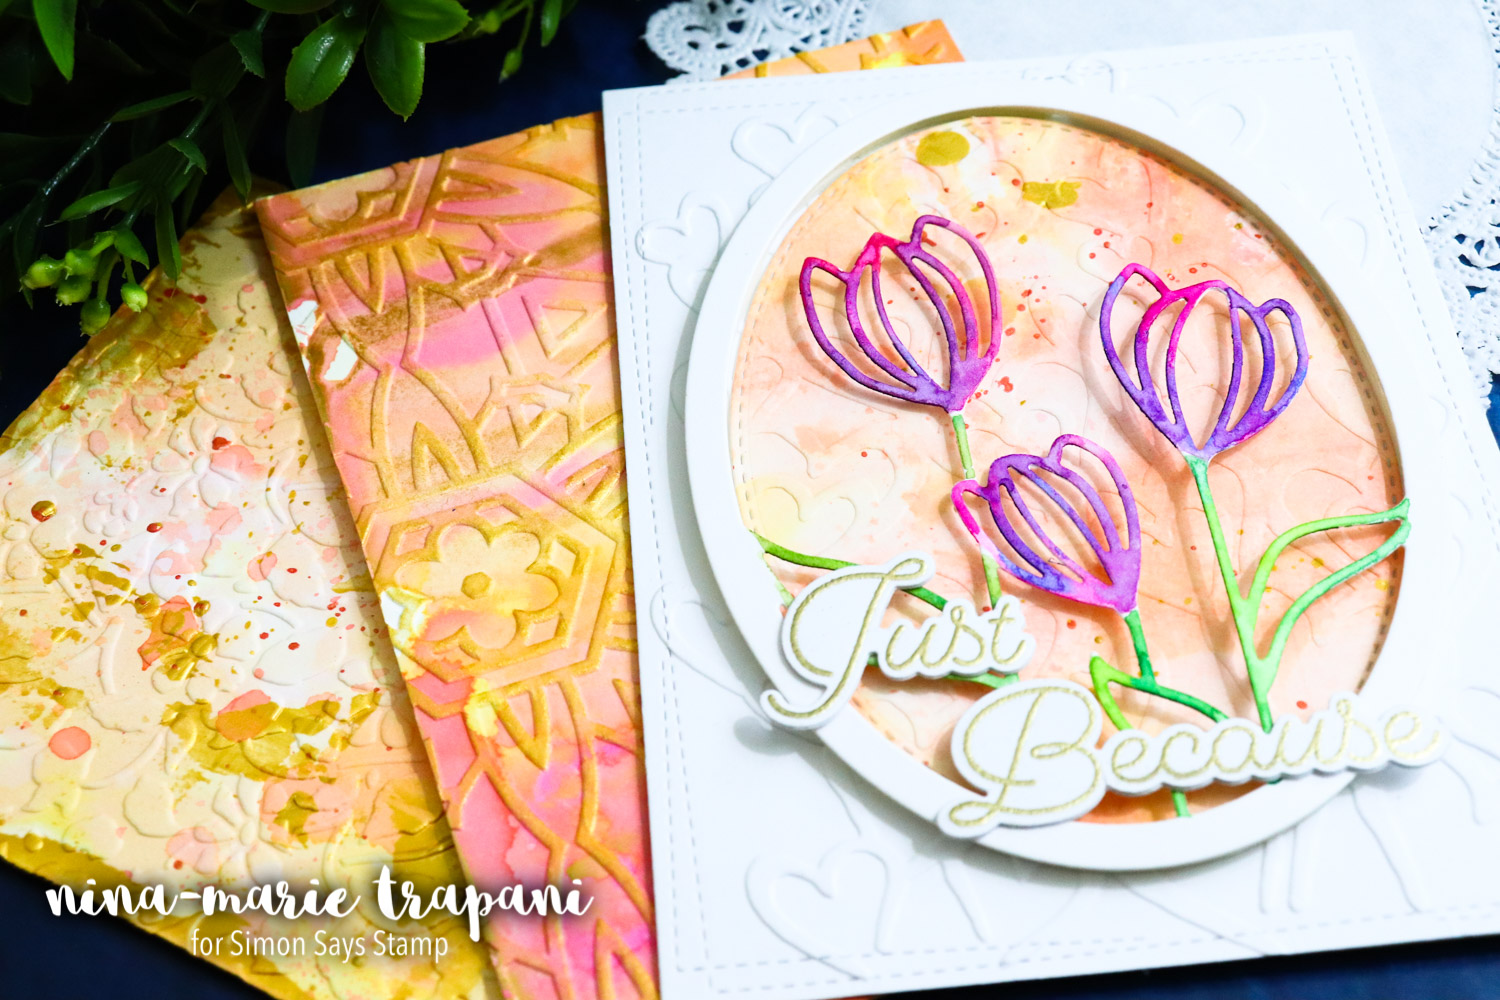
But of course, embossing folder impressions do not have to be subtle! The stunning Floral Burst from Brutus Monroe (middle panel in photo above), looks amazing when embossed… but then, when you add ink overtop to enhancing the embossing? Just WOW. It brings the design front and center, creating a focal point instead of an accent. I did not make cards with all of these backgrounds, but have saved them for future use! Take a close up look at the texture…
DRY EMBOSSING #4: Faux Letterpress with a Stencil
I’m sure most of you are familiar with the gorgeous letterpress designs you see on stationary, business cards and more. Relief printing has become so popular, and for good reason! Have you ever tried getting that same effect using a stencil and inks? Its super easy and very addicting! ;)
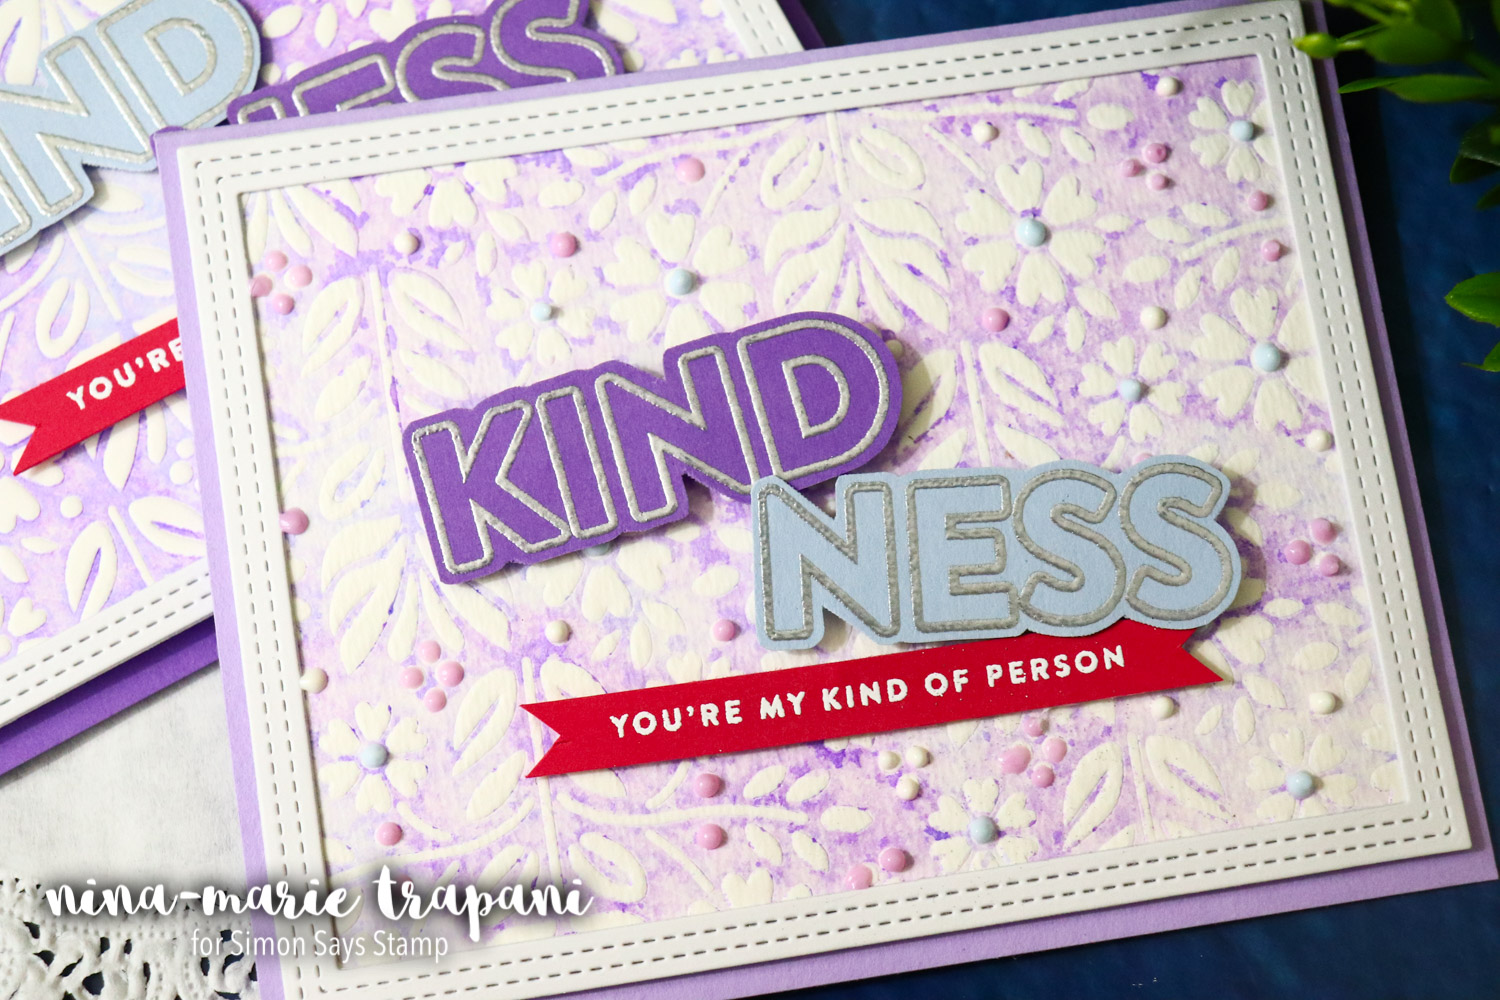
On both of these cards I used the Folk Dance stencil and both Shaded Lilac and Wilted Violet Distress Inks. The only difference between these two designs are the choices of paper. I wanted to demonstrate that depending on the paper, you may get slightly different results (which isn’t a bad thing!). The first card used Bristol Smooth cardstock and you can see that the ink was transferred very smoothly, as there was not any texture to interfere…
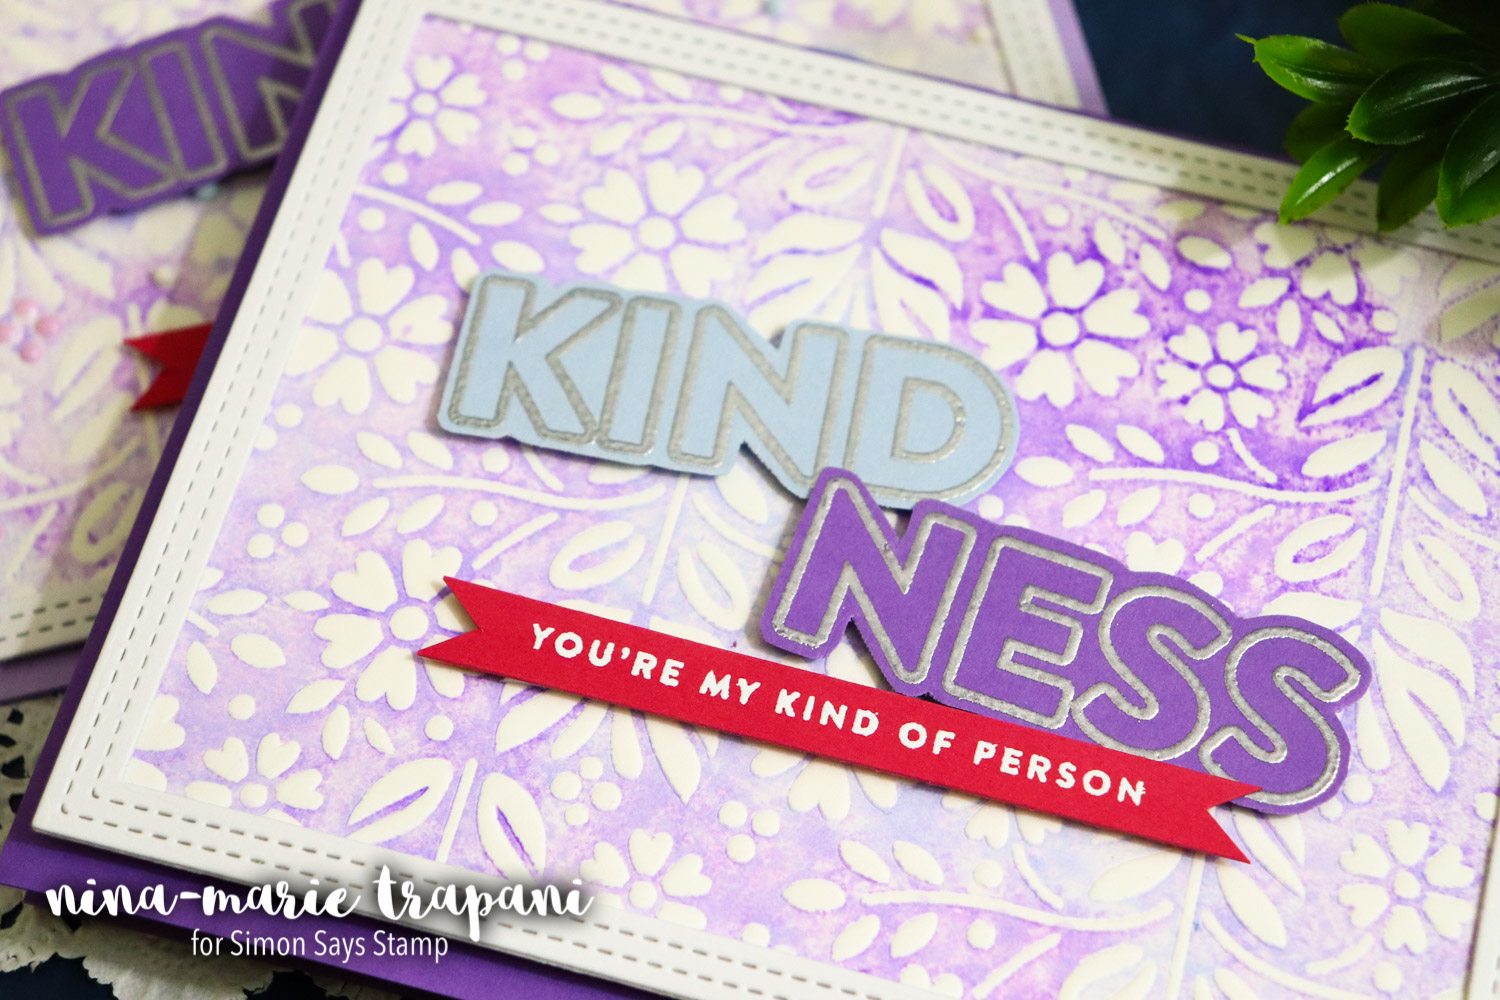
The second version uses cold press watercolor paper from Strathmore and the results are much more textured. I think both look equally as beautiful! I embellished these cards with greetings from our Kind Flowers stamp set and on one of the cards I used a few Nuvo drops on the embossed dots.
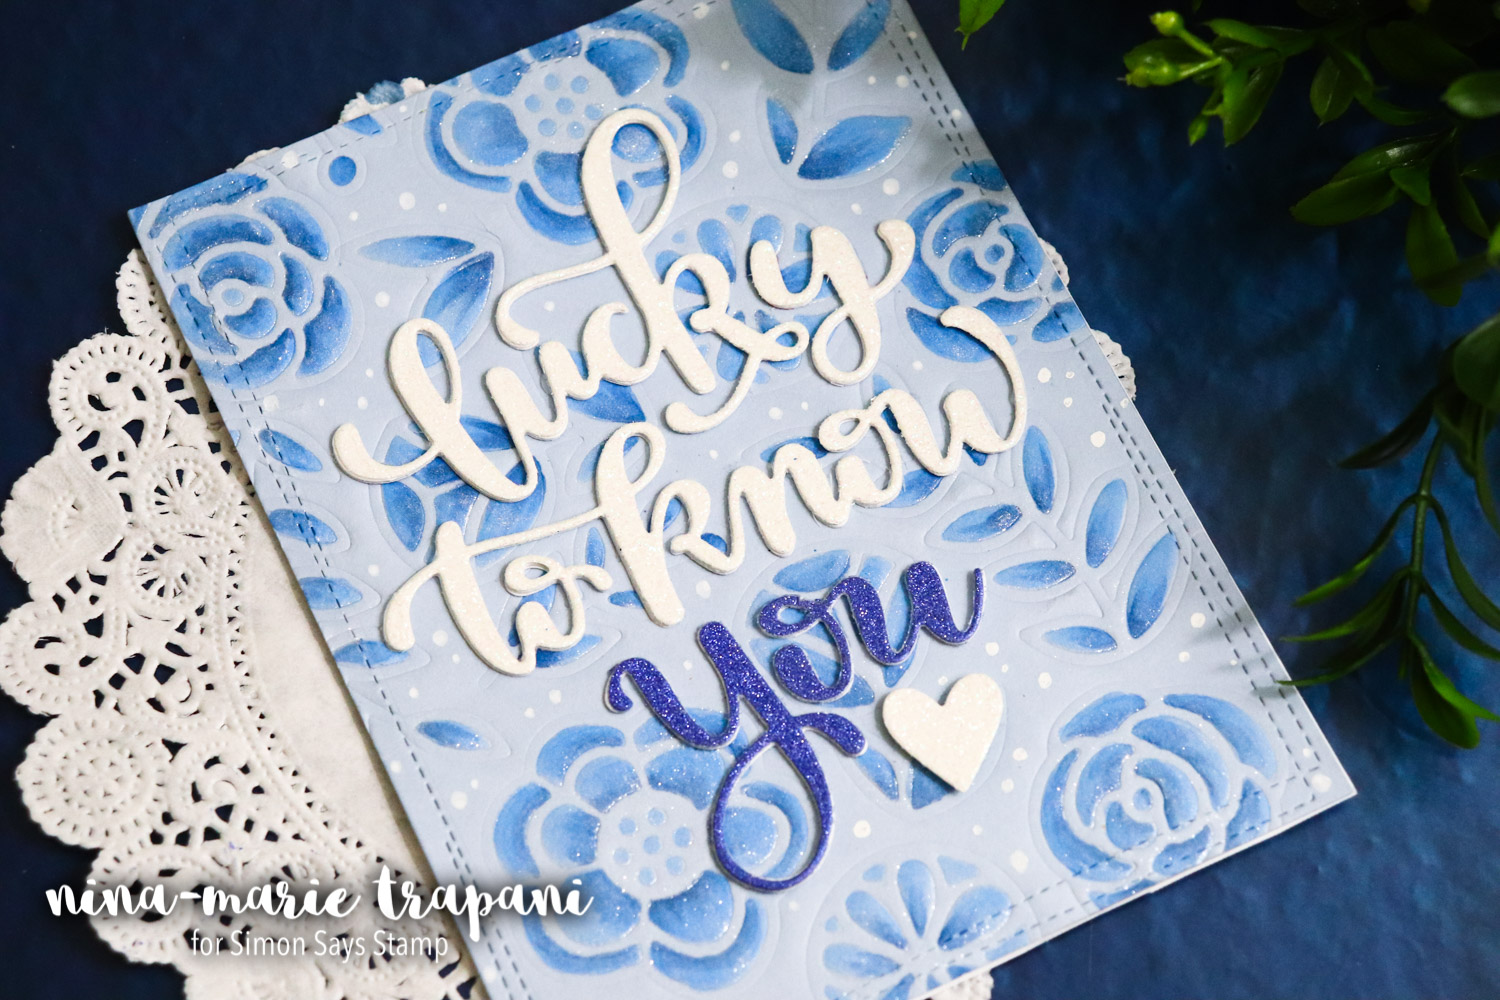
DRY EMBOSSING #5: Creating a Ghosted Sentiment
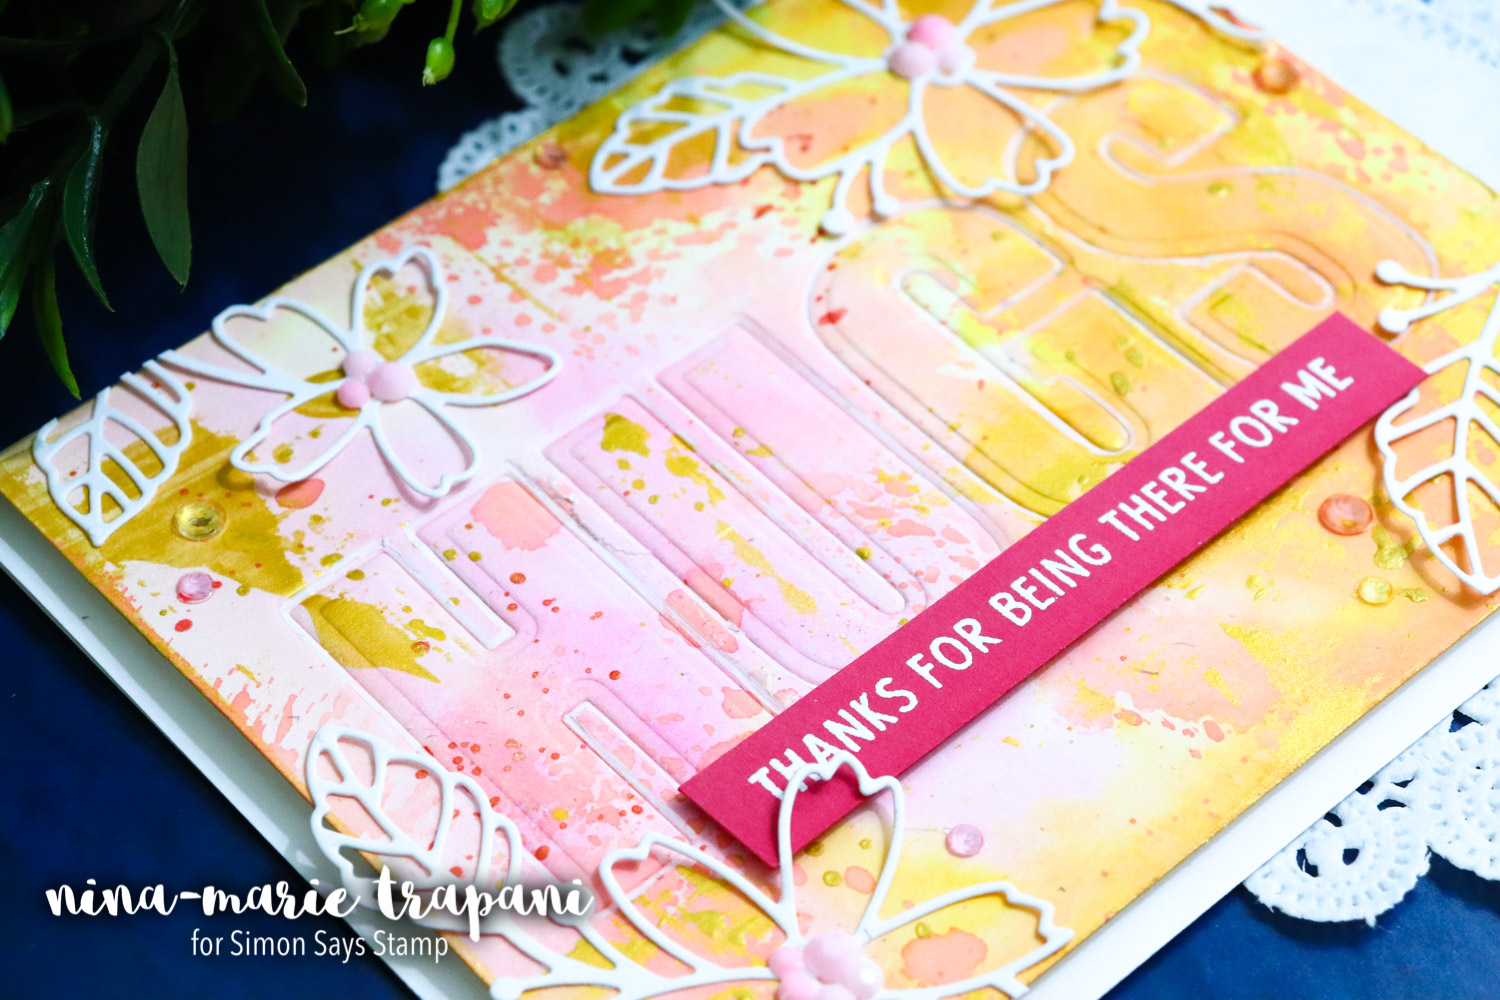
This is a fun way to accent a greeting you have on a card! By taking letter dies, you can emboss them into a beautiful background and then place other elements on and around that embossing because it’s an embellishment. My sentiment “hugs” complements the thank you greeting underneath and grounds the rest of the design. Those letter dies were from Altenew’s Caps Bold Alpha set.
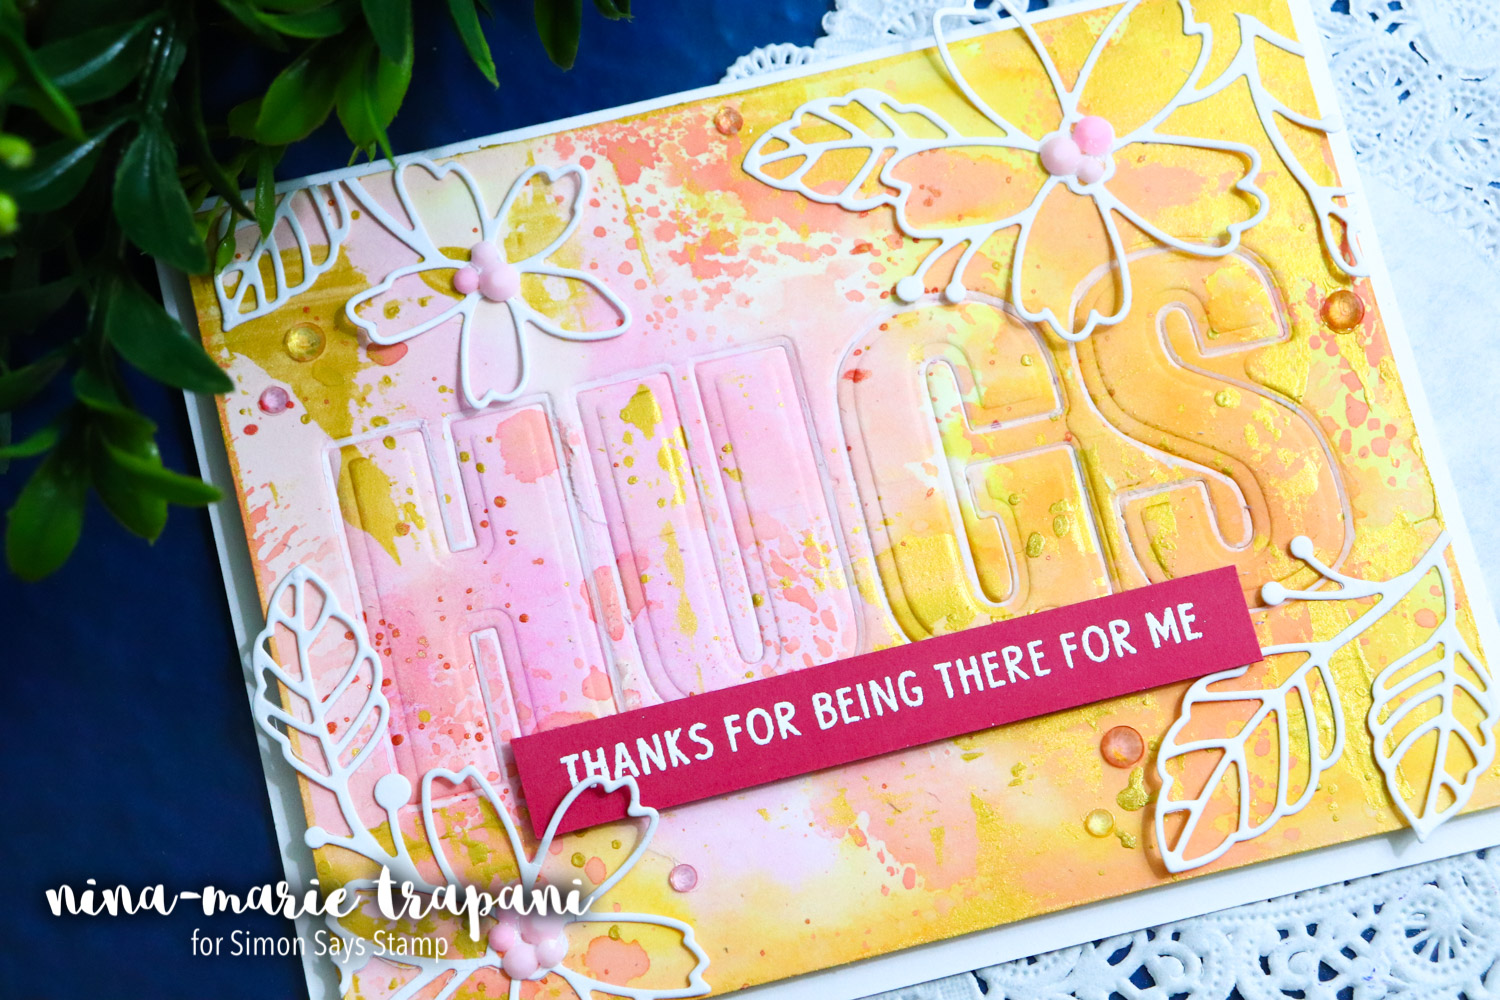
I framed this card with the stunning Fresh Picked Flowers die from Memory Box and added small crystal gems from Studio Katia’s Cupid’s Kiss mix. The texture and layers of this card were very much inspired by mixed media. Check out the close up of the relief of the letters!
I hope you will watch the video below to see how I made each of these techniques work, as they are really fun to do. I find it so exciting to experiment and play with these techniques to see what other things can be done to enhance them and create even more techniques. I hope that it inspires you to do the same in YOUR crafty projects!
Thanks for joining me today; stop back again next week to see my next Studio Monday video!
WATCH THE VIDEO
SUPPLIES
|


Blog Candy Alert!! Follow our blog via email and comment on this post for a chance to win grab bags and blog candy! Remember to tag your awesome projects with #simonsaysstamp on social media so we can see what you are creating! 
Yippee for Yana: Repeat Background with Breakfast Buddies
Hi friends! Welcome to the latest edition of Yippee for Yana! Read on for more details and enjoy!

Hi everyone, this is Yana Smakula and I’m excited to bring you another episode from my bi-monthly “Yippee For Yana” video series! In today’s episode, I’m creating a fun stamped, colored and die-cut background for a card using Breakfast Buddies stamps. You can easily apply this technique to other small images from your stash.
This stamp set features a bunch of images of food that one would usually have for breakfast plus there are fun sentiments that go along with each type of food.
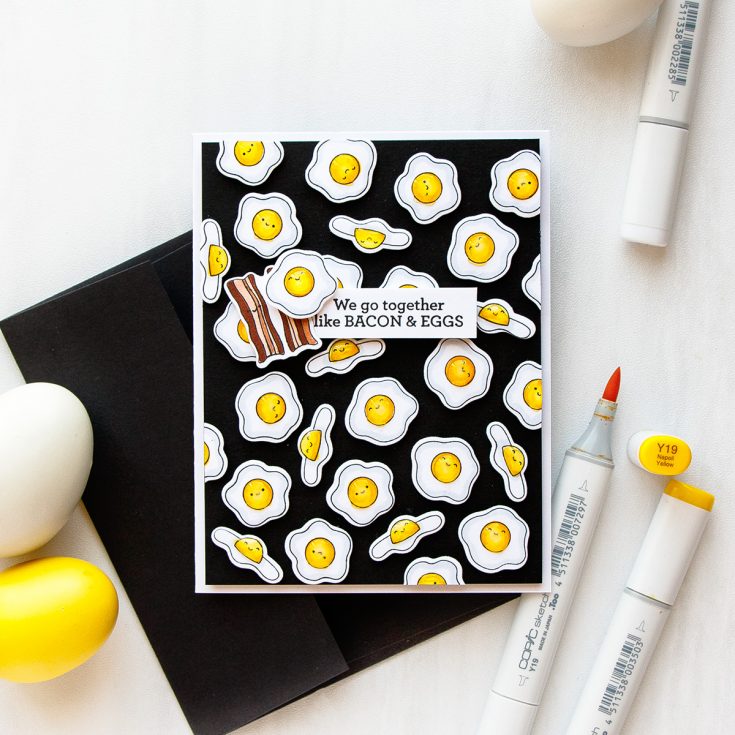
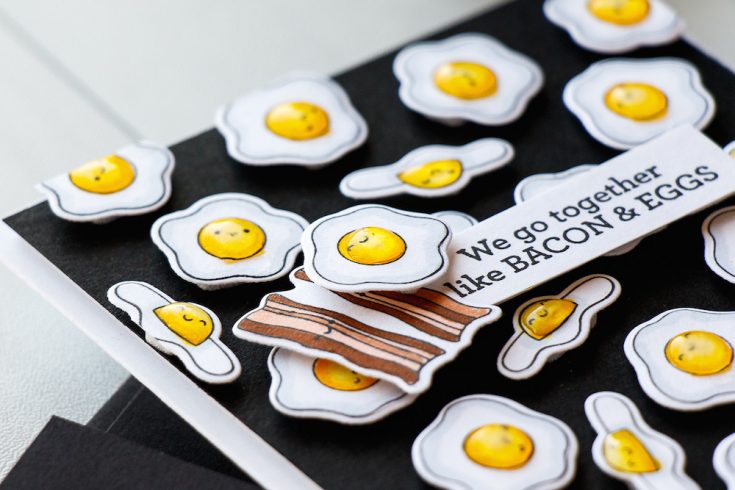
I love to have eggs for breakfast and of course bacon so I decided to go with the egg image for my card. There are 3 different egg images and I used all 3 of them. If you’ve been following me for some time you also know that I am all about creating my own unique backgrounds with the help of small images so this is what I am doing in this video today.
Finding inspiration for my projects is sometimes a tricky business. I like to keep a special board on Pinterest where I pin images that I find inspiring. As I was browsing my board for inspiration I came across a fun eggs pattern image and decided to use this as inspiration for my project.
I mounted all 3 egg images on my clear block (to save time as it didn’t really matter in which order I stamped them) and stamped a bunch of eggs at once in Simon’s Intense Black Ink onto white cardstock.
For my coloring, I picked Copic markers and the reason I went with Copics is because of the ease of use. I can quickly color a bunch of images, do some easy shading and be done in 5 to 10 minutes. If I were to color one or two images I could have picked colored pencils and or watercolor and really took my time to do some awesome and detailed coloring, but since I was doing a lot of coloring I didn’t want to focus much on it, besides the coloring is not the start of the show on this project, its the pattern itself.
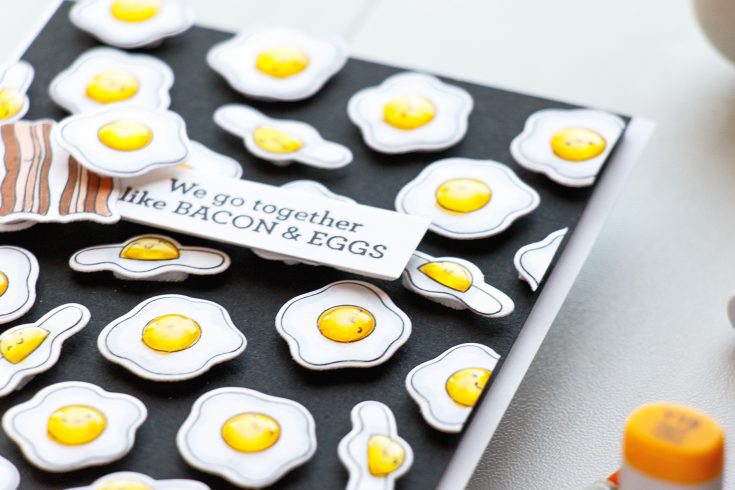
I used Y19, Y15, and Y11 to color the yolk and C1 market to add a bit of sharing to the egg whites. I don’t think that was necessary, but I felt like I wanted to add just a bit of gray here.
Once my coloring was done I used coordinating dies to cut these images out. There is a die for every image in this stamp set, so if you have these coordinating dies it makes cutting these a much easier task.
Next, I cut a piece of black cardstock to 4 x 5 ¼” and started working on my pattern.
So let’s rewind a little bit and talk about the different kinds of patterns or background I like to make. There’s one kind of background where I do a lot of stamping and I stamp everything directly onto a card front or onto a panel that goes on the front of my card. There’s no die cutting involved in that kind of background.
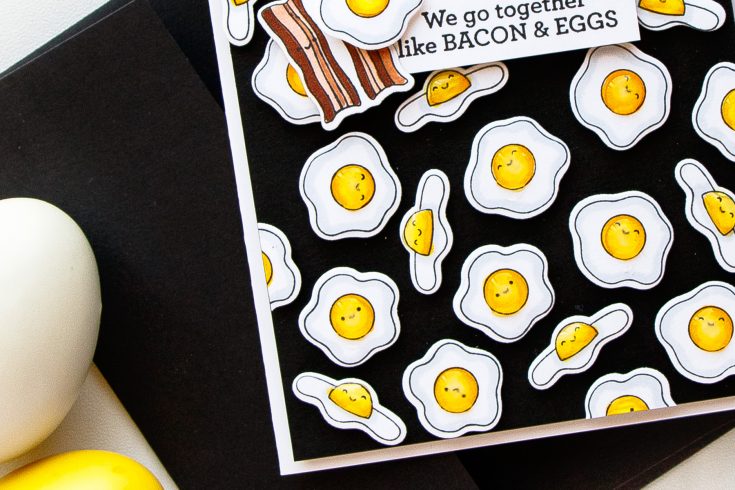
There’s also a kind of background, and I like to call that dimensional pattern stamping, is where I stamp my images but I also cut them out with coordinating dies and form a pattern or a background on my card. In this case, I also like to use foam adhesive to pop things up. I like to do that when I form clusters of images, for example I have florals and leaves and I don’t want to do masking, so I would cut the images out and foam mount onto the card, or like I am showing in this case I want to have a dark background, but I don’t want to spend the time coloring that background. It would have been harder to stamp the eggs onto a white cardstock piece, color the eggs and also color the background black. It’s much easier, if you have coordinating dies, to stamp and color the eggs, cut them out and just foam mount them onto a black background.
I used my Krystal Catana pick up tool to pick up the pieces from my desk and help me position them on the paper with the help of foam adhesive.
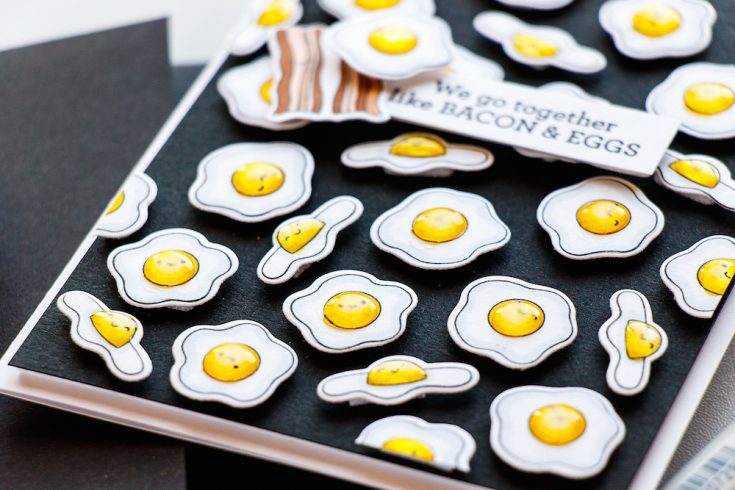
Because I want this background to look as if was cut out from a larger sheet I am trimming some of the die cuts and letting them go outside the edge or rather I’m making it look like as if they go outside the edge. To make this background appear random I’m using the usual tricks: rotating the images as I adhere them to the card, mixing my images – I have 3 different shaped eggs so I am making sure I don’t have them all grouped, but rather spread out on the background and lastly I am not adhering things going in a straight line. This is not the kind of background where I want things to have a very clean and linear look.
To create a sentiment for my card I stamped We Go together like Bacon and Eggs in black ink onto a strip of white cardstock and I also stamped some bacon onto another piece of white paper.
Once my background was finished I used fun foam and foam mounted this panel onto a white A2 card base. Lastly, I used glossy accents and I coated each egg yolk with a generous layer of glossy to create that realistic looking glossy dome to the eggs.
Have fun stamping!
WATCH THE VIDEO:
SUPPLIES:
|


Thanks for reading today and thanks to Yana for being our guest!
Blog Candy Alert!! Follow our blog via email and comment on this post for a chance to win special blog candy!
Simon’s 10 Creativation Crafty Must-Haves!
 Hello crafters! Have you been excited for all the latest-greatest coming out of Creativation 2018? I certainly am! Today I wanted to share 10 things from Creativation that are definite must-haves for your crafty arsenal!
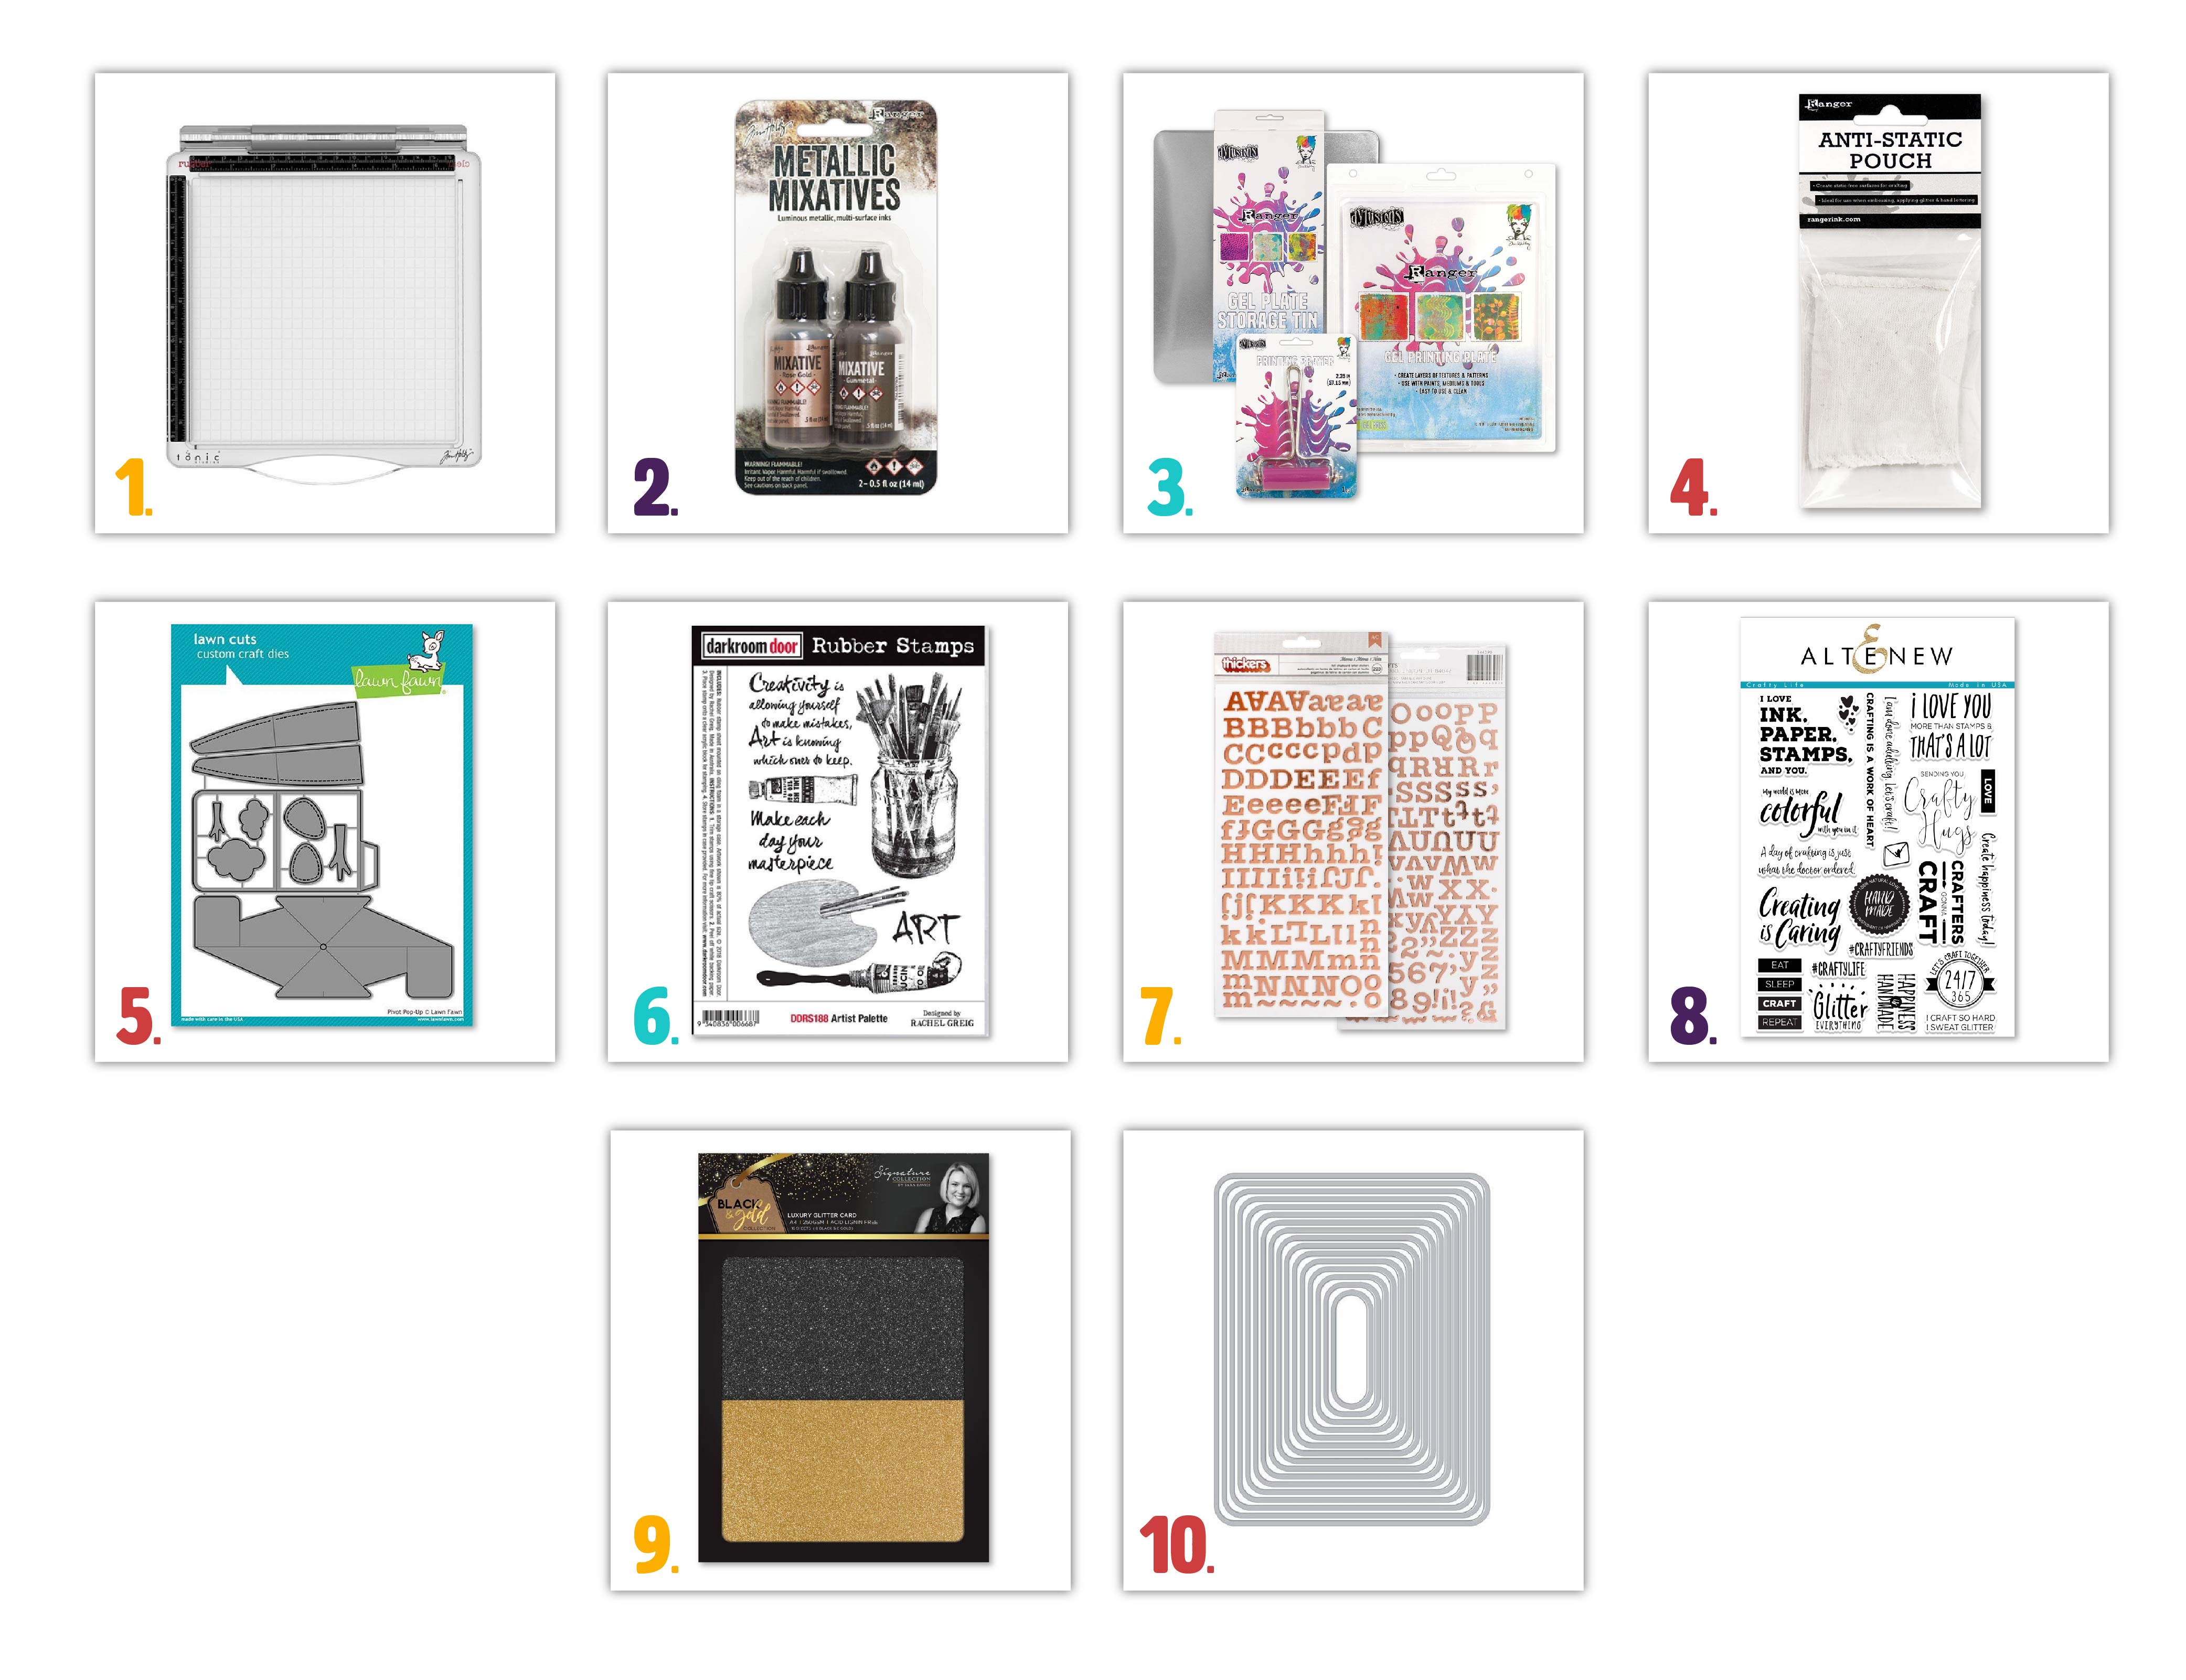
- Tim Holtz and Tonic Studios Stamp Platform: If you loved the awesome 8″ Stamp Platform from last year, you are in for a big treat! The brand new Travel Stamp Platform is the perfect companion for all your upcoming crafty adventures, retreats, classes and more! The platform footprint is 6.5 inches square, which means it is super convenient for card making and small mixed media projects. And just like it’s “big brother”, the Travel Stamp Platform has the reversible lid that allows you to use either clear or cling rubber stamps. What’s not to love about this new kid on the block?! BONUS: There is also a coordinating zipper sleeve (sold separately) available for your Travel Platform!
- Tim Holtz and Ranger Metallic Mixatives: Alcohol Inks are all the rage right now and things just got more ink-credible with the addition of new metallic Mixatives! The trendy Rose Gold adds an elegant shine, while Gunmetal has an awesome vintage vibe with its platinum-like tone! These round out the entire Metallic Mixative line up that Tim Holtz and Ranger have given us. If you are an alcohol ink lover, you’re going to NEED these new mixatives!
- Distinctly Dylusionals and Ranger Gel Plate Collection: Gel press transfer/printing techniques are fun ways to get amazing texture on your projects. Distinctly Dylusionals’ new Gel Plate collection has everything you need to get creative! You can use these Gel Plates not only with paints, but inks too! There are multiple plate sizes available, along with brayers, a Gel Plate Conditioner solution (keeps your plate clean and in tip-top-shape!); even a handy storage tin! These are a mixed media artist’s dream!
- Ranger Anti-Static Pouch:Do you struggle to get perfect, heat embossed images and end up with flecks of powder haloed around your stamping? That is most often the result of too much static in the paper or oil transferred from your fingers. Ranger just released their brand new Anti-Static Pouch and it’s a must-have for any heat embossing crafter! What’s great about a powder bag like this is that it applies powder to your paper almost effortlessly. Just pounce and rub onto the cardstock; then stamp, apply and melt your embossing powder. Once cool, brush away any remaining powder! If you’ve never tried a powder bag before you’ll want to give this one a go!
- Lawn Fawn Pivot Pop-Up die:
 This interactive die is absolutely fabulous and SO MUCH FUN! I got to play with this at Creativation and couldn’t stop opening it! If you are an interactive card fan, you’re going to want this die! The die set includes all the pieces you need to build the po- up effect (yay!). One of the most clever aspects of the entire design of this die is that when you close the card, it is completely flat, which means it will go through the mail without an issue. Lawn Fawn did an amazing job putting this Pivot Pop-Up together!
 - Darkroom Door Artist Palette stamp set: Every crafter can relate to the Artist Palette cling rubber stamp set from Darkroom Door! I really love the detail in these stamps; it even captures the highlights in the paintbrushes! And the quotes are awesome: Creativity is allowing yourself to make mistakes; Art is knowing which ones to keep… and the other… Make each day your masterpiece. We all need little reminders like this when we are having a tough time in the craft room!
- Crate Paper Rose Gold Flourish Thickers: Again, we find metallics in play with the new Crate Paper Flourish collection Thickers in a stunning rose gold foil design! These pretty, dimensional stickers have approximately 3-4 of each character. You’ll be able to spell out just about anything you need on your cards or scrapbook pages! I saw these at the trade show and loved seeing the shiny rose gold foil in person!
- Altenew Crafty Life stamp set: Altenew always has such stunning sentiment stamps in every release they roll out and this new set I spotted at Creativation won my crafty-heart instantly! Welcome in the new Crafty Life set! This 6×8 stamp set is loaded with lots of cute and unique craft-related sentiments (all in a variety of fun fonts)! A few of my favorites are: Create happiness today; I craft so hard I sweat glitter, and; I love you more than stamps & that’s a lot! This is a must-have for ALL crafters!
- Crafter’s Companion Black and Gold Luxury Cardstock:
 The word luxury doesn’t do this new Crafter’s Companion glitter paper justice! I got to touch this cardstock at Creativation and it was SO velvety and smooth, I couldn’t believe it! I’ve used lots of glitter paper before and never have I felt one like this. The glitter doesn’t rub off (YAY, extra bonus!) and it comes in a variety of colors! The Black and Gold pack is a great staple to have in your craft supplies, as we often find ourselves reaching for these classic colors often! Check out that stunning sparkle in the photo above!
 - Hero Arts Nested Rounded Rectangles: My last crafty must-have for today is the versatile Hero Arts Nested Rounded Rectangles die set! I don’t know about you, but for years I used to use a corner rounder to get that rounded edge on my panels. But they are bulky to store and you have to cut the paper down first beforehand… but this die set does it all in one fell swoop! Hooray for convenience! The best part is that Hero Arts designs these nesting dies to fit a TON of them into one set; which is an exceptional value! Basic shapes are some of the most used dies for us crafters and this set is a great addition to your stash!
I hope you have enjoyed learning a bit more about these 10 Crafty Must-Haves from Creativation 2018! Be sure to stay tuned to our store and blog, as we will be bringing in more of the amazing things from Creativation as they are released! Thanks for visiting with me today; I will see you on Monday for a new Studio Monday video!
SUPPLIES
|


Blog Candy Alert!! Follow our blog via email and comment on this post for a chance to win grab bags and blog candy! Remember to tag your awesome projects with #simonsaysstamp on social media so we can see what you are creating!


