Veggie HAPPY Encouragement Card Idea featuring Lawn Fawn!
Hi friends! Happy Thursday! I’m delighted to welcome back special guest Chari Moss to our blog today! She’s sharing this ADORABLE card featuring some new stamps and dies from Lawn Fawn! Read on to learn more and enjoy!
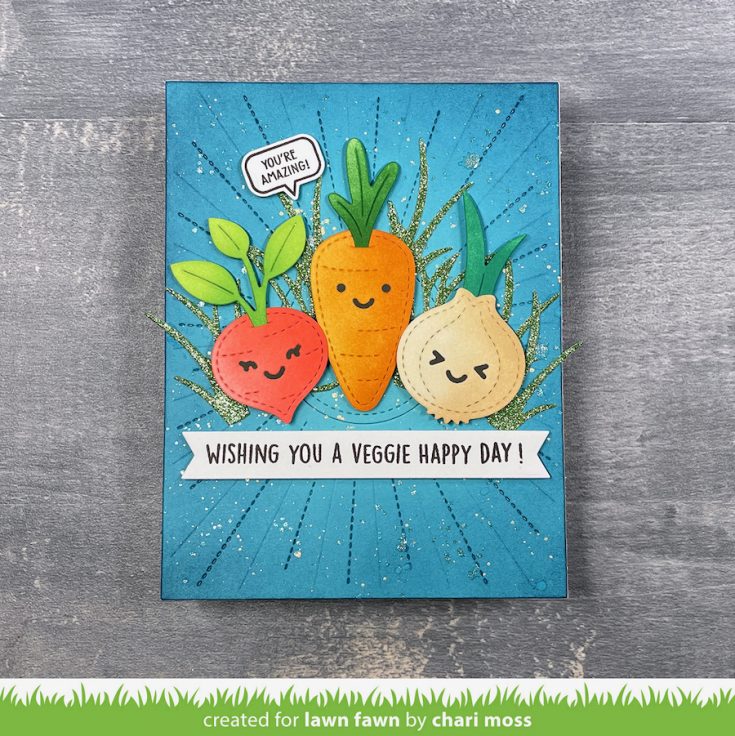
Hello Crafty Friends! Today I am sharing a fun card featuring some new Spring products from
Lawn Fawn. First up I created the background panel using the Sunburst Backdrop to die-cut a
piece of the new colored cardstock, Tide Pool. Then I added hading with uncharted mariner
Distress Ink to create a vignette effect and splatters of liquid stardust and gold watercolor for
shimmer!
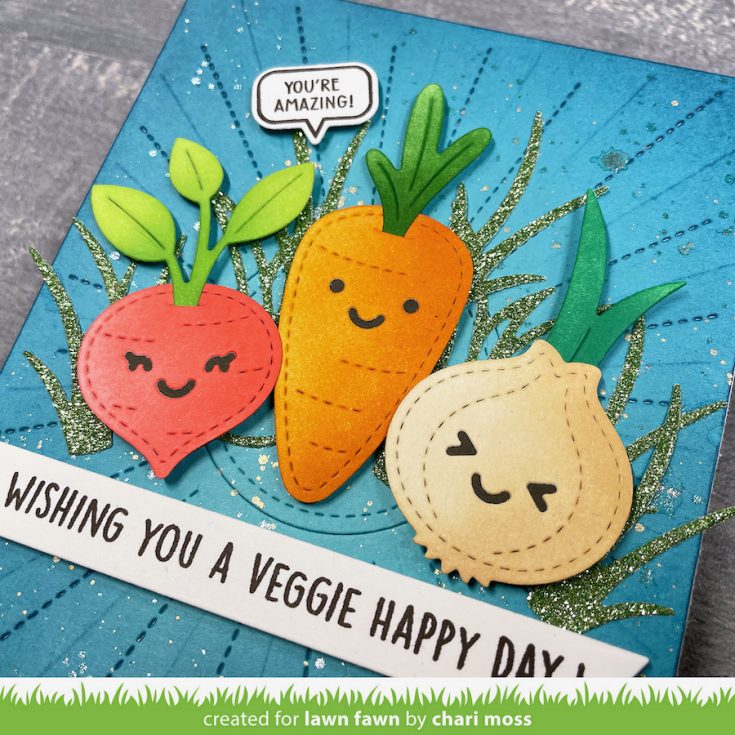
I cut all of my Stitched Root Veggies from white cardstock and then added distress inks to color
each one. For the carrot I used wild honey, rusty hinge, and mowed lawn. The radish was
created with worn lipstick, abandoned coral, and twisted citron. And finally the cutest onion ever
uses antique linen, tea dye, and lucky clover. After all the ink blending fun I added little faces
provided in the die set and backed them with Storm Cloud cardstock.
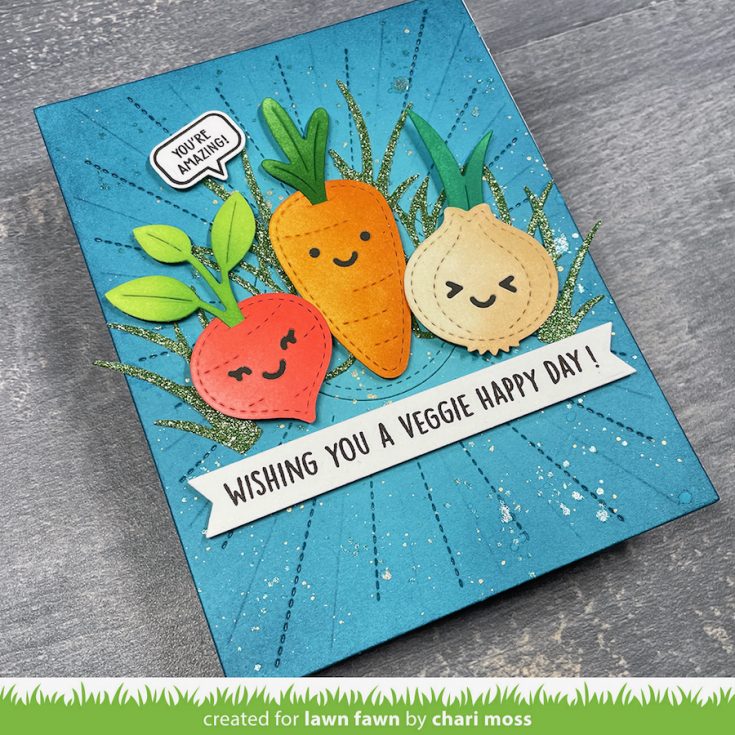
I wanted these veggies to sparkle, but no one wants to eat glitter on their veggies! However,
adding some green glittery grass behind them seemed like the perfect solution. After adding
grass, cut with the Garden Snail die set, I layered the veggies with foam adhesive in the center
of the card. I love how the sunburst backdrop and the grass really frame the veggies as the
focal point.
Finally a veggietastic card like this obviously needs a punny sentiment! I added a sentiment
from Veggie Happy to a white sentiment banner below theses happy veggies and a small
speech bubble from All The Speech Bubbles above. Check out the other fun stitched veggies
from the Lawn Fawn Spring release and have fun playing with your vegetables! Thanks so
much for joining me today!
SUPPLIES:
|


Thanks so much for stopping by today, and thanks to Chari for being our guest!
Absolutely DREAMY Card Design to Send to a Friend + Unique Copic Coloring Tips: Yippee for Yana

Hi friends! Please join me in welcoming back the oh-so-talented and amazing Yana Smakula! (Please note: our dear friend Yana is Ukrainian. To show support to our brothers and sisters in Ukraine, please see Yana’s post HERE.)
Hello, crafters, this is Yana Smakula for Simon Says Stamp! Welcome back for another Yippee For Yana video!
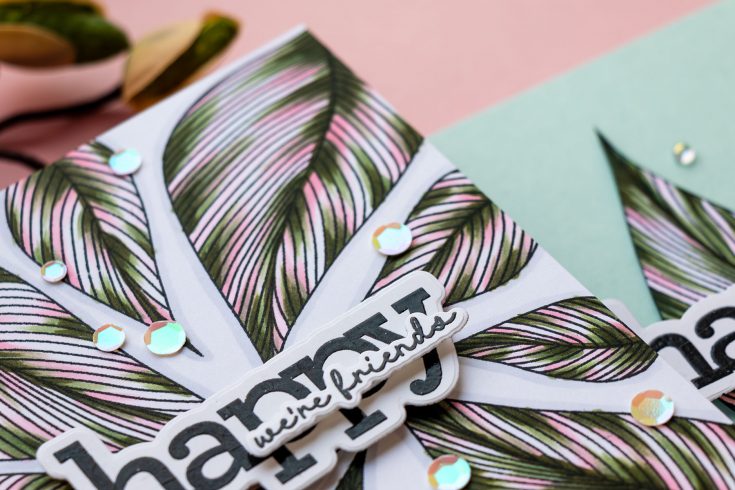
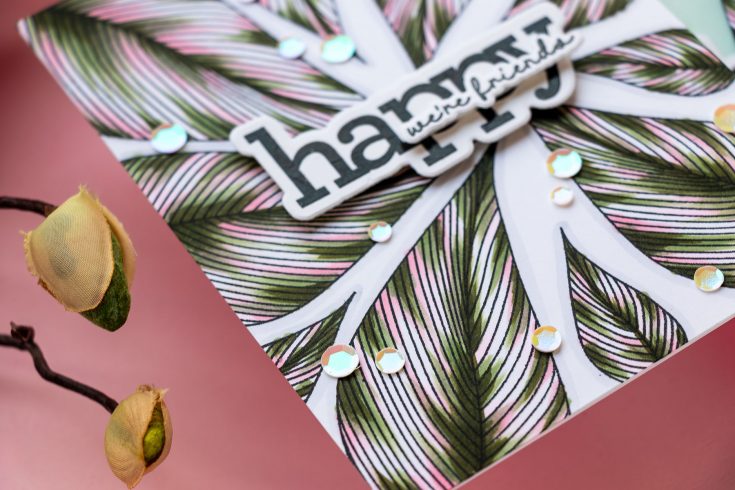
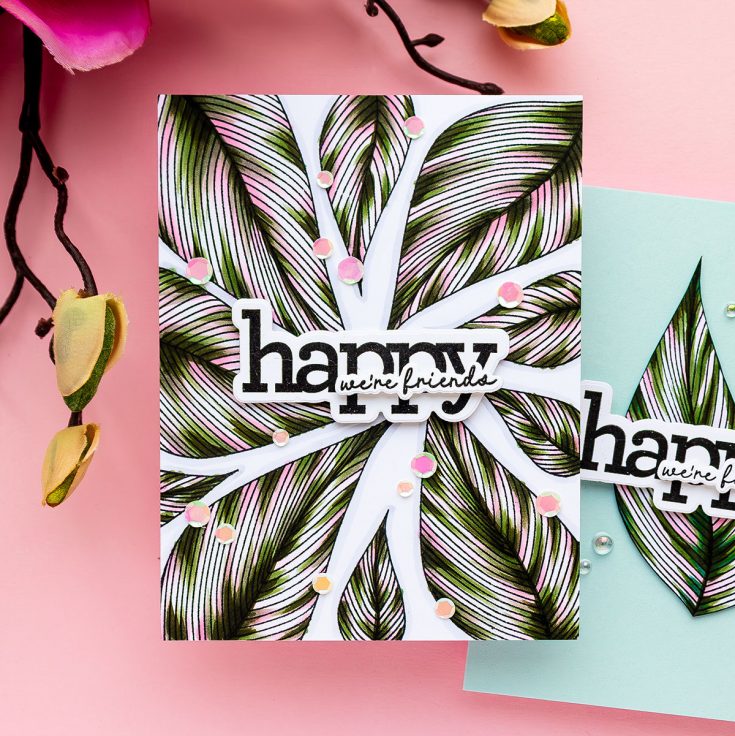
Today I invite you to join me as I do some unexpected coloring featuring the Dreamy Leaves stamp set. As I was planning my card, I went to Pinterest in search of inspiration and came across this stunning image. I loved the way the leaf was colored – it wasn’t solid green, yet it had sections of green and sections of white. It looked so clever! So I applied this coloring method to the leaves on the cards I’m sharing today.
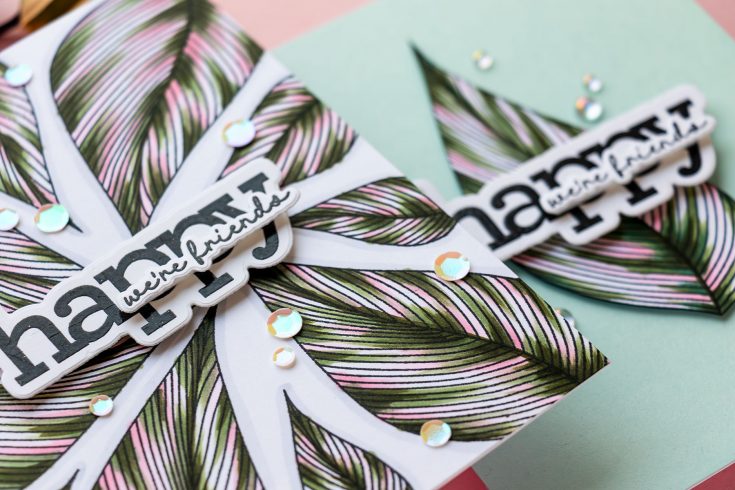
Instead of using just green and white, I also introduced pink. I used G94 as my lighter green and G99 as my darker green. The pinks were colored using RV00 and RV11. You can also experiment with a lot more vibrant and saturated pinks and many other shades of green. Purples would complement green well, too, and even teal + purple or teal + pink would make fore a fabulous tropical leaf color combo. I encourage you to try and color your leaves like this – leave some white space, add some green and bring in a pink or a purple to spice it up.
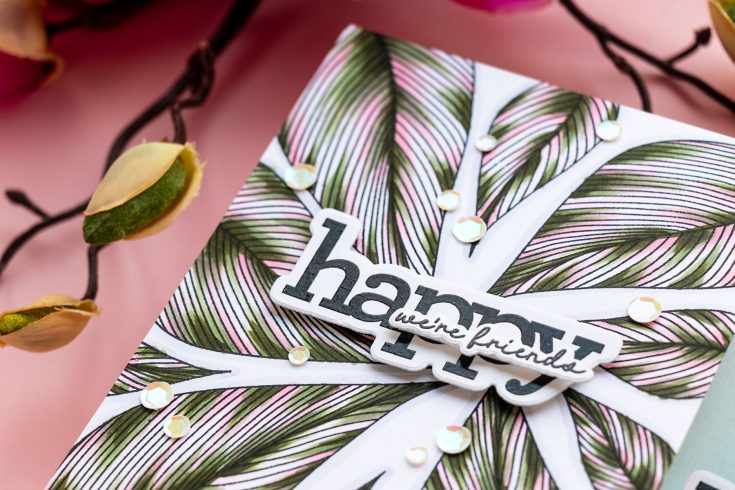
I also used a C1 marker to create visual shadow, I outlined each leaf to fake dimension on my background (as I always like to have a lot of dimension on my cards).
The sentiment was created using a Happy Combos stamp set – I stamped sentiments in VersaFine Onyx Black ink and heat set it with clear embossing powder.
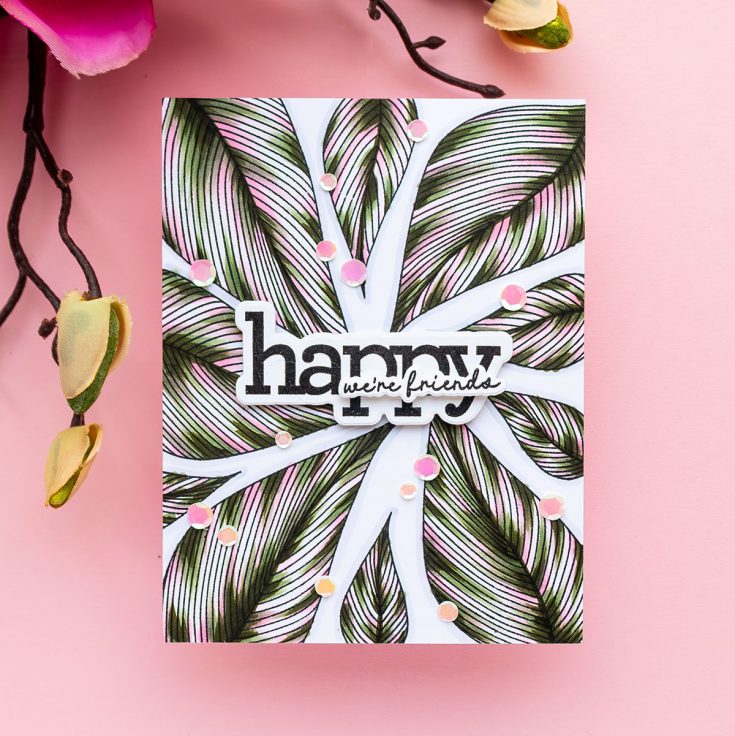
The Spellbinders Aura sequins are serving a dual purpose on this card – they are embellishing it and also hiding some coloring imperfections where I went outside the lines when adding color to the leaves.
I hope I’ve inspired you to try some unexpected coloring the next time you try to color leaves! Have fun stamping! -Yana
WATCH THE VIDEO:
SUPPLIES:
|


Thanks so much for stopping by, and thanks again to Yana for being our guest!
Ways to support Ukraine:
If you are looking for ways to support Ukraine, we encourage you to visit this page on Yana’s blog:

Can’t Miss– Paper Mosaic with Dimensional Butterflies!
Hi friends! I’m delighted to welcome back special guest Anna-Karin with this BEAUTIFUL paper mosaic art piece! Read on to learn the details of how she made it, and enjoy!

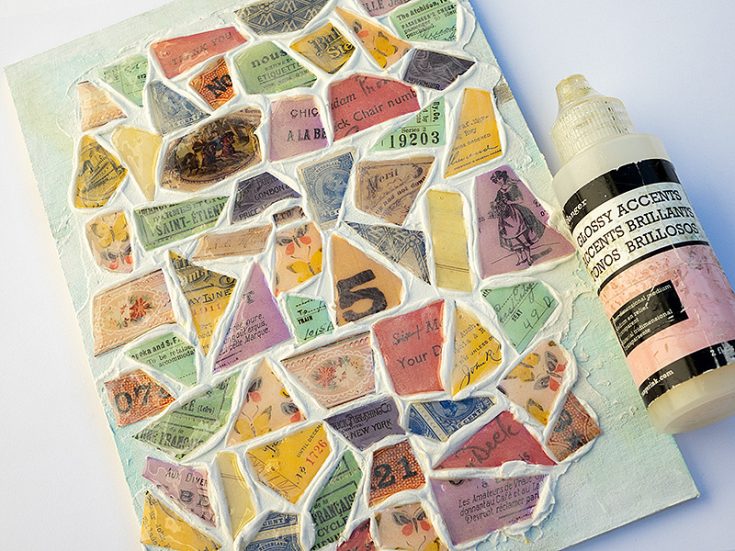
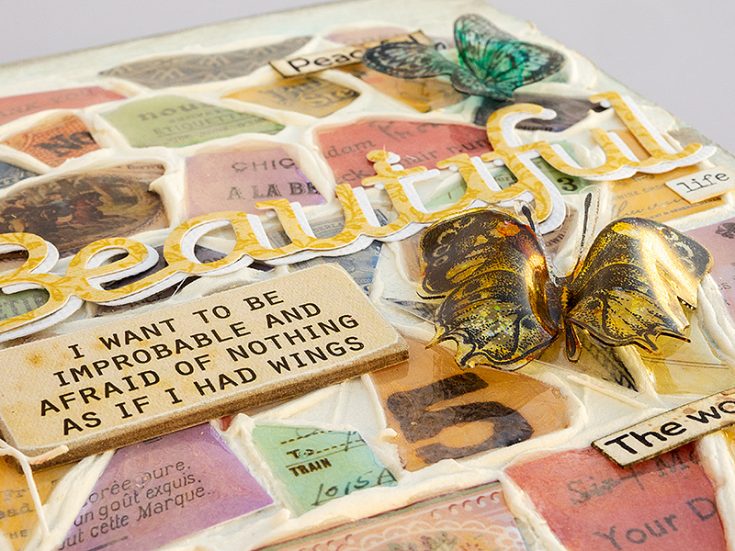
Hi everyone! It is April and almost every day there are new signs of spring. I am happy to be back here today with a new tutorial. I made a home décor piece with a paper mosaic background and dimensional butterflies fluttering about.
I used a Tim Holtz Etcetera Panel as my base since it is nice and sturdy. You can also do the techniques on other types of surfaces. The piece is 6 x 8.5 inches and very shiny, since the mosaic pieces have been covered with Glossy Accents. The butterflies are both shiny and glittery. Let’s start!


- Start by coating the Etcetera Panel with two layers of gesso, letting it dry in between.
- Paint with Distress Paint and mist with plenty of water. Let dry.
- While the paint is drying, pick out ephemera of various colors, words and images. I used mainly Tim Holtz Palette ephemera pack, but also a few of his Backdrops papers.
- Cut the pieces into a variety of shapes.
- Texture paste is going to be our grout. I mixed a tiny bit of Picket Fence and Lost Shadow paint into Distress Opaque Texture Paste. The paint makes the paste completely opaque. If you want greyer grout, add Hickory Smoke paint instead. Apply the grout/texture paste with a palette knife. Press the mosaic pieces into the paste. Try to vary the colors. Sometimes, you will need to trim a piece so that it will fit.


- Continue until you have covered most of the background. If you want to cover the entire background, you can of course do that too. Leave to dry. It will take a while.
- When the paste was totally dry, I decided to wash the piece with white paint, to tone down the colors a little. Use watered-down Picked Fence paint for that.
- Coat the paper mosaic pieces with a thick layer of Glossy Accents. Avoid getting Glossy Accents on the grout since we want that to remain matte. Leave to dry. It will take quite a while.
- Dry brush Pumice Stone and a little Hickory Smoke around the edges.


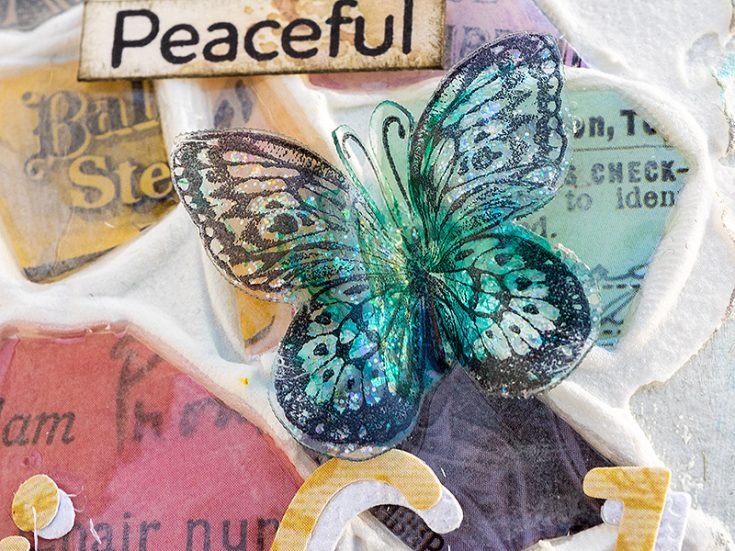
- Now to the butterflies. Stamp butterflies from Simon Says Stamp Beautiful Butterflies on Wendy Vecchi Clearly For Art Modeling Film, with Jet Black Stazon ink.
- Color them at the back with alcohol ink. It is important to work on the back to avoid smearing the stamped impression. I used Butterscotch, Latte, Patina and Turquoise ink. If the ink is too dark; you can drag an ink-applicator with felt and a few drops of Blending Solution on top to lighten it. Cut out.
- Gently heat the wings with Ranger’s heat tool. Be very careful not to burn yourself. Work one wing at a time and shape the wings until you are happy with how they look.


- For a glittery finish, apply Moon Dust Stickles Glitter Gel to the back of the butterflies.
- Glue the butterflies to the panel.
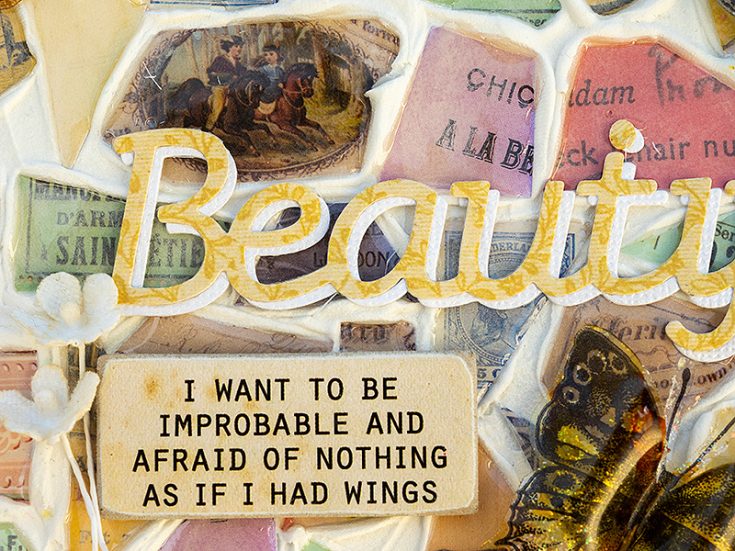


- The title was die cut with Simon Says Stamp Beautiful die, from Backdrops vol. 4 paper and from Simon Says Stamp Glimmery Cardstock. Off-set slightly when you glue them to the background. Add a Tim Holtz idea-ology Quote Chip Label and flowers from Bouquet Findings.
- The glitter gives a great effect to the butterflies. The stamped sentiments come from Simon Says Stamp Forest Scenery.
- I glued the largest butterfly in the left-hand corner so that it appears to fly into the panel.
- The paper mosaic is very shiny and contrasts nicely with the matte grout. It is difficult to capture the effect on a photo.


- Some of the mosaic pieces are a little larger than the others, since I wanted to keep the whole images. I also used a couple of Tim Holtz Small Talk Stickers, here combined with a sentiment stamped with the Simon Says Stamp Forest Scenery set.
- Magical was stamped on the background without reinking in between. I also used a Tim Holtz Quote Flair.
The butterflies are quite dimensional and the Clearly For Art Modeling Film will keep its shape perfectly.
SUPPLIES:
|


Thanks so much for stopping by, and thanks to Anna-Karin for being our guest!


