No Line Coloring with Bouquet Builder 2
Hi friends! Happy Thursday and happy Waffle Flower release day! We’re honored to have special guest Channin Pelletier with us on the blog to showcase some gorgeous brand new Waffle Flower products! Be sure to watch the video and enjoy!

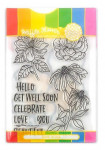
Hello everyone! It’s Channin here and I am thrilled to with you all at Simon Says Stamp sharing a video featuring a brand new set from Waffle Flower Craft’s July Release. In today’s video, I demo some no-line coloring with Tombow Dual Brush Pens and the beautiful new Bouquet Builder 2 Stamp Set!
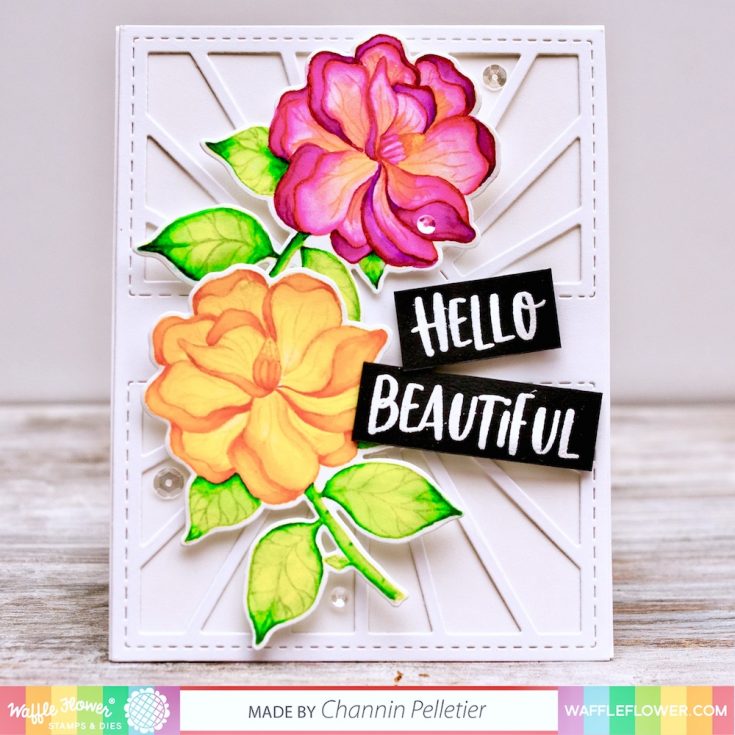
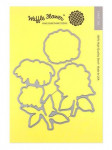
First, I stamped one of the flowers from the Bouquet Builder 2 Stamp Set twice in Antique Linen Distress Ink onto Canson Bristol paper. I then watercolored the images in with Tombow Dual Brush Pens, water, and a brush. Once I had finished the coloring, I die cut the flowers out with the matching dies. Next, I die cut a background panel using the Sunshine Panel Die from white cardstock. I then stamped and white heat embossed a sentiment from the Bouquet Builder 2 Stamp set onto black cardstock. I then trimmed the sentiment down and added foam tape to the back. Next, I assembled my card by adhering the sunshine panel to an A2 top-folding card base. I then adhered my flowers and sentiment with foam tape and then finished my card with some clear sequins.
I hope you enjoyed my card and video! Thanks so much for stopping by!
~Channin
WATCH THE VIDEO:
SUPPLIES:
|


Thanks so much for stopping by and thanks to Channin for being our guest!

Altenew July 2018 Stencil Release Blog Hop
Welcome everyone to the Altenew July stencil release blog hop!! If you’re coming from Crystals Thompson’s blog, then you’re in the right place.
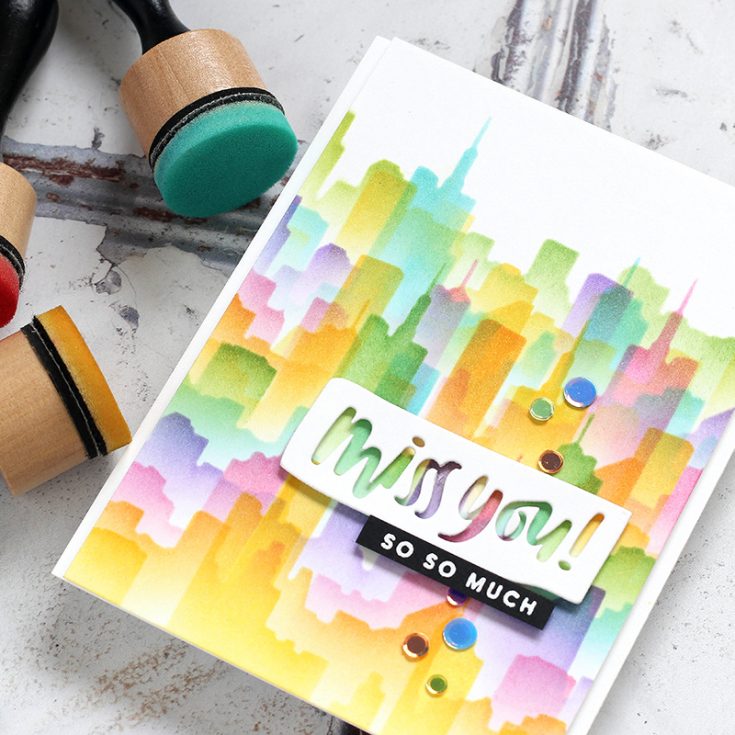
I’ve created two cards using the City Scene and Elegant Swirls stencils with the same selection of Distress inks but different techniques. My first card uses the City Scene stencil where I’ve used a blending tool to create layers of colorful buildings. This card reminds me of a college student moving to the city for school or career.
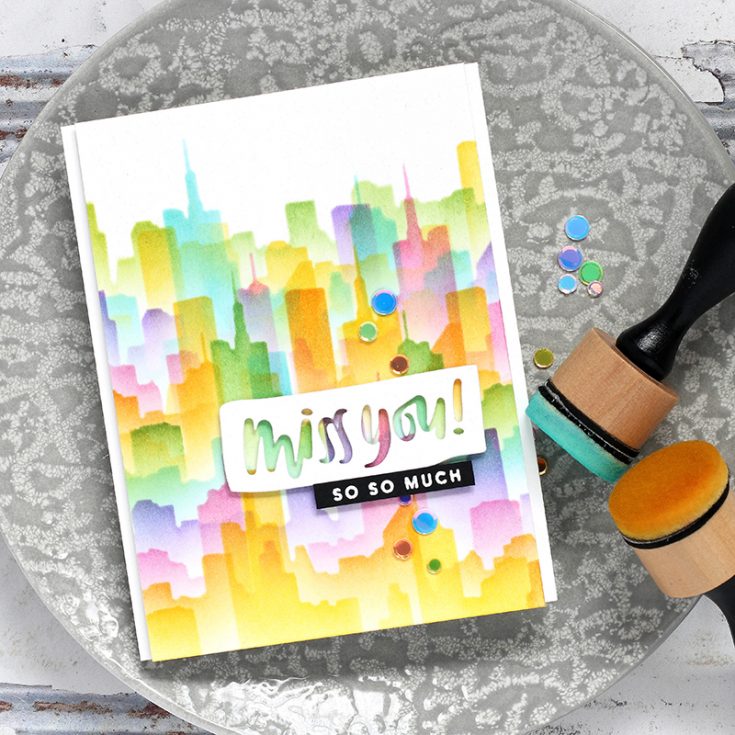
I was sure to use colors that blend well together with each layer. I started at the bottom of my cardstock with Squeezed Lemonade, then Spiced Marmalade, Picked Raspberry, Wilted Violet, Peacock Feathers, and finally Mowed Lawn. I continued up the card with the same order of colors until I got to the top. I finished the card by using the Simon Says Stamp Miss You die and a stamped greeting.
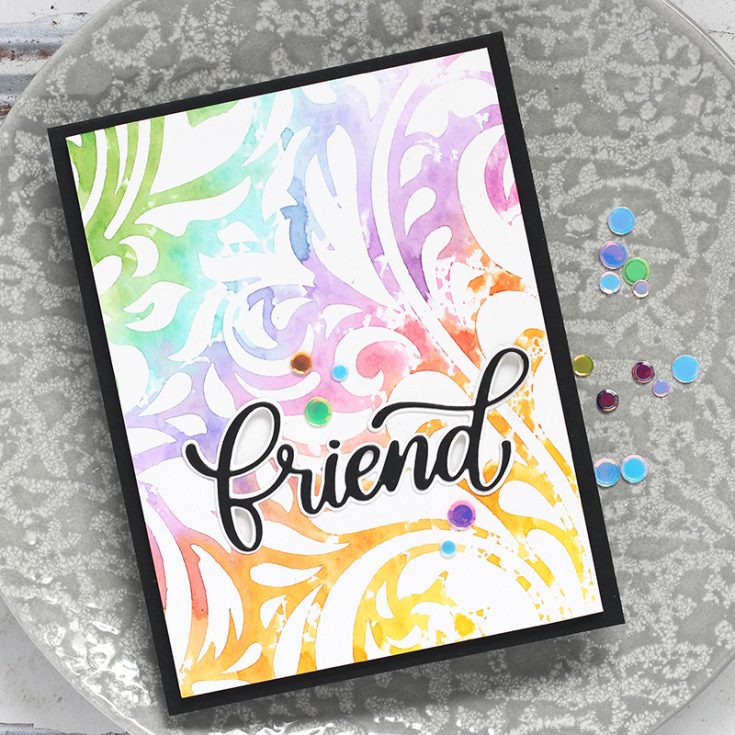
My next card uses the Elegant Swirl stencil where I’ve tapped the ink pads directly onto the stencil, spritzed it with water and pressed my paper onto the ink stencil. This gives me a colorful image of the stencil. I finished the card off by using the Simon Says Stamp two part Friend die and mounted it to a black card.
I filmed a video or how I made the City Scene stenciled card, you can view it below or on our YouTube channel HERE.
We are the last stop of the hop and hope you’ve enjoyed all the inspiration along your way today. If you’ve missed any stops, I’ve include a complete list of of the blogs below.
Thanks for stopping by!!
|


Monthly Mail Art with Kristina Werner – July 2018
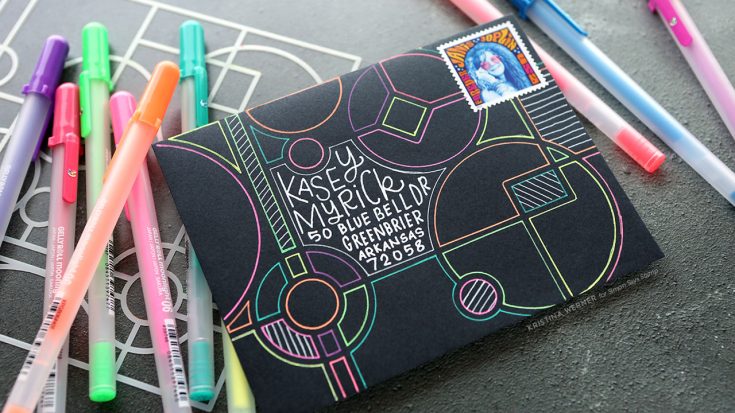
Hello, all! Kristina here with another Monthly Mail Art! This month’s envelope is super simple and easy–just a few supplies!
I used a black envelope (any dark surface will do), the Line Dance stencil, and different colors of Gelly Roll pens.
First I taped the stencil to the envelope to keep it in place while I worked. I traced the stencil design with alternating colors of gel pen, making sure to avoid neighboring sections using the same color. I planned to use the center-left section as the area for the mailing address, so I outlined that section with a fine white Gelly Roll pen. I also added thin white stripes to some of the smaller sections.
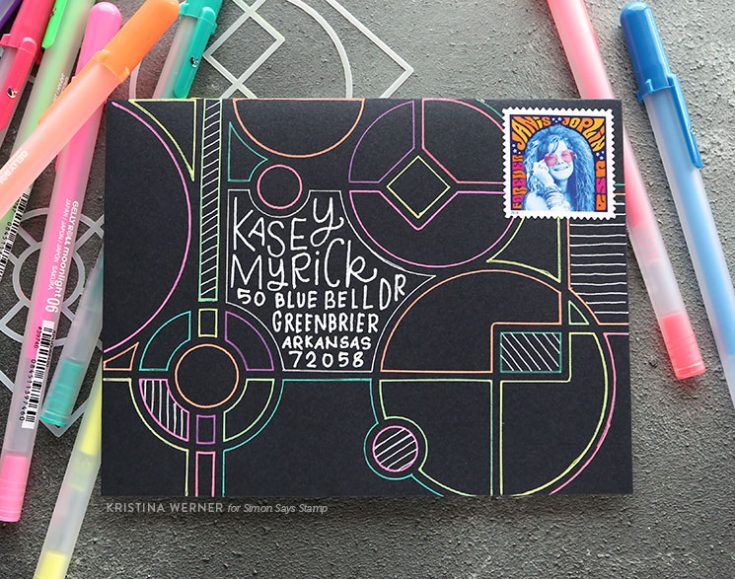
After removing the stencil, I penciled in the mailing address and then went over it with a bold white Gelly Roll pen. Super easy and quick!
NOTE: Mailing address used with permission. Thanks, Kasey!
Thanks for stopping by!
Supplies
|


