Studio Monday with Nina-Marie: Leaf Launcher Surprise Interactive Card!

Hello crafters! It’s Nina-Marie here with you today, sharing a super-fun interactive card that features Sunny Studio and Lawn Fawn products! The cool thing about today’s card is that the interactive element does not require any special dies or products.
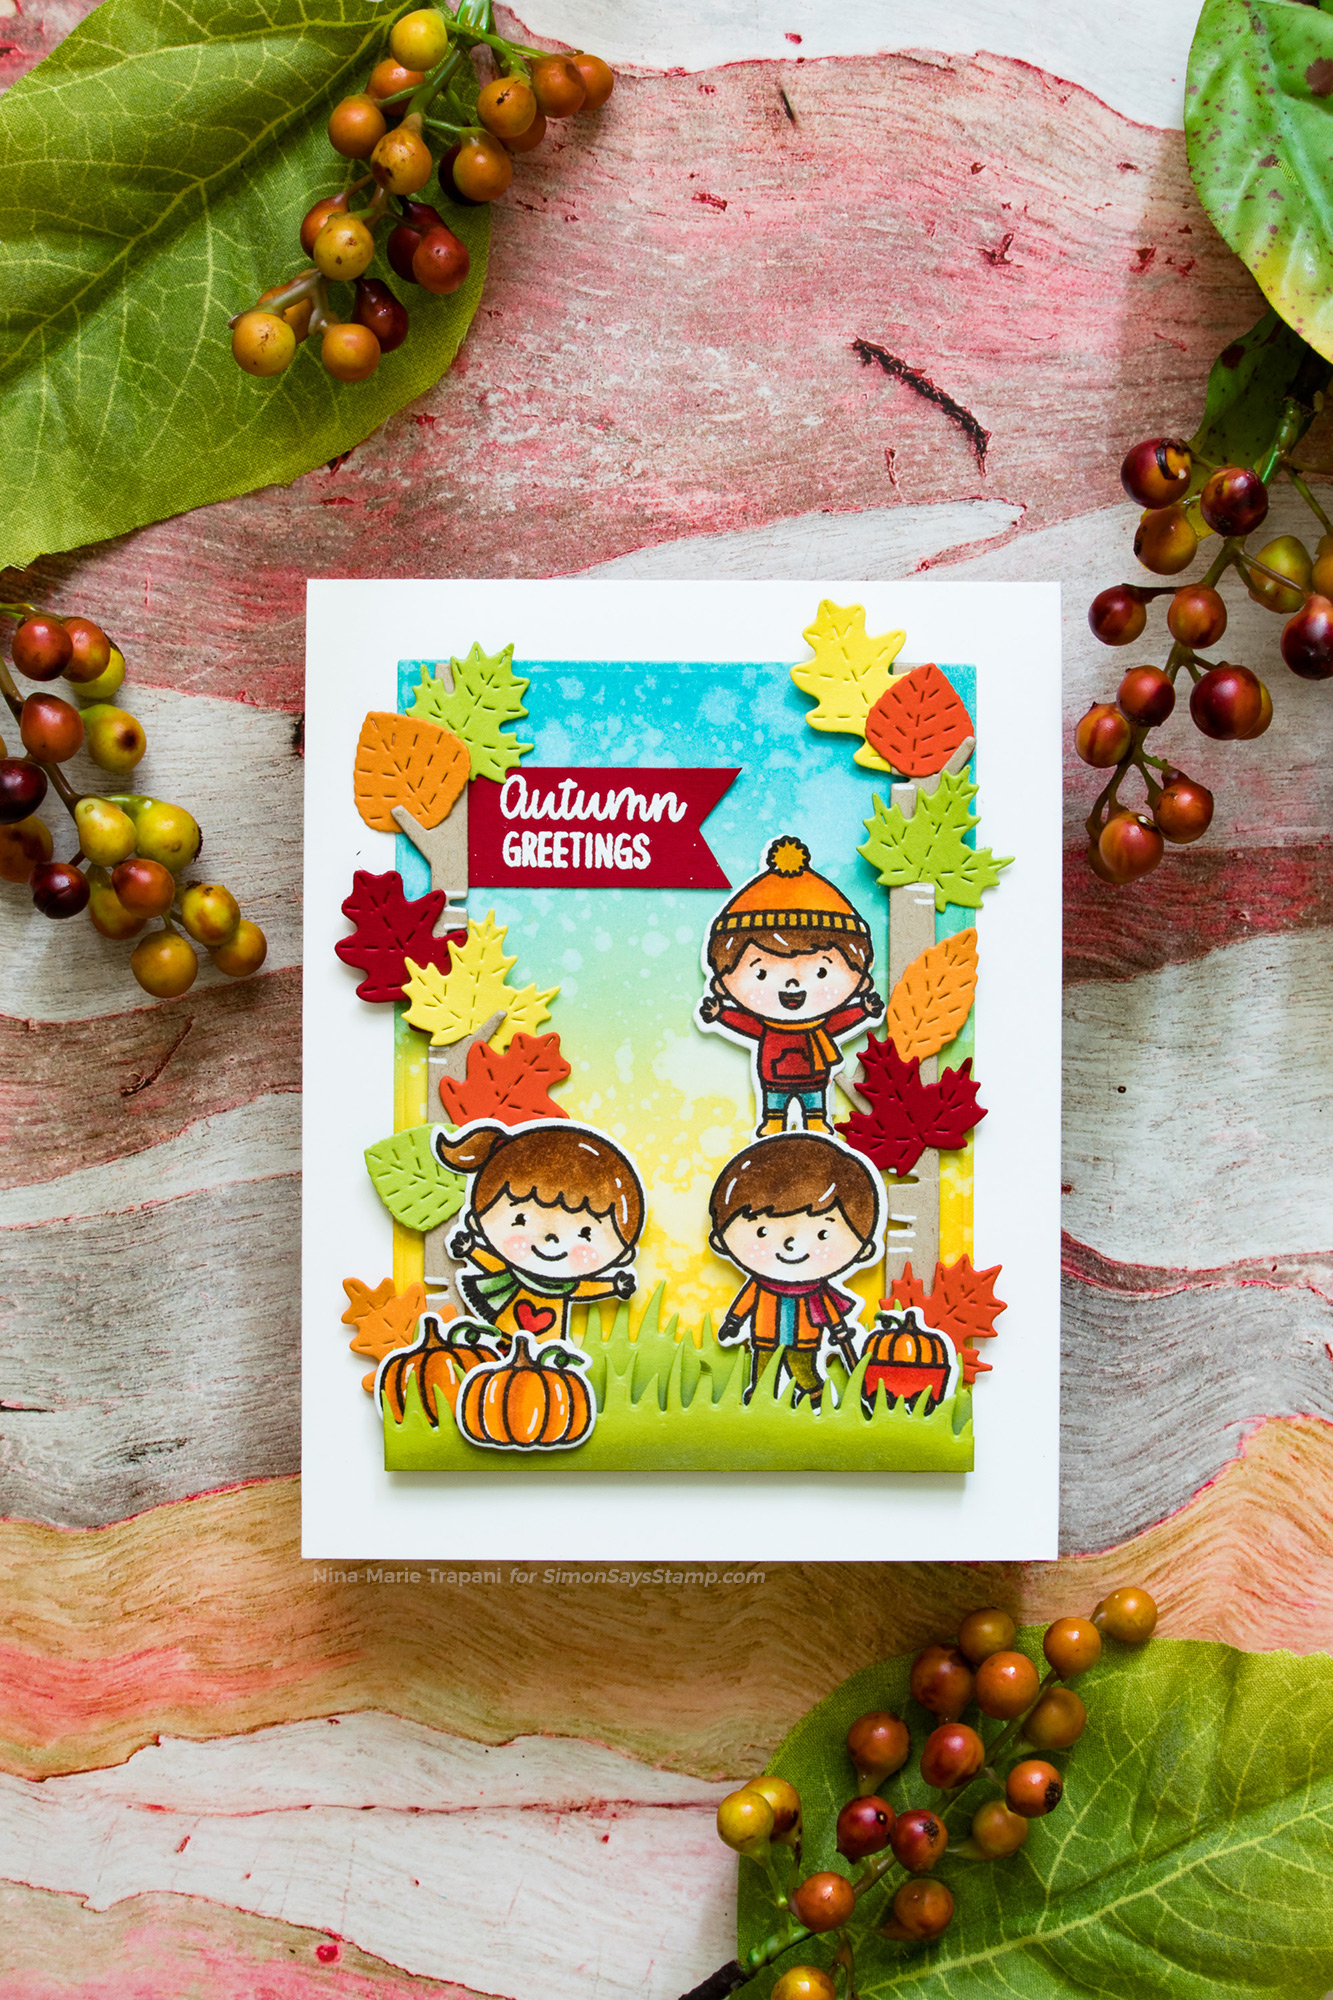
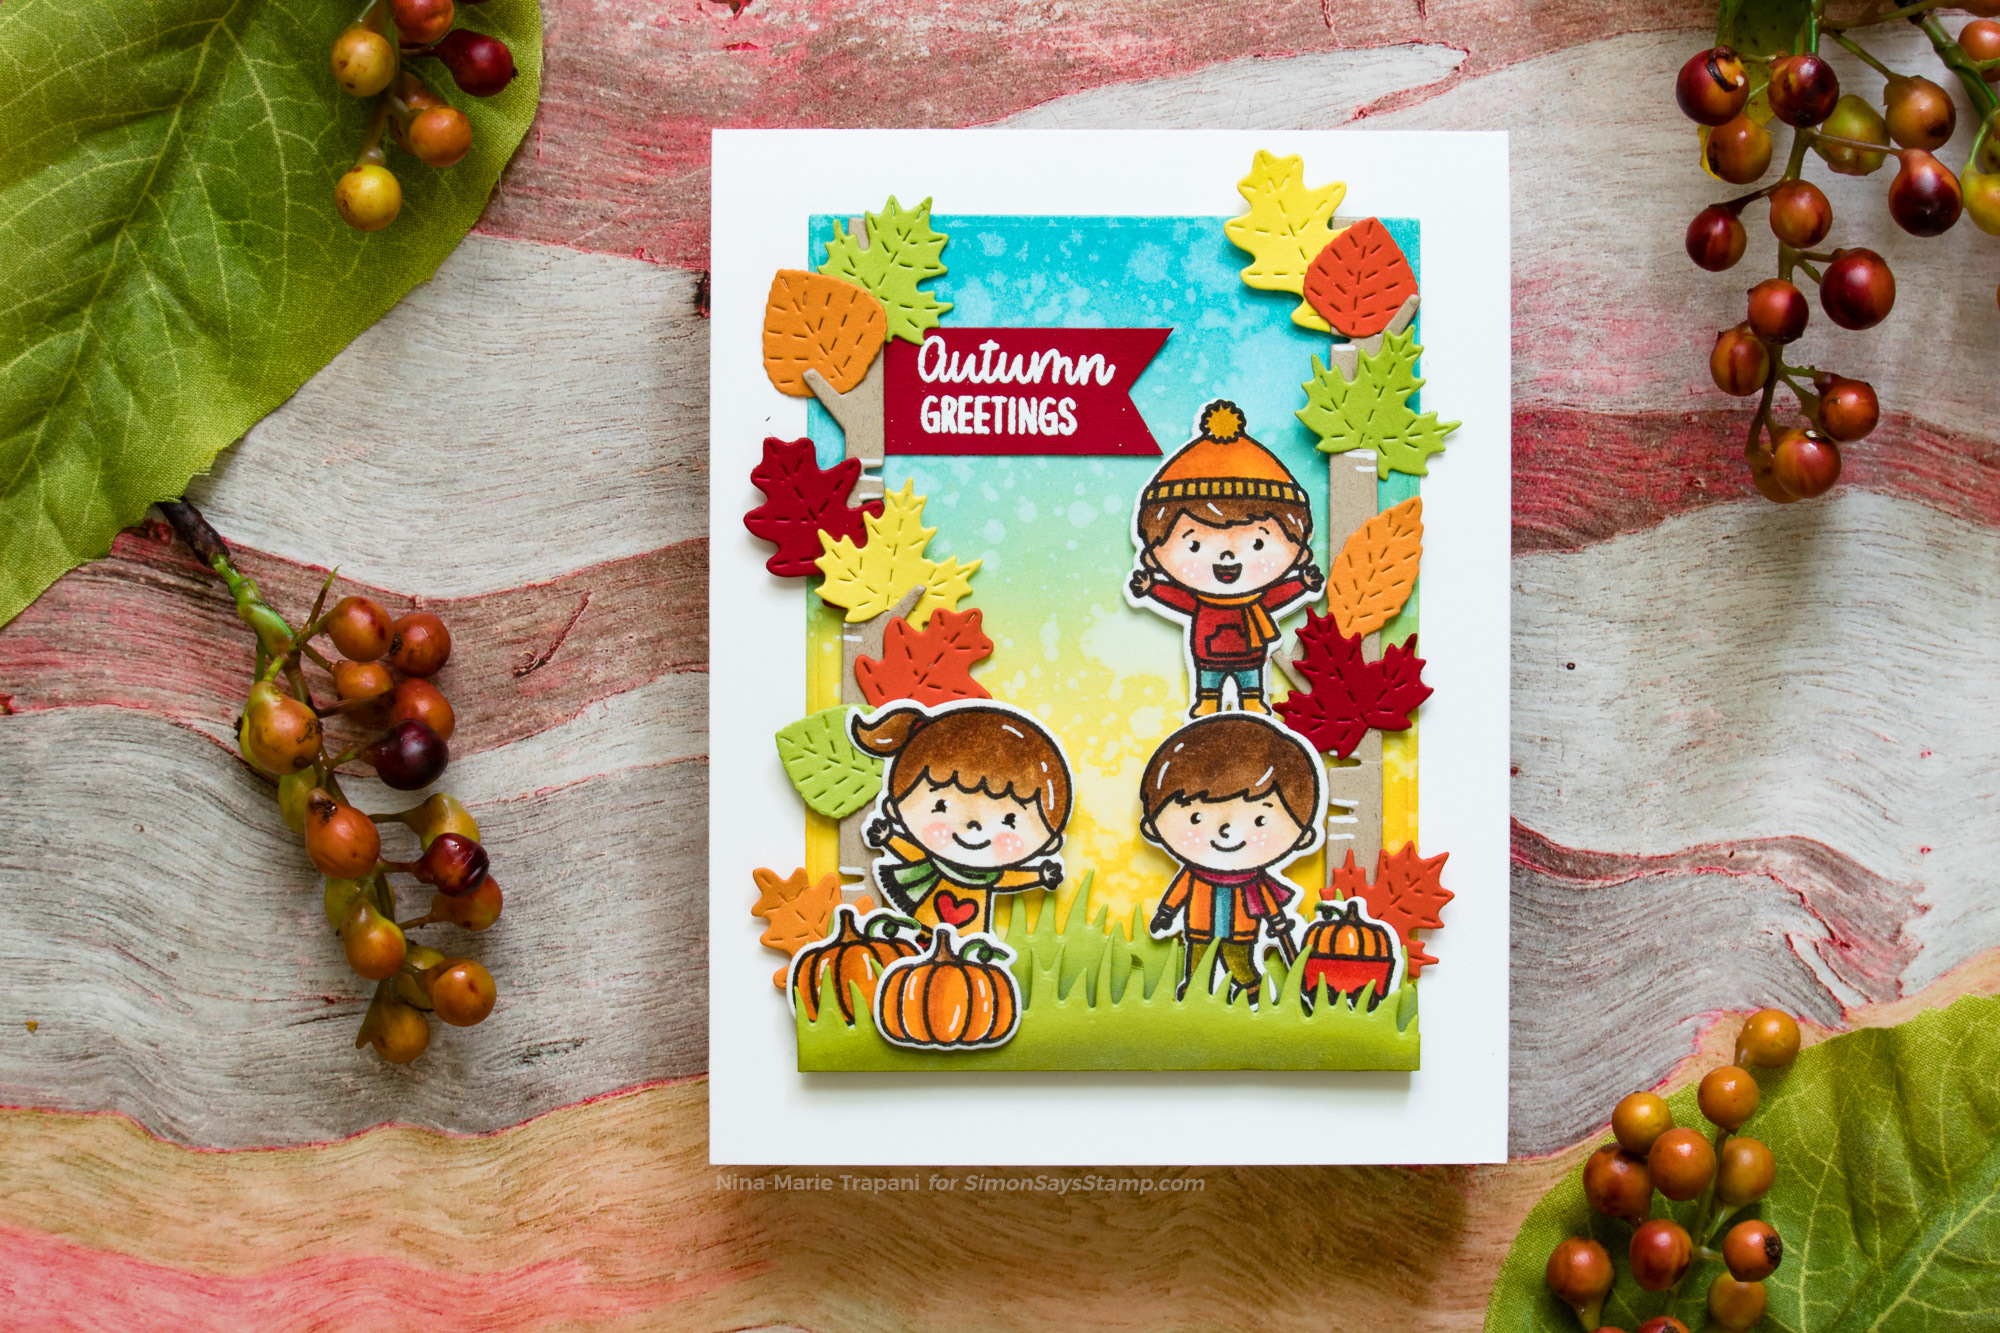
We’re less than a month away from the first day of Autumn… which is quite hard to believe! The Fall Kiddos stamp set from Sunny Studio really captures the joy of Fall with the sweet images and mix-n-match sentiments. In my interactive card, I used quite a few of them.
All of the colors used throughout this card are anchored by the brand new Knit Picky 6×6 paper pad by Lawn Fawn. I love the bright, Fall-inspired colors in these papers and used the multicolored leaf pattern as my guide for selecting the Copic markers I used in coloring the kids.

I built a scene for the kids using dies from Lawn Fawn and Simon Says Stamp. Here are some details on what I did:
- The grass is cut from Green Apple cardstock with the Lawn Fawn Grassy Hillsides die set and blended with Peeled Paint Distress Oxide Ink.
- The trees are from the Lawn Fawn Birch Trees die set and cut from Neenah cardstock. There are highlights on the trees, drawn with a Gelly Roll white pen.
- On each tree are a variety of colored leaves that I cut with the Simon Says Stamp Stitched Leaf Wreath die from different colors of cardstock.
- Behind my scene is a background that I ink blended with Wild Honey and Broken China Distress Oxide Inks. I added splatters with some water for texture.
- I also included a greeting from the Fall Kiddos stamp set and tucked it under one of the trees.
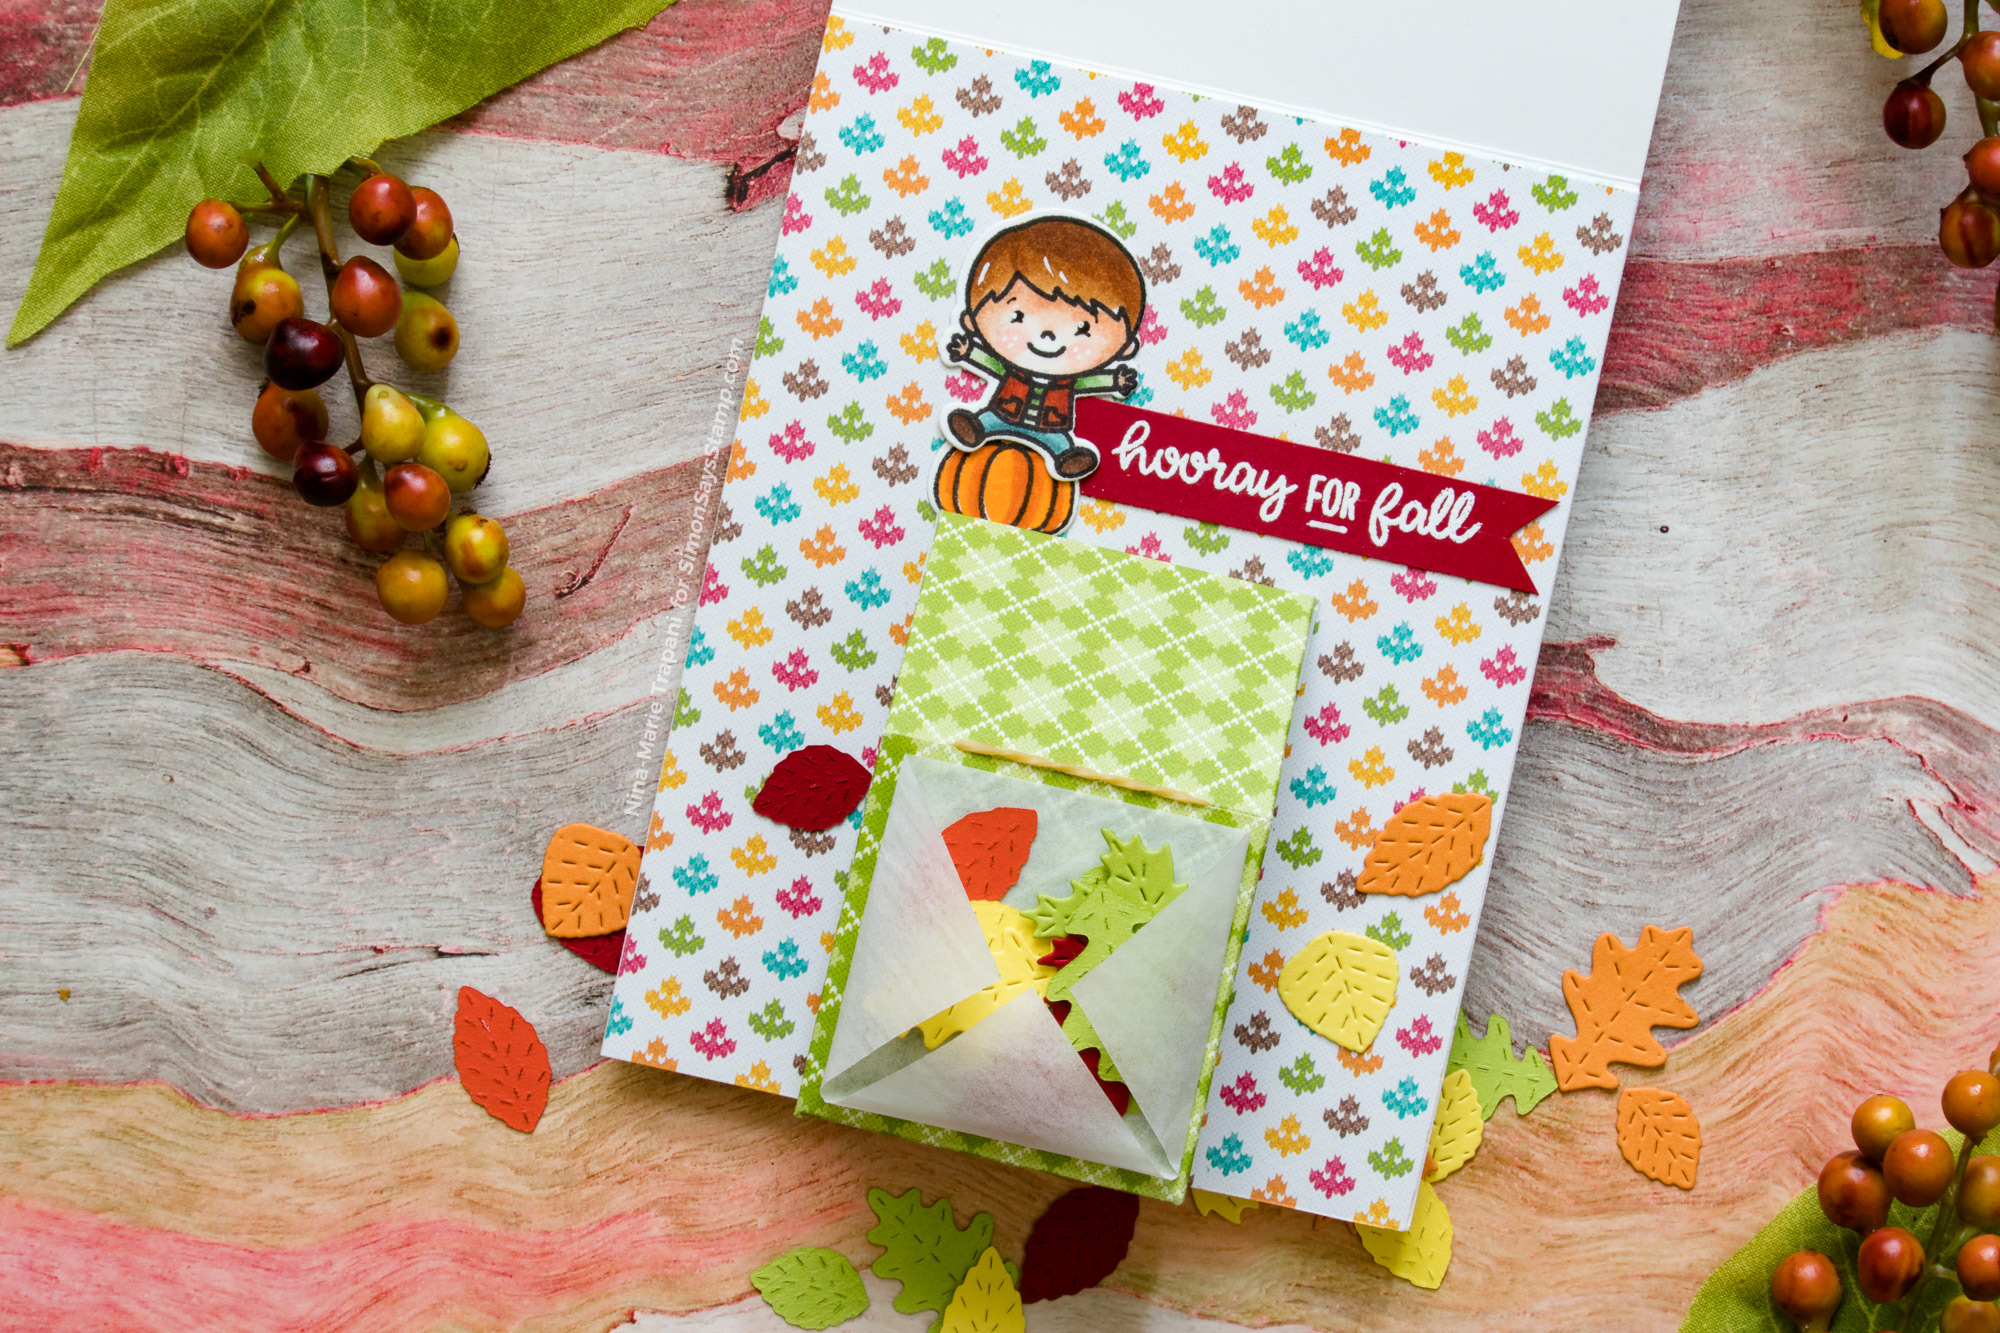
Now you are probably looking at this card and wondering why I would consider this an interactive card… because nothing moves! Well, that’s where the surprise comes in to play! The interative element is on the INSIDE! When you open the card…
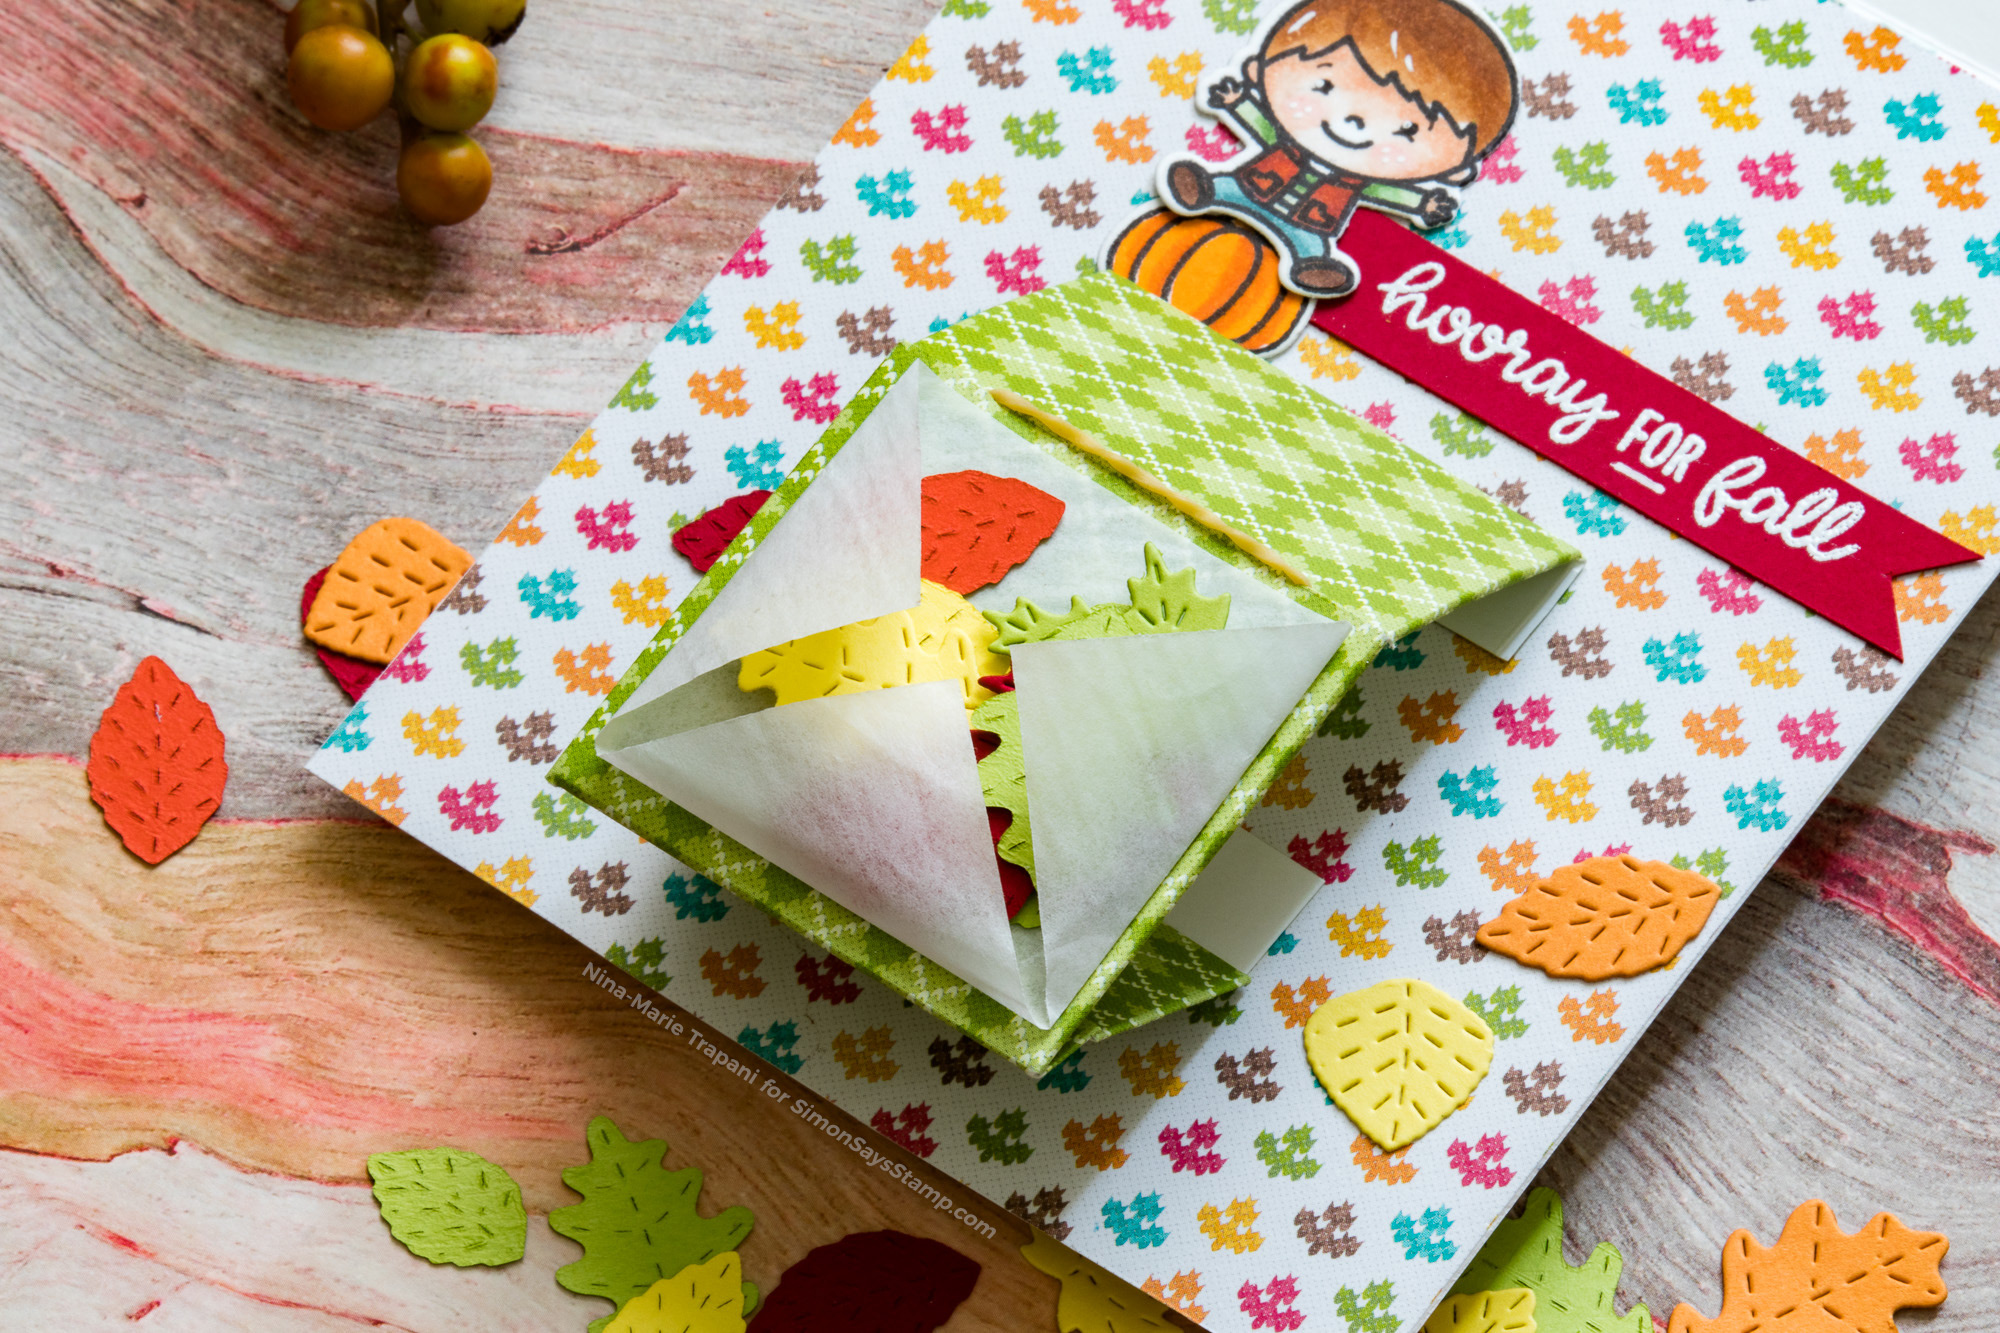
Ta da! Inside the card is a spring-loaded “leaf launcher”, that flings a scattering of Fall leaves out at the receipient! This is SO easy to make and so much fun. I have a video below showing you the step-by-step details on how to put it together, so that you can surprise your friends with a card full of happiness for the Autumn season!
I hope you’re inspired by today’s tutorial featuring some of these adorable products from Lawn Fawn and Sunny Studio! Thanks so much for stopping by and visiting with me today!
WATCH THE VIDEO
SUPPLIES USED
|


Blog Candy Alert!! Follow our blog via email and comment on this post for a chance to win special blog candy!
Together Burlap Panel by Richele Christensen
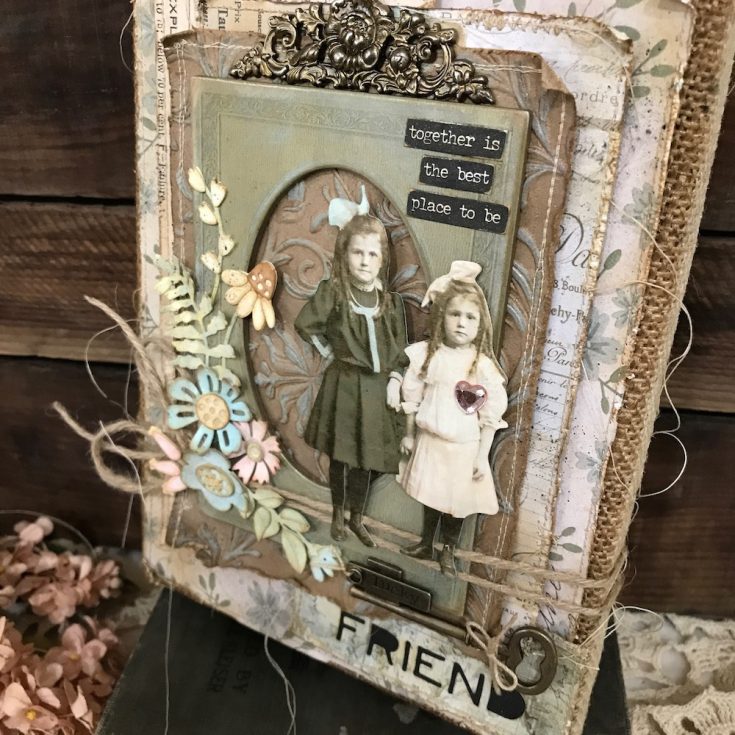
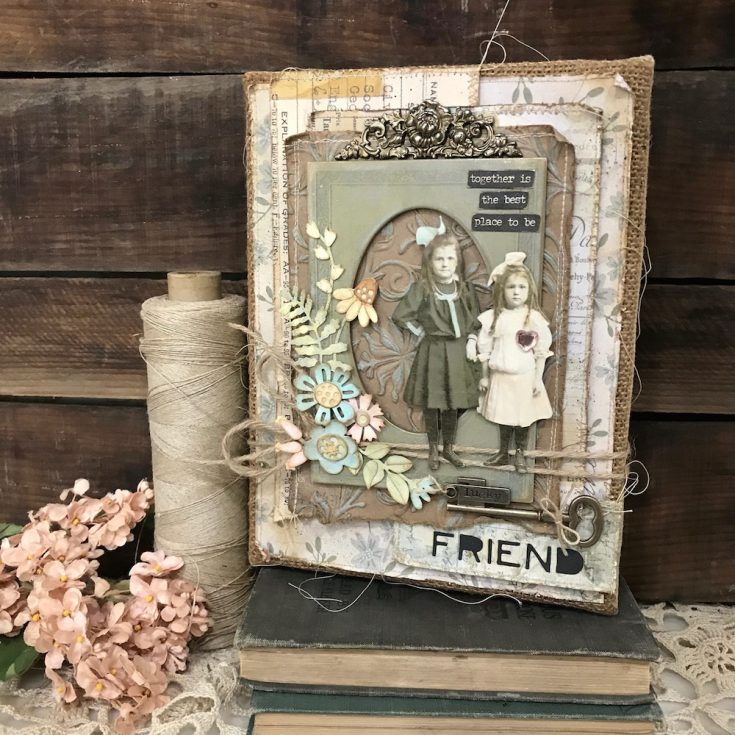
Hi friends! Happy Sunday! Please join me in a warm welcome back to special guest Richele Christensen! She’s made this gorgeous burlap panel that would be a fabulous gift, don’t you think?! Read on to see step by step photos of the creation of this project, and enjoy!
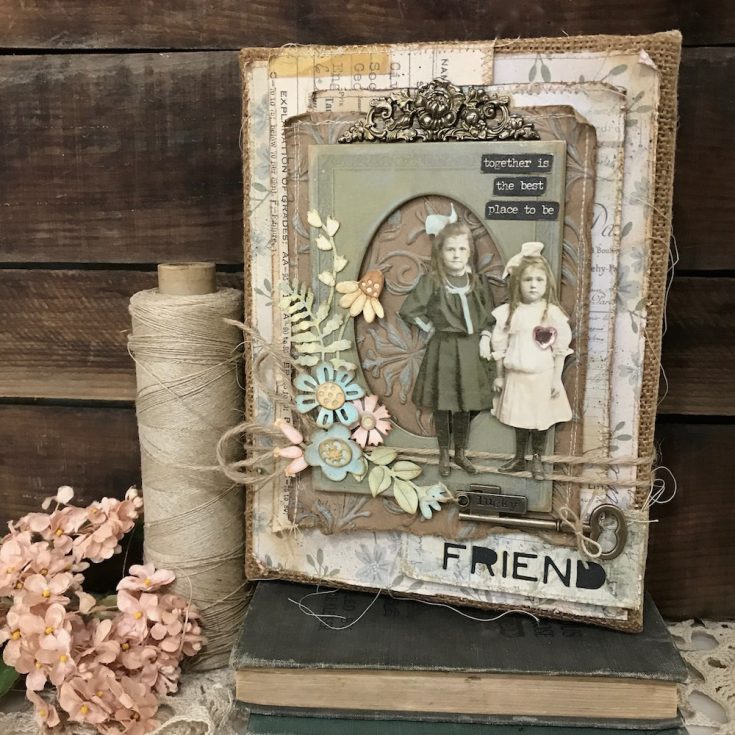
Hello, friends, it’s Richele. Today I’d like to share a Burlap Panel using some of the new Tim Holtz Alteration Dies from Sizzix. I love dies, they can be used is so many different ways.
INSTRUCTIONS:
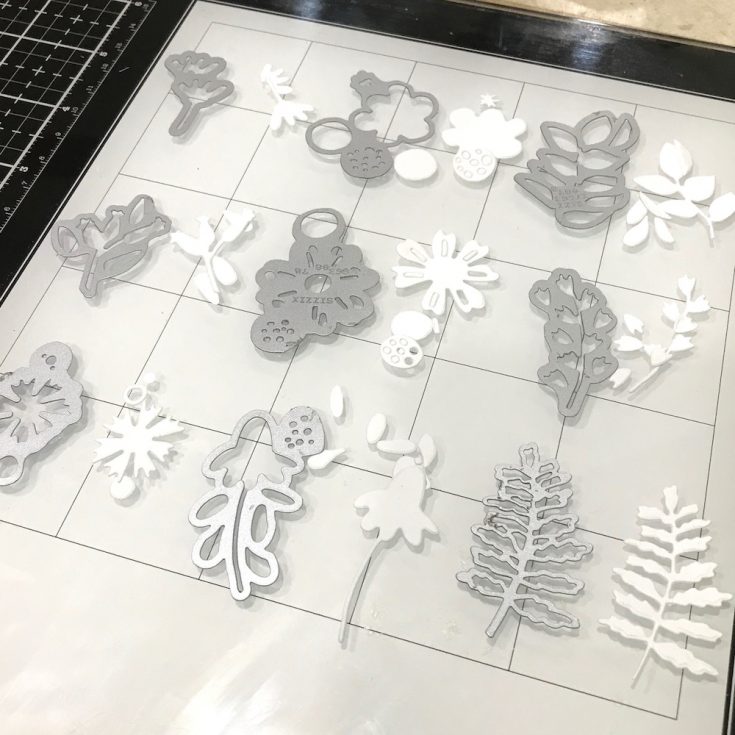
1. Die cut Funky Foliage from Rangers Watercolor Cardstock.
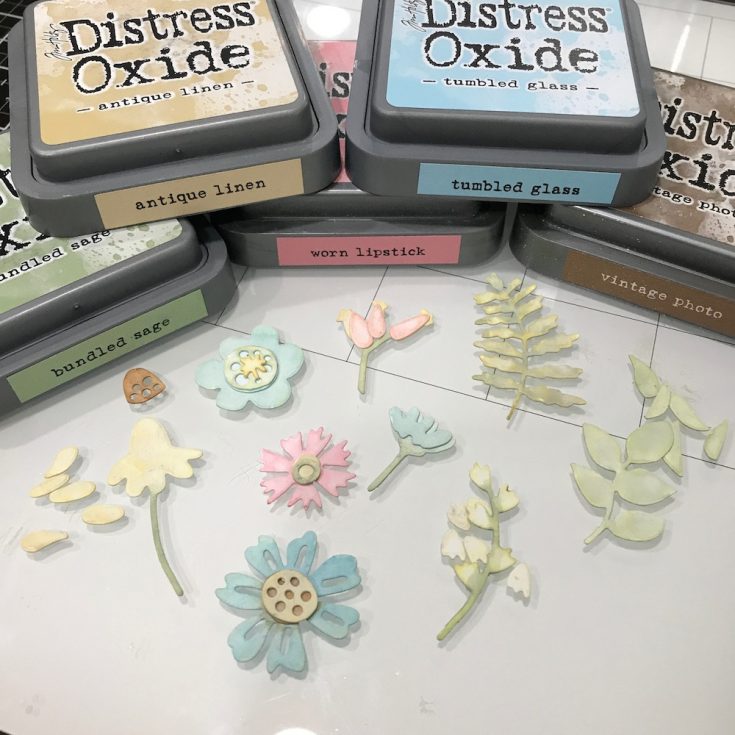
2. Color the flowers and leaves by applying Distress Oxide Inks directly to Glass Media Mat, pick up ink with Waterbrush, color Funky Foliage and dry with heat tool. I used Oxides Inks for a soft and shabby look.
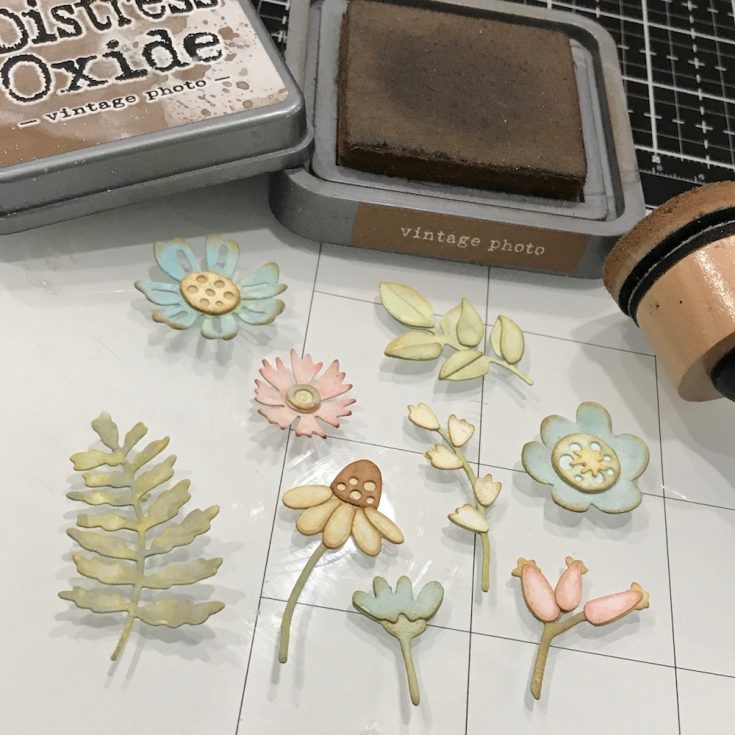
3. Ink edges with Distress Oxide Ink on an Ink Blending Tool.

4. Mist foliage with Distress Mica Spray and Dry with a heat tool. The shimmer will show once the spray dries.
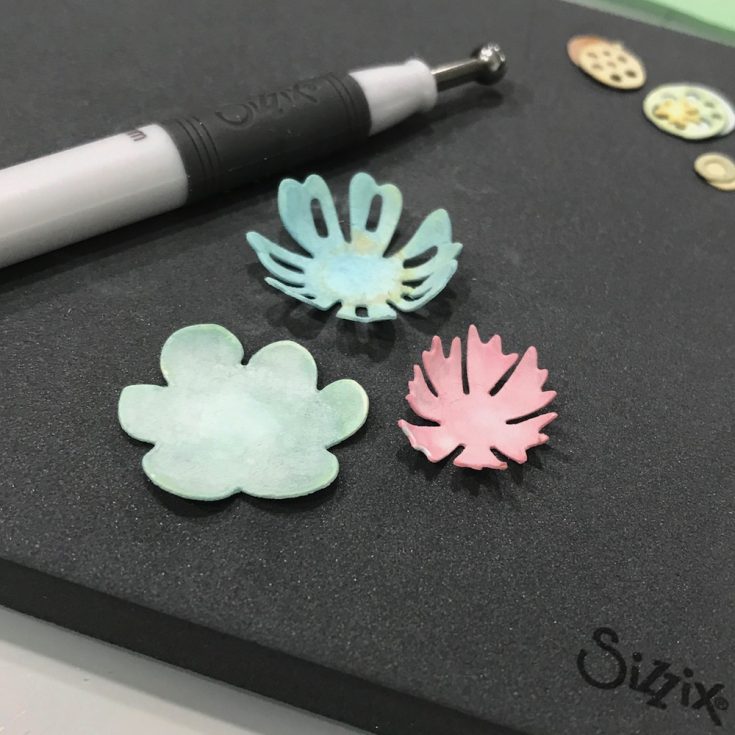
5. Shape flowers with Sizzix Paper Sculpting Tools. I like the smallest stylist for these flowers. Place flowers on molding mat and apply pressure with the sculpting tool to create dimension.
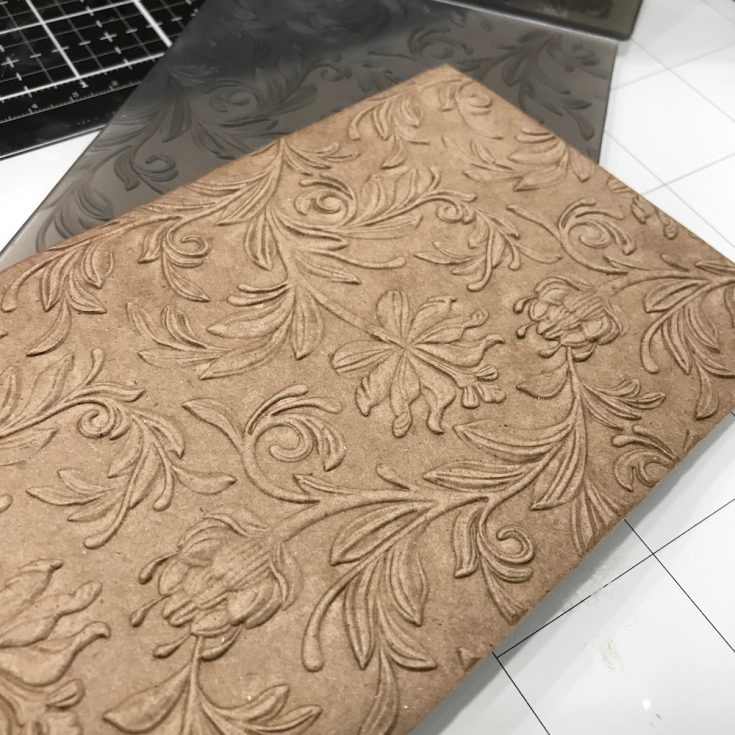
6. Mist both sides of Kraft cardstock with water, emboss with Botanical 3-D Texture Fade running through Vagabond machine twice. Use only one cutting pad as the 3-D Texture Fade is thick.
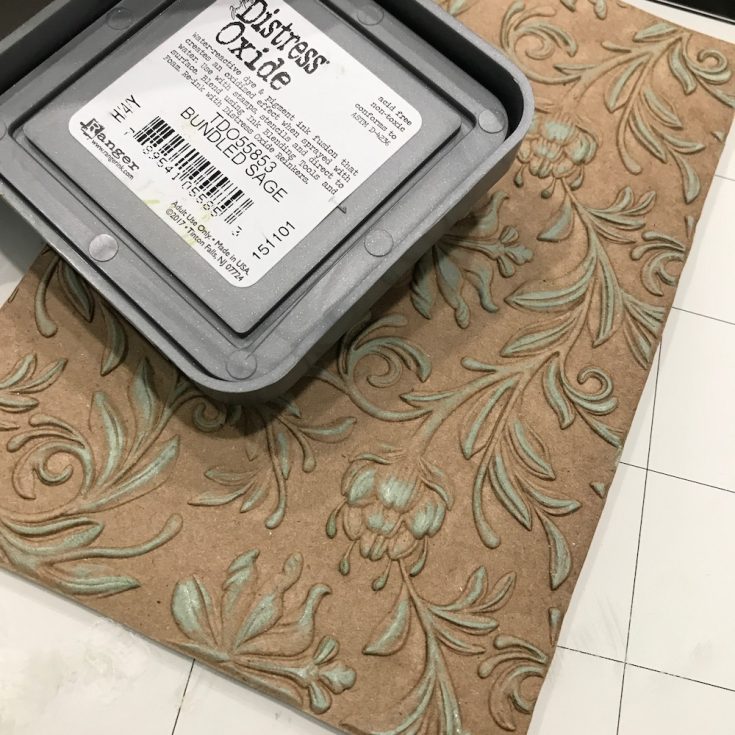
7. Apply Distress Oxide Ink directly to raised areas.
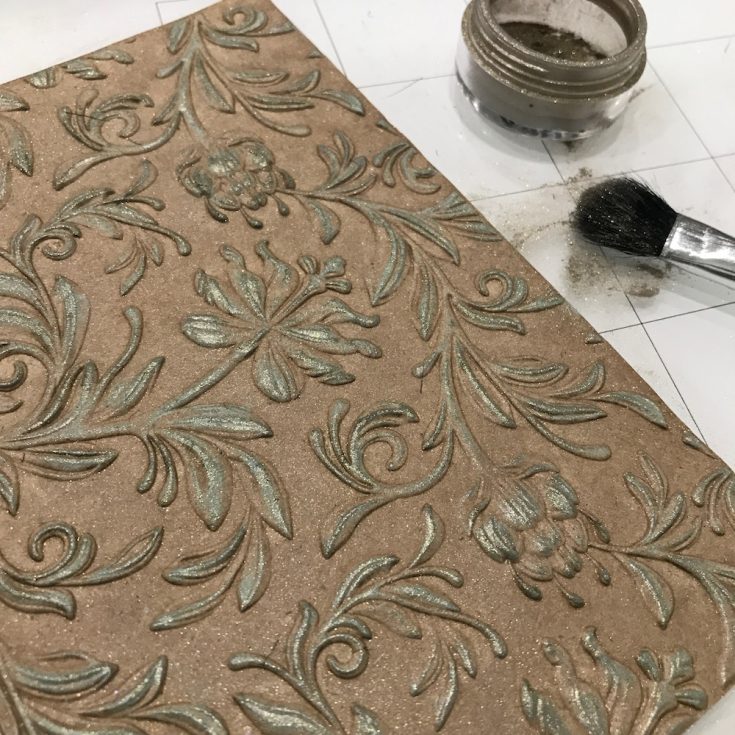
8. Brush on Heirloom Gold Perfect Pearls Powder and buff off excess.

9. Distress edges with Paper Distresser and Vintage Photo Distress Oxide Ink on an Ink Blending Tool.
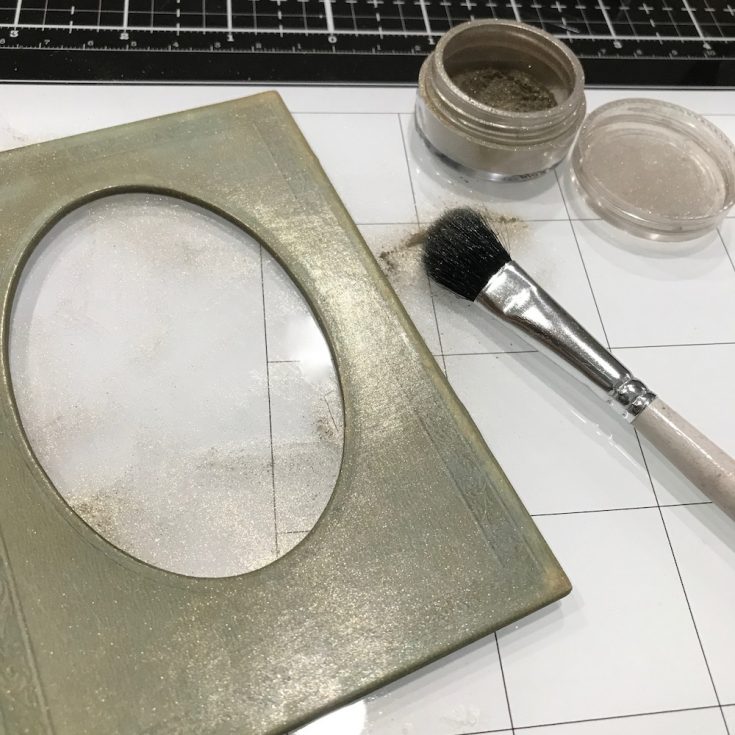
10. Sand and ink the Baseboard Frame, then brush of Perfect Pearls Powder, buff off excess and lightly mist with water to set powder.
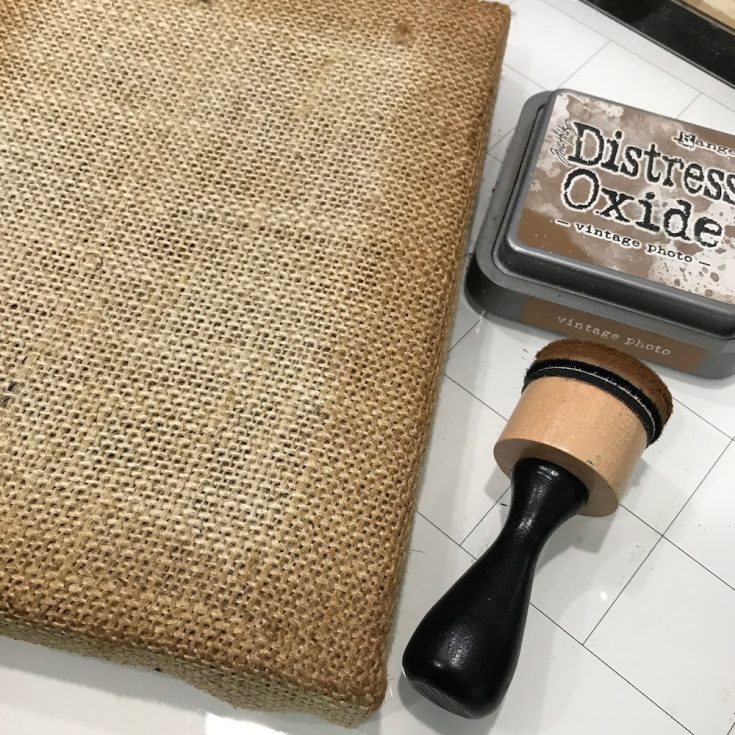
11. Ink edges of Burlap Panel with Distress Ink on an Ink Blending Tool.
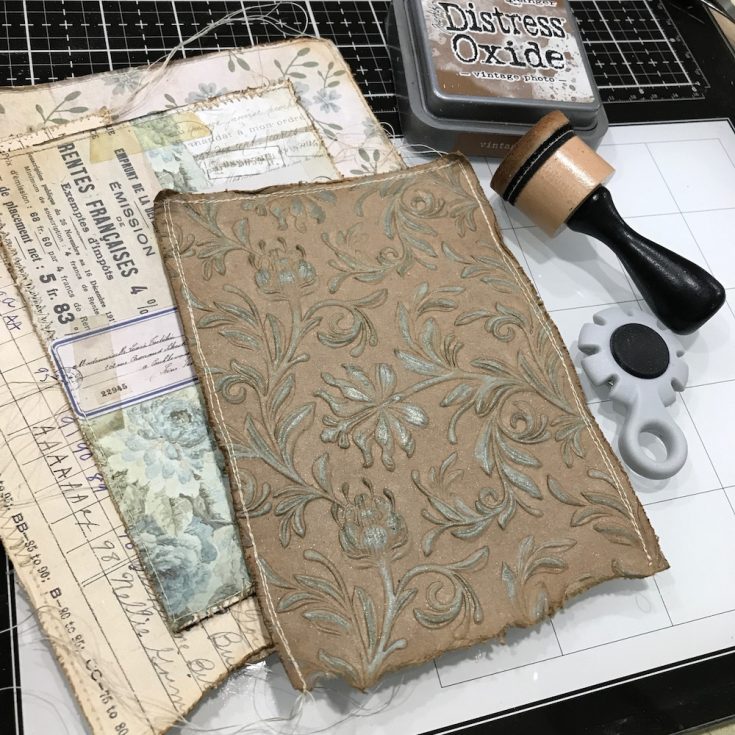 12. Cut Memoranda Paper Stash in several sizes, sew around the edges, use Paper Distresser and Distress Ink on an Ink Blending Tool to Distress edges.
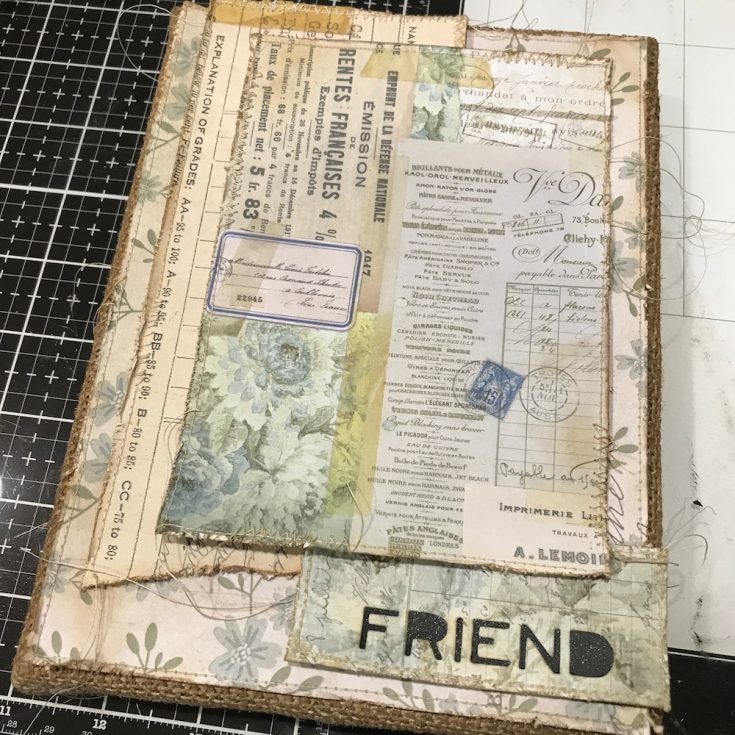
13. Adhere layers to Burlap Panel using foam tape.
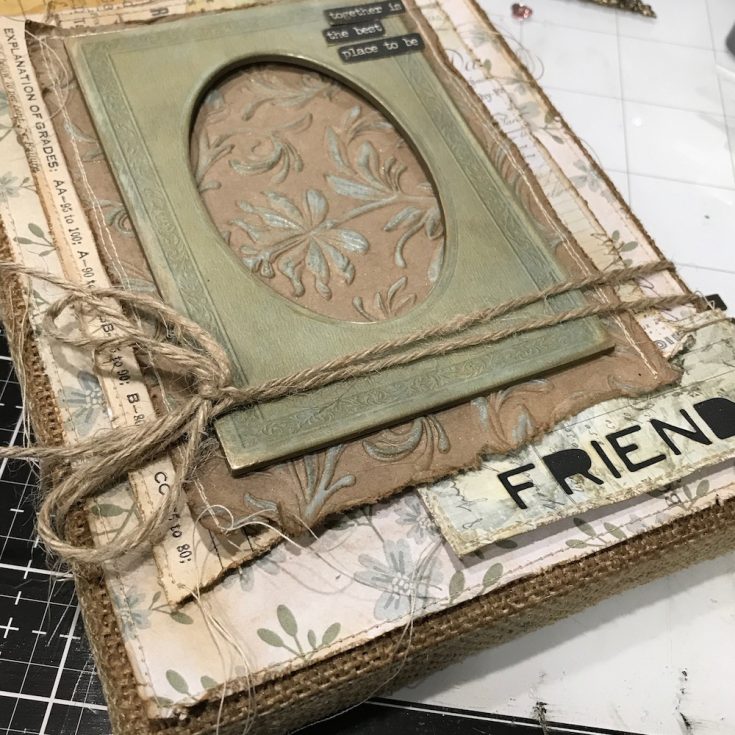
14. Adhere Baseboard Frame with Distress Collage Medium. Tie Jute String around panel with a bow.
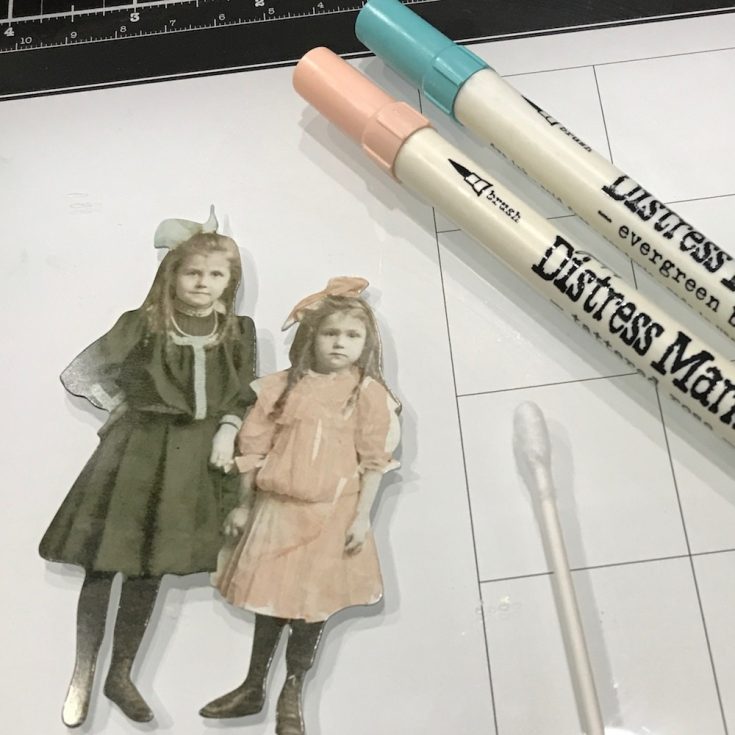
15. Color Paper Dolls with Distress Markers. Color Marker directly on Paper Doll and blend color with a cotton swab.
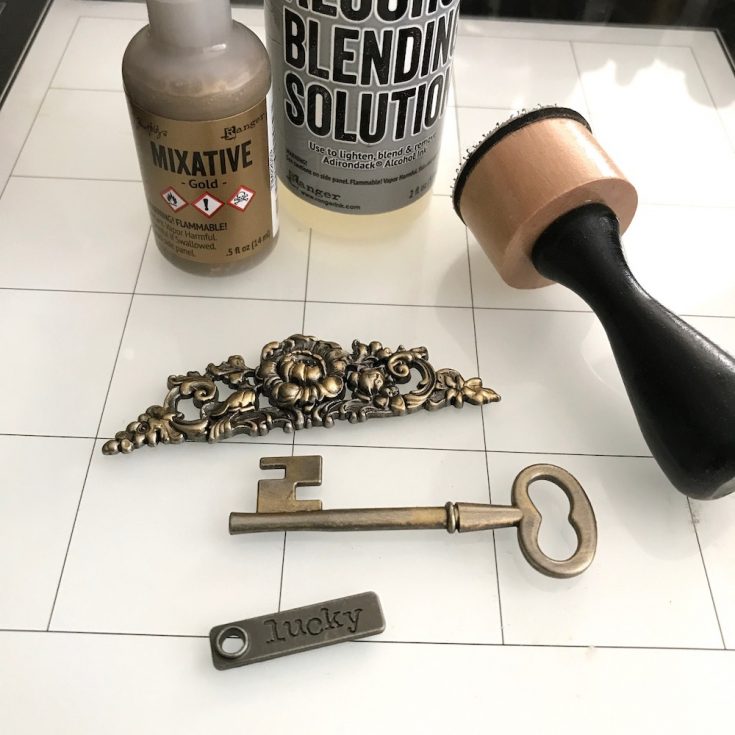
16. Apply Gold Metallic Mixative and Blending Solution to felt and color metal pieces.
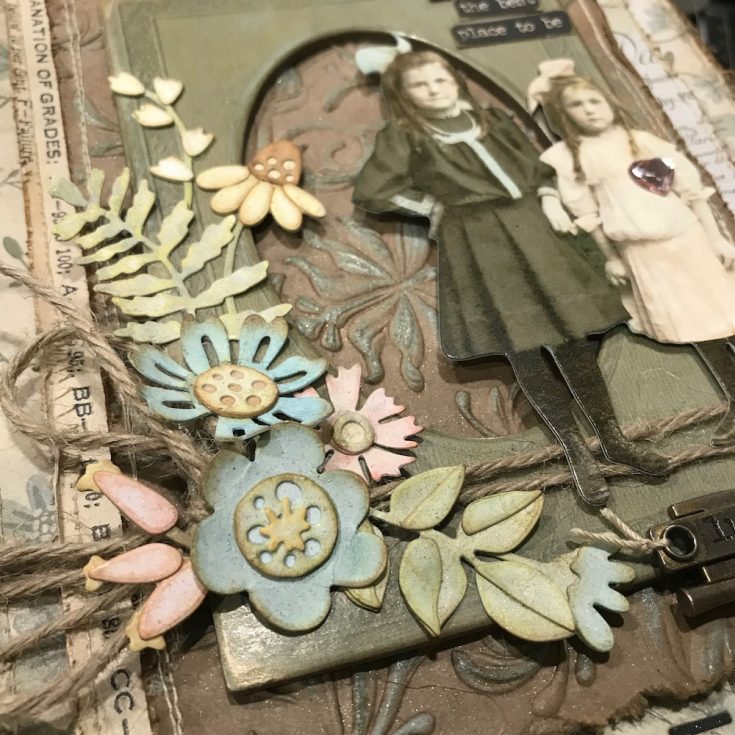
17. Adhere Funky Foliage with Collage Medium and foam tape.
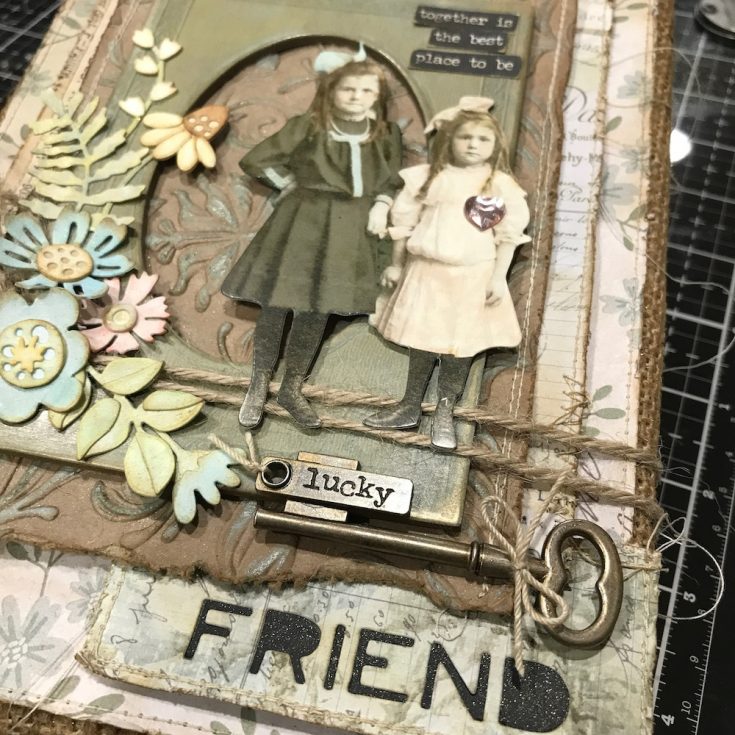
18. Adhere Paper Doll over the frame with foam tape. Adhere Small Talk, Adornment Key and Story Stick with Distress Collage Medium.
I hope you will love the Funky Foliage Thinlits Set as much as I do!
Thank you and happy crafting!
Richele
SUPPLIES:
|


Thanks so much for stopping by and thanks to Richele for being our guest!

Mixed Medium: Acrylic Pour Art Journal with Shari Carroll

Happy Saturday everyone! It’s Shari here with a fun Art Journal page idea. I’ve been playing around with Acrylic Pouring in some of my more recent Mixed Medium projects and wanted to incorporate this technique into Art Journaling.
Dina Wakley Ranger recently came out with a line of Acrylic Pouring products that include Pouring Medium, Cell Creator, Cups and Spoons, and Small Bottles. These new products work beautifully with her paints and Media Board. The Media board is what brings me to Art Journaling. This substrate is perfect for pouring and journaling!! YAH!!
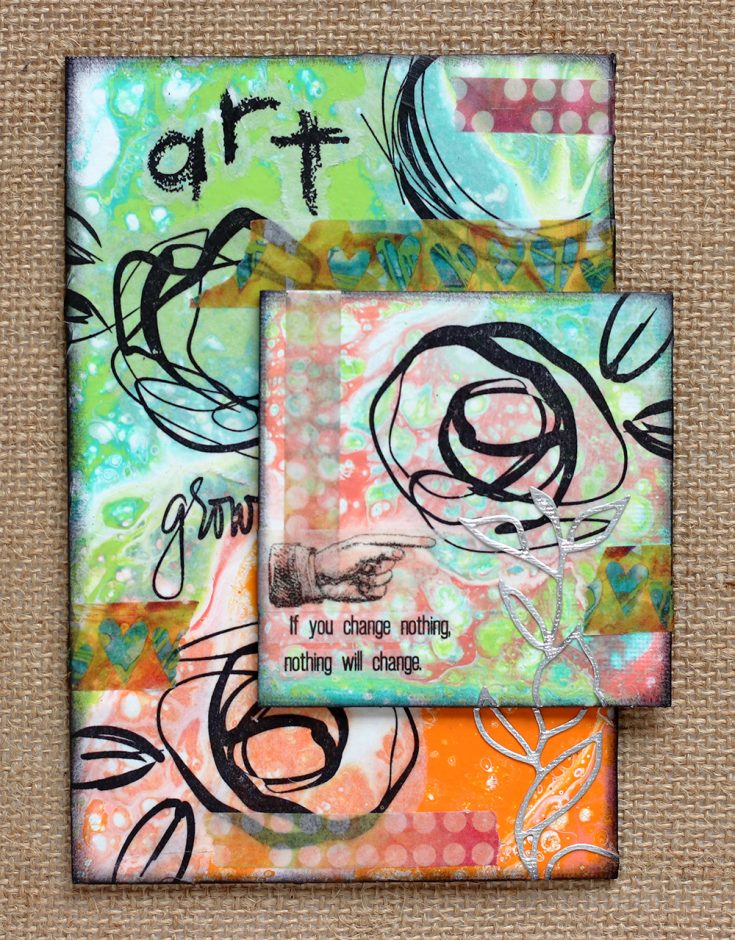
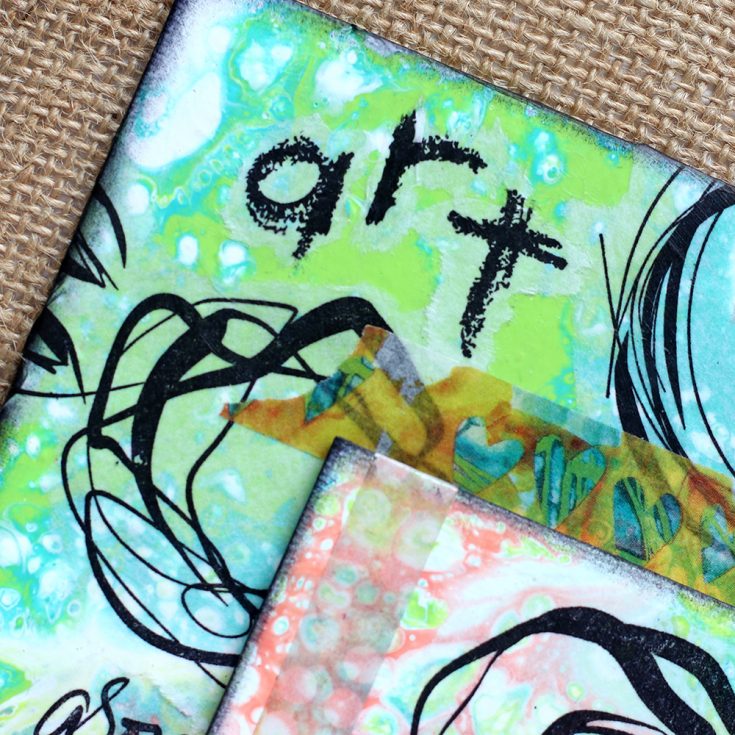
The first thing I did was to mix four colors of paint with the pouring medium. The ratio is 3 parts medium to 1 part Dina Wakley paint. I added a couple drops of Cell Creator to my paint mixtures and created puddles onto the Media Board and tilted it around a bit until the paint covered the board completely.
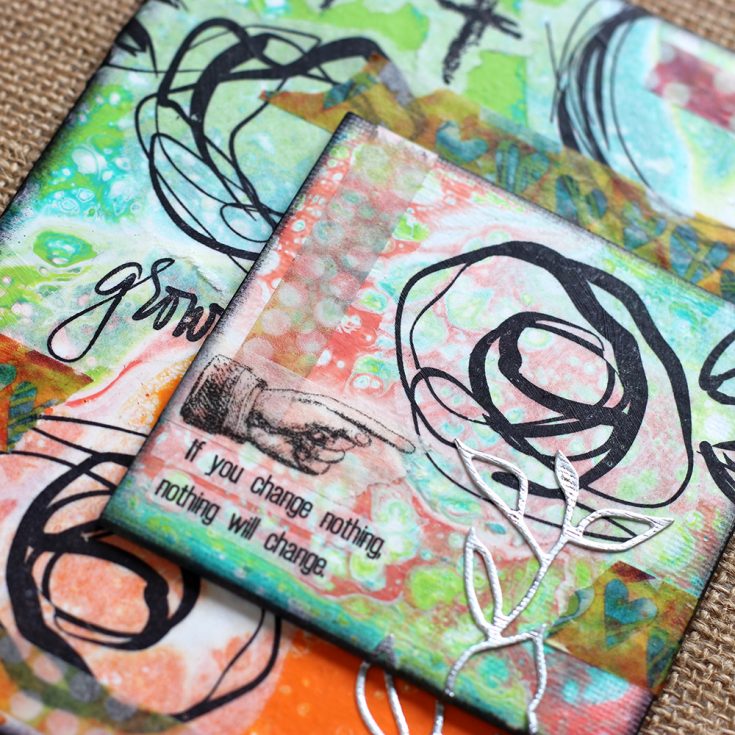
Once the paint was completely dry, I stamped some designs onto Dina Wakley Collage Paper and added them to the background with Matte Gel Medium.
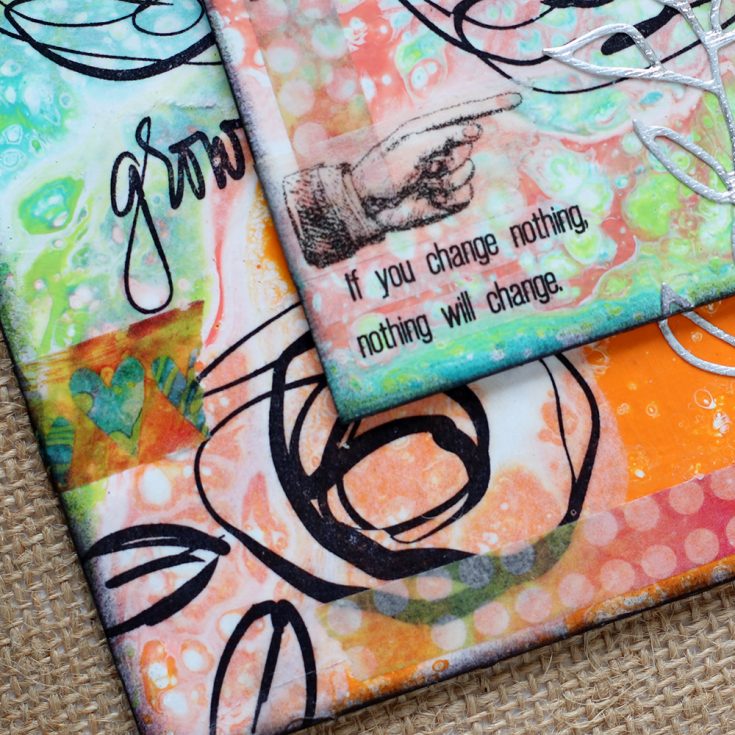
I added a few strips of Dylusions Washi tape here and there on my background for added color.
I’ve filmed a video showing you how to use the Dina Wakley Paint Pouring products as well as how to create this project. You can view it below or on our YouTube channel HERE.
Blog Candy Alert! Follow our blog via email and comment on this post for a chance to win special blog candy!
Thanks for stopping by today, I hope you have a great weekend!!
|


