You Are Loved ❤️ Blog Hop WINNERS!
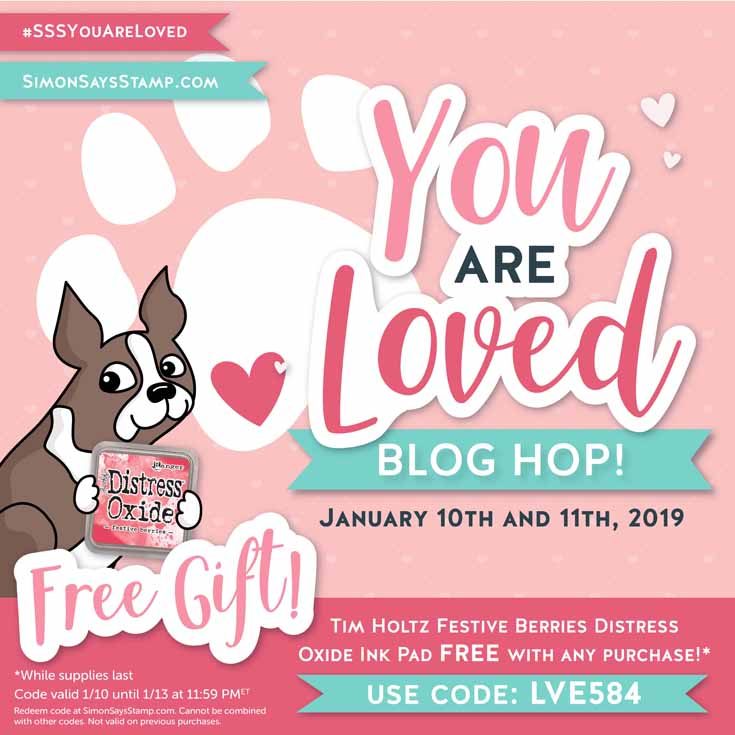
Hello friends! Have you seen our Simon exclusive You Are Loved release? This product lineup that debuted in early December has us thinking about Valentine’s Day! It’s filled with lots of ways to share your heart, of course! There are heart stamps and love sentiments as well as heart stencils and dies to share handmade love in so many different ways! In addition, there are cute and thoughtful products for many of the occasions you make cards for most: sympathy, thinking of you, birthday, and thank you. You’ll also find some cool new designs from CZ Design including a sequel to her Simple Sentiments 1 stamp set, and there’s an adorable set of watercolor cards from Suzy Plantamura! We are so in LOVE with this release!
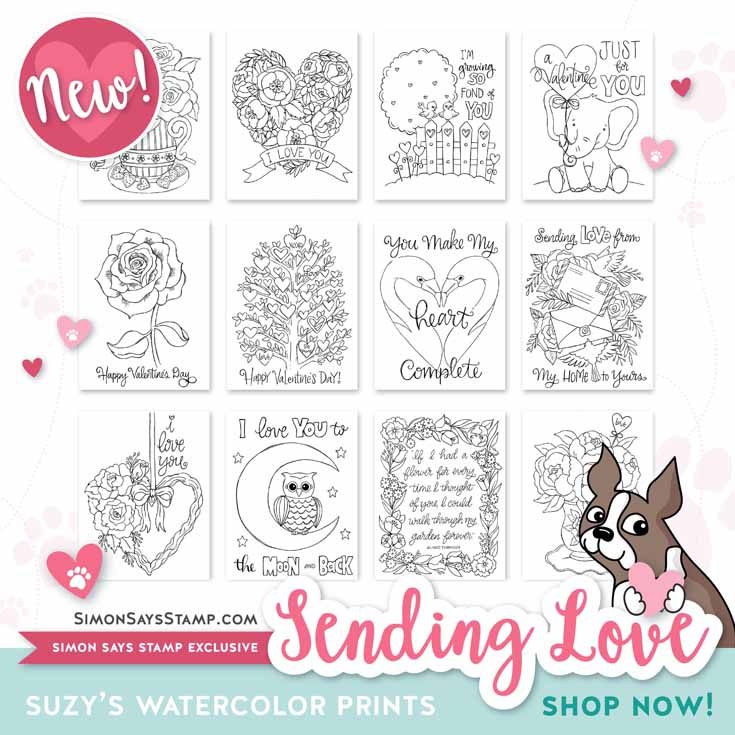
In addition to Suzy’s Watercolor Gift Set that debuted with this release on December 11th, we unveiled these BRAND NEW Sending Love Watercolor Prints from Suzy just last week! These gorgeous designs are the answer to your Valentine’s Day creativity!
To celebrate this phenomenal release, we hosted a two-day blog hop! The hops featured many talented designers and each one created wonderful projects to inspire you. If you missed the hops, you can find the direct links here: DAY ONE and DAY TWO.
A BIG thank you to all of YOU who joined us for the hops! We enjoy hearing from each of you, and your words of encouragement and appreciation to each of the designers mean so much to us here at Simon and to them. It’s our tradition to give away gift certificates to random commenters on each blog stop, and today we are revealing all of the winners! So without further ado, I present to you our winners!
DAY ONE HOP WINNERS:
from Simon Says Stamp’s blog: Lagene!
from Nichol Spohr’s blog: Linnea S!
from Nina-Marie Trapani’s blog: Wendy Lambert!
from Jessica Frost-Ballas’s blog: Sophie Farah!
from Suzy Plantamura’s blog: Bonnie Eng!
from Amy Rysavy’s blog: Stampin With Sandi!
from Lisa Addesa’s blog: Susan Falkler!
from Heather Hoffman’s blog: Siobhan Burtlow!
from Marge Yoon’s blog: kRenK!
from Anna Kossakovskaya’s blog: Liz Ford!
from Karin Åkesdotter’s blog: Heidi Rees!
from Bibi Cameron’s blog: Jenelle!
from Barb Engler’s blog: Benessi!
from Anna-Karin Evaldsson’s blog: Karen @ Misplaced Mojo!
DAY TWO HOP WINNERS:
from Simon Says Stamp’s blog: Kathy J in Ellicott City!
from Kristina Werner’s blog: Terrie D!
from Laura Bassen’s blog: ROstamps4fun!
from Debby Hughes’s blog: Rosann Barnes!
from Cathy Zielske’s blog: eileen bochsler!
from Yana Smakula’s blog: tawna21!
from Yoonsun Hur’s blog: Steffi H!
from Amanda Korotkova’s blog: TLady!
from Vicky Papaioannou’s blog: Neha Mahajan!
from Heather Ruwe’s blog: Lisa Moline!
from Gayatri Murali’s blog: Emmaline!
from Ankita Gupta’s blog: Delia Wilkes!
from Lea Lawson’s blog: Lindar C!
from Kristina Pokazenieva’s blog: Marianne B in AZ!
from Elena Salo’s blog: Joy Meadows!
If you see your name listed above, CONGRATULATIONS! Please email [email protected] and let him know that you are one of our You Are Loved ❤️ Blog Hop winners! You’ll receive a $25 Gift Card. ???
Thanks again for hopping along with us! We hope you enjoy our You Are Loved release and that it gives you creative enjoyment for months to come!
Winning ROCKS, and so do you!
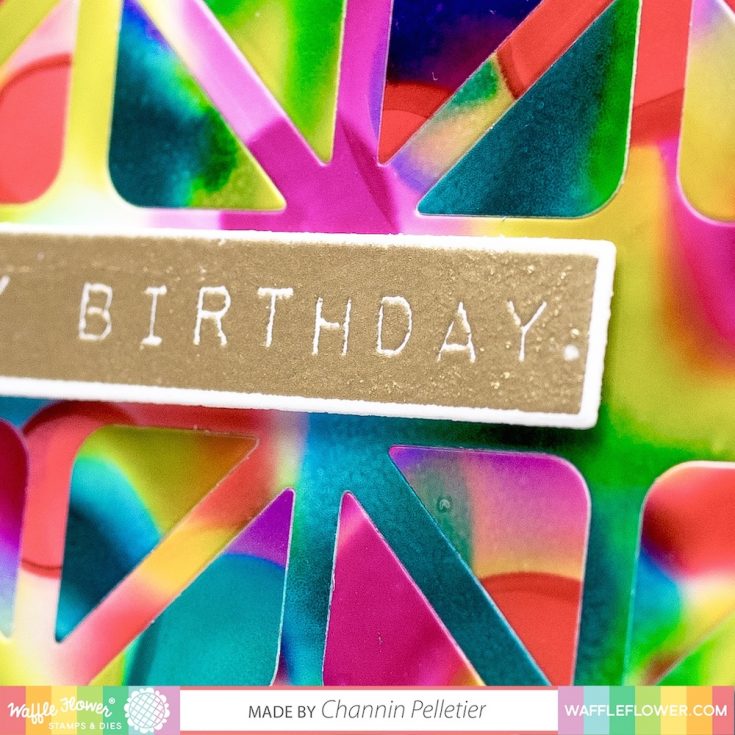
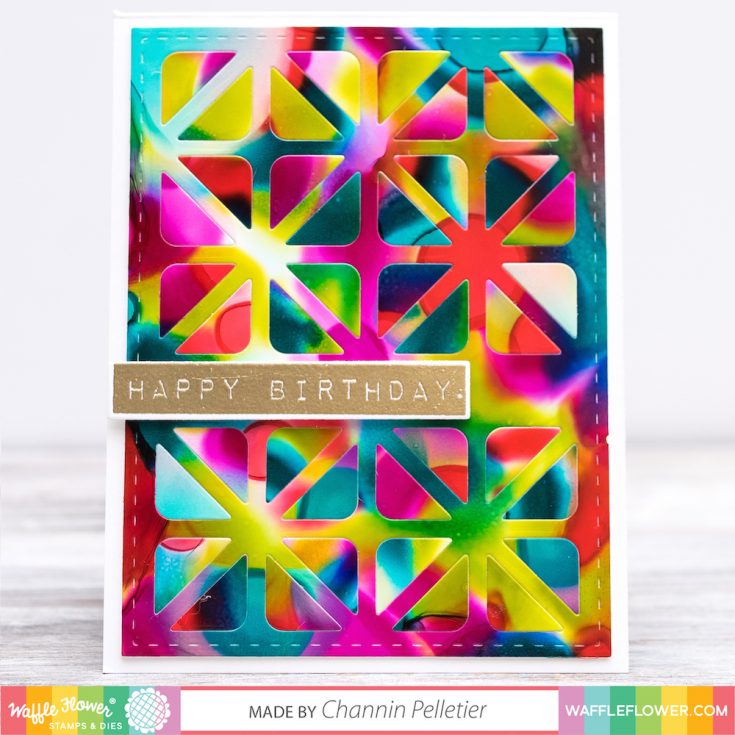
Easy Alcohol Ink Cards with Channin Pelletier
Hi friends! Happy Wednesday and please join me in a warm welcome back to special guest Channin Pelletier showing us a beautiful and colorful representation of new Waffle Flower Crafts products! Be sure to watch the video and enjoy!
Hello everyone! It’s
In today’s video, I will create an easy alcohol ink card that brings a huge wow factor by simply combining an alcohol inked background with the Tile Panel Die and an easy inlaid die-cutting technique
First, I created a colorful alcohol ink background on Y
Next, I die cut my alcohol inked background with the Tile Panel Die. Once die cut, I carefully removed all the triangle negative pieces, making sure not to lose any. Next, I trimmed some scrap cardstock down to 5.25” x 4” and then glued the tile panel down with Tombow Mono Multi Liquid Glue. I then glued the negative triangle pieces into the frame, taking care to place the negative pieces in places where they would create lots of contrast.
Once I had all the negative pieces glued down, I adhered the panel onto an A2 top-folding card base made from white cardstock and added the sentiment with foam adhesive.
I hope you enjoyed my card and video! Thanks so much for stopping by!
SUPPLIES:
|


Thanks so much for stopping by and thanks to Channin for being our special guest!

Blog Candy Alert!! Follow our blog via email and comment on this post for a chance to win special blog candy!
One Layer Floral Background
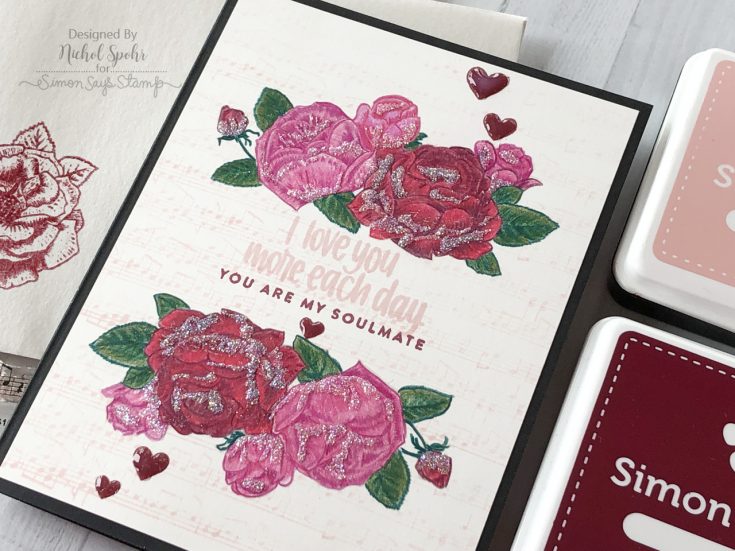
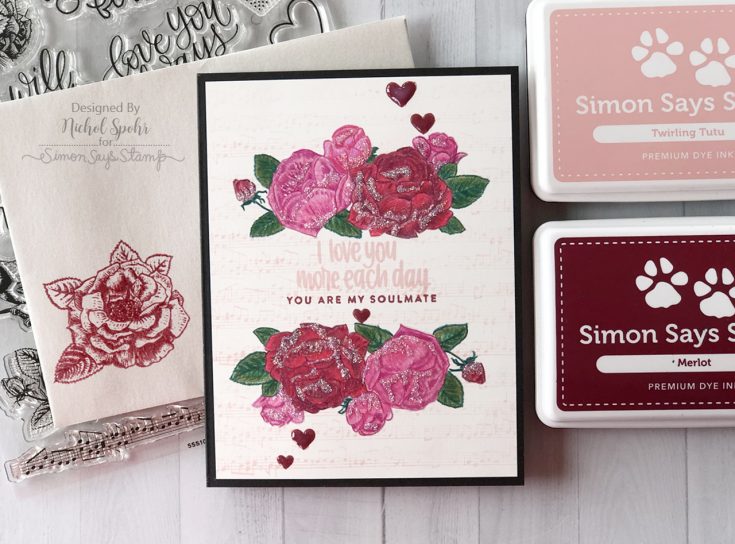
Hi friends! Happy Tuesday! Check out the latest beauty from Nichol Spohr using our brand new February 2019 Love Always card kit! Love the subtle background? Nichol used our brand new Love Always exclusive stamp set to make it! A beautiful dusting of glitter was added to the card using our BRAND NEW Unicorn Dust glitter. Be sure to watch the video and enjoy!

WATCH THE VIDEO:
SUPPLIES:
|


Thanks so much for stopping by and thanks to Nichol for being our guest!


