Winter Wonderland Mixed Media Scene
Hi friends! Happy Sunday! Thanks for stopping by our blog today! Here at Simon HQ in Columbus, Ohio we had a taste of Spring weather last week but are back to the winter cold. Sometimes amongst the dreariness of winter it’s easy to forget the beauty it brings. Special guest Anna-Karin Evaldsson really showcases that beauty in her special project! Read on for step by step instruction and enjoy!
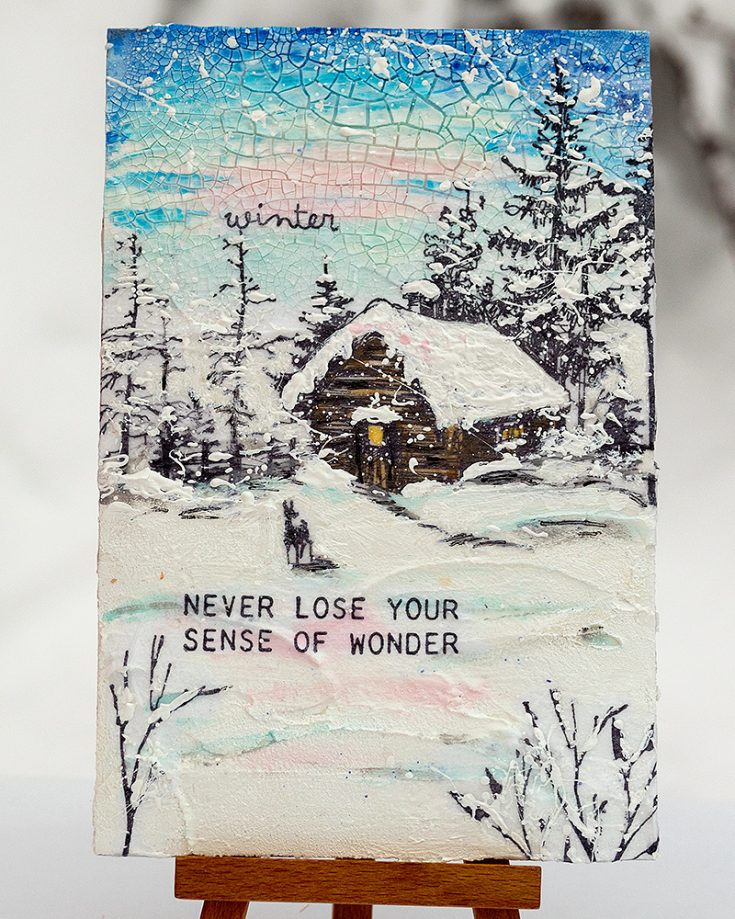
Hi everyone! I am so happy to be here today with an easy and fun mixed media tutorial. I was planning to have done a different project, but I was inspired by the very heavy snowfall we had here over the weekend, and two beautiful walks that I took, and changed my mind and made a peaceful winter project instead.
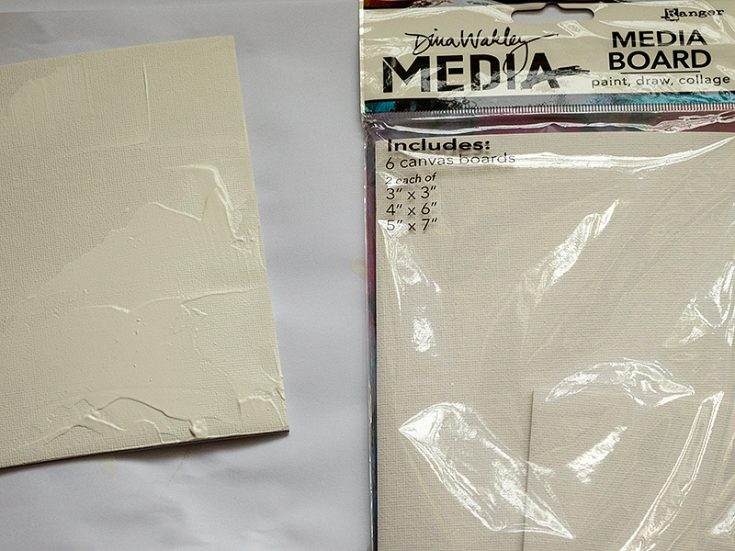
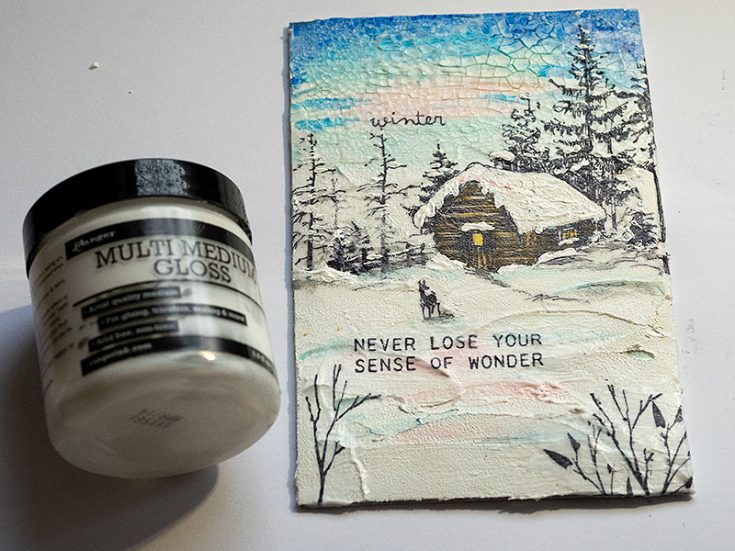
There is something very peaceful about snow and the world becomes brighter and quieter at the same time. I’d love to stay for a little while in the cottage on this canvas. The techniques in this tutorial can be used on any type of project, and not only for winter themes. All you need is a sturdy enough background. I used a Ranger Dina Wakley Media Board, 4×6 in, but heavy watercolor paper or cardstock, such as Heavystock Mixed Media, will also work well.
After I remove my Christmas decorations, I often leave out winter themed décor pieces, such as the one here, and only remove them once spring is here. Some of them might even stay up year around.
Start by coating the board with gesso. I wasn’t planning to add more paste layers on top of the gesso at first, which is why I formed the gesso into snow heaps. You can skip this and use a thinner layer of gesso instead.
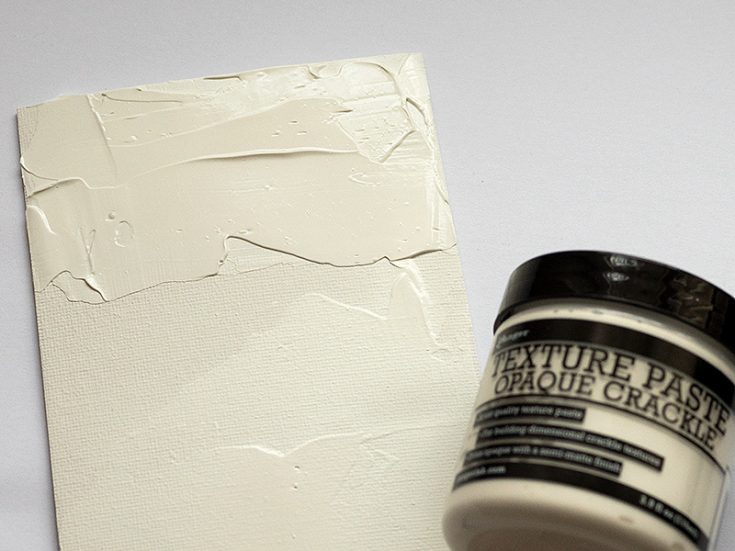
When dry, add a layer of Ranger’s Texture Paste Opaque Crackle to the sky. I love the look of a crackled sky. Cracks will appear as the paste dries and the thicker the paste, the larger the cracks.
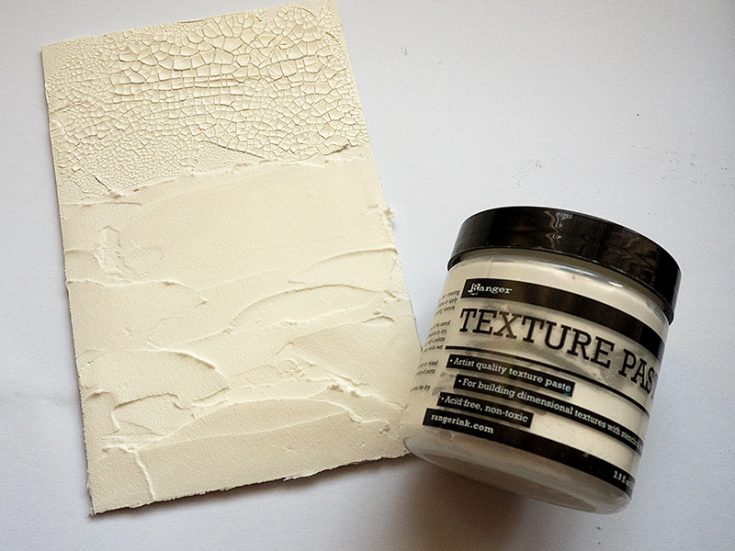
Smear fairly thick layers of Texture paste to create the snowy ground. Use a palette knife and to form the snow into heaps. Let dry.
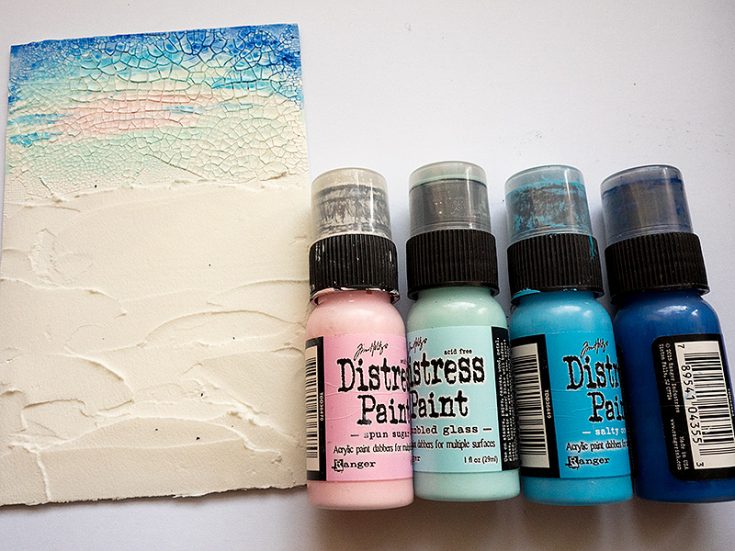
Paint the sky with watered down Distress Paints, starting with the pink.
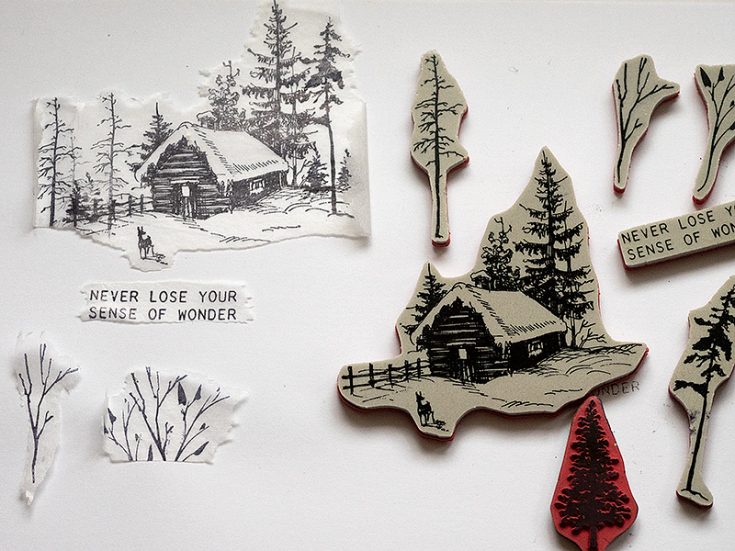
It is hard to get a good stamped impression on a textured background, so instead, we are going to stamp on ordinary tissue paper. Stamp on the glossy side of white tissue paper, using Ranger Archival Jet Black Ink. Tear around the images instead of using scissors, since a torn edge disappears better.
Use gloss medium to adhere the tissue paper to the background. Start by painting a layer of gloss medium on the background, where the image will be placed. Carefully place the tissue paper image into the medium and then add another layer of gloss medium on top.
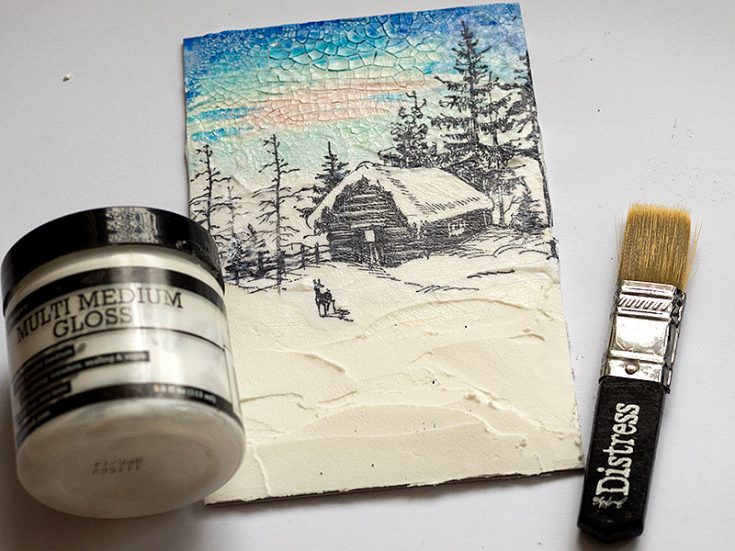
Paint the snow with white paint and the house with brown and yellow. Add thick layers of white paint to the branches of the trees using a toothpick.

When the first layer of paint is dry, add a few areas of pink and blue to the snow, to connect it to the colors of the sky. Also, add some shadows with Hickory Smoke paint.
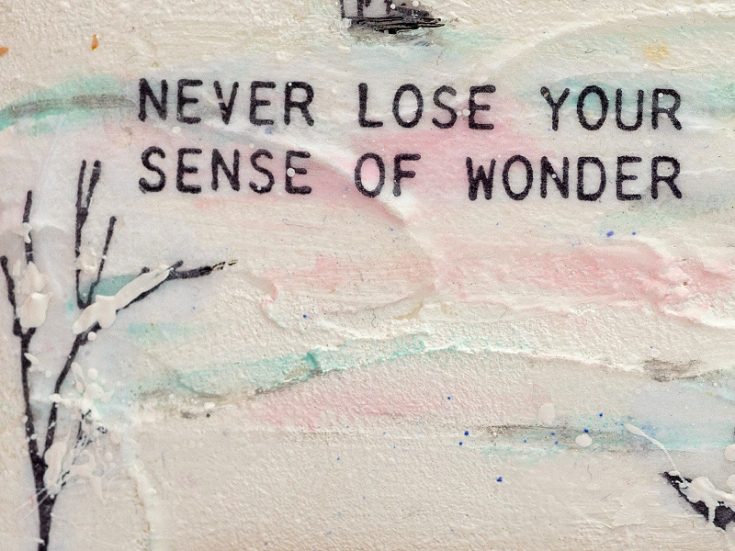
Adhere to the branches and sentiments with the same technique as before. The reason for not adhering them earlier is that I wanted to paint most of the background first so that I wouldn’t paint over the words or branches.
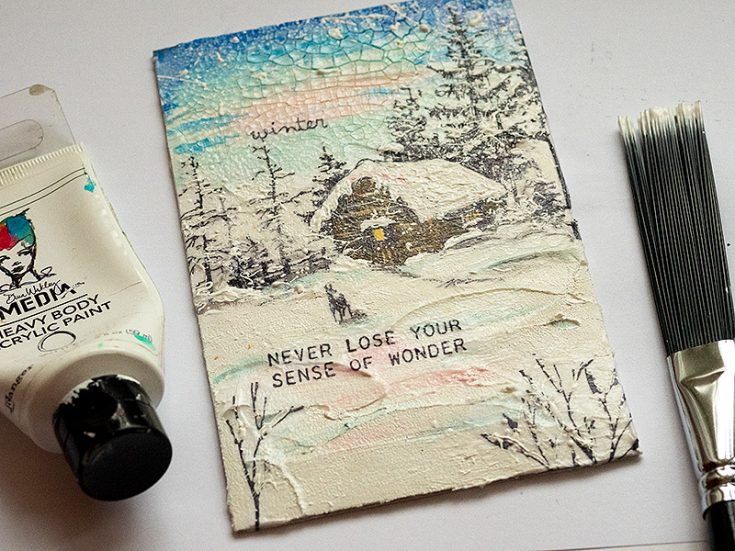
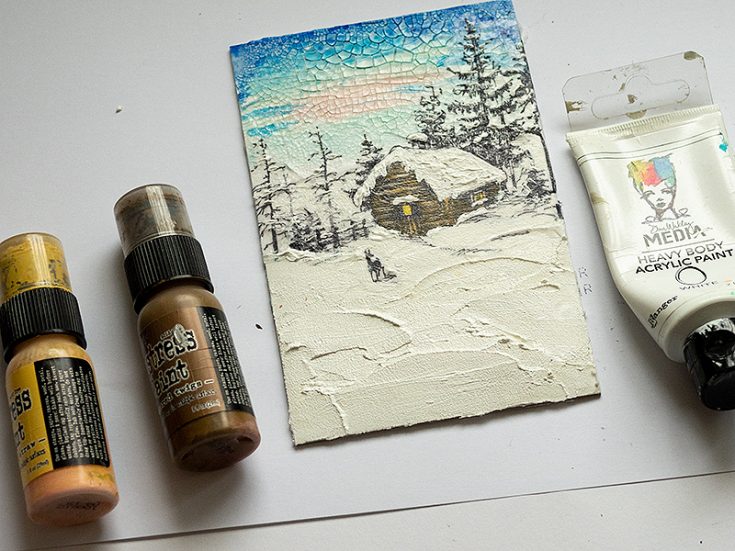
Splatter white paint on the scene to create the look of snow. Avoid the text.
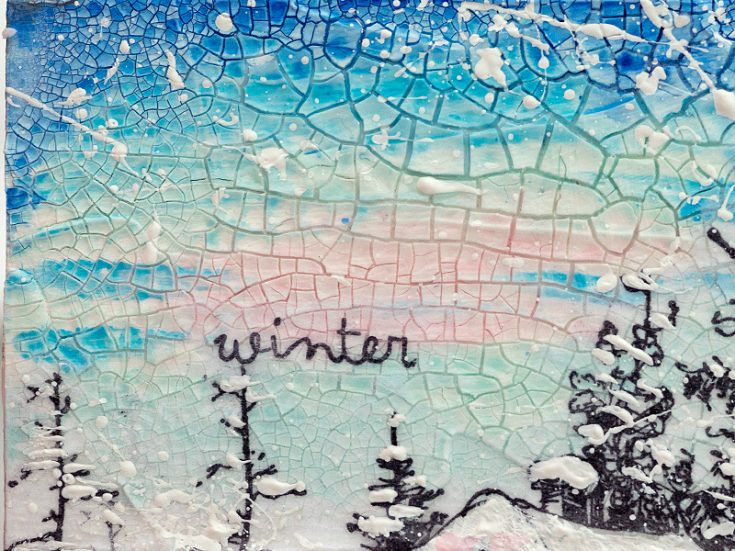
Here you can see a close up of the crackled sky and splattered snow. Note that the edges of the tissue paper aren’t visible. Most tissue papers work well for this technique. Some are a little opaque and might not disappear completely, so experiment on a small area first. If the edge of the tissue paper is slightly visible, you can hide it by painting over it.

I added some black marker lines here and there, to bring back lines that were hidden by paint.
You could add even more details to the scene, but I wanted to leave it fairly uncluttered and peaceful.
I hope this tutorial inspired you to try out some scenic stamping in combination with mixed media techniques.
Thank you so much for looking!
Happy crafting!
Anna-Karin
SUPPLIES:
|


Thanks so much for stopping by, and thanks to Anna-Karin for being our guest!

Blog Candy Alert!! Follow our blog via email and comment on this post for a chance to win special blog candy!
Beautiful Flowers with Bibi Cameron
Hi friends! Happy Saturday! Please join me in welcoming back Bibi Cameron as a special guest on our blog today! She has made a stunningly (well, for lack of a better word) BEAUTIFUL card and envelope with our Beautiful Flowers stamp set. Read on and enjoy!
Hello from Scotland! It’s Bibi Cameron here and I’m so thrilled to be able to share the joy of papercraft with you today.
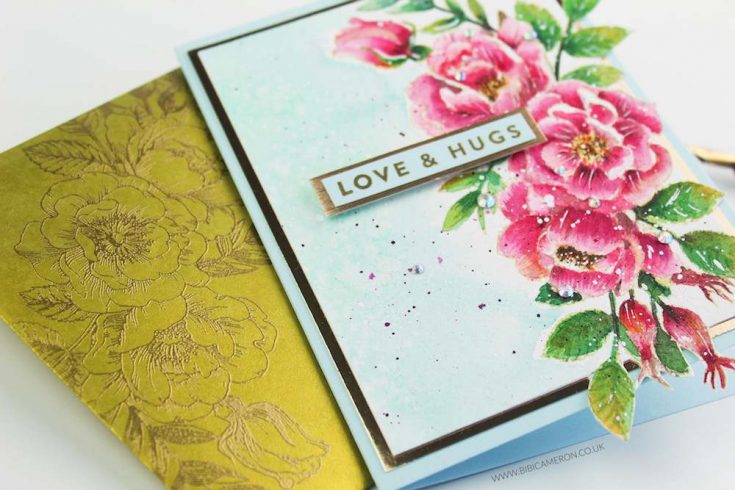
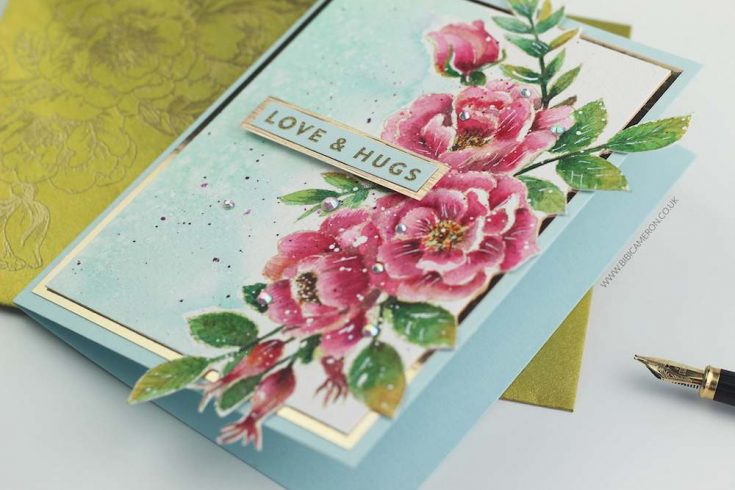
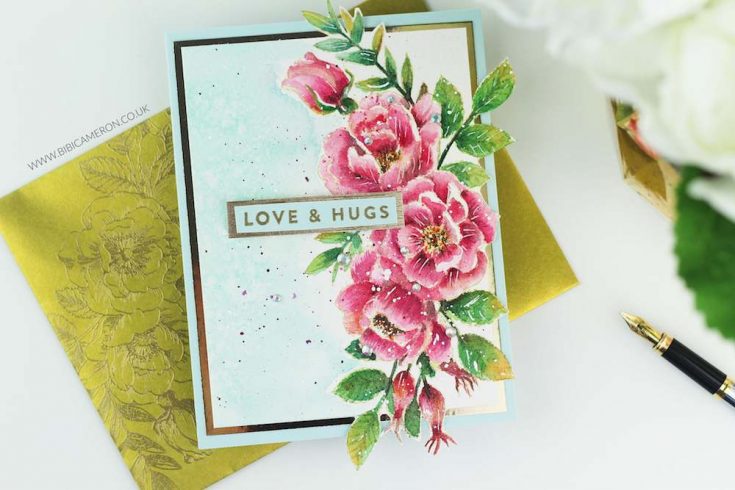
So I’m featuring gorgeous stamped images and sentiments from Beautiful Flowers Stamp Set by Simon Says Stamp. That fantastic floral cluster is just perfect to stamp the front panel of a card, a box, an envelope or a tag and it is wonderful to enjoy coloring.
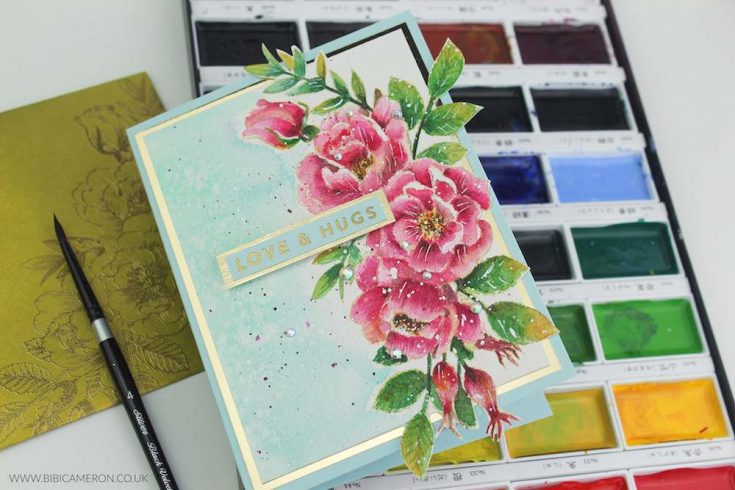
As I love watercolors especially the Kuretake Gansai Tambi watercolors paints as they are beautiful, easy to use, great quality at amazing value and because in the 36 colors set an artist can get all the colors you will ever need including gold, silver, and pearl. You can spray water on the paint and mix different paint colors on a pallet to create thousands of new color shades… the sky’s the limit.
You can apply these paints to your artwork using a water brush or watercolor brushes. For the card today I only used a round tip Silver Black Velvet brush #4.
Ok. I started by stamping the image on the left side of a 6×8 inches piece of Arches watercolor paper using Antique Linen Distress Oxide Ink.
I used red shades mixed with white to add colors to the flowers. To add lights I used yellow, orange and white. To add dark areas I used brown and black and to add colors to the leaves I used different shades of green.
I then applied a wash of aqua and green watercolor paints on the background and around the floral image. When the paint was dry, I splattered the panel using a purple Nuvo Aqua Flow Pen, a Nuvo Shimmer Pen and then ink of a white Posca Marker to add texture.
I then used a pencil and a C6 rectangular die as a guide to trace a rectangle around the stamped panel, keeping the large image in the left of the panel. Some parts of the image were outside the rectangular shape and that was ok. As I wanted to keep them I simply cut the panel with a craft knife and I used scissors to cut around the images in those areas they were outside the line.
To keep this card as small as possible I trimmed the watercolor panel a little bit more so the final rectangular watercolor panel measures 4 x 5 -3/8 inches. I then glued it on a 4-1/4 x 5-5/8 inches piece of gold mirror cardstock and then onto a 4-1/2 x 6 inches card base.
You can see that there are areas of the images completely outside the card so I had to make a larger envelope for it and I used the Envelope Punch Board to easily make a 5 x 7 inches matching golden envelope. Voila!
I couldn’t resist and I heat embossed the large floral image on the back of the envelope using Versamark and Gold Nuvo Fine Detail Embossing Powder.
I also heat embossed the sentiment using Gold Embossing Powder and I made a little banner layered on gold cardstock.
To finish I embellished the card with crystals.
That’s all for today.
Happy Crafting
Bibi
SUPPLIES:
|


Thanks so much for stopping by and thanks to Bibi for being our guest!

Blog Candy Alert!! Follow our blog via email and comment on this post for a chance to win special blog candy!
Yippee for Yana: Floral Friendship Card

Hi friends! Welcome back to another edition of Yippee for Yana where the amazing Yana Smakula is our special guest and making a gorgeous card for a friend with a pretty assortment of products! Read on for more information and be sure to watch the video and enjoy!
Hi everyone, this is Yana Smakula and welcome back for another Yippee For Yana video!
If you live in a warmer climate you probably enjoy beautiful greenery outside all year round. But if you are like me, and live in one of the colder parts of the world, chances are, by now you are dreaming of spring, double-digit temperatures (if you are using Celsius system) or above 60 degrees Fahrenheit weather and some nice greenery and flowers. Since Spring won’t be getting to my neck of the woods for another few weeks I’m browsing for Spring online and trying to recreate it in my handmade card. Today I’m bringing you a simple to make floral Friendship card.
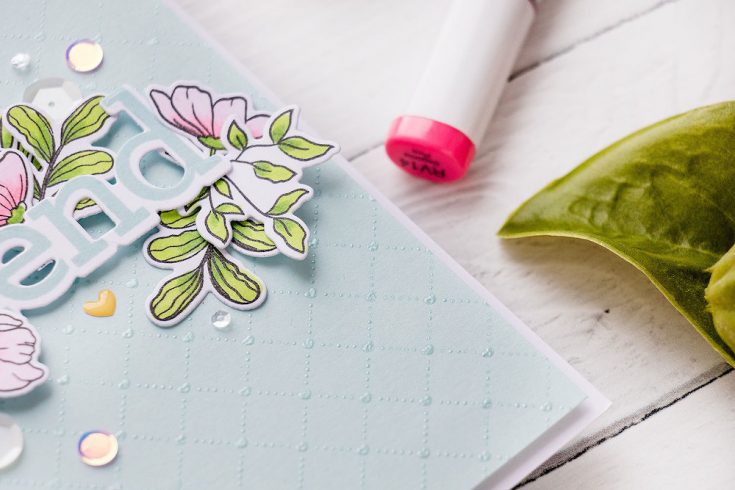
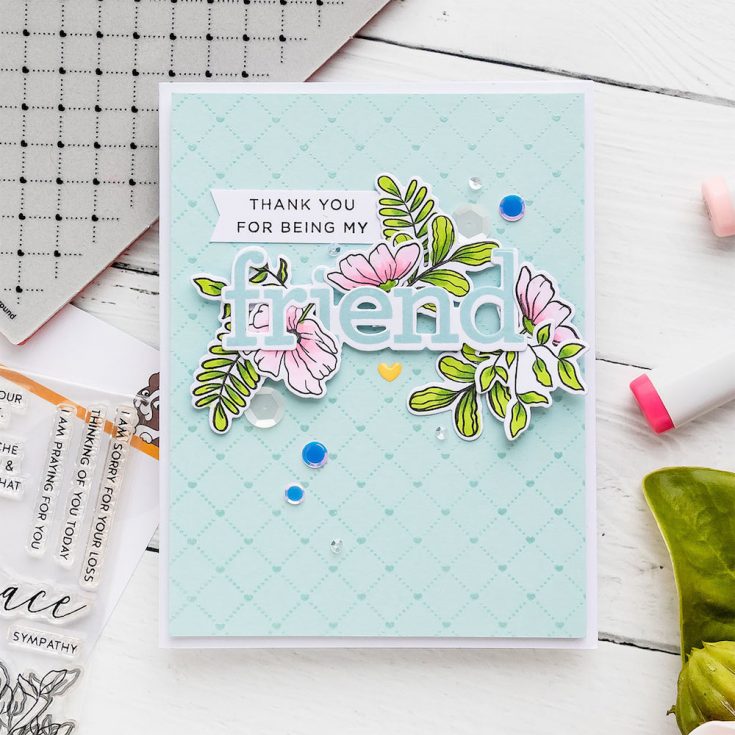
I’ve started working on my card by creating a background using Quilted Hearts background stamp, White Satin Pearl embossing powder, and light blue cardstock.
Next, I stamped “Friend” from the Bestiest stamp set from CZ. I used Cloudy Sky ink on white cardstock. I added “Thank You For Being My” in black ink and trimmed latter into a skinny strip with a V-shape at the end. The word “Friend” was die cut using coordinating die.
I also stamped a few images from the Moments of Grace stamp set in Intense Black ink on white paper. I used this specific ink as I planned to color these with my Copic markers and this ink will not blend when it comes in contact with alcohol.
I used YG03 and YG17 markers to color greenery on this card. For the flowers, I went with RV11, RV10, RV00, and RV13 markers. Using coordinating dies I cut these images out.
Next, I trimmed my background panel to 3 7/8 x 5 ⅛” and foam mounted it onto an A2 white side folding card base. I foam mounted the word “Friend” and added florals all around it.
I couldn’t resist adding a few embellishments – an enamel heart and some sequins from the Girls Best Friend sequin mix.
Have fun stamping!
SUPPLIES:
|


Thanks so much for stopping by, and thanks to Yana for being our guest!
Blog Candy Alert!! Follow our blog via email and comment on this post for a chance to win special blog candy!


