Winter Wonderland Mixed Media Scene
Hi friends! Happy Sunday! Thanks for stopping by our blog today! Here at Simon HQ in Columbus, Ohio we had a taste of Spring weather last week but are back to the winter cold. Sometimes amongst the dreariness of winter it’s easy to forget the beauty it brings. Special guest Anna-Karin Evaldsson really showcases that beauty in her special project! Read on for step by step instruction and enjoy!
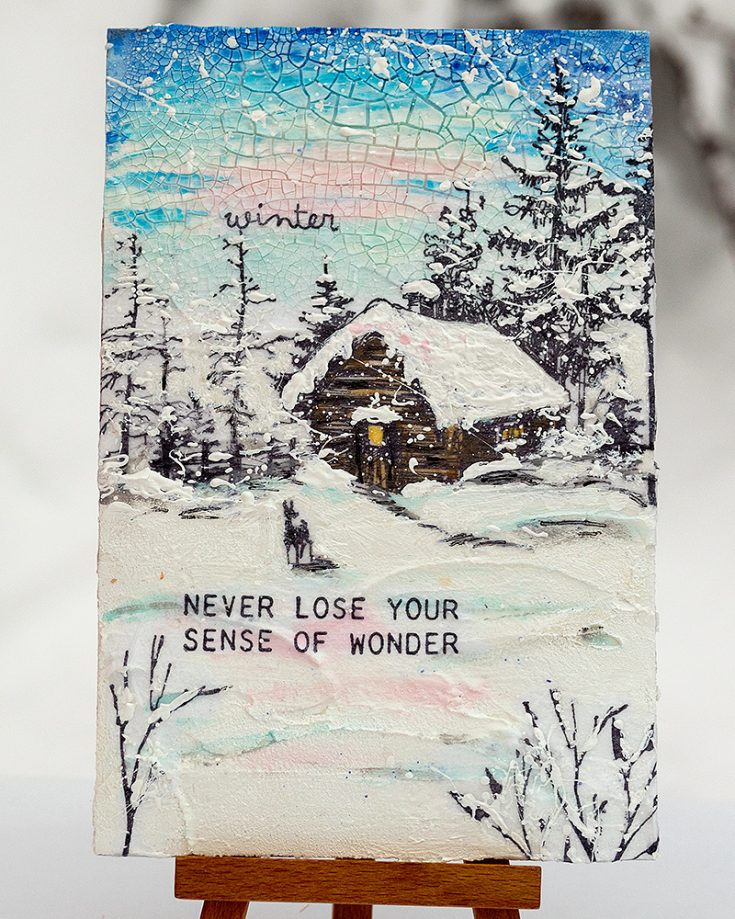
Hi everyone! I am so happy to be here today with an easy and fun mixed media tutorial. I was planning to have done a different project, but I was inspired by the very heavy snowfall we had here over the weekend, and two beautiful walks that I took, and changed my mind and made a peaceful winter project instead.
There is something very peaceful about snow and the world becomes brighter and quieter at the same time. I’d love to stay for a little while in the cottage on this canvas. The techniques in this tutorial can be used on any type of project, and not only for winter themes. All you need is a sturdy enough background. I used a Ranger Dina Wakley Media Board, 4×6 in, but heavy watercolor paper or cardstock, such as Heavystock Mixed Media, will also work well.
After I remove my Christmas decorations, I often leave out winter themed décor pieces, such as the one here, and only remove them once spring is here. Some of them might even stay up year around.
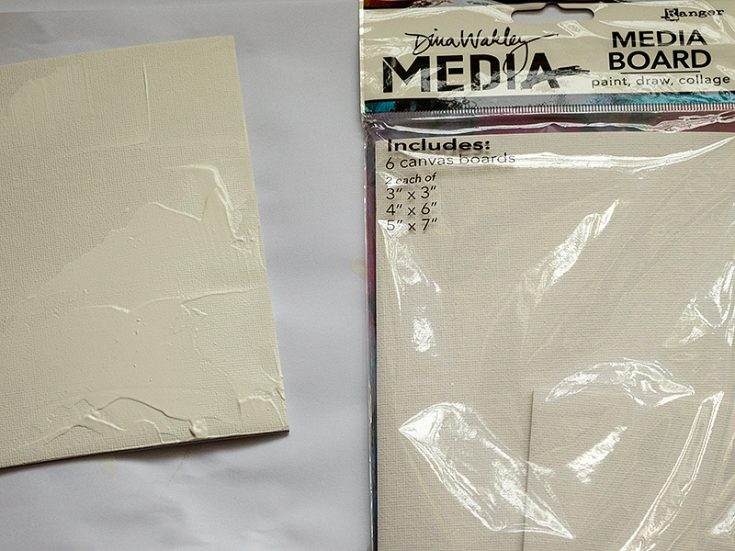
Start by coating the board with gesso. I wasn’t planning to add more paste layers on top of the gesso at first, which is why I formed the gesso into snow heaps. You can skip this and use a thinner layer of gesso instead.
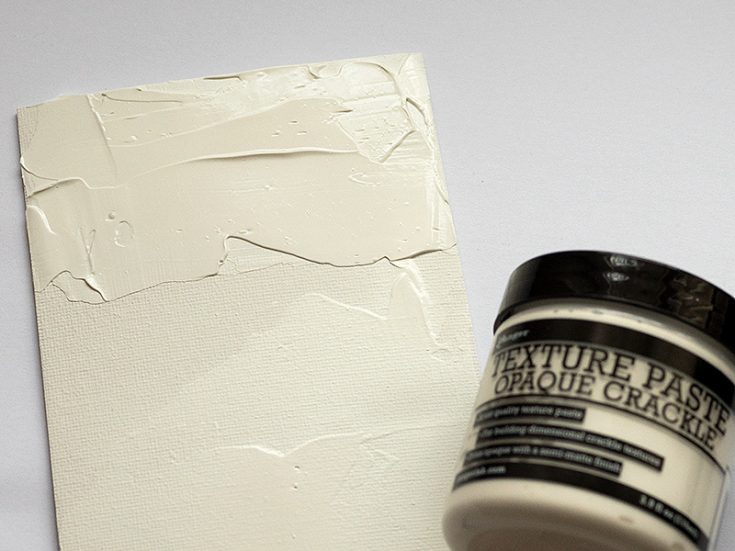
When dry, add a layer of Ranger’s Texture Paste Opaque Crackle to the sky. I love the look of a crackled sky. Cracks will appear as the paste dries and the thicker the paste, the larger the cracks.
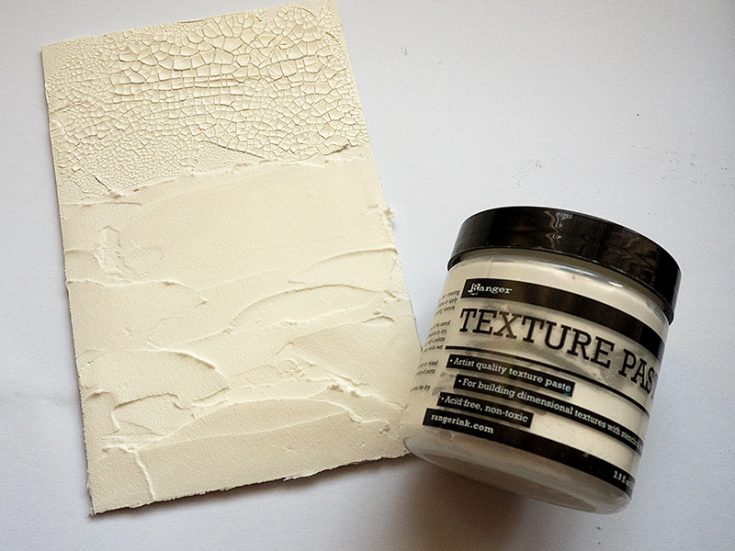
Smear fairly thick layers of Texture paste to create the snowy ground. Use a palette knife and to form the snow into heaps. Let dry.
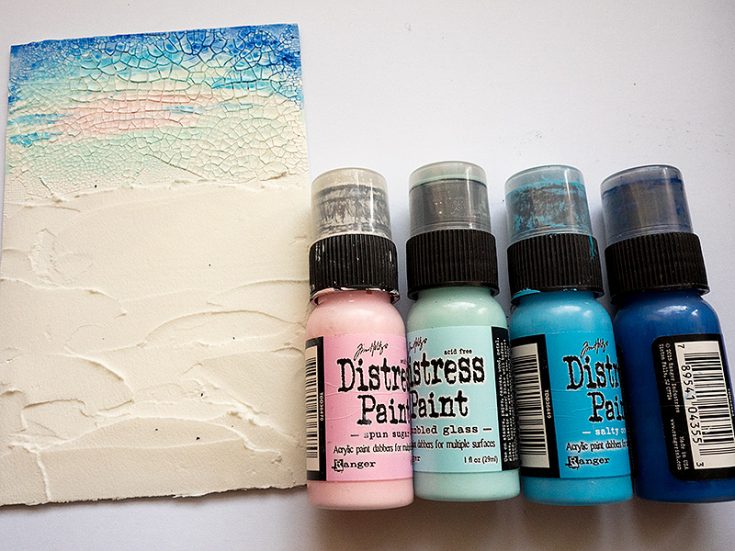
Paint the sky with watered down Distress Paints, starting with the pink.
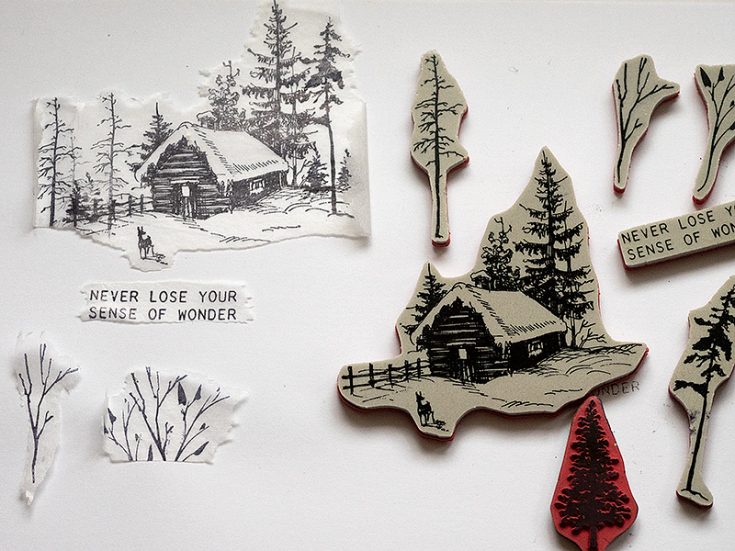
It is hard to get a good stamped impression on a textured background, so instead, we are going to stamp on ordinary tissue paper. Stamp on the glossy side of white tissue paper, using Ranger Archival Jet Black Ink. Tear around the images instead of using scissors, since a torn edge disappears better.
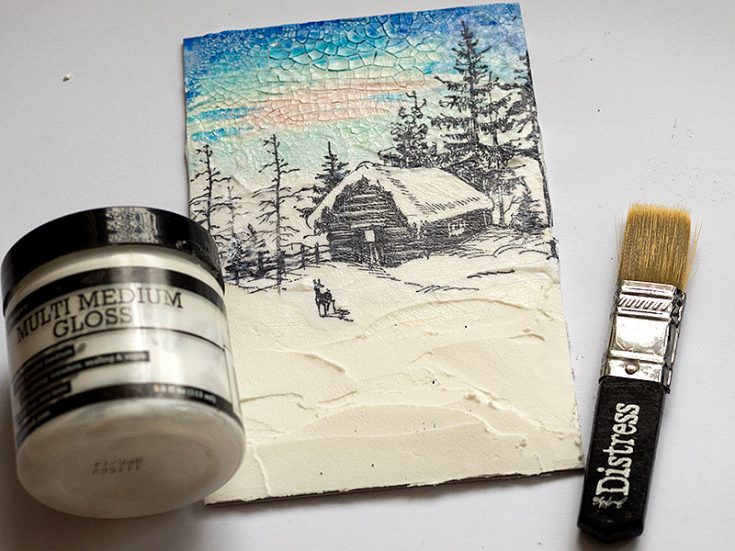
Use gloss medium to adhere the tissue paper to the background. Start by painting a layer of gloss medium on the background, where the image will be placed. Carefully place the tissue paper image into the medium and then add another layer of gloss medium on top.
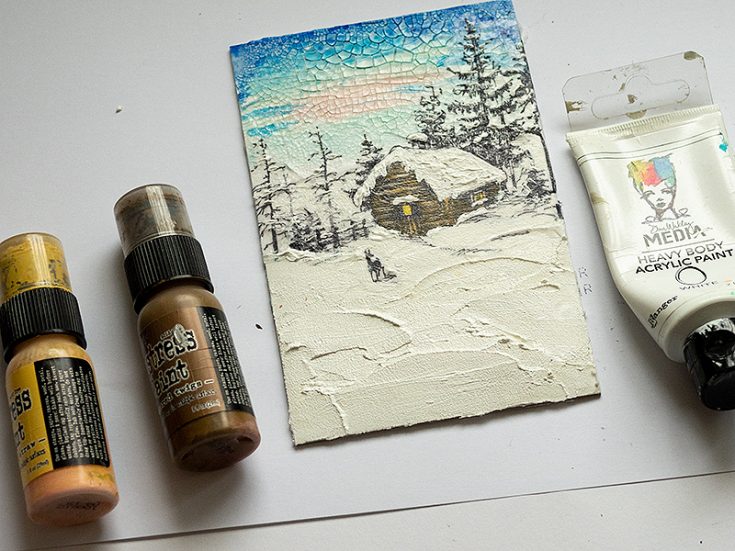
Paint the snow with white paint and the house with brown and yellow. Add thick layers of white paint to the branches of the trees using a toothpick.
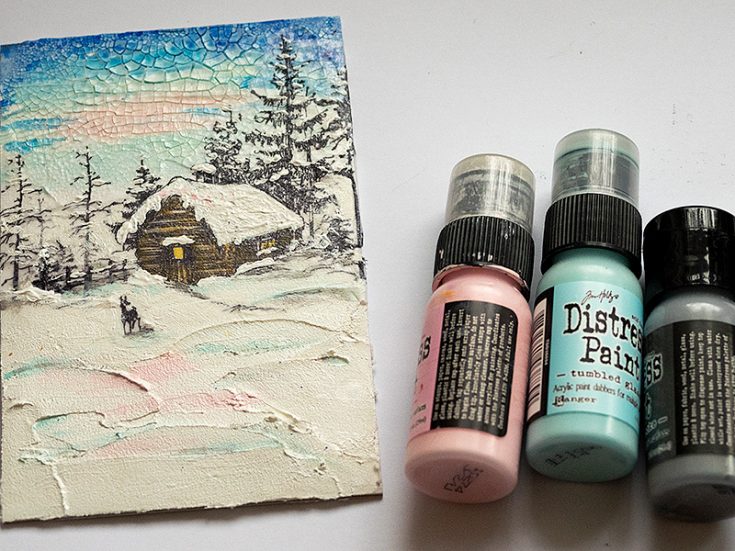
When the first layer of paint is dry, add a few areas of pink and blue to the snow, to connect it to the colors of the sky. Also, add some shadows with Hickory Smoke paint.
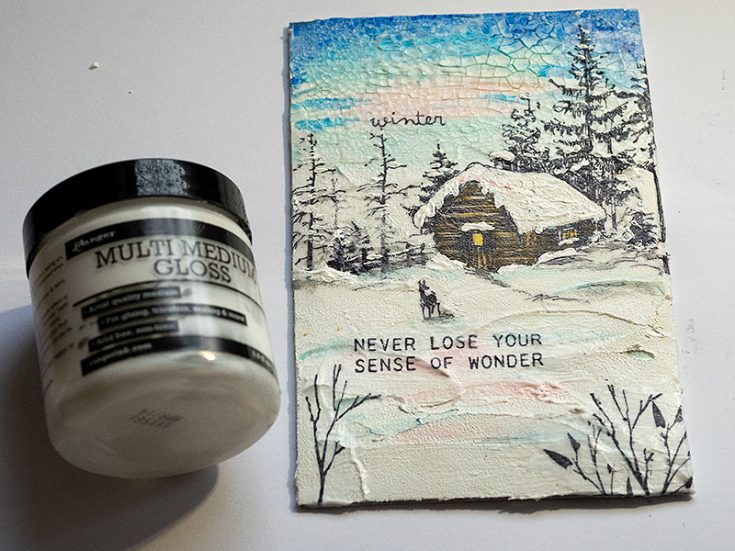
Adhere to the branches and sentiments with the same technique as before. The reason for not adhering them earlier is that I wanted to paint most of the background first so that I wouldn’t paint over the words or branches.
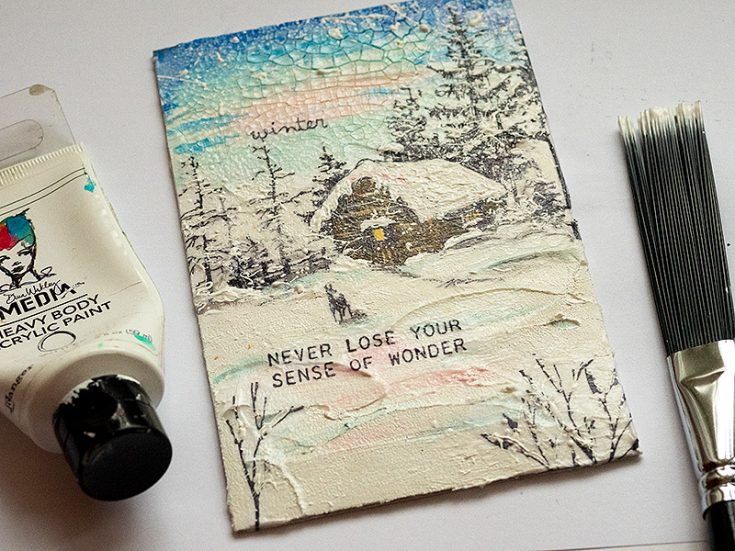
Splatter white paint on the scene to create the look of snow. Avoid the text.
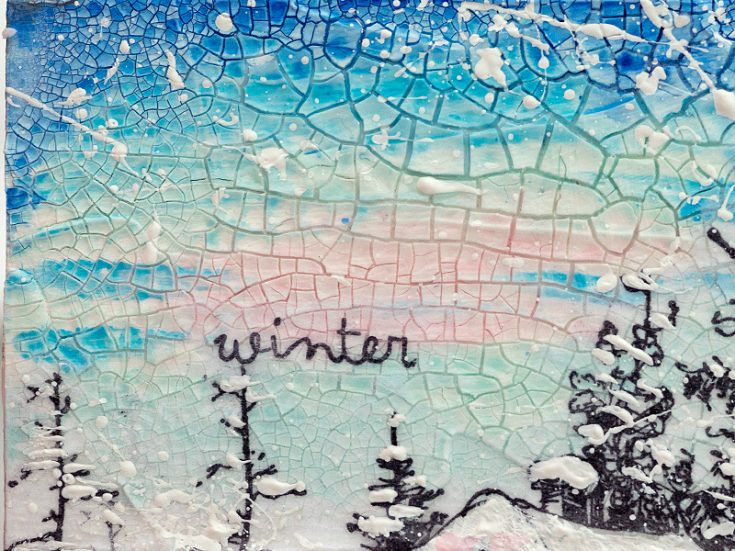
Here you can see a close up of the crackled sky and splattered snow. Note that the edges of the tissue paper aren’t visible. Most tissue papers work well for this technique. Some are a little opaque and might not disappear completely, so experiment on a small area first. If the edge of the tissue paper is slightly visible, you can hide it by painting over it.
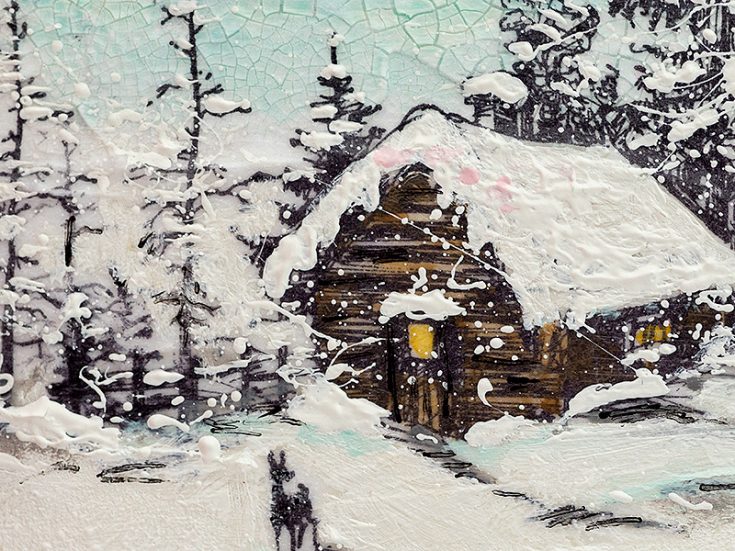
I added some black marker lines here and there, to bring back lines that were hidden by paint.
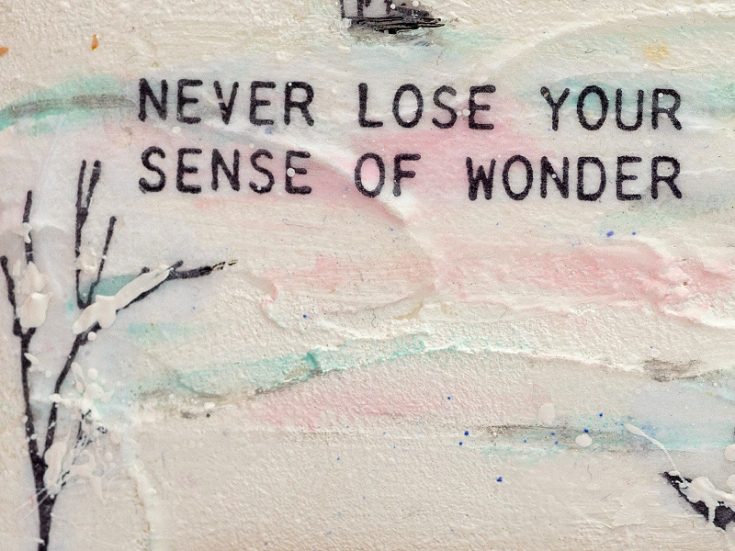
You could add even more details to the scene, but I wanted to leave it fairly uncluttered and peaceful.
I hope this tutorial inspired you to try out some scenic stamping in combination with mixed media techniques.
Thank you so much for looking!
Happy crafting!
Anna-Karin

SUPPLIES:
|
Thanks so much for stopping by, and thanks to Anna-Karin for being our guest!

Blog Candy Alert!! Follow our blog via email and comment on this post for a chance to win special blog candy!


Such a stunning scene!!
Fantastic piece–just beautiful.
Nicely done! Only thought that tissue paper gets absorbed by wax when adding prints to candles. Didn’t know that it also disappears with paint. Thank you for sharing!
Love your creation! Yes winter is still with us here in New England, too. We went from the deep freeze into 60 degrees and back to the deep freeze again! You’ve certainly highlighted the beauty of winter and I love your use of “Never lose your sense of wonder.”
OH MY GOODNESS Anna! THAT is amazing! Thank you so much for the step by step ttutoril, I definitely want to try my hand at this although it couldn’t possibly come close to this beauty. Beautifully done!
Such a pretty scene! The distress paints look like fun!
This is beautiful! I love the crackled sky and the tip about stamping on tissue paper.
Awesome project!Thanks for sharing and teaching. =)
This is simply beautiful!
Very pretty scene Anna. Like you, I like to leave out things that aren’t specifically Christmas themed. Thanks for sharing this project with us.
Love all the texture!
I’ll have to try this. I love stamping and creating. I’m a novice painter too (two years), so this is calling my name to try and create something with your technique. I love it. Thanks. ?
Wowza!! Absolutely beautiful!
SQUEAL!! Such a BEAUTIFUL Scene you created!! LOVE all of the Texture and the Colors!! THANKS for sharing and have a FABULOUS WEEK!!
I have yet to master crackle! Beautiful project!
I love this! Thank you for sharing your time and talent with us.
How cool, I love the crackle. I already follow by email.
gorgeous! The process looks so therapeutic too!!
OMG your crackle paste technique is way cool !!
Oh wow, this is absolutely stunning!
Oh wow! This is fabulous!! Amazing textures and effects for an awesome scene!! <3
So very beautiful.
So much detail! Gorgeous.
Beautiful creation! I love the textures and the crackle on the top!
Such a beautiful scene Anna=Karin! I love the serene feeling, and thanks for all the tips in creating it. TFS
Awesome piece of art!!!
This is so stunning! Looks like you can step in to it and walk away!
Dazzling mixed media piece with the sweetest hues. x
As much as I want Winter to just go away and be done, I must admit I was taken with staring at this beautiful piece. The cracked top and texture are great!
Really neat piece. Love the crackle for the sky.
Beautiful project Anna. I love the detailed instructions.
love love love all the texture!!
Absolutely beautiful, so much texture and detail!
This project is breath taking–love the pink addition to the sky and snow and stamping on tissue paper with torn edges is a great technique!
This is amazing! I’m not a mixed media type person but I love this!
Absolutely breathtakingly beautiful!!!
This is gorgeous! The colors are perfect and I love everything about your scene. I have not done any mixed media for a long time and this has me wanting to get my supplies out and play!
Hello there!
Interesting blog post.I never thought about few ideas you mention here.I like your way of presenting things.Thank you .I like as well your latest publications on Upmixed and Medium.
Best regards: Maria Nebutaires
Beautiful scene and love the crackling technique. Thanks for sharing.
Linda D.
What a cool creation!! Love that crackle sky; so fun!
Really when someone doesn’t understand afterward its up to other viewers that they will help, so here it happens.
Wonderful winter scene. Love all the texture.
A Med Spa in Little Elm offers a sanctuary for rejuvenation and relaxation, blending medical expertise with spa luxury. Specializing in facial services, it provides a range of treatments tailored to individual skincare needs. Among them, the deep cleansing facial stands out as a transformative experience, targeting impurities and revitalizing the skin’s natural radiance. With the latest techniques and premium products, it ensures the best facial treatment in Little Elm, leaving clients feeling refreshed, renewed, and glowing with confidence.