Work It Wednesday February 2019: Green & Gold!

Happy Wednesday, friends! Welcome to Work It Wednesday for February 2019!
In case you’re wondering what ‘Work It Wednesday’ is, let me explain: On the third Wednesday of every month (or towards the end of the month ), we want to see what you’re creating! The Simon Says Stamp community is so very talented, and we want to see more of your cards and projects every month.
Each month we’ll pick a few random participants to win a Simon Says Stamp grab bag! YAY!
The projects and cards that were shared for December 2018/January 2019 were bursting with NEW ideas! Do you want to see all of the cards and projects that were shared for our previous Work it Wednesday? Check them out; if you are looking for new ideas to try or inspiration using new products, it’s a great place to peruse!
The following three participants from our December 2018/January 2019 Work It Wednesday were randomly chosen to win a goody bag from Simon Says Stamp:
- #98 maria f.!
- #22 Katrina T.!
- #59 Gerrina!
CONGRATS TO OUR WINNERS! Please email [email protected] with your mailing address and he will get your prize sent out to you.
We were thoroughly inspired by EVERYONES creative ideas, and we look forward to seeing what you make for our newest challenge!
This month we want to see how you use GREEN ? and GOLD ? together! Maybe make something festive for St. Patty’s Day, a Springy card blooming with freshness, or a classy design with rich emeralds and shiny golds.
Whatever you create this month, make sure green and gold are the main colors in your project! Here are 3 ideas to spark your creativity!
Once you’ve created your projects, make sure you link your creations below!
Please remember to limit entries to 3 per month.
What are you waiting for crafters? WORK IT!
Inlinkz Link Party

Blog Candy Alert!! Follow our blog via email and comment on this post for a chance to win special blog candy!
Fresh Altenew Ideas by Jen Rzasa!
Hi friends! Happy Tuesday! Please join me in welcoming special guest Jen Rzasa to our blog today to share two gorgeous projects featuring Altenew products! Read on for more information and enjoy!
Hi there, this is Jen Rzasa from Altenew and today I have two fun projects to share with you!
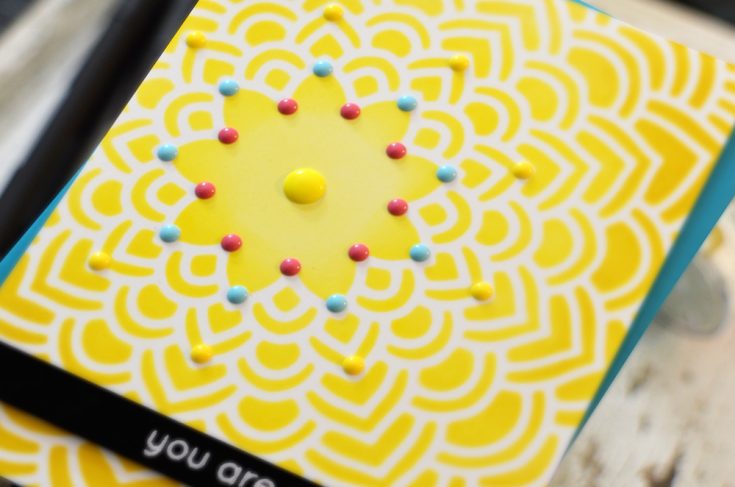
The first one features the gorgeous Floral Mandala Stencil, which I temporarily adhered to a 4.25″ x 5.5″ white card base with painter’s tape. I then blended ink through the stencil using Maple Yellow Ink in the center, transitioning to Honey Drizzle towards the edges. Once I removed the stencil, my design was revealed!
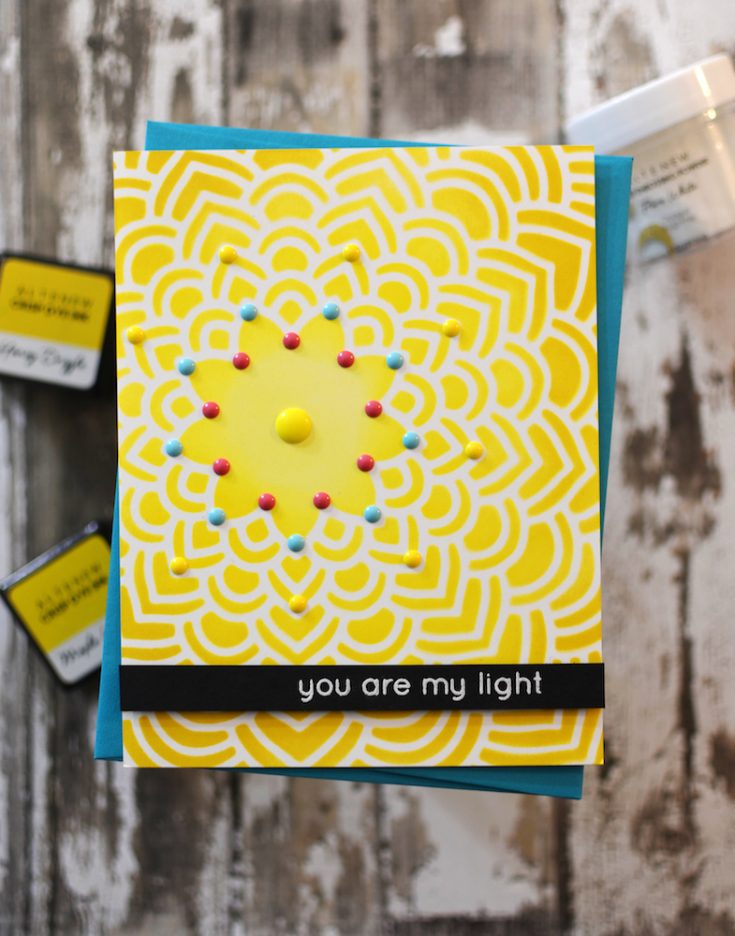
I then selected various colors of enamel dots, from the Pocketful of Sunshine, Red Cosmos, and Cool Summer Night packs. These were adhered in the center of the medallion. To finish off the card, I embossed a sentiment from Stained Glass Window on to a strip of black cardstock with Pure White Crisp Embossing Powder and adhered it with foam tape. I love how the black and white strip contrasts with the colorful background!

The second card was quick and easy to create. The background is a piece of confetti paper from the Pastel Dreams 6×6 Paper Pack, which I trimmed to 4.25″ x 5.5″ and adhered to a white card base. Next, I cut a strip of pink cardstock and embossed the word “birthday” from Birthday Builder using Pure White Crisp Embossing Powder.
The following step was a bit fiddly, but I love how it looks! I took the word “happy” from the Sweet Hearts Adhesive Wood Veneer set and placed my sentiment strip beneath the “

To finish the card, I added two hearts from the wood veneer set. I hope these projects inspire you to get crafty!
SUPPLIES:
|


Thanks so much for stopping by today and thanks to Jen for being our guest!

Blog Candy Alert!! Follow our blog via email and comment on this post for a chance to win special blog candy!
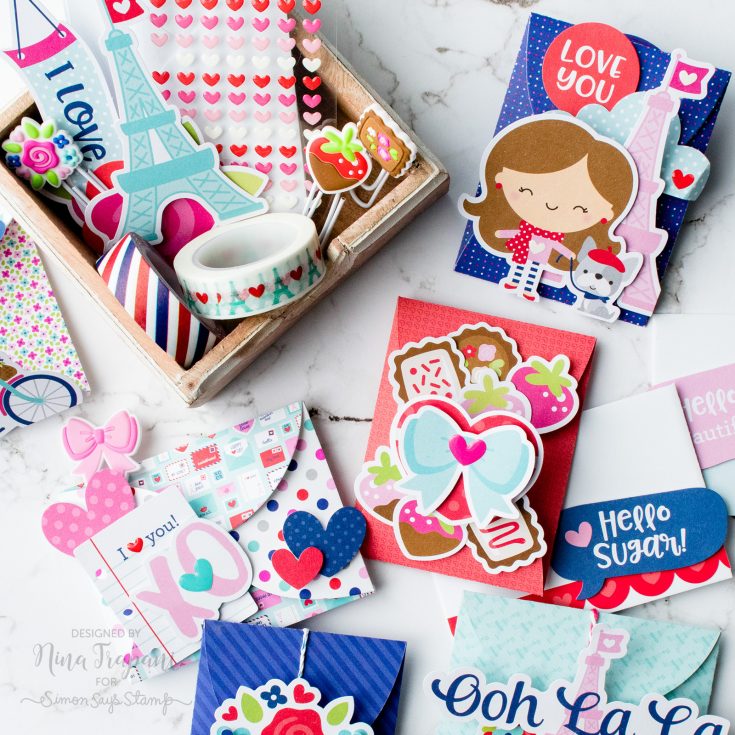
Studio Monday with Nina-Marie: Mini Love Notes for Any Occasion

Hello crafty friends, it’s Nina-Marie here with you, and today I wanted to share some inspiration for using the Doodlebug French Kiss collection to make adorable (and easy!), mini love notes!
These mini notes are perfect for many occasions! Some ways I think would be perfect to use them are:
- Put into your kid’s or grandkid’s lunch box with a little note written inside.
- Tucking money or a gift card into for a sweet surprise.
- Leave on someone’s desk as a thinking of you note.
- Give as Valentines.
These are simple to create which means even kids can put these together!
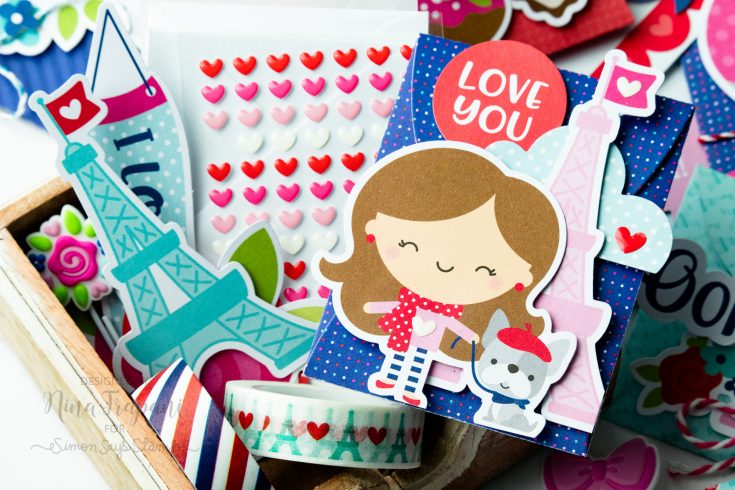
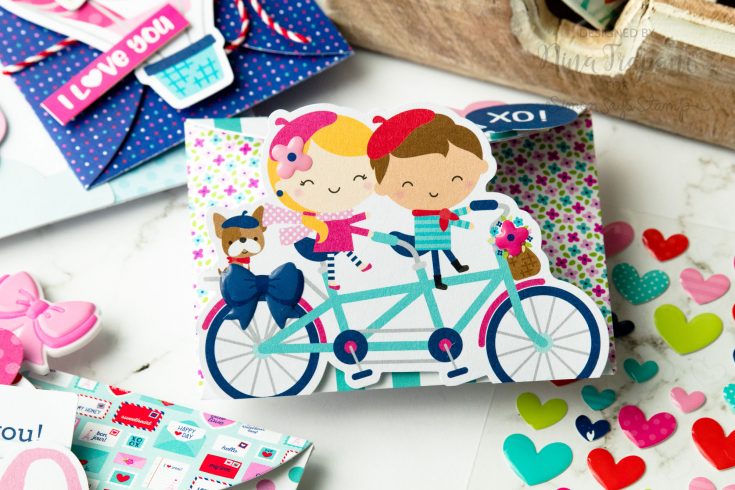
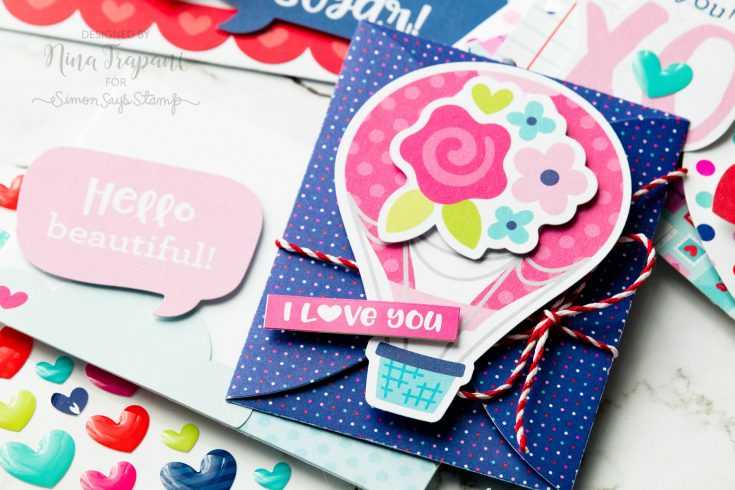
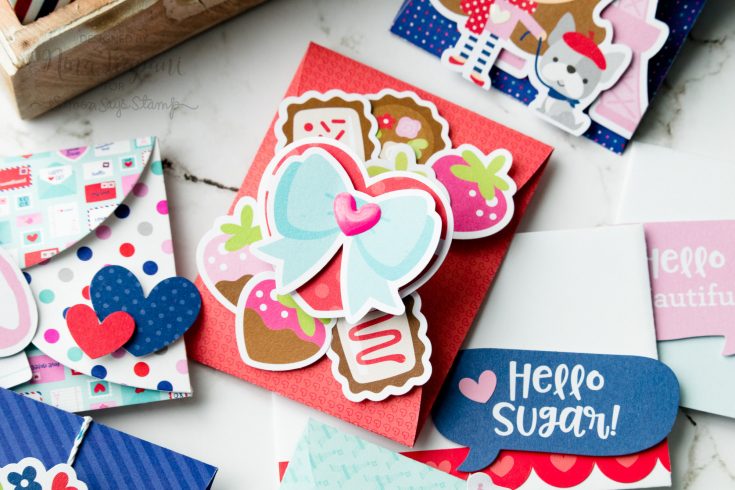
Each of these cards feature the versatile, Petal Envelope die (a Simon exclusive!) This clever die has four tabs that can either be tucked into each other for a petal effect (and stays closed on its own!) or tied closed with some cute twine or ribbon. I used both techniques for these cards.
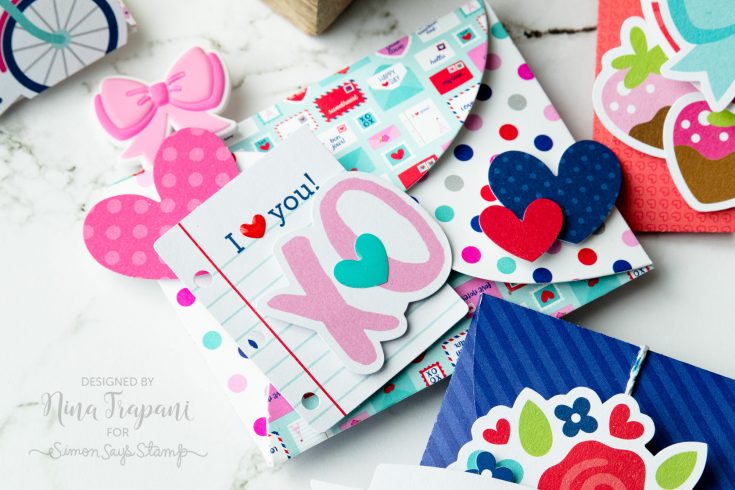
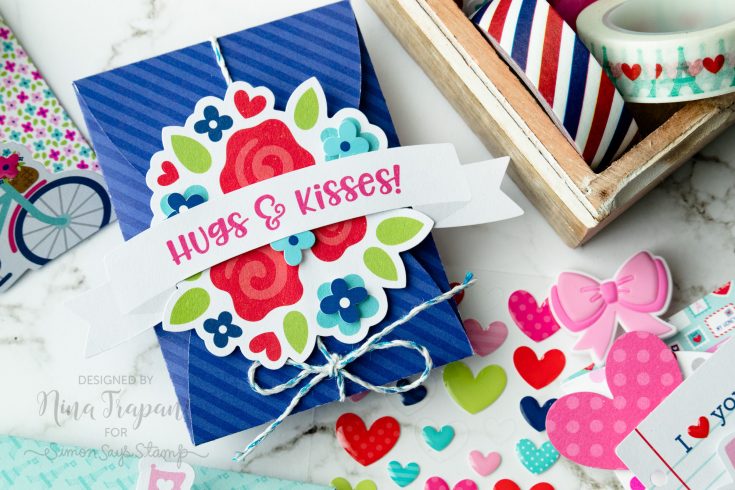
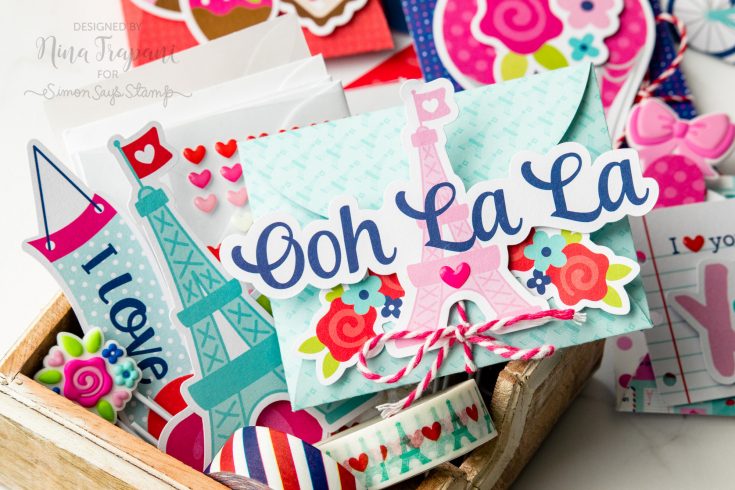
I even decorated White Mini Envelopes to match some of my cute notes! Once folded, the petal envelope fits inside the mini envelopes perfectly (and looks so adorable!). The new French Kiss washi tapes can be used to close the flaps of the envelopes; the border stickers in the 12×12 paper collection also look cute on the envelopes!
Be sure to check out the video below to see how I put these cuties together! I hope they inspire you to make some sweet mini notes of your own. They are so much fun to create, and even
WATCH THE VIDEO
SUPPLIES
|


Blog Candy Alert!! Follow our blog via email and comment on this post for a chance to win special blog candy!
Blog Candy Winners!!!
Winter Wonderland Mixed Media Scene: isabel z!
Beautiful Flowers with Bibi Cameron: Chris Eder!
Yippee for Yana: Floral Friendship Card: Lynne Jardine!
Distress Oxide Sprays Background + Die Cuts:
Honey Bee One Layer Wonder with Kelly Latevola: Heather Mills!
I Love Your Face: “Just because” card inspiration!: Debbie P!
Watercolor Birthday Llama!:Carla Hundley!
Please email [email protected] with the name of the blog you won from, your prize(s), and your address if applicable!


