Challenge: Tissue
Anna-Karin suggested a challenge with tissue, and being the holiday season this sounded great to me! From decoupage to giftwrap, home décor to cardmaking there is so much possibility for tissue of all kinds to be used on this challenge. Perhaps you want to take this a little different direction and alter a tissue box or make something tissue thin.
Andrea, an appreciator of accessories, went the jewelry route with this tissue paper pendant necklace.
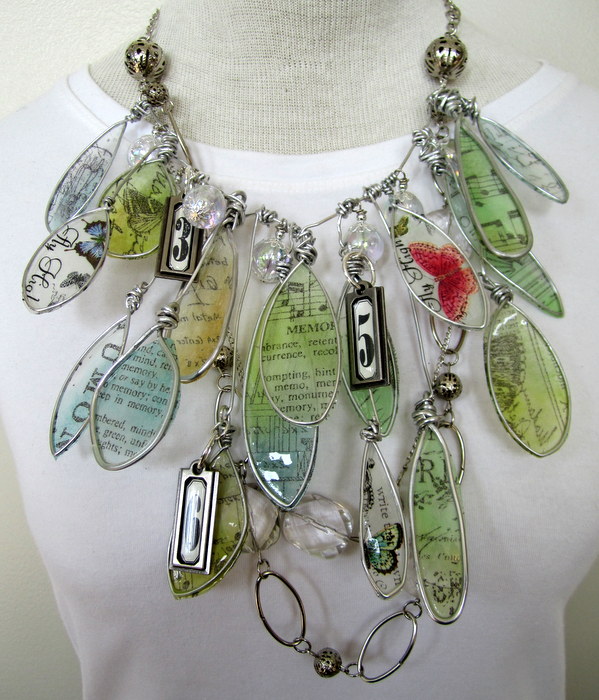
When I saw this week’s challenge, I knew it was time to whip up a new necklace! After all, if you have a neck, you might as well dress it in style. Receiving guidance from Susan Lenart Kazmer’s new book, Resin Alchemy, I made these tissue paper pendants out of wire, Tim Holtz tissue paper, ICE Resin and a handful of gorgeous inks.
Dan has always been a fan of tissue tape so when he saw this week’s theme he jumped at the chance to make use of it.

For the longest time the only tissue tape I owned were the designs by Tim Holtz, and I’ve used one of those on my tree here. Recently though, I’ve started to acquire designs from other companies and designers so today I thought I’d give an airing to a couple of the great designs available from Kelly Purkey, her numbers and teal polka dots. As ever, stamping has to play a part here too and I’ve used a face from the Tim Holtz Classics #5 set and the Hero Arts printer’s alphabet.
Meihsia created a holiday project using tissue paper and tissue tapes to cover the ornaments.

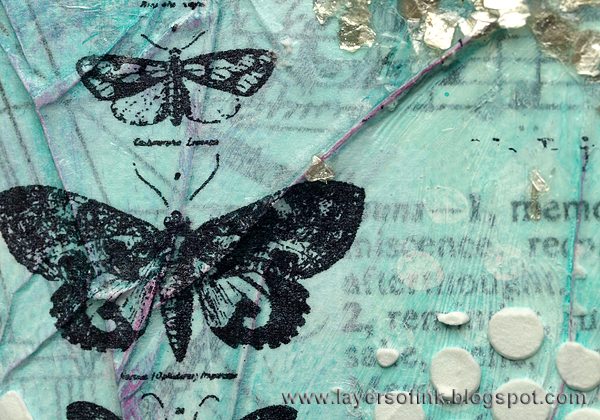
I have used lots of tissue paper in many of my mixed media projects and I love it. So for the challenge this week, I wanted to use something a little different – tissue tapes. I covered the ornaments with tissue tapes, colored with Distress Stain and sprinkled them with Wow! Glitter. You can also make various tissue tapes by stamping on the tissue paper and add adhesive on them. It’s easy and fun to use tissue paper on holiday projects.
Sandra Mouwen had lots of pink on her mind while making this card
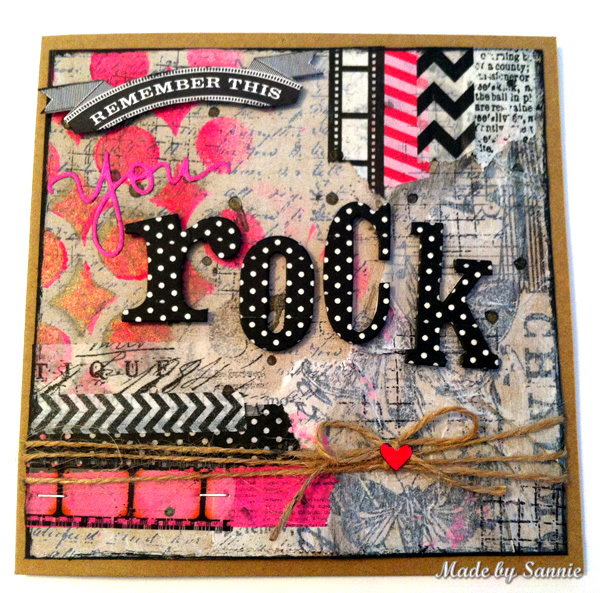
My close friend Paula recently changed jobs. So I made this card to let her know I have all the confidence in her that she will rock her new job. In the back I used Melange Tissue Wrap. I covered it with a thin layer of Gesso. I love the exclusive Blocked Circles stencil and used it with Neon Pink Paint Dauber and Bronzer Color Shine.
Suzz decided to create a teacher’s gift using a little tissue and some decoupage.
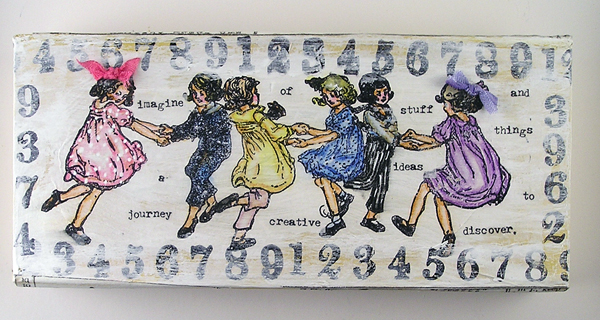
My project was inspired by the delightful image from Indigo Blue Dancing Children. This time of the year has me thinking of clever ways to package up gifts. The dancing children is a perfect image for a thank you to a teacher. I stamped them up on tissue paper which gives them such a lovely texture. I then found a great pencil case box to put them on. I painted the box with the Paper Artsy Haystack crackled with the PaperArtsy Crackle Glaze. The box is the perfect size to slip in a gift card for one of my daughter’s favorite teachers.
Tracy spent a fun filled few hours creating a mixed media canvas for a loved one.
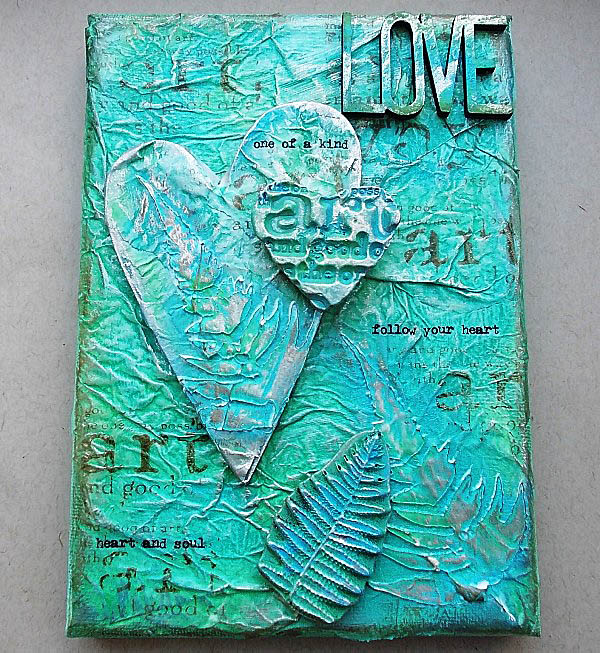
Using tissue in my artwork is one of my favourite things to do, it adds wonderful texture and dimension to a piece. Many pieces were added to my canvas to add texture and dimension including a heart from Wendy Vecchi’s Hearts, Love and Stars Art Parts, White Embossing Paste, Black Ultra Thick Embossing Enamel to name but a few. I love how tactile this piece is!
Candy is continuing to celebrate the Christmas season with this festive multi medium picture frame.
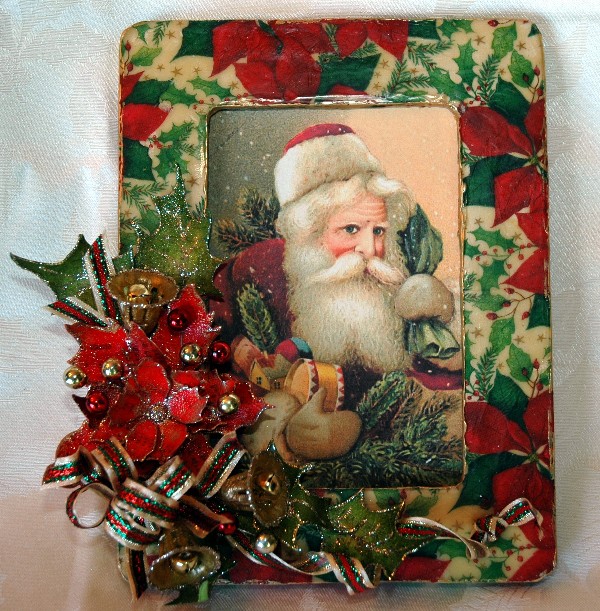
I love tissue paper and don’t use it all that often in my work. Another medium that I love yet don’t use all that often is Melt Art. So, I combined those two things to create this very vintage Christmas frame. It’s amazing what you can create with a Christmas napkin, a wooden frame and Natural Beeswax. But the really fun part is the embellishing! The Holly Leaves, the Tattered Poinsettia, the little vintage bells and the Mercury Glass Stickles trim reminds me so much of those sweet little vintage corsages that my mother wore on her coat lapel every Christmas.
Michelle is using tissue to create a vintage holiday wreath.
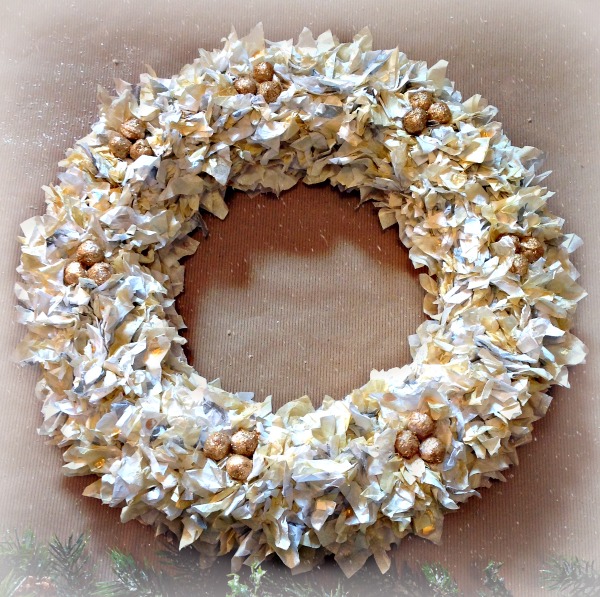
I love pulling heirloom holiday decorations from the attic each year. Thanks to Grandma and Great-Grandma, we are able to have an old-fashioned Christmas every year with items that once graced their homes. This year, I was able to create a vintage-inspired wreath from tissue, antique linen, and silver inks. A bit of Gold Lame added the sparkling, final touches. This wreath will work beautifully with my actual vintage décor!
While doing this week’s challenge, Ashli fell in love with a new material!
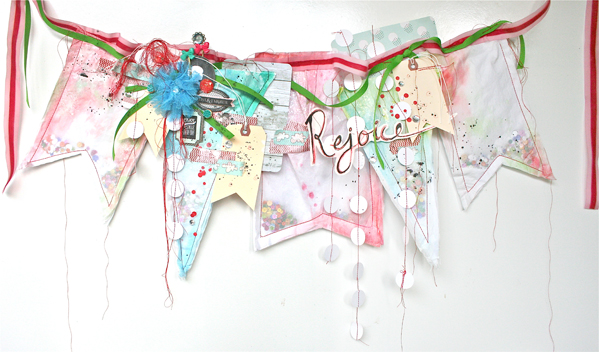
Yes, it is true! I have to admit, this tissue challenge had me a bit stumped at first. I have used tissue in bits and pieces, but have never really put it to use as a foundation of a project. I decided to create a festive holiday banner using Watercolors, Gelatos, Color Shine, sequins, and of course… tissue paper! Once all of my elements were assembled, I completed this project with a Maya Road Flower and some Maggie Holmes Pins. And now, I am happy to report that I LOVE working with tissue paper. Rejoice!
Mona was inspired to create a holiday tissue covered tag featuring a delicate tissue paper snowflake.
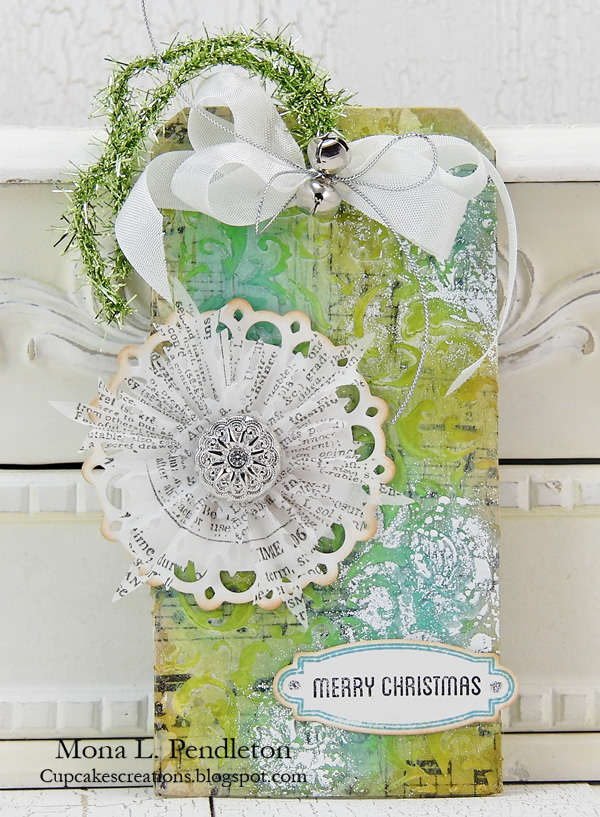
I covered a die cut tag using tissue paper then I added texture and design using a Flourish stencil and modeling paste. Once dry, I colorized using Broken China and Crushed Olive Distress Inks. I embellished the tag with a beautiful tissue paper die cut snowflake rosette and a Fanciful button.
Tune in Wednesday to see Anna-Karin’s project!
So many ideas and so much inspiration! Who knew tissue could be more than just a gift wrap accessory this time of year? Click the links to the team member’s blogs to find project photos (and full supply lists) for their entries. Leave them a little comment love while you’re there so they know how they’ve inspired you too, if you’re so inclined.
Then be sure to share how you’re using tissue this week!

As always, Simon Says Stamp is giving away a $50 gift voucher that will go to a random entry chosen by random generator. To qualify all you need to do is create a new project that ties in (in any way!) with our theme and post it, along with a link back to this challenge, and add a link here. This challenge will end at 11:59pm on Sunday December 15th Eastern time.
We will also be choosing some of our entries to put in the spotlight – a special honor where we talk about why we loved that entry in particular and award a special badge too!
For the full rules, read the “challenge rules” posted in the side-bar here on our blog.
[raw]
[/raw]
Challenge Badge

Spotlight Badge


Wow, this sounds and looks great! Beautiful examples ladies and Dan! Have a great time! Edith
Wow. You are all so talented!
Holy cow, who knew tissue paper could look so good!
wow, I’m the first one to link up! First time that’s happened. ;) I used gift wrap instead of tissue paper, but I hope it counts. ;)
hmmmmmm…i think i have only once EVER used tissue paper on a project. gonna have to put the thinking cap on for this one. and while all the samples are nice in most of them i can’t tell where the tissue paper is so not so much help there for me. hmmmmm…….
Wow, stunning art pieces! So much inspiration. Thanks!
Anna-Karin…..Such a stunning piece!! Karen.x
It`s been a long time (you already change the blog home between), but I am playing with you again…fantastic inspiration from DT, thank you!
Hugs
Thanks so much for the super fabulous challenge! AND thanks for the amazing DT work for added inspiration! Merry Christmas, friends! :)
These are all stunning pieces. You all amaze me at how each one of you comes up with such a different take on the challenge.