Gelli Plates with Sandra Mouwen
Hello, Sandra here and in this tutorial I’ll take you along with me how I use my Gelli Plate for creating backgrounds. The Gelli Plate is hot right now and that makes totally sense, because it’s such a great and verstile tool. It’s so much fun to experiment with. Since Halloween is around the corner and this week’s challenge is “A Spooky Season”, I’ve chosen to work with two typical Halloween colors, orange and black. Just by using these two colors you already get a bit of a spooky effect.

Let’s start at the beginning. What do you need? Of course the Gelli Plate, which comes in different sizes. I chose for the 8.5 x 11 inch, so I can also use it for my art journal. This size is also really handy for the stamp technique I’m gonna show you in this tutorial. You can’t go without a brayer. I have the large size of 6 inches, that works perfectly with the larger Gelli Plate. The other things you need are paints and materials to make some texture with. Here are the materials I used for this tutorial.

The first thing I did was adding a little bit of paint(Studio Altered Orange in this case) to the Gelli Plate and roll it out into a thin layer with the brayer on only one half. After that roll the brayer on a piece of scrap paper, so that the paint does not dry or unintentionally interfere with another colors when you change your paint.

To make some texture I pressed some corrugated cardstock in the paint in different directions.

What I like to do is use embossing folders, but not directly on the plate with the paint. No, I emboss a piece of cardstock and make textures with that. By using two kinds of different textures, it looks like you have made it in two runs. It gives it lots more dimension in a monochromatic way. Love it!

For my printing surface I chose the #8 manila tags. These are ideal for taking the paint, but also ink and other medium that I may like to add later. After I put the tag on the paint to get the print I also lay a plain sheet of printer paper over it and firmly rubbed over it. This way the paint will not go all over the place. I removed the tag and I got this beautiful print. You can choose to have more layers to apply with the Gelli Plate, but for this one I chose to let it be as it is and do some other techniques to make a finished project.

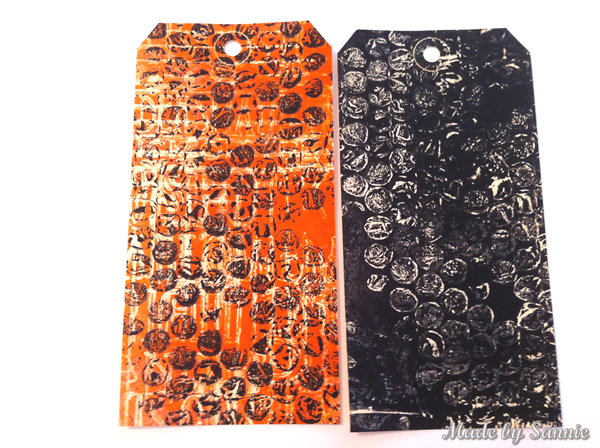
On the right site I pressed a piece of bubble wrap in the black layer of paint. That’s my favorite texture. Each time it’s a little different and it gives such a nice dimension and great effect.

Very dramatic, don’t you think ? I’m not goona give this tag another layer of paint with the Gelli Plate. What works best for me with printing is to use just a few layers. Most of the time only one or two. I like to finish the project with other techniques.

It’s orange’s turn again. This time I used the embossed cardstock and stamped from the painted side onto the empty side of the Gelli Plate. If I stamped directly on the tag, the print would be reversed. So this is only necessary if you have text or other images you don’t want to be reversed.

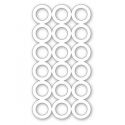
One of my favorite stencils is the blocked circles of Simon Says Stamp. This is also very nice to use as a stamp. I’ve pressed the stencil in a pattern in the paint on the left and stamped into a pattern on the right. With the right side I’ve given the first tag a second layer. The result you’ll see you at the end of this tutorial.

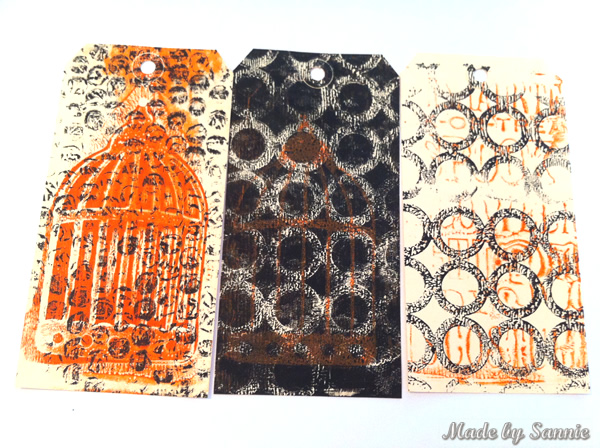
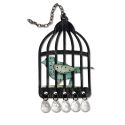
Also die cuts work perfectly as stencils and as stamps. The left tag is a ghost image, that’s what they call the 2nd print that’s made with the remaining paint that is left over after the first print. The right tag is the print of the left side of the photo above and is the second layer is the cage as a stamp.

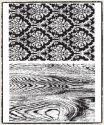
For the next tag I’m doing two layers, but they don’t overlap. For this you need a stencil where you have both the negative and the positive part. Did you know that stamps also work very well to make texture with? In this case I used the Wallpaper stamp from Tim Holtz.

In order to make a positive print you need the negative portion of the stencil. Because I don’t want, the other parts of Bert’s on my tag I covered them op with the positives. On top of the stencil I placed a tag and rubbed with some pressure to get a good print. The next step is to fill the background. So I made a layer of arange paint on the Gelli Plate, made some texture wiht the embossed cardstock and blocked circle stencil. To cover up the print I stuck the positive portion of the stencil on top of it with a little piece of washi tape (make it into a roll and stick it on the backside of the postive), so I could print the orange paint layer without printing over the already printed portion. Because I work with manila card stock, which is thick, you get a nice thick halo around the first print. The result you see in the final project.

These are a few prints I made in this run.

SUPPLIES
 |
 |
 |
 |
 |
 |
 |
 |
 |
|
 |
 |
 |
 |
 |
|
 |
 |
|
|
 |
 |
 |
 |
 |
 |
 |


Now that I know there is nothing spooky about Gelli Plates – I might have to give them a try!
Guess what? It’s your turn! Join us in this week’s challenge! For the full rules, read the “challenge rules” posted in the side-bar here on our blog, and be sure to enter the challenge in the post below this one.
Challenge Badge

Spotlight Badge


Wow. So much gorgeous-ness. TFS.
Such fabulous gellied halloween tags. Thanks for the tutorial and inspiration.
Spooktackular tags! Love the detailed shots and the gelli plate inspiration!
sooo very cool!!!
Really wonderful tutorial on gelli plates, Sandra! Your examples and finished tags are amazing! Thanks so much for the steps, the easy to understand instructions and the great pictures! <3 Candy
I don’t have a gelli plate (yet!) but you are making me want to go out and buy one…your results are so beautiful.
WOW !! So spooky magnifique !!!!
Hugs from France
Lunéa
Wow Sandra! What an awesome tutorial! Love your collection of tags! Thanks for sharing your creative process!
Love what you’ve done here Sandra. The idea about the embossed card was so clever. Jenny x
This is fabulous Sandra! Your prints are so cool! Love that you only used two colours and all the things you used to make patterns are great. The finished tags are fantastic!!
My favorite of all those tutorials that I’ve seen on Gelli! I finally realized how to use the Gelli plates and now I can also buy it! fantastic and thanks for sharing! Barbarayaya
Sandra, this has been a great and very informative tutorial! Love how you used the Gelli plate and shared all the details! Love these tags!
They turned out fabulously! :) hugs, Kimberly
Gosh! This is so awesome! Thanks for the terrific tutorial, Sandra! I only recently ordered my very first Gelli Plate and now I know what I will do first, when it arrives! Your tags are absolutely stunning and I am begeistert!
Greetings from Vienna,
die amelie x
Wow… this is totally cool! Sandra, I love the beautiful result. Thank you for the great tutorial. :)
You did a fantastic job on this! For some reason, I am terrified of gelli plates, so thank you for inspiring me to give them a try. I was intrigued by the different materials you used to add texture and the artwork of the finished tags is truly stunning. Thank you for this amazing post!
hmmm very interesting, i never heard of gelli plates so this was decidedly something to think about.
Fabulous tutorial, Sandra… love what you’ve done with your GP!