Treasure Gold with Tracy Evans
Hi all, Tracy Evans here and I am absolutely thrilled to have the opportunity to share some tips with you all using a product that I love, the PaperArtsy Treasure Gold Gilding Waxes. These waxes are fantastic and easy to use on paper, cardstock, furniture, wood, frames, ceramics, glass, metal, plastic, resin, plaster and leather. They are touch dry immediately and are a wonderful smooth surface to add any stamping. You can blend any colours to create new shades, apply with fingers, a brush and buff with a cloth, so simple. I love them.
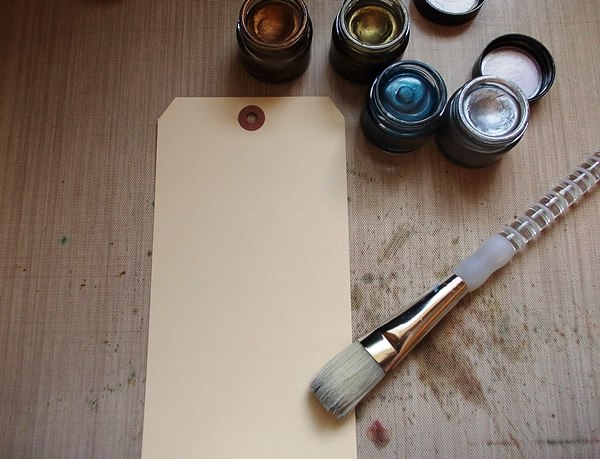
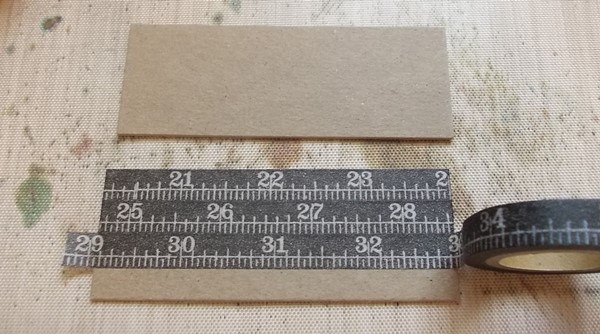
I thought the best way to show the waxes was to create a nautical tag book, decorating each tag with the waxes. To begin take any size tag or die cut using the Tag and Bookplate Die. You will need a brush and Treasure Gold Waxes, I used Sapphire, Olive Bronze, Spanish Topaz, Silver and White Fire throughout my book.
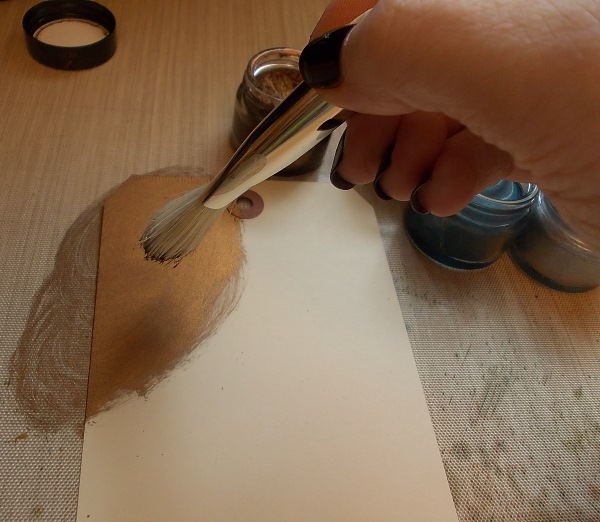
Begin by applying the colours to the tag using a brush, I tend to use a circular motion to add the colours.
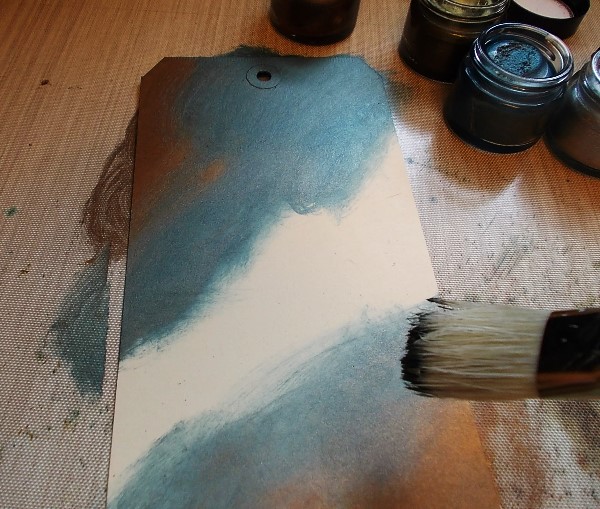
You can add as many colours as desired and you will notice as you add colours and they are blended together you create new shades.
I tend to add the Silver Treasure Gold Wax to add highlights and lift all the other colours, the luster finish is just fantastic and so smooth.
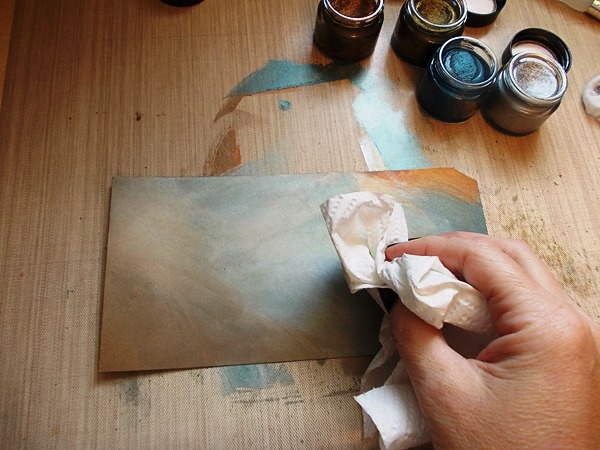
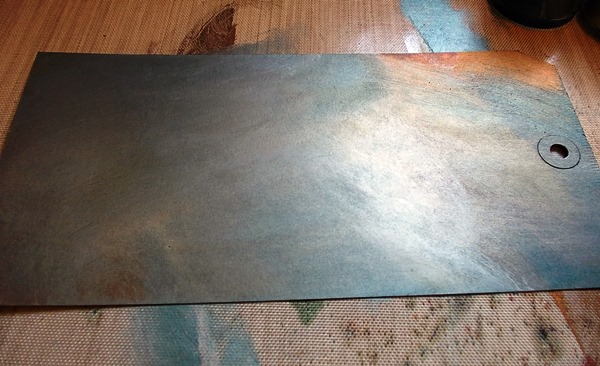
Buff the wax with a dry cloth.
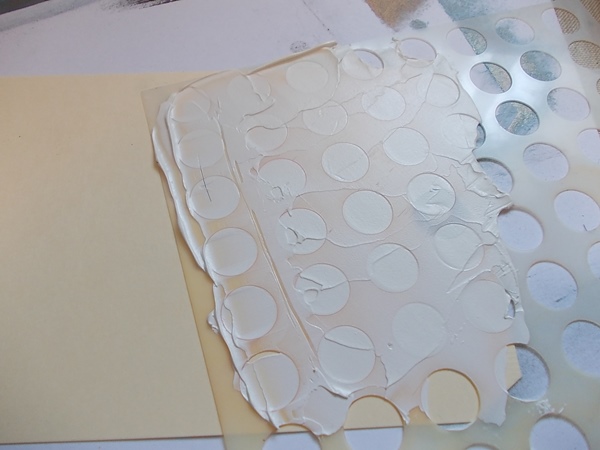
One of the other ways I like to use the Waxes is to highlight texture so on one of my tags I applied White Embossing Paste through a Crafters Workshop Mini Circle Grid Template.
To add further texture I also added stamping to the Embossing Paste using the background stamp from Tim Holtz Classics 9 Stamp Set. Simply spritz the stamp lightly with water and press into the Paste. Spritzing with water prevents too much of the Paste sticking to the stamp. It is however important to remember to clean your stamp immediately.
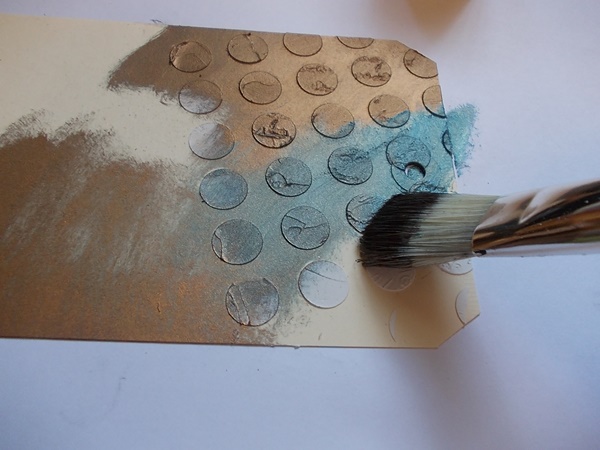
Once the paste is dry apply the Waxes with a brush as before.
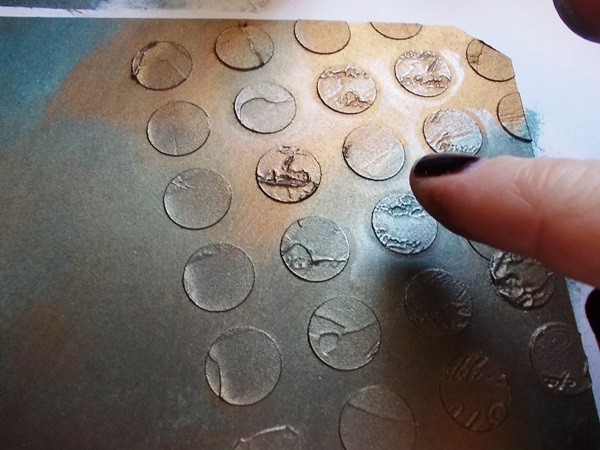
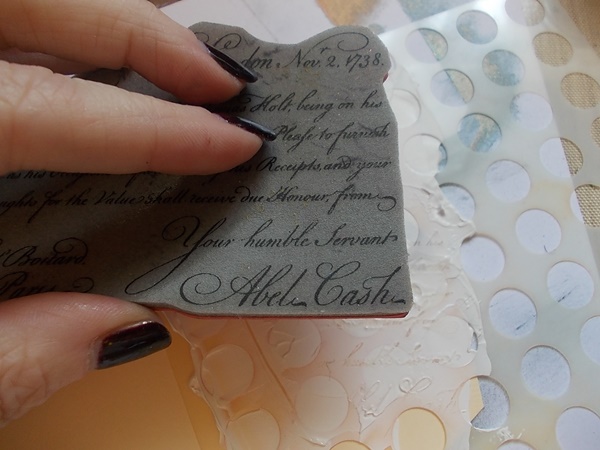
Highlight the text and texture using Silver Treasure Wax this highlights all the detail beautifully. Simply apply with a finger.
I attached all the tags together by adding two pieces of grey board, one to the top and one to the bottom of the tags and fastened together with twine. adding Elements Tissue Tape to decorate.
Again I have used the waxes, this time to colour the edges of my grey board and to add gold highlights around the tape.
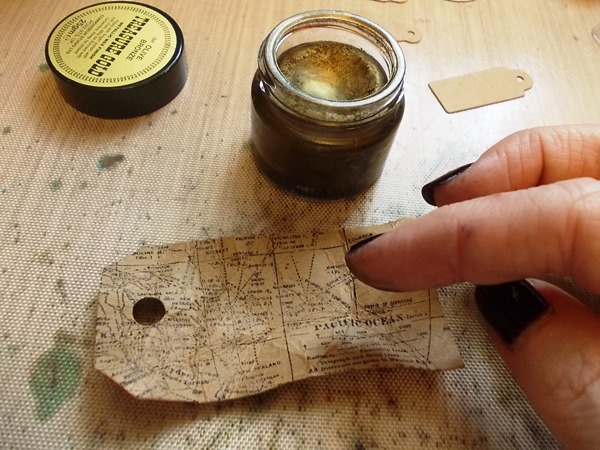
Treasure Gold Waxes are one of my star products when crafting as I use them all the time even for something simple like highlighting texture when crumpling paper, the wax highlights all the creases and cracks. Here I have crumpled a tag to add to my tag book stamping the background with the map background stamp from the Air Travel stamp set.
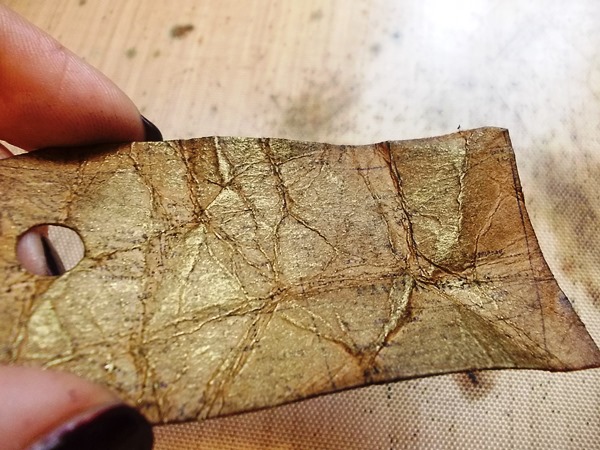
The Wax adds wonderful detail and look who it highlights all that texture!
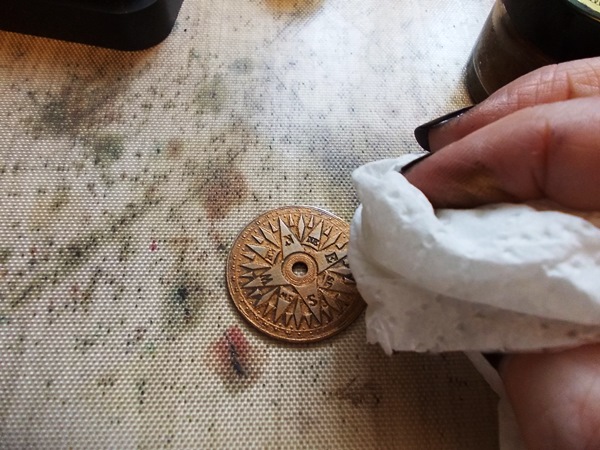
The Waxes are also fabulous to use on embellishments and here I have used Wax on an Idea-ology Compass Coin and then buffed with a dry cloth.
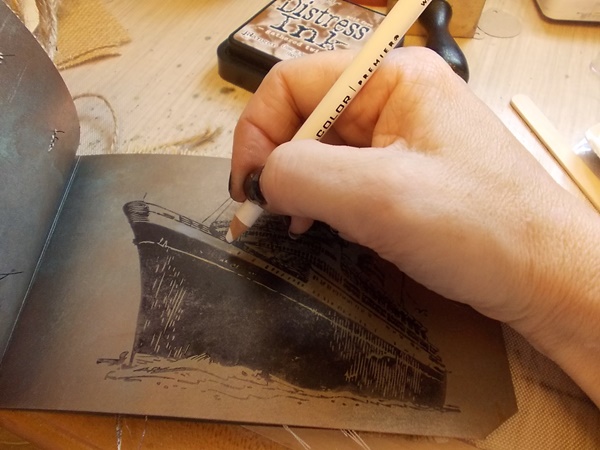
Stamping is so easy directly onto the waxes and the detail is still crystal clear. I stamped the ship image from the Artful Voyage stamp set using Black Archival Ink and then added white highlights to the ship using a white pencil.
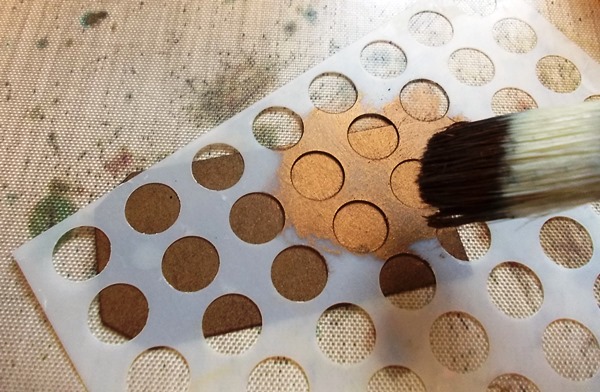
I also applied the waxes directly through a stencil and then added stamping over the top.
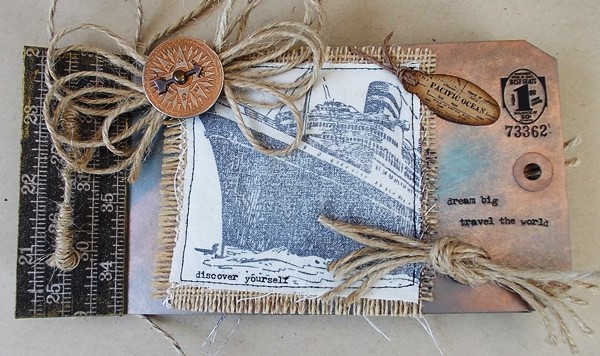
This is the completed tag book. The ship has been stamped onto calico and the background tag coloured with waxes is a wonderful backdrop for the focal image. I have also added wording using Remnant Rubs Words. Lots of twine to add to that nautical feel along with a reef knot, Compass Coin with added Game Spinner and a mini tag.
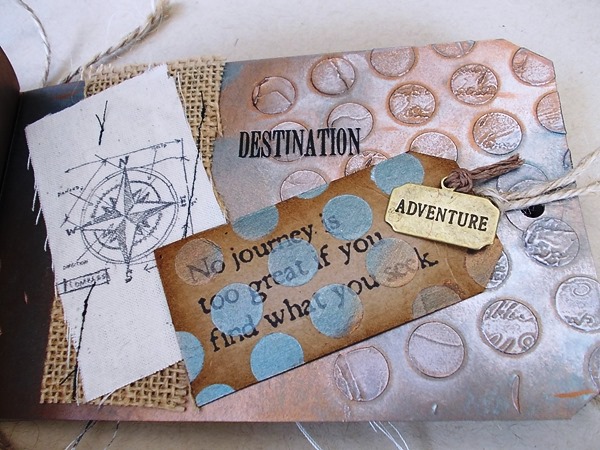
The second tag page has a compass stamped onto calico, random stitching and the mini tag I decorated with stencilled dots using the Waxes and you can see the wonderful texture from the Embossing Paste and how wonderfully the Silver Treasure Wax highlights the text and detail.
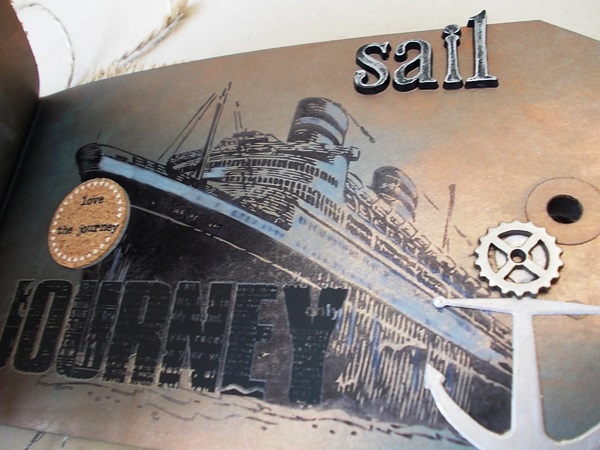
The third page with the stamped ship, Memory Box Majestic Anchor cut from white card and coloured with White Fire Treasure Gold Wax with added mini gear. I have also included a Studio Calico cork sticker with added Remnant Rubs Words.
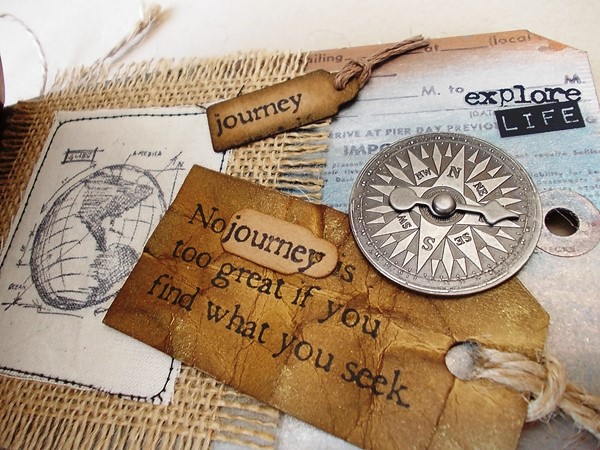
A further image stamped onto calico on the next page mounted onto a piece of burlap along with aged tag and Compass Coin.
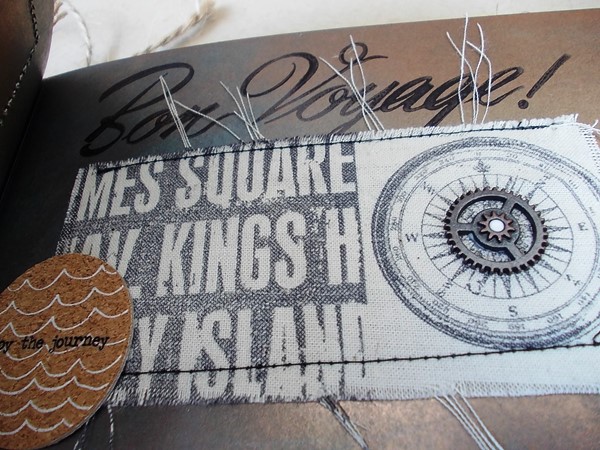
The next page also has further stamping onto calico a cork sticker and mini gear along with more machine stitching.
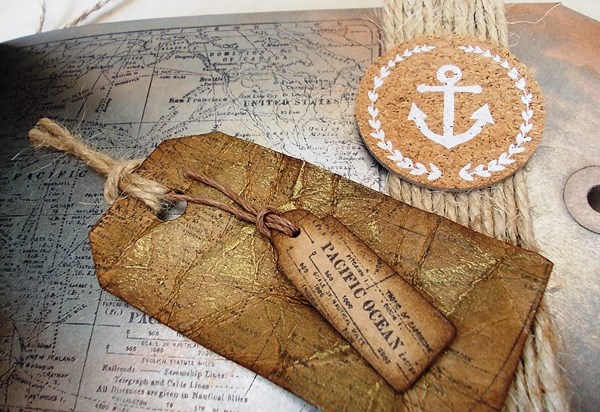
The final page has a stamped map, cork sticker and aged tags.
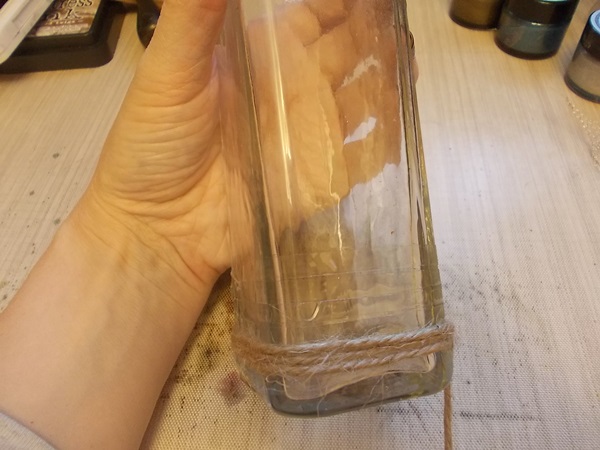
Along with my tag book I also decorated a bottle, well no Nautical piece is complete without hidden treasure and my map is hidden in my bottle and thrown out to sea! I decorated the bottle with twine; simply add double-sided tape to the bottle and then wrap twine around the bottle.
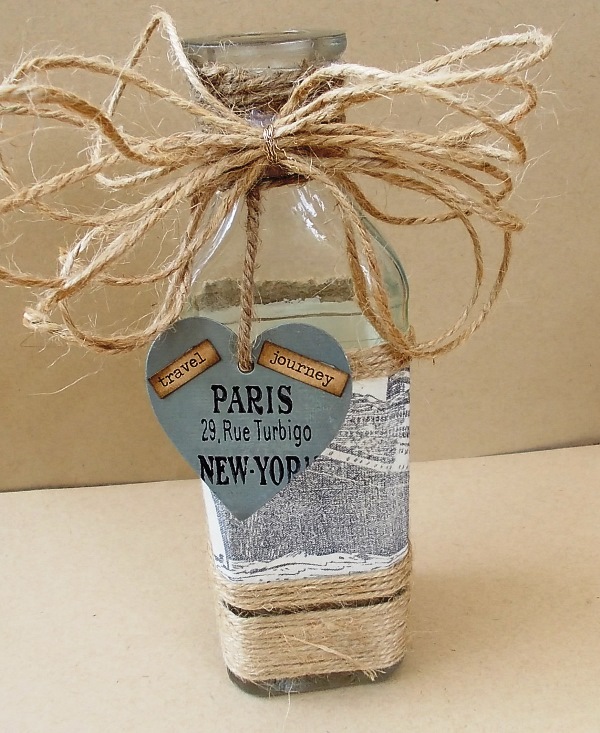
Finally, my decorated bottle to hide the treasure map!
Hope you have enjoyed my tutorial and are inspired to try some of the wonderful Treasure Waxes.
Products Used:
Treasure Gold Waxes – Sapphire, Olive Bronze, Spanish Topaz, Silver, White Fire
Tim Holtz Stampers Anonymous Stamps – Classics 9, Air Travel, Artful Voyage, Mini Blueprints 3, Remnants, Roadtrip, Papillon
Tim Holtz Idea-ology – Compass Coins, Game Spinners, Signmaker Alpha Parts, Remnant Rubs Words, Mini Gears, Elements Tissue Tape
Tim Holtz Alterations – Tag and Bookplate Die
Wendy Vecchi White Embossing Paste
Crafters Workshop Template Mini Circle Grid
Memory Box Majestic Anchor Die

I love learning about Treasure Gold – the perfect product for this week’s Nautical challenge! Thanks to Tracy for such a great tutorial.
Now – what are you waiting for? Join us in this week’s challenge! For the full rules, read the “challenge rules” posted in the side-bar here on our blog, and be sure to enter the challenge in the post below this one.
Challenge Badge

Spotlight Badge


Fabulous use of TG Tracy, I love this product so much and you’ve shown it off so well.
Fabulous project Tracy and a great tutorial. Love all the different ways in which you used the waxes and the results are wonderful.
Wow Tracy! What an amazing project! I love all the shimmer and texture! Thanks for sharing your creative process and for the enabling!
Oh my word Tracy, these are BEAUTIFUL. I am so glad the pictures came through. They are just, well, spectacular
tracey, this is a great artistic project post today. Your eye for detail is truly appreciated and thanks for the step up photo’s along the way, truly inspirational
Absolutely fabulous project Tracy, I’ve shied away from waxes not really knowing how to use them without them looking trashy but I love all the techniques that you’ve bought us and all the photos along the way which after seeing I might just have to muster up the courage to try. Thanks for sharing such an inspirational project. Hugs xNx
Oh Tracy, thanks so much for showing us how to use these waxes. I have been wanting to see them used and now you have shared this technique. Beautiful project.
Your tag book is fabulous – I never knew you could use the waxes in this way – how versatile are they! Thanks so much for the step by step.
WOW!!!! I have never tried those before and now I MUST – thank you for the great tutorial!!!
I love the tag book and how you bound it. Such a fabulous idea Tracy. And the PaperArtsy Treasure Gold Gilding Waxes add such luminosity. I want some !!!! Love all you embellishments. Thanks for taking the time to do this tutorial. I definitely have some new ideas that I want to play with :) — Mary Elizabeth
Gorgeous and amazing card !!!
Wow !!
hugs from France
Lunéa♥
OMG… while I read this I must think of the Movie Titanic ….
all so wondefull and with a lot of love made pieces
Love that Little book
TFS
CU hellerlittle
Gorgeous work, Tracy!! Such beautiful step by step pictures! I love the blending and texture!
*mwah*
Steph
Simon Says Stamp!
Tracy, that is such a spectacular tag! Love all the details and texture! Thank you for sharing all the details! Hugs!
Oh… what a fantastic project! Tracy. I love all the tag pages you created. The bottle is awesome! Thank you for sharing this great tutorial. :)
Amazingly gorgeous book with so much lovely detail. The sheen from the wax is so unique.