Coloring stamps with Suzz
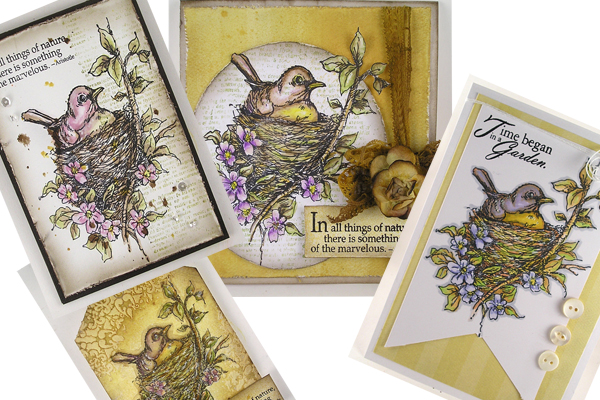
Happy New Year! Suzz here. Resolution time and it is about time I picked up some long neglected ways of coloring my images. I love using my watercolor pencils so they are my first choice to color with but I forgot how much fun using the different mediums could be when coloring images. I decided to use the lovely Stampendous Nestled Bird stamp as the base for my different inky choices which include watercolor pencils, watercolor markers, distress inks and Copics.
Depending on what type of medium you are using you will need potentially different papers and inks to stamp the image. For the water based mediums you will need an ink to stamp the image that will not run when the water is applied. For my watercolor and distress ink pieces I used the Ranger Archival Jet Black ink to stamp the images. For the watercolor markers it is important to have watercolor paper to help with the blending.
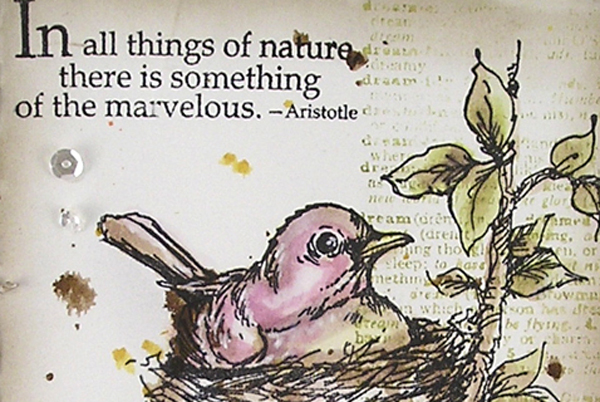
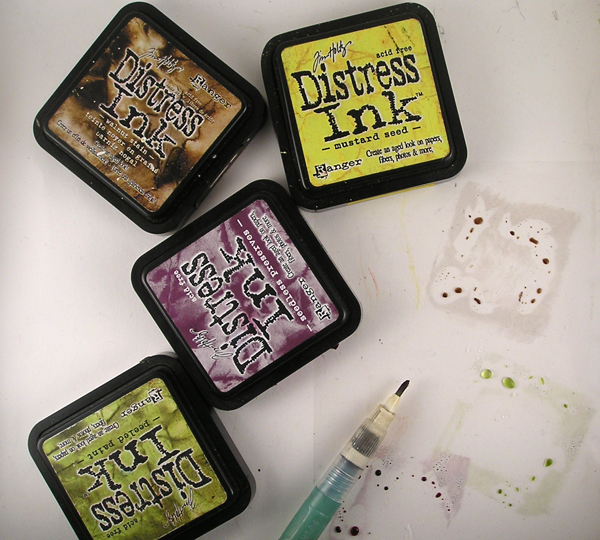
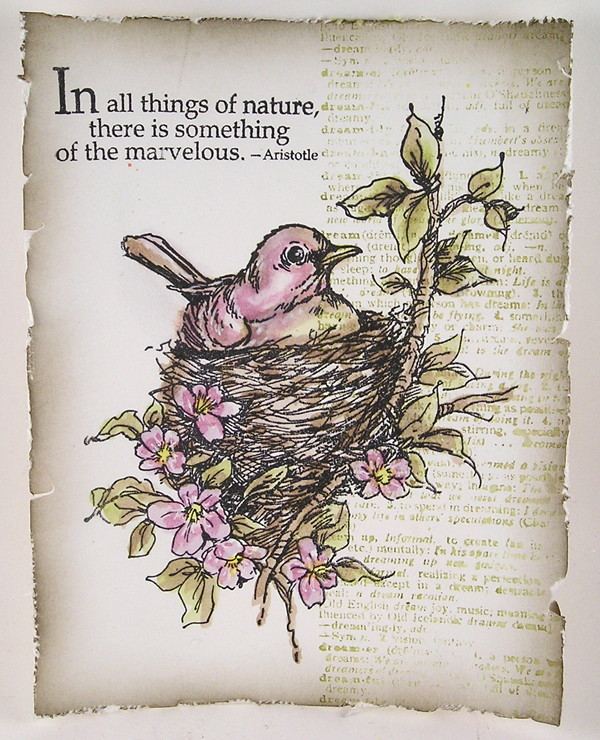
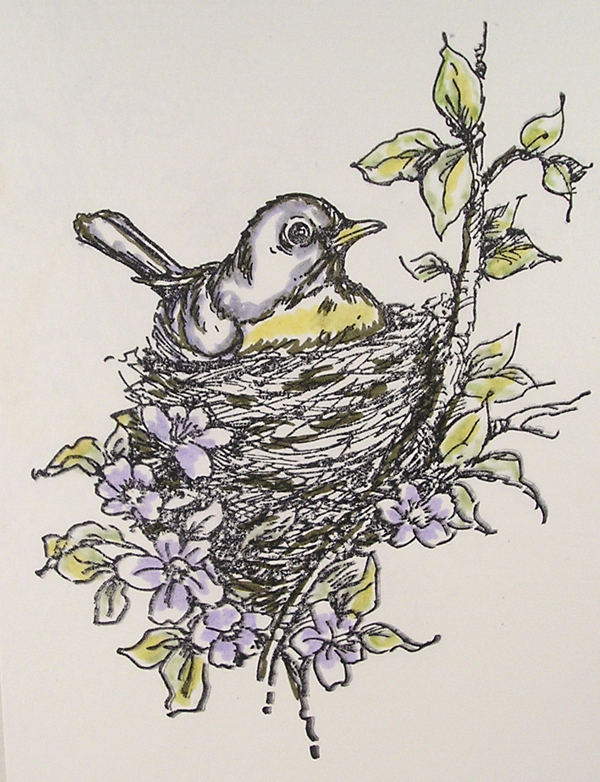
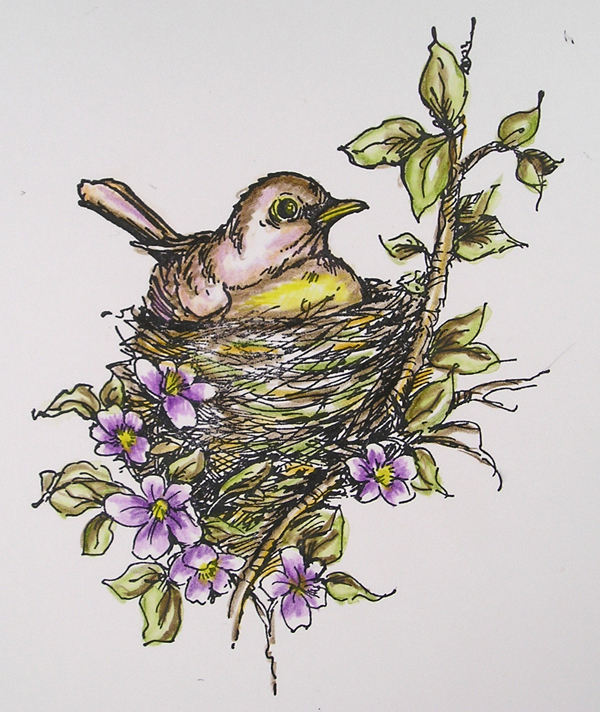
I started with the distress inks as my first piece. I stamped the image onto a piece of white cardstock using Ranger Archival Ink. You can also use watercolor paper. You can apply your Distress Inks using ink pads, the new distress sprays or the stains. I used the ink pads and some acetate to show how I picked up the ink with my water brush.
I will usually smear it on my craft mat and pick up the color with the waterbrush. The waterbrush dilutes the color and allows you to paint it onto the image in very subtle tones. You can increase the color by using less water in the brush, picking up the color directly from the ink pad or using a regular brush and more water spritzed on the ink.
I paint from the edges into the middle so the darkest colors/shading is around the edges leading into the light. I add different colors to the image to add shading using the brown or gray to help with a touch of darkness in the areas where the shading would naturally occur.

I add highlight with a white gel pen after everything is dry. I love how the distress inks give a soft watercolor effect to the image.
Next I moved onto the watercolor markers which require watercolor paper for the technique I used to color my image. You could use the markers similar to the distress inks with coloring on the acetate and picking up the ink with the waterbrush. The image should be stamped with a water-resistant ink on the watercolor paper. I used Ranger Archival ink.
First you color around the edges with the markers. You can add multiple shades of color with the markers. I have shown adding the first layer of color. Using the water brush you start to blend the marker and pull the color to the middle of the image. This is where the watercolor paper helps bleed the color to center.
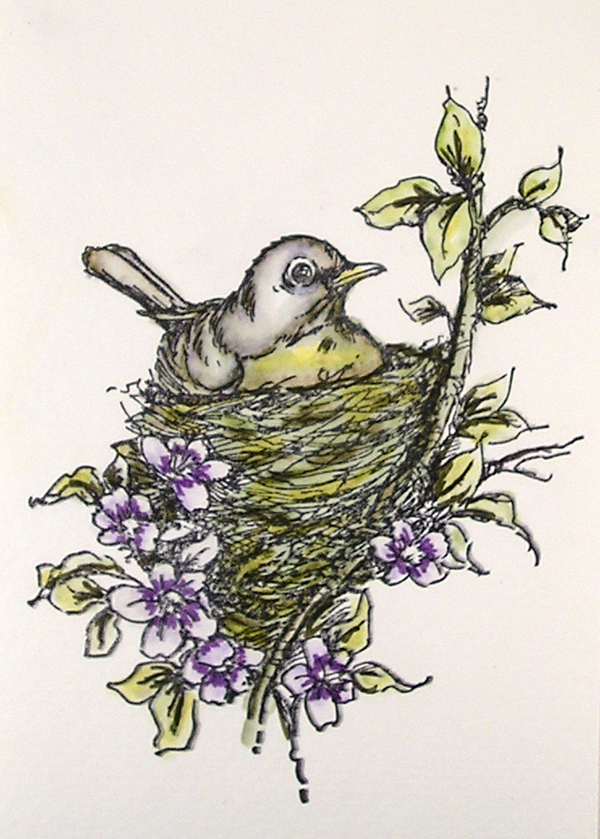
You can keep applying more colors and blending them until you are happy with the effect. The watercolor paper will not degrade by applying more water and ink.
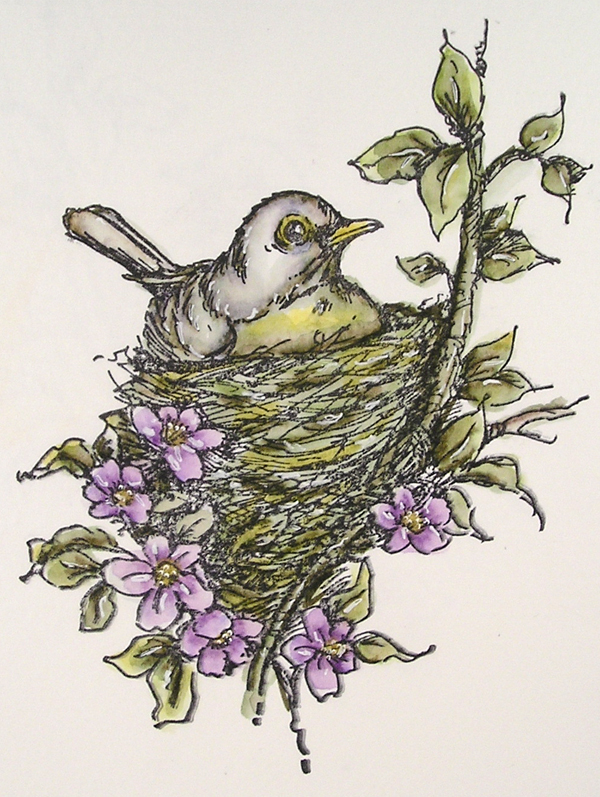
Next up was my favorite medium which is the watercolor pencils. Typically with these I use Ranger Archival Ink and white cardstock. Because I am shading and blending with the pencil I don’t need the watercolor paper to help blend out the colors.
I start with shading in all the color around the edges of the darkest colors first. I will use the pencil to blend the colors before applying the waterbrush. I use the waterbrush to soften the shading.
You can add many layers of color with the watercolor pencil.
Don’t apply the watercolor pencil while the image is wet as it will grab too much of the color and if the pencil tip gets wet you will also get a strong burst of color.
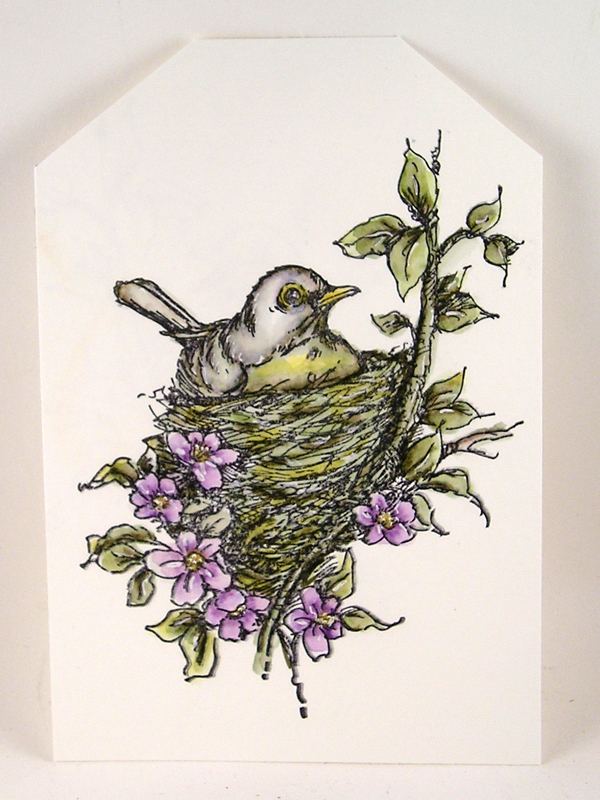
My final image is colored using the Copics. This requires two things stamping the image with a non-solvent based ink and paper that allows the blending of the colors. Simon Says has some excellent copic paper and Memento works beautifully for the ink.
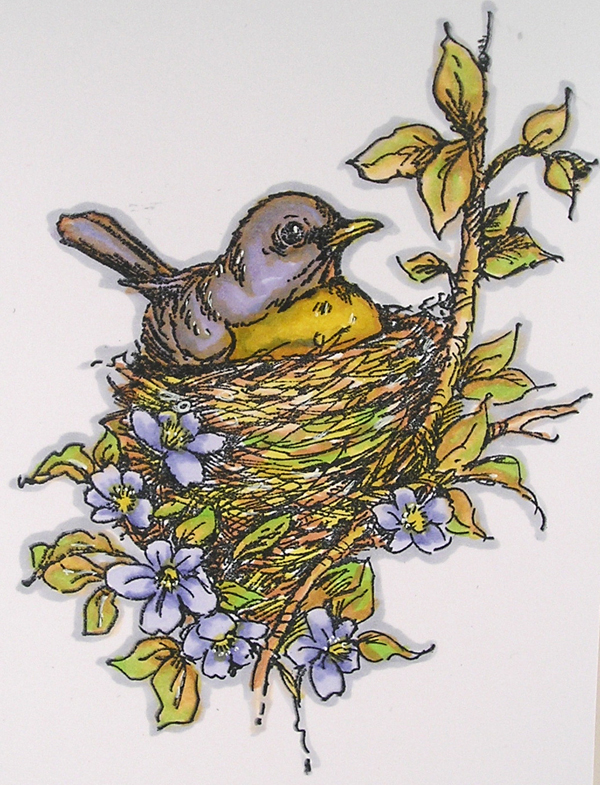
To shade with the Copics you will look for numbers in a family and typically will start with the darkest close to the edge and add in the lighter shades and blend with the lightest shade. I mixed up my colors and used a variety and blended with the lightest color used in the image.
Now you can see the same image with a variety of mediums you will have to decide which one you like and play with the different mediums. I have to say I hardly use my copics but the brightness and freshness had me re-thinking why don’t I pull them out more often? Hope you can find something old to renew with today.
Products:
Copics: B60, BV11, Y15, YG25, E00, BV04, Y26, E15, E35, C3, E47, Ranger Distress Inks: Dusty Concord, Seedless Preserves, Mustard Seed, Walnut Stain, Peeled Paint, Simon Says Stamp Copic Paper, Watercolor Paper, Waterbrush, Watercolor Pencils, Ranger Distress Markers1, Ranger Distress Markers 2, Stampendous Nestled Bird, Impression Obsession In a Garden, Simon Says Stamp Cardstock – Brown, White, Memory Box – Dream, Signo Uni-Ball White Gel Pen, Ranger Archival Ink – Black, Memento – Black.

Wow! So much fantasic possibilities- and perfect for this week’s challenge! Now it’s your turn! Join us this week in the challenge and show us how you’re using new (or old!) products and techniques.
Challenge Badge

Spotlight Badge


Distress inks and birds are some of my favourite things. Lovely.
Wow, LOVE the coloring! Gorgeous work.
Like the watercoloring of the bird & nest.
Melissa
“Sunshine HoneyBee”
LOVE this project, Suzz! And I really like how you showed so many different applications of different birds.
I appreciate this display and lesson on coloring using different media. I am learning that certain paper and inks need to be used according to what one has in mind of the end result. I have learned a lot from your designers. Thank you.
Beautiful coloring. Thank you for the tips.
Love these gorgeous creations, Suzz. Your coloring is amazing. :)
Beautiful assortment of projects Suzanne! You did a fantastic job coloring the sweet image! Thanks for sharing your creative process!
They are all beautiful! Very helpful to see the same stamp used with the different ways to color. Thanks for a great tutorial.
Beautiful work Suzz and a great tutorial sharing all the different colouring techniques!! :)
Amazing tutorial and so helpful! thanks for sharing with us!!! BArbarayaya
Gorgeous project!! Those little birdies are colored perfectly!! :)
*mwah*
Steph
Simon Says Stamp!
Thanks for the fabulous tips!!
Beautiful!