Moonlit Sky Tutorial with Emma Williams
Hello everyone, it’s Emma here and today, I’m so excited to be sharing my “Moonlit Sky” tutorial with you all. In this post, I will be showing you how to create a winter’s night background using Distress Inks.
Distress Inks are a wonderful way of creating backgrounds for stamped projects and they can give the most fabulous effects by layering and blending different colours together.
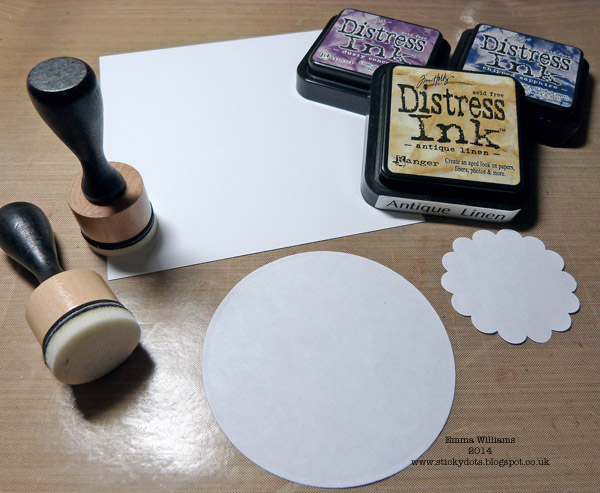
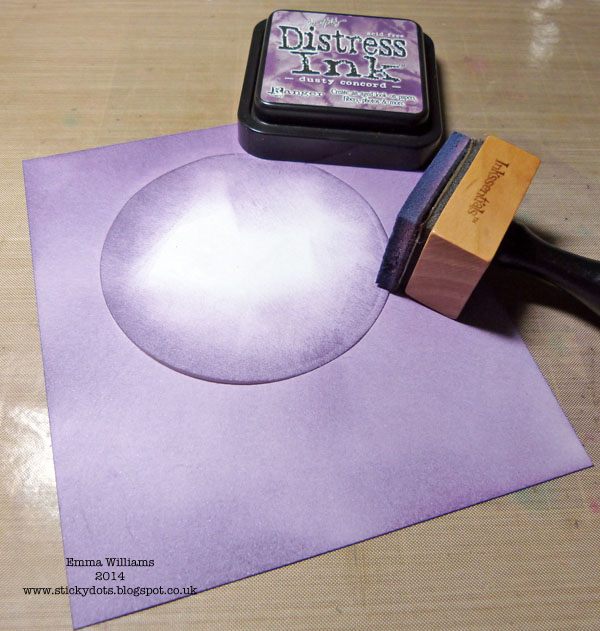
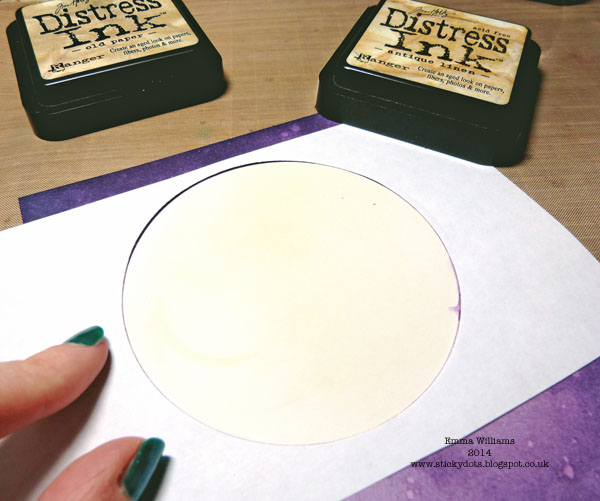
To begin with, cut a circle from a piece of copy paper approx. 3.75″ in diameter (at this stage don’t throw away the paper that you’ve cut the circle from, you will need this for later) and also punch out a scallop circle, approx 2.5″, from copy paper. You will use these as masks to create your sky. You will also need a piece of white stamping card measuring 5.5″ x 6.25″, Antique Linen, Dusty Concord and Chipped Sapphire Distress Inks and blending tools.
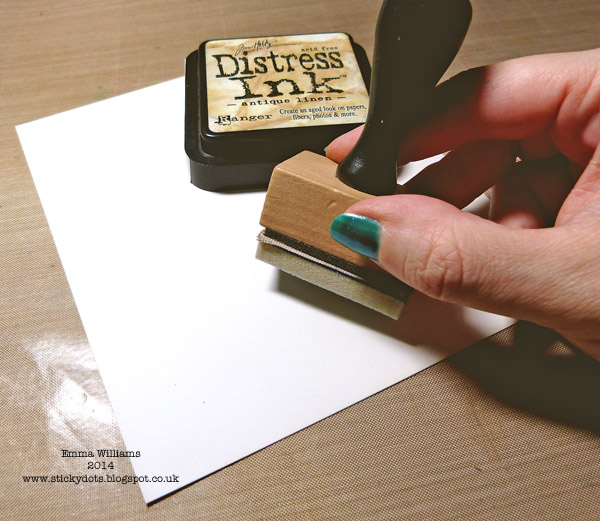
Lightly blend Antique Linen Distress Ink over the entire surface of the white card.
Take your circle shape and place it onto the inked card, to act as a mask for the moon.
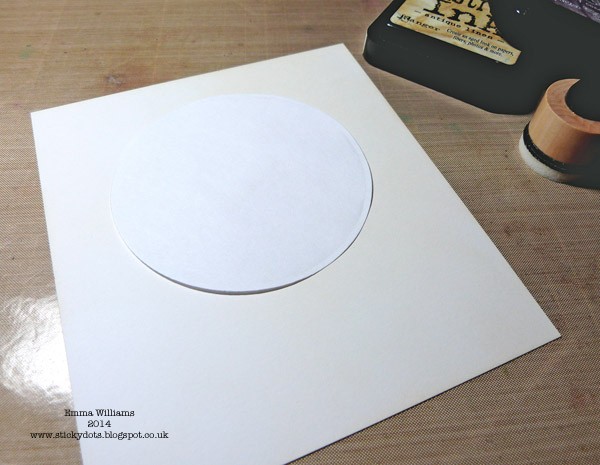
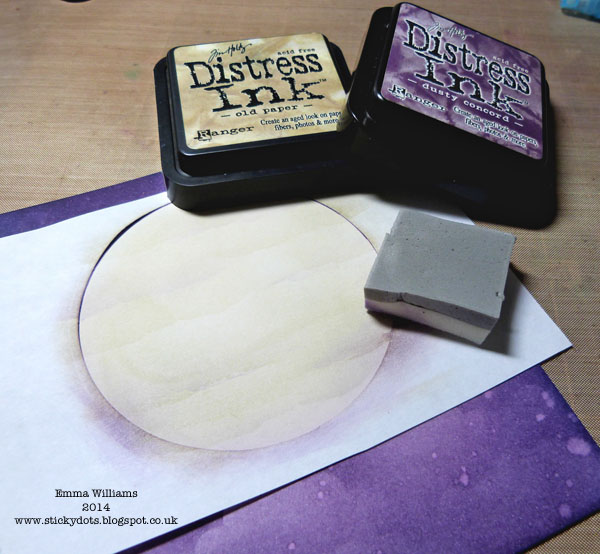
Holding the circle in place, ink the card with Dusty Concord Distress Ink.
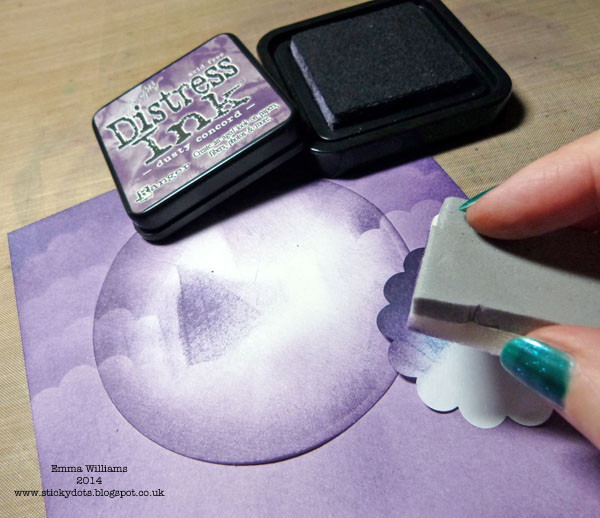
To create the cloud effect, keep the circular mask in position and using the scalloped circle, place it at the top of the card, holding it in place and ink around the top section of the scallops to create clouds. Move the scalloped circle around the card to create a cloud effect over the entire background.
With the moon mask still in place, flick droplets of water over the top of the inked card.
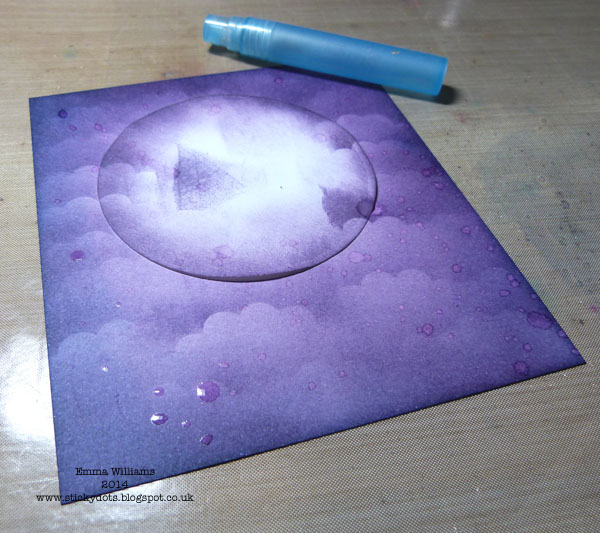
Using a paper towel, dab the background to remove the excess water from the card. Ink around the edges of the card with Chipped Sapphire Distress Ink.
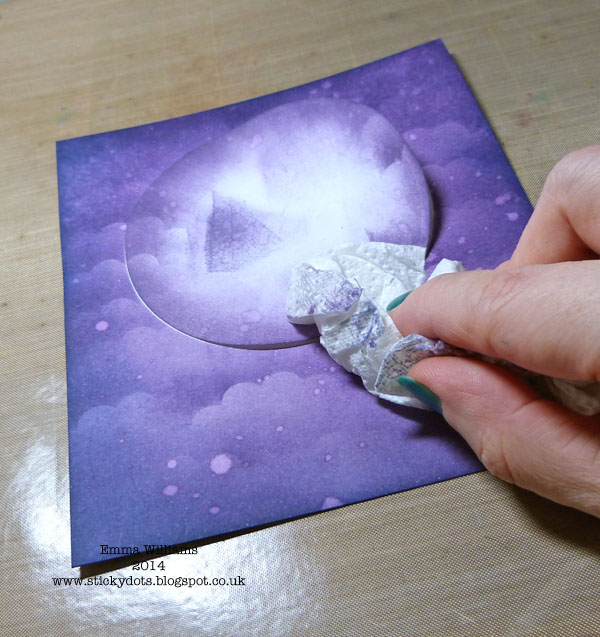
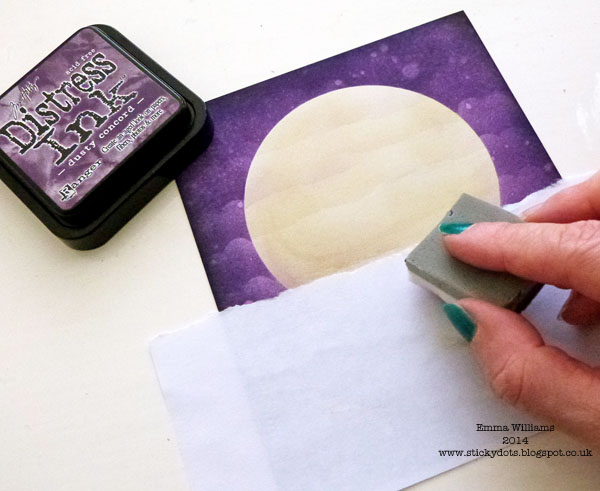
Remove the moon mask from the card and here’s where you will need to use the piece of scrap paper that you previously cut your circle from. Place the circular aperture over the top of the moon, to mask off your cloudy sky background.
Using Old Paper and Dusty Concord Distress Ink and using a piece of cut n dry foam, lightly ink the inside of the circular mask to create shading for your moon. Start with a little ink at first and then build up the colour gradually to create light and dark within the circle.
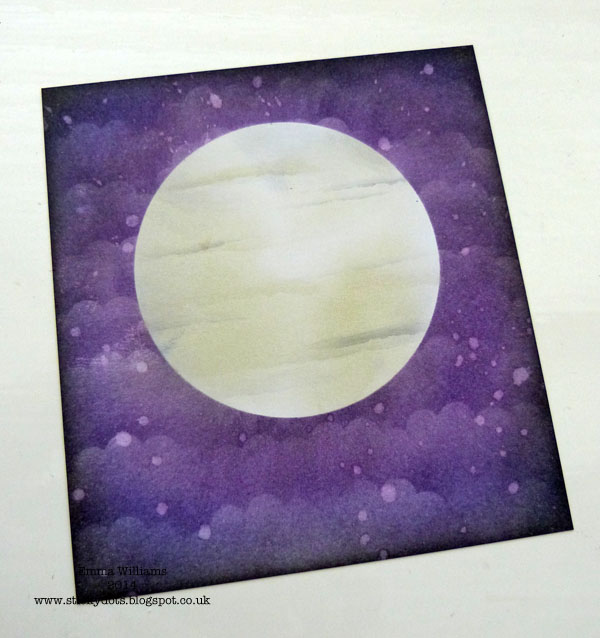
Tear a strip from a sheet of copy paper place the rough, torn edge of the strip over the top of your moon. Add shading by lightly inking along the torn edge to give the effect of moon shadows.
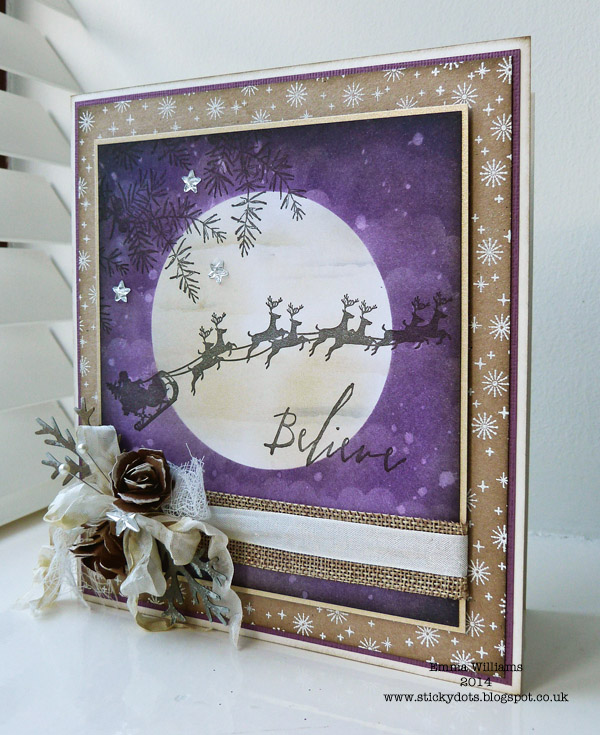
Your background is now complete and ready to stamp on.
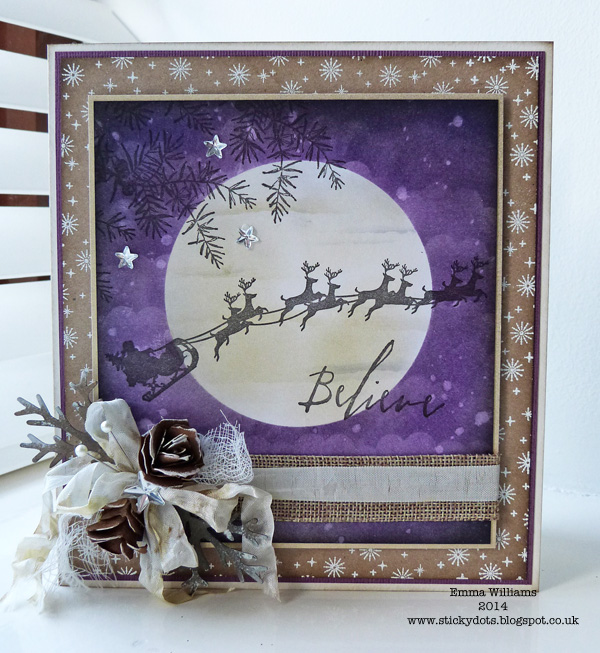
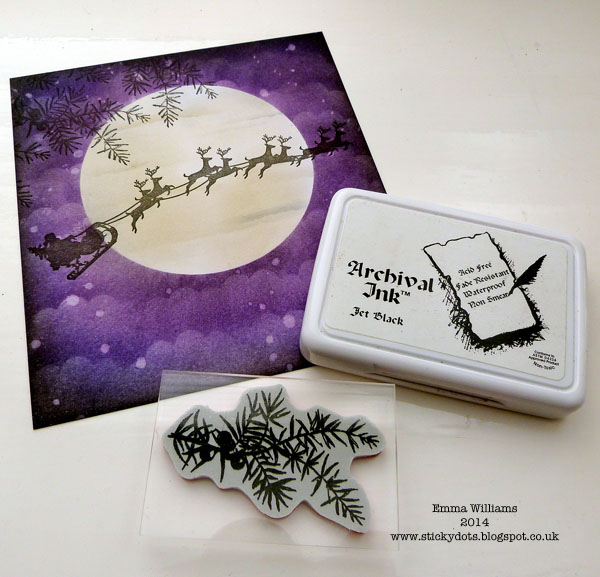
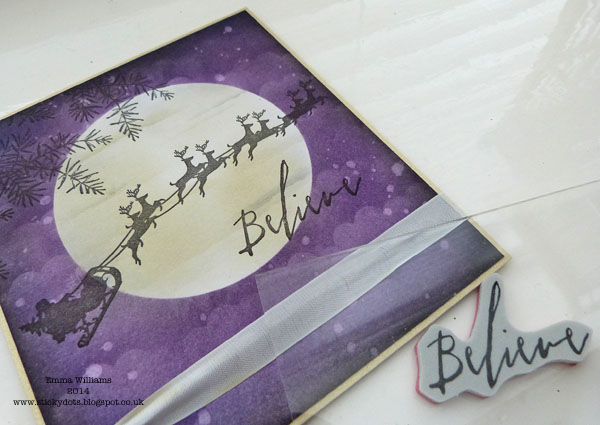
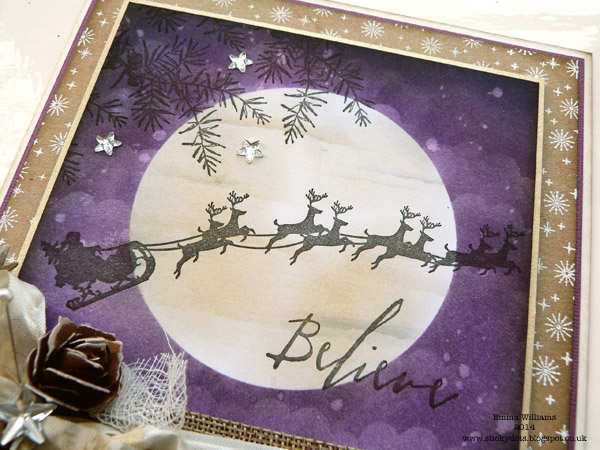
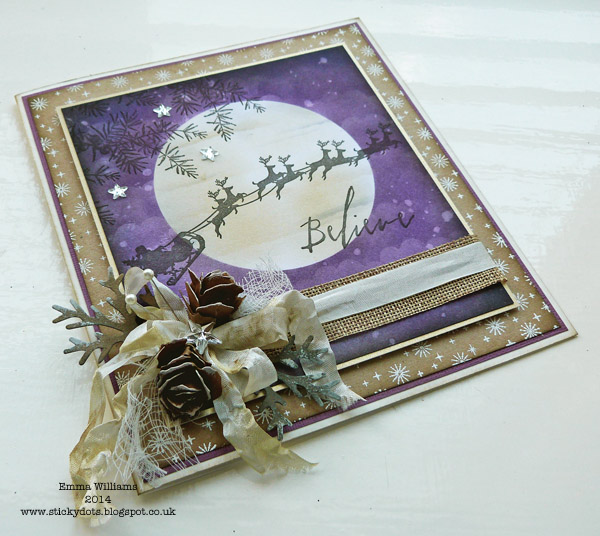
Using Jet Black Archival Ink, ink up Santa and his reindeers from the Tim Holtz Christmas Nostalgia stamp set and stamp the image across the centre of the moon.
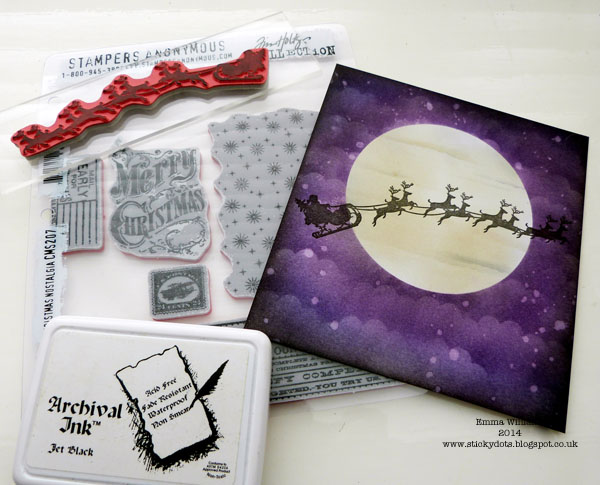
Ink up the silhouette foliage, again from the Christmas Nostalgia stamp set and use the stamp to create the foliage in the top left hand corner.
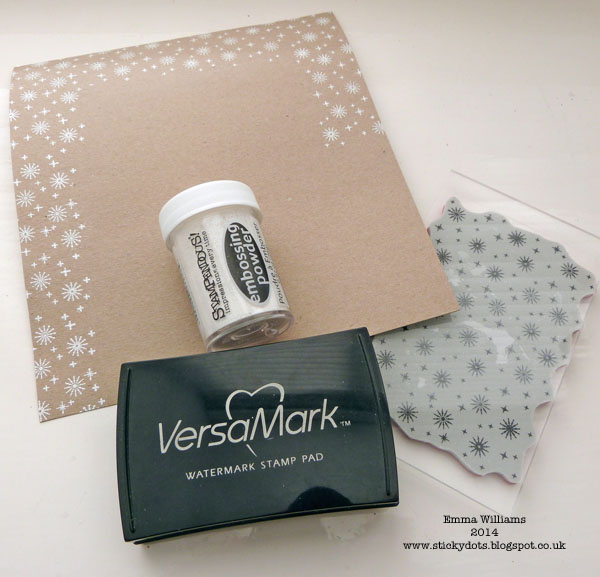
Cut a piece of kraft card, 6.75″ x 7.5″. Ink up the starburst background stamp from the Christmas Nostalgia set using a Versamark Watermark Stamp pad, (or any other clear embossing ink pad) and stamp around the edge of the piece of kraft card. Sprinkle white embossing powder over the top of the wet ink and heat emboss until shiny and molten.
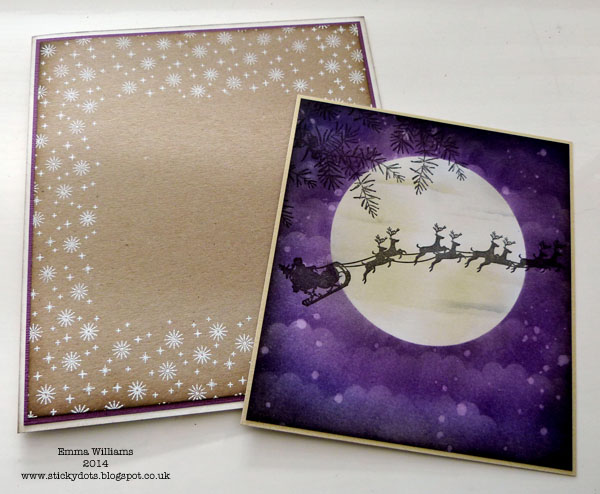
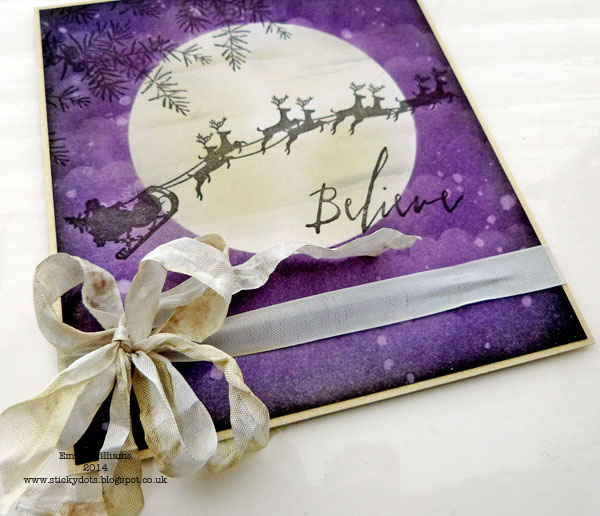
Ink the edges of the kraft card with Frayed Burlap Distress Ink, matt onto purple cardstock and mount onto the front of a white cardblank, measuring 7″ x 8″.
Matt the inked background onto gold cardstock, leaving a narrow border around the edge.
Using the Written Believe stamp, stamp the word onto your background in Jet Black Archival Ink.
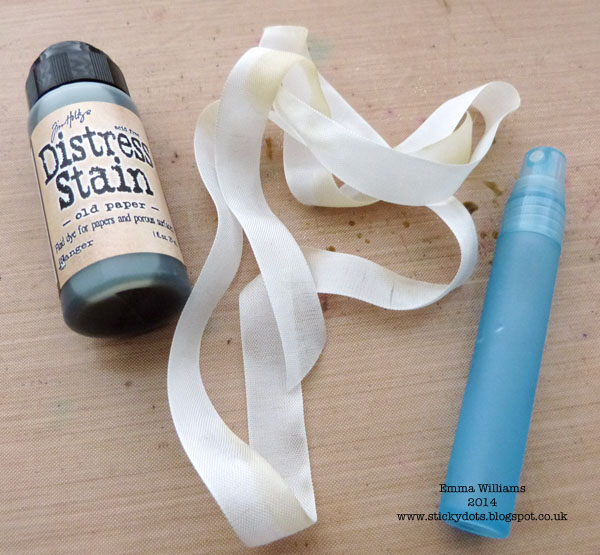
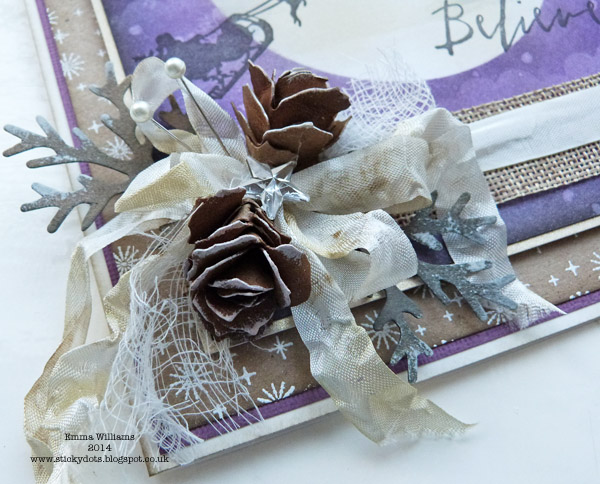
Cut two strips of crinkle ribbon. Apply some Old Paper Distress Stain to your craft sheet, mist with water and dye the ribbon using the stain. Heat dry.
Layer the ribbon over the top of a piece of burlap and wrap the layers around the bottom section of stamped background. Tie into a shabby double bow. Mount the matted layers of card, with the ribbon attached onto the front of your covered card blank.
Using the Tim Holtz Tattered Pinecone die, die cut a piece of kraft card, ink with Gathered Twigs Distress Ink and assemble two pinecones. Attach the pinecones to your bow, using a hot glue gun. Add a small piece of cheesecloth to the arrangement.
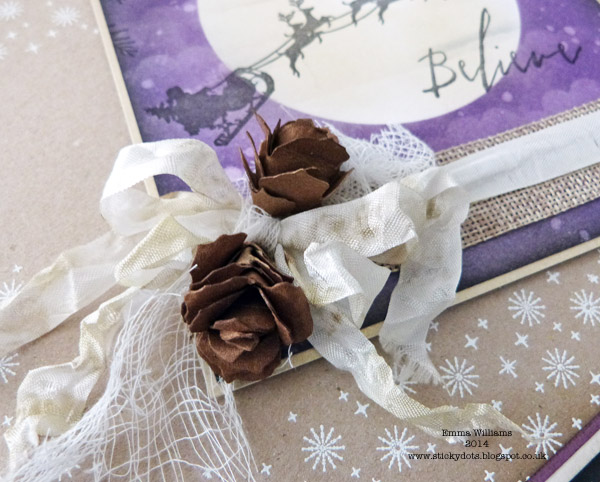
Add die cut twigs to the arrangement and then apply small amounts of Picket Fence Distress Paint onto the edges of the twigs and pinecones to give the appearance of snow.
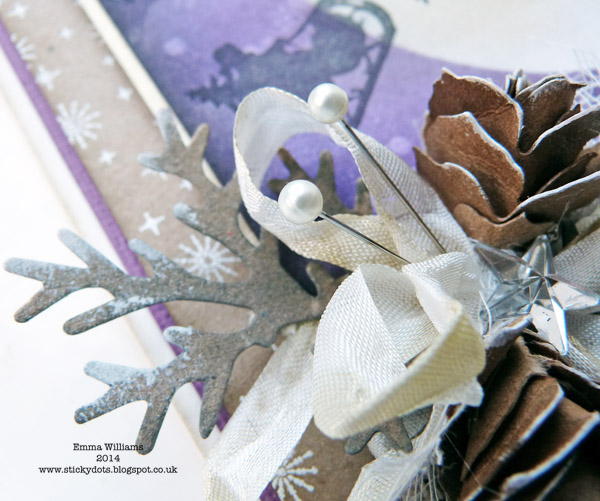
Place a Mirrored Star in the centre of the bow and add decorative pins.
As a finishing touch, attach three small Mirrored Stars onto your main stamped image.
Your card is now finished and ready to send to someone special!
I really hope you’ve enjoyed my tutorial and I’ve inspired you to use your Distress Inks to create some wonderful backgrounds for your stamped images.
Supplies Used:
Surfaces: Ranger Kraft Card, Ranger Speciality Stamping Paper. Purple Core’Dinations Cardstock.
Stamps: Tim Holtz Written Believe, Christmas Nostalgia
Dies: Sizzix Tattered Pinecone by Tim Holtz
Inks: Distress Inks Dusty Concord, Antique Linen, Old Paper, Chipped Sapphire, Frayed Burlap. Jet Black Archival Ink. Versamark Watermark Ink Pad
Distress Paint: Picket Fence
Distress Stains: Old Paper
Embossing Powder: Stampendous Detail White Fine Opaque Embossing Powder
Embellishments: Idea-Ology Mirrored Stars, Crinkle Ribbon
Tools: Hot Glue Gun, Craft Sheet, Big Shot, Blending Tools, Ranger Cut-N-Dry Foam, Ranger Mister Spray, EK Success Scallop Circle Punch
Items from my own stash: Cheesecloth, decorative pins, burlap ribbon, white card blank, gold cardstock, copy paper

Wow! I absolutely love how Emma created such an interesting background so simply. Stunning – and perfect for this week’s challenge! Now it’s your turn! Join us this week in the challenge and show us what techniques you’re ready to rock!
Challenge Badge

Spotlight Badge


Amazing! I love every detail!
This is a gorgeous card! Love how Emma created the moonlit sky. This girl is talented!
Great tut! And so beautiful! Inky greetings, Gerrina
Just beautiful…keeping this on file!
this is wonderful! Thanks for sharing your technique for the moon!
That is so cool! I’m going to follow your lead and make a similar card with items I have. Thank you for sharing.
So clever Emma, your cloudy skies always look so amazing xx
Gorgeous! I love your purple sky and the hint of layered clouds is beautiful!
Absolutely beautiful!
Fantastic. I love the techniques you used to create the moon and clouds. Such a beautiful card, thanks for sharing. :)
what a beaut. i have learnt to make that kind of sky after seeing a number of your card samples on telly. those clouds and big moons were your trademark. this is beautiful. would love to be the lucky recipient of this, hugs xx
Wow! This is incredible. Thanks for the great step by step tutorial.
Exquisite! I love this card! Great instructions.
Wow, Emma, that was such a brilliant tutorial. I must confess I don’t usually read tutorials but I absolutely adored your card and couldn’t resist finding out how you created it. I am definitely going to give this a whirl, thank you so much for sharing your creativity and artistry with us all. XOX Lucy
This is a wonderful tutorial Emma, thank you so much for sharing it, your card is beautiful! x
Such a beautiful card! Love the gorgeous colors and stamping. Thank you for the great tutorial, Emma. :)
Great tutorial. So beautiful Emma!
This is really lovely (and a great tutorial), I am anxious to try this!
I have got to try this….today!!
Absolutely stunning, I love the color combo and the burlap…gorgeous!
This is simply gorgeous. Colors are stunning!!
I love every word and every picture in your tutorial, it’s fantastic! Amazing card! Thanks for sharing with us! barbarayaya
What a terrific card.
Gorgeous. Hugz
Wow, this is stunning!
Absolutely stunning! Such a beautiful card, one I would love to receive.
So beautiful! Thanks for writing such a great how-to! I will try it out:)
~kim
Awesomeness!
~God bless
awesome project! love the cloud technique :)
This is gorgeous, I love it. I definitely have to get/start getting the distress markers and stamp pads!!! Thanks for the great tutorial!!!
OMGosh this is incredible!!!!! Thank you for sharing!
AMAZING! Thank you for the awesome tutorial!! I already do a few of these things but you have given me the tools to take it to a new level of awesome! THANK YOU!
This is so beautiful! I like it so much how you created the background with the distress inks, it’s fabulous!
Great technique. Thank you so very much. Lovely card.
Beautiful :-D Thank you so much Ema for this great tutorial :-D
MAGNIFIQUE!
What a fabulous card, Emma! Love it! What a great way with the masking! Stunning! Hugs, Sandra
SO PRETTY, Emma! You are always so skilled with your techniques and this was a tutorial that can come in handy on many projects! Thank you!
What a stunning card and superb tutorial. Thank you so much! Hugs, Wends x