Yippee for Yana: Simplistic Christmas Cards

Hi friends! Happy Saturday! Welcome to the latest edition Yippee for Yana with the fantastic Yana Smakula and the continued celebration of our latest release, Fun & Festive! I personally LOVE this simple design by Yana because it’s beautiful but also because it would be relatively easy to recreate for mass sending! Be sure to check out the video and enjoy!
Hi everyone, this is Yana Smakula and welcome back for another Yippee For Yana video!
Lately, I am all about simple and doable card making and also cards that feature very basic and beginner techniques. So for today’s video, I have a simplistic Christmas card idea what features just some heat embossing and ink blending for stunning results.
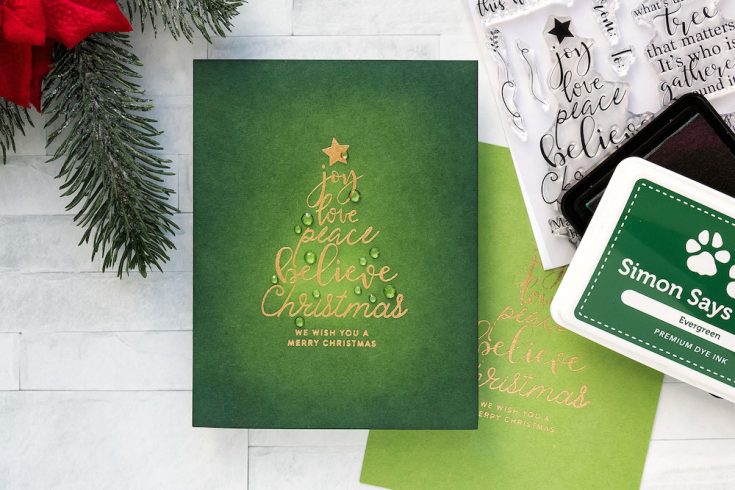
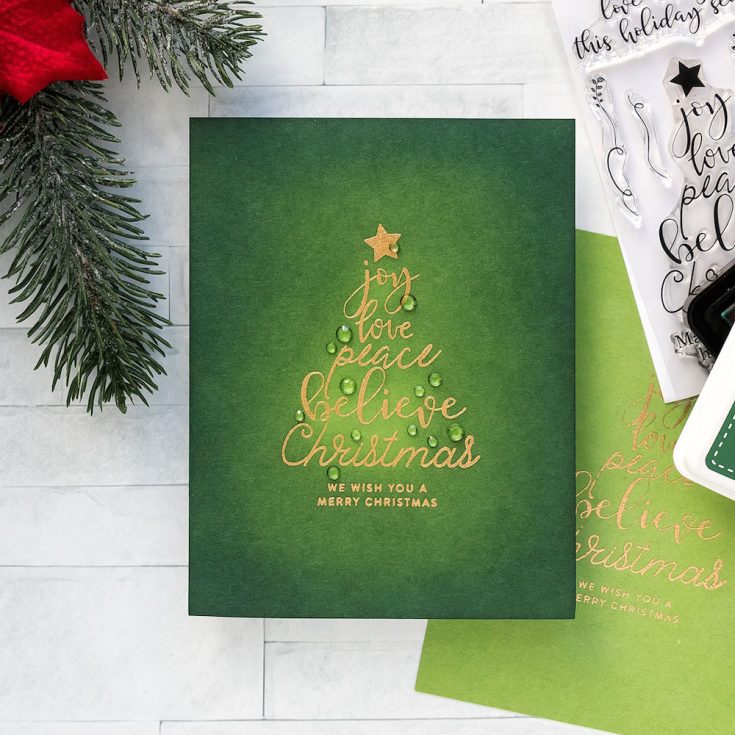
The card that I am sharing today is using just the sentiment stamps – “Joy, Love, Peace, Believe, Christmas” message that is shaped like a Christmas tree from the Christmas Wishes stamp set and “We Wish You a Merry Christmas” from the Tiny Words Christmas set.
My idea here is to gold heat emboss these images using Antique Gold embossing powder from Simon Says Stamp on Green Leaf panel that’s cut to 4 1/2 by 5 ½”.
Once my heat embossing was done I added ink blending to the edges of the panel to help the embossing pop. I used Evergreen ink to blend darker green color around my heat embossed tree in the center of the panel. I want the edged to be darker and direct the eye of the recipient to the center of the card where the focal point is.

You can do this on white cardstock, but it is so much easier to blend this kind of look on colored paper. Because my paper already has a color I don’t have to do additional blending and add a base color to it, a light green. If you were to heat emboss this on white and add ink blending on top, you’d have to start with the light green first to have that spotlight in the center where the
heat embossed tree is.
To darken the edges, even more, I used Hero Arts Navy ink pad, this is very deep blue color and I added a bit of this color around the edges. You can also try using black. I adhered my panel onto an A2 white side folding card base and dressed the tree up using some Clear Jewels from Pretty Pink Posh. Less is more on cards like this.
I hope you guys will give this idea a try. If you do make a card inspired by this video, we’d love it if you shared your project and tagged us on social media – we always enjoy seeing what you make!
Have fun stamping!
WATCH THE VIDEO:
SUPPLIES:
|


Thanks so much for stopping by and thanks to Yana for being our guest!

Blog Candy Alert!! Follow our blog via email and comment on this post for a chance to win special blog candy!


So elegant, I love the gold embossing!
Great and mellow Xmas card x
Beautiful and elegant card ! Thanks fo the video.
Stunning card. TFS
So pretty!! Thanks for the video.
I really love the gold embossing!
Such a beautiful and elegant holiday card! Thanks for the inspiration for these simplistic card ideas. (They don’t look simple at all!!)
what a simple yet eye-catching card! the ink blending has really helped pop up the central quote. it seems to be glowing. also the clear sequins is a beautiful touch.
Very beautiful card
Totally stunning!
Stunning card Yana!
This really is stunning
So elegant with the gold embossing !