Yippee for Yana: Repeat Background with Breakfast Buddies
Hi friends! Welcome to the latest edition of Yippee for Yana! Read on for more details and enjoy!
Hi everyone, this is Yana Smakula and I’m excited to bring you another episode from my bi-monthly “Yippee For Yana” video series! In today’s episode, I’m creating a fun stamped, colored and die-cut background for a card using Breakfast Buddies stamps. You can easily apply this technique to other small images from your stash.
This stamp set features a bunch of images of food that one would usually have for breakfast plus there are fun sentiments that go along with each type of food.
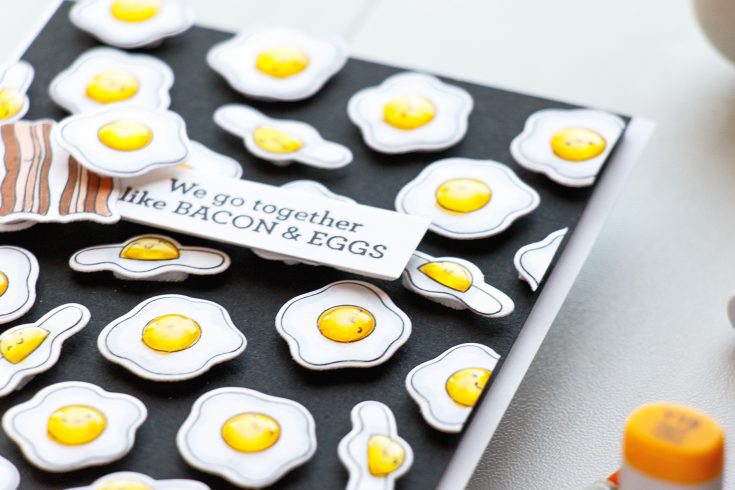
I love to have eggs for breakfast and of course bacon so I decided to go with the egg image for my card. There are 3 different egg images and I used all 3 of them. If you’ve been following me for some time you also know that I am all about creating my own unique backgrounds with the help of small images so this is what I am doing in this video today.
Finding inspiration for my projects is sometimes a tricky business. I like to keep a special board on Pinterest where I pin images that I find inspiring. As I was browsing my board for inspiration I came across a fun eggs pattern image and decided to use this as inspiration for my project.
I mounted all 3 egg images on my clear block (to save time as it didn’t really matter in which order I stamped them) and stamped a bunch of eggs at once in Simon’s Intense Black Ink onto white cardstock.
For my coloring, I picked Copic markers and the reason I went with Copics is because of the ease of use. I can quickly color a bunch of images, do some easy shading and be done in 5 to 10 minutes. If I were to color one or two images I could have picked colored pencils and or watercolor and really took my time to do some awesome and detailed coloring, but since I was doing a lot of coloring I didn’t want to focus much on it, besides the coloring is not the start of the show on this project, its the pattern itself.
I used Y19, Y15, and Y11 to color the yolk and C1 market to add a bit of sharing to the egg whites. I don’t think that was necessary, but I felt like I wanted to add just a bit of gray here.
Once my coloring was done I used coordinating dies to cut these images out. There is a die for every image in this stamp set, so if you have these coordinating dies it makes cutting these a much easier task.
Next, I cut a piece of black cardstock to 4 x 5 ¼” and started working on my pattern.
So let’s rewind a little bit and talk about the different kinds of patterns or background I like to make. There’s one kind of background where I do a lot of stamping and I stamp everything directly onto a card front or onto a panel that goes on the front of my card. There’s no die cutting involved in that kind of background.
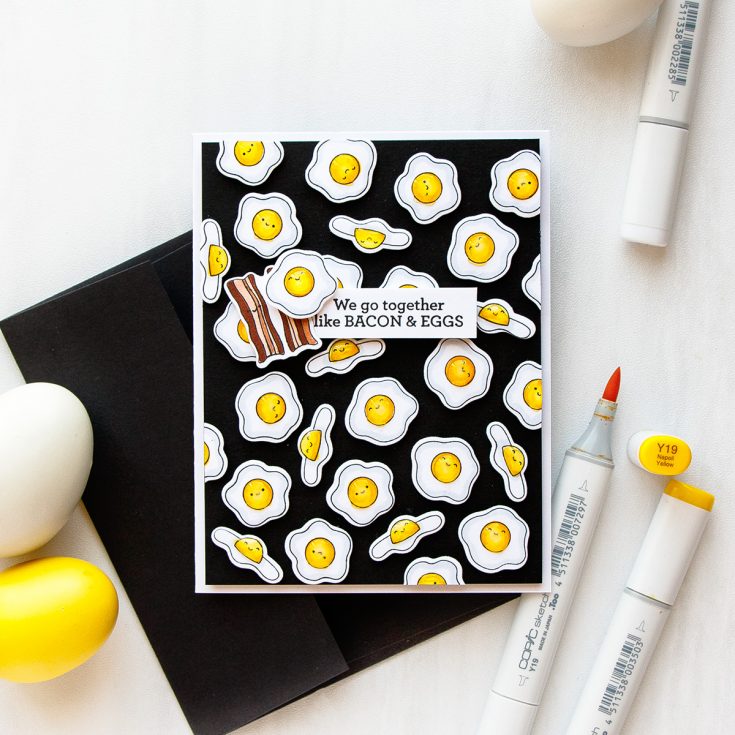
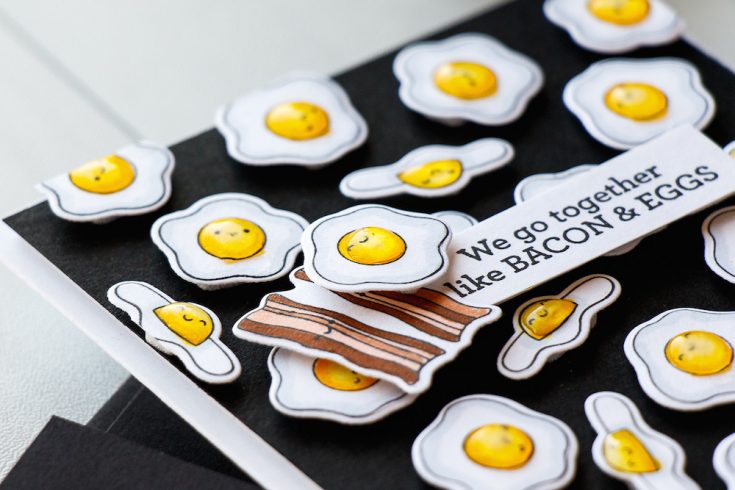
There’s also a kind of background, and I like to call that dimensional pattern stamping, is where I stamp my images but I also cut them out with coordinating dies and form a pattern or a background on my card. In this case, I also like to use foam adhesive to pop things up. I like to do that when I form clusters of images, for example I have florals and leaves and I don’t want to do masking, so I would cut the images out and foam mount onto the card, or like I am showing in this case I want to have a dark background, but I don’t want to spend the time coloring that background. It would have been harder to stamp the eggs onto a white cardstock piece, color the eggs and also color the background black. It’s much easier, if you have coordinating dies, to stamp and color the eggs, cut them out and just foam mount them onto a black background.
I used my Krystal Catana pick up tool to pick up the pieces from my desk and help me position them on the paper with the help of foam adhesive.
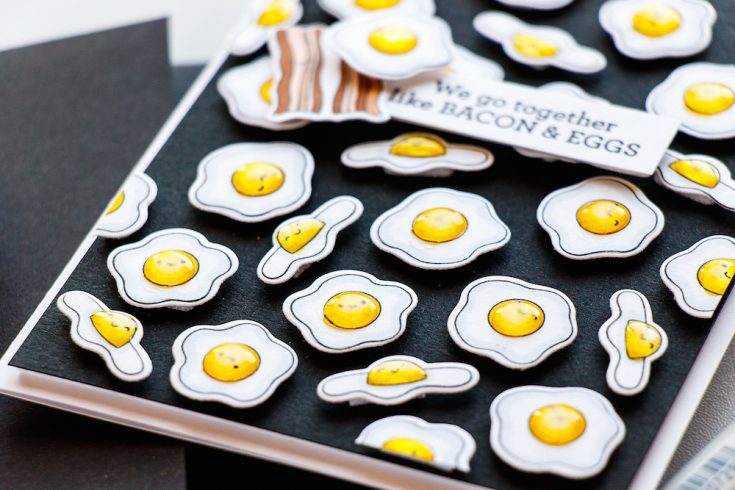
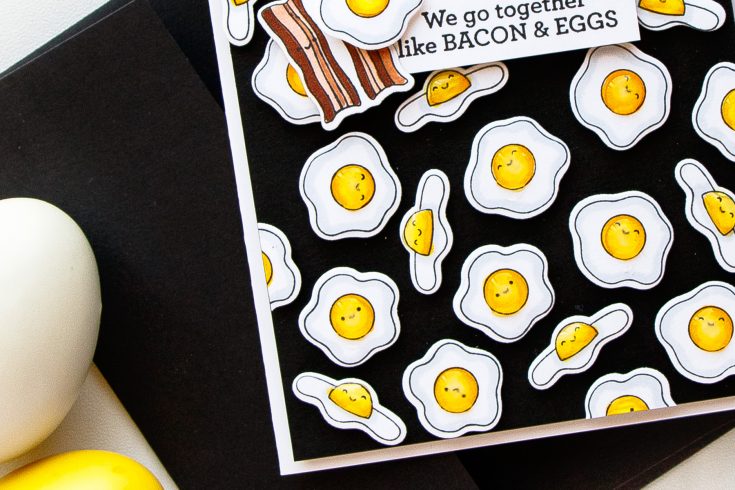
Because I want this background to look as if was cut out from a larger sheet I am trimming some of the die cuts and letting them go outside the edge or rather I’m making it look like as if they go outside the edge. To make this background appear random I’m using the usual tricks: rotating the images as I adhere them to the card, mixing my images – I have 3 different shaped eggs so I am making sure I don’t have them all grouped, but rather spread out on the background and lastly I am not adhering things going in a straight line. This is not the kind of background where I want things to have a very clean and linear look.
To create a sentiment for my card I stamped We Go together like Bacon and Eggs in black ink onto a strip of white cardstock and I also stamped some bacon onto another piece of white paper.
Once my background was finished I used fun foam and foam mounted this panel onto a white A2 card base. Lastly, I used glossy accents and I coated each egg yolk with a generous layer of glossy to create that realistic looking glossy dome to the eggs.
Have fun stamping!
WATCH THE VIDEO:
SUPPLIES:
|
Thanks for reading today and thanks to Yana for being our guest!

Blog Candy Alert!! Follow our blog via email and comment on this post for a chance to win special blog candy!



Just love this! Love the black background, the dimension, the glossy accents!
What a fun idea! The egg images are so cute and I love the punny sentiment!
Ohhh that’s so cool, I love it!
So cute and fun, I love the glossy accents on the eggs!
Oh this is wonderful! Now I want Bacon and Eggs :-) Love your card ♥
That’s absolutely adorable! Love how you used the Glossy Accents. :)
This is so super cool! I have bacon and eggs and I have not tried them out yet – thanks for the inspiration – have a blessed week – Enjoy your day and TFS
Haha! What a yummy card! I’ve gotta make something similar for my husband. He’s a chef and would get a good laugh from it! -Amy
Such a fun card – the glossy accents make the eggs look so good!
I love the 3D look of the yokes with the shading and glossy accents. You say it was easy but I would love to be able to color that well!
I’ve been trying harder to make flat cards. Now I say, “Forget that!” Those little foam raised eggs are just too cute!
Your card makes me “egg-cited!”
Hi Yana. Thanks for sharing this cute and cool card. Love your take on this part of the release. I always enjoy watching you and listening to you create – I just love your accent. Thanks for yet more inspiration.
Ahh the eggs with the smiley face!!! too cute!
Dk what but this makes me giggle… lol… ♡
Love this cute bacon and egg design!
The card is so creative ♥
Adorable card! I love the glossy accents on the yolk!
This is such a fun design! There are a few people in my life that this card would be perfect for. :D
That’s one super delicious looking card! :-)
Very cute!
Those yolks make me smile! :)
Like the multi-stamping with dimension & whimsy sentiment.
Melissa
“Sunshine HoneyBee”
This card is just so darn cute with all of the eggs as a background.
Dear Yana, not only are you a talented designer, but you also give clear directions. Thanks.
Ah! This is so cool!! I love the eggs!
Eggs have never looked cuter!
Absolutely gorgeous, Yana! And now for some strange reason, I have a craving for bacon and eggs! Breakfast is my favourite meal! Yummy card!
OH MY GOODNESS this card is the cutest ever!!!!
Love the glossy eggs! Thanks for sharing tips about your stamped backgrounds!
Such a cute card Yana! Love the eggs and bacon from the Breakfast Buddies stamp set.
Haha this is so fun :D
Wow! This is so cute and so adorable. Yana has done it again!
A very fun card! The eggs look so real, and I love the black background!
This is so sweet. Awesome background!
Such a cute card! The eggs are so adorable and look great mounted on the black background! I like your inspiration board as well. What a helpful idea!
What a funny card, I love it !
Super cute card – love how the images pop against the black. Great little card and different from the usual Valentines cards!
cute and fun
Wow! What a stunning card! I can see how having the dies for the eggs would have made this design possible – can’t imagine fussy cutting all of them!
What a fun card. The jelly centres are really cute. Great idea. x
How can eggs be so cute?! Hahaha I love the backgroung and the detail you added at the e d with glossy accents!
Thanks for the tips! I love seeing how Yana puts her cards together!
I love how realistic the eggs look!! I love the card and there are a lot of eggs on that card!! It was fun watching you put all the eggs onto the card, watching your process and thanks for showing your Pinterest board, I’ll have to go check that out. Thanks for sharing .
Awww!!! Too funny!!!
Very cute and thanks for all the tips on how to make this technique work well !
I just LOVE this project!!! I love how you chose to use a black background for those adorable little eggies to pop-out against!!!! I absolutely need this set I just love it so much!
Such a cute and fun card. Stunning on the black back ground.
Mmmm! I do love my eggs this way with the white done and the yolk messy. I used to tell Granny if the yolk gets broke them scramble it because I always want dippy eggs.
This is just the cutest card. I love how you created it. The glossy accents really look nice. A great stamp and die set.
Amazing card! Really fun and sweet card!