Yippee for Yana: Happy New Year 2019
Hi friends! Happy Friday! Welcome to the latest version of Yippee for Yana with the always awesome Yana Smakula. :D Scroll down and make sure to watch the video for the full tutorial and enjoy!
Hi everyone, this is Yana Smakula and welcome back for another Yippee For Yana video! Today I have a Happy New Year card to share featuring a long horizontal card design inspired by Kristina Werner.
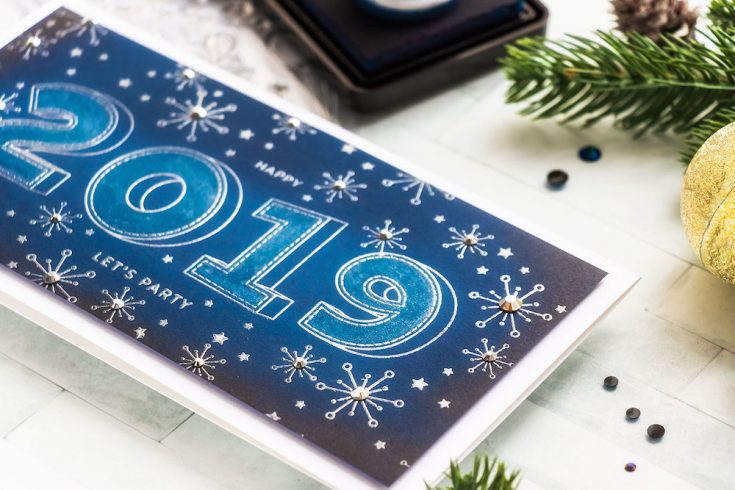
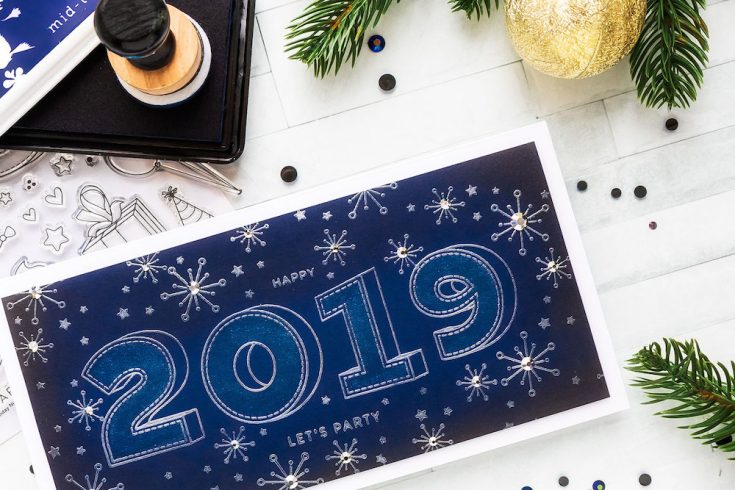
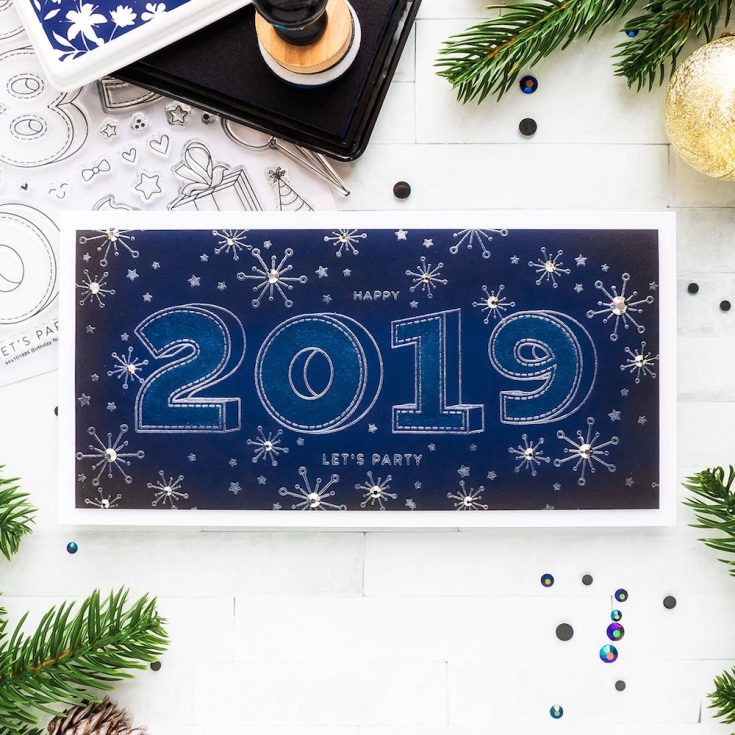
I made a ton of Christmas card this year, but zero New Year cards. And yes, they aren’t quite as popular, but I thought it would be nice to make at least one. I’ve been meaning to use the large numbers from the Birthday Number stamp set and this seemed like the perfect occasion to do so. I picked 2019 along with two messages – “Happy” (stamped above the numbers) and “Let’s Party” (stamped below the numbers).
I’ve decided to go with silver embossing powder for a change and heat embossed it on soft blue cardstock. Next, to fill the background around the 2019 I pulled out some snowflake-like images from the Ornamental stamp set by Cathy Z and stamped them in several sized around the 2019. These look more like little fireworks and less like snowflakes, so I thought they would go perfectly with the New Year theme of this card. I also stamped a few more images – little stars from the Christmas Town stamp set; any tiny element would do here, you can add little swirls, dots, anything small to help fill in space and look a bit like scattered confetti. Again, I covered everything with silver embossing powder and heat set it with my heat tool to melt it. I tried to heat set this panel as few times as possible to have a minimum amount of warping, but it still warped a bit from all the heat.
I also did some ink blending around the edges of the panel to darken them up and draw the eye of the recipient to the center where it says 2019. I’ve been rediscovering ink blending this year and I really love this technique. I used Hero Arts Navy ink, it’s the darkest blue in my stash to add the darkness around the edges. If you regularly watch my videos you’ve probably seen me
do this quite a few times this year.
I trimmed my panel down and used a solid layer of fun foam to foam mount it onto the card. Using a solid layer of fun foam helped flatten the panel and minimize warping. I used my tonic studios shimmer pen to add some sparkle inside the open area of each number and I also decorated the card using silver jewels from Pretty Pink Posh to spice it up a bit. This card ended up being 8 1/4 x 4 1/4”. I’ll be hand delivering it, so I didn’t worry about the envelope to mail it in.
Have fun stamping!
WATCH THE VIDEO:
SUPPLIES:
|
Thanks so much for stopping by and thanks to Yana for being our guest!





Beautiful card! It is so festive despite the cool and elegant colors.
Fun and festive card! Love the stitched detail, reminds me of denim.
I love the big bold numbers and that midnight blue background~
Beautiful card – love the technique!
Amazing card! I love the background technique starting with a solid color and using a darker shade around the edges.
Another gorgeous card!! I love the ink blending on the dark blue. The extra glitter and glitz is perfect!
Great card! Love the big numbers they are perfect for a New Years card! That blue color is also wonderful!
Love the big numbers!
Very nice card
The ink blending on the edge is a good touch. And, FYI I didn’t notice the warping…
Gorgeous design, love the big bold numbers and the color!
This is a fabulous card – I love the silver and deep blue!
Yana is so inspirant! She is one of best girl of cardmaking ! Happy New Year Yana !
Love the card, and the beautiful blue with the inked edges. Happy New Year!
Awesome card!