Yippee for Yana: Floral Pattern Birthday Card
Hi friends! Happy Tuesday! Welcome to the first edition of Yippee for Yana for 2019! Yana Smakula is BACK with a gorgeous floral Birthday card idea that you don’t want to miss! Be sure to watch the video for more information and enjoy!

Hi everyone, this is Yana Smakula and welcome back for another Yippee For Yana video! I think we can all agree – one can never have too many spare Birthday cards on hand. For today’s video, I decided to stamp a simple, one layer floral Birthday card. The design of this card can be adapted to many other occasions as it is not using any birthday specific imagery, but rather only flowers. It can be a thank you, a miss you, a paper hug and many more.
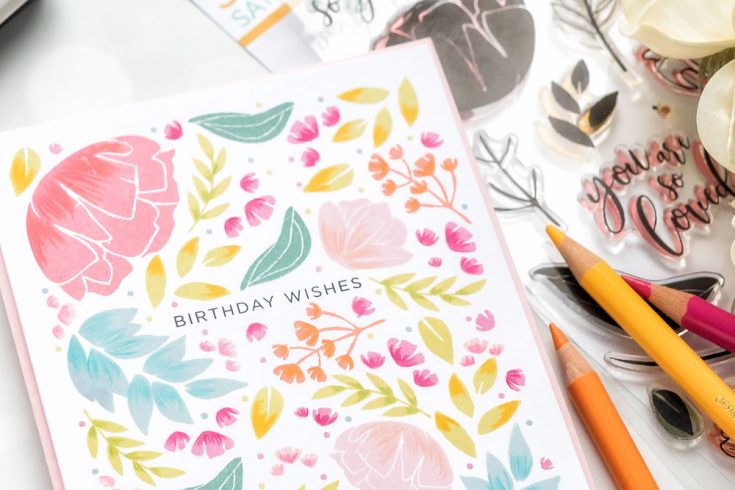
I started by stamping skinny strip sentiment somewhat in the center of my panel in black ink. This message, Birthday Wishes, comes from the Simple Sentiment 2 stamp set by Cathy Z. Next, I made a mental note to leave the sides of my white panel blank, I didn’t want to mask anything as sometimes with masking tape it can rip the paper and damage your project, so I just envisioned about 1/4” border on each side being free from any stamping. I also didn’t mask the border because I wanted the images to not be chopped off in the middle, I wanted each stamped image to be fully stamped on the paper.
To create the floral background I pulled images from the So Loved stamp set by Simon Says Stamp. This is a large 6×8” set that features a solid and corresponding outline images. I picked a handful of solid images skipping the outline layers and started planning their placement on the panel.
I used Rose Apple for the largest flower. Next, stamped smaller flowers in Twirling Tutu. The next color I used was Cloudy Sky to stamp that large leafy cluster. Many of these images, when stamped without the outline layer, have a more artistic look to them, as is they are hand painted. They look unfinished in a way and also look more appealing, at least to me, and at least on this
card.
I used Catkin to stamp a lot of greenery on this panel. Next, I used Hollyhock, it’s a very beautiful pink color, one of my favorites; I stamped a bunch of tiny floral clusters. The next color I used was Sunkissed, a nice bright orange.
Picking out the right colors for a busy design like this is key, I think, so it’s important you have the right color combination when you start. You can use Simon’s Color Coordinates videos and combinations to help you pick the right colors for your card design.
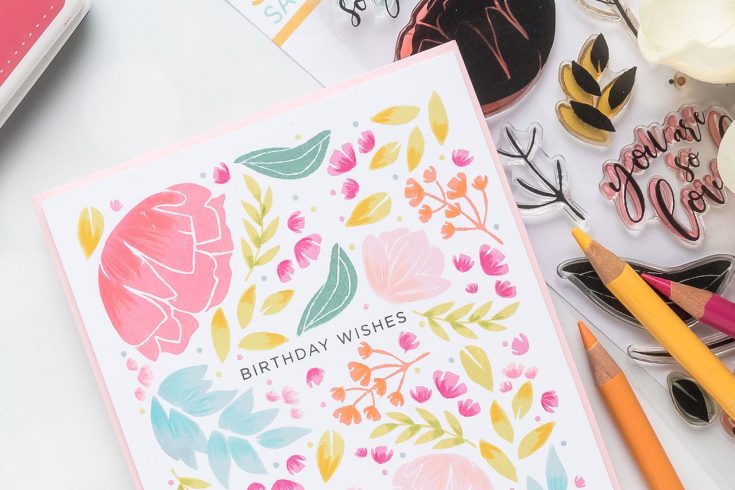
Next, I used Seafoam color and stamped several darker leaves filling some more of the background in. With these kinds of inks, it’s important to remember that they become lighter as the ink dries. So if you’ve stamped something and it looks too dark, give it a few minutes and let the ink dry. The color will become lighter and possibly exactly what you were expecting it to be.
I also used Rosie Cheeks to stamp some additional tiny flowers in pink. When stamping patterns like this, patterns consisting of a number of images or various size it’s important to go from large to small. Don’t start with a small image because you might not have room to fit the largest one later. Start with the biggest flower and the biggest leaf and work your way down to the smaller size images.
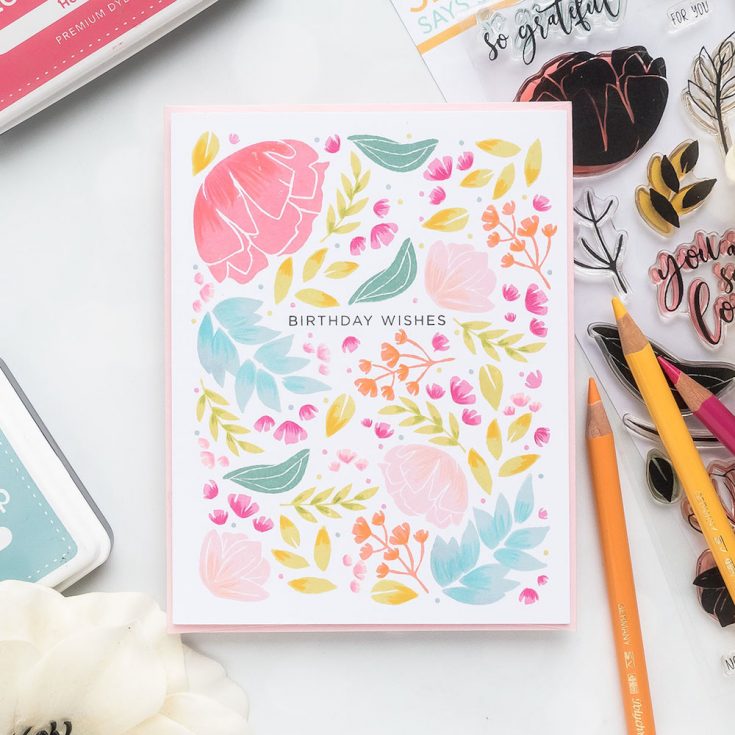
There’s also a little dot stamp in this stamp set and I took advantage of it by stamping it in several colors of ink filling in the gaps on the card. My stamping was done on a separate panel, instead of a card base as that’s how I prefer to create. Once it was all finished I adhered it onto an A2 white side folding card base.
To add shading I used my Polychromos pencils by Faber Castell and added just a hint of details to some of the stamped images. I used: #123 Fuchsia, #129 Pink Madder Lake, #132 Light Flesh,#131 Medium Flesh, #108 Dark Cadmium Yellow, #111 Cadmium Orange, #168 Earth Green Yellowish and finally #154 Light Cobalt Turquoise.
I hope you guys will give this idea a try! Have fun stamping!
WATCH THE VIDEO:
SUPPLIES:
|


Thanks so much for stopping by today, and to Yana for being our guest!

Blog Candy Alert!! Follow our blog via email and comment on this post for a chance to win special blog candy!


Wow such a pretty card Yana, makes me wish for Spring
Love the soft colors!
I love a stamped all over design like this. Beautiful!
This video was soooo helpful to me! I am creative, but not very artistic so I struggle with how to accomplish looks like this one. I am eager to get into my craft room and try this out now that I have some better understanding of how to go about it. Thank you so much!
So darn inspiring, Yana. You made me love to random stamp panels. Now I want to do one with a clean edge. What a fabulous touch.
What soft and beautiful colours. Just lovely. Cheers.
Such beauty.
Yana! I just love all your cards, your choice of colour and placement. Your talent is amazing!
This is so soft and pretty. Love the femininity
Such a lovely card! It would make a perfect birthday card for my mother-in-law.
Pretty card.
Can’t wait for summer and the flowers.
thanks for sharing
txmlhl(at)yahoo(dot)com
I love the way you filled in the background. Pretty colors too!
I love the soft pastel colors that you used on this card. This is quite a simple and easy card yet lovely and elegant. I love the stamp set!!
So pretty! Can’t wait to try this technique!
Lovely card. Love the duo of the ink plus the colored pencils.
Love the pastel colors! Beautiful coloring!
This is a great technique for creating a beautiful one layer card. Adding dimension with colored pencils is a fun idea!
Lovely card and great tips. I was wondering why I liked the card so much, and it is because of how it was stamped. It is the space around the words and that there are only full images that caught my eye. The tiny dot stamp is so necessary! Also loved the addition of the Polychromos pencils.
Such a Pretty card Yana!!! The pencil shading really makes these flowers pop!!
Such a pretty background!!
Such a beautiful card Yana!!!
That’s a beautiful card with pleasant colors!! I love the simplicity of this card! :)
Pretty card, love the soft colors! Thanks for the video!
Great card Yana. I loved how you showed your stamping all the way. And big suprise, I would never thought of that, stamping and colouring the details with pencil. Loved it!
Thank you so much for your always great inspiration.
Love your work, Yana – always so inspiring:)
Using pencils to shade! I can’t believe I have never seen that before. What a great idea and a good way to use more of your supplies. The card is lovely.
Pretty card!
Stunningly beautiful floral card, love the soft colours and shading!
Beautiful stamping–love this!
So pretty. Love the colors.
This card is so pretty Yana! I’m so glad you didn’t abandon the project when you thought it was going downhill, it’s gorgeous!
Your colorful flowers are so simple and cute!!
The little bit of shading on the flowers is nice. Great job.
Such a beautiful card. Love the soft colors.
How beautiful Yana and what a sweet stamp set.
This is really pretty!!!
Beautiful card, I like the color combination.
Very pretty floral background, Yana! Love the soft colors.
Another gorgeous card.
Thanks so much for the video.
Looks fun and
so easy to make.
Carla from Utah
Beautiful!! I love how you stamped the sentiment in the center to create a truly one layer panel. And leaving the white border looks fabulous!
Your card is so pretty, Yana! I always enjoy your work!
An elegant and delicate card! Wonderful work!
Fun card, great video.
Fantastic card.
Love your work,I always enjoy!
BEAUTIFUL Card!! I LOVE the Design!! THANKS for sharing and have a FABULOUS WEEK!!
What a lovely, soft card! Love the design!
What a beautiful card!
Yippee for Yana!