Yippee for Yana: Dry Embossing with a Stencil

Hi everyone, this is Yana Smakula and I’m excited to bring you another episode from my by-monthly “Yippee For Yana” video series! In today’s video I’m showing how to use a stencil to create a subtle textured background for a card with the help of dry embossing!
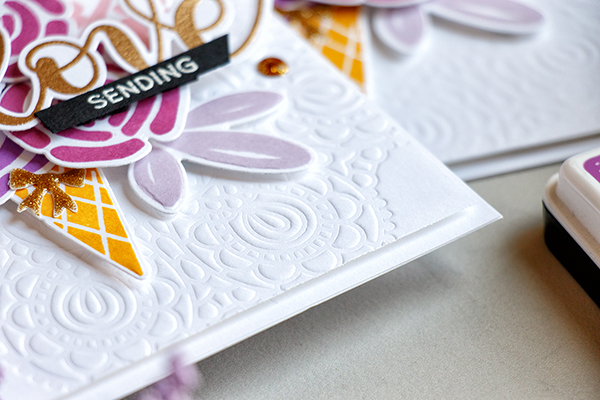
Let’s jump right in. I’m going to start by saying that you can most definitely dry emboss with stencils. The depth of impression will depend on how thick the material out of which the stencil is made of is, Simon’s stencils are pretty thick and durable so they always leave a nice and visible impression on the paper. If you use a thinner stencil the embossing and debossing you’ll get might not be as deep.
To dry emboss with a stencil you’ll need to use a die cutting machine and an embossing mat. I used my Platinum 6” machine from Spellbinders but this can be done in any die cutting machine. I followed the sandwich instructions for dry embossing with dies in my machine and I also added a paper shim (regular paper folded in half, so 2 sheets thick).
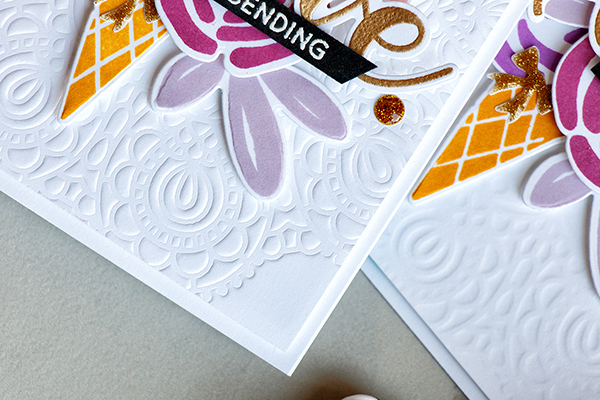
I cut my white cardstock to 4 x 5 ¼” and aligned it in the center of Circular Lace stencil; you can also have it offset to the side if you like. After running it through my machine and ended up having a gorgeous textured background with an embossed and debossed side.
You can use a background like this for just about any card, you can also make these backgrounds on colored cardstock, not just white; they look fabulous on kraft.
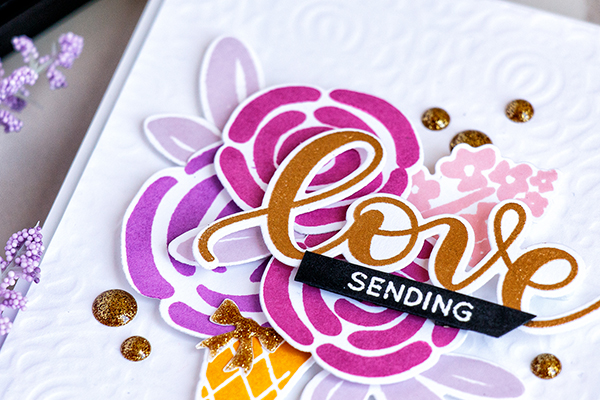
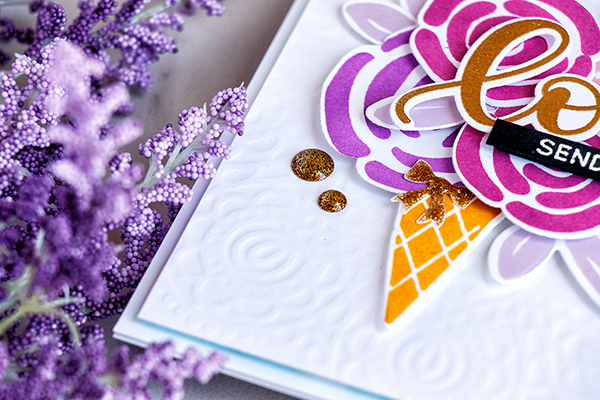
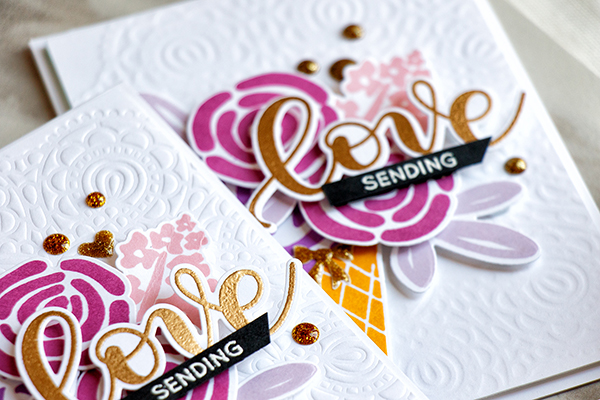
To finish this card I stamped a few images and created a floral arrangement. Using my mini MISTI I stamped ice cream cone in Sunshine, large flower in Hot Mama, small flowers in Magnolia, floral branch in Twirling Tutu and leaves in Thistle.
I also heat embossed the word “Love” in Simon’s Antique Gold embossing powder and cut all images out using coordinating dies.
After having all of the parts and pieces ready I foam mounted my dry embossed background onto an A2 top folding card base and foam mounted all of my die cuts in place creating a floral arrangement. I doubled up foam adhesive in some places to add more dimension. Lastly, I adhered the large heat embossed “Love” and added “Sending” heat embossed in white on black, so my sentiment reads “Sending Love”.
Which background do you like better? The crisp embossed or less detailed debossed one? Please, comment below! Have fun stamping!
WATCH THE VIDEO:

Supplies:
 |
 |
 |
 |
 |
 |
 |
 |
 |
 |
 |
 |
 |
 |
 |
 |
 |
 |
 |
 |
 |
 |
 |
 |
 |
Thanks for reading, and thanks to Yana for being our guest!


elegant cards! Going to give this a try using my old Spellbinders machine:)
This is Gorgeous!!! Soooo Many possibilities!!
Wonderful!!
Your card is stunning Yana! Thanks for the inspiration!
I’ve known for years you can do this, but have only embossed with my dies. Your cards are gorgeous–personal preference is the embossed one. Thanks for the inspiration!
dry emboss stenciling is so pretty.
Such a beautiful card!! Thanks for the tutorial on dry embossing.
Sweet embossing and
gorgeous coloring!
Carla from Utah
Beautiful card. Thanks for sharing…
Both are wonderful, I favor the embossed one the most. Lovely card thanks for sharing.
Just so pretty!
What a great idea! I like the crisp embossed one best, but both cards are pretty.
I like both results and think it would depend on the focal image I choose, but overall I have a slight preference for the embossed side. Beautiful card!
Yana, this is amazingly beautiful! TFS!
So BEAUTIFUL!! LOVE the Colors!! =)
Beautiful card! What a fun technique!
I love the idea of the ice cream cone for the flower base. Great flowers and the embossed Love is awesome.
What a beautiful card. I think I like the embossed side the best, but they’re both gorgeous. I love the idea of dry embossing with stencils, but I never think of it. I’m going to try to change that.
Lovely card! I definitely like the embossed side best — I like the crisp look! Your cards are always stunning.
Awesome layered card! Thanks for the video!
Great cards! :)
I never knew you could do this with stencils!! Thank you for the info!!! I also like BOTH the embossed and debossed looks the same.
I LOVE this card!! I do like the crisp embossed background better than the more faint one. But wow! what a stunning card! I’m going to have to get the ingredients for this one!! Thanks for the great inspiration!! Hugs, H
Graceful and stylish….the backgrounds take your cards up several notches. Thank you for sharing your creative talent, I love your videos.
Love the embossed background. I will try this with the stencils I have. I love both the looks.
I like the crisp one but have been meaning to try using a stencil to emboss. Thanks Ayana for the inspiration!
Beautiful cards! I love the embossing, though they both are great.
Beautiful cards! I’ve never tried this technique, but hope to soon. Love your choice of colors. I think I prefer the crisper embossing, but they are both nice! TFS!
Pretty cards! I like the embossed side!
Absolutely, GORGEOUS!
This is one of those smack your head and say why didn’t I ever think of that. Now I know. I already follow by email.
These are both just gorgeous but I prefer the embossed side. I only have one stencil so far but I can’t wait to try it. TFS!
Gorgeous cards! Love this color palette and I can’t wait to try this! Thanks for inspiring us, Yana!
I just love dry embossing as a background for a card.
What a great way to stretch your supplies
Gorgeous background Yana. Love the color combo. Great inspiration!
I didn’t know you could dry emboss with a stencil. Awesome!
I love the texture, layers and colors!
It is hard to decide Yana. I like them both!
Just so beautiful!! Great use of the stencil. Love the I e cream cone too. Surprise :)
This card is awesome! I love the dry embossing technique using the stencil and the ice cream made from flowers! What a great idea! ???
Your card is beautiful! And I totally need to dry emboss some cards :D
Awesome card!!!
I absolutely love the colour combination on your cards! So pretty.
Love love love these cards. Yana’s cards are so drool worthy :)
Loved this card! Love the white on white. I’m going to have to dry emboss.
Yana – These are gorgeous, as always!! I love the crisp embossed one the best cuz I like all the texture. So pretty!!
Fantastic look. Thank you for the techniques and tutorial.
This is so pretty! I’ve tried dry embossing with my dies but never my stencils. Thanks so much for sharing your idea and for the instructional video!
Beautiful cards! Have not thought of dry embossing with stencils, what a creative idea, thanks for the inspiration!