Yippee for Yana: Step-by-Step: Shiny Baubles Ornaments

Hi friends! Please join me in welcoming back the oh-so-talented and amazing Yana Smakula! (Please note: our dear friend Yana is Ukrainian. To show support to our brothers and sisters in Ukraine, please see Yana’s post HERE.)

Hello, crafters, this is Yana Smakula for Simon Says Stamp! Welcome back for another Yippee For Yana video!
Today we’re diving into the Shiny Baubles Stamp & Die Set – and oh my, is it a showstopper! Think vintage holiday ornaments with a fresh twist. This set allows you to layer, mix, and match parts to create realistic, dimensional ornaments that appear to be plucked straight from your Christmas tree.
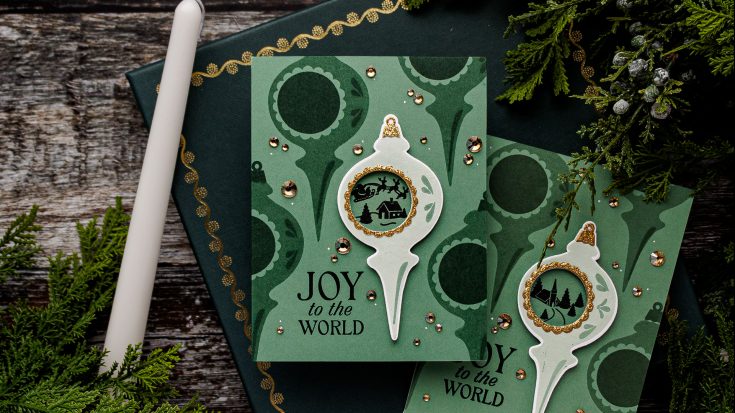
I paired the Shiny Baubles with Pawsitively Saturated Ink Trio 31 for my stamping, and then added sparkle with Gold Pawsitively Dazzling Gems. The combo is pure holiday magic.
To start, I used Simon’s 130lb cardstock and stamped my ornament in two shades of green from the ink trio: Jade and Eucalyptus. (You can totally do this in reds, pinks, purples – whatever makes your holiday heart happy!)
With the coordinating dies, I cut out the ornament plus an inner window. I die cut the opening and topper from gold glitter cardstock and glued them on. That touch of gold with muted sage greens is perfection – but silver would also be gorgeous if you’re into cool tones.
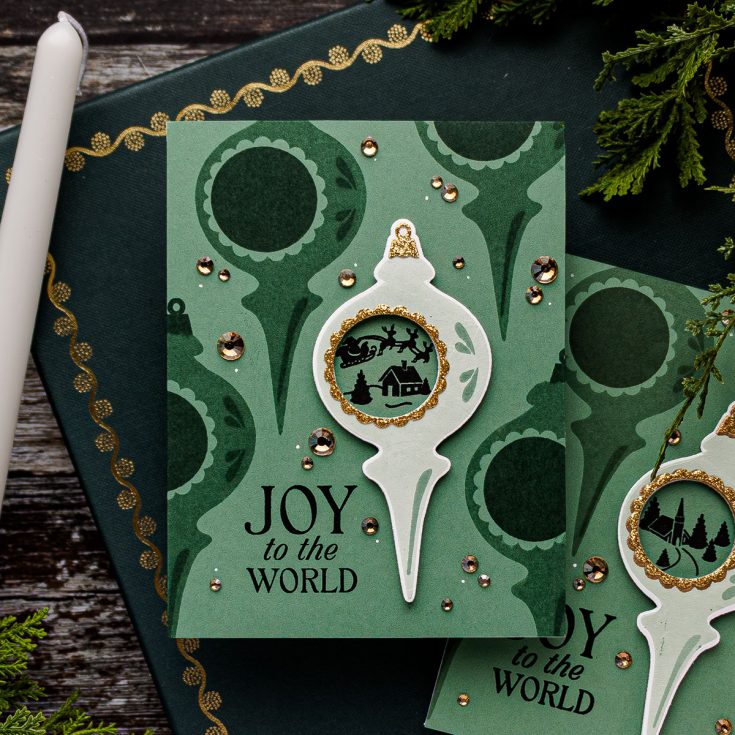
Inside my ornament, I stamped a tiny Santa’s Village scene in black for a surprise detail. Layering the stamped piece over a solid sage ornament gave me instant depth and dimension without any bulk.
For my background panel, I did tone-on-tone stamping with Eucalyptus ink on Sage cardstock to suggest a whole tree of ornaments. This gives a rich pattern but keeps the focus on the main ornament.
I added a simple black-ink sentiment, “Joy to the World,” at the bottom. With everything in place, I foam-mounted the main ornament for that delicious pop of dimension – because, let’s be honest, a little lift makes everything look fancier!
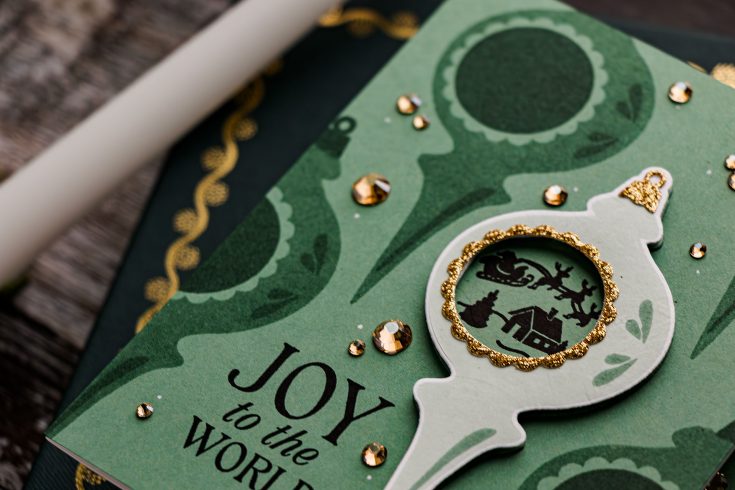
Finally, it was time for sparkle. I scattered Gold Pawsitively Dazzling Gems across the panel. They come in multiple sizes, so you can cluster them naturally – like twinkle lights on a tree. A few tiny white gel-pen dots finished the snowy effect without overwhelming the design.
Here’s my finished card – fresh, dimensional, and oh-so-sparkly. If you’re itching to start your holiday crafting, grab these goodies while they’re in stock!
WATCH THE VIDEO:

SUPPLIES:
|


Ways to support Ukraine:
If you are looking for ways to support Ukraine, we encourage you to visit this page on Yana’s blog:

Thanks so much for stopping by, and thanks to Yana for being our guest!


Oh wow this is so pretty
Stunning card! I love this stamp set and dies! Will definitely be making some of these!
These cards are gorgeous! I really love the green cardstock :)