Yippee for Yana: Slimline Scene Builder 3 Ways

Hi friends! Happy Tuesday and welcome back to our bi-monthly Yippee for Yana blog series with Yana Smakula! Read on and be sure to watch the video for more information! Enjoy!
Hi everyone, this is Yana Smakula, welcome back for another Yippee For Yana video! Today I am playing with the Slimline Builder stamp set, which is designed, of course, to make slimline cards. But, I’ll show you 2 additional ways to use it to make regular, traditional size A2 projects. And of course, a slimline card!
This stamp set is simply gorgeous. I particularly love the huge solid piece to make the sky. It is beautiful. The bottom ground piece is separate to make it easier for you to stamp these in different colors of ink. You also have 2 tree stamps, ornaments for both trees, or snow, if that’s how you’d like to use it, and of course, beautiful sentiments.
We will start with a slimline card. I got my MISTI stamping tool set up, and I will say that you do need to use a stamping tool such as MISTI or similar for best results. My first card is heavily inspired by Debby Hughes, I love everything that Debby makes, and her work often inspires me, I’m sure many of you feel the same way.
The colors of ink I picked for my card, and all of my cards today, are Cloudy Sky, Audrey Blue, High Dive, and Deep Sea from Simon. The plan is to do ombre stamping but without the use of ombre ink pads. The idea is to ink up the background with all 4 colors of ink progressing from the lightest color at the bottom, to the darkest color at the top.
It is a really beautiful background that can be used with a variety of images, not just the images in this stamp set, I think it would make a fabulous background for all the winter and Christmas critters out there or other scene building images. The dots can also represent the stars and thus allow this background to be used for Summer camping cards or similar.
Next, I added sparkle and shine to the background using a shimmer spray. My favorite one is from Hero Arts – White Iridescent Shimmer Spray. With the shimmer in place, I stamped the trees using VersaFine Onyx Black.
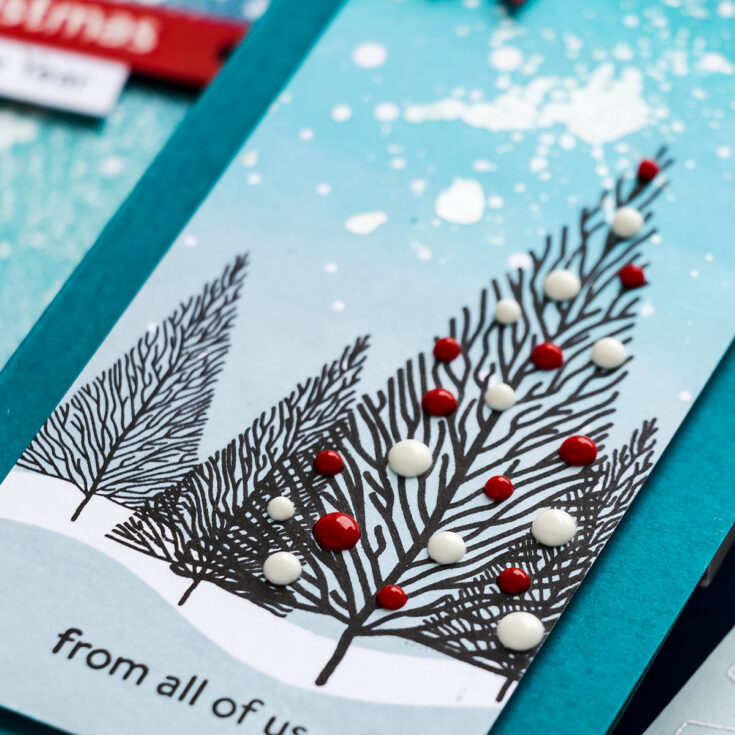
This stamp set comes with another layer for the trees – a layer to create ornaments or snow over the tree. I stamped mine over the large tree in white pigment ink. My idea was to add Nuvo Drops in Red and White over the tree and I just needed this stamped layer for placement purposes.
Next, I used my paper trimmer and trimmed the background so that I didn’t have any white border around my stamping – just a pretty background panel.
I also cut a layer of fun foam to be able to adhere it behind the panel and onto the card. I first planned to use a white card base, but later changed my mind and used a dark teal card base for this card, I made it using Hero Arts Adriatic Cardstock.
Next, I die-cut a banner from Simon’s Schoolhouse Red cardstock using a banner die from Spellbinders, it is from one of the Spellbinders Glimmer Sentiment sets. I treated the panel with anti-static powder, inked the stamp with clear embossing ink, and stamped onto the banner. I added white embossing powder onto the sentiment and heat set it with my heat tool to melt the powder in place. I used foam adhesive squares and foam mounted the sentiment onto my card.
I also stamped a little “From all of us” sentiment at the bottom of the card, again using that same Versafine Onyx Black ink. Having nearly finished the card, I mean having adhered everything in place, I used Nuvo Drops in white and red, these colors are Gloss White and Gloss Red Berry, I added dimensional dots over the white stamped circles on my tree. I had to wait to adhere everything down before I could add the Nuvo drops, as I didn’t want to accidentally smear the wet drops while still assembling the card. I alternated red and white dots on the card.
A2 Card Ideas with Slimline Products
The next 2 cards I have for you are the traditional A2 size. I wanted to try and see if I could use the Slimline products for traditional size cards. I stamped just a part of this background, the top part, twice to fill the entire panel. I used the same colors of ink to stamp the background. Having stamped one background, I’ve repositioned the stamp on the panel so that it continued the background to the left – to fill the entire panel of the card. This ended up looking almost perfect, with a slightly visible seam between the two impressions. To fix that and hide the seam, I gave this background a generous spritzing of the same shimmer spray. And that worked like a charm! You couldn’t really see the seam at all, maybe just a tiny bit at the bottom, but I planned to add stamped trees in that section and that hid it completely.
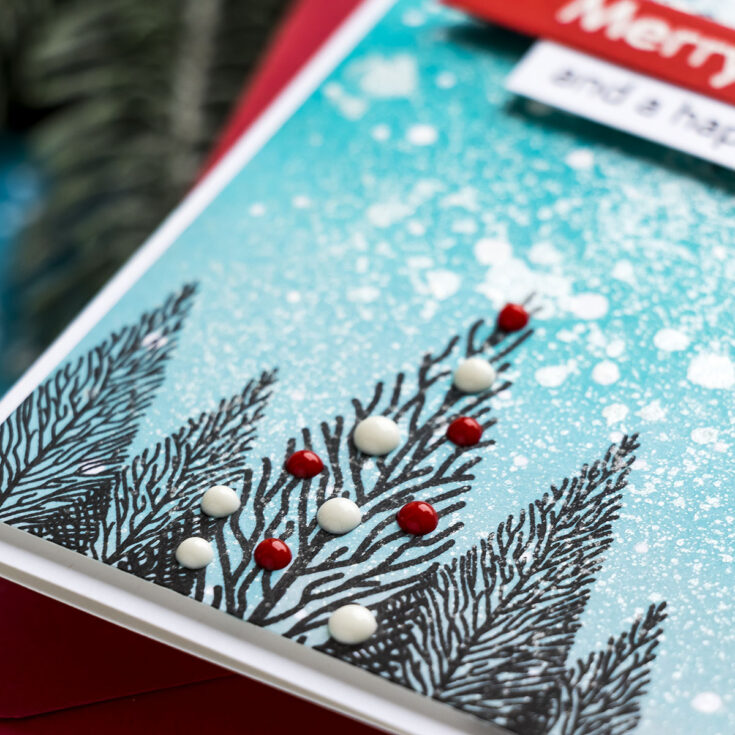
Speaking of the trees, for this card I wanted to stamp just the treetops to make it look like you are seeing just the top of the forest. Again, I used both the small and large tree and the same VersaFine Onyx Black ink and stamped the images filling the bottom edge of the panel.

I added Merry Christmas and A Happy New Year sentiment on this card. I foam mounted both onto the background. The background was trimmed to 4 by 5 1/4” and was foam mounted onto the card. I also added Nuvo drops in white and red onto the tree as I did on my slimline card.
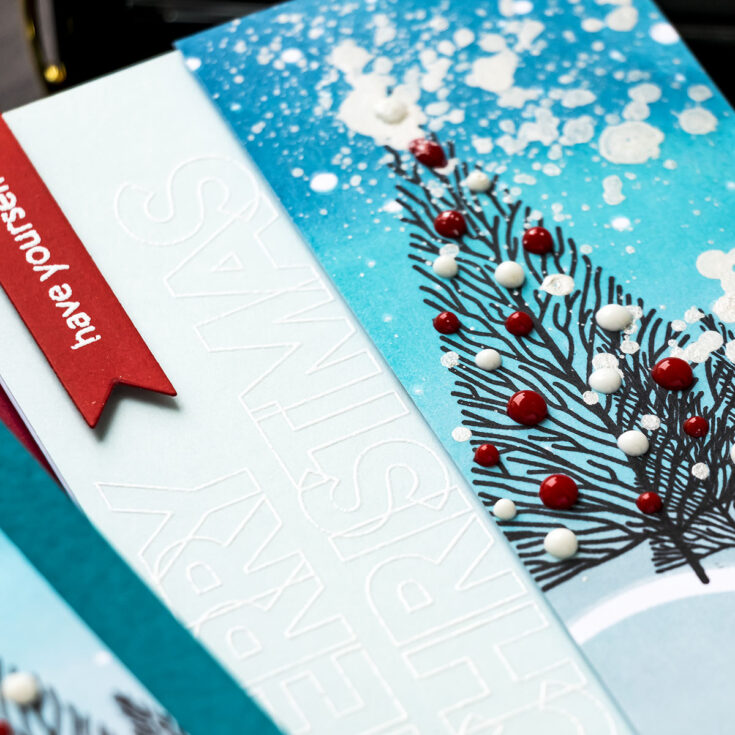
My last card for today features a sentiment from another stamp set from Simon, the Slimline Greetings! Oh my goodness, these are incredible! They, of course, are meant for slimline cards, but I’m using the Merry Christmas sentiment on a traditional size A2 card today. I’ve detail white embossed the sentiment on a panel of Hero Arts Arctic cardstock.
I have also stamped a smaller size panel using the Slimline Scene Builder stamp set and my idea was to foam mount the panel onto the background. I did that using foam adhesive, I also added Nuvo Drops in Red and white as I did on the other 2 cards, I sprayed the background with that same shimmer spray and added a red banner with a white heat embossed “have yourself a” so that the entire sentiment reads – have yourself a Merry Christmas.
That’s it from me for today! Have fun stamping!
WATCH THE VIDEO:
SUPPLIES:
|


Thanks so much for stopping by, and thanks to Yana for being our guest!


Absolutely Gorgeous cards!!!! I love the pops of red with those beautiful blues!!!
Beautiful cards Yana–thanks for a great video!
Fantastic cards. Thank you for the great tips.
liked the idea of using slimline stamps for a2 cards.
thank you
Beautiful cards with this stamp set and shows the versatility of the set. I love that background. Guess that one needs to be on my “wish list”. Thanks for showing another slimline as am going to make some soon.
AWESOME creations!!!!!!
So stunning
What a gorgeous set of cards! This set has just nose dived onto my “never ever gonna end”wish list! As has the slim line dies!
Really great cards and I love how this set can be used on regular sized cards
Hello Yana, Love your gorgeous cards – they look so special. I’m loving SSS October release and am especially loving the slimline cards. Lovely to have a little more room and scope. Thanks so much for always giving us ideas and sharing your talent.
Hi guys! Your cards are eye-catching. Can you guide me to make them? I think that my friends will love them. So, your article gives me the motivation. I will try making beautiful cards.