Yippee for Yana: Pattern Stamping with Masking Paper
Hi friends! Happy Wednesday and welcome to the latest edition of Yippee for Yana, our bi-monthly card making blog series with the awesome Yana Smakula! Read on & enjoy!

Hi everyone, this is Yana Smakula, welcome back for another Yippee For Yana video!
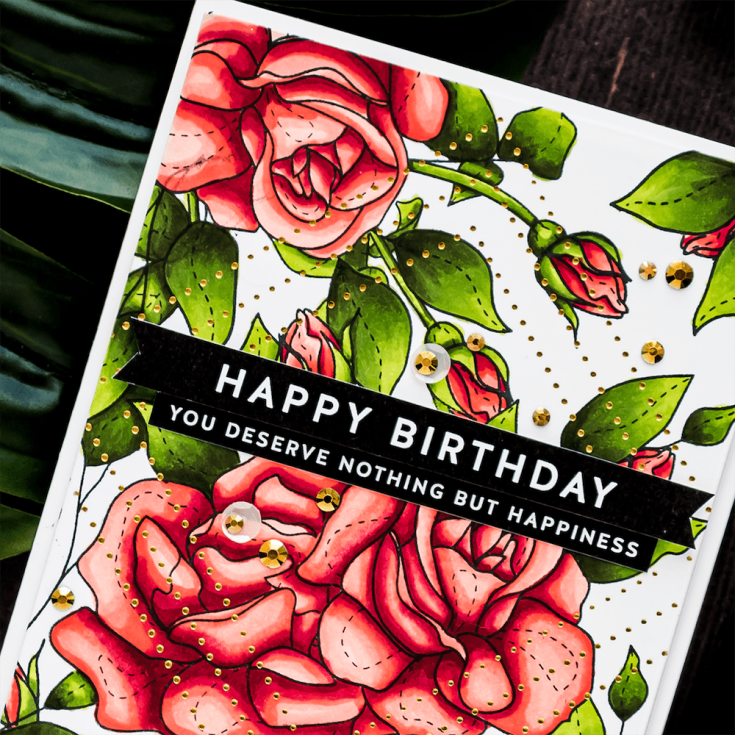
Every once in a while comes a stamp set I can’t put down. I keep using it until I’ve stamped it in every possible way, colored using every possible color combination, and made every card imaginable. The Spring Flowers 4 set from Simon Says Stamp is this set for me these days. I’ve already shared two cards using this set over on my blog and today I have another, more dramatic take on this set.
I love to stamp patterns for my cards and frankly, it has been ages since I’ve done that last. This stamp set inspired me to stamp all sorts of rose patterns for my projects. The kind of pattern stamping I have in mind today requires masking, I stamped several masks for this project. I used masking paper, stamped images in black ink, and cut them out using my Tonic Studios Spring Assist scissors. I’m not really a fan of making masks as it is a tedious process, but the great thing about masks is that they can be reused multiple times.
I’ve started my pattern with the main image, the smaller rose, and stamped it in Simon’s Intense Black ink onto Neenah Solar White 80lb card. I masked this flower, this image is going to be the one most forward, everything else will be set back a bit and will be placed in the background, this is why we stamped this rose first.
Next, I inked up the other rose, the large one, and stamped it next to the smaller over overlapping it slightly. Again, I’ve masked my image to protect it from further stamping.
The rest of the stamping was simple – I stamped an image, I masked it if needed, and stamped additional images next to it or around it. The Spring Flowers 4 stamp set has a variety of leaves, two stems with leaves, and a gorgeous little rosebud. All of these can be used to create beautiful custom patterns for your cards or they can also be used alone, without combining them into a pattern.
I used a rectangle die from Spellbinders and trimmed this panel down to about 4 x 5 1/4”. I did this now so that I wouldn’t have to color any unnecessary pieces.
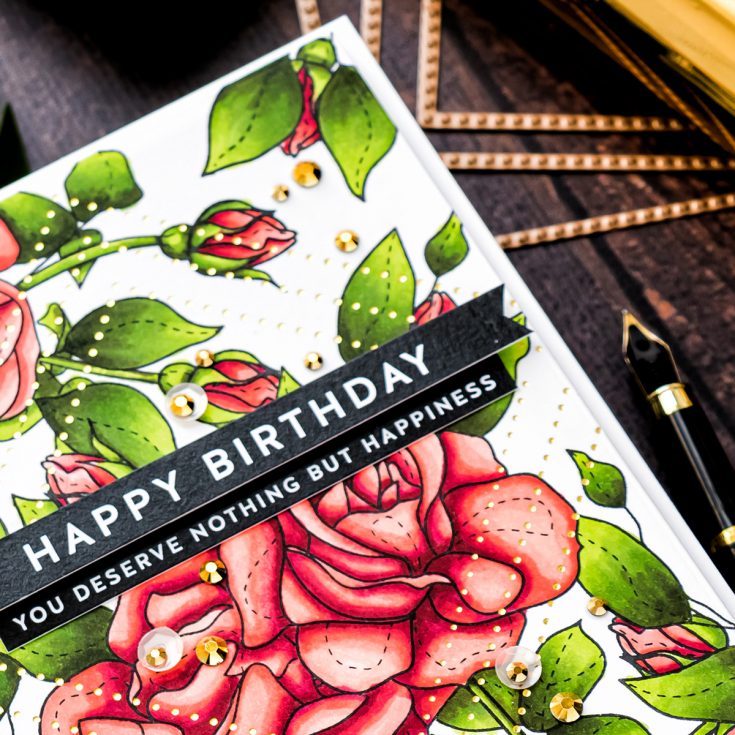
For my coloring, I decided to use greens and red. I used the following green markers YG03, YG17, G94, and G99 markers. As always, I did rather quick and simple coloring applying light, medium, dark colors, and going back to the medium and light to blend the colors together.
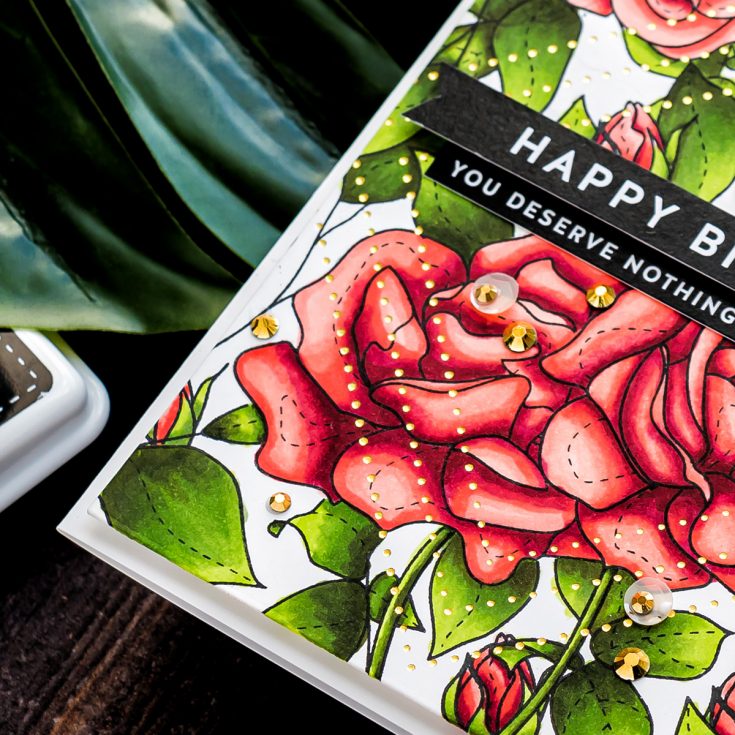
To color the flowers red I used R20, R22, R24, R39, and R89 colors. And again I went for the light-medium-dark method coloring the image with the lightest marker first, adding my medium color and my dark color and going back to the medium and light to blend the colors together.
Next, I wanted to add some foiling to the background and used squares and foiled them as diamond shapes on the card. These are Essential Glimmer Squares from Spellbinders and they add the most beautiful subtle detail to your projects – all they foil are tiny dots, but these dots are enough to add a level of beautiful sophistication to the card.
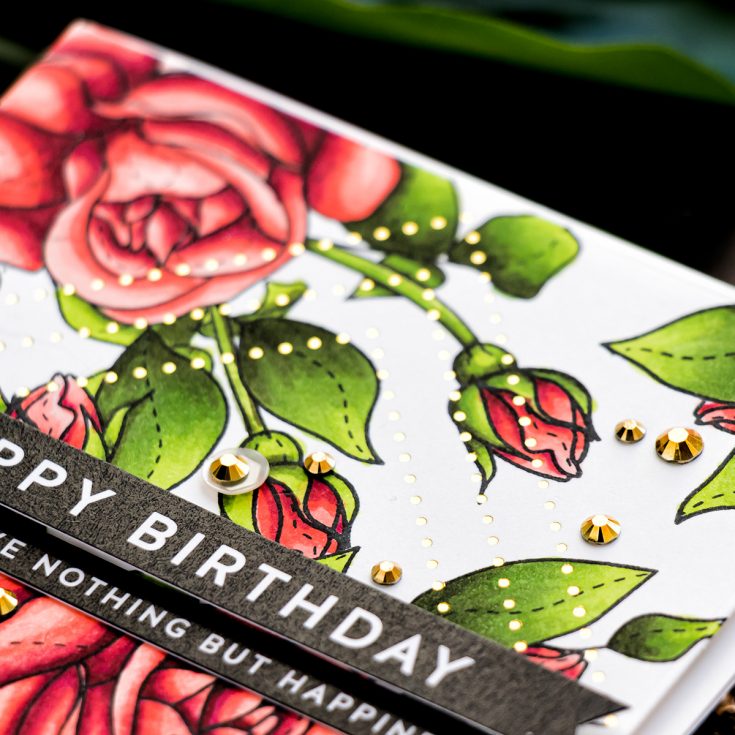
I foam mounted the panel onto A2 white side folding card base and next to create a sentiment for this card I used Simon’s Sentiment Strips. I cut one that reads Happy Birthday – foam mounted that onto the card and next added a skinnier sentiment strip using double-sided tape immediately under it. The strip reads You Deserve Nothing but Happiness.
I used several sequins and gems from my stash to dress this card up – I added a lot of Metallic Gold Jewels from Pretty Pink Posh to tie together with the foiled dot border on this panel. And that finished my card for today. Have fun stamping!
WATCH THE VIDEO:
SUPPLIES:
|


Thanks so much for stopping by, and thanks to Yana for being our guest!


This is one in a million… Love your coloring, always! The added foiling is a spectacular idea! I keep thinking of purchasing a foiling machine, but so far??? Thanks so much for your most excellent video.
Beautiful card Yana.
Gorgeous card Yana
Love this Beautiful card!!! The gold foil dots are perfect!!
This card is beautiful, Yana. Like that touch of glimmer foil…such a great idea. tfs-stay well.
Beautiful coloring.
Just gorgeous
This card is so pretty. You know just where to mask to make the perfect arrangements, and colouring and colour choice is amazing! I love that added foil dots at the end of your Video! Stunning!
This is absolutely GORGEOUS! The foiling is AWESOME! I see why your hand got tired coloring!
Your colouring is always stunning Yana and this card is a big example of it. Stunning card and I love the gold pattern. Thank you so much for sharing, stay safe and have a great day.
Gorgeous card
The offered paper is utilized generally in painting, workmanship and specialty ventures, carpentry, and other light modern employments. I read about these papers when I was taking help from the http://www.toptenwritingservices.com/ website to complete my paperwork. Delivered by best quality paper-based crude materials, covering paper is requested broadly for its unequaled quality and strength.
Absolutely lovely! I need to use masking more often to create a panel with more images. You’ve inspired me to try it soon. Thanks.