Yippee for Yana: Modern Christmas Cards

Hi friends! Happy Saturday! Please join me in welcoming special guest Yana Smakula in our bi-monthly Yippee for Yana blog series! Read on to learn more about this gorgeous design and enjoy!
Hi everyone, this is Yana Smakula, welcome back for another Yippee For Yana video! In this episode, I have 2 elegant Christmas card ideas to share using some of my new and old favorite products from Simon. Chances are you already have these supplies in your stash and should be able to re-create these cards easily. And I do encourage you too.
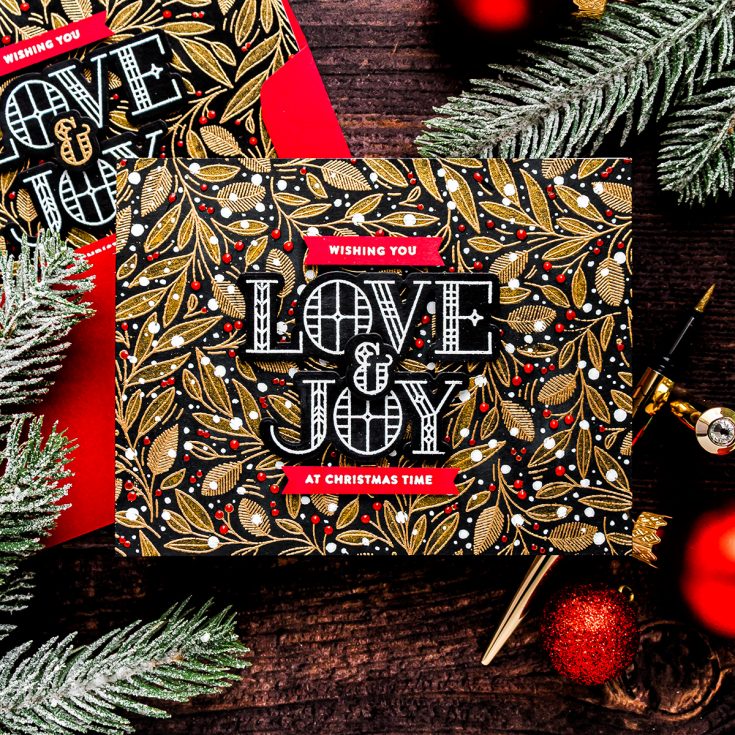
I love all things modern and also elegant in home decor, in clothing and accessories and thus this is the style I tend to choose when I make my handmade cards. Today’s video shows how to use black cardstock, a lot of gold in both heat embossing and pen forms as well as subtle hints of red to create beautiful Christmas cards. If you are not a fan of black cardstock, I know not everybody likes that color you can try to substitute it for dark blue, or even dark green and still use the same design.
I started to work on my card by creating a small sticky handle inside my MISTI stamping tool to affix the paper in place. Next, I treated a panel of black cardstock using anti-static powder to eliminate and static of grease I might have had on the paper.
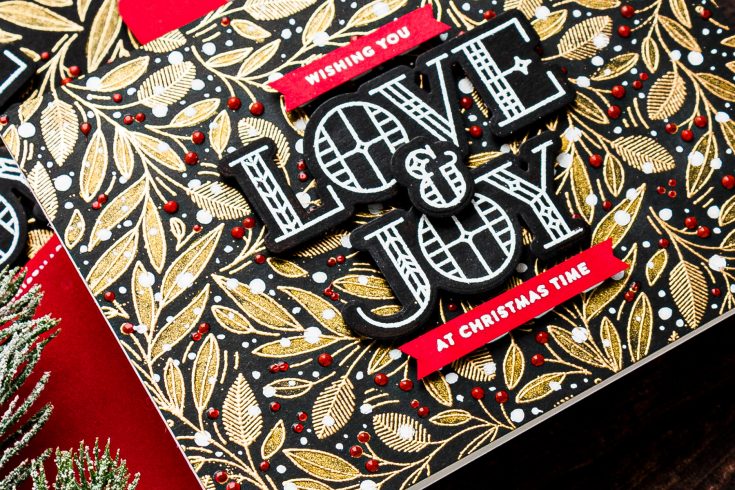
Next, I mounted a Leaves and Berries background stamp on the door of my MISTI tool. It is one of my favorites this Holiday Season, I inked it up using clear embossing ink and stamped. After stamping the background I removed the panel from MISTI and poured Antique Gold embossing powder covering the entire background. With the powder applied I used my heat tool and heat set the powder to melt it. This background, when embossed, looks absolutely spectacular – I just love the fine lines of the leaves and berries and also the dashed lines on some of the leaves, it is very classy in my opinion.
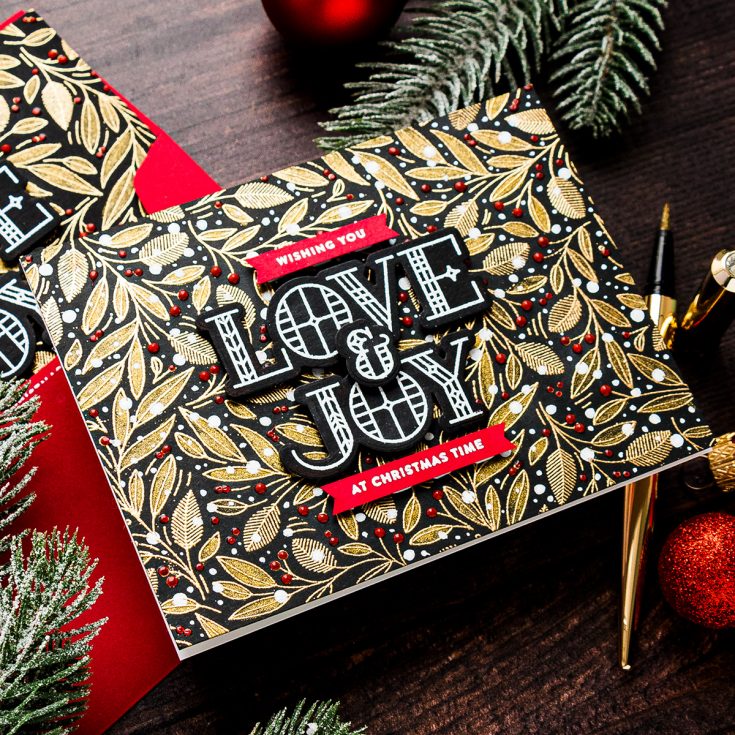
This background can also be enhanced, it can be colored. I decided to go all out and add some shimmer using a gold shimmer pen. There are a lot of shimmer pen products on the market, there are gold and clear shimmer pens from Tonic Studios, I love using those, there are also gold and silver shimmer pens from Jane Davenport for Spellbinders that give beautiful results and a lot of other similar products on the market. I used a Jane Davenport Gold Shimmer pen in color Golden Age and colored all of the open leaves gold. I did a double layer of shimmer coloring over all of the outline leave twice with this pen to make sure they were really shimmery. I love the result!
With the leaves colored I also decided to color the berries. You can’t use your traditional coloring mediums here, I mean alcohol or watercolor markers, you’ll need to use something that is opaque. I decided to use Nuvo Drops in Red Berry to not only color the berries red but also to add dimensional accents to the background. I added various size berries following the heat embossed berries on the background and set this aside to dry for about 30 minutes. The Nuvo Dots weren’t too big, in fact, they were rather small, so they dried very quickly.

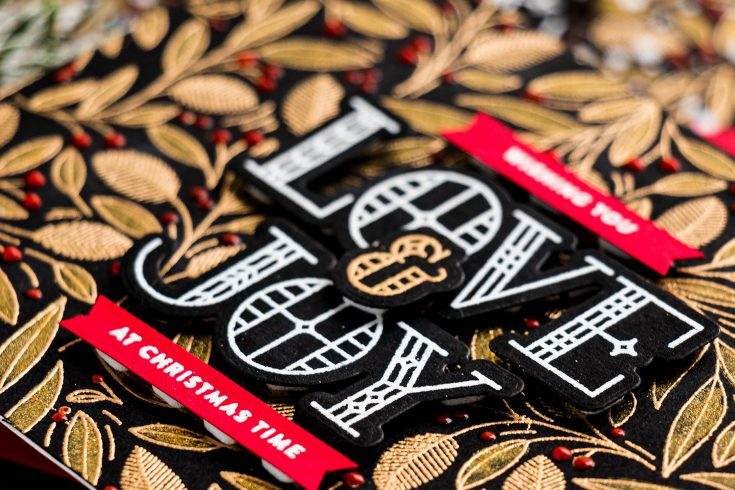
This background looked stunning once finished. To create a sentiment for this card I decided to use another favorite set of mine from Simon – the Stained Glass Greetings set. It is such a timeless and classic font stamp set – I find myself reaching for it every year I make holiday cards.
I opted for a lightly longer sentiment that reads “Wishing You Love & Joy at Christmas Time”. I heat embossed larger words in white on black cardstock to better blend with the background and the sentiment strips were embossed in white on red cardstock, trimmed into V-shape banners and also foam mounted on the card. I didn’t add any other embellishments here as I felt this design was already busy enough and any additional sequins or gems would just get lost here.
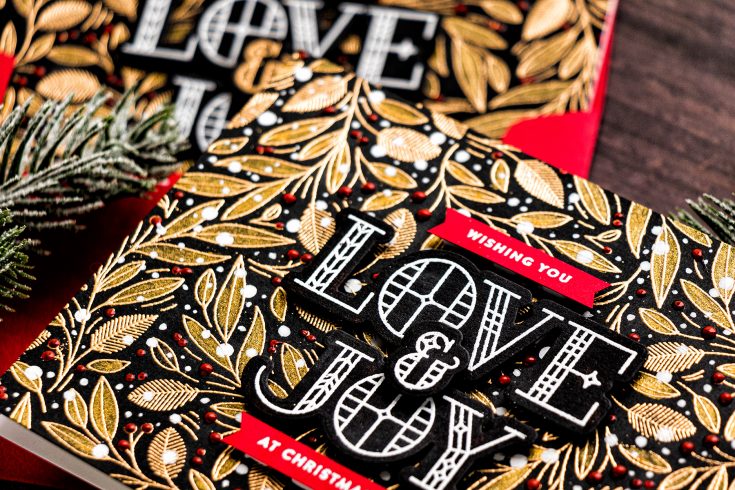
I also made another, nearly identical card. I wanted to try adding snow to the background of my project, so I made another background and tested adding various size snow dots all over it.
I used several products to add the dots starting with the Storytime Paint Pens by Jane Davenport in Snow White. I first used the largest pen to add large size dots all over the background, next moved to use the small size pen to add medium size dots and finally finished the blizzard with Sakura pen in size 8 and 10.
Here’s what the finished card looks like – I really like the one with the added snow, although I think they both turned out beautifully. I’d love to know which card you like best.
Have fun stamping!
SUPPLIES:
|


Thanks so much for stopping by and thanks to Yana for being our guest!

Blog Candy Alert!! Follow our blog via email and comment on this post for a chance to win special blog candy!


This card is so elegant in gold and black combo.
I love the rich gold embossing and little red berries add festive touch.
These cards are stunning! My favorite is the one with the snow. So beautiful!
WOW these are stunning, I love the gold embossing!
Hi Yana! I’m so glad I purchased this amazing background stamp as I adore everything you’ve created with it this year! I love both cards but if I was making the card I’d probably go for the one without the snow as I’d be worried to mess it up, lol! Thanks so much for the stunning inspiration!
Yana is the best! So inspiring! ^_^
Very pretty card!
Thanks for sharing…
Your backgrounds are OUTSTANDING!!!!!!!!!!!!!!!!!!
This card is so elegant
These cards are STUNNING! love both versions, the first one looks a bit more formal, but again both are stunning.
Gorgeous cards. The gold on black is absolutely stunning. I love them both, but since you asked, I think the one with snow is my favorite. Also, the washi tape handle is a genius idea!
Stunning card! I love the colors and the white pen detail- it really compliments the white greeting!
Yana, I love your work! These cards are absolutely beautiful!!!!
Stunning work of art! All that’s needed: a frame! These would be perfect as timeless pieces of Christmas home decor!
~carol
Wow!! So elegant!! Yana always awes me with her incredible talent!! That black and gold is classic!!
Gorgeous card Yana, I love the gorgeous background stamp and the stained glass sentiment. Thanks for sharing!
Over the top beautiful! All that amazing gold!
What a beautiful elegant card! I like the black card stock but, think the dark green would be a good choice, as you indicated. Beautiful design!
Wow! Fabulous work! I love the black and gold! :)
Beautiful layered elements on this card, Yana always does a great job.
Oh Yana, you always leave me with the urge (that I often go with) to run, not walk, to my craft room to try your ideas so I don’t forget what you did even though I pin them! These are both so elegant but I have decided the one with the blizzard action is my choice of the two but it really was a hard decision. Beautifully done as always! Yippee, I am off to play…
So elegant!
These cards are so elegant!
Such elegant cards! I honestly can’t decide which one I like best. They’re both so beautiful. Thanks for sharing your designs and for the very helpful how-to video!
Wow! This is stunning! Now I wish I had bought this stamp set during the Black Friday sale!
Wow, all the gold makes this card really rich !
Both versions are just stunning! Thank you for always inspiring me, Yana!
Elaborate,elegant,stunning and beautiful! It has been all said so all I can say is WOW!!
Wow Yana!!!!! These are STUNNING!!!! I love them both!!!
Gorgeous details on this beautiful card! Love the gold embossed image on the dark background!
gorgeous cards!
The Video of this lovely make is fabulous – love love that rubber stamp and the GOLD embossing – no wonder you love it sooooo much! I have not used shimmer pens before – so that was a great tip for me! TFS your lovely work Yana!
OOPs forgot to tell you I like the first card the best Yana – although the snow one is cool too! TFS
These are both gorgeous! I am definitely a fan of black and gold! I just got the Leaves and Berries stamp, too. While my cards for this year are just about done, I’ll absolutely be using this idea next year – thank you!
Simply love the gold and black color combo!! So elegant and beautiful!!
These are simply stunning! I love when you make this type
of card with all the gold embossing on a dark (black)
background! I think the “snow” one is marginally better!
Oh what striking and beautiful cards!
Simply stunning! The use of black card stock adds an elegance to the card. I like the one with the added snow as well. Thank you for sharing your amazing talent with us!
Very stunning cards!!!!
I love both of the cards! Very elegant with the black background
So elegant and beautiful!!
Beautiful example…thank you for the instructions.
Love the card with the snow!
Fabulous with the gold embossing.
OH, Yana! They are both beautiful! I think it would probably depend on who/where I was sending the card. We don’t get snow here, but if I was sending a card to someone in a snowy climate, I might send the snowy card. To someone in a warmer climate, the no-snow card. Hmmm. . .I dunno. They are both spectacular!
Beautiful card. I love the gold background and that stained glass greeting stamp set.
Fabulous card, Yanna!
Oops, only one n in Yana. Sorry. =)
oh my !!! – -these cards are sensational – love all the gorgeous background !!!
Yana these cards are stunning! I love both of these cards but the snow one is my favourite, I also like how you were able to control where the white dotes went with the pens. I have ruined more than one card after hours of work with splatter that didn’t really go. What a great idea. Now after watching your video I have to go to my craft room and try out this technique. Thanks so much for your inspiration!