Yippee for Yana: I Like You Floral Card
Hi friends! Happy Tuesday! We hope you are as creatively inspired as we are after a weekend of quality time with quality people in a great industry and LOTS of crafty fun things on the horizon! Let’s continue this excitement with a gorgeous card to inspire by the one and only Yana Smakula! Don’t miss the video for more info! Enjoy!

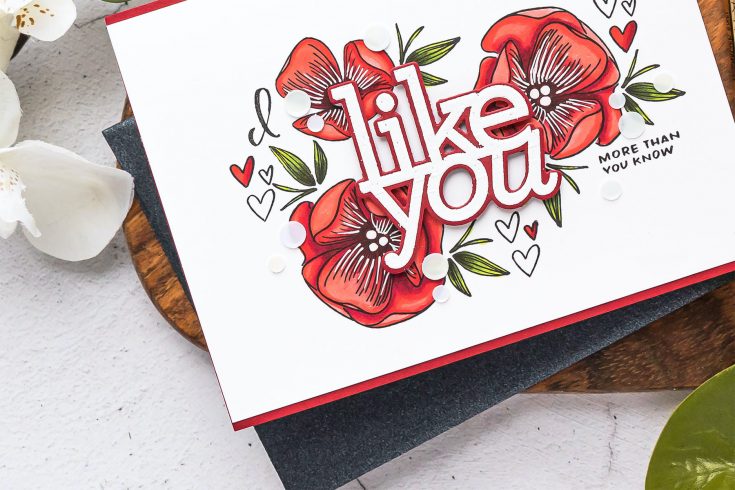
Hi everyone, this is Yana Smakula, welcome back for another Yippee For Yana video! In this episode, I have a floral “I Like You” card featuring products from Simon’s Hey Bestie release. It’s an easy one to make and hopefully one you’ll be inspired to replicate in your craft room. I started to work on my card by stamping “Like You” from the Like You stamp set by Cathy Z in Simon’s Intense Black ink onto a panel of white cardstock, this is Neenah Solar White 80lb cut to 4 1/4 x 5 1/2”. I didn’t actually need this “like you” stamped on the card, the final card will have a heat embossed and die cut “like you” foam mounted over the original image, but I have stamped it for placement purposes. It will help me figure out better placement for the flowers I want to stamp next.
The flowers, I have two – a larger and a smaller flower come from another stamp set from SSS. This is a set called Love Friendship and the flowers are simply gorgeous. I love the illustrated style of these images, how the petals are curled up and how the flowers just look so natural. I’ve placed two images both overlapping the sentiment and I’ve positioned them so that there’s a bit of space in-between the images to stamp the leaves. I double stamped them for best impression. I’ve also stamped one more flower, another large one on the other side of the sentiment to balance things out. With the flowers stamped I just need to add several leaves, for this I’m going to use my clear block and just stamped the leaf clusters here and there completing my arrangement.
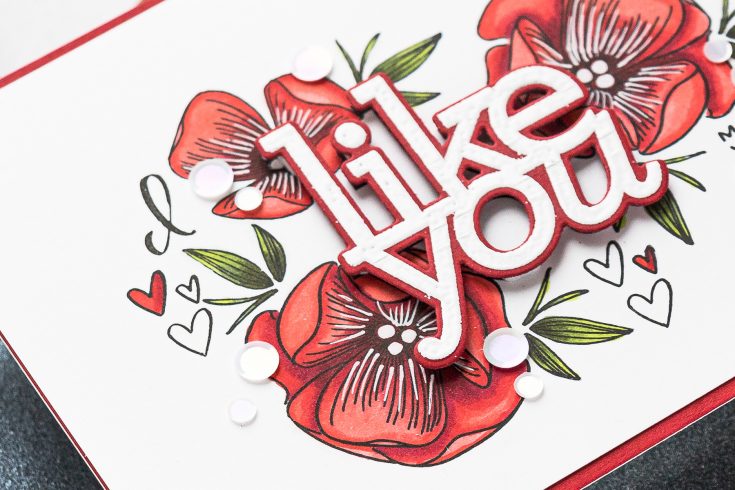
Next, I’ve selected several colors of Copic markers to color these. I’ve picked G99, G94 and YG03 markers, these are my go-to colors for coloring leaves lately. As for the flowers, I decided to go red. I typically use a lot of pinks for my cards, but with Valentine’s Day being not that far away I feel more and more inspired by red. The colors I picked are R39 my darkest red, R27 medium red, R24 light red and also R22 – the lightest red for the highlights of the petals. I went ahead and colored all of the flowers and some of the detail got lost. I restored the detail using a white pen. First I used my White Sakura pen in size 0.8 to color the flower centers white, this instantly helped the flowers pop and I also used the same pen to add white detail to the petals of my flowers. Again, this added a ton of interest and details to the flowers and helped them stand out.
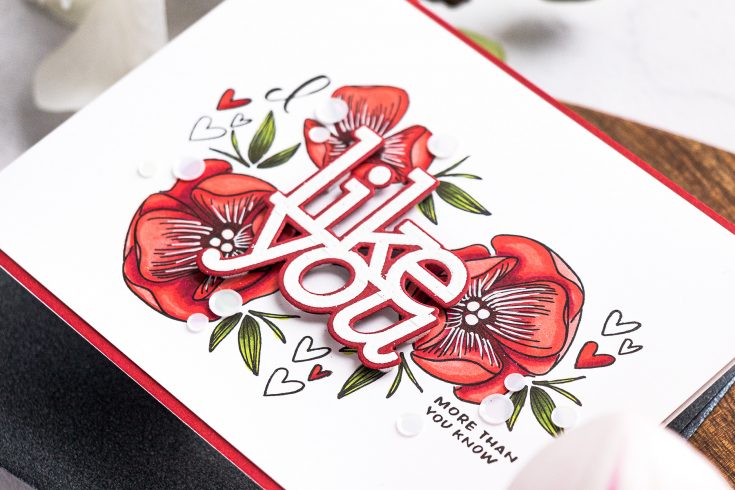
I’ve gone ahead and prepped a die-cut sentiment for this card. For this, I heat embossed “LikeYou” in white embossing powder on Schoolhouse Red cardstock and have cut it out using a coordinating die in my Spellbinders Deep Sea Die Cutting machine. I foam mounted the sentiment onto the card. Next, I’ve picked an additional sentiment from the LOVE stamp set, one that reads “More Than You Know” and stamped it in the same Intense Black ink right next to the main sentiment under the large flower on the right-hand side. There’s also a letter “I” in the set and I stamped it as well completing my sentiment which now reads “I like you more than you know”. The stamp set comes with a small heart cluster and I decided it would nice to stamp the hearts here and there scattering them around the panel. I stamped them in 3 sections on the card forming a visual triangle around the sentiment and flowers. I also used my red markers and colored one heart red in each of the clusters.
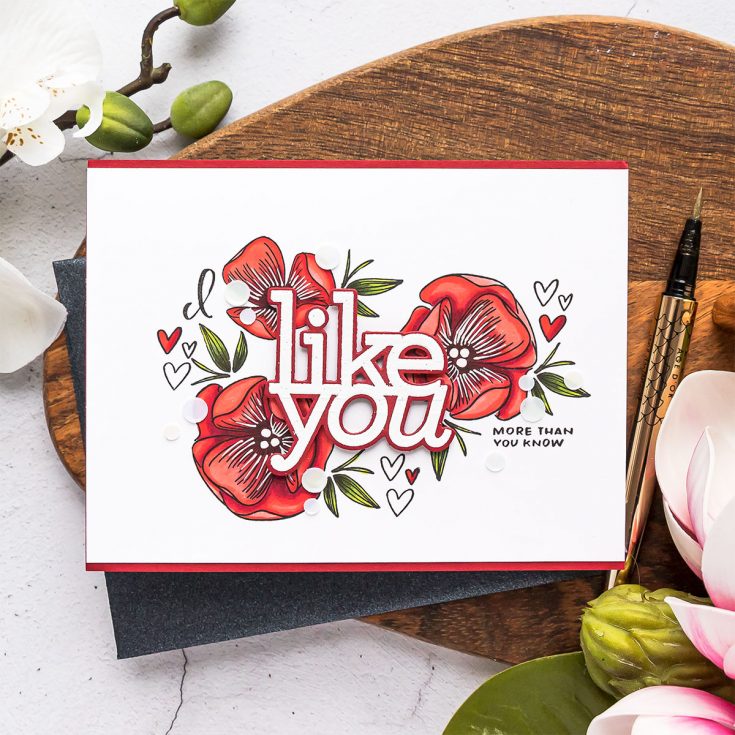
I trimmed the panel to 5 1/2” x 4” and adhered it to the A2 red top folding card base. Finally, I picked some flat white sequins from Simon, these come from the Classy mix and adhered them in place using Simon’s Craft Tacky glue and my trusty Crystal Katana tool. Our card is finished!I love the way it turned out and how easy it was to make.
SUPPLIES:
|


Thanks so much for stopping by, and thanks to Yana for being our guest!


Yana this card is spectacular! I love the arrangement you did. I like how you stamp the word die first so it was easier getting the right placement for the flowers. What a great idea. I am going to have to steal that technique. The white gel pen really makes the card pop! And I love the hearts! Thank you so much for the video! I learned so much!
Really Beautiful card!!!
This will be perfect for Valentine’s Day but other days too! Thanks for the great tips on design!
So cheery! I love that!
This is beautiful!! I love how you mixed the stamped sentiment with the die cut sentiment; it adds a fun touch!
Beautiful coloring and layout for your card!
Simply gorgeous!!
This is such a gorgeous card Yana, the bold vibrant colours make it a real show stopper.
Very pretty card. I love the colors.
Fantastic card. Thank you for the great tips.
Beautiful card Yana, great tip for stamping the sentiment for placement and then placing a finished die cut sentiment over it! Love it!
Love the design of the card! Pretty card!
Beautiful card! Love the coloring!
Pretty flowers and sweet sentiment.
Very pretty card and would make a wonderful Valentine. Thanks for sharing your talents with us!
Great card, Yana! I love those flowers!
So beautiful!
What a beautiful card! I love the design and the gorgeous red flowers!
This is gorgeous
This beautiful card has a lot of depth.
So beautifully crafted, Yana. Thanks for sharing your card and video.
beautiful card!
love how elegant this looks!!
Awesome card Yana and stunning colouring.
Thank you so much for the video tutorial and have a great week.
Absolutely stunning card. Yana is an incredible artist and I love her color choices!!
I love the bright white against the bold red. This is such a cheerful card!
Beautiful card Yana!!