Yippee for Yana: Floral Pattern Friendship Card
Hi friends! Happy Thursday! Please join me in welcoming back special guest Yana Smakula to our blog! Read on and be sure to watch the video for more information! Enjoy!

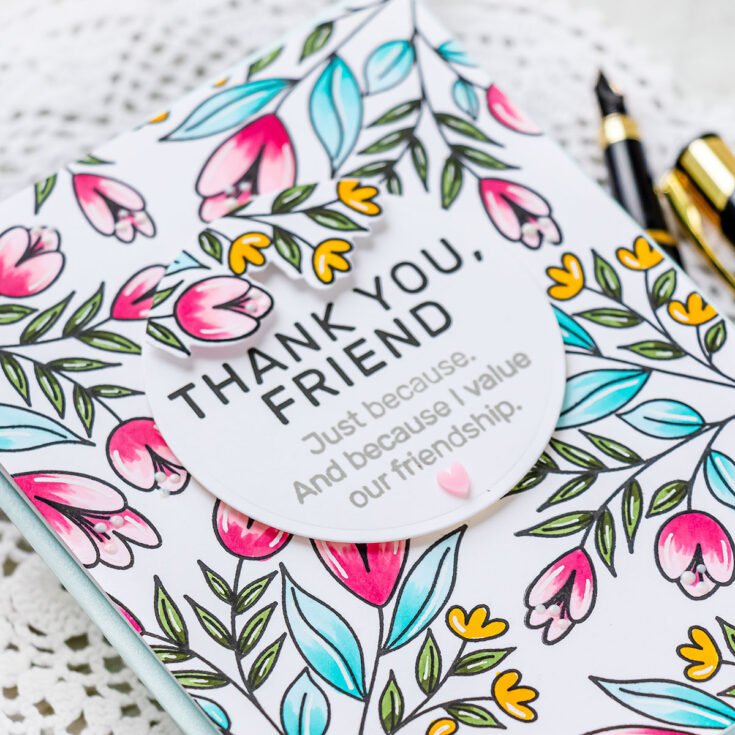
Hi everyone, this is Yana Smakula, welcome back for another Yippee For Yana video! One of my favorite ways to use floral stamps is to build my own custom floral patterns. Today I’m using one of Simon’s new floral clusters, from the Best Friend Ever stamp set, to create a custom floral pattern for a friendship card.
This is a simple-to-make card using an oldie but goodie technique. I invite you to join me and make a card like this using the supplies I am using today or similar products you might have in your stash!
Follow these steps to re-create this card:
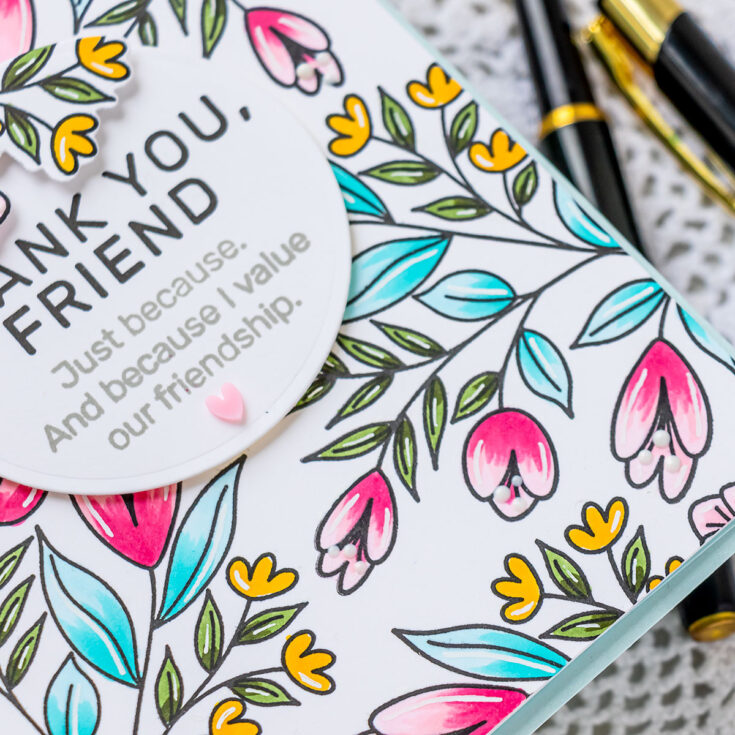
- Using a MISTI stamping tool stamp the floral cluster coming in from the corners of the panel to fill the entire 4 ¼ x 5 ½” panel. I needed to stamp the image 4 times to fill the background. I also stamped 3 partial impressions in the gaps where I felt I had too much space.
If you’d like to create a one layer card, begin by stamping the sentiment first. Next, build the floral pattern around it. This way the sentiment will look as if it is nestled in between the florals.
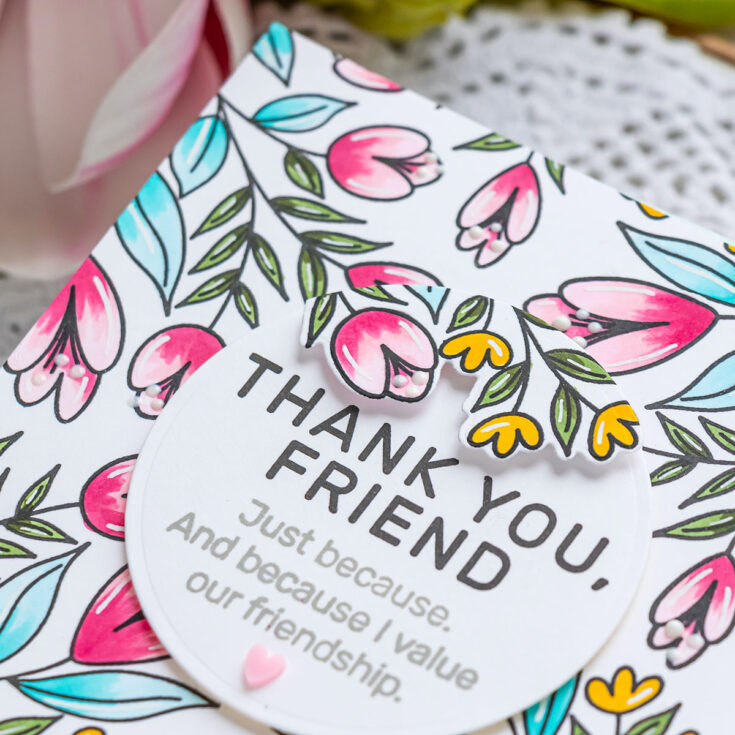
- Color the pattern using Copic markers. I used RV34, RV11, and RV00 to color most of the flowers pink; BG45 and B000 to color the large leaves teal; G99, G94, and YG63 to color the small leaves green and Y15 to color the smallest flowers yellow.
- Add white highlights to the images using Sakura gelly roll pen.
- Die-cut a circle from white cardstock. Stamp sentiment using sentiments from the Inside Friendship Messages stamp set. Stamp the main sentiment in VersaFine Onyx Black ink and the sub-sentiment is light gray.
- Foam mount sentiment circle onto the card.
- Stamp another floral cluster onto a piece a scrap paper. Color just the section with the yellow flowers. Cut the image out using a coordinating die. Cut the edge using a circle die and foam mount partial cluster over the sentiment circle.
- Decorate the flower centers using Nuvo Drops in white.
- Let dry and enjoy!
Have fun stamping!
WATCH THE VIDEO:
SUPPLIES:
|


Thanks so much for stopping by, and thanks to Yana for being our guest!


Really Beautiful card Yana!!!
Yana – I Love these quick video’s that make you think “outside the box” and take a look at what you may all ready have to make a something similar. I love the look of using the highlight gel pen but this is what I have an issue with. I would love for you to explain the basic behind this technique. Mine doesn’t add any highlight, seldom happy with the end result.
This is beautiful and inspiring. I’m having trouble coming up with card design ideas and this technique could be the start I need. I don’t use Copic coloring but this would work equally well with watercolors or colored pencils! Thanks!
Thanks for sharing this lovely card technique, I love that you changed up your design in the middle, when you weren’t liking the sentiment placement. No need to scrap all that work, just rethink it!
I always love seeing your process Yana!! Gorgeous color choices and design of this beautiful card! Love that you changed how you did the sentiment because it really made a terrific difference!! Love it!
Super pretty! I love your colouring!
Really pretty card