Yippee for Yana: Flip Up Birthday Card
Hi friends! Happy Tuesday and welcome to the latest edition of Yippee for Yana with the always inventive and fun Yana Smakula! Read on and be sure to watch the video for all the information on how to make this card and enjoy!

Hi everyone, this is Yana Smakula, welcome back for another Yippee For Yana video!
In this episode, I’m showing how to make a flip up interactive masculine Birthday Card featuring simple stamping and partially cutting techniques!
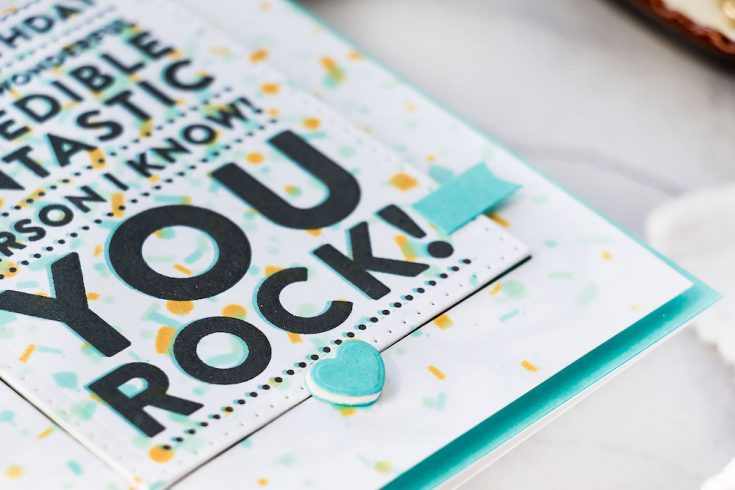
I used a new stencil from Simon Says Stamp, Confetti, it’s a fabulous one to create some cool confetti-like backgrounds for Birthday and party cards. You probably think this stencil doesn’t look like much at a first glance, but often it’s the simplest things that pack the most punch and so it this stencil.
I did some simple ink blending using ink blending tools and several colors of inks from Simon – Duckling, Mint, Maliblue, Audrey Blue.
To avoid having the exact same pattern on my paper when blending 4 different colors of ink, I’m flipped my stencil to the other side and rotated it 90 degrees. If you want you can turn your stencil and flip it up to 8 times to have different ink blending for each layer. Imagine using all sorts of different colors for your confetti background and maybe also using texture or glitter pastes and even embossing powders.
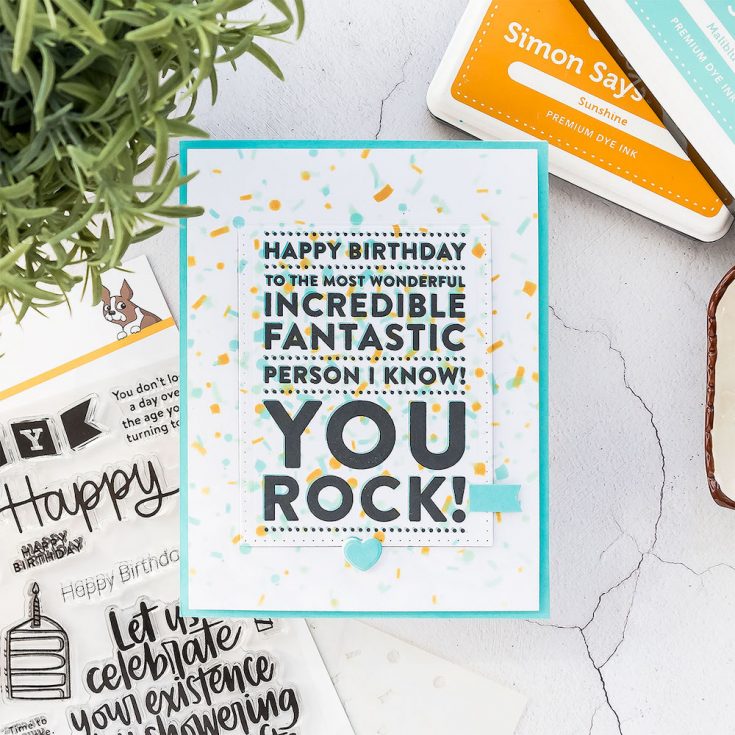
Next, I stamped a big sentiment from the Big Birthday Greetings stamp set in the center of my ink blended background. I love block style sentiments, they are perfect to take center stage on a card! I first stamped it in Audrey Blue ink, next offset slightly and stamped in black.
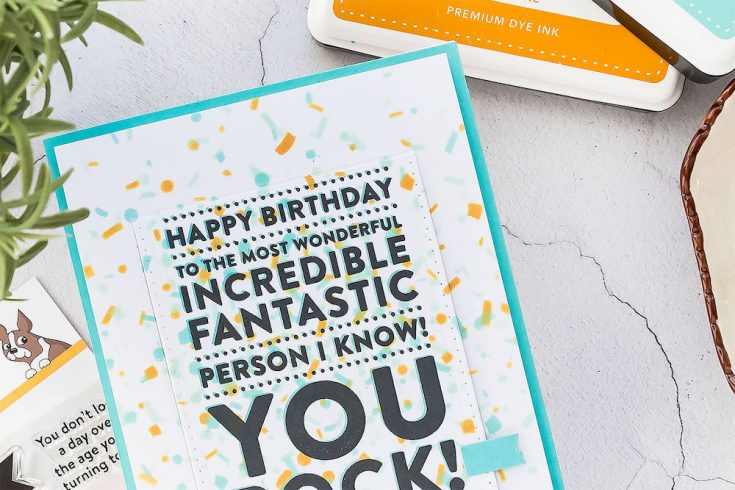
I trimmed my panel to 4 x 5 ¼” and used a rectangle die to die-cut a partial panel in my background. Watch my video tutorial for a detailed how-to.
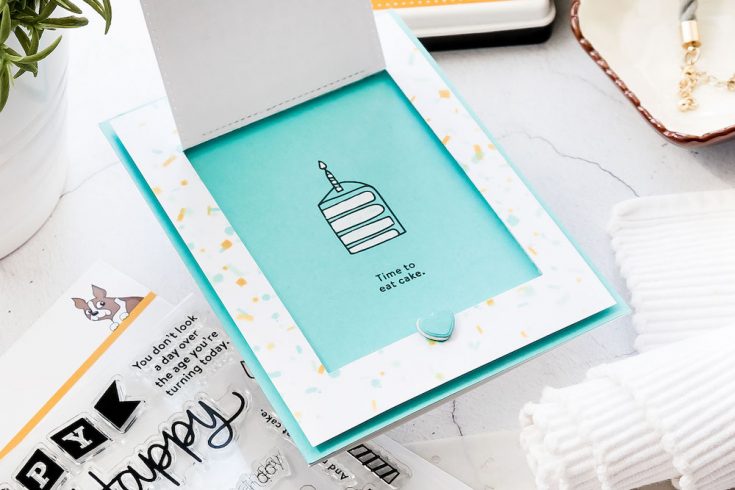
Finally, I used foam adhesive tape to adhere my panel to an A2 light blue card base. I only added adhesive to the sides of the panel, not to the flap itself and I need to be able to open it up. Next, I stamped the image of a cake and additional sentiment on the card base directly behind the flip up pane. I used a white pen to color the cake.
Have fun stamping!
SUPPLIES:
|


Thanks so much for stopping by and thanks to Yana for being our guest!

Blog Candy Alert!! Follow our blog via email and comment on this post for a chance to win special blog candy!


Such a fun card and love the technique
Cute, cute card! Interactive cards have to be my favorites. Love the shadow stamping.
Fun card! I love interactive cards like this. The idea of a surprise is always fun.
Super fun flip card, great video too.
So fun and a great card for the guys. I already follow by email.
Great card and so easy to make. It will also work with a number of stamps that I have. Thanks for sharing.
Linda D.
Great idea! I love your card!!!!
Yana, your cards are always wonderful!
Really fun masculine card
Such a fun card and great technique. I love the little heart stopper.
What a great birthday card!! I love that turquoise color. Wonderful flip up idea, my husband’s birthday is coming up—he would love it!!
Love the colors used and style of this card…so fun!
Thank you for the info on how to make the flap. So easy!
Great design and sentiments.
Yana, this is such a great card. The flip up front is so cute and the stencil you used is fantastic. So celebratory and fun. Nice job!
Such a fun card!
What a great card for a guy – I love the interactive part!
Very clever card!
Fun card and
great design.
Carla from Utah
Awesome card! Love the stamps!
Just fabulous!!!!!
Fabulous card!
Such a cute and fun card! Love it!!
so fun! love the colour combo!
Yana rocks and provides the best detailed videos!
Great card! I think I will try this for my next birthday card!
FUN and FABULOUS card!
LOVE it, inside and out! The sentiment and confetti are SO COOL, so is the interactive action :)
Love interactive cards! just too awesome!
I love your interactive window card!
Such a fun card Yana! I love the little heart at the front! TFS
Great way to make the card 3-D and still clean!
Wow! Such a cute card. I love the large, bold sentiment.
Oh my!! This is such a fabulous fun card! Always inspired by your creations Yana. Thanks so much for sharing.
Fab colours and such a fun design. Hugz
Such a pretty card!! Love the clean and simple look yet still 3-D. So neat.
Such a fun card, love it!
such a great card
This is a cute birthday surprise Card.
A great card!
Such a fun card, love it.
This flip up card is so innovative and cool.
What a great card! I love the fun flip-up portion. :)
Cute card Yana ad a great idea. Thank you so much for showing and have a great weekend.
Really fun card!
Such a fun interactive card! And, those colors are perfect. Love it.
What a fun, interactive card. Love this Yana!!
Love you interactive card – thanks for the inspirations!