Yippee for Yana: Easter Card Ideas

Hi friends! Happy Sunday! Welcome to the latest edition of Yippee for Yana, our bi-monthly blog series with the fabulous Yana Smakula! Read on and be sure to watch the video to learn more about this SUPER cute bunny project! Enjoy!
Hi everyone, this is Yana Smakula, welcome back for another Yippee For Yana video! Today we are making Easter cards! I have 3 rather simple Easter card ideas to share all created using one stamp set – Bunny Blessings from Simon Says Stamp.
The Bunny Blessings is a large 6×8 set designed to create cute Spring, Easter, and Friendship cards. You have 3 adorable bunnies in here, all positioned slightly differently, to create various scenes. You also have several sentiments, both for Easter, Spring, and Friendship cards and I really love the big scripty font used for these sentiments.
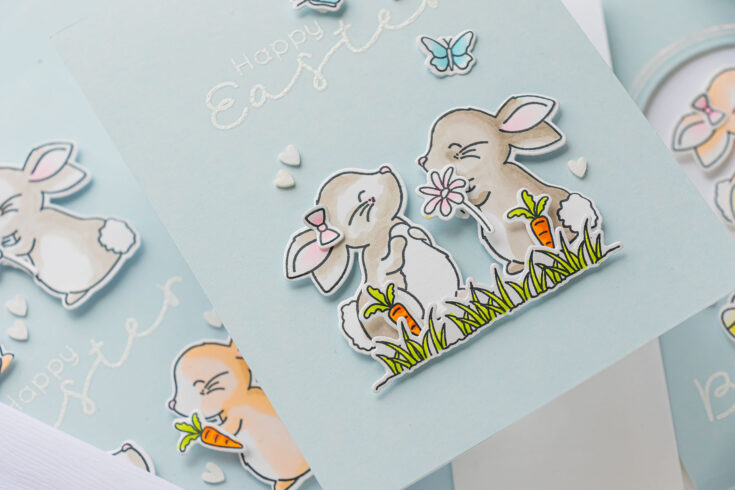
There are also several smaller filler images to add to your bunnies, they can hold flowers, a carrot, or some easter eggs. And you also have some butterflies in there, again to build all sorts of scenes, and even a balloon for the bunny to hold and perhaps with a Happy Birthday.
There are 2 large birch tree stamps, long enough to be used on a slimline card, or you can cut the tree into smaller pieces for a smaller size card and there’s also a grass stamp, again, to build those fun Spring scenes.
There is a coordinating die set available, sold separately and I love that it includes dies for every image in the set.
With so many different images in this set, you have multiple options. I wanted to create simple Easter cards. I am not really big on building scenes from scratch, I do love these types of cards, with ink blended grass and sky and clouds and so on, but I am more of a simple card kind of person. I like to have solid layers of color on my cards, I love to use colored cardstock and add just a bit of stamping and coloring.
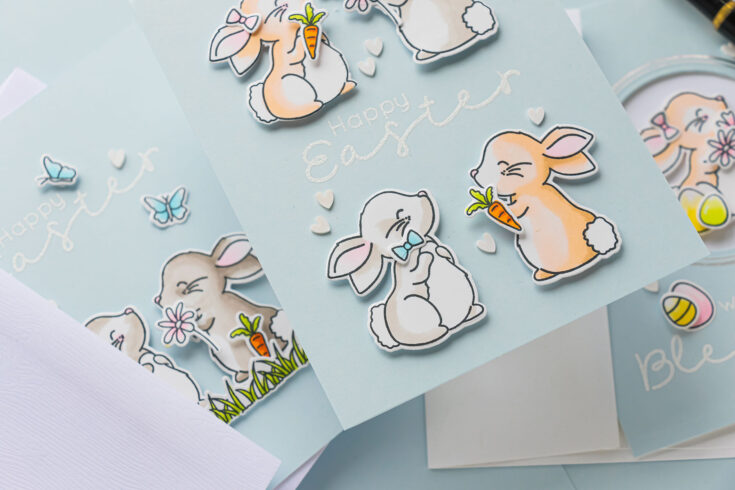
All 3 of my Easter card ideas feature a colored cardstock background and some simple stamping and coloring. These really are quite easy to make and easy to mass-produce should you need to make multiples.
I started by stamping the images I needed onto Neenah Solar White 80lb cardstock using Memento Tuxedo Black ink. I mostly used just the 2 bunny images and many of the filler elements such as carrots, eggs, flowers, butterflies, and grass.
I enjoy coloring with Copic markers as I find them to be an easy and fast way to add color and this is what I used for these cards. But, of course, these can be colored using any other coloring medium you prefer. I aimed for very simple coloring with minimum colors and almost no blending.
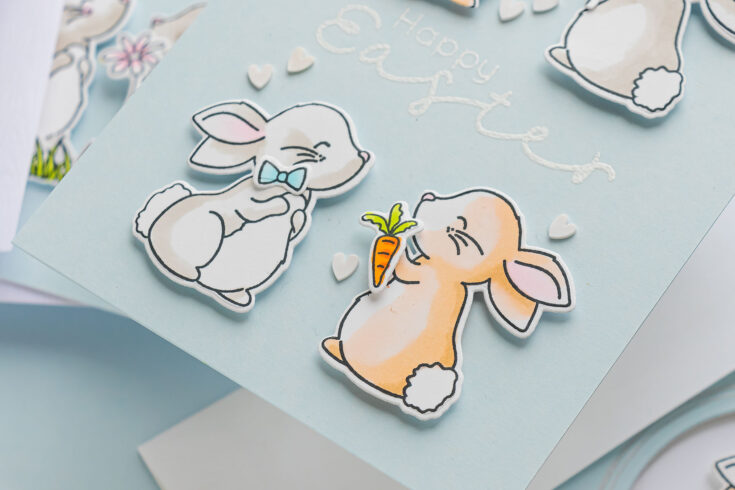
The bunnies were colored mostly light brown and light gray. I used E000, E51, and E31 for the light brown bunnies and W1 with a touch of W3 for the light gray bunnies. I also used an RV00 marker to color their noses and ears. Some bunnies were colored in one way, others in a different way as I was trying to make them look a bit different.
Next, to color the carrots I used YR15 and YR18 markers as well as YG01 and YG03. The bow and some of the eggs were colored using a B000 and B00 markers, I used the same blues to color the air bubbles one of the bunnies was blowing, but I later decided to trim this off and alter that bunny slightly to have him or her hold a flower or a carrot.
I used RV00 and RV10 to color some of the flowers and eggs. And Y11 along with Y13 again to color some of the flowers and eggs. I was aiming for soft, pastel colors and often times didn’t extend the coloring all the way but left some of the white paper showing to add to the softness of the look. I used light flick style strokes when applying the color onto these images. and I avoided having harsh lines.
My idea for the first card is to have 4 bunnies and include an Easter sentiment in the center of the card. My coloring was made quite pale intentionally so that it would stand out nicely on Simon’s Sea Glass cardstock.
I treated my paper with anti-static powder, this helps keep the embossing neat, inked up my image with clear embossing ink, and stamped it onto the panel. I did stamp it several times to make sure I had a good ink transfer and then I covered the stamping with Simon’s Detail White embossing powder – the sentiment is rather detailed, so it helps to use a finely milled powder here and then I heat set it using my heat tool. This is how I made the sentiments for all 3 of the cards I am sharing today.
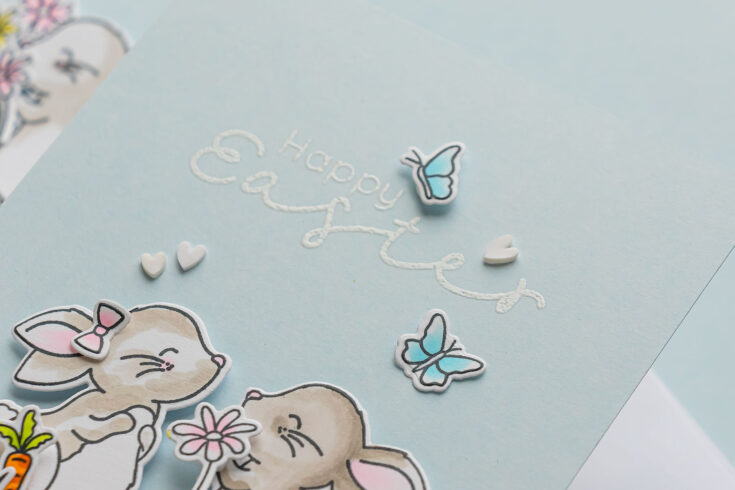
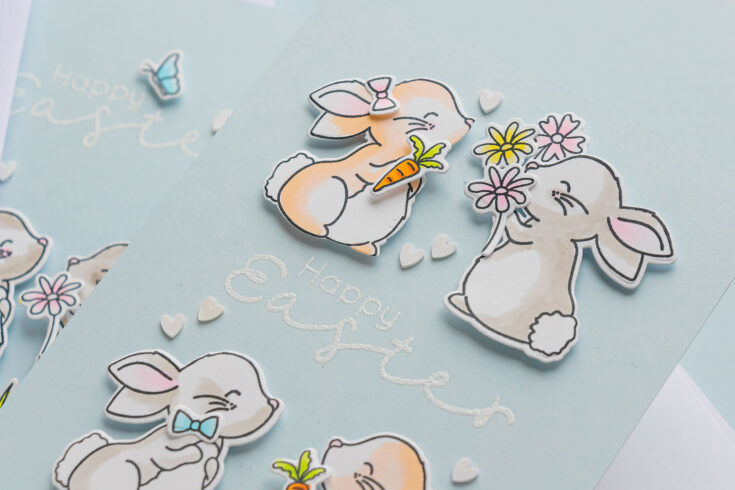
The air bubbles one of the bunnies was blowing weren’t going with my card idea, so I used my scissors and carefully trimmed that off. It is not that hard to do, just a bit of fussy cutting, and if you are using a good pair of scissors, that should do the trick easily. I instead have my bunny holding a flower, which works better for this scene. I did the same for the 2nd bunny here and gave him a carrot to hold as if he just received it from the bunny across from him.
I played with various filler images to build my little Easter scene. Once I was happy with my plan I used foam adhesive squares and foam mounted the bunnies onto the card.
I love to add little embellishments to my cards and for these cards today I opted to use the plastic white hearts. The white went really well with the white embossing and I feel like the hears complemented the scene without distracting from it.
My next Easter Card idea for today is a little bit more advanced. I am a big fan of hot foil stamping, and I often reach for my hot foil machine to add some sort of foiled accent to my cards. I wanted to make a window card and have a bunny inside the window, and then add hot foiling around the circle opening to create a cute border.
I cut a piece of matte silver foil, I used low tack tape to secure a circle hot foil plate on the panel, I added the foil and used another piece of tape to secure everything in place.
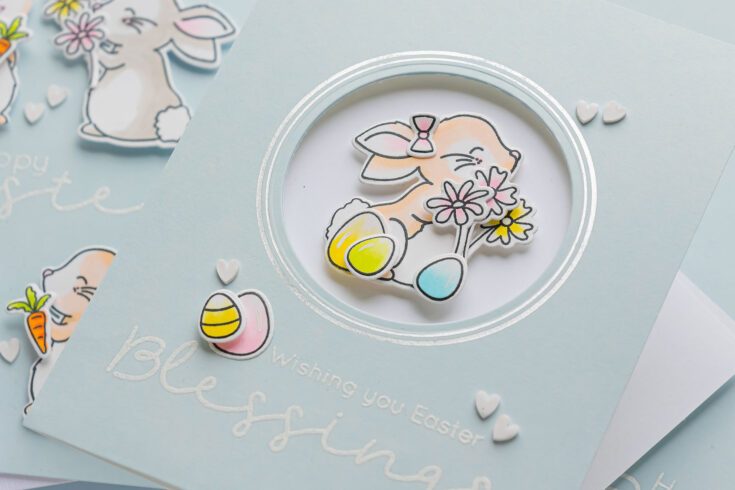
I then used my Glimmer Hot Foil System from Spellbinders and foiled this image. Since this video is not about hot foiling I am not going to go in-depth on how to foil. You can look up my previous videos if you’d like to learn how to add hot foiling to your cards, it really does take your cards to the next level.
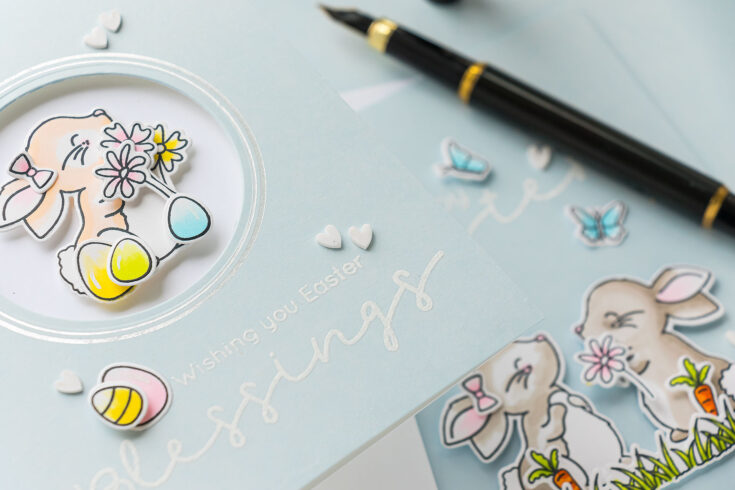
The next step for this card was to heat emboss a sentiment. When you combine these two techniques on one background, a hot foiling and a heat embossing technique, it matters in which order the techniques are done. Both require heat. But one type of heat can mess up the results from another technique. The heat from the hot foil machine can mess up heat embossing as it can re-melt the embossing powder. So best to foil first and heat emboss later as re-heating the paper with the heat tool will not do any damage to the already applied foil.
I wanted to turn this card into a window card. I used a circle die that fit inside my foiled circle and die-cut a window.
It is always best to use fresh cutting plates when cutting window cards as that will reduce the number of cut marks you have on the inside of your card. Sadly, we don’t always have the luxury of using fresh cutting plates. When you die cut a window card on an old cutting plate you will end up having a lot of the cut marks from the plate embedded into the paper. There is a way to avoid it – you can place a piece of thin printer paper on the plate, next add your card base, remember it has to stay open and you can even add another piece of printer paper on top, before adding the top cutting plate. The printed paper will take all the damage the plates will do to the paper and your card base will come out without any cut marks.
I foam mounted the bunny on the inside of my card, inside that circle opening, and once again used various filler elements to dress this card up. I love this stamp set for the abundance of the little pieces to create any sort of scene.
The last card was made in a similar way. Just the element placement was different.
Thank you for joining me today! I hope you enjoyed these simple Easter card ideas! If you make a card inspired by this video, we’d love it if you shared your project and tagged us on social media – we always enjoy seeing what you make! Have fun stamping!
WATCH THE VIDEO:
SUPPLIES:
|


Thanks so much for stopping by, and thanks to Yana for being our guest!


Fantastic cards. Thank you.
Awesome cards, Yana! I love those cute bunnies & your CAS designs are my favorite kind! Great job!
These are Sooooo Adorable!!!!
Dear Yana
Your cards are more than cute and adorable. I am going to save them under your name in a separate folder so that I can learn coloring bunnies. tc Stay safe
These are so sweet!
so super cute