Yippee for Yana: Crafty Pattern Card

Hi friends! Happy Wednesday! Please join me in welcoming back special guest Yana Smakula who is sharing this colorful and oh-so-crafty card with us today! Be sure to watch the video for all the details, and enjoy!
Hello, crafters, this is Yana Smakula for Simon Says Stamp! Welcome back for another Yippee For Yana video!
In this video, I’m sharing a simple take on a one-layer stamped pattern card for a crafty friend! It’s been a while since I’ve done any fun pattern stamping and I thought it was time I re-visited this awesome stamping technique.
For me, pattern stamping is taking a small image or a grouping of small images and stamping them onto the background to fill the entire card front space in what appears to be a random or structured manner. You can create a stamped pattern using just a single image or a grouping of images.
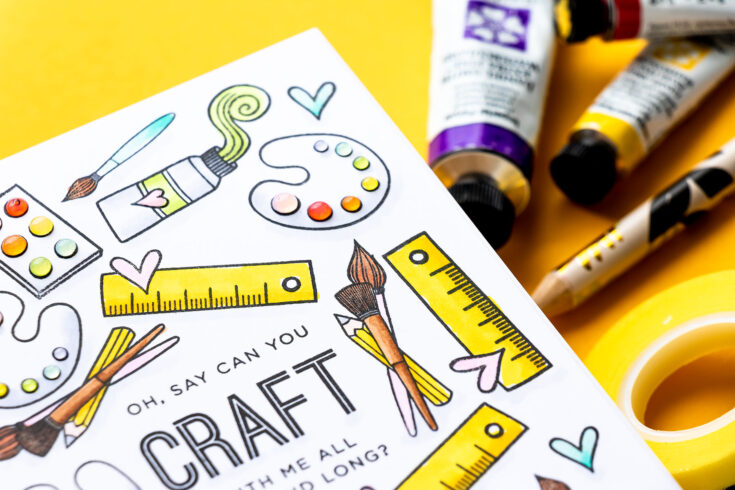
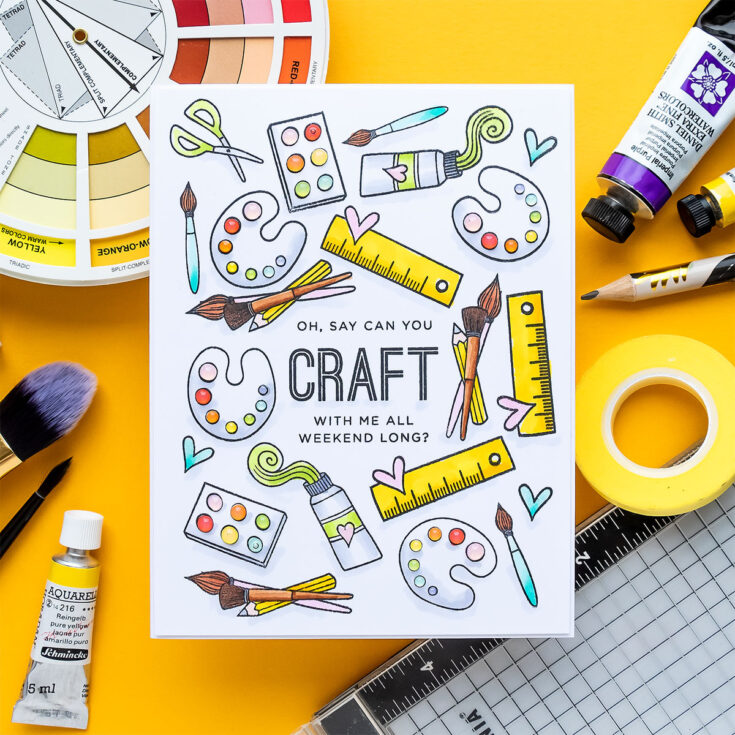
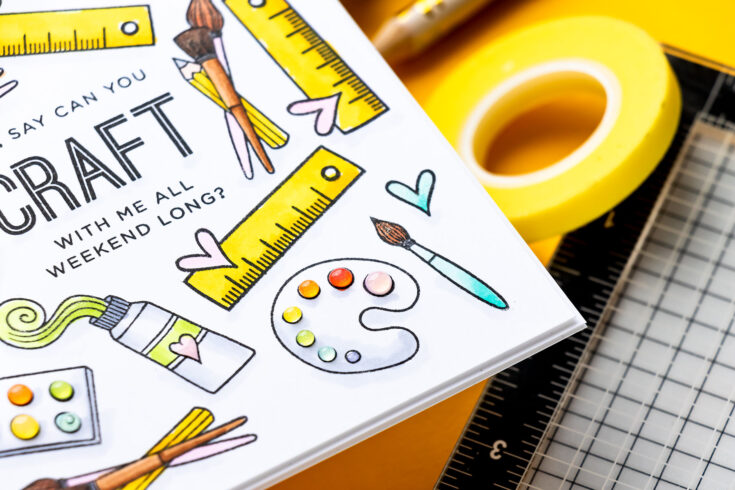
I love all of the images in the US OF CRAFT-AY set, these crafty supplies look so adorable and very inspiring, so I opted to use all of them on my card. I stamped a test pattern onto a piece of scrap paper, and even test colored it to decide which colors to use for my final project. For this particular pattern, I reserved the space in the center of the background for my sentiment. I wanted the card to be one layer, so I needed to leave space on the background for the sentiment. My sentiment reads “Oh Say, Can You Craft With Me All Weekend Long”? And because it is a pretty big message and it is the focal point of this card I will stamp it first.
Because I created my test pattern, I call it a stamping guide, I used it to re-create this pattern to the letter on my finished card. To do that, I placed my stamped guide in my MISTI stamping tool and used it to position the stamps to build the background. This is also an excellent way to stamp multiples to make identical cards.
I did my stamping on Neenah Solar White 80lb cardstock and stamped everything in Hero Arts Intensified Black ink.
If you look carefully, you’ll notice I have a small white border around the edges of my panel. This was my intention. I didn’t want this pattern to extend past the edges of the card, rather I wanted to keep it contained, so when placing my images I made sure to step away from the edge of the card and leave about a 1/4” gap.
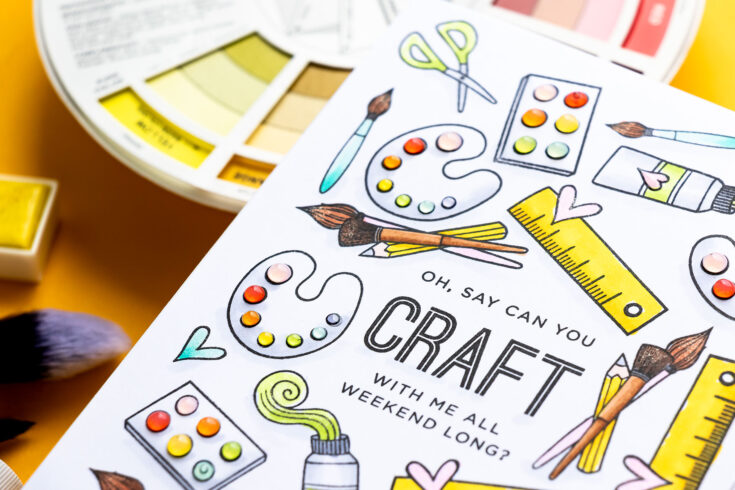
I colored the images with Copic markers, coloring was simple with basic shading. I trimed this panel just a little bit and to add sturdiness to my card I adhered 2 scrap sheets of cardstock together and used those to slightly pop the colored panel on the background. So there is a little bit of dimension, but it is only 2 sheets of cardstock thick. The card is still pretty thin and easily mailable.
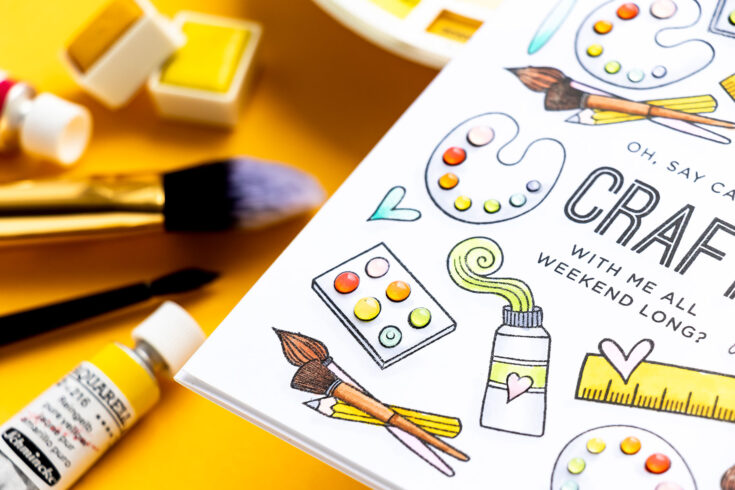
Finally, to add some wow, I used a Wink of Stella Glitter pen and glossy accents! I coated the paint wells and the hearts with the Wink of Stella glitter and added glossy accent dots over the paints and the tiny hearts. Have fun stamping!
WATCH THE VIDEO:
SUPPLIES:
|


Thanks so much for stopping by, and thanks to Yana for being our guest!


Neat card. Would make a great card for a teacher. Liked that idea of making a pattern and you can keep it with the stamp set for future use or for mass producing. Thank you. Thoughts and prayers sent your way.
This is fantastic!!
Really Beautiful cards!! I love the template idea!!!
Beautiful, reminds me that so much can be achieved using small images on cards, thank you x
Thankyou for sharing this link it is very helpful website https://essayoutline.net/ An article frame momentarily makes sense for how the ideas in your paper will proceed as far from the start as possible. An ideal diagram would show the design of the exhibit and create a stream for the paper before you start composing. Paper frames are important because they make it easy for you to stream smoothly from one point to another as you compose.