Yippee for Yana: Coloring Flowers White
Hi friends! Happy Monday! Please join me in welcoming our special bi-monthly guest Yana Smakula for our Yippee for Yana blog series. Be sure to watch the video for more information and enjoy!

Hi everyone, this is Yana Smakula, welcome back for another Yippee For Yana video! Today I am creating with the Simon Says Stamp new Spring Flowers Background stamp to make a Hello Sweet Friend card. The technique in this video shows how to color flowers for your handmade cards to have them appear white. While it seems like a no brainer, white is white, it is actually very hard to color white flowers on a card.
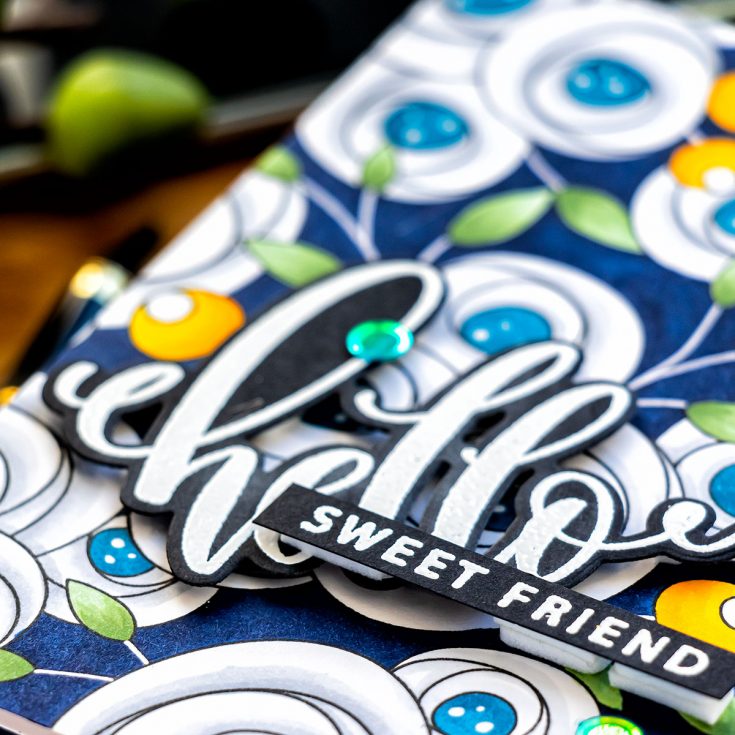
I started to work on my project by stamping the Spring Flowers Background stamp in alcohol marker friendly ink using my MISTI stamping tool. I used Hero Arts Intensified Black ink and stamped images onto Neenah Solar White 80lb cardstock.
Next, I picked several colors of Copic markers to do my coloring. Nothing too crazy, just a handful of colors. I started by coloring the flower center using a B34 marker. Next, to color my flowers white, I used a light gray marker, a C1, and simply added shadows onto each of the flower folds. This is very easy to do, it doesn’t take away the whiteness of the flower, yet it adds a bit of shading and helps the flower look dimensional and not completely flat. If you want, you can use 2 gray markers, perhaps a medium and a light gray, if you want to intensify the shadows. Using one, light gray marker felt enough for this background.
This flower pattern also has pretty leaves. I picked the G21 marker to color the leaves green. I later came in with a medium and a dark green and colored the leaves using YG63 and G94 markers to add shading and dimension.
I love to create dark backgrounds for my cards, especially for flowers, as I feel like a dark background helps the images pop. I even have several dark walls in my apartment including a completely black wall and believe me – when I place a bouquet of flowers on a table against that wall – those flowers instantly grab the attention and pop against the darkness of the wall. I wanted to re-create the same effect here. Instead of black, I used a very dark blue marker, this is B39. I typically prefer to use the B99 marker, but that one is in a desperate need of a refill and while the fills are on their way to my crafty corner, I am using other dark blue markers in my stash for a similar effect.
Coloring a background in takes time, especially if you want to do 2 coats, which I did here. I take it slow and meticulously color the negative space. Next, I colored the berries. I used Y08 markers as the lightest yellow, Y15 as a medium yellow and added a bit of Y17 as the darkest yellow later.
Having colored the background this dark deep blue color I faced one problem – the stems of the leaves and berries became invisible on the background and the leaves and berries now looked like they were floating and not attached to anything on the pattern. I wasn’t quite sure how to fix that, I thought about using a black pen and intensifying those black lines but later decided to use a white pen and instead make the stems white. I’m glad I went with the white as that really made quite a difference in this background. I used a white sakura pen in size 0.8 to create the stems and I also used the same pen to add white dots to the flower centers.
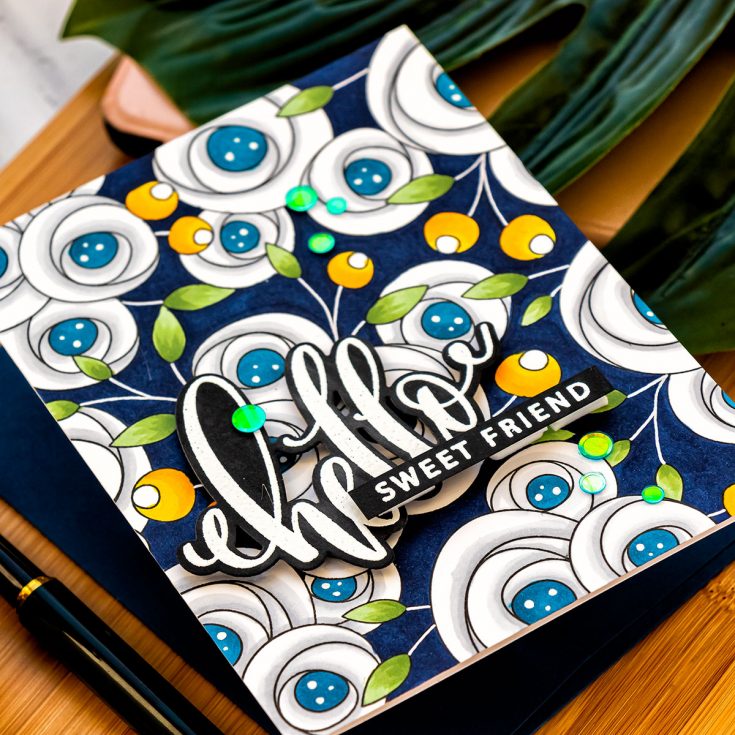
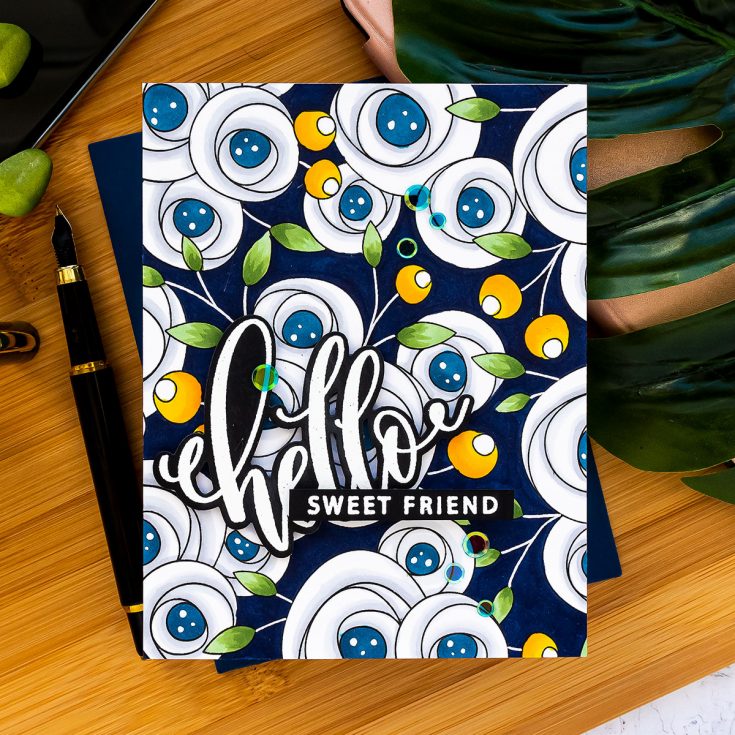
I white heat embossed “Hello” and “Sweet friend” using stamps from the new Summer roses stamp set from Gina K and Simon to create a sentiment for my card. I die cut the “Hello” out using a coordinating die, I love the size of this sentiment and also the font used here – it makes for a perfect size hello for the card.
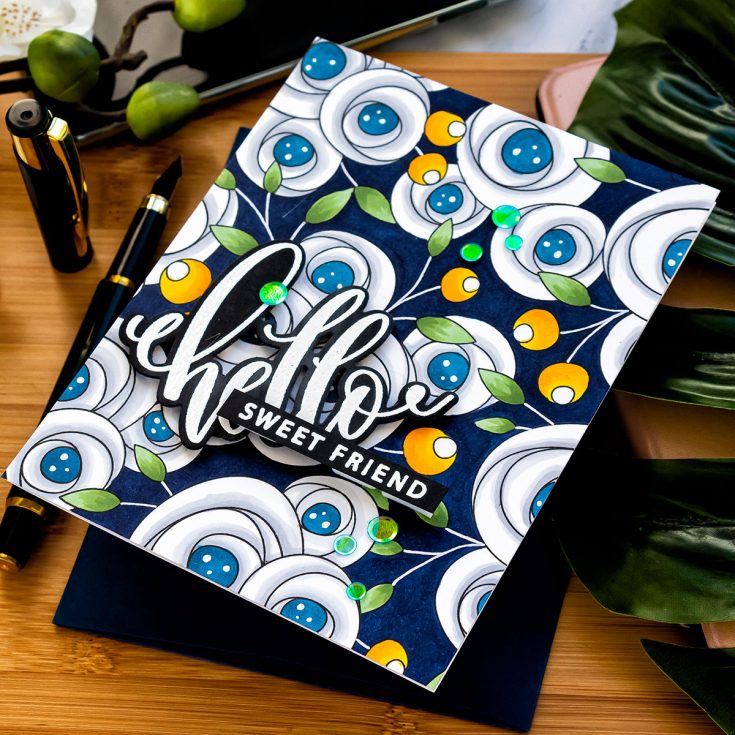
I foam mounted the “Hello” onto the background and also foam mounted the “Sweet Friend” sentiment strip. I added a double layer of foam adhesive to the right-hand side part of the strip – the sentiment overlapped the “Hello” and I had one layer of foam adhesive over the hello. To level everything I needed a double layer of adhesive on the other side of the strip.
I adhered the background onto the A2 white card base and that used gorgeous Rainforest sequins from Simon to embellish the card. I adhered them in place using a crystal katana tool and Kuratake 2 Way Glue pen.
Have fun stamping!
WATCH THE VIDEO:
SUPPLIES:
|


Thanks so much for stopping by, and thank you to Yana for being our guest!


So glad your go to blue was out, cuz this has me over the moon. Especially the white stems. Brilliant.
Beautiful Card! I love how the flowers standout on this card.
This is gorgeous!
So impressive!!
I love to see the white flowers pop against the dark blue background.
A striking card! I often use a black background when I draw or doodle flowers.
Love the white flowers against the dark background! Thanks for the coloring tips!
Thank you for a wonderful video. I was very ambivalent about this stamp until I saw the cards you made. Now this stamp is definitely on my wish list!
Stunning! Ready to wipe off the dust from my Copics from years ago and try this out! Thanks for the inspiration!
Gorgeous!!! Love how the white flowers pop off the dark background!!!
Love the blue background. Made the flowers pop!
Not at all surprised…Yana always rocks it! Fabulous card!
Brilliant, love it. Stay safe love Jane x
Love the cards you do with the dark colored background It really makes them pop
This card convinced me to order! Beautiful!
Absolutely beautiful Yana! I love the simple sketch flowers in this background set. Ive seen a few cards with this stamp and every time I want it more! The white with blue background is perfect. Always inspired by your creations.
Yana, your card is stunning! I love how the dark blue background makes the other elements pop, I’m going to have to start trying this on some of my cards. Thanks for the inspiration.
The dark blue background really makes the white flowers stand out!
This is just stunning
Fabulous!