Yippee for Yana: Card Making with Nuvo Crackle Mousse

Hi friends! Happy Tuesday! Please join me in welcoming back the amazing Yana Smakula back to our blog with our bi-monthly Yippee for Yana blog feature. This month, she has made some really pretty cards featuring some cool stenciling. Read on, and be sure to watch the video for more information! Enjoy!

Hi everyone, this is Yana Smakula, welcome back for another Yippee For Yana video!
A few weeks ago I came across a video by my friend Bibi Cameron where she demonstrated the new Nuvo Crackle Mousse from Tonic Studios. I was very intrigued and inspired by Bibi’s video and the mousses, of course, and wanted to give this product a try myself.
The mousse arrived several days ago and I couldn’t wait to open the jars and begin playing with this new fun product. In this video, I will share my first take on these mousses and will show you several card ideas I made using them.
These add metallic dimensional details to your craft projects. They are currently available in 8 colors, and I have 5 to show you in this video. It is best to apply this mousse using a palette knife. On the back of the jar, there are instructions: for a textured finish apply with a spatula. If applied using a stencil a raised effect will occur. Ensure a thick even layer is applied to create a cracked effect.
I did not apply too thick of a layer, the thicker you go, the bigger the cracks you will get. I wouldn’t go too thick as the mousse might actually fall off the paper if the cracks are too big. This product is designed to work on a porous surface such as paper, cardstock, chipboard, untreated wood. It will not work on acetate, glass, or any other non-porous surface.
It is best to leave your backgrounds to dry and crackle overnight. Mine were dry and ready to go in about 3 hours, although I did leave them overnight as recommended. Drying time does depend on how thick of a layer you apply to your surface.
Once the backgrounds dried they curled up. I was very surprised and I was even afraid to uncurl and flatten the paper as I was afraid the mousse would come off the paper. But it didn’t, this mouse is very nice and flexible, and unless you have very large cracks the product stays put on your porous surface. I loved the backgrounds I got, absolutely wonderful texture, nothing like I have in my stash.
Because these curled up so much I needed to find a way to flatten them. I cut scrap cardstock to 4 x 5 1/4” panels, I adhered 4 panels together to create sturdy chipboard-like pice, I figured that would help flatten the paper and used that to adhere the backgrounds too.
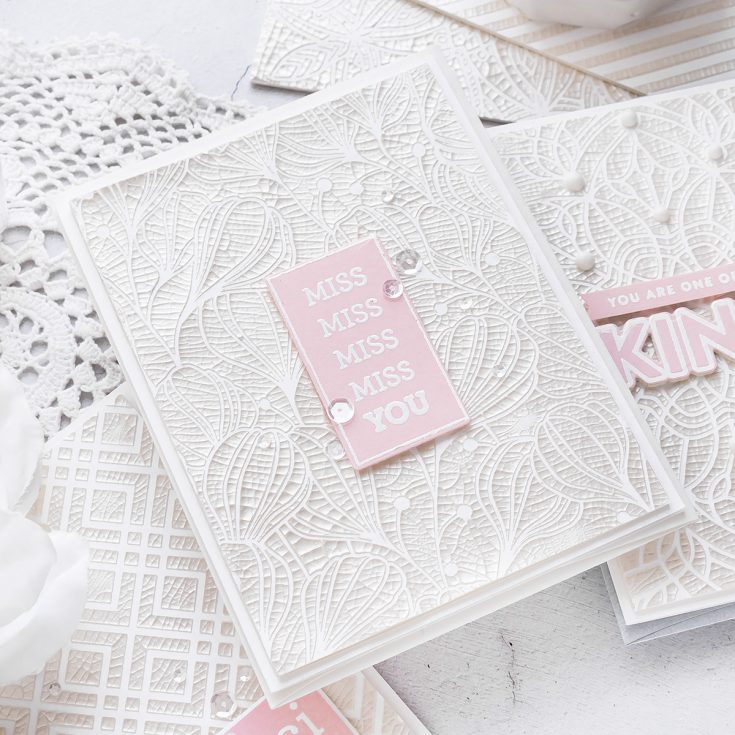
To create cards I adhered my crackled background to A2 white side folding card bases. For the first card, I white heat embossed Miss You sentiment from CZ Miss You Missy stamp set. I thought that using light pink cardstock worked really well with the pearlescent white color of the mousse and the white card background. I treated my paper with anti-static powder, stamped the image in clear embossing ink, I used ink from Hero Arts, covered with white detail embossing powder and heat set using my heat tool.
Next, I used a coordinating die and cut that embossed rectangle out in my die cutting machine. Sometimes when I die cut heat embossed images the embossing powder flakes off and I end up having gaps in my image. It is frustrating, but it is something that I can fix using a white jelly roll pen. Before I do that I like to re-heat the powder anywhere where it looks like it is about to come off and then I use my white pen and just draw the white line where it is missing. Another option, of course, is to die cut first and heat emboss later.
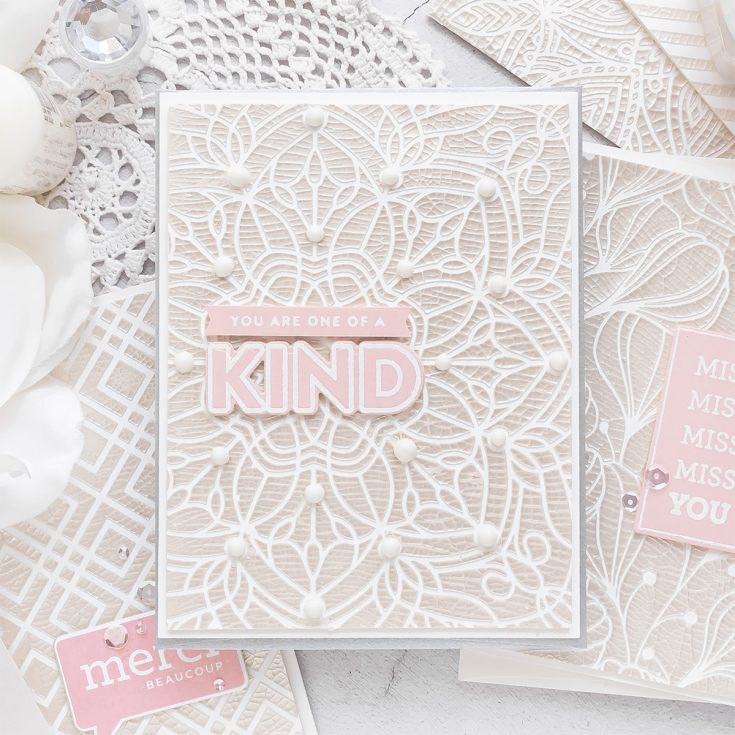
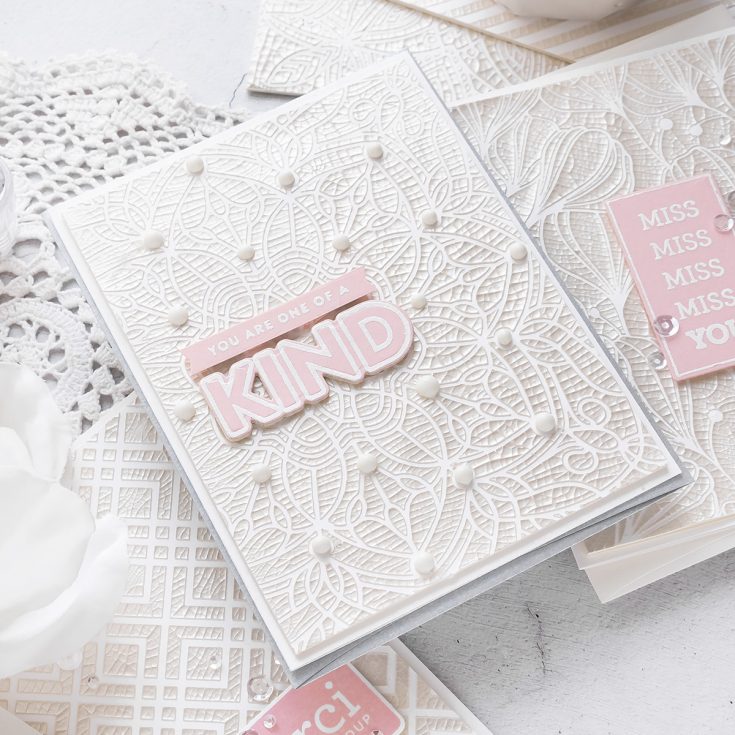
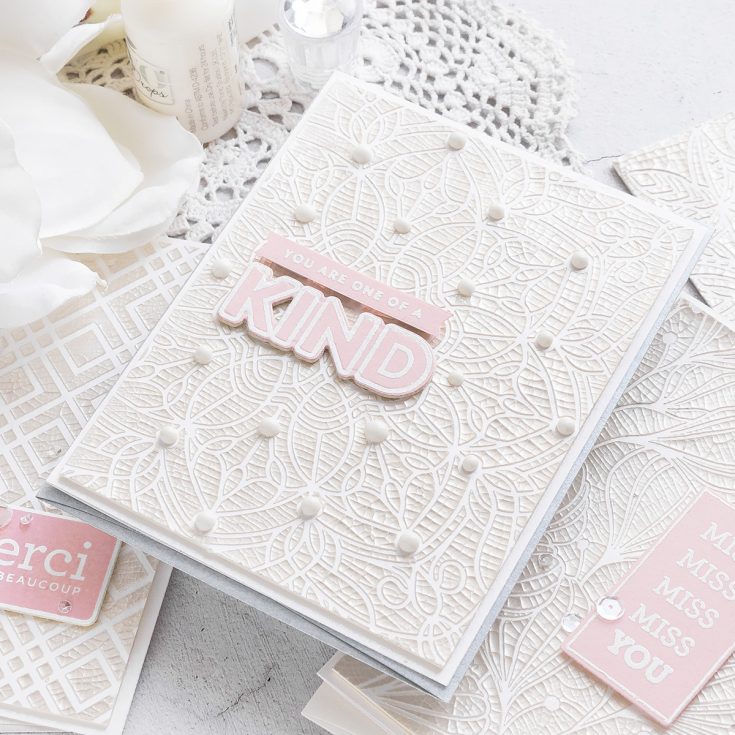
For my next card I heat embossed a sentiment that reads You Are One of a Kind, I used SSS Kind Flowers stamp set.
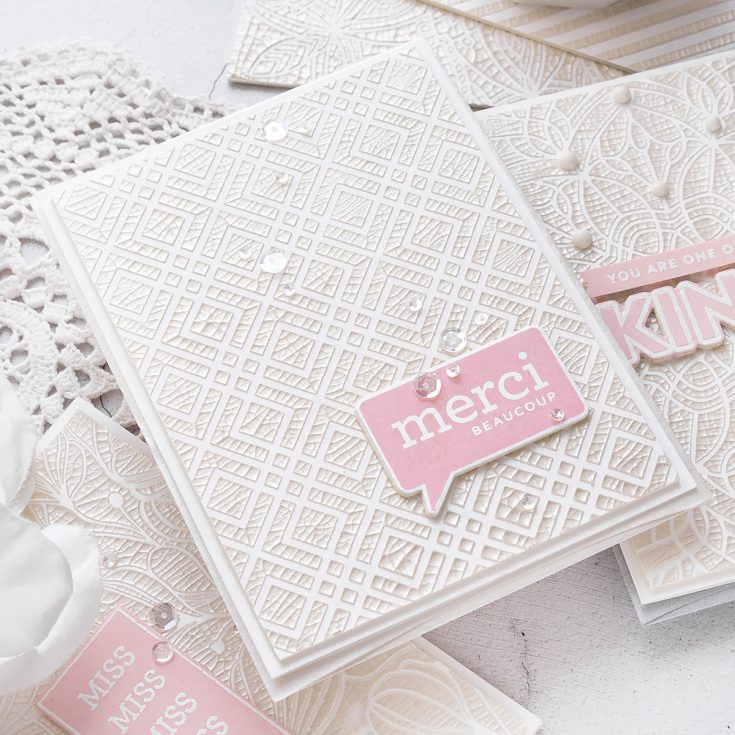
For my final card, I stamped Merci in Twirling Tutu ink from CZ All the Thanks stamp set and cut it out using a coordinating die. Next, I used glue and adhered my die cut sentiments onto the cards, I did add 4 layers of that same cardstock I used to flatten my backgrounds. I just used the coordinating dies to cut additional scrap layers and adhered them all together using glue. This is an alternative to using fun foam, but it does make the card significantly heavier as cardstock is heavier than foam. But if you don’t have fun foam it is a good option.
I used Nuvo Drops in Gloss White to embellish my One of a Kind Card, and for the other 2 cards, I used sequins from SSS Girl’s Best Friends sequins mix set.
I still have loads of background leftover from my experimenting and I have them saved for future projects. I enjoyed using these mousses from Tonic and I look forward to playing with them some more!
WATCH THE VIDEO:
SUPPLIES:
|


Thanks so much for stopping by, and thanks to Yana for being our guest!


WOW These are Gorgeous backgrounds!
I love these backgrounds. They are simple yet elegant.
Beautiful cards. Thanks for sharing.
Wow!! These look awesome!!
Amazing cards!!!! Soooo Elegant!!!
Gorgeous, Yana! Cool new product!
Fun products! At this rate the Hallmark-type card makers won’t have a chance to compete!
So pretty and elegant.
Gorgeous cards … what a great effect that crackle mousse has!
Fabulous cards and such a helpful video, Yana. Appreciated your comments on working with this mousse. The results are beautiful. tfs-stay well.
These cards are absolutely STUNNING! I love the soft look, and the cracked effect. And those detailed stencils took beautiful paired with the paste. These cards are so elegant looking!
P.S. I always enjoy your video’s and learned so much about the product and how it works and tips to use them. Makes buying so much easier when you understand the product and how to use it.
This card is beautiful!