Weekender with Wanda – Tim Holtz Wildflowers!

Happy Saturday! It’s time for the latest edition of “Weekender with Wanda” here on the Simon Says Stamp blog! I’m happy to see you today! Hope you are having a great weekend so far! There is a lot going on here at Simon Says Stamp! We will be announcing a new Release very soon and the stamps and dies are so awesome! The Instagram Contest is going on through April 15th (CLICK HERE for details).
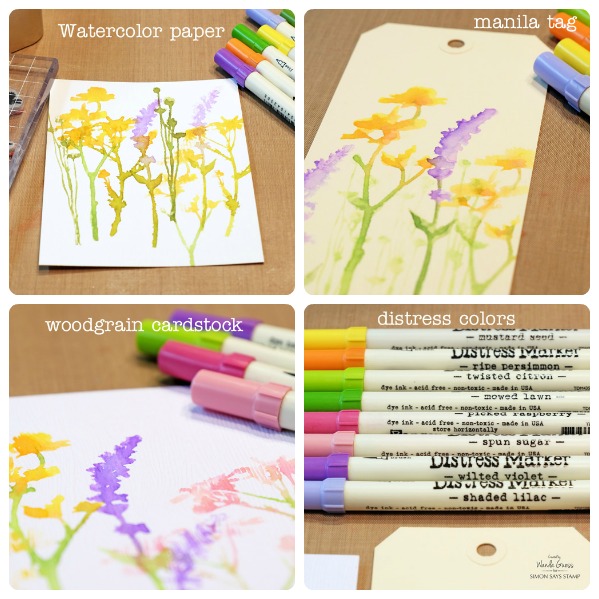
Today is my monthly Tim Holtz feature for sharing all kinds of techniques, products and tools from one of our favorite craft superstars! I’m sharing a tried and true technique that I have used and loved for years – watercolor stamping with markers. It’s a fun and easy way to get awesome watercolor results. The Tim Holtz Wildflowers stamps were my inspiration for today’s card and tag. They are perfect for this technique! (And who doesn’t love Distress Markers?) I took a lot of photos to show you the technique, and also how it looks on different types of papers. Sit back and grab a cuppa joe and read along with me!
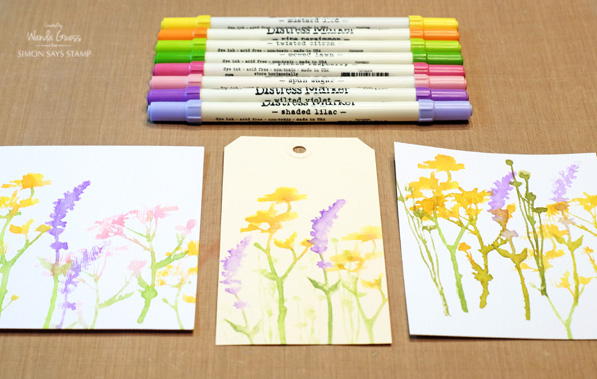
Here is a photo of my card and tag – two different takes on the same technique!
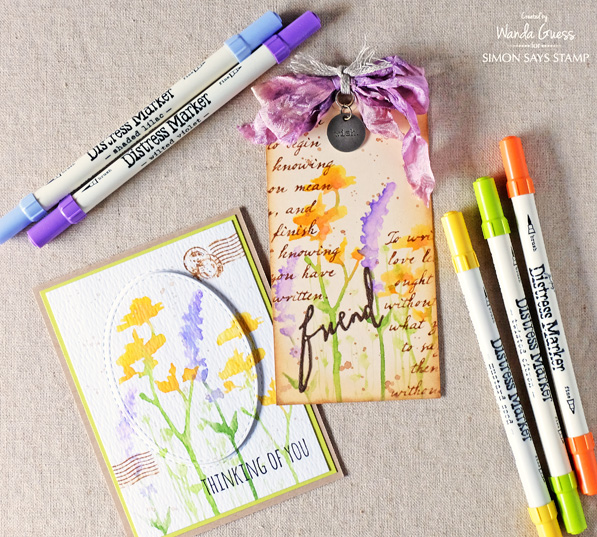
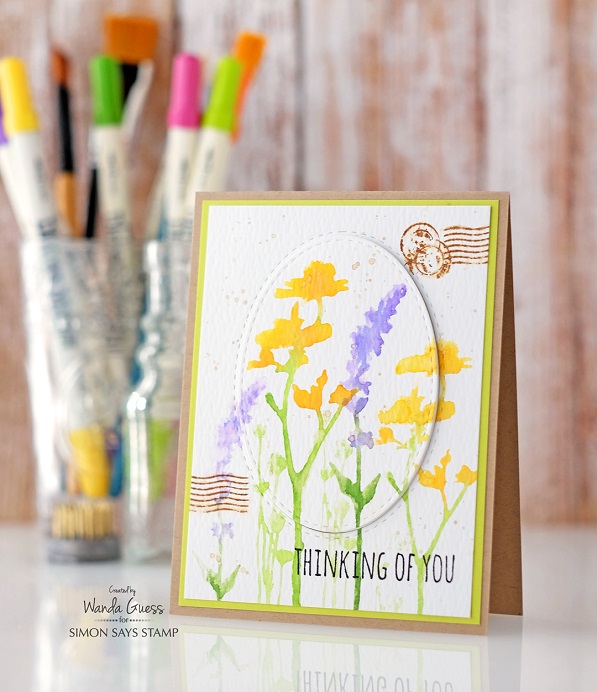
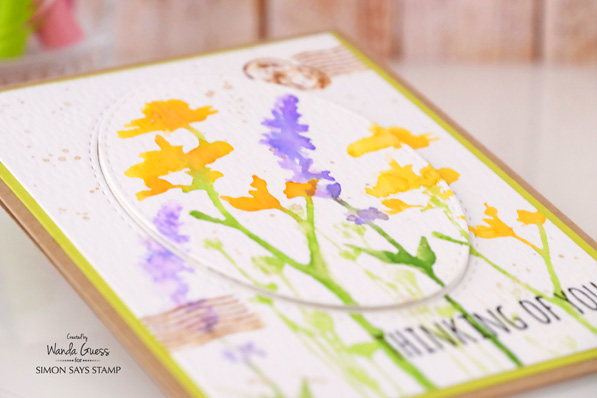
For the card I used Watercolor paper and also combined it with another favorite technique – stacking die cuts! I kept the colors bright and vivid with minimal ‘distressing’ around the edges, etc.
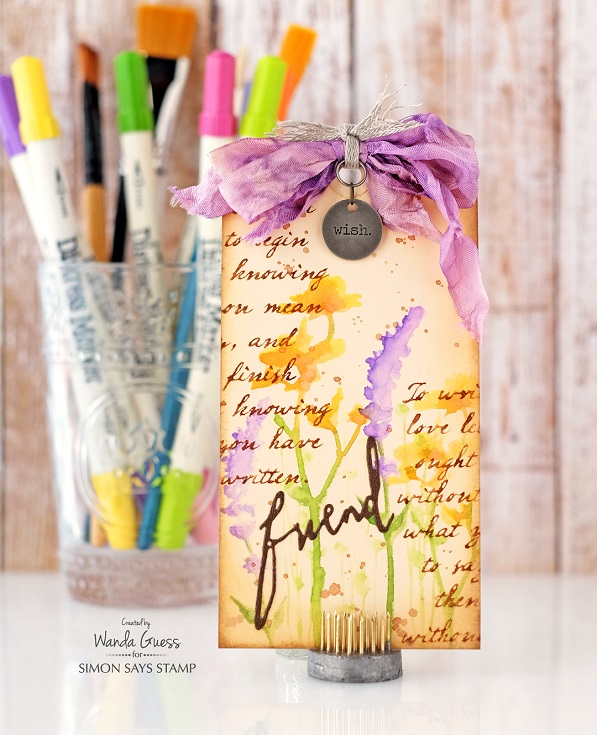
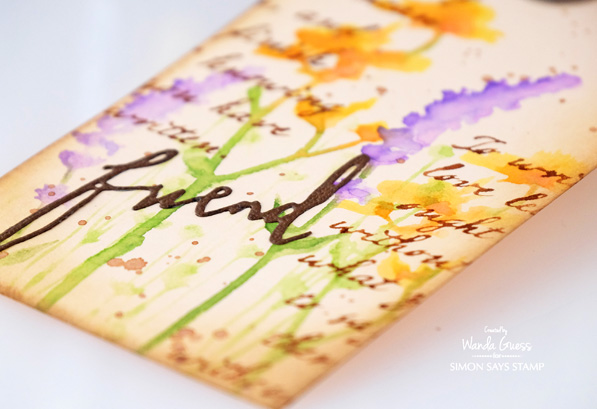
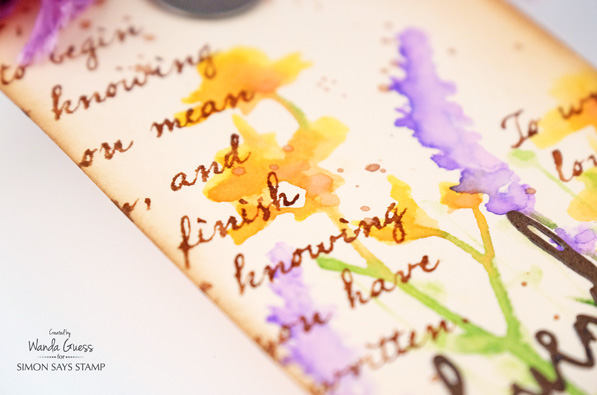
For the tag I used a Ranger Manila Tag – this made the colors more muted and subtle. I also used a lot of ink ‘distressing’ around the tag in rich brown tones. I hand dyed my own Crinkle Ribbon with beautiful Wilted Violet Spray Stain mixed with Antique Linen Spray Stain.
The watercolor with markers technique has just three steps! First, I used my Distress Markers to color (with the brush side), directly onto the stamp. No need to be super careful about it. Mix your colors together so you will get a nice blend. I usually put my lighter color down first. Second, I used my Sprayer to mist the stamp. I hold the sprayer about 10 inches away from the stamp and give it about six pumps of a fine mist of water. You want it pretty wet, and you will see the water start to mix the colors together. The third step is to stamp! I stamped directly down onto the paper. You need to let it dry to see the final results. You can get at least three stampings out of one inking!! That’s it! And, it looks like you painted the images.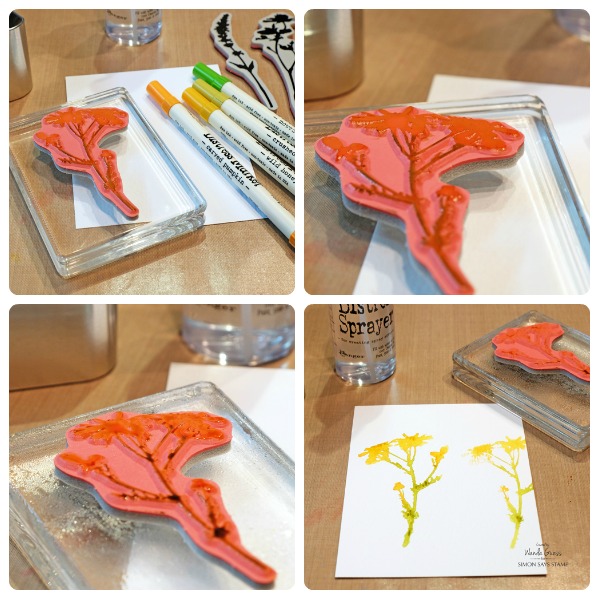
I got all excited about it, so I wanted to see the results on different papers. Watercolor paper gives the most ‘painted’ effect since the paper allows the inks to spread. I think this is my favorite. The Manila Tag gives a more solid image and the color of the tag mutes the ink colors. The Woodgrain paper is really pretty, since it is white and allows the bright color to show through. However, you can see that the lines from the wood grain changes how the images appear. I like them all – which on do you like the best?
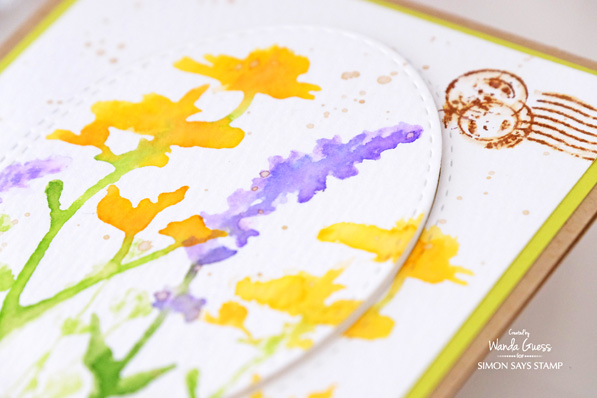
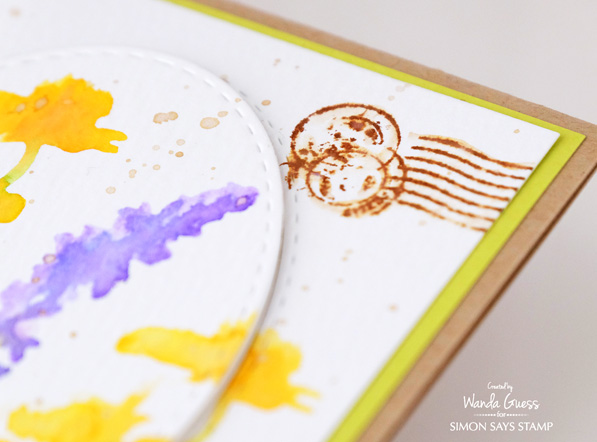
Here is a close up of the card. After my watercolor flowers were dry, I went back with some Antique Linen Ink, water, and my Splatter Brush and added flecks of brown paint to the card. I die cut a Stitched Oval from the center to use as my raised focal point. This technique is very fun! I cut the oval out and then replaced it in my original paper with another oval of paper. Then I put foam squares all over the back of the top oval piece and mounted it directly in place to match up with the bottoms of the stems. I love how this looks.

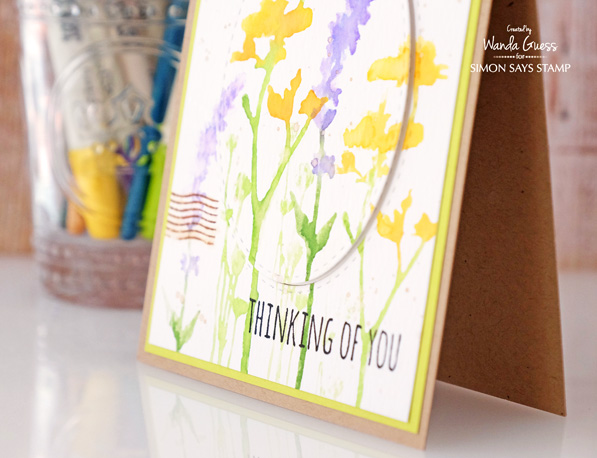
I stamped my sentiment, from the Crazy Talk Stamp Set, in Simon Says Stamp Intense Black Ink. Here is a side view of my card. I mounted some pretty Juicy Pear Cardstock onto a Kraft card base.
I stamped the post marks in Vintage Photo Distress Ink. Then I went back with my Water Brush and put a touch of water over the images to soften the look, and to make them look watercolored too.
Here is a close up of my tag. I used the beautiful script stamp and the same technique as the wildflowers! I inked the stamp with Vintage Photo Distress ink and then spritzed it with water and stamped it over my flower images. I also added some ink speckles to this the tag.
Be still my heart…. Wilted Violet Ribbon!
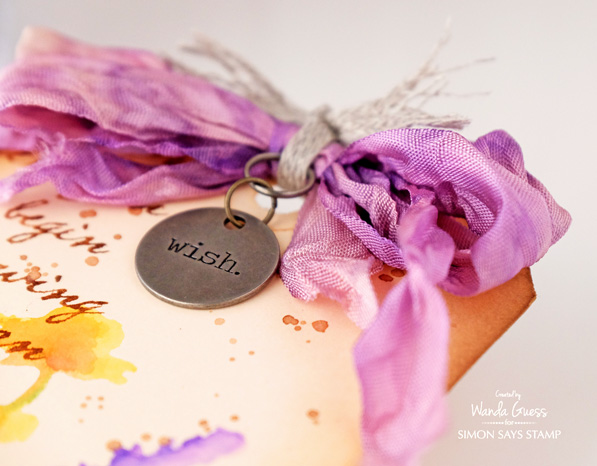
To finish the tag, I edged all around it with Antique Linen Distress Ink and Vintage Photo Distress ink and a sponge dauber. I added some Linen Ribbon and a Typed Token on the top.

As always, thank you, my friends, for coming by to see what I’m up to on the weekends! I hope that you will try this technique and hope you have some time for creative play this weekend! See you soon!
SUPPLIES:
 |
 |
 |
 |
 |
 |
 |
 |
 |
 |
 |
 |
 |
 |
 |
 |
 |
 |
 |
 |
 |
 |
 |
 |
 |
 |
 |
 |
 |
 |
 |
 |
 |
 |
 |
 |
 |
 |
 |
 |
 |


These are just gorgeous!
Both are incredibly beautiful! I think I prefer the manilla tag because if the color and the ribbon is so yummy!!!
So pretty! I love this technique!
Very pretty projects.
I am teaching this technique today. It has been on the schedule for two months. How timely.
They are so beautiful. Love your water colouring technique using distress markers and the raised oval center which bring a lovely dimension to the card. I will definitely try this technique. Thanks so much for sharing :-) Have a wonderful weekend !
Beautiful water color card and tag, a great pictorial, thanks for sharing.
How lovely Wanda! The Distress products continue to amaze me. Gorgeous results.
Wanda, these are so pretty! Thanks for making my snowy weekend a little brighter. :)
You’re so creative & talented! Love seeing what you come up with each week, Sandy! This is a technique I learned long ago, but tend not to use. Thanks for the reminder as I do love the look. Think the wc paper is my favorite, but all 3 came out great! I love the raised focal point–gotta remember to do that!
love this technique Wanda, beautiful creations with distress magic!
BEAUTIFUL BEAUTIFUL BEAUTIFUL!! =) LOVE the FUN technique and the Spring Colors!! THANKS for sharing and have a FABULOUS WEEKEND!! =)
Loving the different ways to stamp! I always see all of the distress items at Michael’s and now I want to buy some markers!!
WOWZERS! Gorgeous watercolor cares!!!!
Very pretty.
love those colors!
Awesome cards and tags. The colors are beautiful and you watercoloring is lovely. Thanks for sharings
Linda D.
I love this technique. Awesome cards. tThank you for sharing.
These are looking to fresh ! I’m looking forward to card making myself this weekend.
I love “tuning in” on Saturdays with Wanda. Your projects are always so inspiring.
What a way to start my weekend!
Love the postmarks and the script! As a postcard collector and pen pal, this is awesome!
Great techniques! The card and tag came out great!
Great card
Lovely work. Thanks for sharing.
Great technique!! I think I like the one on the card the best!!
Beautiful creations, absolutely love the tag! Gorgeous colours too! :-)
I love both of your creations but especially the card, so pretty and such beautiful colors, I love this technique.
Sounds like a fun technique that I’ll have to try.
I don’t have any of the markers yet.
thanks for sharing a wonderful card and tag.
Such pretty colors! Gorgeous creations!
SO BEAUTIFUL!!!
THANK YOU for sharing this technique and all the photos Wanda, I look forward to trying it myself, maybe even this weekend :)
Two lovely creations; the effect the manila has on the inks is a new discovery for me. So very pretty. Thank you for the smile today!
~carol
Oh, love, love, love the fresh style of these!! Wonderful projects, thanks for sharing your technique!
I love everything about this project… These stamps have been on my wish list, along with the dies. Can’t wait to get the set & try them out!
Great technique :) The cards are lovely!
These are absolutely gorgeous! I bought this set a while ago, and forgot about it! Thanks for reminding me … gotta pull it out and play!
So pretty! I love the Wildflowers set!!
These are gorgeous!
Wow! These are gorgeous! Great colors and awesome technique ♥
Really beautiful!
Beautiful! TFS Wanda!
Beautiful card and tag Wanda!!! Always love what you create:)
Beautiful techniques! Thanks for the detailed info. Love the way these look!!
Great techniques! Thanks for sharing your results using different papers!
Sheer watercolor gorgeousness!
LOVE these cards! So beautiful and full of colors. Thanks for the tips!
I love the simplicity and the softness of the wild flowers.
Beautiful!! Love your Weekend post.
Wonderful wild flowers. One of the wildflowers looks like BlueBonnets. I have BlueBonnets growing in my back yard. Have a BEE-utiful day!
Melissa
“Sunshine HoneyBee”
Hey Miss Wanda, oh so pretty! I love how different they look just by changing the color of the paper. I’m going to have to try using the manila paper, it gives that vintage look, I love that. Thanks for sharing your über talent and always inspiring!!!
Ooh, these are fabulous!
Another fabulous project Wanda. I have been experimenting with my distress markers and will definitely give this a try. I love the woodgrain paper. Isn’t watercolor sooo popular right now. With all the beautiful flower stamps out there it fits perfectly. Thanks for your inspiration and have a wonderful weekend.