Weekender with Wanda – Tim Holtz Product Spotlight!
Happy Saturday! It’s time for the latest edition of “Weekender with Wanda” here on the Simon Says Stamp blog! I’m happy to see you today! It’s one week until Easter and Spring has sprung. It’s nice to create with vivid, happy colors right now and get in the mood. Today I’m sharing a card I made with loads of new Tim Holtz products. The Simon Says Store is stocked to the brim with everything new from CHA that Tim created for Sizzix and Ranger. It’s all fun! I finally got my hands on the Distress Crayons and wanted to make something to share here with you, and talk about them a little bit.
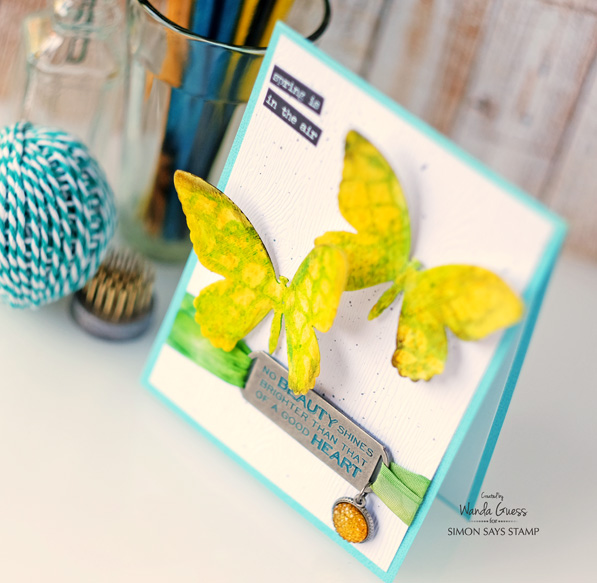
My card is a really bright color scheme that just kind of happened when I mixed some of the crayons together….and I thought butterflies would be nice for this time of year.
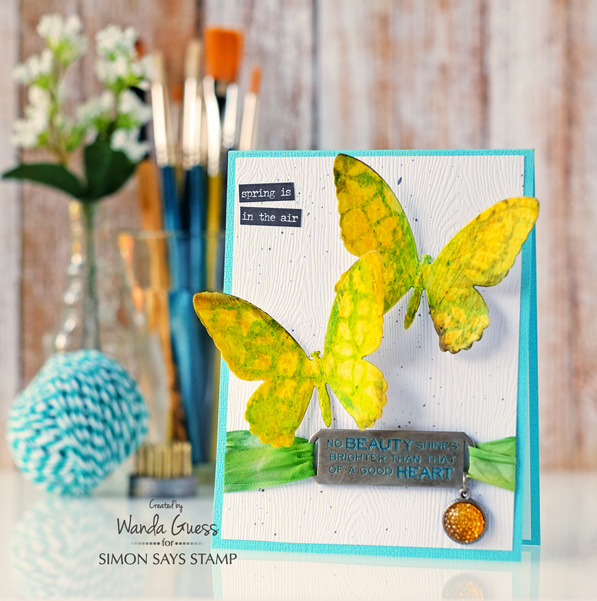
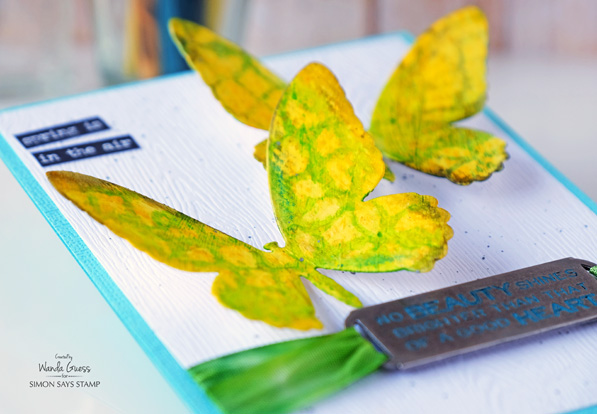
The Detailed Butterflies dies are the perfect size and scale for cards. I die cut two butterflies out of watercolor paper to use as my focal point. The background layer is the new Woodgrain cardstock! It’s pretty awesome. Great for adding some texture and great for ‘nature’ theme cards.
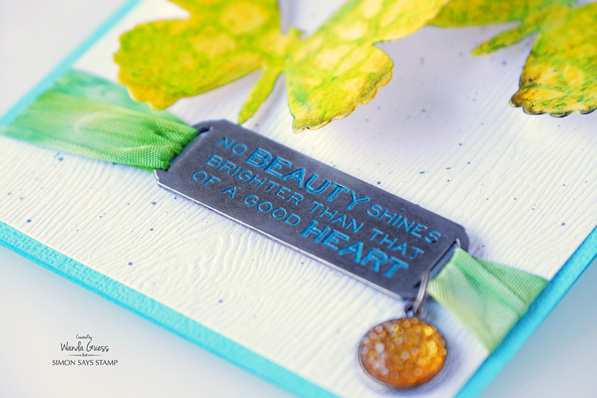
The newest addition to the metal word bands are these big quotes. LOVE this for the front of a card. I used the Distress Crayons to color in the words to make them match my project. The Crinkle ribbon was hand dyed using Distress Spray Stains.
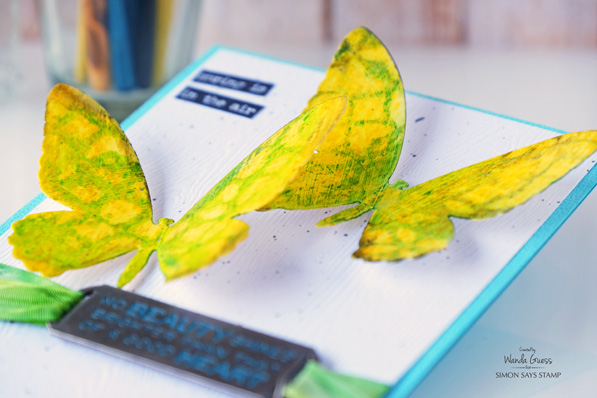
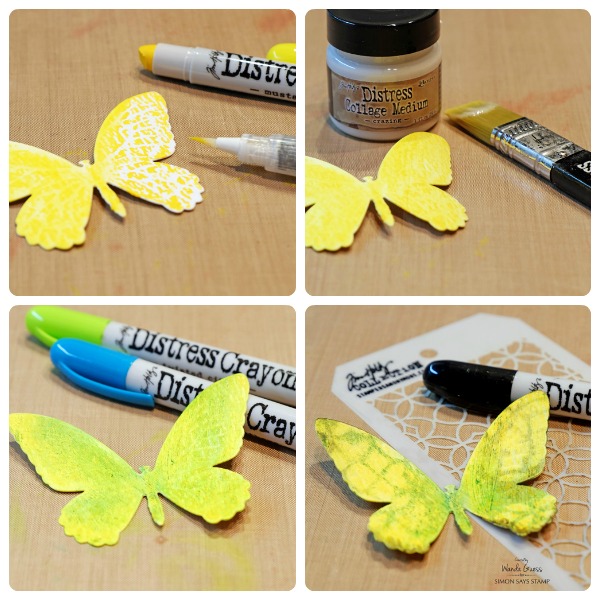
The new Distress Crayons are so unique and fantastic to work with. There are so many techniques you can try. I used a few different techniques for the butterflies. The crayons are almost the exact texture and consistency of a lipstick. They are super smooth and glide over the paper. They are loaded with pigment! For my butterflies I first rubbed the crayons over the watercolor paper and then moved it around with a water brush. Next I applied a thin layer of Distress Collage Medium (Crazing) and let that dry. The collage medium sealed the yellow color for me so I could use that as my base. Next I applied some blue and green Distress Crayons over the yellow and smudged it with my fingers to meld the colors together. The next technique is something that Tim demo’d at CHA and I loved it! I laid a Mini Stencil over the butterfly and then gently wiped with a baby wipe to remove the color in the shape of the stencil. Finally I used a bit of the black Distress Crayon on my fingers to edge the butterflies.
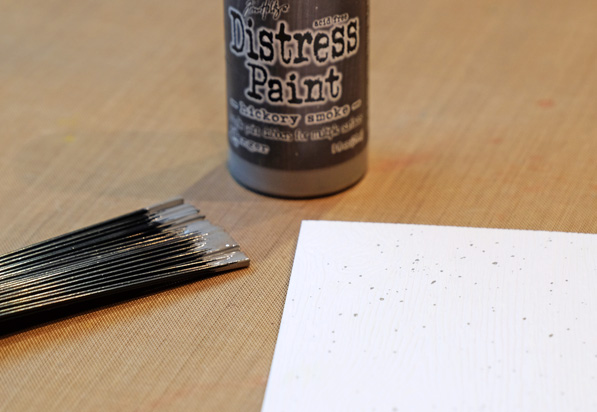
For the white background layer I used Hickory Smoke Distress Paint and the Splatter brush to make speckles. The Splatter brush makes it really easy. Just apply some paint onto your craft sheet and then tap or pull the bristles to make the special effect you desire.
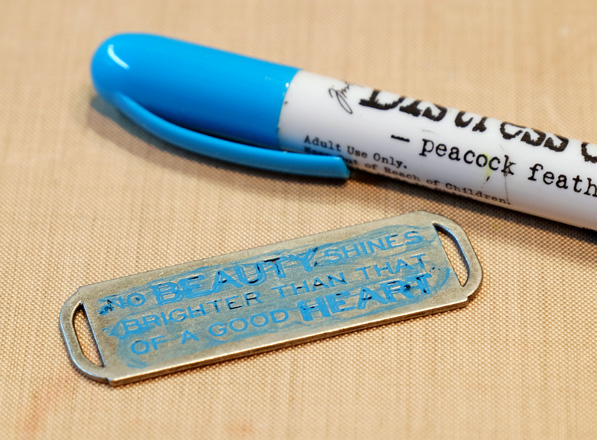
Since the Crayons have body to them it makes it simple to get into the grooves and letters of the quote band/word band. Here you can see how I applied it to the metal. Then I simply wiped the excess away with a dry towel.
Some word stickers are always nice!
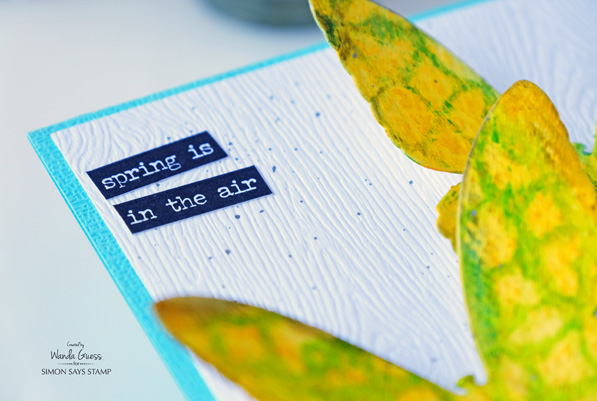
The butterflies are attached to the card with foam squares. Then I gently lifted their wings up to add dimension and movement. The card will lay flat for mailing still, though.
Thanks so very much for spending part of your weekend here with me!
SUPPLIES:
 |
 |
 |
 |
 |
 |
 |
 |
 |
 |
 |
 |
 |
 |
 |
 |
 |
 |
 |
 |
 |
 |
 |
|
 |


Like the butterflies on your card….look like a lot of movement.
stamping sue
http://stampingsueinconnecticut.blogspot.com/
This is so springy and pretty! I love how you did the butterflies. Gorgeous!
Beautiful Project, Wanda!
Beautiful butterflies. Love the sentiment. Hugz
Wow, those butterflies are stunning creatures! And the metal piece, ribbon and charm take it to such an awesome place – gorgeous!
Lovely, how fun to see the new things put to use, Wanda! Is Simon planning on stocking Tammy Tutterow’s Spellbinder’s stamps that she debuted at CHA? There’s a couple “Joy” ones that I’ve had on my wishlist, but haven’t spied them anywhere yet…..
I’ll check on this Lin! I love Tammy’s stamps too!
Like the coloring & dimension of the Butterflies aas well as the rest of the inking on this wonderful creation. Have a BEE-utiful day!
Melissa
“Sunshine HoneyBee”
Oh goodness, what a bright and HAPPY card! So cool.
Oh how pretty! Thanks for such great ideas for how to use the new crayons!
Spring is a great time of the year and the yellow reflects the new beginnings in the garden so well.
Swooning over your beautiful butterflies; signs of Spring, indeed! Gorgeous card!
~carol
I’m a sicker for anything with butterflies and this project is no exception! Love the colours!
Such a gorgeous card – and perfect for spring! I’ve not tried distress crayons before (yet!) and enjoyed reading through your card production process. That’s fabulous that you were able to colour the letter grooves in the sentiment tag too! Love it!
great spotlight feature for tim holtz love the crayons and their look, nut i need to be convinced more to buy them lol ;-)…i mean does one really need them? oh well nevermind i know the answer haha
That’s a great idea to add paint to the metal tag. Really makes it pop.
Can you do a comparison of gelatos and the crayons? What is different about them, and can they be used the same?
Hi Joyce!
Tim posted on Facebook a link to a video comparing all of the different mediums. Here is the link! https://www.youtube.com/watch?v=TjMaAEHJIFM
Very clever project. I really like the final result. Thanks for the very informative steps and ideas.
Beautiful :-)
The butterflies are wonderful. Love the coloring.
Great idea for filling in the lettering on the tag.
thanks for sharing.
I have been a Tim Holtz fan for many years, Love all his products. Great coloring on the butterfly’s.
Great project using those distress crayons.
I just love this card!! What great colors. I have been playing with the distress crayons too!
A great card Wanda. Love how you did the butterflies and also how you gave the metal piece some dimension with the distress crayons. Sweet!
Those butterflies are so vibrant and spring-like and love the clever way you made the sentiment stand out:)
What about the ribbon and the jewel?!! Just kidding. I’ve been following your posts so I know how you got them the way they are. I love how you color the jewels. I have some gumdrops ordered so I will be able to do the same. I need to get some crinkle ribbon and distress crayons. SSS sent one crayon in the March kit and I love it. Thank you for the instruction AND inspiration. :-)
Thanks for making me laugh Tricia Ann! Yes – please try the crinkle ribbon – you will love it!
Such a gorgeous card and oh how fun to play with Distress Crayons!!!
Oh dear. And I promised myself I didn’t need anything else in my craft room. But your card is beautiful. And the crayons look like they are so much fun to use.
SUPER JOB WANDA, on showing us how to use these new crayons! They look like SO MUCH FUN to use!!!! ;) BEAUTIFUL CARD TOO!!! I LOVE how you just rubbed the crayon onto the little quote band/word band! :D
This is just gorgeous! Love the butterflies!!
Great card. I wish butterflies were always “in season”.
So neat to see the distress crayon on metal!!
Oh that card makes me think of spring
Bright and cheery!
You made your butterflies come to life. Pretty card.
Great technique on the butterfly! Love it!
Love your project & you’ve made me add to my wishlist!
Love this card Wanda! The butterflies are awesome and that quote band is lovely with the color swiped through the words. Thanks for sharing.
The butterflies came out so gorgeous
What a pretty card! Thanks for sharing how to use the distress crayons.
Great to see how you used the crayons and collage medium….
I never before heard of a splatter brush….
Thanks for showing and explaining some of the different properties of the crayons.
Very pretty card!! Love the springy colors!!
LOVE this card!! Wanda you always have great ideas! I love the blue, white and yellow color combination. Thanks for sharing.
Everyone is talking about this crayons.
Lots of pretty details!
Those crayons look amazing! Can’t wait to play with them!
Beautiful card, Wanda! Thanks for showing us more about the distress crayons!
How fun and pretty! LOVE the design and all the dimension. Gorgeous ♥
Fabulous card, Wanda. Thanks for sharing all of the fun products and techniques!
Happy little butterflies!
Thanks for all the details on how you created your beautiful butterflies, Wanda. Great card using lots of new products!