Weekender with Wanda – Gift Card Ideas with Reverse Confetti!

Hi creative friends! Welcome back to the latest edition of Weekender with Wanda here on the Simon Says Stamp Blog! Happy Saturday! And, Happy Halloween too! Are you going to a party? Having a party? Whatever you do I hope you have a good time! Once Halloween arrives, I feel like gift shopping and gift giving season really ramps into high gear. Around this time, is when I start buying Christmas presents and tucking things away for the rest of the year. So, today I’m sharing a fun card design that you can use for giving gift cards. I love to give (and receive!) coffee gift cards. My friends and I all seem to be coffee lovers! For today’s projects, I am using awesome supplies from one of our favorite companies – Reverse Confetti! The Just Brew It stamp set is perfect for these cards today! I have two versions to show you of the same card – one for Fall and one for Winter. I used pretty plaid papers and vivid colors to make the cards super cheerful and fun for whoever gets them.
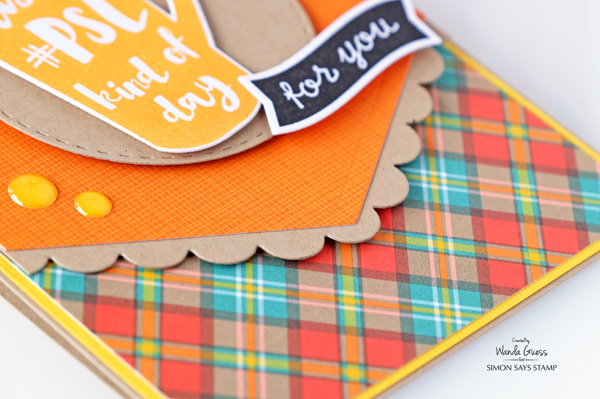
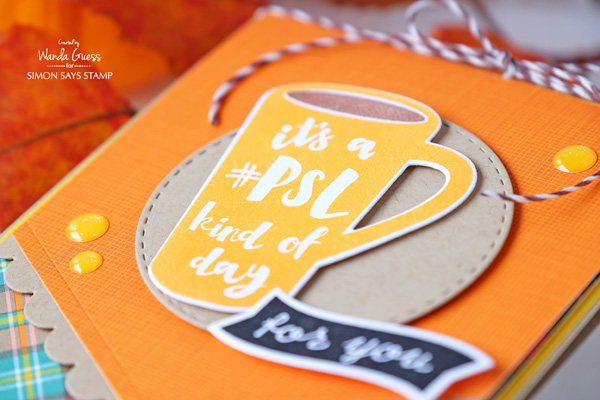
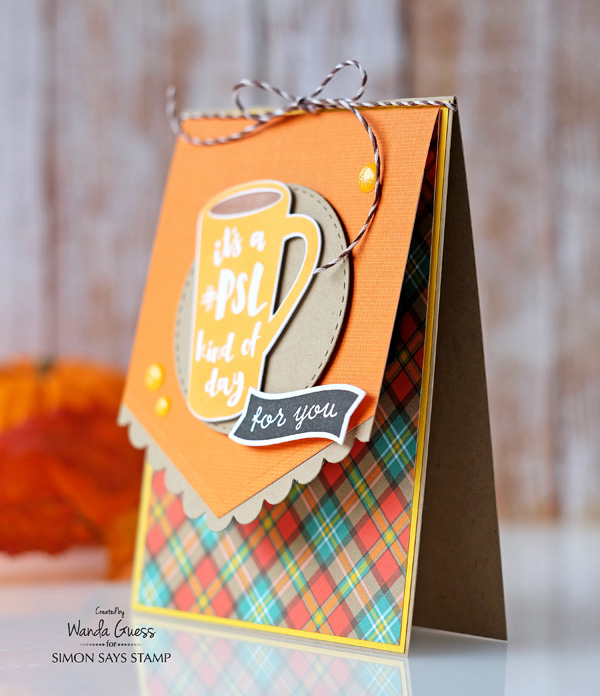
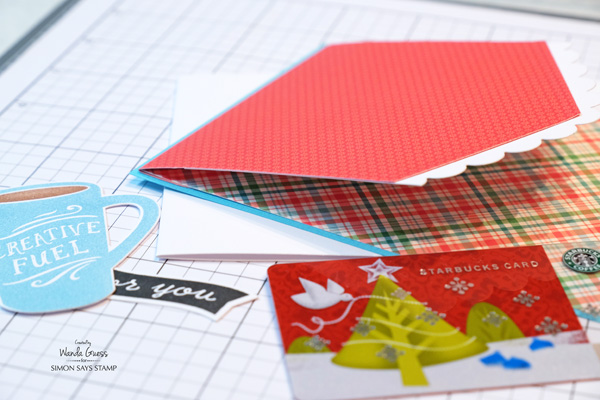
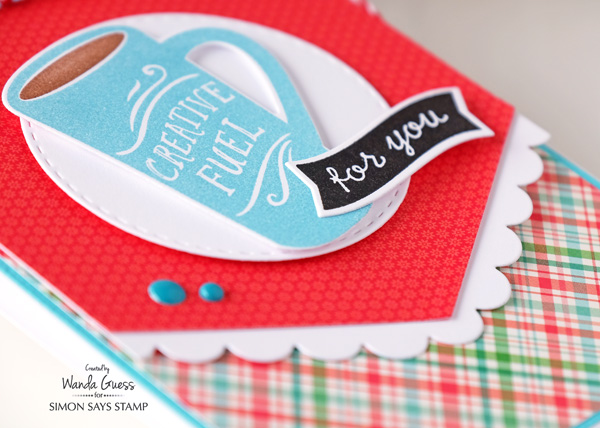
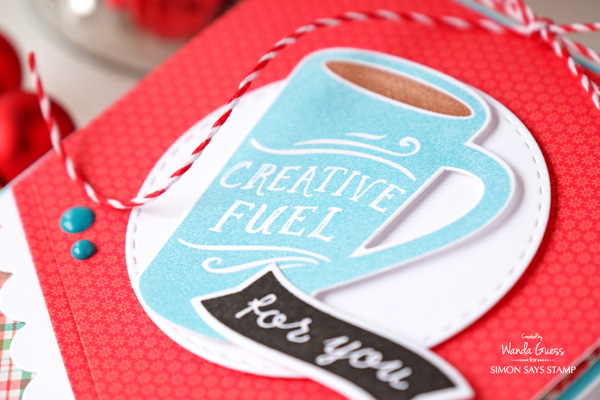
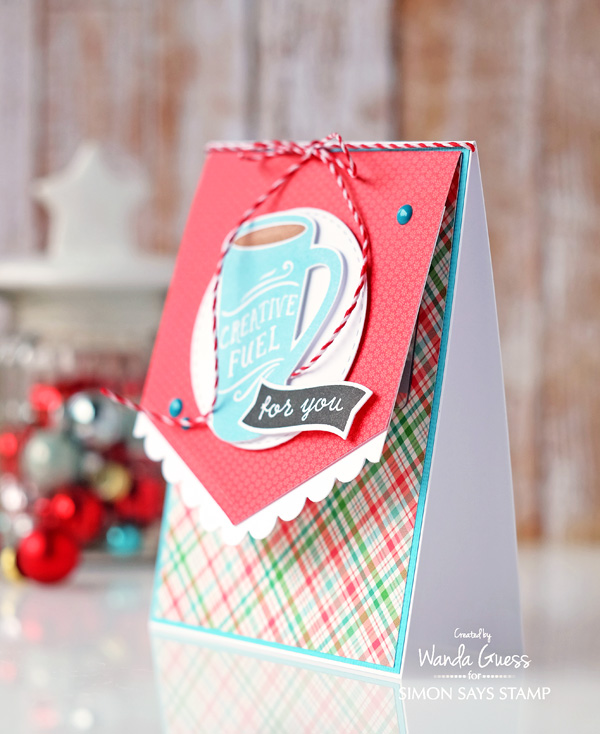
The Just Brew It stamp set has coffee mugs with perfect sayings inside them. Of course I love a good pumpkin spice latte myself, so I had to use this stamp! There is a matching die that makes it easy to get a clean cut every time. The Reverse Confetti Edgers Dies set made the gorgeous edges on the front of the card. This part is actually a flap that folds over to hide the gift card!
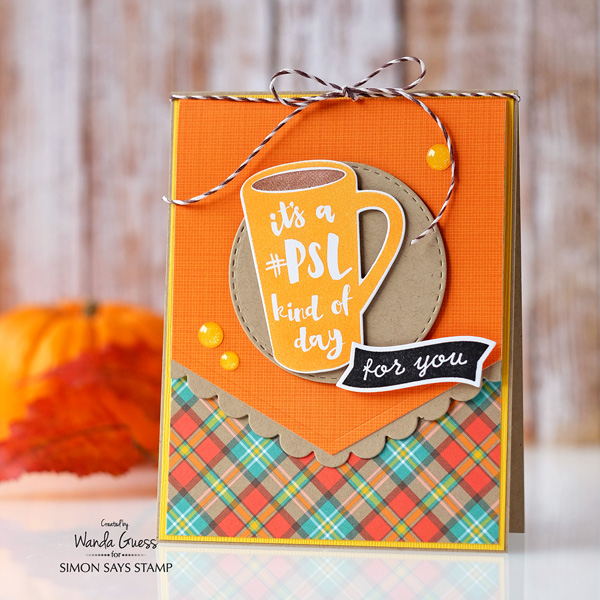
I started the card with an A2 card base made from Kraft paper. I layered yellow cardstock on top of the Kraft. Next I cut my plaid layering piece and set that aside. I used the beautiful plaid papers from Lawn Fawn for both cards. Next I die cut the scallop edge from Kraft and the straight edge (see the beautiful embossed line?) from orange Doodlebug paper. This linen paper has the look of a soft texture.
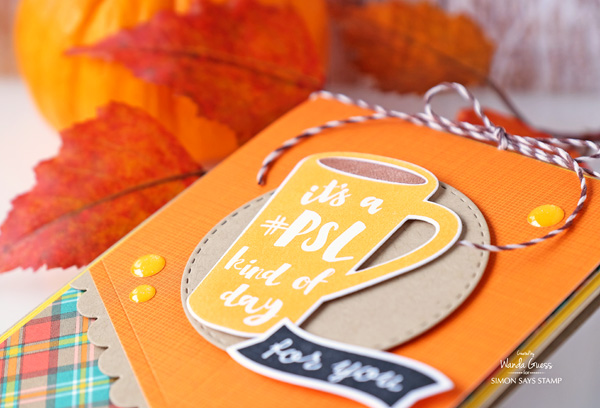
I adhered the orange piece to the Kraft scalloped piece using Tombow adhesive. I layered my Stitched Circle Die, Coffee Cup and Bitty Banner at the very end – with foam squares.
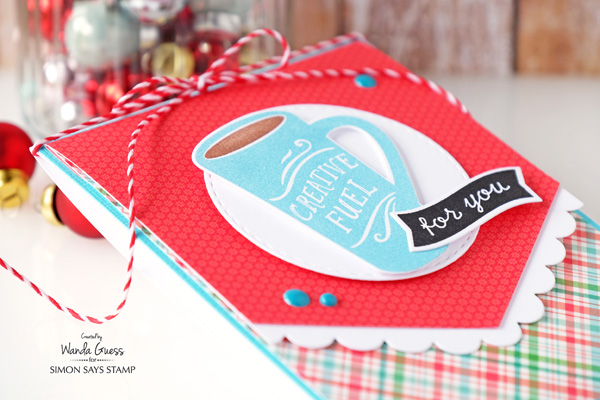
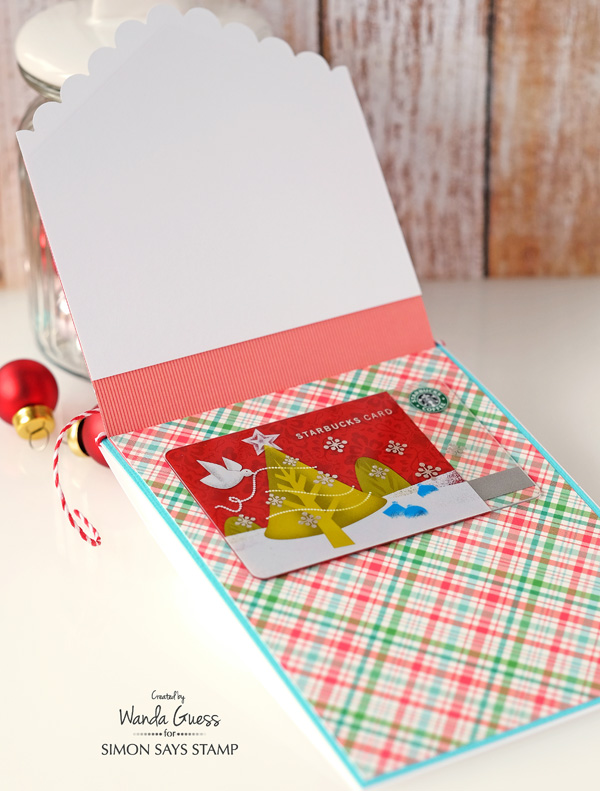
This is what the card looks like with the flap open. I attached the gift card using some pretty washi tape to hold it in place – and so that the person could easily remove it later. In this photo you can see that I folded the orange edge over the top of the plaid piece before adhering the plaid part to the front of the card.
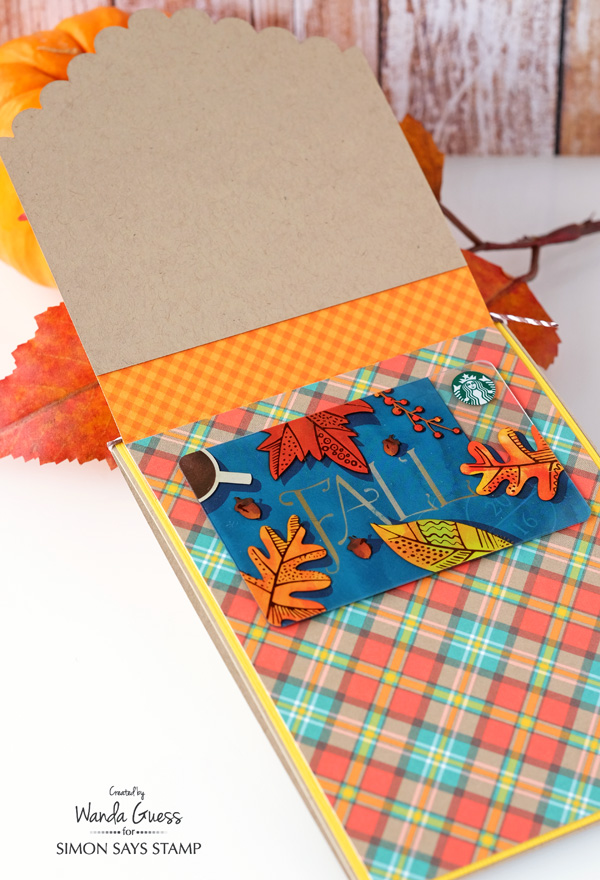
From the side view, you can see that the card opens for you to write your greeting or a letter inside…. And the gift card is on top under the flap!
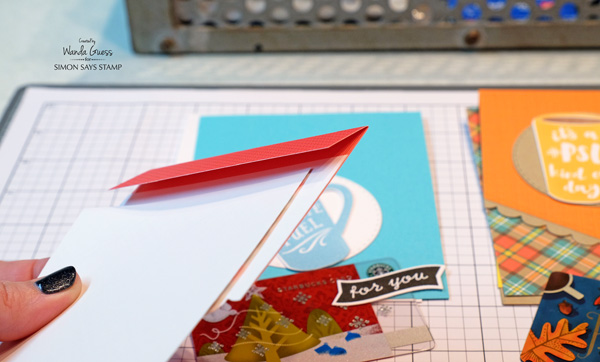
Getting my supplies ready…
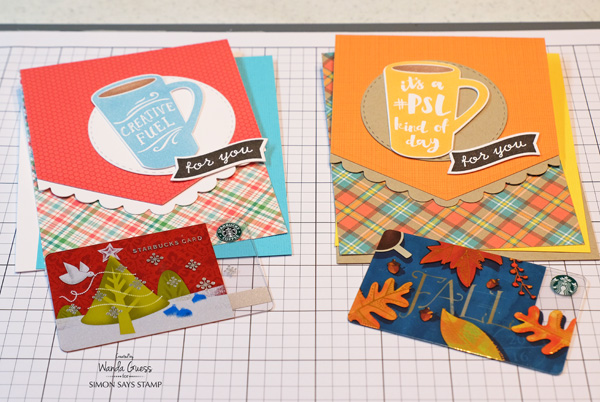
This is the Winter version of the same card! My base layer is bright white cardstock. I layered a bit of icy blue – because I love red and blue together at Christmas (well, anytime actually!)
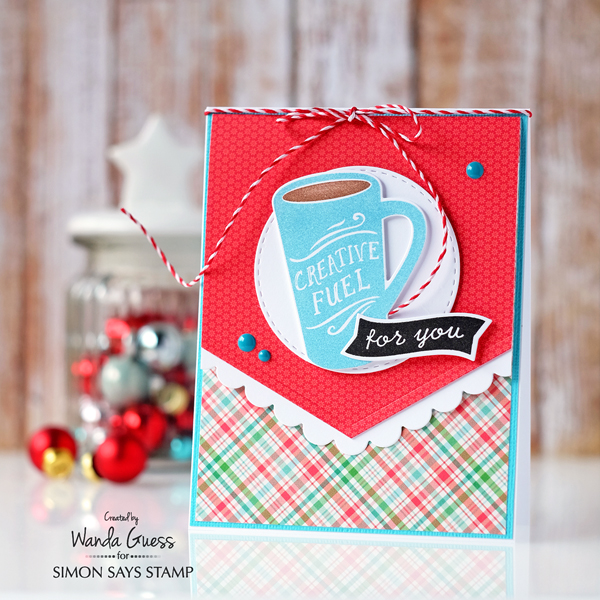
On both cards I finished them off with pretty twine and a few Doodlebug enamel dots for some more color and bling. The Bitty Banners were stamped in SSS Exclusive Intense Black Ink for contrast.
Close up of the Edgers Dies – the are perfectly sized for the front of an A2 card.

Creative Fuel indeed!! This would be a nice gift for a crafty friend!!
This is a really versatile card layout for giving someone a card with a gift card inside! You could make it a birthday card, retirement card…anything really! I hope you’ll give it a try. Thanks for spending part of your weekend here with us on the Simon Says Stamp Blog!
SUPPLIES:
 |
 |
 |
 |
 |
 |
 |
 |
 |
 |
 |
 |
 |
 |
 |
 |
 |
 |
 |
 |
 |
 |
 |
 |
 |
 |


Great gift card ideas. The design is wonderful as well as the pretty colors ! Love all the pretty plaids !
Lovely cards — love the colors!
Love this idea, and the card is lovely!
What a great idea. Fun colors & patterned papers!
Love these!! The creative fuel is my favorite! TFS!
Such pretty cards! I love the colors!!!
Love this! Super idea!
Lovely card. Great idea. Hugz
Cool idea, I love this as a way to give gift cards! :) Thank you for sharing.
Katie B.
Love the plaid papers and that mug is very cute!
Wow, two cards that really will cheer the recipiant up! Love the bright colours!
Oh, these are so sweet!
These cards are so pretty. Great gift card idea. TFS.
I love this card, could you please post the dimensions of this card?