Under the Wide Starry Sky by Paula Cheney
Hi friends! Happy Thursday! I’m always delighted to welcome back special guest Paula Cheney to our Simon Says Stamp blog! She has used a mixture of Halloween and everyday Idea-ology items to make this one of a kind beauty! Read on to learn more and enjoy!
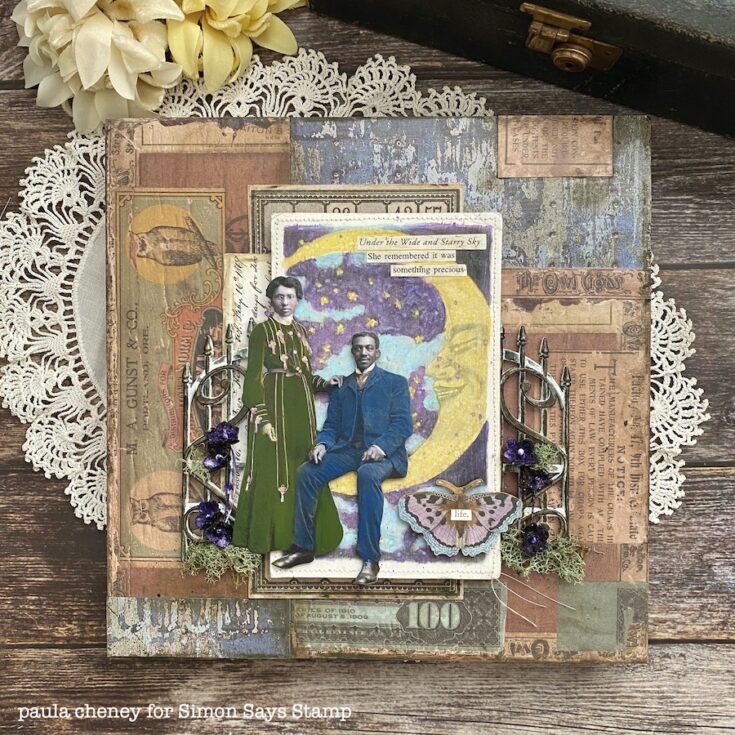
Hello friends! In today’s project I wanted to explore what you can do with Halloween product when you are either running out of time or miss the holiday completely! Do you have to stash it away for next year? or can it still be used? The answer to the last question is yes! it can still be used in everyday projects. Follow along and I’ll show you how I did it…
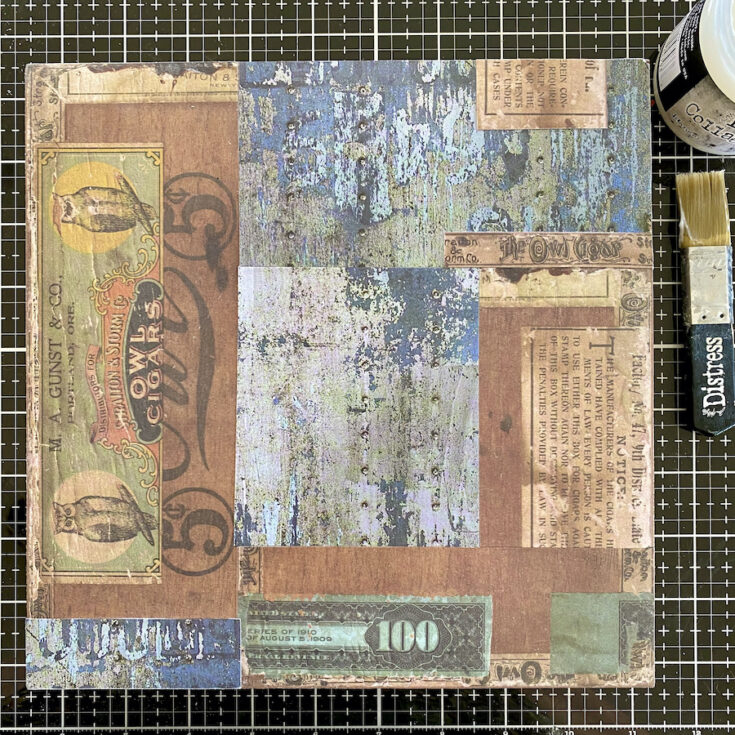
Create a paper patchwork over the 9 x 9” wood Vignette Panel, using paper from the Halloween Backdrops. Focus on what is on the edges since the center will be covered by other layers. Once your paper pieces are cut, add Collage Medium to each piece as you add it to the Panel. Once the paper is secure, seal the surface with another layer of Collage Medium.
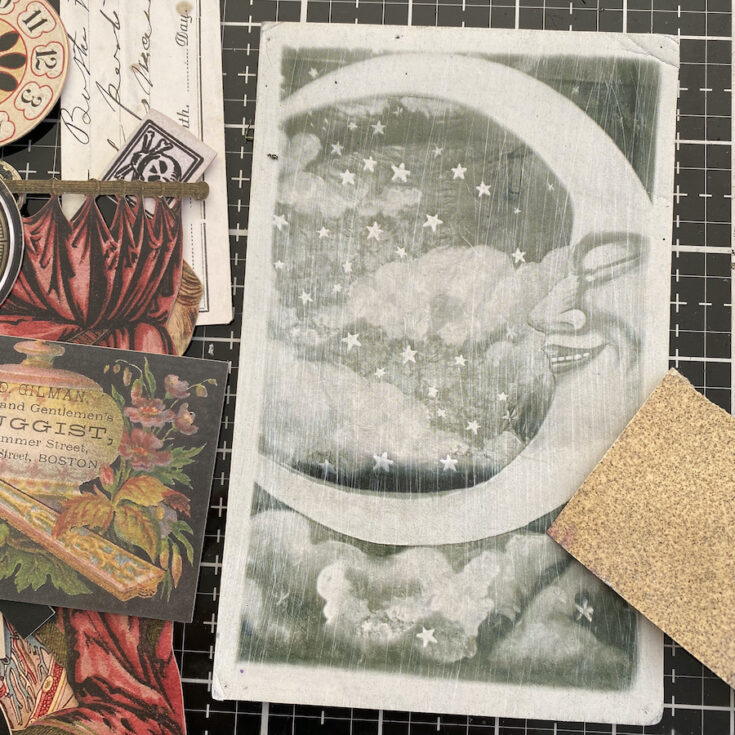
Pull the moon card from the idea-ology Halloween Layers pack. This piece could definitely be used year round. Lightly sand the moon card. This will allow the Oxide Ink in the next step to penetrate the coated surface of the card.
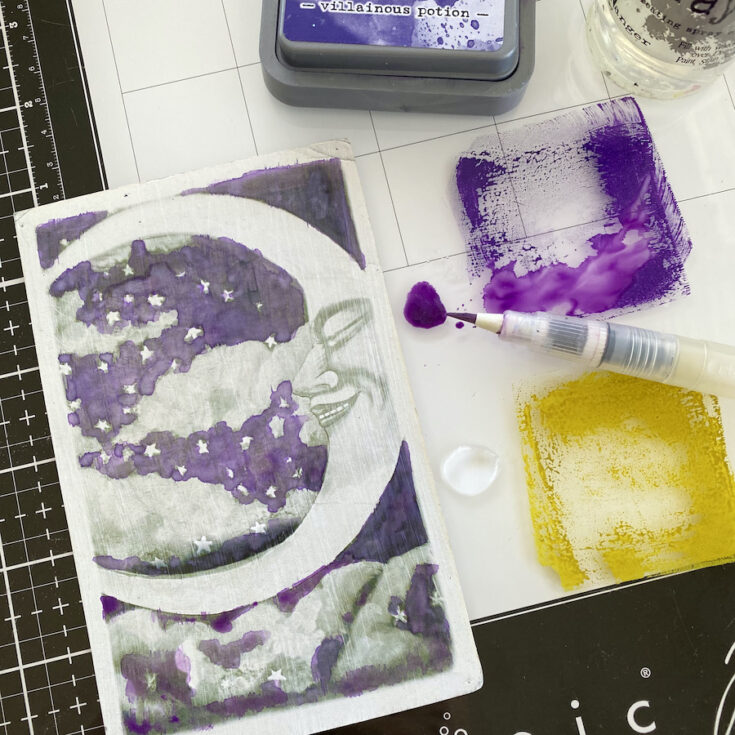
Start with the background color. I chose Villainous Potion Oxide Ink for the “moody sky”. I like the way the Oxide Ink layers over the surface. Picking up more even water with the Detailer Water Brush allows you to fill in the background with ease. More than one layer of ink is suggested.

Salvaged Patina Oxide Ink is a beautiful color and worked perfect for the clouds. Again, adding more water to the Oxide Ink allows the ink to flow and create a watercolor effect over the surface of the clouds.
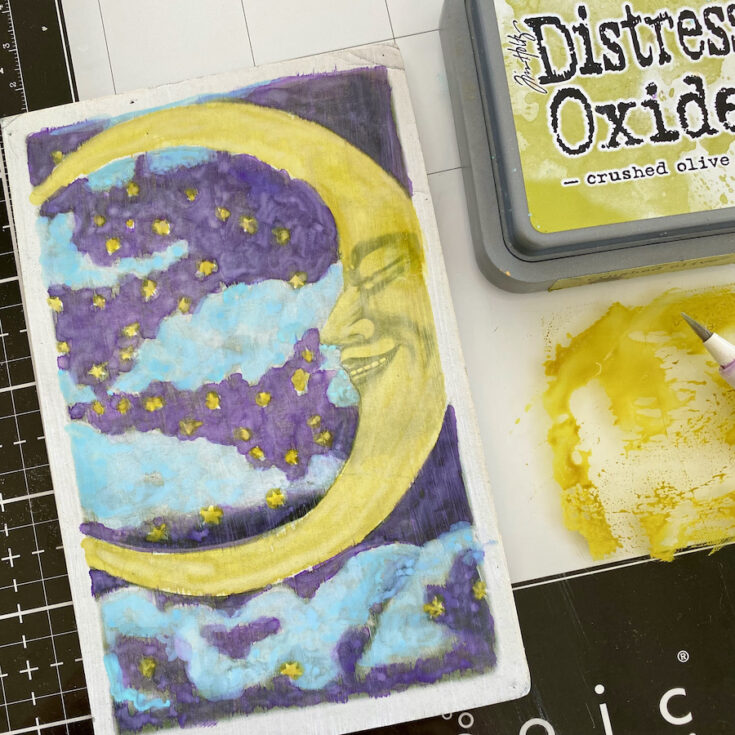
Fill in the moon and stars with Crushed Olive Oxide Ink.
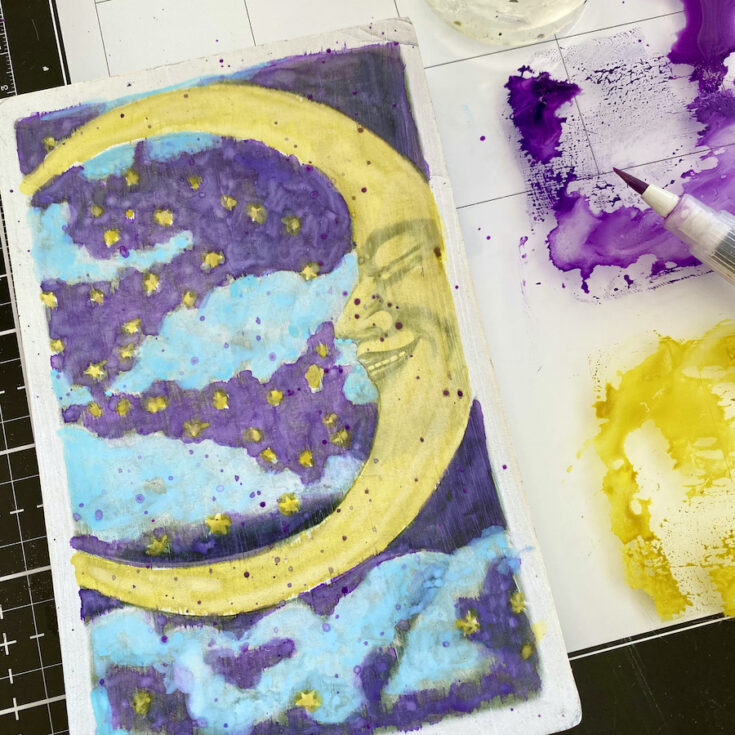
I went back to the Villainous Potion that was dried on my glass Media Mat, added more water and splattered the ink over the surface of the card using the Water Brush.
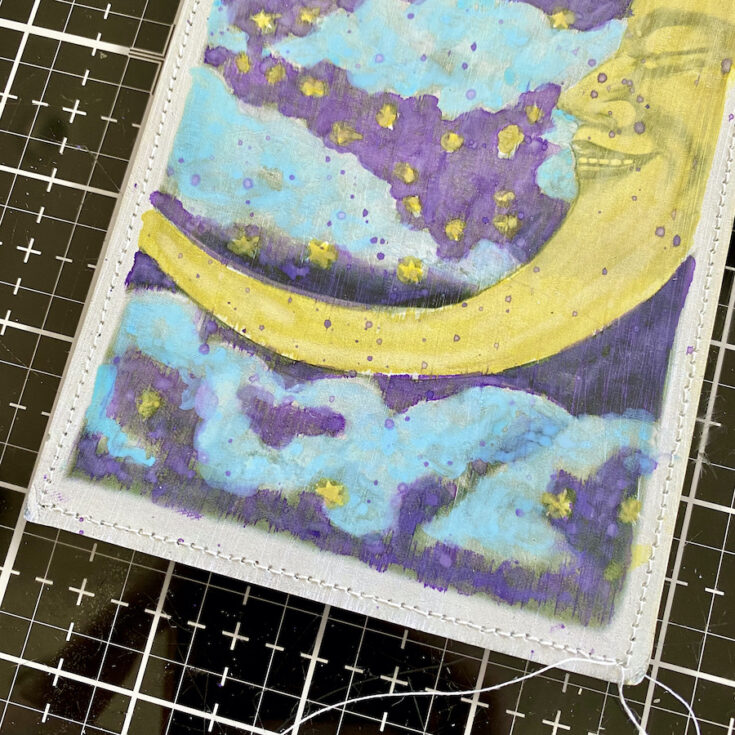
If you have access to a sewing machine, stitching always adds great texture to a mixed media piece. Stitch around the card, leaving the threads long at the end.
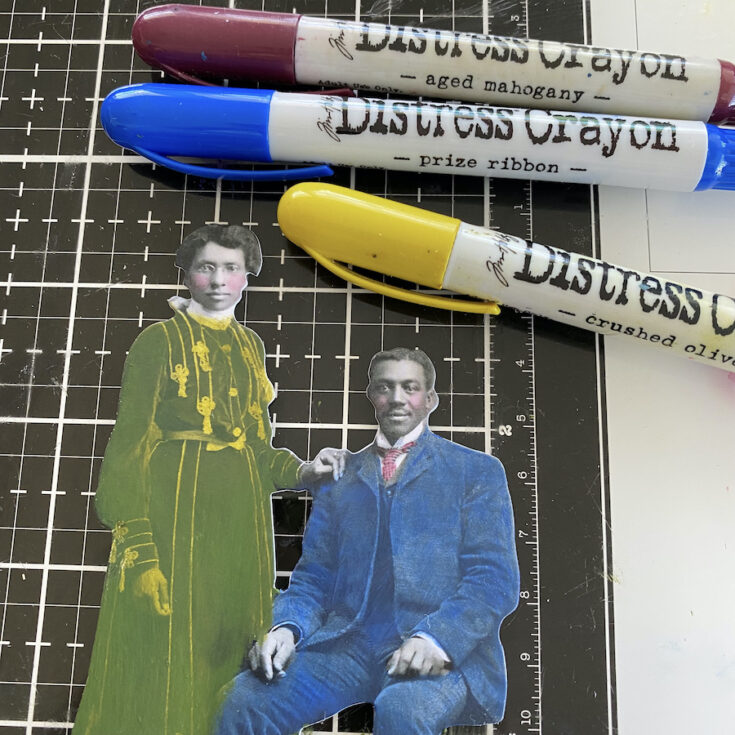
There are also many Halloween Paper Dolls in the pack that can be used all year long. It all depends on the scene in which you put them! They might look mysterious or spooky in a Halloween scene, but here they just look like a lovely couple!
(I’m going to focus on the lady for this tutorial) I chose to color the clothing with Distress Crayons, my go-to medium for coloring Paper Dolls. I like the control and the lasting quality (it does not fade). To get started, I colored her dress with the Crushed Olive crayon. When you use the Crayon directly, it will add a thick layer of color over the doll. Use your finger to rub the crayon away till you can see the details on her dress again. The darker the color, the more you might have to rub away but don’t shy away from rich blue or red. Crushed Olive over the dark dress looks almost like deep green velvet. You’ll notice that I colored right over all the embellishment on her dress and her hand. Not to worry, we will take card of that in the next step.
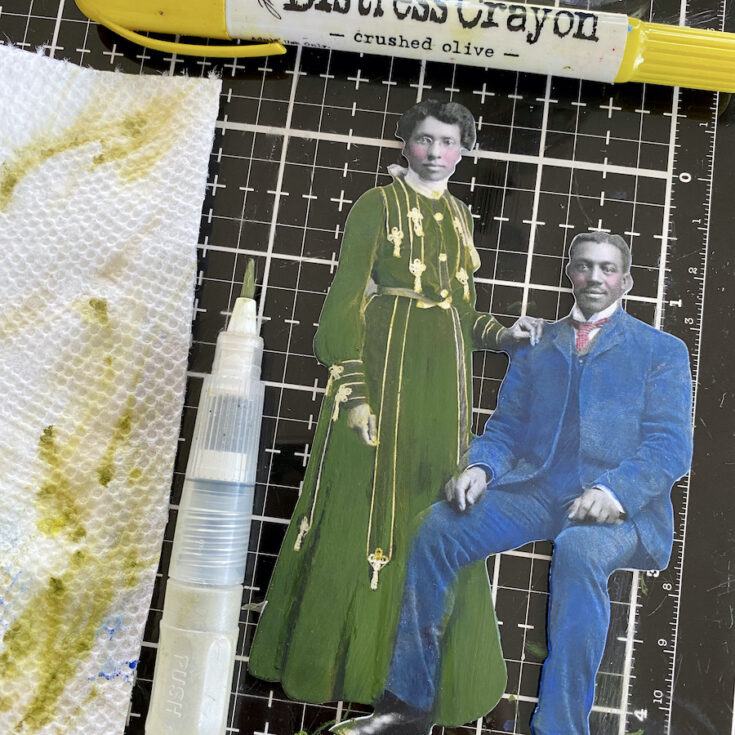
I call this step: “removal”. I used my Detail Water Brush to remove the color from the embellishments on her dress, her belt, and her hand. You can see I have a paper towel next to me so I can wipe the color on the towel before going back to remove more of the crayon with the tip of the Water Brush. You might also notice that I removed crayon to add folds at the bottom her dress.
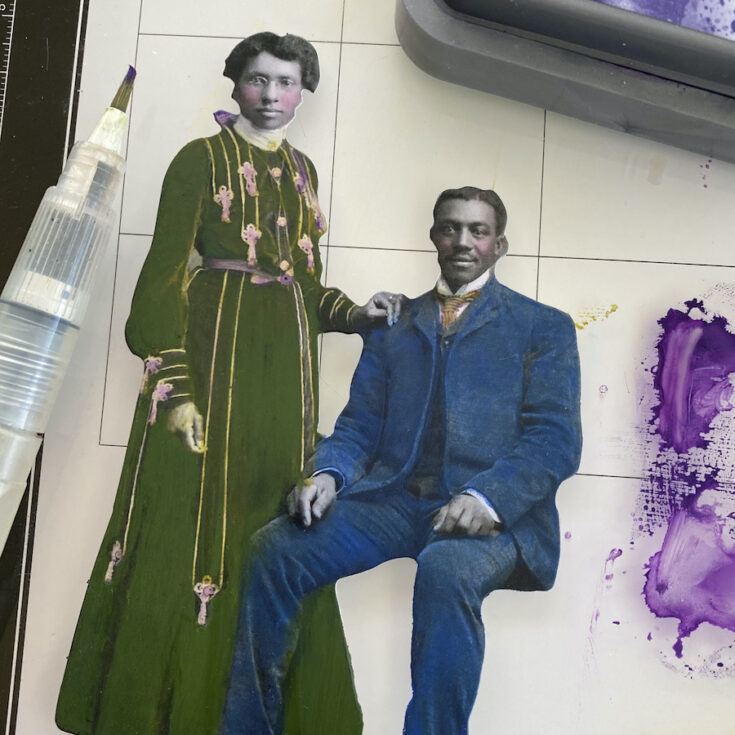
I could have left the dress as is, but I decided to add a little color to the dress embellishments. This time I used the leftover Villainous Potion Oxide Ink. I just picked up the ink with my Water Brush and added it to the dress. I think it made the dress even more interesting.
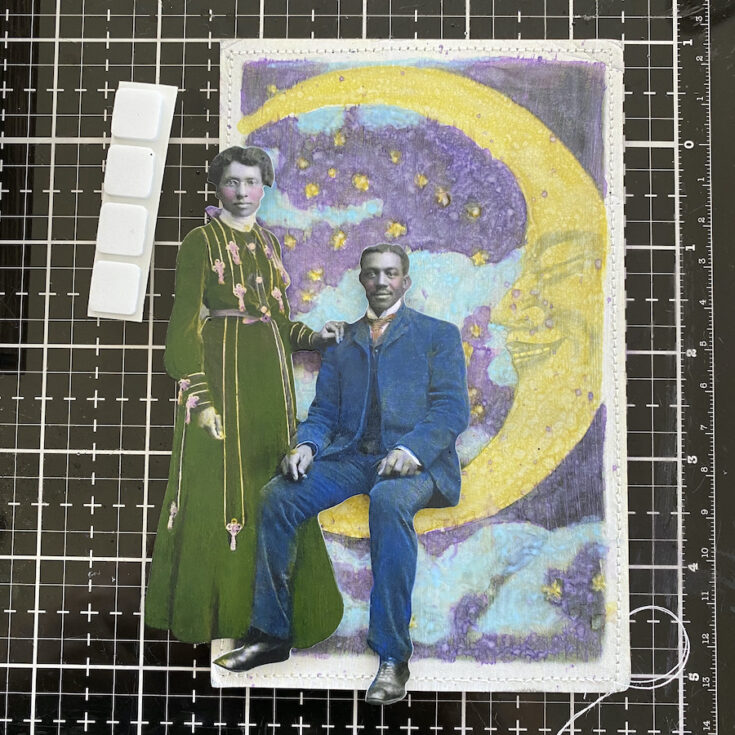
Add 3D foam Squares to the back of the Paper Dolls and add to the moon card. I like that you can have anyone sitting on the moon, man, woman, kids….they all work.
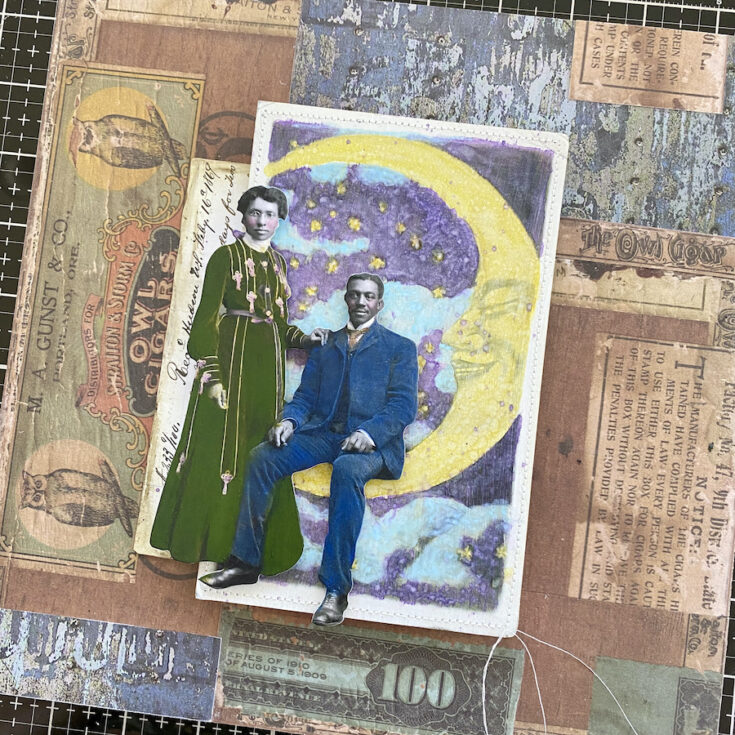
Use additional 3D Foam Squares to adhere the collage to the wood Vignette Panel.
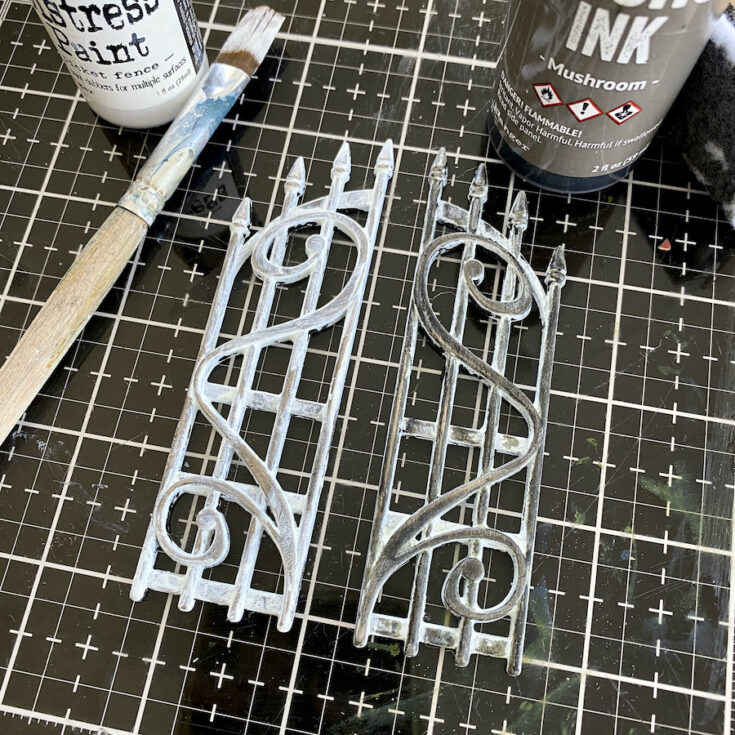
Another Halloween product is the idea-ology Ornate Metal Gates. We have seen them used so many ways in Halloween makes, but they are still wonderful as garden gates. I quickly painted on some Picket Fence Distress Paint over the Metal Gates. Once dry, I pounced Mushroom Alcohol Ink over the surface to age.

Use Collage Medium to adhere the Metal Gates to the Vignette Panel along with another card from the idea-ology Halloween Layers pack.

Villainous Potion may look and sound like a Halloween color, but I decided to use it anyway on the Bouquet flowers. I sprayed them with Villainous Potion Distress Spray Stain and dried them with a heat tool. Once dry, I rubbed Collage Medium over the flowers and lightly sprinkled Nightfall Glitter over the top. I love the texture the glitter brings! You can let dry naturally or dry with a heat tool (I went for the latter).
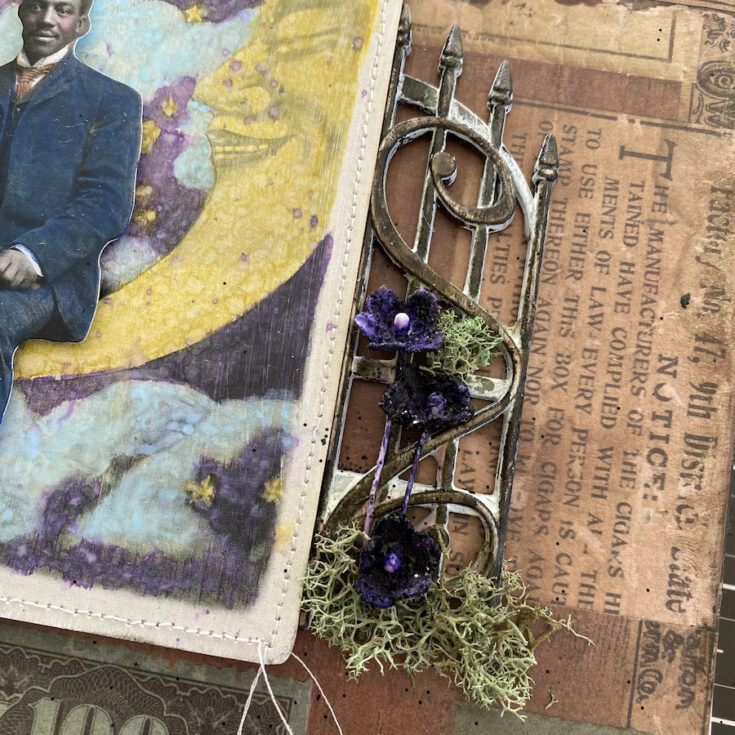
I used Collage Medium to add the flowers and moss to each side of the Metal Gates. I left the stem on some of the Bouquet flowers and others I just used the head of the flower. I wanted them all to look like they were growing from the ground.
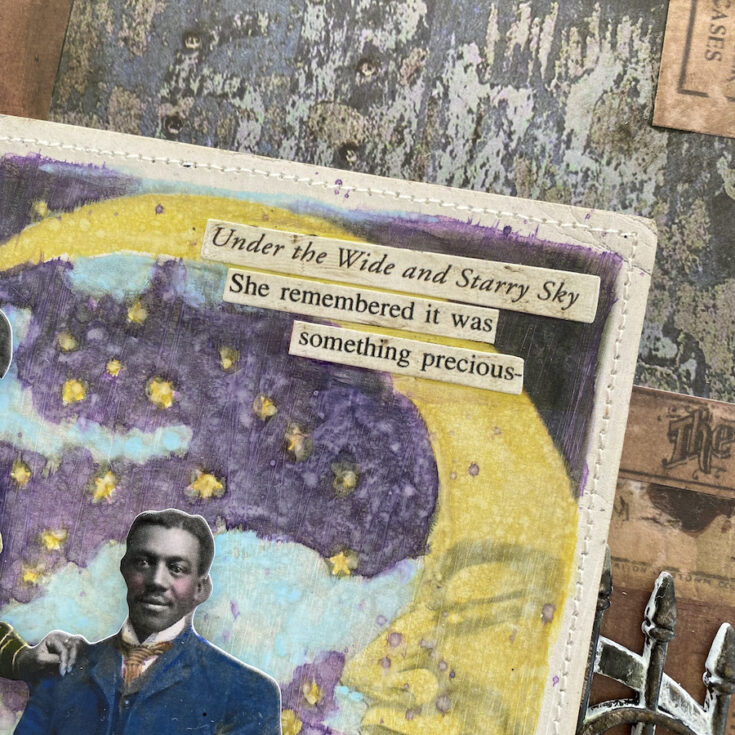
Here is where I deviated from the Halloween product and used a sentiment from our regular line, Clippings. I combined sentiments to create a phrase that has nothing to do with Halloween.
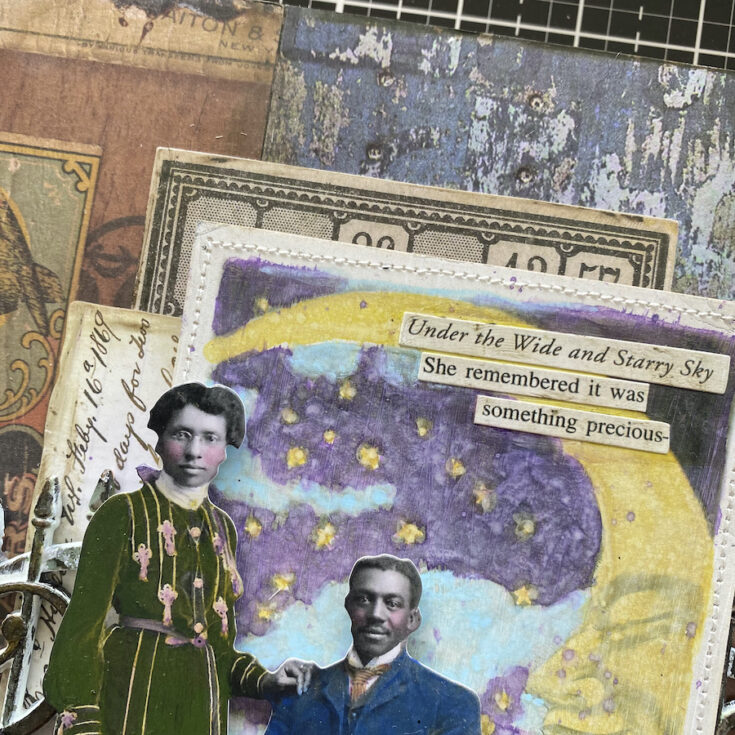
I thought I might add more layers from the same pack. I cut the small lotto card you see at the top in half and used one part at the top and one part at the bottom, so it looks much longer than it really is.
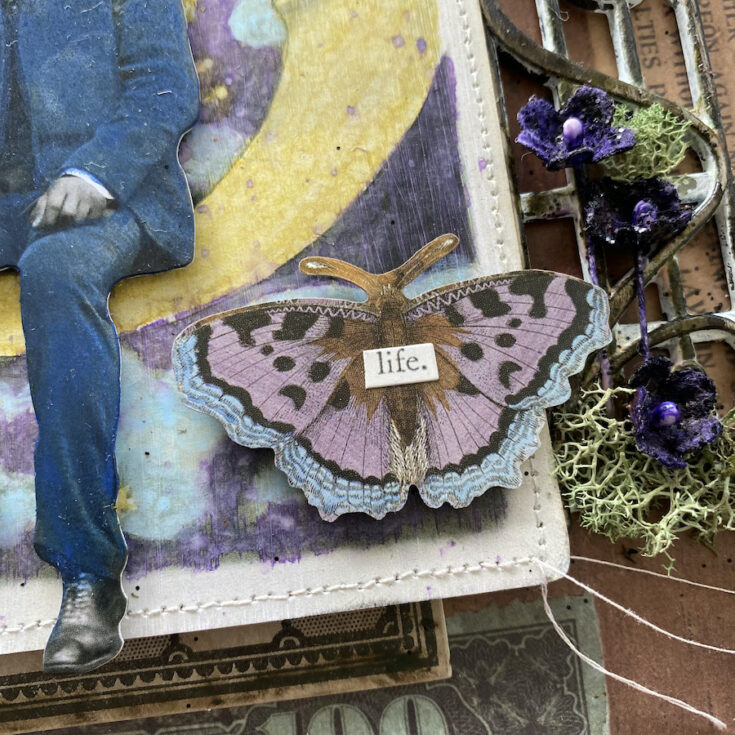
And the last piece is also from the Halloween Layers pack, the butterfly. One more added sticker from the Clippings book is the perfect response to the sentiment above.
I hope you can see that many Halloween idea-ology products can be used all year round! I know I have a lot more Paper Dolls to use up before I get to the end of the pack!
SUPPLIES:
|


Thanks so much for stopping by, and thanks to Paula for being our guest!


Wow!!! Gorgeous work of Art!!!!!
I LOVE this!! Thanks for sharing the tutorial….it’s something I am going to try!!!
This is awesome
Thanks Paula for sharing! You make everything look so easy. The paper dolls are amazing.
So amazing, love the details, great tutorial !!
Oh wow, this is just stunning
A beautiful project Paula, I love how you added the gates and the flowers decorating them are gorgeous. x
so very pretty