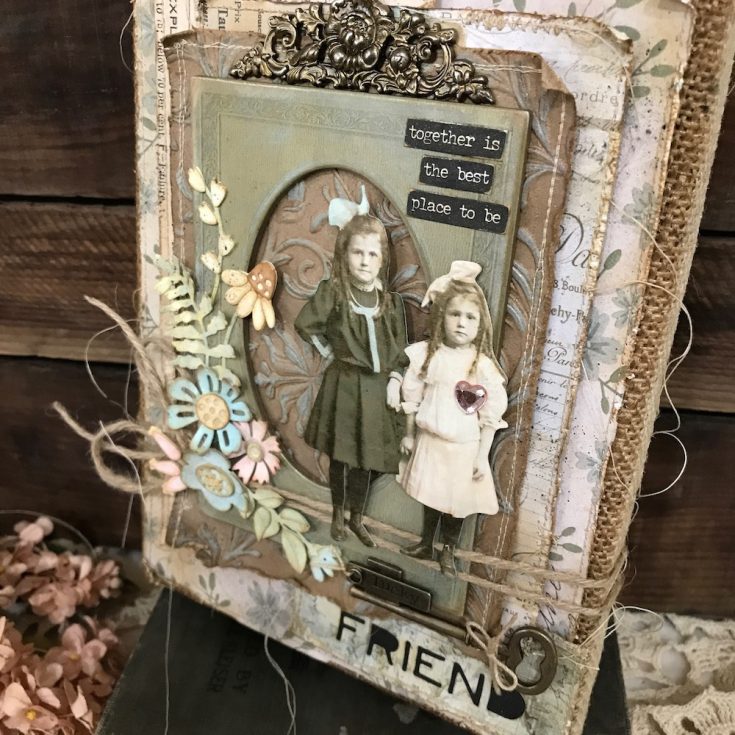
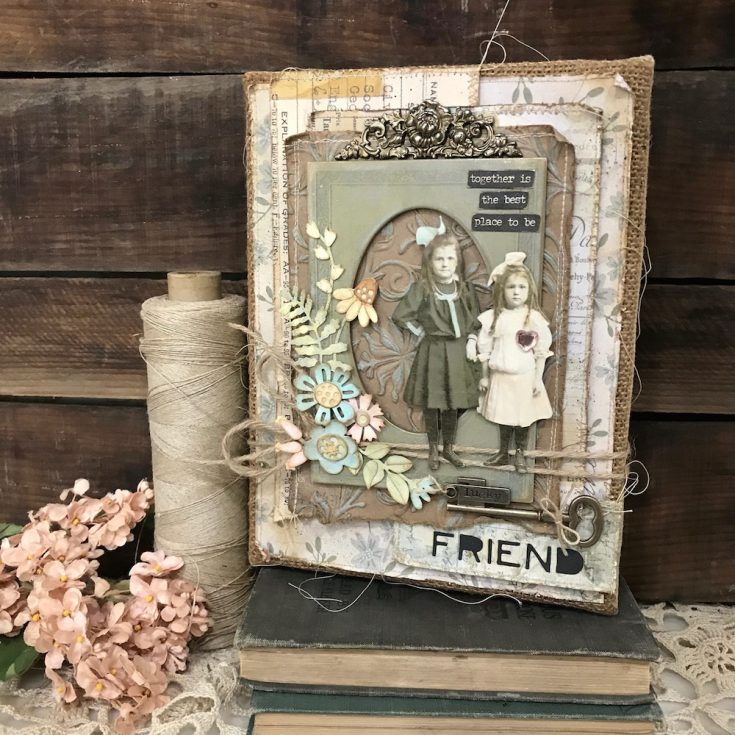
Together Burlap Panel by Richele Christensen
Hi friends! Happy Sunday! Please join me in a warm welcome back to special guest Richele Christensen! She’s made this gorgeous burlap panel that would be a fabulous gift, don’t you think?! Read on to see step by step photos of the creation of this project, and enjoy!
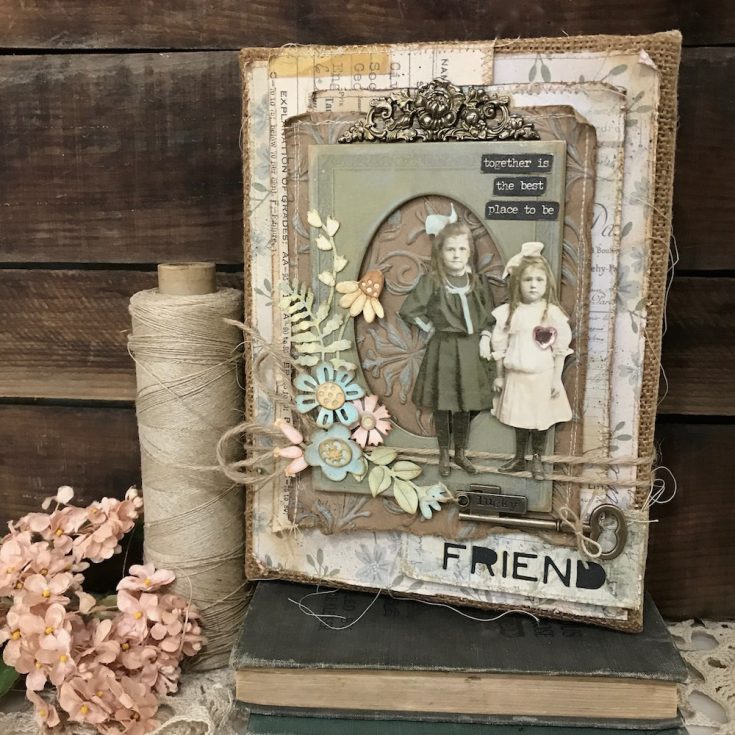
Hello, friends, it’s Richele. Today I’d like to share a Burlap Panel using some of the new Tim Holtz Alteration Dies from Sizzix. I love dies, they can be used is so many different ways.
INSTRUCTIONS:
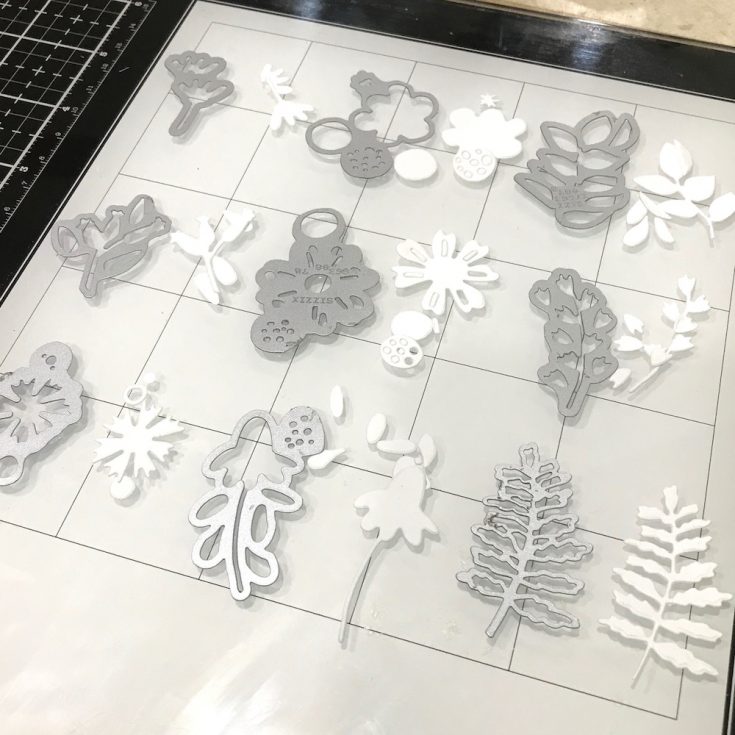
1. Die cut Funky Foliage from Rangers Watercolor Cardstock.
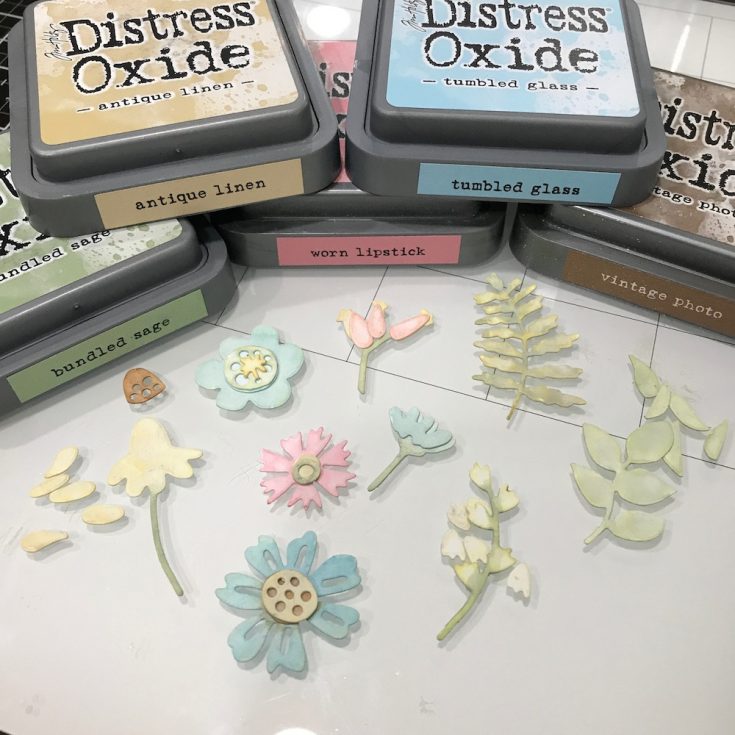
2. Color the flowers and leaves by applying Distress Oxide Inks directly to Glass Media Mat, pick up ink with Waterbrush, color Funky Foliage and dry with heat tool. I used Oxides Inks for a soft and shabby look.
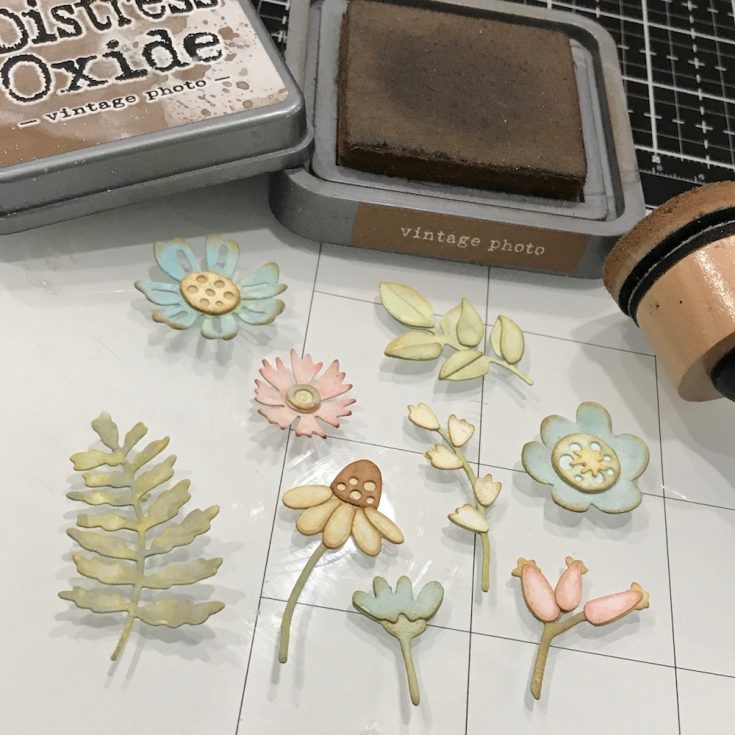
3. Ink edges with Distress Oxide Ink on an Ink Blending Tool.

4. Mist foliage with Distress Mica Spray and Dry with a heat tool. The shimmer will show once the spray dries.
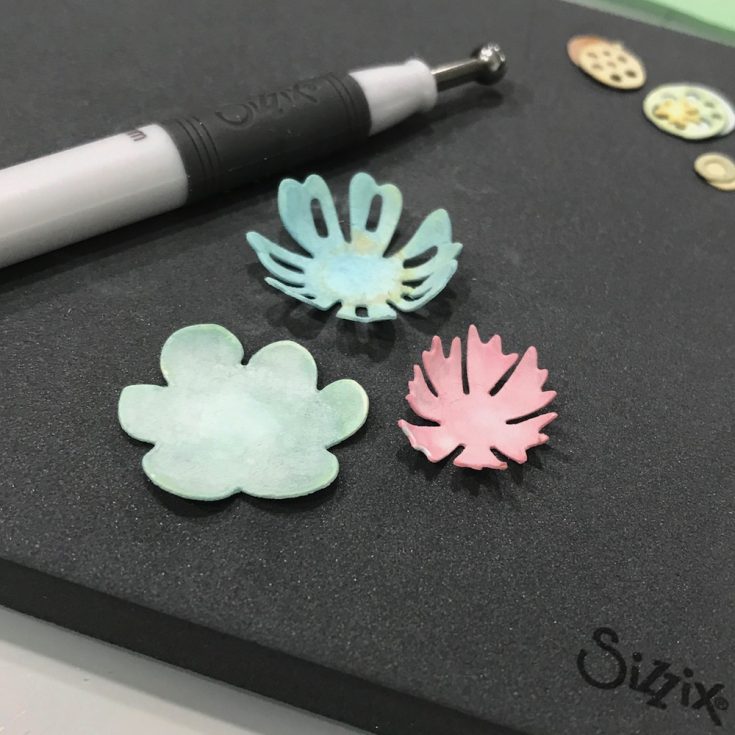
5. Shape flowers with Sizzix Paper Sculpting Tools. I like the smallest stylist for these flowers. Place flowers on molding mat and apply pressure with the sculpting tool to create dimension.
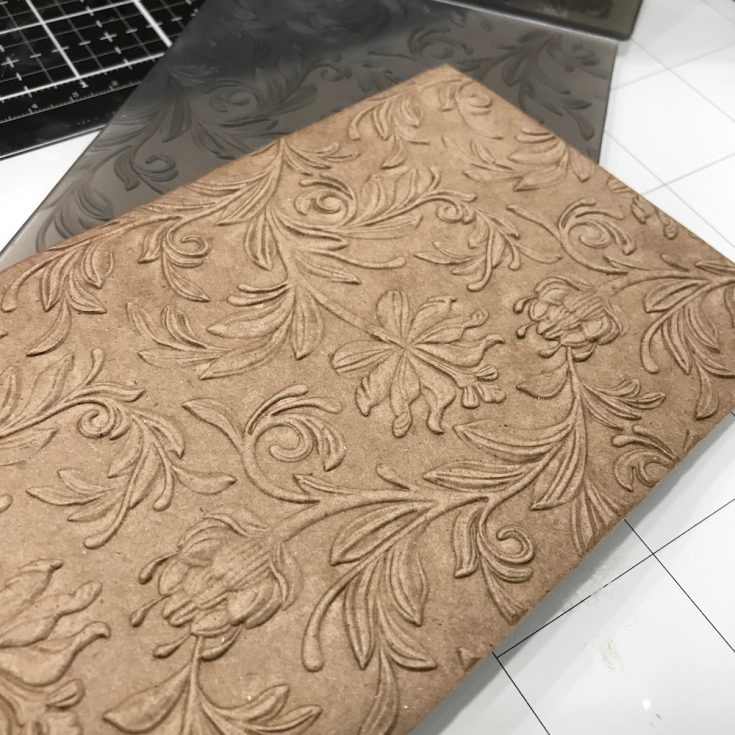
6. Mist both sides of Kraft cardstock with water, emboss with Botanical 3-D Texture Fade running through Vagabond machine twice. Use only one cutting pad as the 3-D Texture Fade is thick.
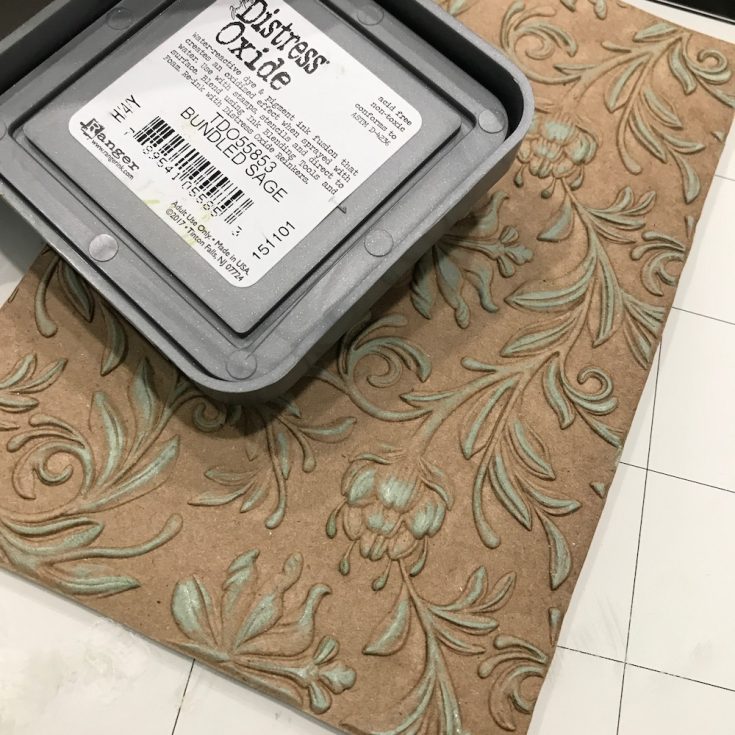
7. Apply Distress Oxide Ink directly to raised areas.
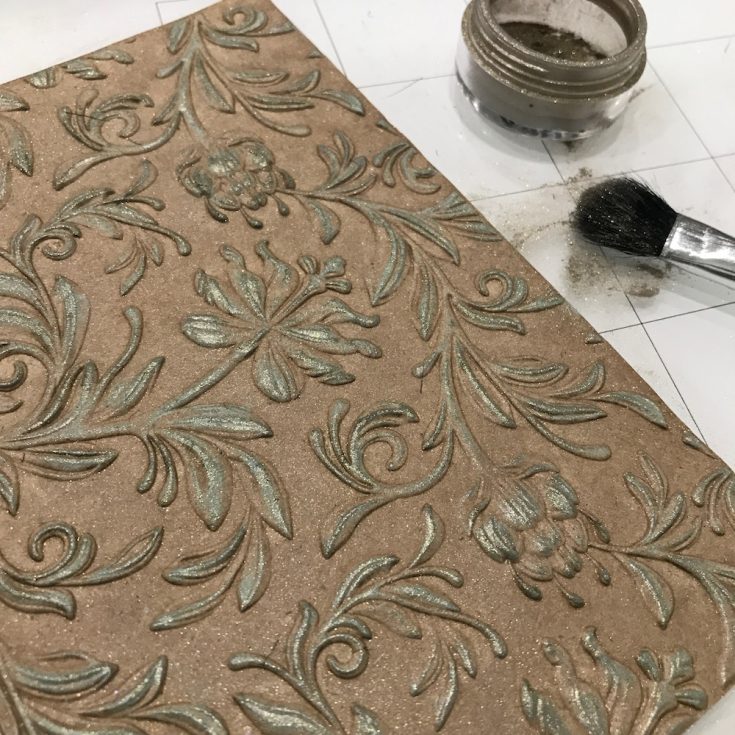
8. Brush on Heirloom Gold Perfect Pearls Powder and buff off excess.

9. Distress edges with Paper Distresser and Vintage Photo Distress Oxide Ink on an Ink Blending Tool.
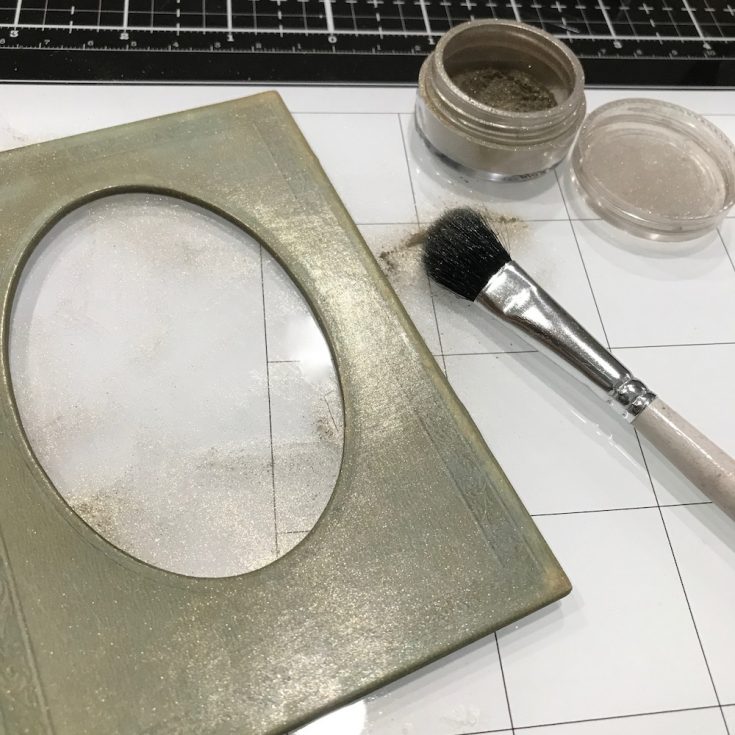
10. Sand and ink the Baseboard Frame, then brush of Perfect Pearls Powder, buff off excess and lightly mist with water to set powder.
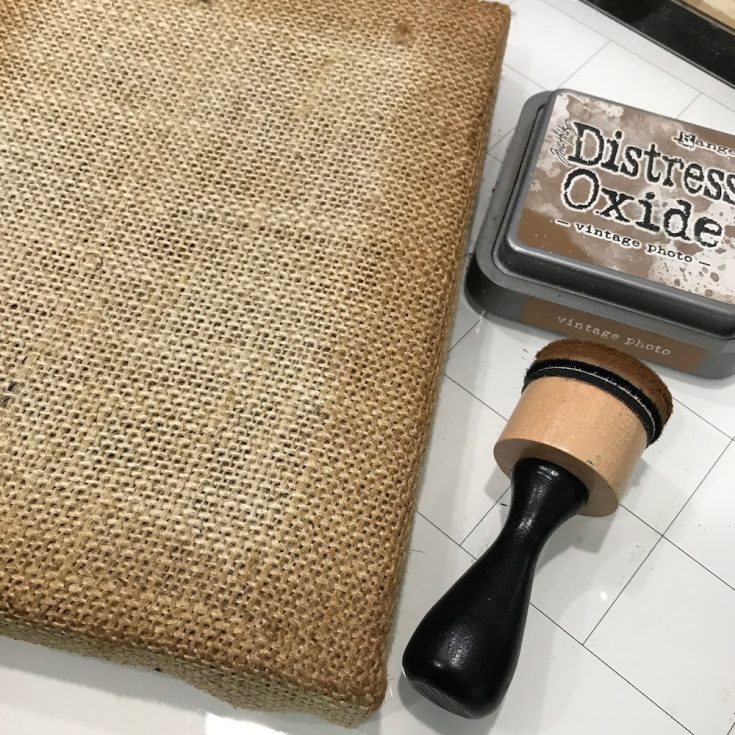
11. Ink edges of Burlap Panel with Distress Ink on an Ink Blending Tool.
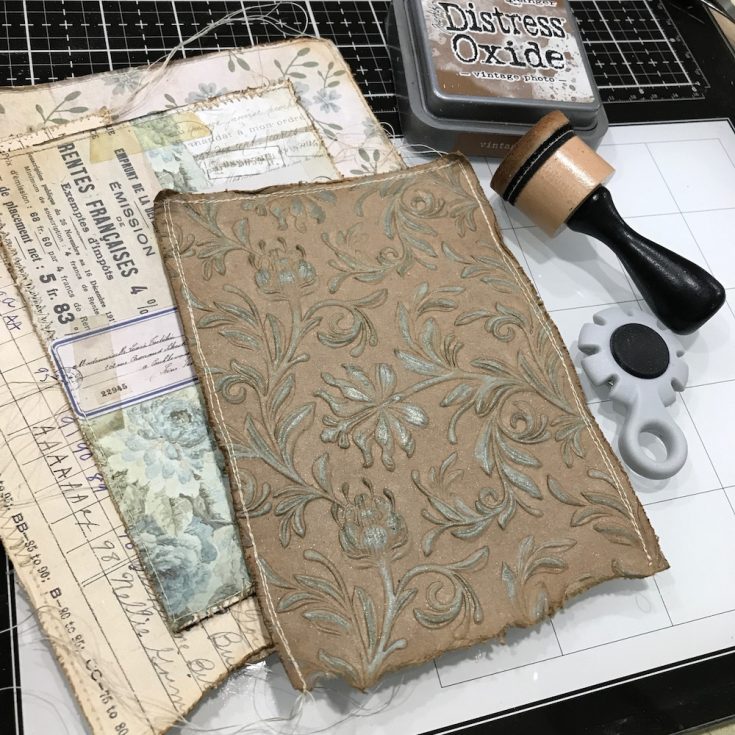 12. Cut Memoranda Paper Stash in several sizes, sew around the edges, use Paper Distresser and Distress Ink on an Ink Blending Tool to Distress edges.
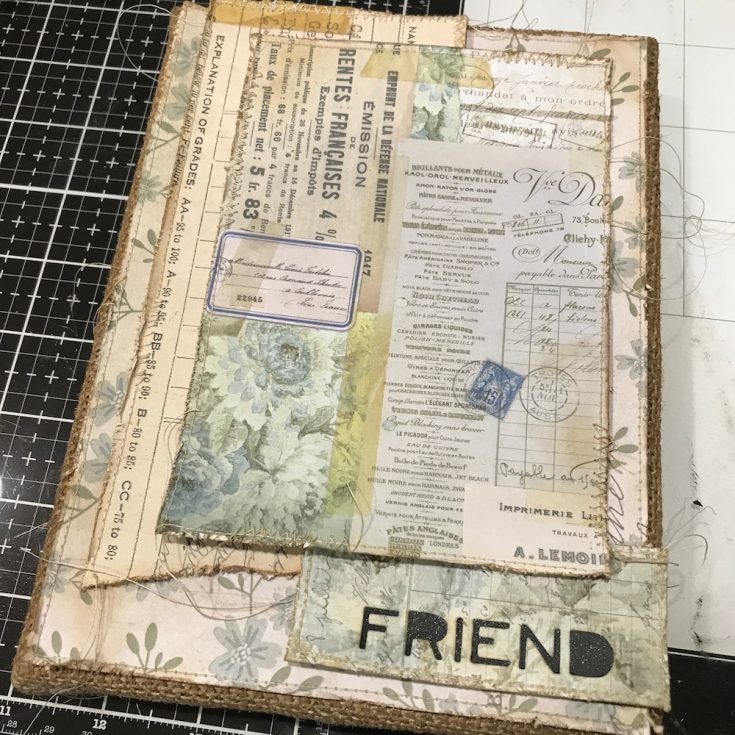
13. Adhere layers to Burlap Panel using foam tape.
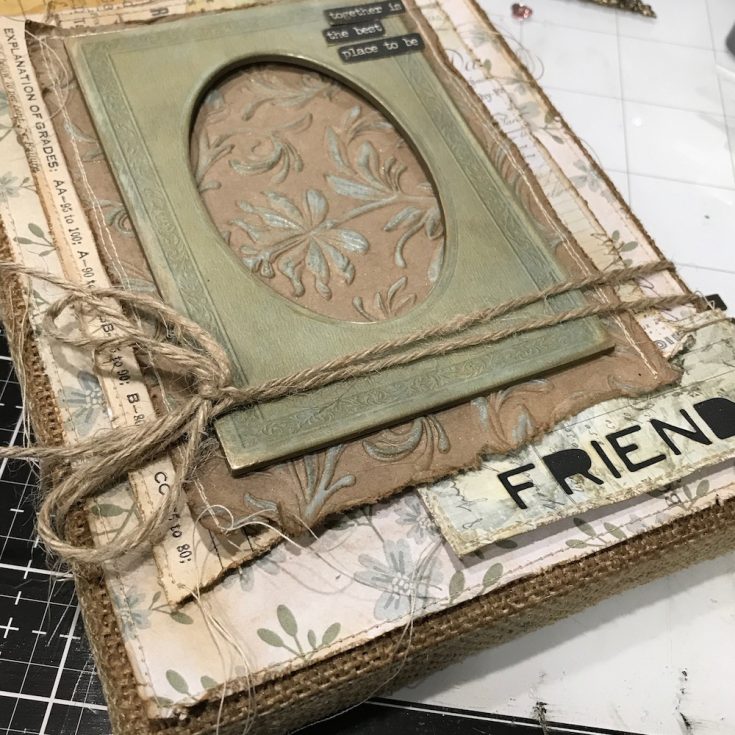
14. Adhere Baseboard Frame with Distress Collage Medium. Tie Jute String around panel with a bow.
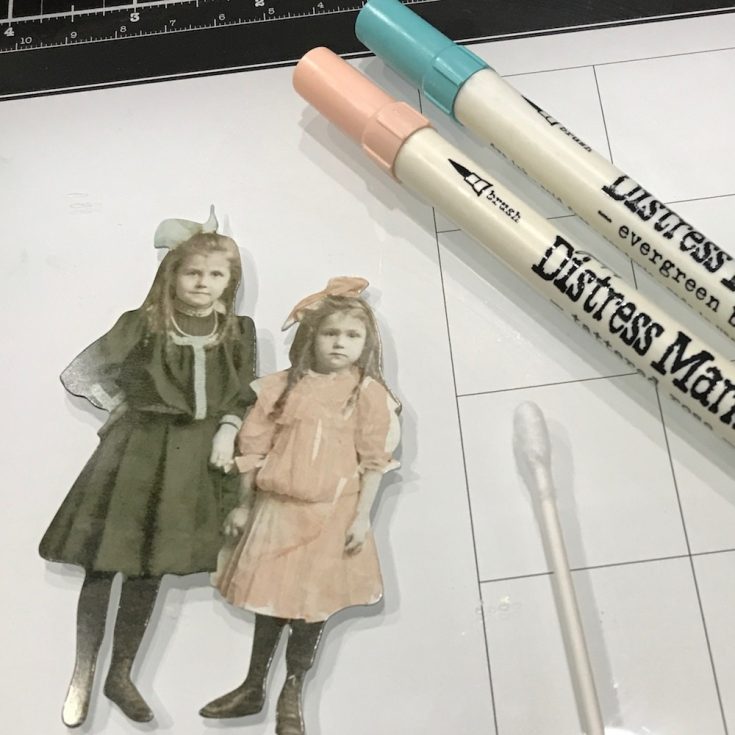
15. Color Paper Dolls with Distress Markers. Color Marker directly on Paper Doll and blend color with a cotton swab.
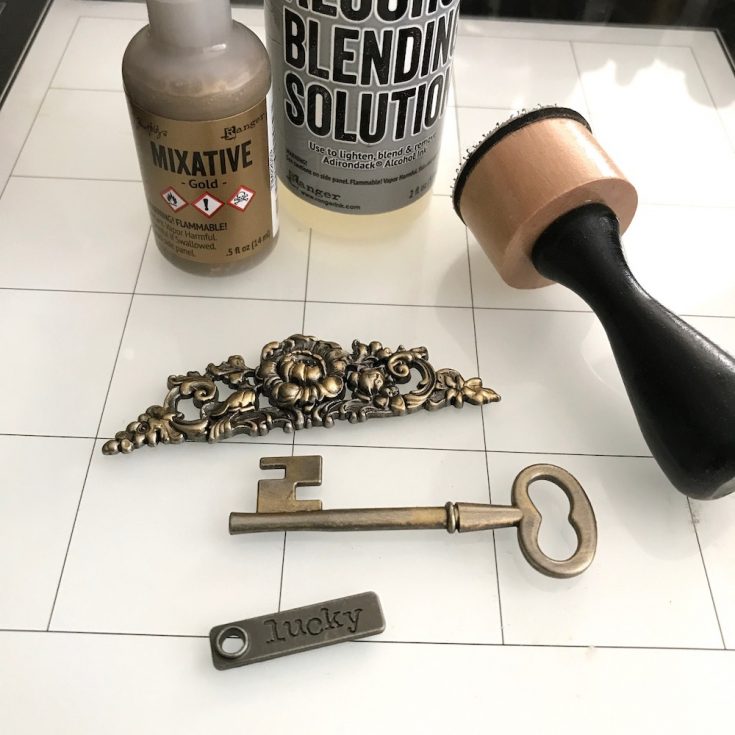
16. Apply Gold Metallic Mixative and Blending Solution to felt and color metal pieces.
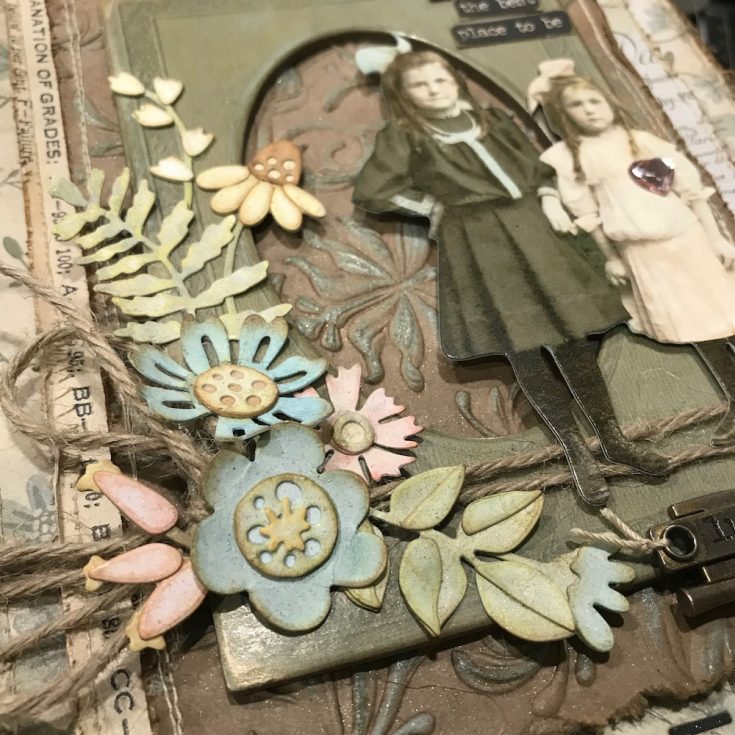
17. Adhere Funky Foliage with Collage Medium and foam tape.
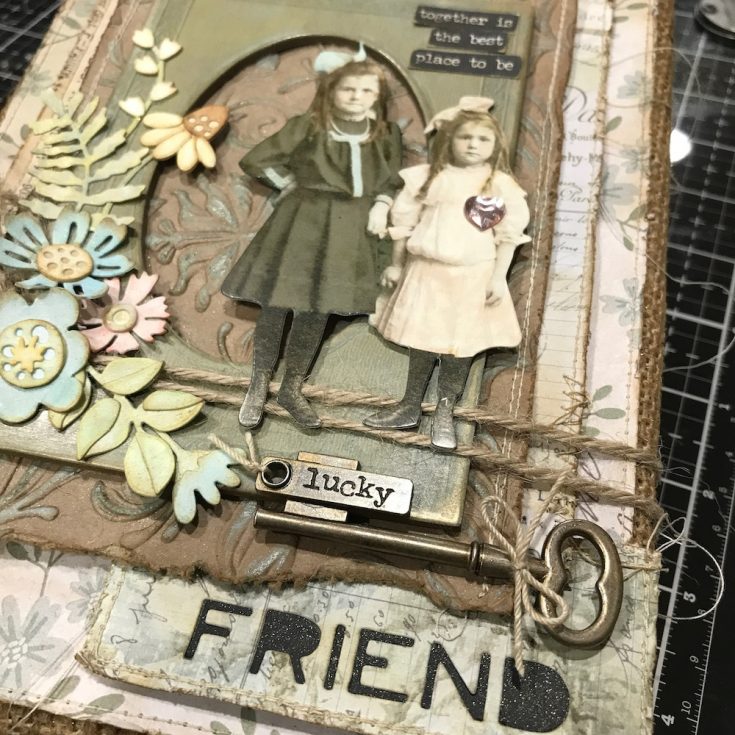
18. Adhere Paper Doll over the frame with foam tape. Adhere Small Talk, Adornment Key and Story Stick with Distress Collage Medium.
I hope you will love the Funky Foliage Thinlits Set as much as I do!
Thank you and happy crafting!
Richele
SUPPLIES:
|


Thanks so much for stopping by and thanks to Richele for being our guest!


Those dies are very pretty and I love how you coloured them. I haven’t tried using dox as a watercolour medium yet. Such a beautiful project. Hugz
How perfect. Even the colors look vintage. I already follow by email.
Awesome. Thanks for sharing.
Linda D.
Thanks for the great tutorial, this project is awesome!
Wow, fab project! Love your little pops of colour
Love the look of that. Great use of the all the products. Love to see how you colored all the pieces. Great job.
AMAZING detail! LOVE all these pieces and how it came together for one beautiful creation. Wow!
Amazing!! It looks so antique yet a little modern. I love how she described each step, it helps so much. You can tell each detail was well thought out. Excellent piece!!
I love how the flowers turned out! :)
Such an awesome project!
Thanks for sharing.
Love what you did with the Botanical Texture Fade. Very cool project!
Love how you coloured the flowers!
Fabulous project! I love all of those layers! TFS
This is beautiful! Love the colors you chose and the different layers and mediums.
I love seeing the different steps of this project. Just beautiful!
Just stunning
Oh this is so pretty
and love all the texture!
Carla from Utah
Such a lovely panel. Love all the details.
Distress oxide are my favorite inks!
Love the soft colors the distress oxides produce! Beautiful project!
This is a beautiful piece of art. It looks so antique that it looks like it should be found in an antique sale.
Thank you for the inspiration.
Absolutely stunning shabby vintage creation! I love everything about it! :)
I really appreciate that you took the time to post all of the photos and instructions. It helps me to see how your beautiful project came together. Thank you!
Wonderful layers – love all the different levels of colour and texture!
This is gorgeous – I love all of your layers and especially the shimmer from the Perfect Pears. So inspiring!
Absolutely gorgeous vintage look to this card with so many fabulous embellishments. Love the subtle addition of colors.
This so cool! Love the die cuts coloured with distress oxides.
What an incredible creation ! Thanks for sharing the process.
so very pretty!!
Wow, fabulous amount of detail! And love how you coloured the flowers, too! Gorgeous project, thank you for the inspiration
LOVE
O
V
E
LO
VE
I am just speechless. This project is amazing.
Love all the details!
Your work is consistently awesome & inspiring. I always learn something new from each of your posts. Thank you for sharing so much with us.
Well done! Very creative!
Beautiful project! Love how you did the flowers!
I have never thought of inking my die cut flowers. THEY LOOK WONDERFUL! So glad that I saw this particular post because I will do that from now on.
What a great gift that will make. The vintage look is great–leave it to Tim…
Wonderful project!!! Thanks for sharing this tutorial!!!
Those flowers are divine and so is that 3D embossing! WOW! FABULOUS!
Love the flowers!
This is so gorgeous! I really love that embossed panel; the inking really makes it pop!
You already KNOW I’m loving this ! I NEED Funky Foliage (squeal); love these florals! You rocked that 3-D background, love the kraft asnd those colors; just so classy !!
Beautiful panel!
I’m always amazed at the layers and layers of details on projects like this – it is simply stunning!
Wow this is just outstanding, such wonderful detail and put together perfectly, great tutorial too!
I absolutely love all of the layering and use of textures on your panel Richele. What a lovely piece for home decor. Beautiful work!