Tips + Tricks to Mass Produce Cards: Yippee for Yana

Hi friends! Please join me in welcoming back the oh-so-talented and amazing Yana Smakula! (Please note: our dear friend Yana is Ukrainian. To show support to our brothers and sisters in Ukraine, please see Yana’s post HERE.)
Hello, crafters, this is Yana Smakula for Simon Says Stamp! Welcome back for another Yippee For Yana video!
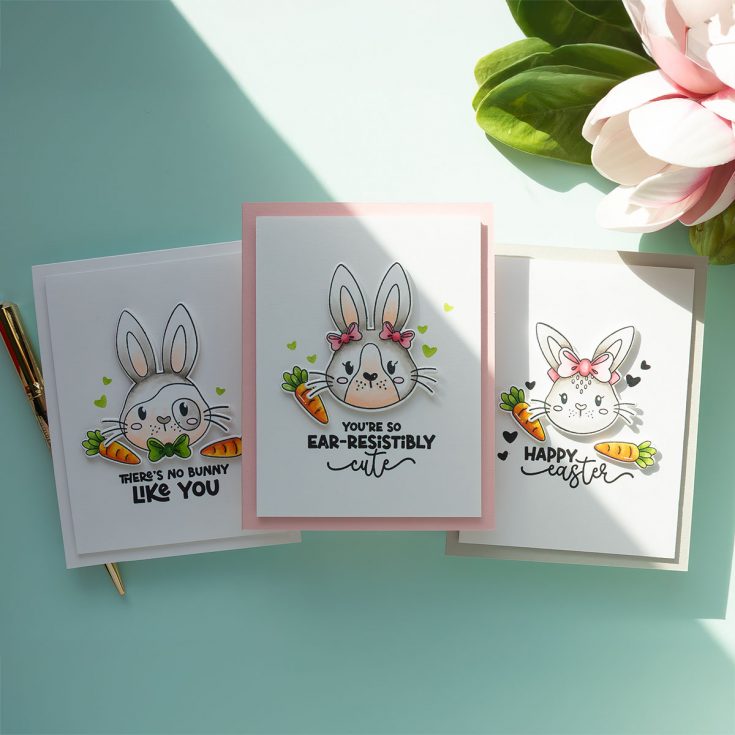
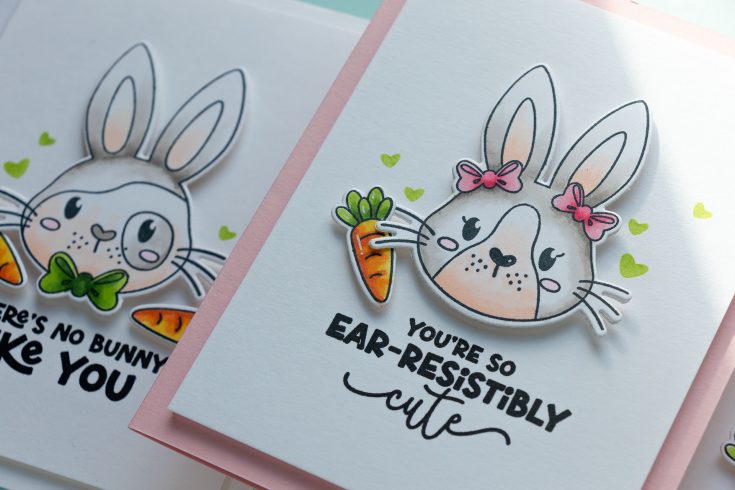
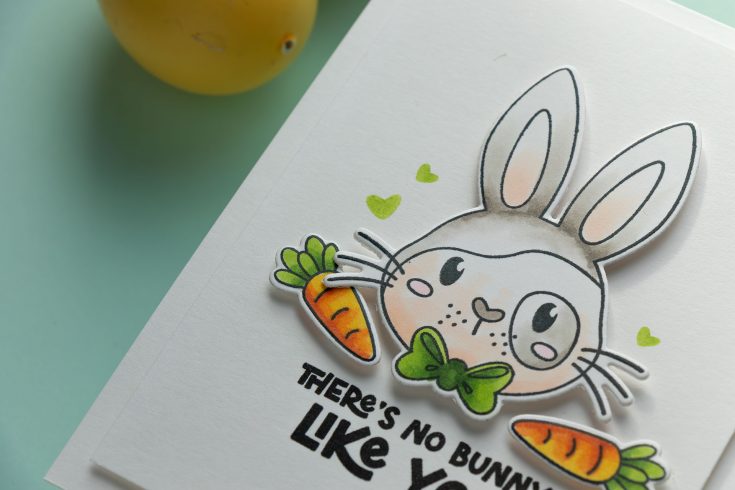
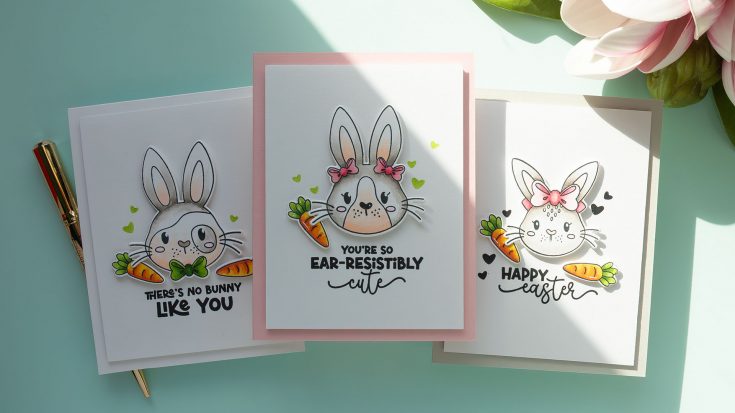
In today’s Yippee for Yana episode, I’m sharing four cheerful Spring and Easter-themed cards featuring the Ear-resistibly Cute stamp set from the latest Simon release. These sweet little bunnies completely stole my heart, and I had such a great time creating with them!

Whether you’re sending Easter greetings or celebrating spring, these cards are perfect for spreading joy. Plus, I’m sharing one of my favorite simple strategies for mass-producing cards – so if you’re making a stack of handmade happiness this season, I’ve got you covered.
Meet the Ear-resistibly Cute Stamp Set
This brand-new 6″x8″ stamp set, complete with coordinating dies, is packed with adorable bunny images and sweet sentiments that are perfect for spring.

I stamped a whole bunch of bunnies on Neenah Solar White 80lb cardstock using Memento Tuxedo Black Ink (perfect for Copic coloring). A quick tip – don’t forget to re-ink your black ink pads! It makes a huge difference when you want those crisp, bold outlines.

Simple Copic Coloring for Easy Mass Production
Keeping things simple and repeatable was my goal, so I used warm gray Copic markers (W5, W3, W1) to color my bunnies, along with a colorless blender for smooth transitions. Their little noses, ears, and cheeks got a blush of soft pink (RV00), and I used E00 and E000 to add warmth to their sweet faces.
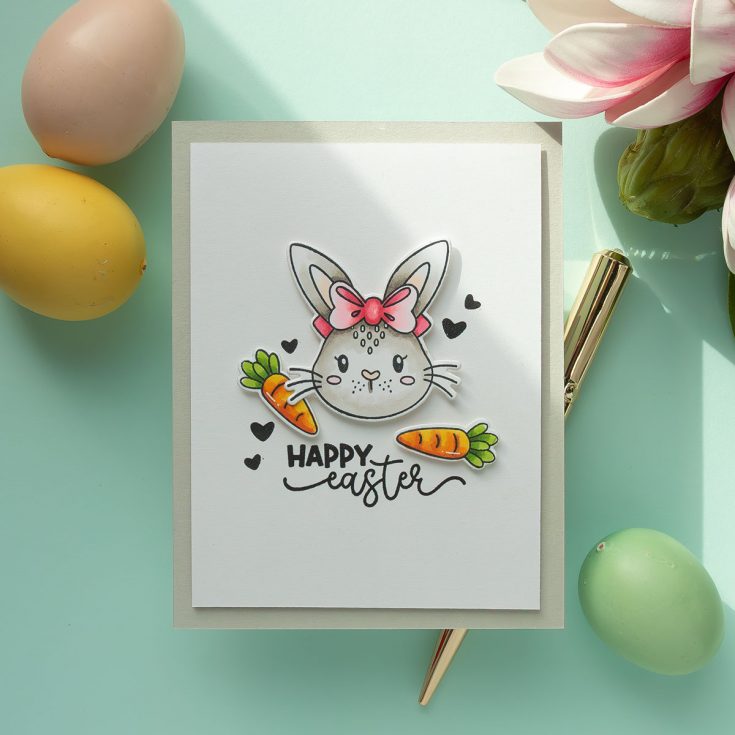
The embellishments – bows and flowers, were colored in a soft pink palette (RV14, RV13, RV11) with pops of green (YG67, YG17, YG03) and yellow (Y35, Y15).

Plan, Prep & Assemble: My Mass Production Process
I like to batch my work to streamline the card-making process:
- Stamp all images
- Color everything
- Die-cut everything
- Prepare card bases and panels
- Select and stamp sentiments
- Assemble the cards
Breaking things down into steps saves time and makes it easier to create multiples without feeling overwhelmed.

Bringing the Cards Together
At first, I planned on using white A2 card bases with cream panels, but I decided to add more color variety with cotton candy pink, fog, and classic white bases. My panels (cut to 3.25″ x 5″) are popped up with Simon Says Stamp foam sheets for dimension, and I used foam adhesive squares to pop up my bunnies and accessories.
I also stamped a few carrots (who can resist?) and tucked them into the designs, colored with YR18, YR15, Y35, and used little stamped hearts to fill the backgrounds. For sentiments, I used VersaFine Onyx Black Ink – it gives a beautifully crisp, dark impression that makes the greetings pop!
Once everything was in place, I had a sweet collection of Spring and Easter cards, ready to brighten mailboxes. Whether you’re making just one card or a whole batch, these little bunnies are irresistibly cute and so much fun to create with! Happy crafting!
WATCH THE VIDEO:

SUPPLIES:
|


Ways to support Ukraine:
If you are looking for ways to support Ukraine, we encourage you to visit this page on Yana’s blog:

Thanks so much for stopping by, and thanks to Yana for being our guest!


Really great cards – and thanks for the tips!
Cosmetics and personal care products play an important role in enhancing beauty and maintaining well-being. From skincare essentials like moisturizers and serums to makeup and hair care items, these products help individuals feel confident and refreshed. For those looking to make informed purchases, musely reviews offer detailed insights from real users, helping consumers evaluate the effectiveness and suitability of various products. Whether it’s about tackling acne or finding the right shampoo, these reviews guide shoppers in selecting the best options tailored to their needs. With a wealth of choices available, trust in genuine feedback is key for a satisfying experience.
Learning and actually doing are really important to bring effective approaches for learners. Always be creative and improve your block blast skills to create impressive works. Attract with new updates. Thanks to the source of information, people can easily catch up on how to create their own projects.