Tim Holtz Holiday Collage Christmas in July Class Inspiration Part 3: Greeting Display Panel by Paula Cheney
YES, this magnificent piece of art you see below was made with the class kit too! WOW! Please join me in welcoming special guest Paula Cheney for this additional inspiration, and read on for all the fabulous details! Enjoy!
Psst! As a friendly reminder… there’s a FREE Virtual Class that just dropped yesterday, and it’s packed with inspiration to help you get the most out of your kit! (if you missed our LIVE virtual class yesterday, click or tap HERE to rewatch all the FUN!)
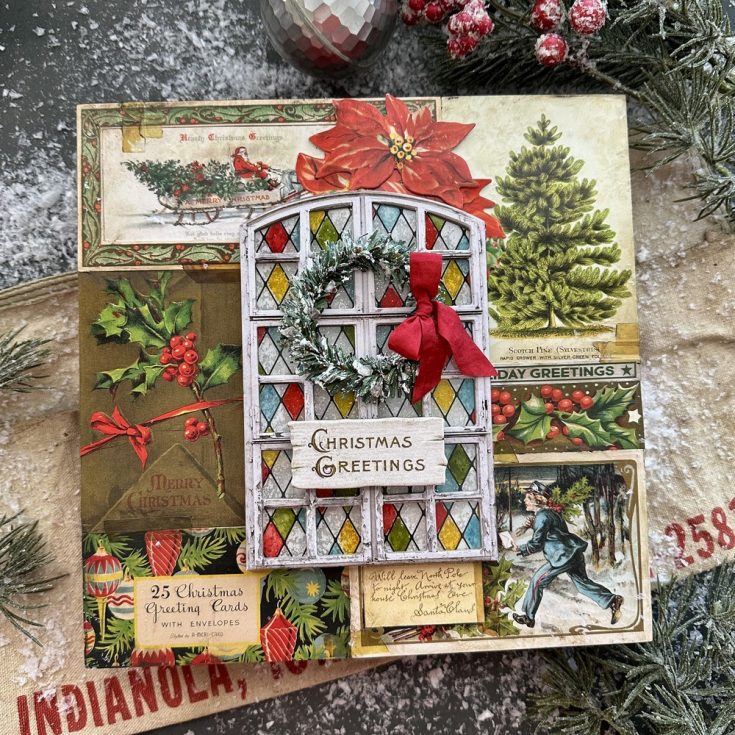
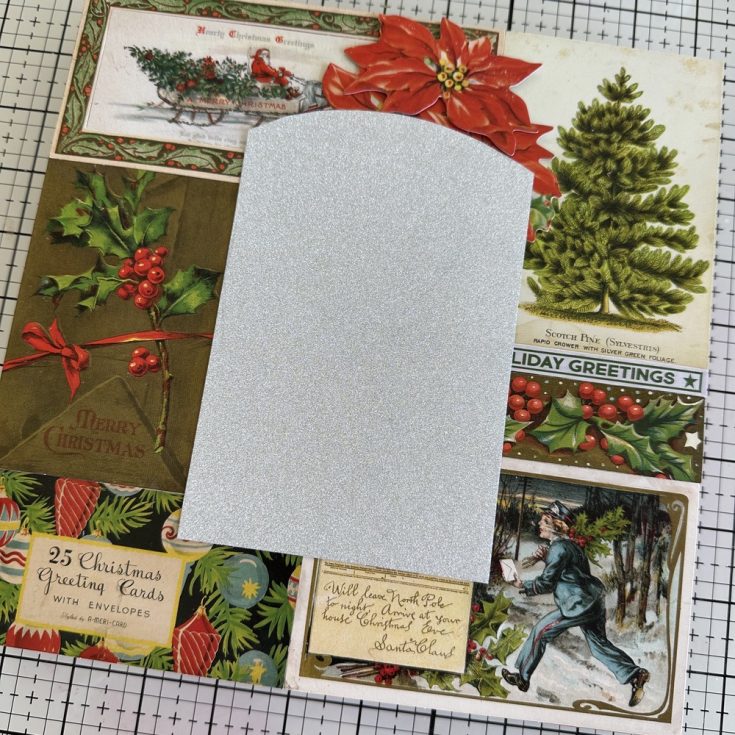
I was so excited to receive the Simon Says Stamp/Tim Holtz Christmas kit! It’s absolutely packed with products, and I couldn’t wait to open it and get a head start on my Christmas crafting. I chose an idea-ology Display Panel as my base and then used kit components like Christmas Layers and Paper Dolls, Christmas Baseboards and Transparencies, Wired Pine Stem and Kraft Stock Sparkle to bring to life my favorite kind of piece: vintage-inspired decor!
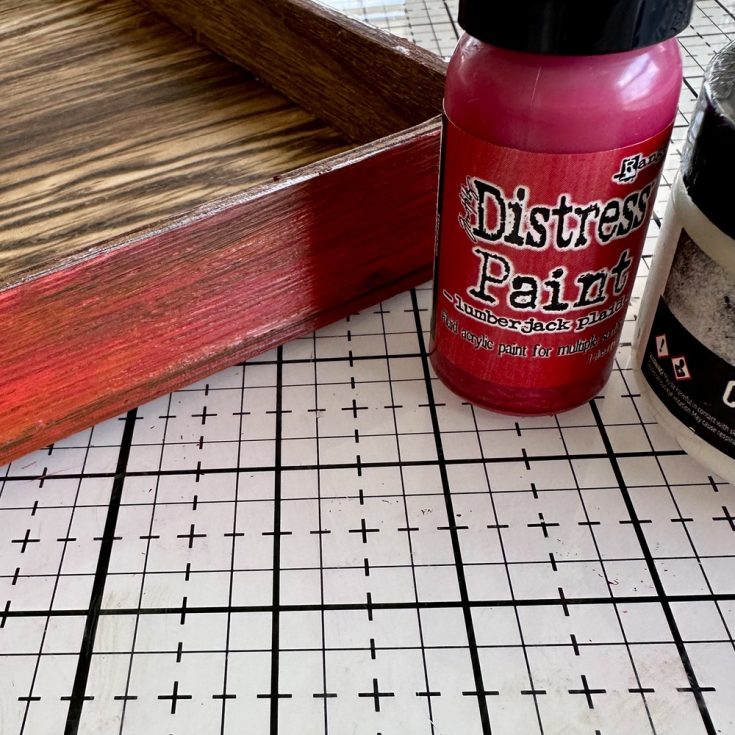
Paint the sides of idea-ology Display Panel with Lumberjack Plaid Distress Paint. Once dry, sand the painted surface to let some wood show through. Finish by adding a thin layer of Collage Medium, then set aside to dry.
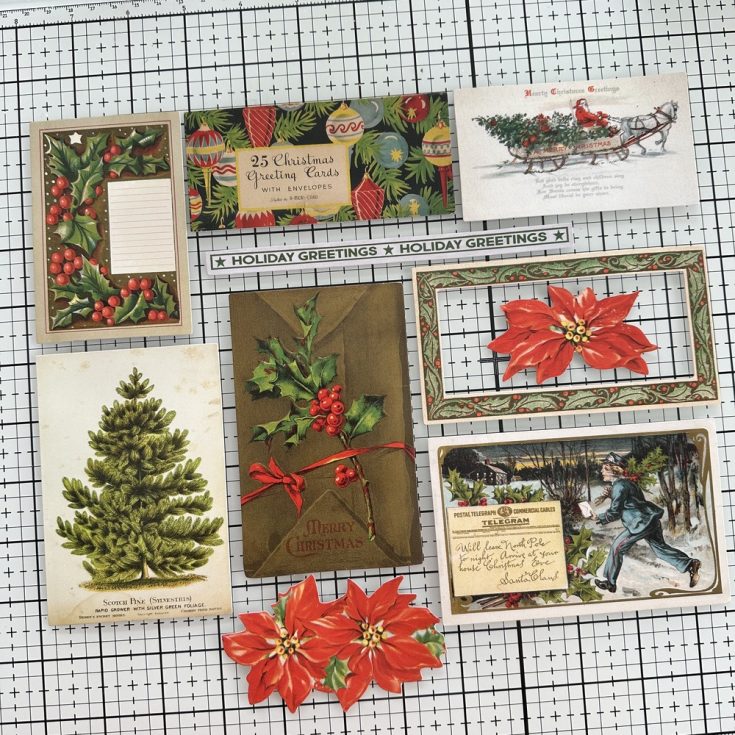
Pull ten pieces of ephemera from the Christmas Layers & Paper Dolls pack.
Alter some of the pieces to accommodate the size of the Panel.
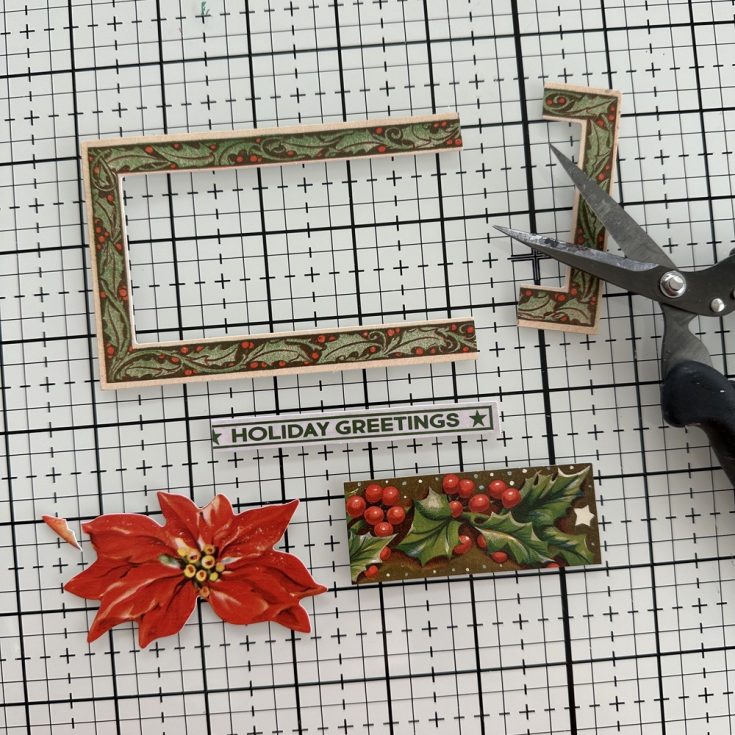
Cut 7/8” off the right end of the frame (save both pieces)
Cut Holiday Greetings strip to 3”
Cut holly to 2 3/4 long”
Cut light colored petal tip off the left side of the poinsettia
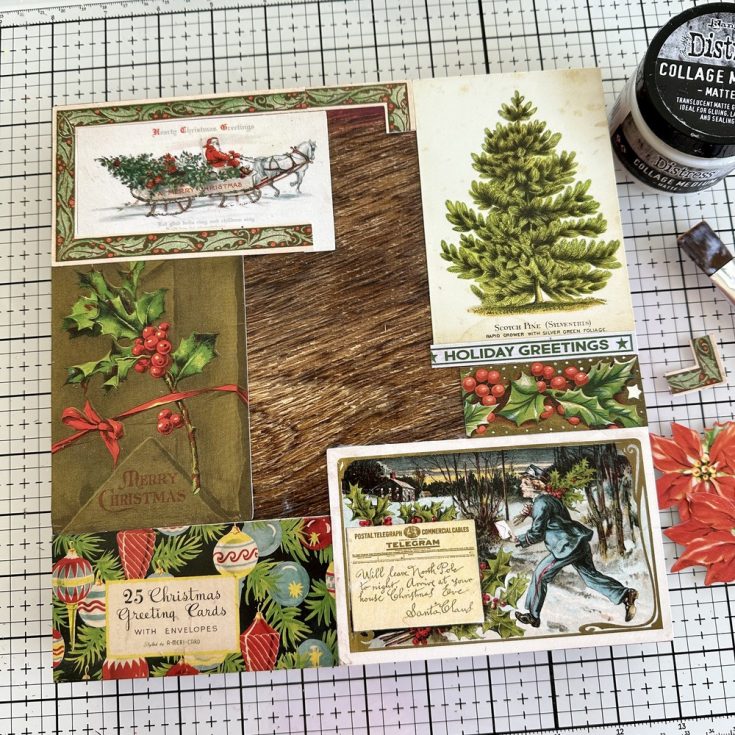
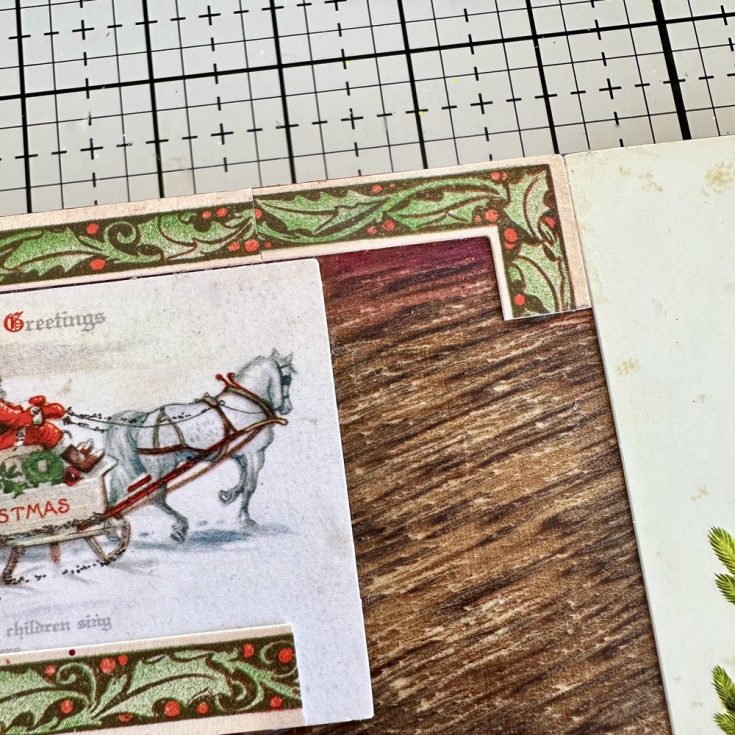
Use Collage Medium to add Layers ephemera to the panel. I started with the two pieces at the bottom because they fit perfectly across the panel and then worked my way around the panel. The large card with the holly on the left was cut off at the top to fit in the space.
I added part of the leftover piece of the frame to finish the top. Don’t worry, the rest of the area will be covered in the next step and you won’t be able to see the break in the frame either.
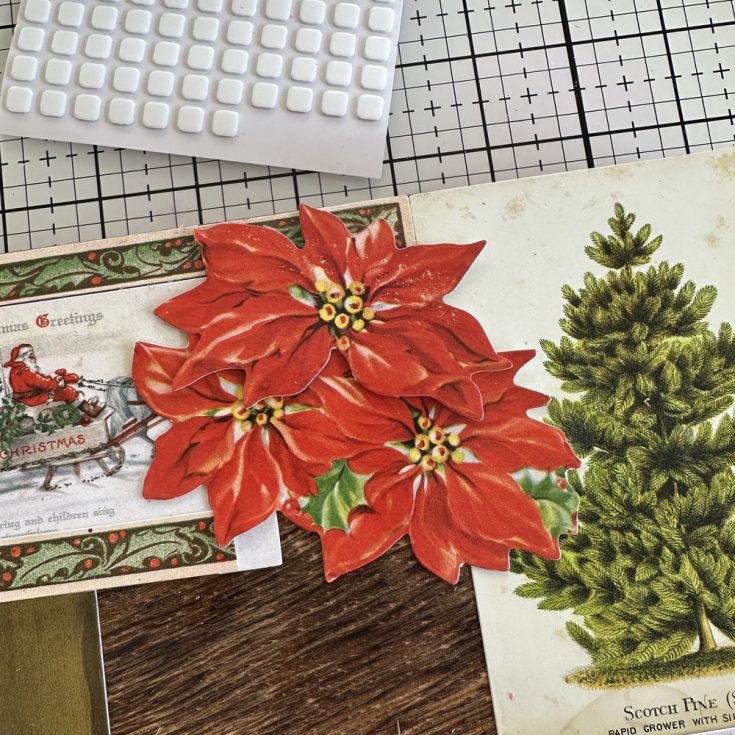
Add the double poinsettia to the panel with Collage Medium. Add the second, single poinsettia with Thin 3D foam squares. Make sure the petal of the poinsettia covers the break in the frame.
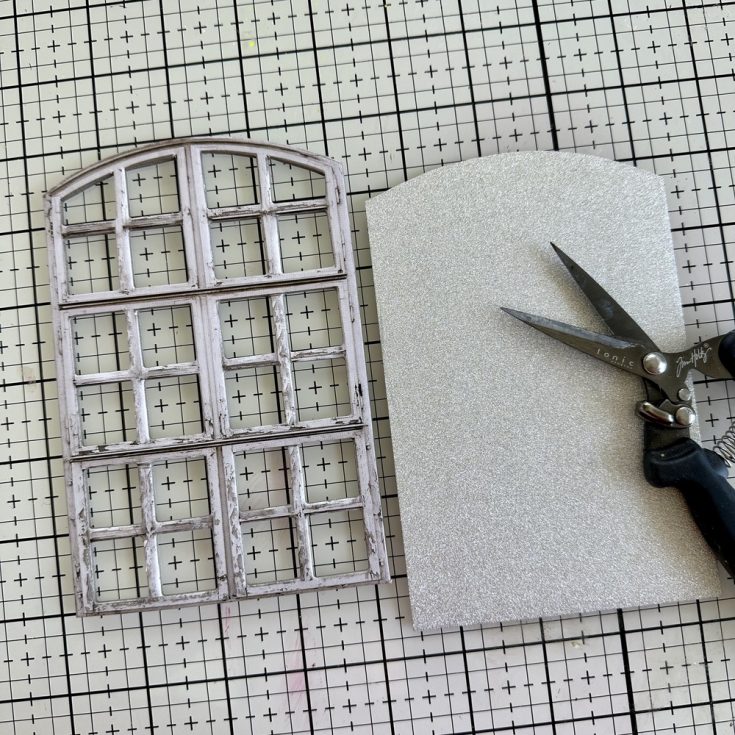
Cut a piece of Kraft Stock Sparkle using the large white frame from the Christmas Baseboards and Transparencies pack as template. Set aside.
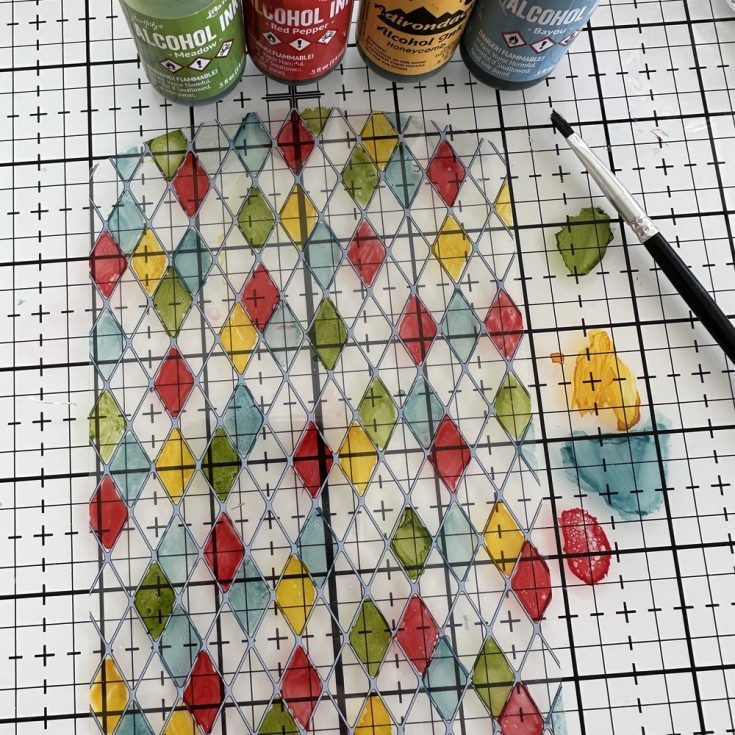
Pull the transparent shape from the Christmas Baseboards and Transparencies pack that matches the window. Working on the backside of the transparency, use a small brush from the Alcohol Ink Tool Set to paint the diamond pattern with Alcohol Ink. I chose Meadow, Red Pepper, Honeycomb, and Bayou. Squeeze out a small amount of Alcohol Ink onto the glass Studio Mat. Pick up with brush and just paint it on. It’s just that simple. If you get ink outside the shape, use a cotton swab and a bit of Isopropyl Alcohol to remove it.
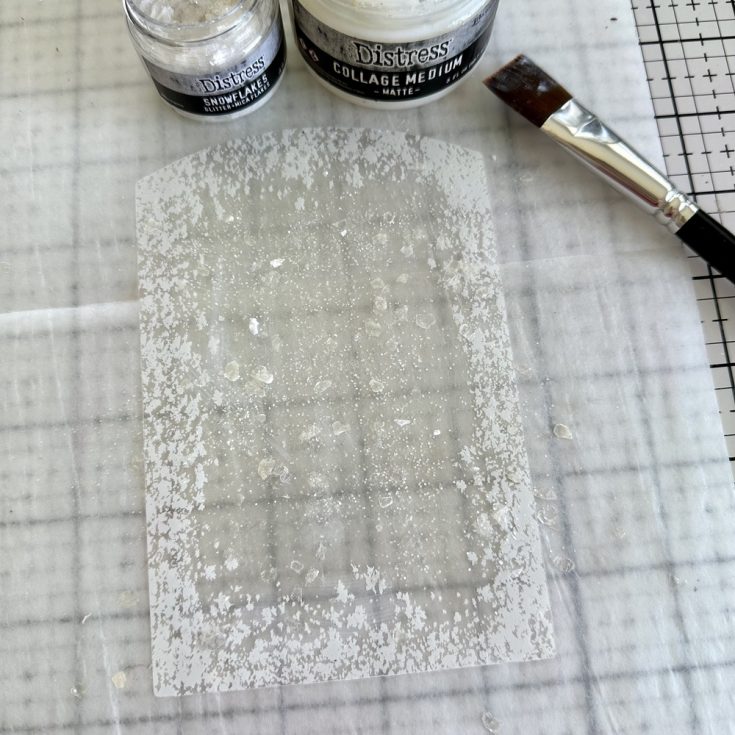
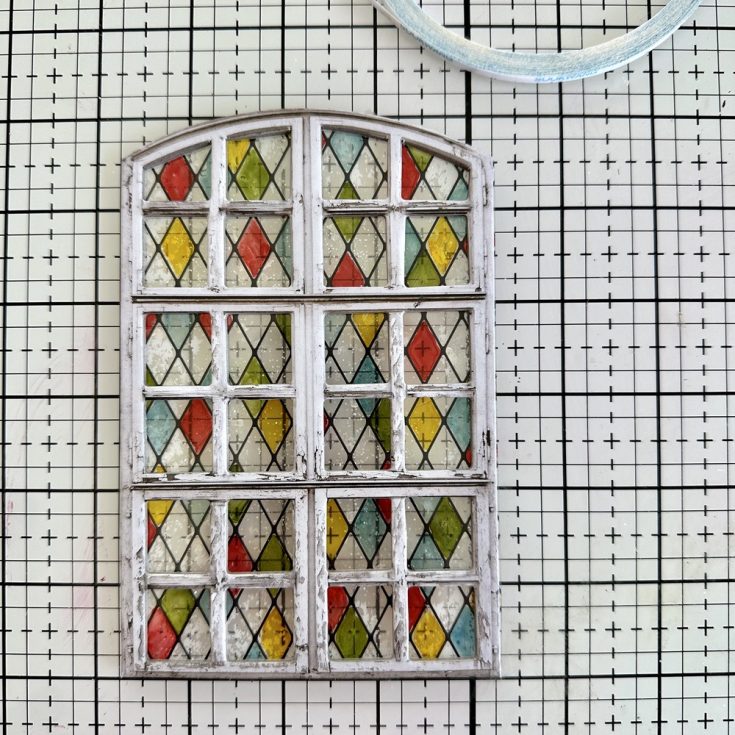
Pull a second transparent shape from the Christmas Baseboards and Transparencies pack that has snow along the edges. Paint the clear part of the transparency with Collage Medium, then lightly sprinkle Distress Snowflakes over the top adding both glitter and a few Mica Flakes. Let dry.
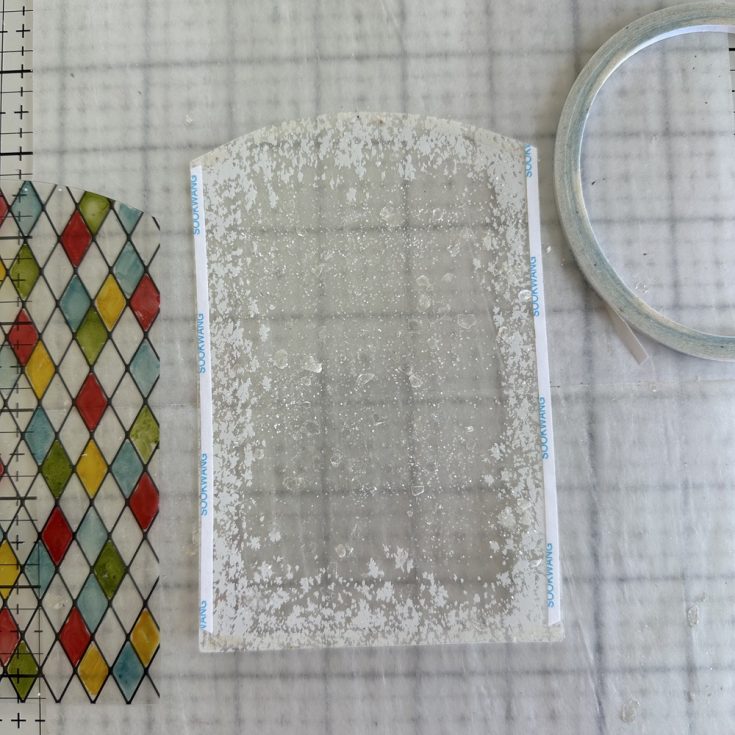
Add 1/8” Scor-tape to the edges of the transparency.
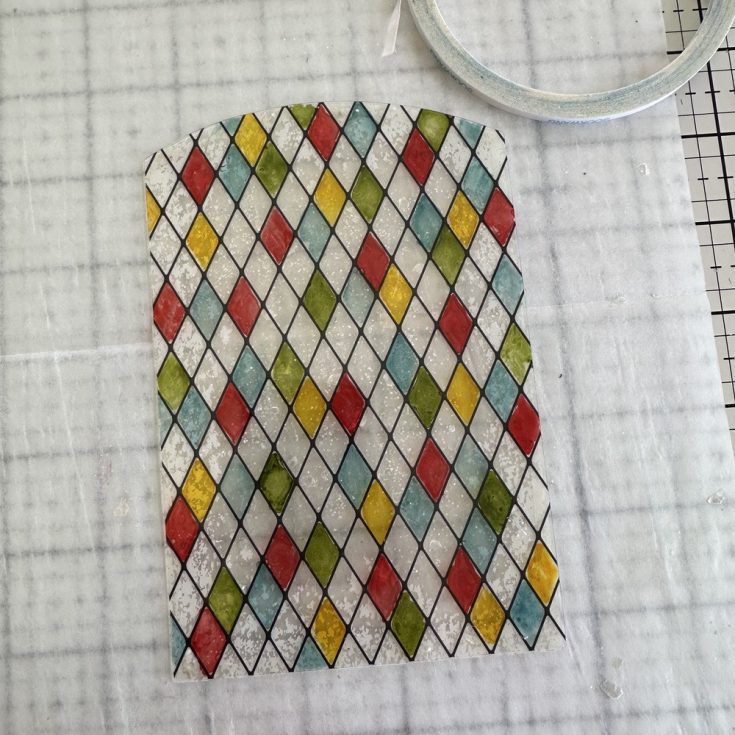
Adhere the ‘stained glass’ widow over the top of the snow window.
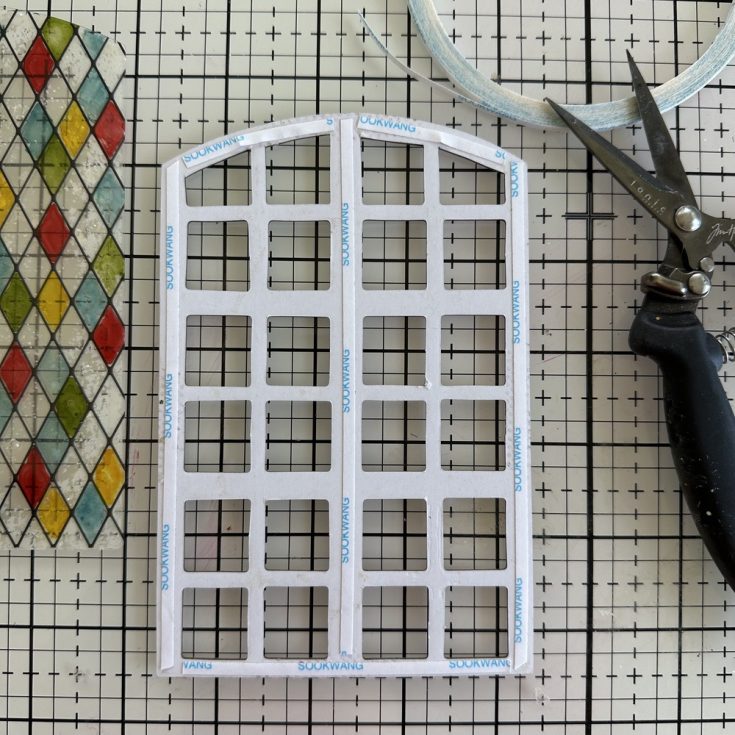
Add 1/8” Scor-tape to the edges of the baseboard Window.
Adhere the window to the transparencies.
Turn over and add double or even triple stacks of 3D Foam Squares to the back of the window.
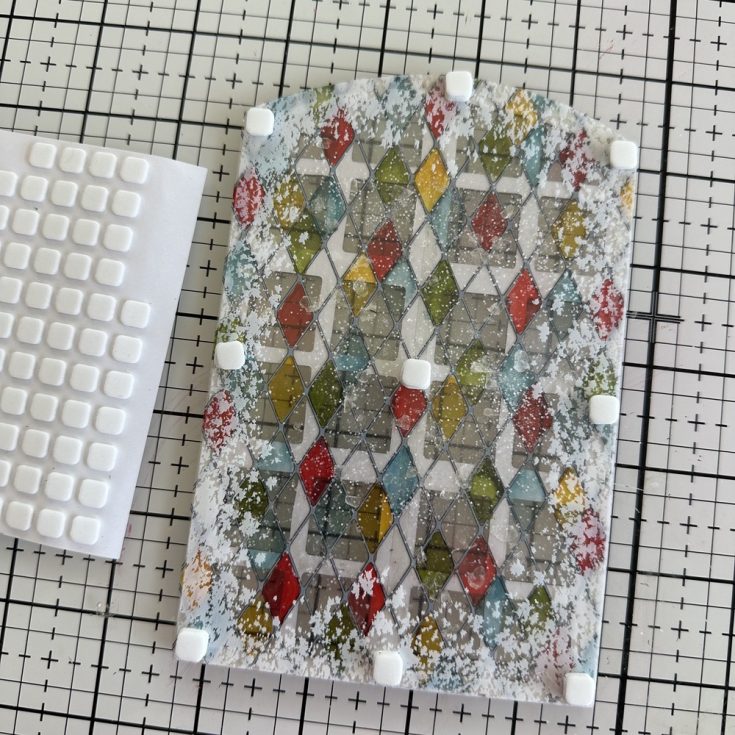
Use Collage Medium or 1/2” Scor-tape to add the previously cut Kraft Stock Sparkle to the panel. The Sparkle will really come to life in the evenings when the lights are low!
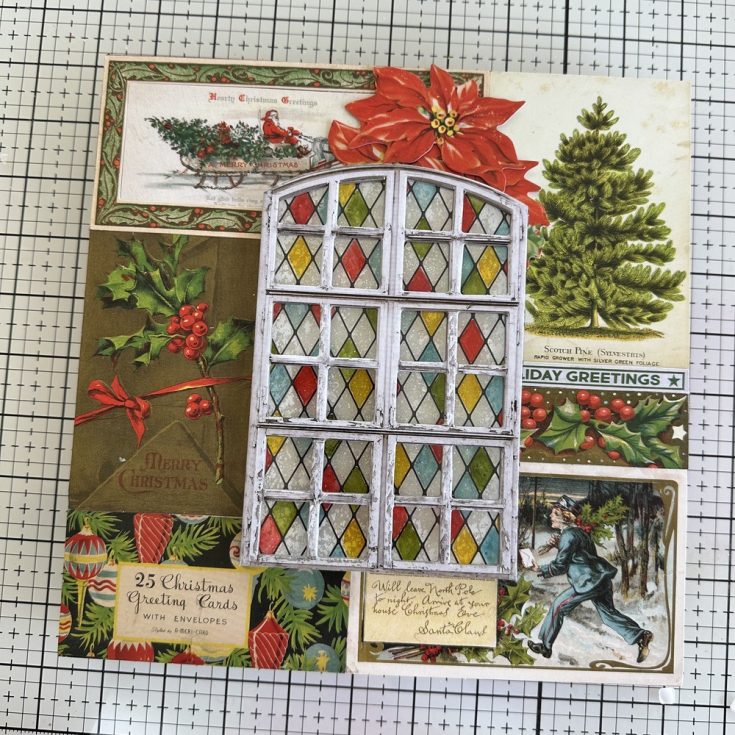
Peel the paper off the 3D Foam Squares and adhere the window over the Kraft Stock Sparkle.
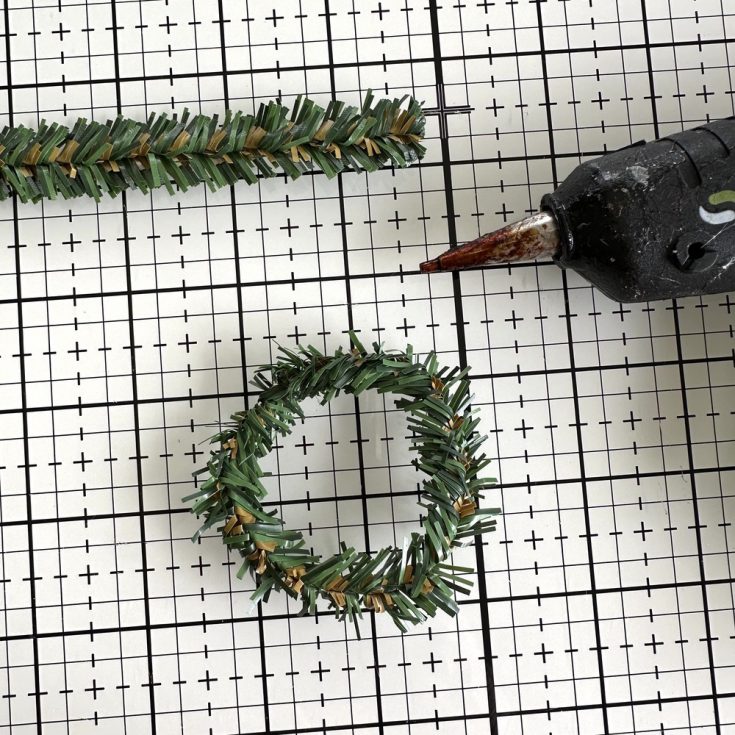
Cut a 7” piece of wired Pine Stem. Bend into a circle and secure ends with hot glue. Hold together till glue cools.
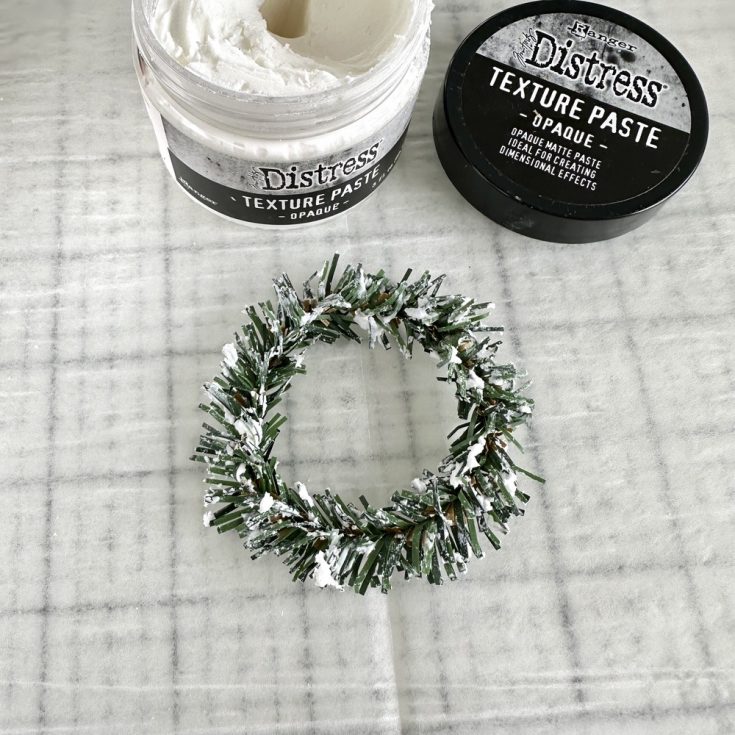
Use your fingers to add Distress Texture Paste Opaque to the pine wreath. Try to make sure the majority of the pine is covered with the paste.
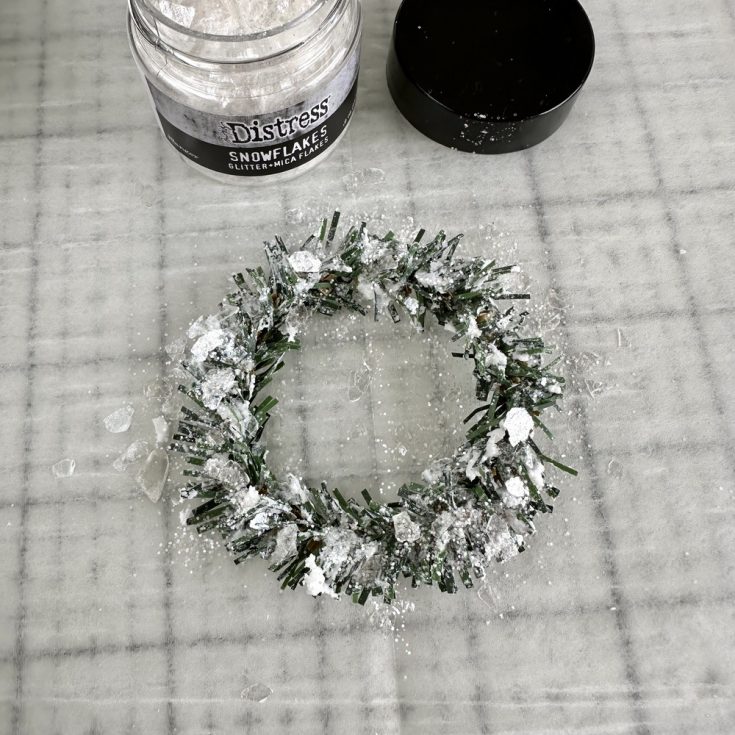
Immediately sprinkle Distress Snowflakes over the top of the wreath. Let dry before picking up.
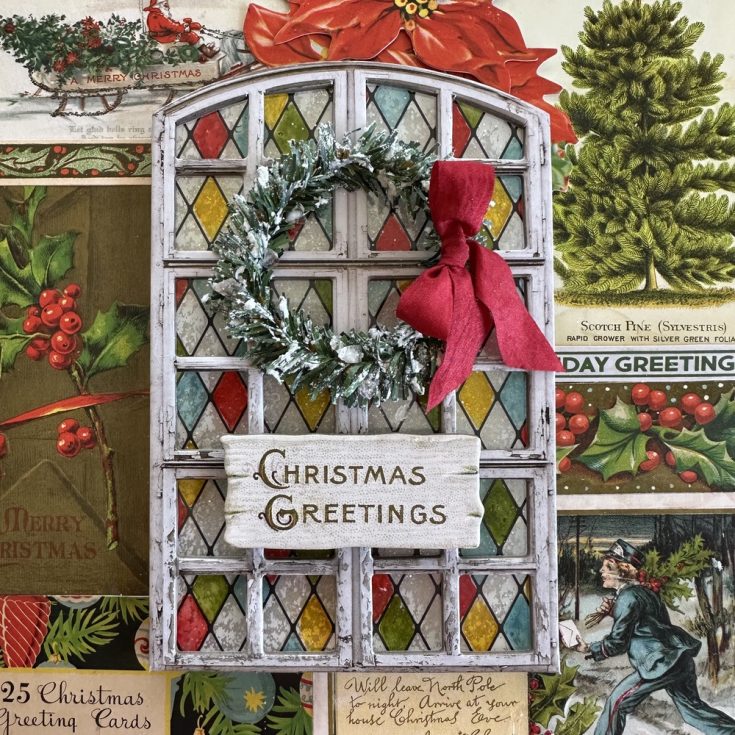
Use hot glue to add a red ribbon bow to the side of the wreath. TIP: tie the bow, then mist with water to get the right shape. Dry with a heat tool, then spray with hairspray to keep the shape over time (I think that’s important with Christmas decor). Adhere the wreath to the window with hot glue. Add 3D Foam Squares to the back of the “Christmas Greetings” sign from the Christmas Baseboards and Transparencies pack and add to the window.
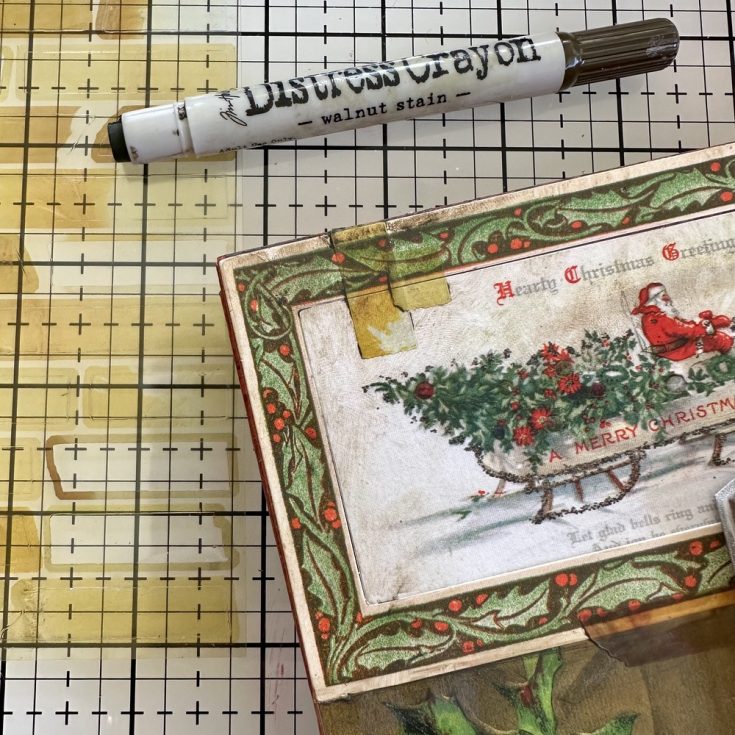
Add multiple pieces of Cello Tape Stickers to the cards on the panel so they appear to be taped down. Scribble Walnut Stain Distress Crayon over the tape and rub it with a damp fingertip to create build up along the edges of the Cello Tape. I like to do that by touching a wet wipe, then rubbing the crayon. If you get too much, just pounce over the crayon with a wet wipe.
SUPPLIES:
|


Thanks so much for stopping by today, and thanks to Paula for this GORGEOUS inspiration!


Absolutely Gorgeous panel, Paula!!!!
I love this! What a gorgeous, festive make!
Beautiful work! What a great way to use more of Tim’s / SSS Kit!
WOW! This is amazing!
This is so beautiful, Paula! I can’t wait to try this project. Your instructions are wonderful! I really appreciate all of the inspiration that you provide!
so gorgeous
This is superb! I especially love the center portion w/ the leaded window.
Lori S in PA
Paula Cheney’s greeting display panel brilliantly showcases Tim Holtz’s holiday collage techniques, inspiring my own Christmas-in-July projects. Her confetti canon layered ephemera, subtle distressing, and dimensional framing demonstrate masterful composition and balance. I value how she transforms ordinary substrates into heirloom décor, reminding me that curated nostalgia can energize mid-year creative momentum.