STAMPtember® with Paper Artsy!
Hi everyone. I’m Ellen Vargo. I am a signature designer for PaperArtsy, as well as a former design team member for Simon Says Stamp & Show. I am thrilled to have the chance to do a guest post STAMPtember® and thought I would take it a step further and design an exclusive stamp set for the event. I’m a big fan of flowers, so I wanted to do some hand drawn sketchy designs. Below I’m showing 3 different ways to use them for cards, adding some of my other stamps as well as other fabulous PaperArtsy products. I hope you enjoy them!
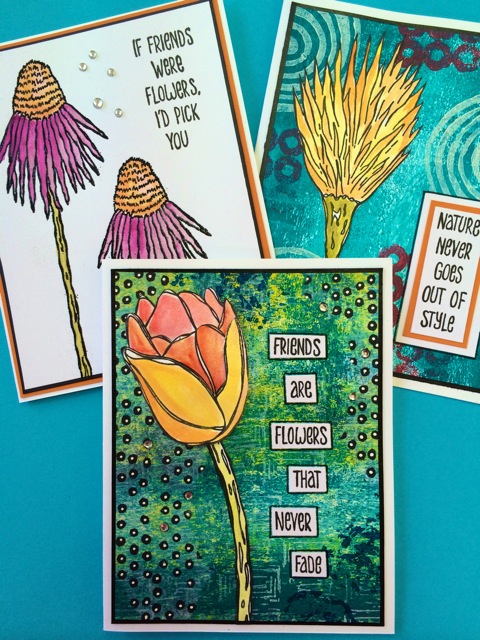
The first card in the set shows how you can make a clean and simple card using just one stamp set. I used Versamark ink and black embossing powder to emboss the coneflower two times onto PaperArtsy’s Smoothy Heavyweight card stock, then painted the flowers in with a watery mix of Fresco Finish chalk acrylic paints. Then I stamped the sentiment with Versafine black onyx ink directly onto the card front. I added a black outline with a sharpie paint pen, matted the whole card front onto orange card stock, and with a few sequins you’ve got an elegant and simple one layer card.

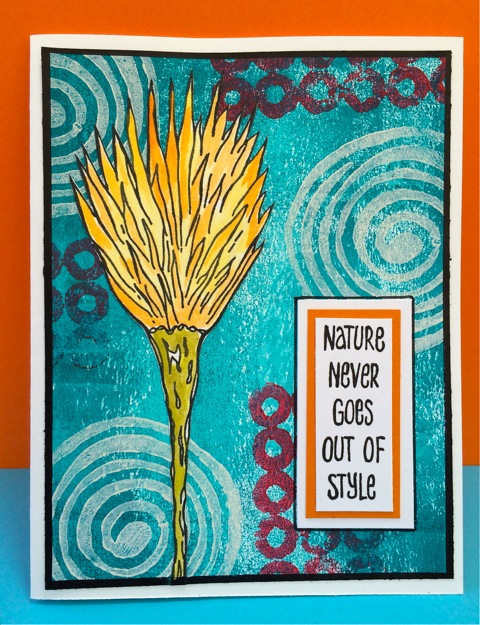
The second card shows more of my typical style, which is very mixed media / painty / inky. I used a brayer (inky roller) with Fresco Finish paints to create a multi layered background and added some paint-stamping with stamps from EEV01 and EEV06. Then I stamped the fringy flower from the exclusive stamp set onto white card stock, painted it in with Fresco Finish paints, and then did some fussy-cutting and adhered it to the card. The fussy cutting allows you to layer a bright flower onto a darker background. The sentiment was stamped with Versafine black onyx ink, double matted and outlined with a black fine-line pen so it would stand out.
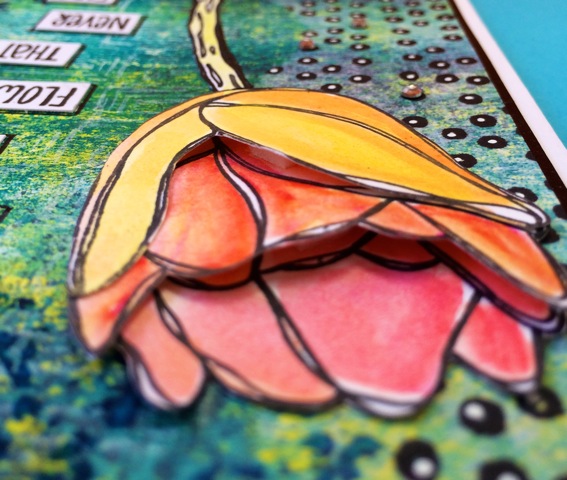
And our final card shows how to make another mixed media background with a dimensional flower. I created another multi-layer background with a brayer (inky roller) and Fresco Finish paints, then added some textural stamping with archival inks as well as paint, and this time I added a layer of tissue paper collage made with the dotty stamp from EEV06. Added some white dots as accents with a white paint pen and a few scattered sequins. I stamped the tulip three times and painted it in with coordinating but different fresco paints, and then cut different layers from each flower, gluing them on top of each other with foam dots between the layers. The dimension doesn’t show too well in the main photo, but there’s a detail pic below so you can see.
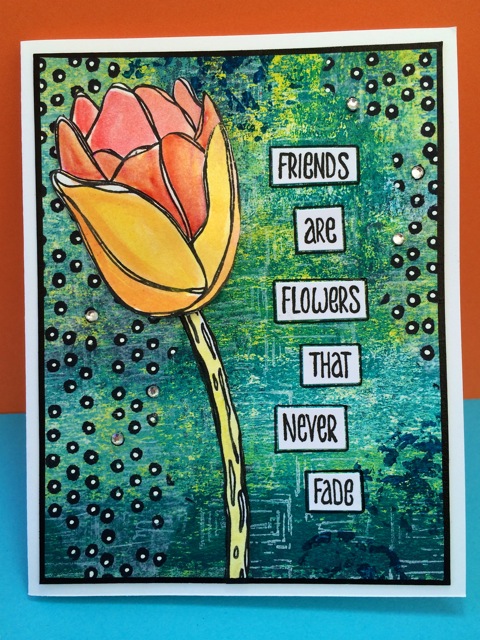
This picture shows the dimension of the multi-layered tulip with foam dots between the layers.
I hope you enjoyed seeing a few different ways to use my new flower stamps along with my go-to favorite paints and paper from PaperArtsy. Thanks to Heidi and the SSS family for the opportunity to share my stamps and my style with all of you. Happy STAMPtember®!
~ ellen
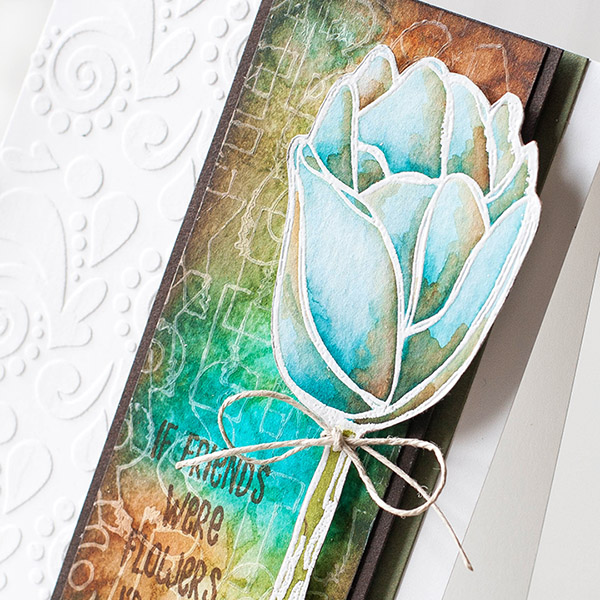
Hey everyone! It’s Shari here with another card using Ellen’s stamps. I fell in love with the tulip blossom and tried something a little different. I used Peakcock Feathers, Rusty Hinge and Peeled Paint Distress markers to color my flower.
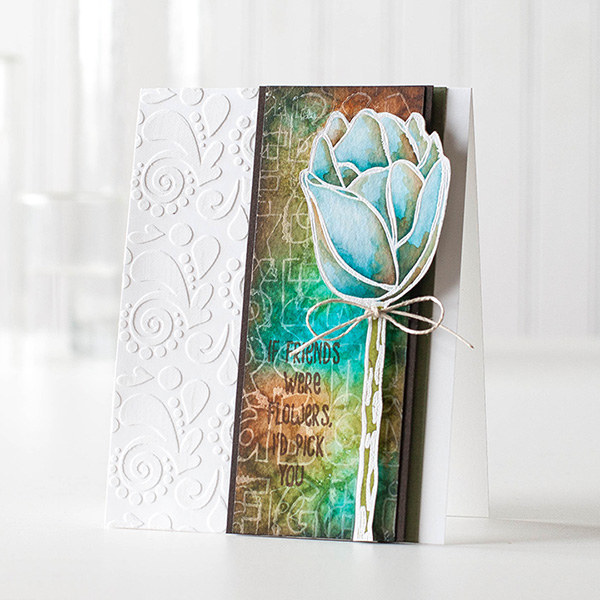
I also played around with the Paper Artsy JOFY letters and Gesso to create a unique background. The new Tim Holtz Distress sprays Peacock Feathers, Rusty Hinge and Peeled Paint were used for my color.
I have a video for you with the full process. Enjoy!
All of the products in this “Paper Artsy Sale” category: http://www.simonsaysstamp.com/category/Shop-Stamps-and-Stamping-Paper-Artsy-Sale are 75% off when you use coupon code ARTSY! OR you will receive a FREE Paper Artsy Gift (while supplies last) with coupon code ARTSYGIFT.
Blog Candy Alert!! Follow our blog via email and comment on this post for a chance to win a special blog candy from our STAMPtember® stash!
Thanks for coming by today, hope you’re having a great week-end!
Ellen Vargo Supplies:
 |
 |
 |
 |
 |
 |
 |
 |
 |
 |
 |
 |
 |
 |
 |
 |
 |
 |
 |
 |
 |
 |
 |
 |
 |
 |
 |
 |
 |
 |
 |
 |
 |
Shari Carroll Supplies:
|
|
 |
 |
 |
 |
 |
 |
 |
 |
 |
 |
 |
 |
|
|
|
 |
 |
 |
 |
|
 |
 |
 |


I really like the vibrant cards!
I LOVE the arty look of each of these cards!!! The swirls and mixtures of pretty colors make my heart sing!!!
<3 J
jwoolbright at gmail dot com
HerPeacefulGarden.blogspot.com
I also like the tulip. I love the stencil you used, too. Thanks for also showing how to use the gesso.
Love these cards, the paper tole done with the flowers gives me ideas to try with some of my own stamps. Will also have to try getting the Tim Holtz Distress markers as well, but being on a carers pension its getting harder to keep buying crafty stuff especially when theyare becoming more expensive. I would dearly love to get Copic Markers but they are just out of reach for me. :-( :-(
Love the tulip blossom as well!! Love you card Shari!!
Beautiful cards! Love, love love that gorgeous tulip.
Shari: Your card is absolutely stunning! I can’t wait to try it. Love the stamp set also.
Beautiful cards! Love the dimension on the pieced flower and gorgeous coloring on Shari’s card!
Wow, all of these cards are beautiful! I love the stunning colors.
OMG, these cards are just stunning!
wow these are sooo beautiful!!!
Beautiful cards. The colors are so vibrant yet lovely. Thanks very much for a chance to win. Michelle t
What fun cards. I already follow by email.
Beautiful, unusual stamps and some fantastic designs! These cards are all gorgeous!!
Beautiful cards! Fabulous stamps!
These cards are absolutely AWESOME!!!
I got so busy shopping I almost forgot to comment ;)
Beautiful cone flowers
Such beautiful backgrounds and flowers!
Beautiful work and
the layers really add
to the great looks of
them.
Carla from Utah
What fabulous cards! I adore the color combinations in the last card.
Beautiful stamp set. I love the textures!
Wow what a day
Looks wonderful, love the brightcolors
So pretty. Love all the colors!!!
Nice large stamps
I love flowers and I especially love artsy so these stamp sets are for me. I love the technique of the first card. I never thought of embossing a stamp in black and then watercolor it in.
love the size of these flowers!
Beautiful ideas from Ellen, love the dimensional tulip! Shari’s card is magnificent!
Love the look of the tulip stamp – looks very versatile. Thanks for the video of your card Shari – loved watching you put that one together!
Wow, how gorgeous!! Love the layering in the flowers. What a nice touch!!
The tulip done in peacock feathers, rusty hinge and peeled paint is just gorgeous!!! That’s going on the list!
R/
I love all the layers and depth to these cards!
I love the color combinations on these cards! Great job!
Great artsy look to these cards.
Stunning cards! Love the bold flower images!
Such fun stamps from Paper Artsy – and the cards are so varied in technique and flavor.
WOW! I just love these stamps and I love that mixed media card that was made with them. You guys are really going to get me in trouble with my hubby, because I want everything I see.
Your cards are lovely. I follow the blog by email.
Gorgeous card Shari! Love all the layering.
awesome flower stamps and gorgeous backgrounds on all the cards!
Really cool and different look! Love the technique!
beautiful cards!!!!
Very beautiful card and great tutorial. thank you so much. I adore the tulip, the soft tones you used on it are pretty, but the multiple backgrounds on the card and layering piece are amazing and makes your tulip pop! I wish I had all those neat products! Awesome!
Ellen’s cards and stamps are so interesting, I love how they remind me of graphic posters or the artsy postage stamps. And Shari’s choice of colors completely changed that tulip/rose stamp. They are all gorgeous Cards! Happy Stamptember!
Oh my goodness!!! Is this card gorgeous or what. TFS!
Fun stamps and love Shari’s card!
I can’t wait to try those new Tim Holtz Distress Sprays! Beautiful Projects!
Amazing stamps and wonderful mixed media inspiration, thank you for sharing.
Those tulip cards are simply stunning! Beautiful stamp designs!
Love what you did for the background: I need to play like that!!