Spring Tim Holtz Thank You Card!
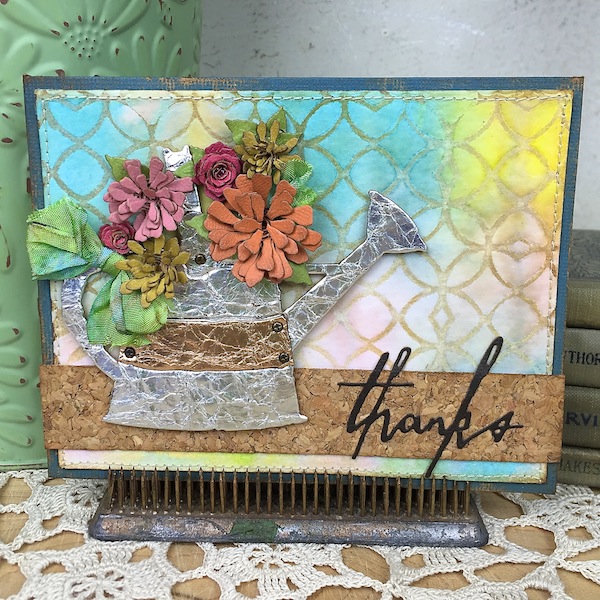
Hi readers! Happy Friday to you! I hope your weekend is starting off wonderfully and the sun is shining wherever you are! We’re beyond pleased to welcome back the magnificent Richele Christensen as a guest on our blog today with this watering can thank you card that is just the perfect combination of clever and beautiful! Check out all the details on how to make this neat card below!
Hello friends! It’s Richele here and I have lots of new products to share with you today! “Kraft-core” cardstocks are a favorite of mine they’re perfect for cards and to distress of course. The new Classic collection is so bright and the Metallics are to die for. Another favorite is the Tiny Tattered Florals die it’s a great set with 15 dies (8 flowers and 7 leaves) and the quilling tool is included with the die set. There are so many beautiful details to love about this card!
Instructions:
-
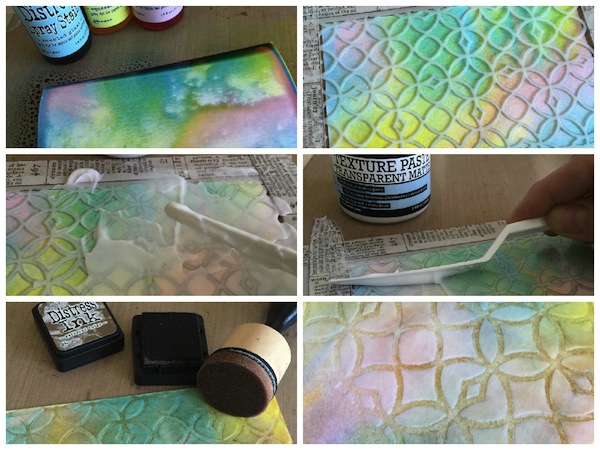
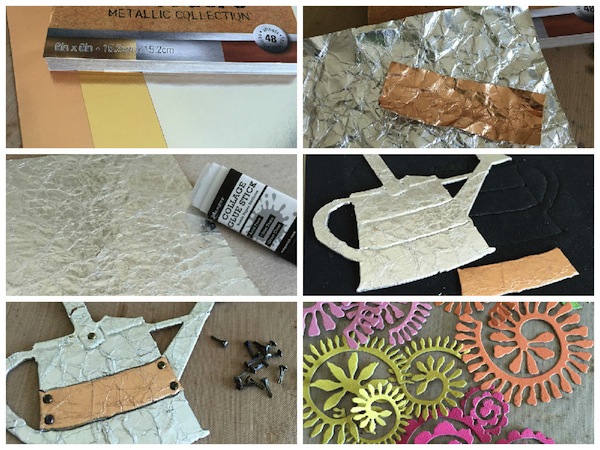
Color a piece of Watercolor Cardstock with Distress Spray Stains and dry with a heat tool.
-
Tape Latticework Layering Stencil over cardstock lining up at the top.
-
Apply a layer of Texture Paste in Transparent Matte with a Palette knife.
-
Holding the Palette knife at an angle scrape off excess paste. Set aside to dry. Once the paste is dry it will dry clear and have a matte finish which is perfect for our project today.
-
Ink over the areas with Distress Ink on a Mini Ink Blending Tool, the paste will act as a resist.
-
Wipe off inked area with a damp cloth to remove the ink over the paste.
-
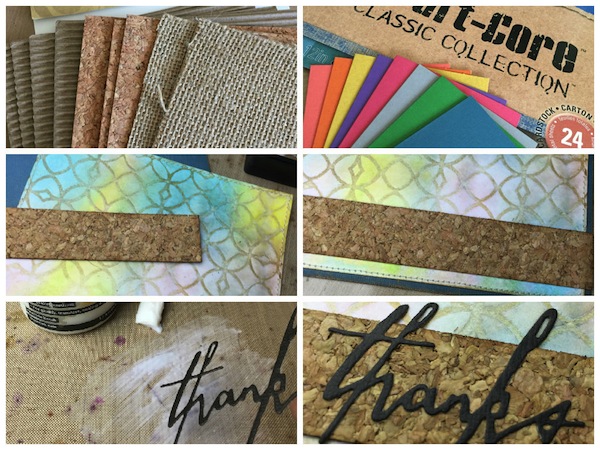
Cut a 1” strip from the Textured Surfaces pack by the width of your card. The Textured Surfaces pack comes with Cork, Burlap and Corrugate. They are sticky backed with a very strong adhesive for easy use.
-
Cut base card from Kraft-Core Cardstock. Score and fold in half. Love the new Classic colors!
-
Ink the edges of with Distress Ink on a Mini Ink Blending Tool. Add stitching if desired.
-
Adhere pieces to the base card.
-
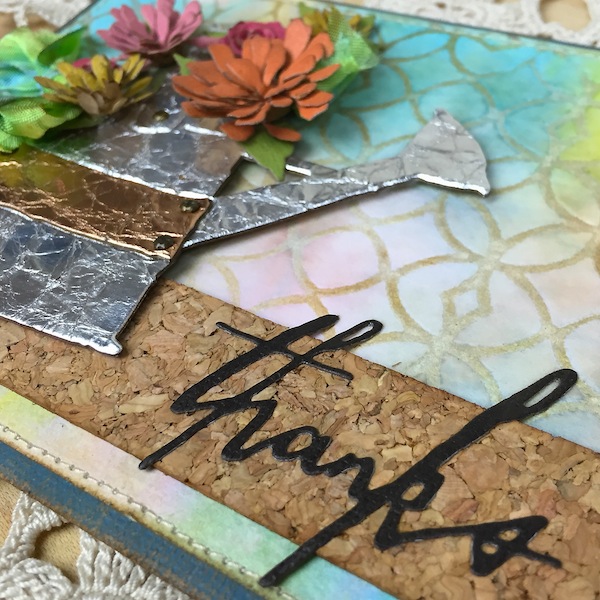
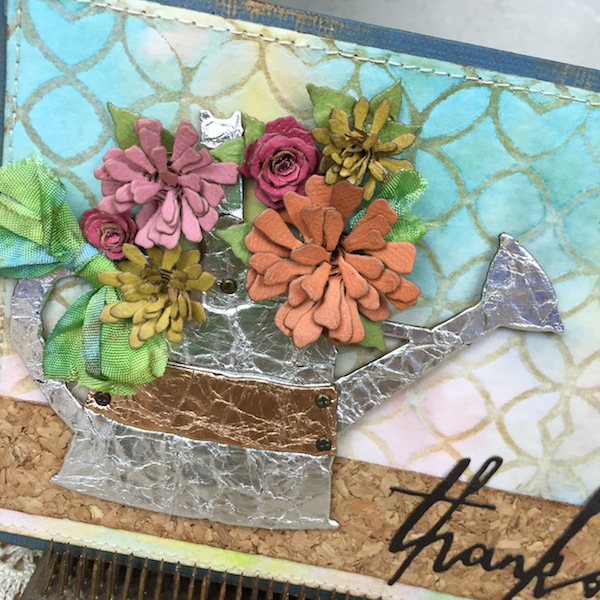
Die cut “thanks” from black cardstock using the Handwritten Celebrate Thinlits Dies. These dies have become a staple for me. They are great for cards, mixed media projects, layouts and more. To adhere apply a thick layer of liquid adhesive to your craft sheet and pounce the word over the adhesive.
-
Position the “thanks” on the cork strip.
-
The new Kraft-Core Metallic Collection comes in 3 colors silver, gold and copper.
-
Crumple up a piece of silver and copper cardstock for the watering can. Tip: Mist the back of the cardstock with water and it will make it easier to crumple up.
-
Adhere the metallic pieces to chip board with glue stick.
-
Die cut the pieces using the Watering Can Bigz die.
-
Add Mini Fasteners at the handle and contrasting center strip.
-
Die cut the flowers form several colors of Classic Kraft-Core using the Tiny Tattered Florals Thinlits die. The set comes with 8 flowers, 7 leaves and the quilling tool is also included. Tip: Use the Precision Base plate with the Magnetic Platform when die cutting intricate dies and it will help cut them every time.
-
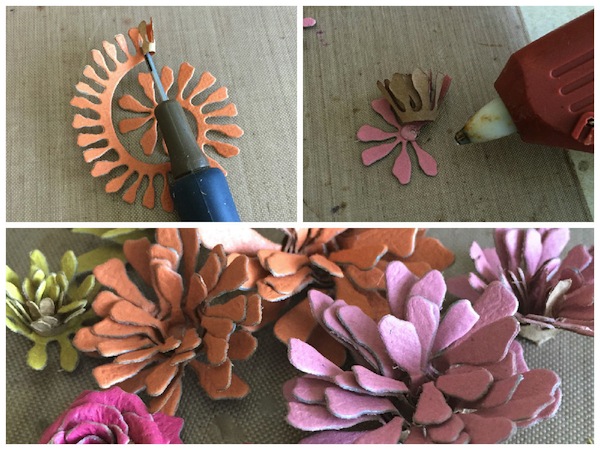
Insert the Quilling tool at the small end of the die cut flower. Roll towards the colored side of the cardstock and continue to roll up the flowers to the end. Remove from quilling tool.
-
Apply a little dollop of hot glue at the end and push the rolled petals onto the glue. Spread out the petals to create a beautiful flower.
-
Create several flowers and ink the edges with Distress Ink on a Mini Ink Blending Tool. Don’t forget the leaves.
-
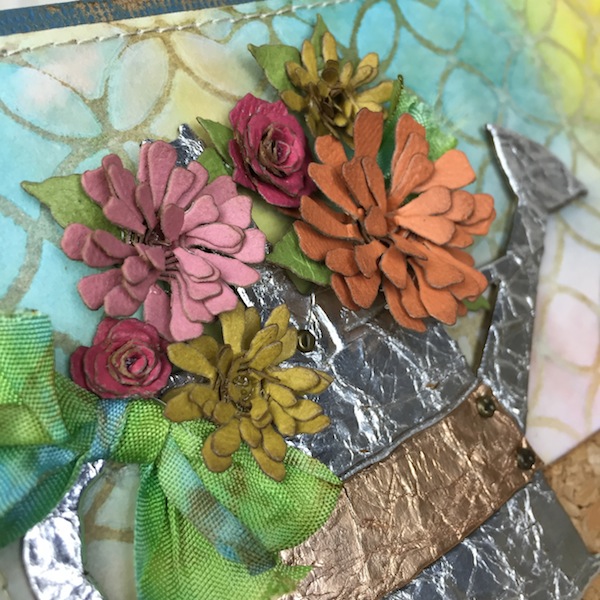
Adhere the Watering Can with foam tape. Arrange flowers and adhere to card with hot glue.
I hope you will try some of the new products and techniques i’ve shared today. I know you will love them as much as I do!!
Thanks so much for stopping in and sharing your time today!
Richele
SUPPLIES:
 |
 |
 |
 |
 |
 |
 |
 |
 |
 |
 |
 |
 |
 |
 |
 |
 |
 |
 |
 |
 |
Thanks for reading today, and thanks to Richele for being our fabulous guest!

Blog Candy Alert!! Follow our blog via email and comment on this post for a chance to win a special blog candy!


very creative card, love those scripty Tim Holtz word dies :)
very cool card!!
Very nice.
What a beautiful card. Loved the colors and texture
Amazing dimension and texture.
What a neat card. I love learning how people put together such detailed cards.
Thanks for sharing all those techniques!
Wowzers, what a beauty! LOVE all the texture and what a beautiful array of posies!!
I love stencils and still learning about texture paste.
AWESOME!! LOVING this!! THANKS for sharing and have a FABULOUS WEEKEND!! =)
This is a work of art!
Great tutorial and inventive layout and textures – very striking. Thank you for sharing such an amazing design!
Wow – thanks for an awesome tutorial and for sharing your amazing talent with us!
Gorgeous card! Love the beautiful little flowers in the watering can. Thanks for sharing Richele!
love the textured surfaces pack – lots of fun!
A stunning project, thanks for the inspiration!
Stunning card, such gorgeous texture and layering, love it!!!
I really love the background and all the little flowers in the watering can. Adorable card and great idea.
Wonderful use of the TH watering can with flowers.
Melissa
“Sunshine HoneyBee”
fantastic!
Thank you! Sometimes I look at products and think, wow, cool, and then, so what do I use this for and how do I use this? These posts are greatly appreciated! Thank You!
Great project. Those flowers are amazing!!
Simply stunning! Love it!
WOW!!! That is beautiful:)
Great card and technique info! ;-)
Totally awesome card…love all the details!
very pretty!
This card looks like an artist’s work – not “just” like a card.
Wow that’s gorgeous! LOVE the watering can!! That texture is awesome ♥
Lovely card. I love the use of the cork paper and the script sentiment. Amazing flowers too. The water can is a very nice touch and a “spark” with the beautiful colors. Great design.
beautiful card… love the flowers…
Gorgeous! lovely! as always Richele…TFS
Love the metallic cardstock. the watering can is beautiful.
thanks for sharing.
Fabulous–so gorgeous! Love the bright colors, the 3D flowers–thanks for sharing this awesome project.
This is too cool! It should be kept on display by the recipient instead of stuck in a box or drawer somewhere after receiving it.
You gave excellent directions. Thank you.
How pretty this is. Love
the flowers on it.
Carla from Utah
Gosh, isn’t that beautiful!!!!
Beautiful! Love how Richele created the watering can. TFS
I love the colors and the background technique looks great!
Lovely with this mixture of colors….brights and others that have almost a smoky autumn feel. Gorgeous!!
<3 J
jwoolbright at gmail dot com
HerPeacefulGarden.blogspot.com
spring indeed, very pretty!
LOVE this card!! I am awaiting the Metallic Papers but need to order the New Classic collection!! Such scrumptious colors!!! IOOOOOOOO! Happy shivers goin’ on! Must order the Tiny Tattered Florals also!!! So many NEEDS and so little $$!! What’s a girl to do? Maybe I can sell a kidney or a lung?!?! LOL TFS!
So many different and amazing techniques in one lovely card creation! WOW!
OMG LOVE all these textures going on … the fun watering can in Kraft-core metallic!! How cool is that… Fun stenciling paste work; and cork and flowers OH MY … So much Tim goodness !!!
Gorgeous! Love those flowers & the script word dies.
Great project. Thanks for the step by step. I follow the blog by email.
Those flowers are to die for!
So many details and textures…. Gorgeous card! :-D
Beautiful card, Richele!
I love the beautiful colors and textures in this card!