Palette Halloween Tags by Paula Cheney!
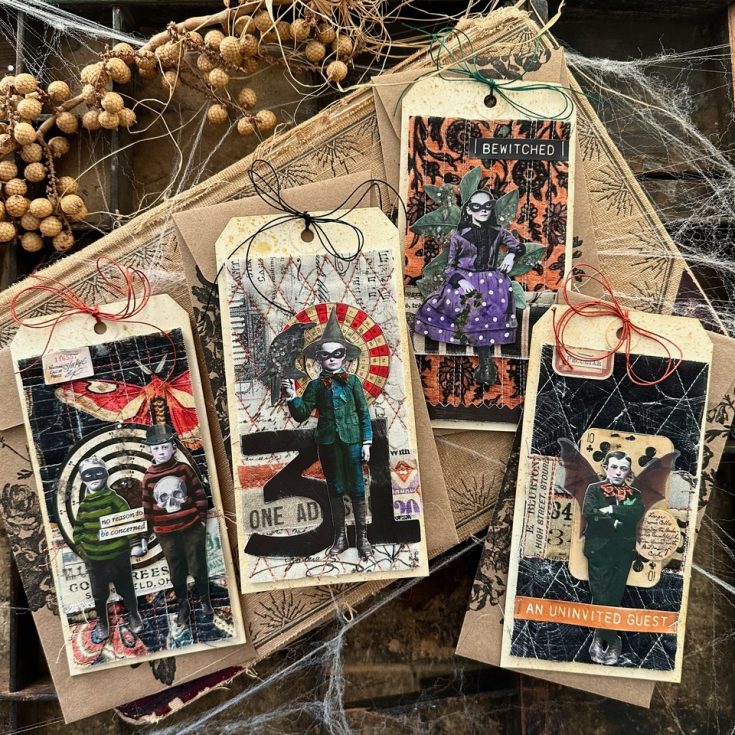
Hi friend! Happy Saturday! Let’s keep that Halloween FUN from Tim Holtz and Heidi yesterday on our YouTube channel for that wonderful Curio class ROLLING with this gorgeous tag tutorial by Paula Cheney! Read on for all the details on how to make these gorgeous tags! Enjoy!

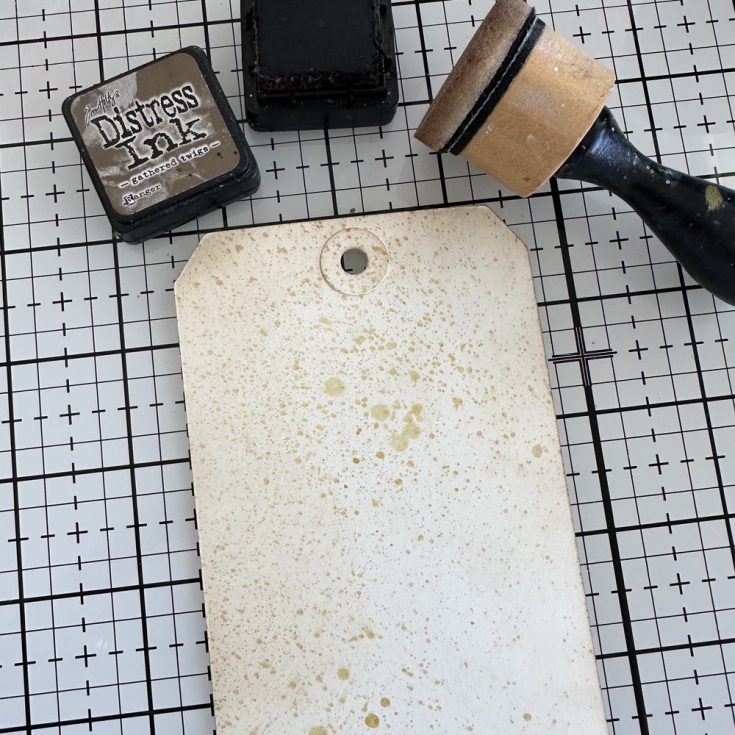
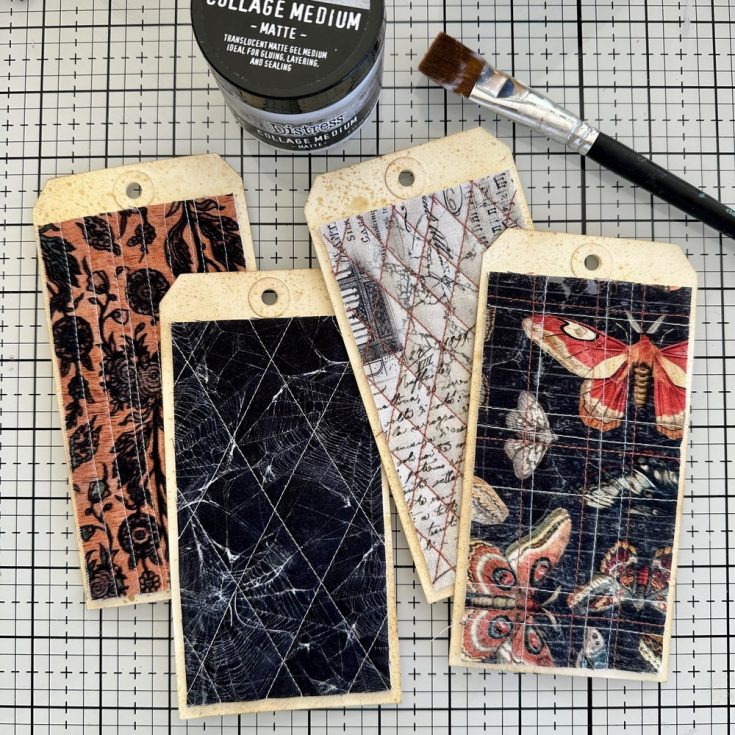
- Lightly spray four #8 Mixed Media Tags with Antique Linen Distress Spray Stain.
- Once dry, use Gathered Twigs Distress Ink and a Blending Tool to ink the edges of each of the four tags. Set tags aside while you work on the fabric backgrounds.
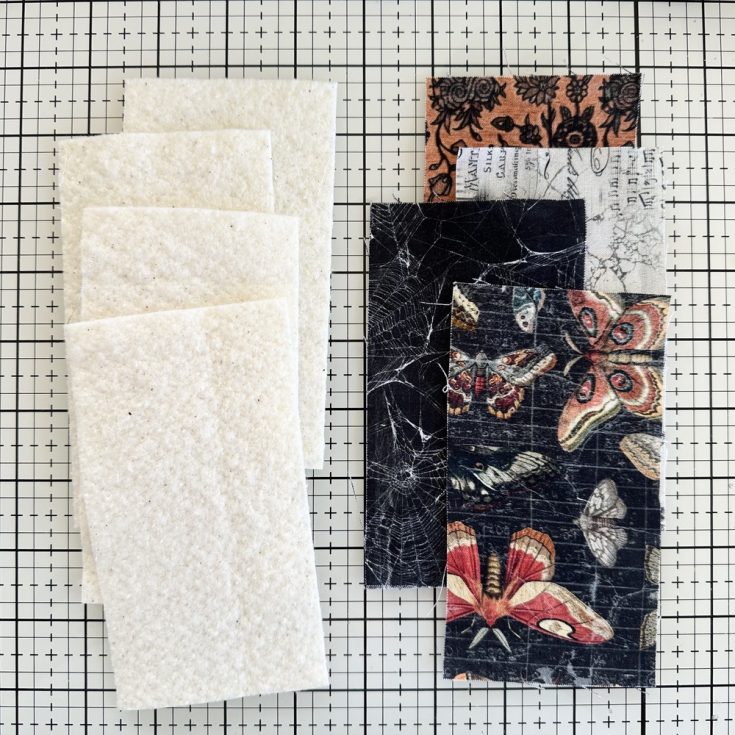
- Cut 4 pieces of Tim Holtz Palette Halloween Collection (3 x 5 1/2” each). I used Moth Study, Entangled, Remnants, and Gothic Tapestry for the four backgrounds. Cut 4 matching pieces of cotton batting.
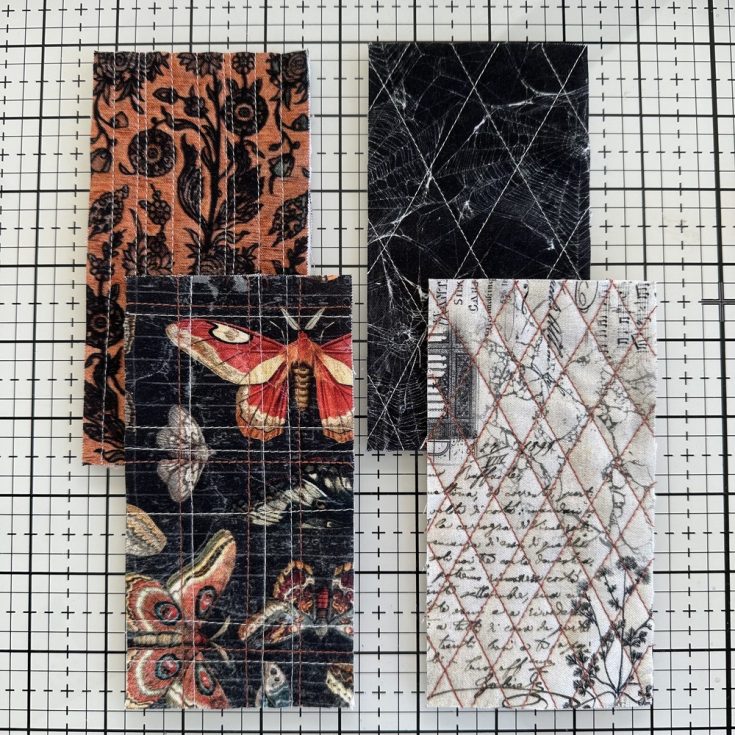
- Lay each piece of fabric over matching cotton batting, then stitch together. Any pattern of stitching will do. I started with the two on the left that are just straight stitching. No measuring, just using the machine foot as the guide. For the two on the right, I used a 60 degree angle and marking pen to make a guide for sewing. Of course you can’t see the line marks on black fabric so I eyeballed the 60 degree angle (that just means I sewed from the top of the right corner to the bottom of the left corner) and used a piece of blue masking tape as my guide. I just kept moving it to the next section. I love how the large harlequin turned out!
- Use a small amount of Collage Medium on the quilted pieces to glue them to the four tags you made previously.
Embellishments
I’m going to walk you through the embellishment of one tag start to finish, then use some of the same or similar elements to make three more. So lets get started!
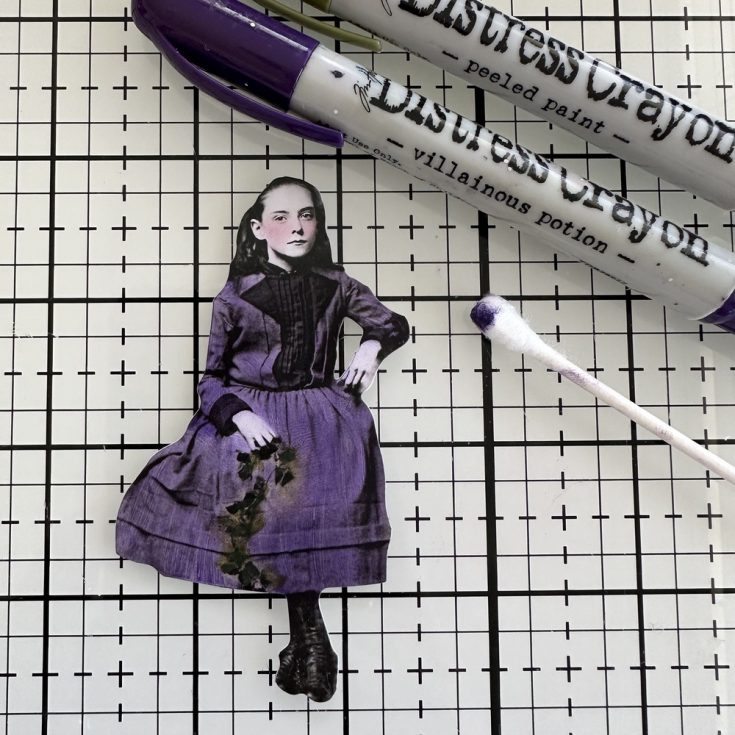

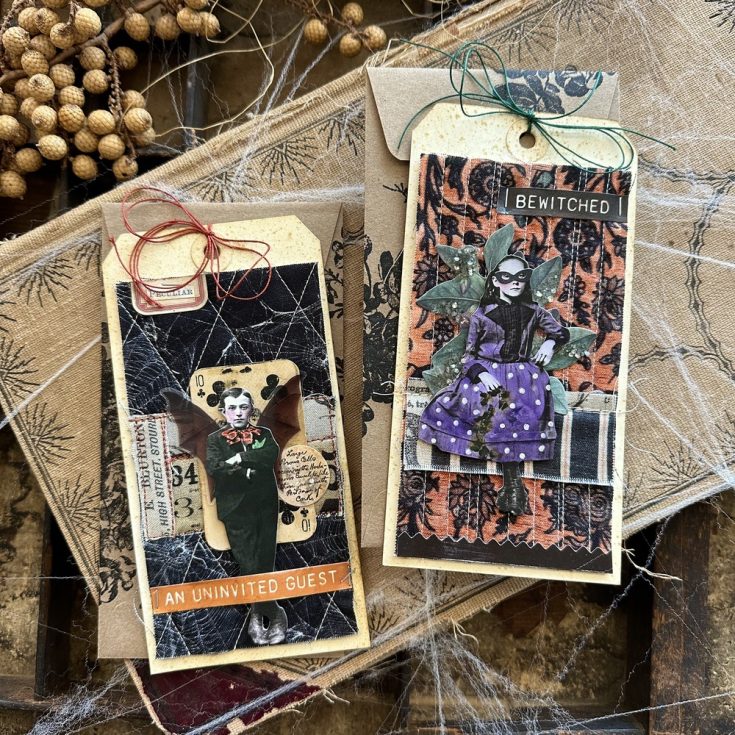
- Color a paper doll of choice. These came from the Halloween Layers and Paper Dolls pack. Scribble the Villainous Potion Crayon directly on the Paper Doll. Smooth out crayon with your fingertip to cover the dress. Use a cotton swab to blend out the crayon even more. Use a damp cotton swab to remove crayon that may have gotten on the face of hands.
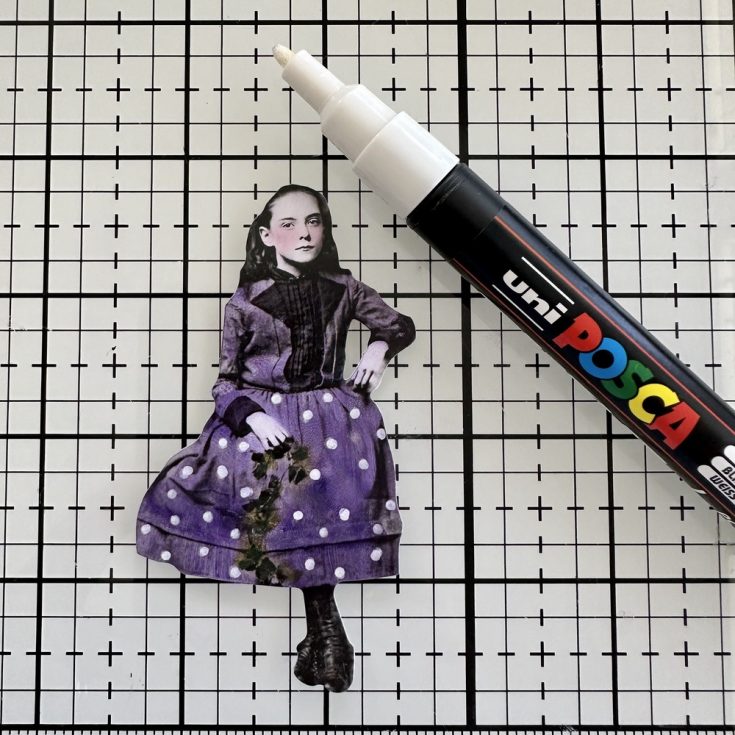
- Use a POSCA Paint Marker to add polka dots to the dress (optional).
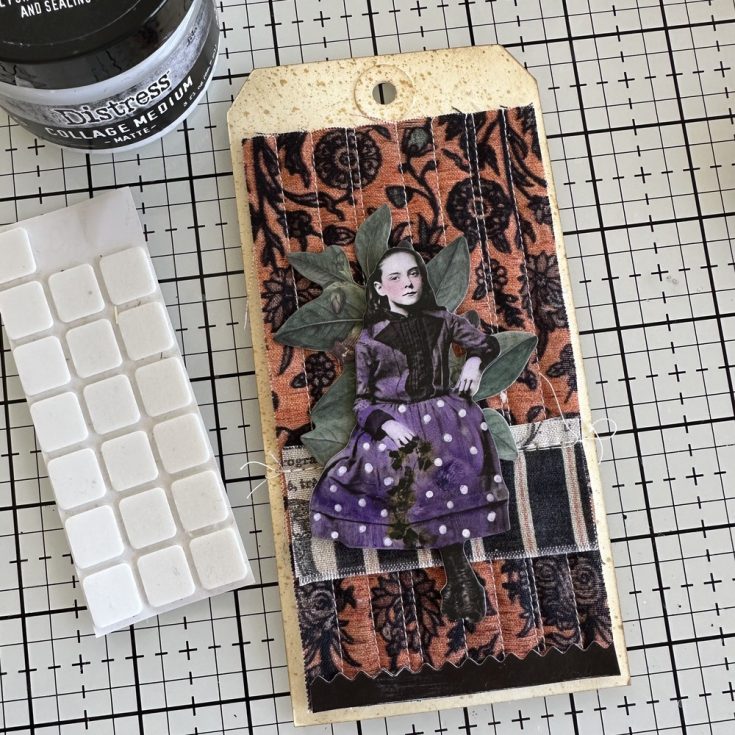
- Sew an additional fabric scrap (from the Halloween Collage fabric) to the tag.
- Use Collage Medium to add Halloween Ephemera leaves and SSS Thin 3D Foam Squares to add the Paper Doll over the top.
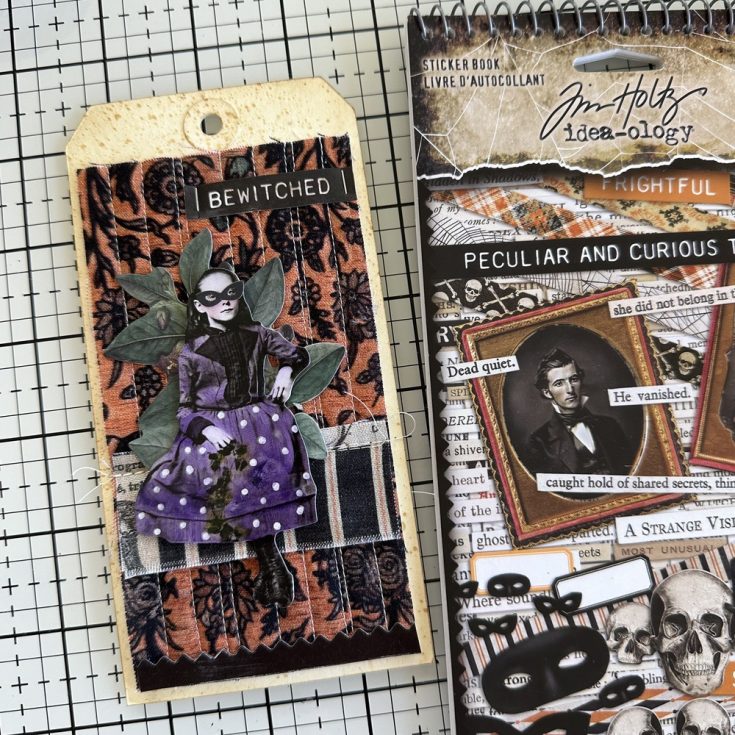
- Add words, mask and the pinked strip along the bottom of the tag – they are all from the 2025 Halloween Sticker Book.
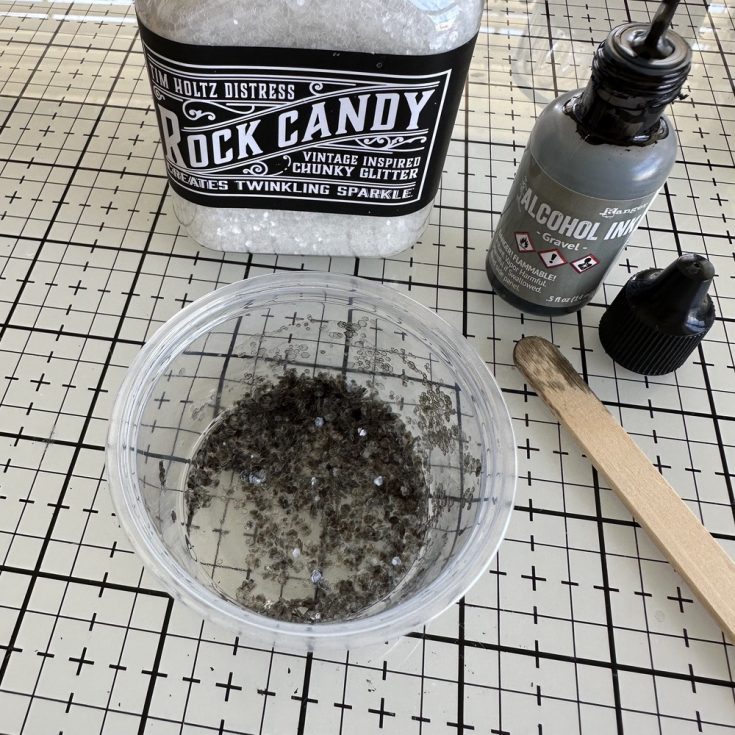
- Pour Chunky Rock Candy into a mixing cup. Add a small amount of Alcohol Ink (Gravel) and mix with stir stick until the Rock Candy is colored. TIP: if you are coloring a larger amount of Rock Candy Glitter, turn out onto a paper towel to dry before use.
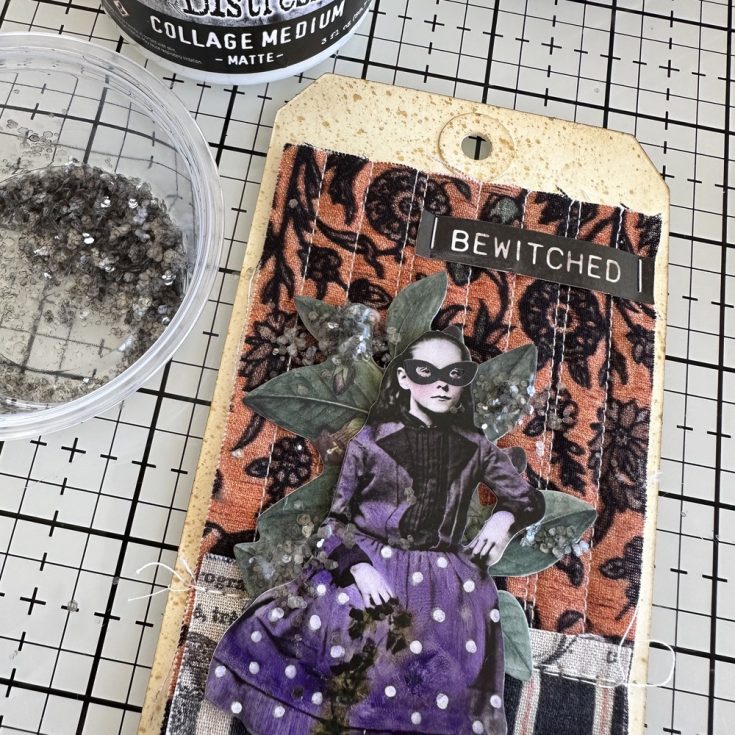
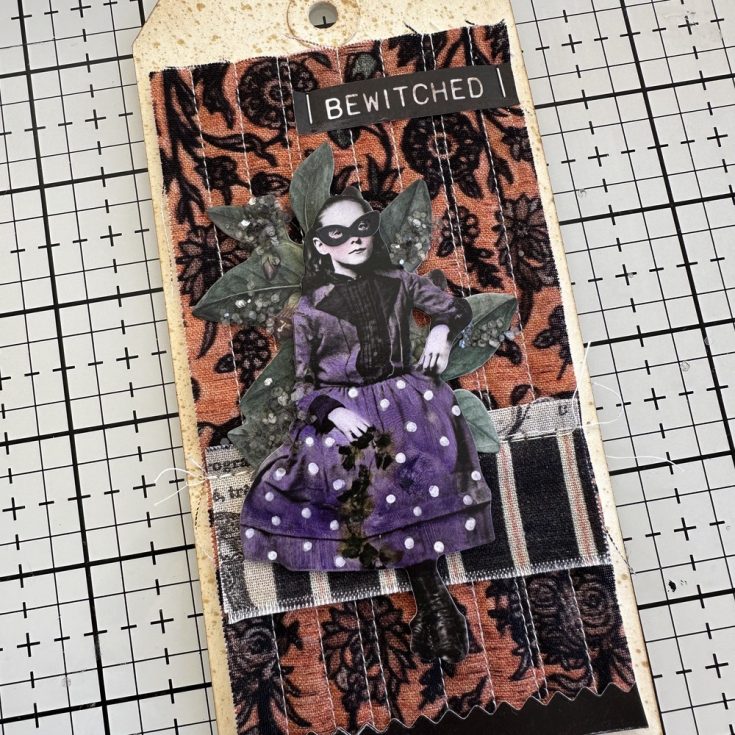
- Add a small amount of Collage Medium to the leaves and sprinkle the colored Chunky Rock Candy over the top.
- Once the Collage Medium is dry, shake off any excess Rock Candy.
Three more tags to go!
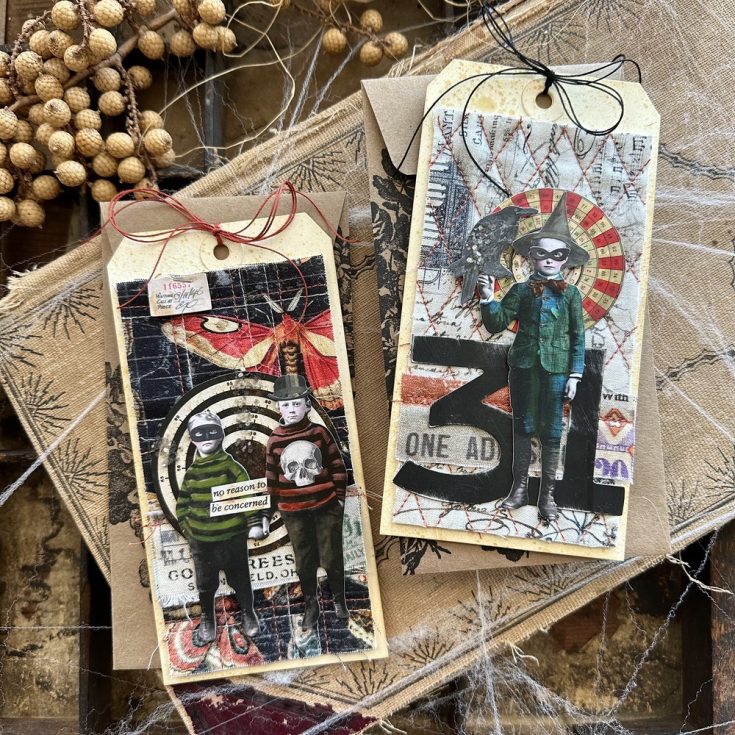
TAG 2
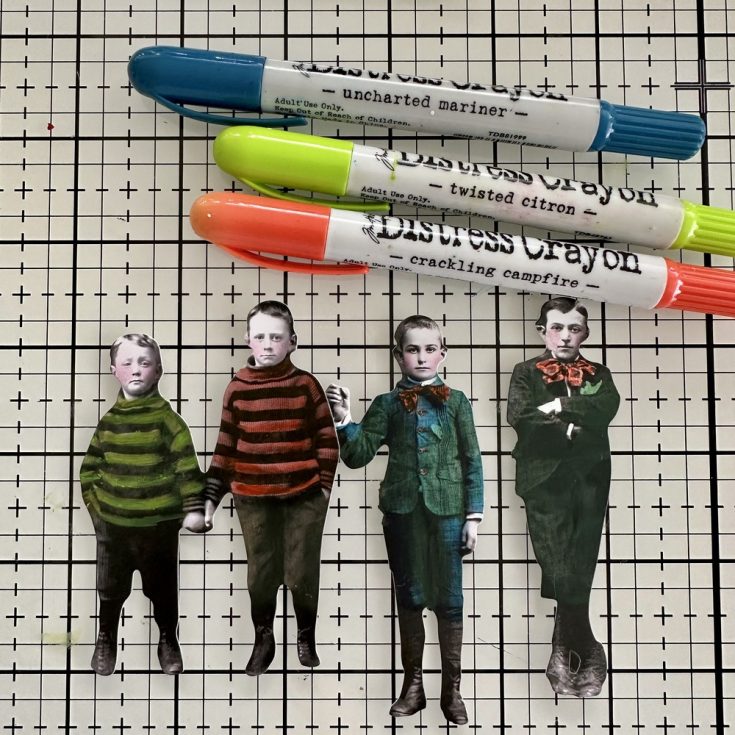
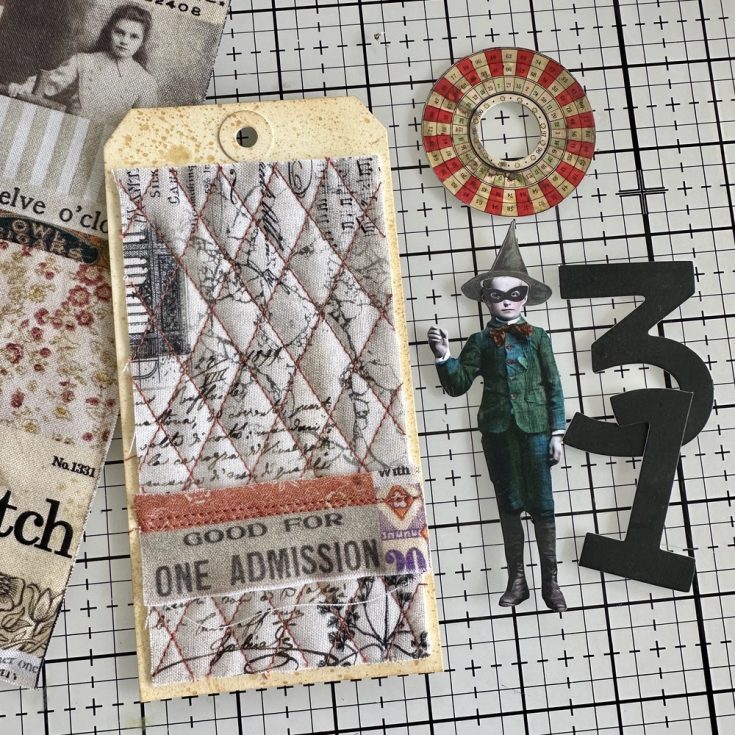
- Start by coloring more Paper Dolls. Don’t be afraid to use bold colors when coloring Paper Dolls. Twisted Citron is one such color! Look at the results on the boys sweater. I love how bold and bright the green is! Same goes for Crackling Campfire on the sweater and ties of the two boys. It’s the pop needed to make them more friendly, rather than scary.
- Gather a few pieces from the Layers pack + embellishments from the Sticker book (hat and mask) to add to the tag. I have also sewn on a strip across the tag using Halloween Collage fabric.
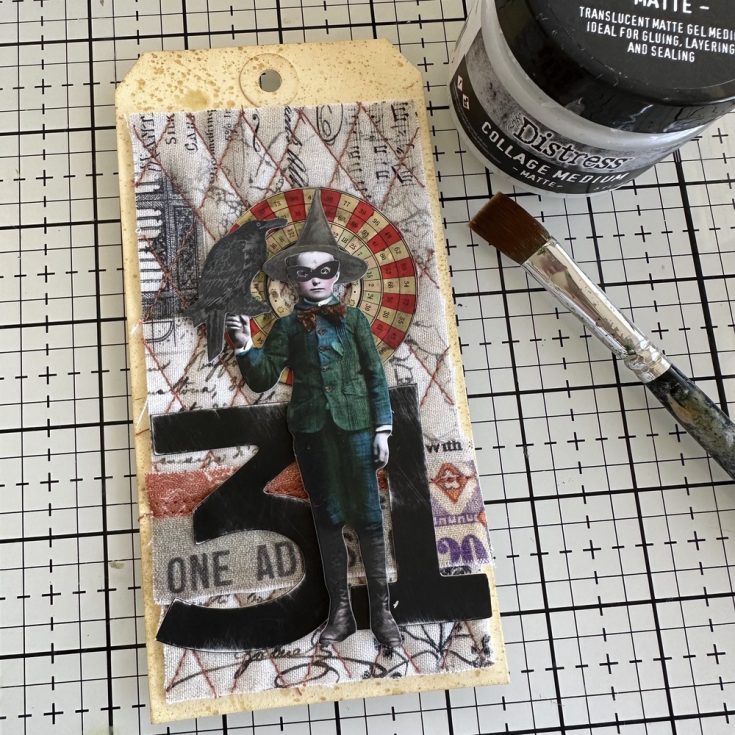
- Add embellishments with ether Collage Medium or in the case of the boy and the bird – SSS Thin 3D Foam Squares.
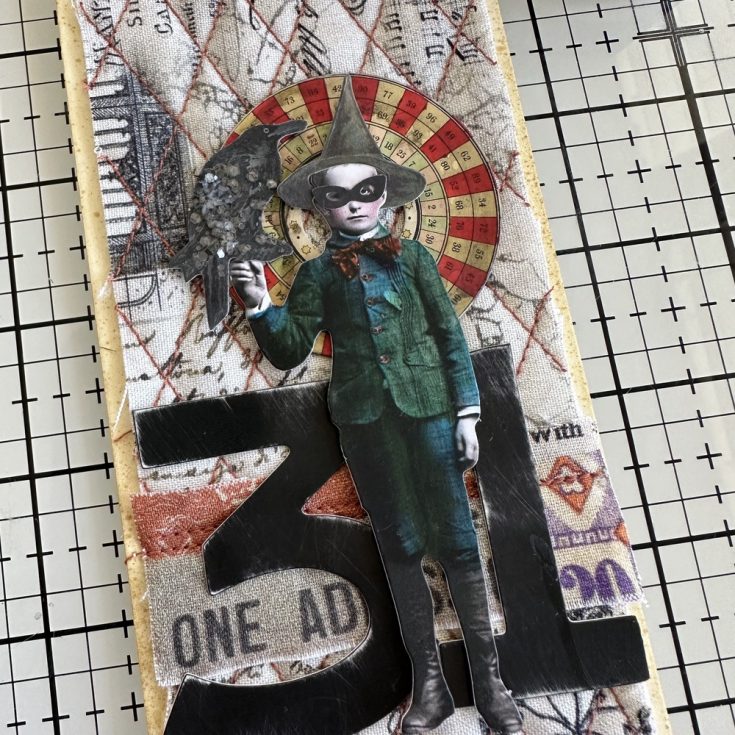
- Add a small amount of Collage Medium to the bird and sprinkle with colored Chunky Rock Candy. Set aside to dry.
TAG 3
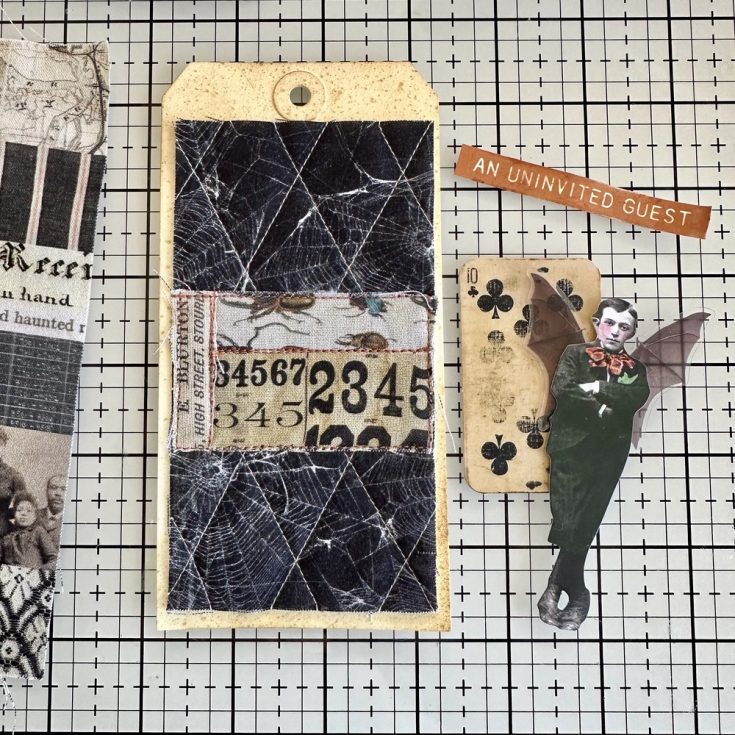
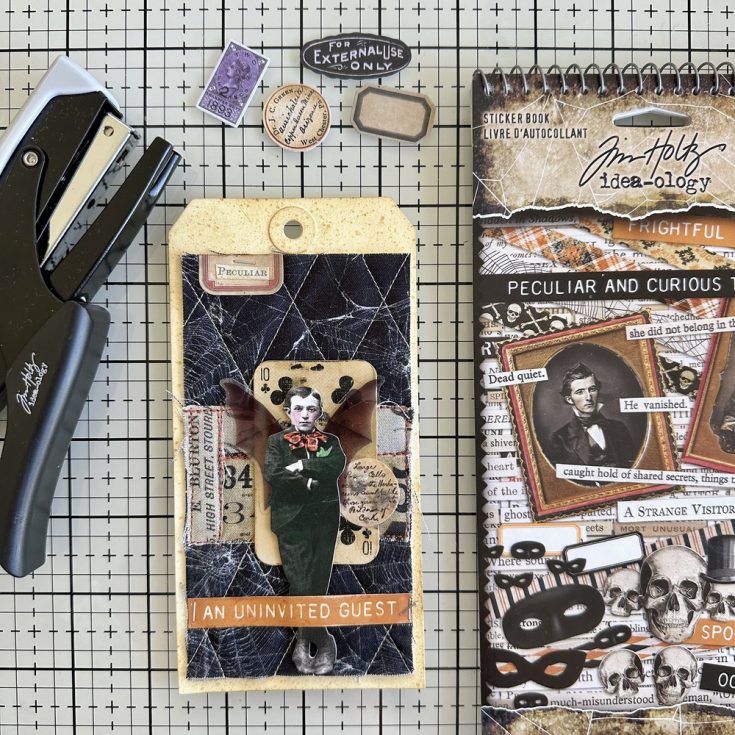
- Sew another strip from the Collage fabric to the tag. Feel free to create your own patches to use the parts and pieces that appeal to you. If you are not a sewer, just use Collage Medium to add the patches. The embellishments come from the Halloween Layers pack, Halloween Sticker Book, and the Halloween Transparencies (wings).
- Add the embellishments with Collage Medium or SSS 3D Foam squares. Use Tiny Attacher for the sticker word strip across the bottom. I also added a couple pieces from the Halloween Ephemera Pack (label at top and small circle). Chunky Rock Candy was added on the circle to mimic the other tags.
TAG 4
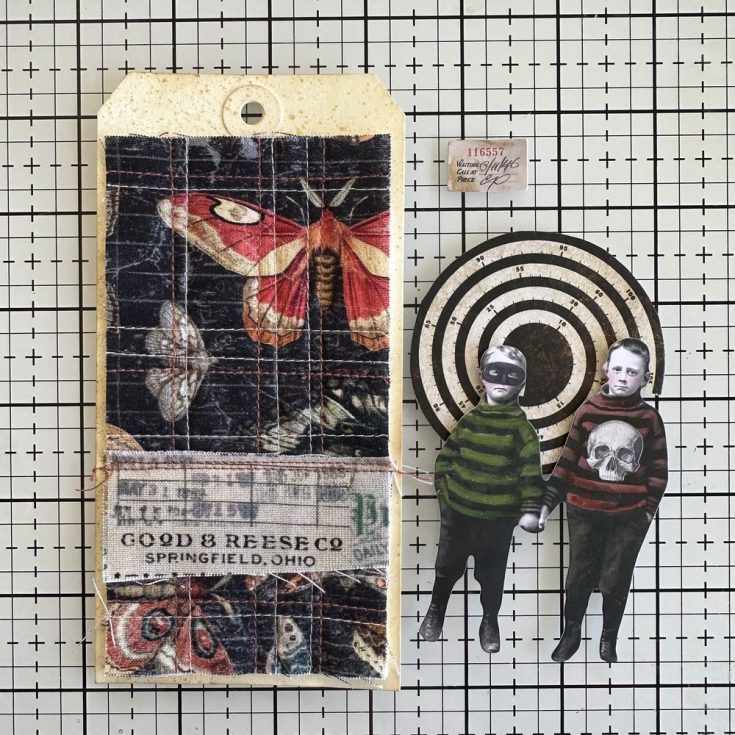
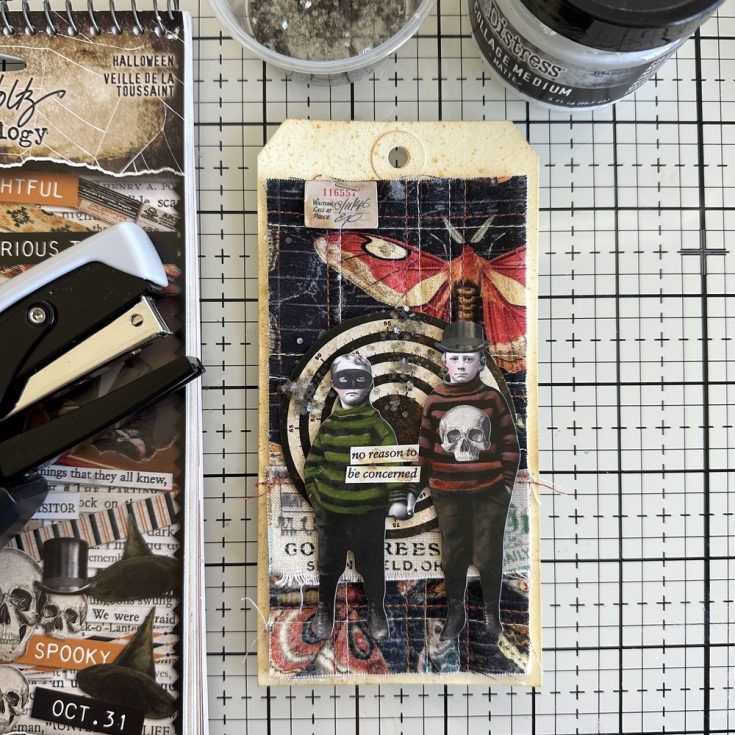
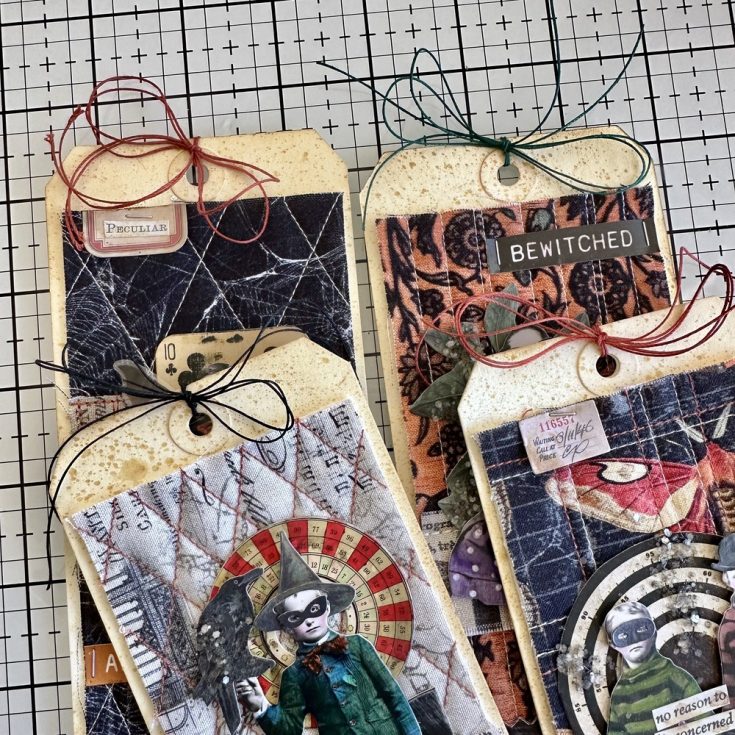
- For the last tag, another strip of the Collage Fabric was added, then I gathered a few elements like the black and white spiral. This was a large spiral form the Layers pack so I just followed the black line to cut it down to a better size for the tag. The small tag came from the Halloween Ephemera pack and the mask and skeleton came from the Halloween Sticker Book.
- The spiral was adhered with Collage Medium and the boys with SSS 3D Thin Foam Squares. I stapled the small tag at the top, added clippings “no reason to be concerned” + a mask and a hat, all from the sticker book (NOTE: I cut a top hat into a shorter bowler hat). To finish off, I added randomly Collage Medium over the spiral so I could add more Chunky Rock Candy.
- Colored heavy string was added to the reinforcer so each tag can be pulled from an envelope.
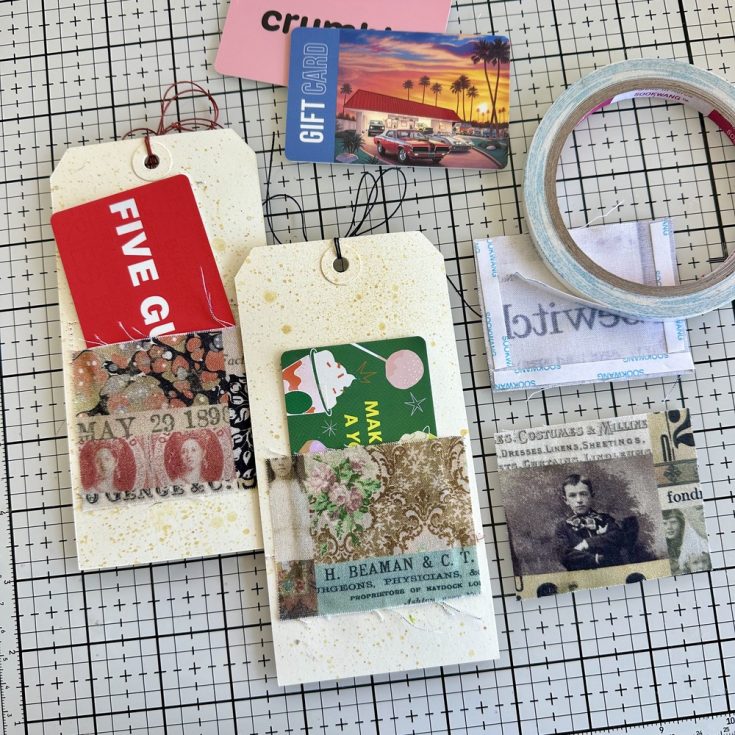
- OPTIONAL: If you wish to add a gift card to the back, just cut a square of fabric (2 1/2 x 3”) for each tag. Add 1/4” Scor-Tape on three sides as shown. Peel the tape and add to the back of the tag before slipping in a favorite gift card.
- TIP: I found it was easier to work with the pieces of fabric if I starched them before adding the tape. You could also add Collage Medium to the back of each fabric piece instead of starch, but you would need to let it dry completely before you use it.
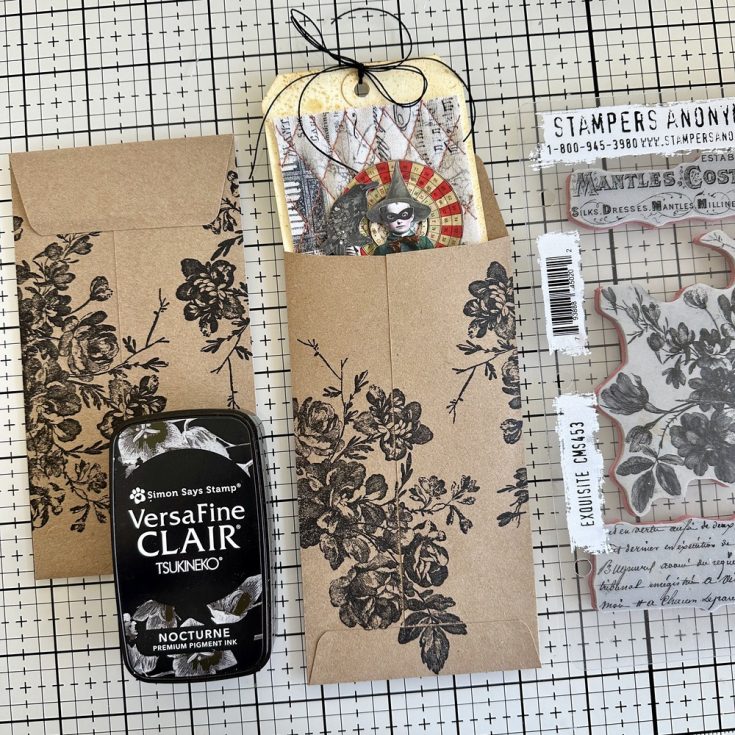
I’m going to be sending my Halloween Tags in the mail so I needed some envelopes! I am using envelopes made by Simon Says Stamp called Mini Slimline in a color called Grocery Bag. They are made to fit #8 tags – and they do fit perfectly, even with the layers of batting and fabric, 3D Foam Squares and a gift card! I stamped on each envelope with SSS VersaFine Clair Ink Pad and the floral ‘Exquisite’ stamp from Stampers Anonymous. I love the super black ink over the brown of the envelope! Seems like the perfect ending to me!
SUPPLIES:
|


A big thank you to YOU, our reader — and to Paula for being our guest!


Blog comment creationI love how Paula combined the stitched fabric backgrounds with the Distress Ink–aged tags—it adds such rich texture and depth. The mix of patterns like Moth Study and Gothic Tapestry gives each tag its own personality while keeping a cohesive Halloween feel. The angled stitching tip with the masking tape guide is such a clever trick for anyone looking to add visual interest without overcomplicating the process!
These are so cool
I’m not a sewer; but, these are so fun and inspiring, I’m going to try to make similar tags using backdrops. Thanks for sharing your art and for all the detailed instructions and photos.
Wow, Paula! 🎃 These Halloween tags are absolutely stunning — I love how you mixed the fabric textures with Distress Inks and Collage Medium. The stitching and Rock Candy glitter give such a cozy yet spooky vibe! The step-by-step breakdown makes it feel so doable even for someone who’s just getting into mixed media crafts. My favorite part has to be the way you colored the Paper Dolls — that Villainous Potion shade really pops! Thanks for sharing such a detailed and inspiring tutorial, can’t wait to try this technique myself. 👏🧵✨
so fun and cool!!
Very useful, thank you.