One Stamp Five Ways Woodland Whimsy
Hi friends! Happy Friday AND happy last day of January! We’re one month into 2020! Man, time flies! Please join me in welcoming back special monthly guest, Suzy Plantamura! I always enjoy seeing all of the unique and beautiful card designs she comes up with using one set. Please read on and enjoy!
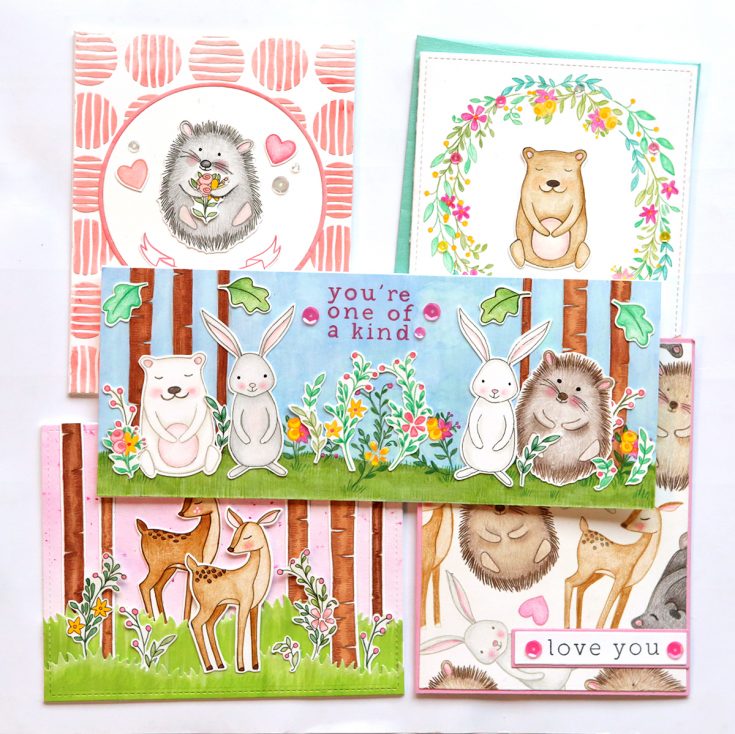
Today I am back with another “one stamp, five ways” post using a 6” x 8” stamp set called Woodland Whimsy. This stamp was part of the November 2019 card kit. Although it was released during the Fall/Winter time frame, it is also a great stamp set for the Spring season. I’ll be showing you different ways to use it for love cards and thank you cards. Let’s get started!
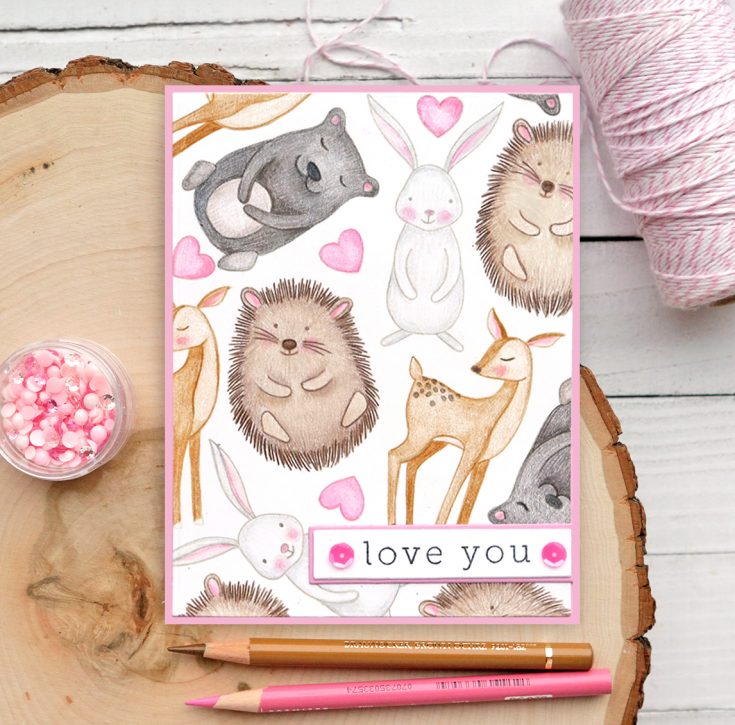
As you all know by now, I like to do what I call my “random stamping” technique with many stamp sets as one of my five cards. It is definitely my favorite card style. I used a light color of ink for a no-line stamping look, which again is my favorite technique for coloring in stamped images. I colored all of these cute critters and hearts with colored pencils.
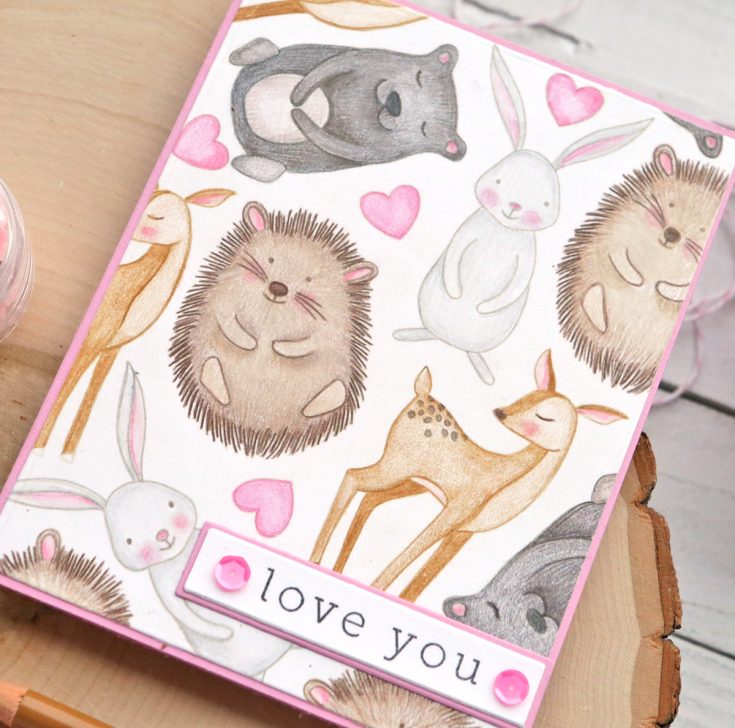
I stamped the “love you” sentiment from the stamp set with black ink on a pink cardstock banner from the SSS Sentiment Label dies (I use this set of dies on almost every card I make – good purchase alert!). I matted it with a white cardstock banner die-cut from the same set one size up. I attached these to the bottom of the card and used some sequins on each side.
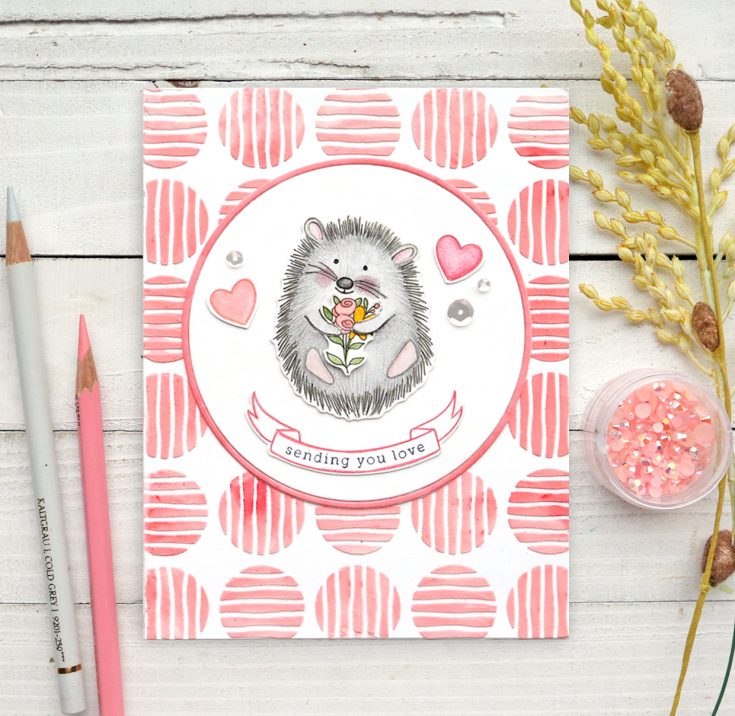
I used the SSS Lined Circles Stencil to make the background of this card. I mixed some Abandoned Coral Distress Oxide Ink with Texture Paste and rubbed it over the stencil with a palette knife. Next, I die-cut a circle and circle frame from white cardstock using the Circle Thin Frames dies (another die set I use a lot!). I colored the outside circle with a Peach Copic Marker. I attached the white circle and frame over the card background.
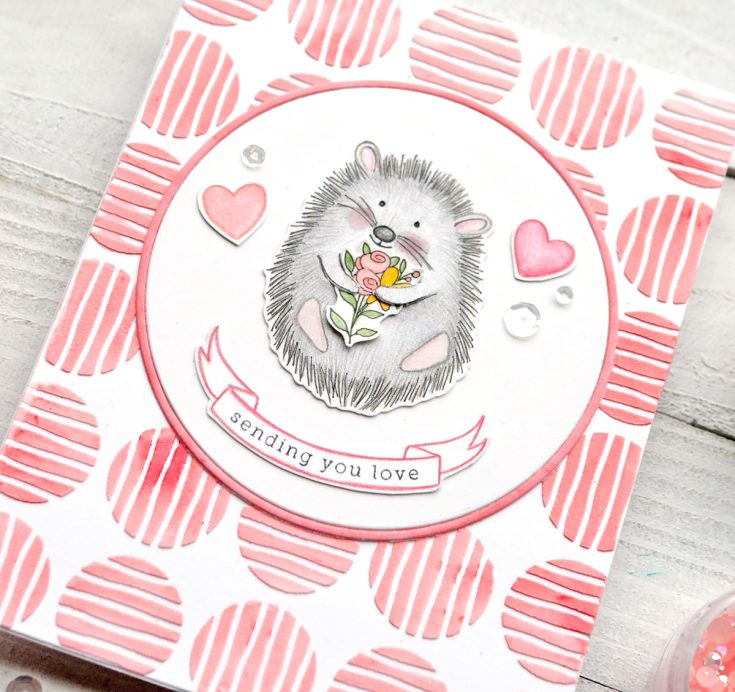
I stamped the hearts, the hedgehog, and the small flower bouquet on white cardstock with a light color of ink. I colored the images in with colored pencils. I liked this coloring medium for the hedgehogs as I was able to outline all those little lines on the outside of his fur. I outlined some of the images with a very fine point black pen. I cut around the arms of the hedgehog and tucked the little flowers inside his paws. I attached all of the images to the circle and stamped “sending you love” inside the little banner.
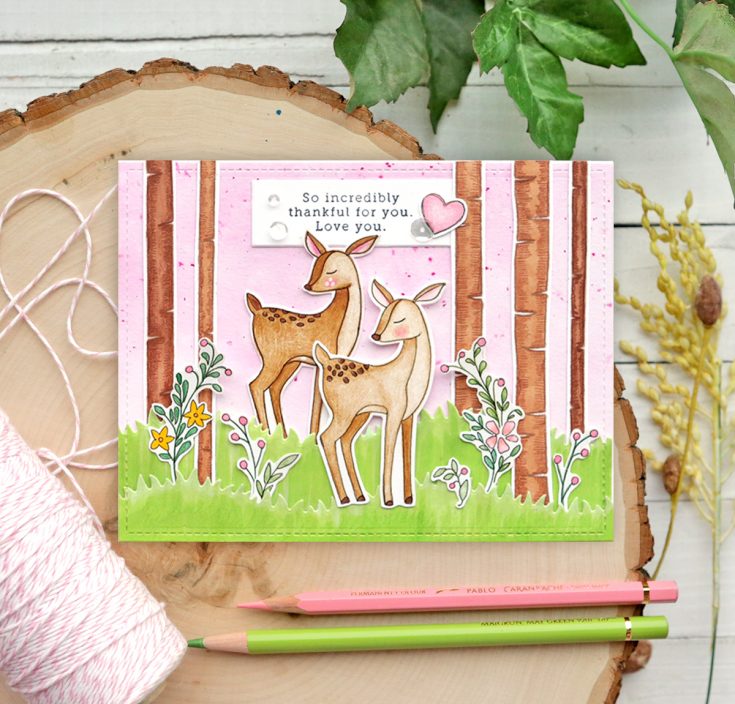
I made a background with Tonic Nuvo Shimmer Powder in Cherry Bomb for the top half of the card. I used grassy edges dies for the bottom half and colored the grass with Copic Markers. I attached the two levels of grass over the pink sky for the card background. I stamped all of the images from the stamp set with a light color of ink and colored them in with colored pencils.
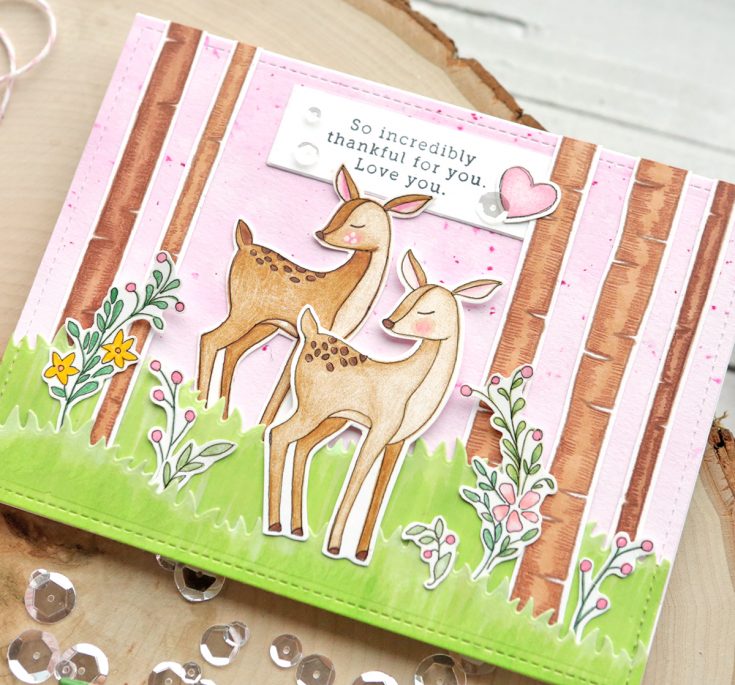
I attached several of the trees to the background tucked under both levels of grass. I attached the two deer to the center and then added some of the floral stamped images around the grass. I stamped the sentiment with black ink on another SSS Sentiment Label die and added a pink heart to the right side. I finished with a few sparkling clear sequins around the sentiment.
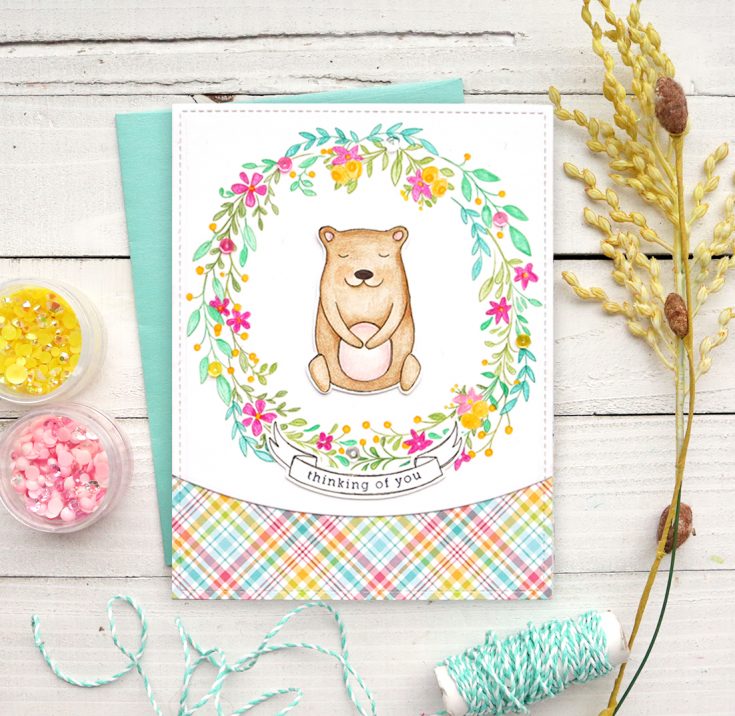
One of the benefits of stamping with light ink for a no-line coloring look is that you can stamp images overlapping without worrying about lines showing. I stamped all of the greenery/flower stamps in the shape of a wreath and colored them in with colored pencils. I die-cut the bottom edge of my wreath cardstock with the SSS Bixby Arch die. I attached this piece over a plaid patterned paper by Lawn Fawn.
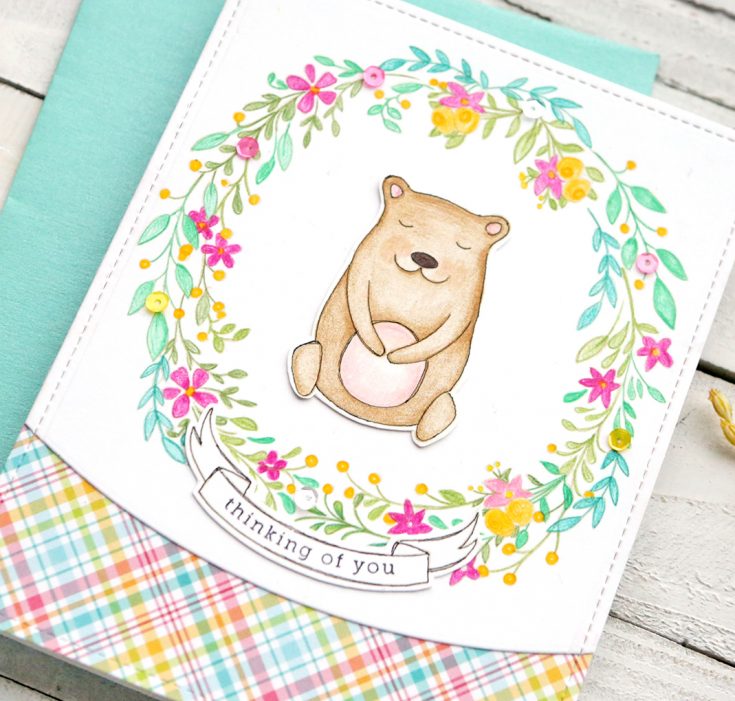
I stamped the bear and sentiment banner with black ink and colored the bear with colored pencils. I stamped the sentiment inside the banner and attached it to the bottom of the wreath design. I attached the bear inside the wreath. I added some 4mm sequins around the wreath to finish the card.
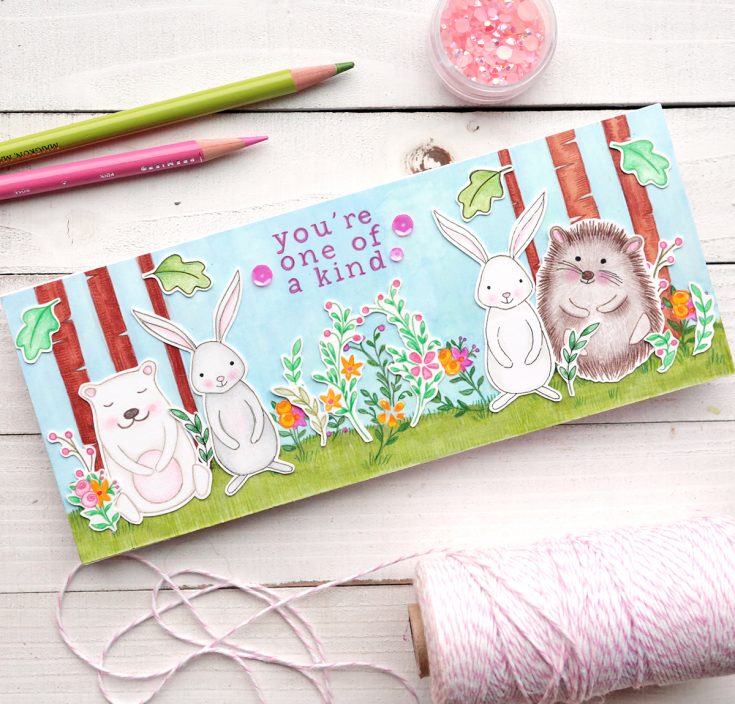
This card is a slim-line card so the dimensions are 8.5” long x 3.5” wide. I start with a full size piece of white cardstock and then cut a 7” strip off. I fold that in half for the card base. I then cut the remaining piece to be 3.5” wide which leaves me a ½” strip left over. I use this piece for the front of my card. I stamped the trees and a bunch of the greenery stamps in the background with a light color of ink. I also stamped the sentiment on the top center of the card.
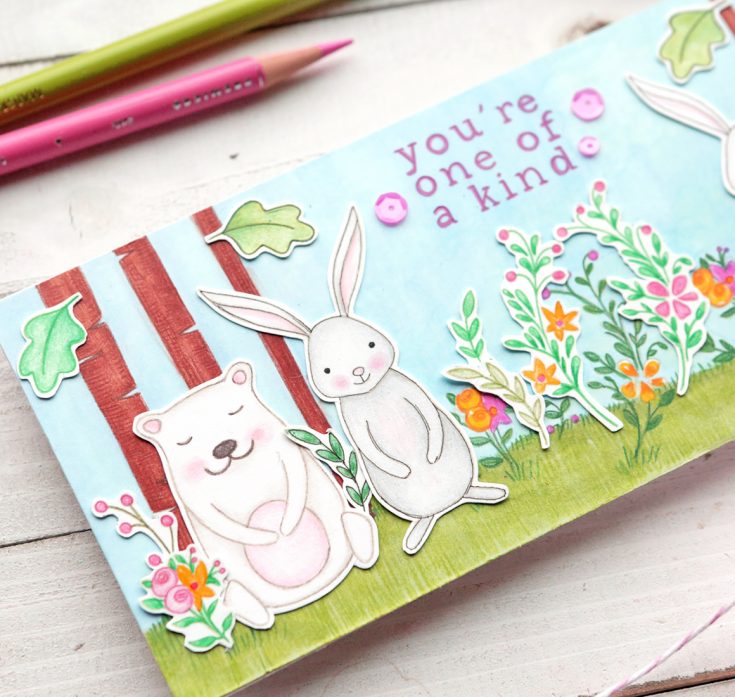
I colored the sky and the grass with Copic Markers overlapping the stamped greeting as the ink showed through the markers. I then colored all of the trees and plants with colored pencils. I also used colored pencils to outlined the greeting.
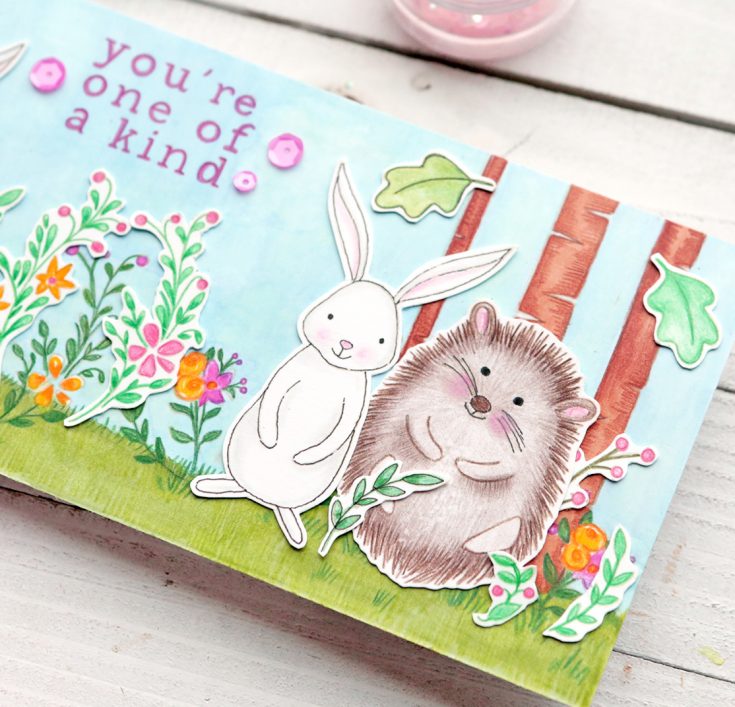
I stamped all of the critters and plants with a light color of ink on white cardstock and colored them in with colored pencils. I then attached them over the background. I realized at this point that I did way too much work on the background to cover up so much of it! I shouldn’t have colored in all of the plants, rather just add them as stamped images to the top. Oh well – it looked great before I covered it up haha.
Do you see how this Woodland Whimsy stamp set works great for love and thank you cards? There are also birthday and baby greetings in this one, so it can definitely be used for lots of cards. I loved working with it since it had all of those cute little plant pieces that were so fun to color. I hope you enjoyed this “one stamp, five ways” post today and have a great week friends! Thanks for visiting the SSS blog today! Suzy
SUPPLIES:
|


Thanks so much for stopping by, and thanks to Suzy for being our guest!


So cute!!!
Aww so cheerful and cute!!!
sweet cards – beautiful designs
These are just too CUTE!!!!
Adorable cards!!
Have a wonderful day,
Migdalia
Migdalia’s Crafts
Wonderful variety with these cute woodland critters.
Great variety. Love to see how you can stretch a stamp!
Great cards, too!
Awesome creations, such variety in ways to use these sweet woodland critters!
These are adorable!
Great use of this stamp set. That hedgehog is so cute.
These are all so very cute and I especially love the slim-line card. Your skill with the colored pencils is amazing! :)
Lovely cards Suzy, I love that stamp set too! I was doing
Christmas cards when that one arrived, so didn’t get too many cards made. But the critters will be great for VD’s or maybe even Birthday and anniversary cards. Thanks for the inspriation.
I love this blog post. Often when I get a stamp set, I will use it for a couple cards and then I get board or can’t think of anything creative to use it for again. (Mainly because I steal ideas from others). I always love this post and to see the variety one stamp set can be used in so many ways. The cards are truly amazing and so fun!
I really like the “soft colors!” The little creatures are adorable, too!
Love them all… you are really good at coloring!
These cards are delightful. Such cute critters. tfs
Darling!
The hedgehog is especially cute! I LOVE HER WORK.
These are so adorable. I have this stamp set so thanks for all the inspiration
Gorgeous cards Suzy, great inspiration with this beautiful stamp set. My favorite is the card with the deer in the grass and the trees, awesome.
Thank you so much for sharing and have a great weekend.
These are so cute!!! Such adorable images and cards to go along with them!
Always enjoy seeing your ideas for multiple designs from the same set!
All of the cards are so beautiful. Usually cutesy critters are not my thing but I have to say I really love these. I especially like the rabbit and porcupine!!
Your cards are adorable Suzy. Thanks for sharing with us how you used the stamp set in different ways.
Cute little critters and nice cards.
such sweet cards